You are viewing the Split Screen Van Club forum archive.
The forum archive is read-only.Unfortunately in 2021 the Split Screen Van Club forum suffered a ransomware attack and lots of the forum data was lost.
What threads that have been recovered are now searchable on this site. Some threads may be incomplete and some images are still being recovered.
Forum archive search
Re: Torvette Help Please
by barndoorz » Tue Jan 06, 2015 7:52 pm
TractionMan wrote:
I hope they help.

Perfect, especially this one!!
Just awesome, this is the first time I have seen a Torvette interior set up so complete. It is the finer details of how the cabinets mount that I am keen for more info on.
The last four photos showing how the floor cabinets fit to the bulkhead are just what I was after, never seen this before!!!
A huge thank you for posting these.
And that floor!!!!
barndoorz
Registered user
Posts: 93
Joined: Fri Feb 13, 2009 5:13 am
Re: Torvette Help Please
by barndoorz » Fri Jan 09, 2015 4:13 am
Neil (TractionMan)
A couple of questions for you .......... I was just looking closer at the stove, it looks as though it sits in a sheet metal 'frame', I have the same stove but not this piece. How does the stove attach to this, does it just sit in there or is it on some sort of hinge/swivel system?
For the stove to sit back against side in closed position, is it sitting in flush mount brackets?
The other query I have is regarding the floor furniture and how the backs mount to the bulkhead, would love to see more detailed photos of this area, I am pretty sure I have all these pieces, (need to drag it out of storage to confirm). In particular the piece along the bottom of the spare wheel well in bulkhead, how is this fixed?
Also, in the first photo of the series of photos you posted, it shows the cushions attached in place with push/snap clips, the bottom cushion the clip looks as though it is sewn to a black strip attached to the cushion?
I have seen a Duracour cover that I think clips in to cover the area behind these floor cabinets, from memory the water containers were behind them, the photo I am thinking of is in David Eccles book, Pg57?
Sean looks like he may have this piece?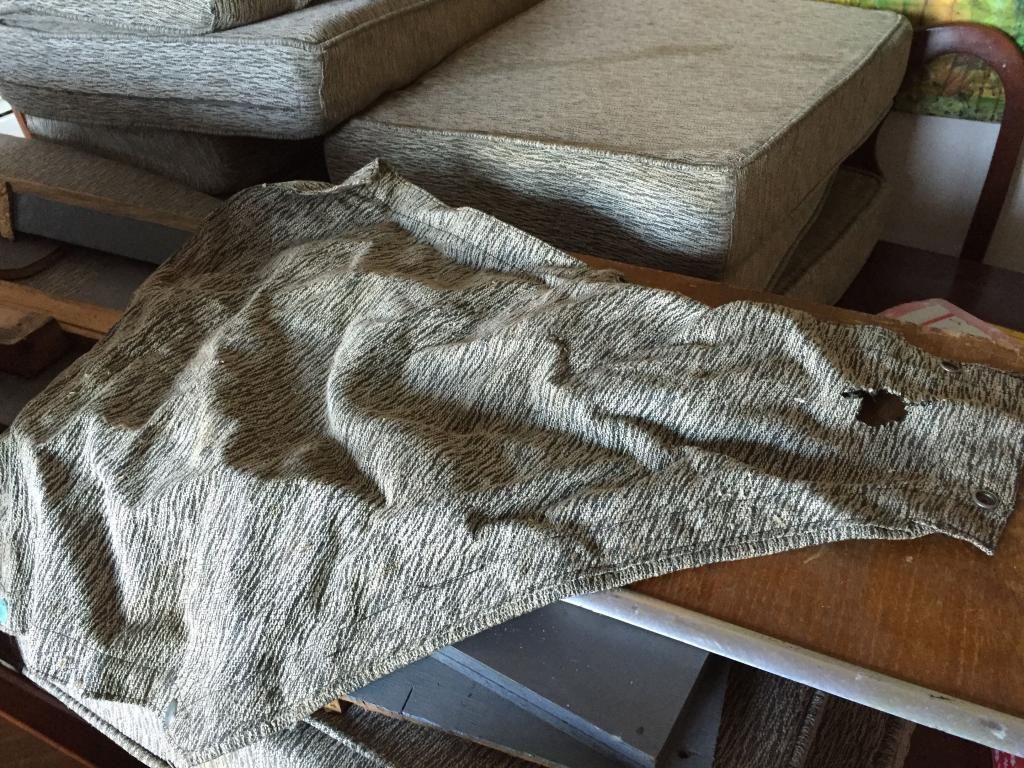
Cheers
barndoorz
Registered user
Posts: 93
Joined: Fri Feb 13, 2009 5:13 am
Re: Torvette Help Please
by type21f » Fri Jan 09, 2015 5:22 am
Indeed I was very interested in the cooker mount. Not seen that before on any other bus.
I also noticed the poppers on the edge of the buddy seat and the division panel. I was gong to say these were I believe originally there to hold the triangular cover but did not want to mislead at this stage. This IS the cover piece I have only ever seen on one other picture as you say from David Eccles
G
type21f

SSVC Member
Posts: 7409
Joined: Tue May 29, 2007 12:55 pm
Re: Torvette Help Please
by barndoorz » Fri Jan 09, 2015 6:27 am
type21f wrote:Indeed I was very interested in the cooker mount. Not seen that.
I also noticed the poppers on the edge of the buddy seat and the division panel. I was gong to say this but did not want to mislead at this stage. This IS the cover piece I have seen on one other picture.
G
Thanks Graeme, there is so much awesome detail in those photos, I keep going back to them and seeing something new each time.
barndoorz
Registered user
Posts: 93
Joined: Fri Feb 13, 2009 5:13 am
Re: Torvette Help Please
by TractionMan » Fri Jan 09, 2015 10:56 am
First the stove:
The complete panel behind the stove is sheet metal. On that panel is a tray that the stove sits in when folder up and a hinged lid that clips to the top of the stove to secure it when stowed. There are two clips mounted to the panel (near the top of the tray) that attach to the back of the stove when in use. To setup the stove, you unclip the hinged lid and lift up to fold flat over the window, lift the stove out of the tray, rotate and lower the stove onto the clips which mate with brackets on the back of the stove. The base of the cooker sits on the edge of the tray.

The complete panel behind the stove is sheet metal. On that panel is a tray that the stove sits in when folder up and a hinged lid that clips to the top of the stove to secure it when stowed. There are two clips mounted to the panel (near the top of the tray) that attach to the back of the stove when in use. To setup the stove, you unclip the hinged lid and lift up to fold flat over the window, lift the stove out of the tray, rotate and lower the stove onto the clips which mate with brackets on the back of the stove. The base of the cooker sits on the edge of the tray.
TractionMan
Registered user
Posts: 17
Joined: Sun Sep 11, 2011 10:36 am
Re: Torvette Help Please
by TractionMan » Fri Jan 09, 2015 11:14 am
The four cushions against the bulkhead have a little black piece of webbing with a push/snap clip attached. The clip either attaches to a clip on the furniture or the clip on the adjoining cushion. I don't know if these are original, my feeling is they were added at a later date. They do stop them falling about while driving.
I do have the holes on the side of the bulkhead seat and underside of the bulkhead cupboard where the clips were originally mounted for the cover piece to attach. Maybe they were reused to make the cushion straps. I don't have the cover piece.
Going back to an earlier question from Graeme about legs. Unfortunately I only have a single table leg.
I'll do a bit of investigation re the mounting of the bulkhead seats.
TractionMan
Registered user
Posts: 17
Joined: Sun Sep 11, 2011 10:36 am
Re: Torvette Help Please
by maddison » Fri Jan 09, 2015 1:16 pm
tsunamivw wrote:Hi G
There are only two curtains and they may be up for grabs? if you're interestedI have four short (maybe 6 inch) and four long legs, I appear to have two of the sliding piece seat top bits with one having an attached speaker in the same cloth and on with a water pump, really confusing
Cheers
Sean
Hi sean - Give me a shout if you decide not to keep the curtains and no-one else is in front….i'm gonna see how long it takes to collect a full set…hahaha
maddison
SSVC Member
Posts: 5103
Joined: Fri Feb 01, 2008 1:56 pm
Re: Torvette Help Please
by type21f » Sat Jan 10, 2015 8:29 am
There is always someone in front of you Maddy. .I graciously allowed you the Devon Car tent...
I have one but I think mine is labelled a Devon Tent and I reckon looks to be smaller than yours.
I digress .
If the curtains are for sale I would like a chance.
I did want to see if I could get a quote to have some material woven..
So wanted some of this colourway.
Does anyone have a copy of the 1964 Interior materials and fabrics?
I only have one from 1967...
LoL
type21f
SSVC Member
Posts: 7409
Joined: Tue May 29, 2007 12:55 pm
Re: Torvette Help Please
by type21f » Sat Jan 10, 2015 9:24 am
Just re read from start to finish and with everyone's permission I will be downloading all the photos into my file. It is the detail you learn from such photos.
I believe the wooden strips on the bulkhead were held by screws through from the other side.
When looking at other bare Devon buses to try to help identify the origin I have been able to match holes for example to tall Devon cupboards.
Most of the Devon cupboards had a curved infill piece which sat tight against the inside of the B post. This infill had a letter box slot cut in it to allow the check strap to go through and engage on the pin. You can fit the pin from inside the tall cupboard.
So I always look at the inside of the B post.
VW fitted a very small fingers spur tab behind the lower door hinge on the inside to brace the panel and stop the opening and closing bending the B post.
Devon removed it and slotted their curved infill panel and cupboard in place tight against the inside. This had a caulk seal and was held by three black Japanned dome headed screws through from the seal channel in the B post.
So no bracket...three screw holes equals probably a Caravette. Plus the awning rail and M code...No seats in the rear etc.
But with a bracket....now what model was this...
The cooker mount is interesting. I expected there to be flushmount fittings to hang the cooker on it but thought they might be on the side panel.
Also I am fascinated by the orange gas pipe run from the rear....I expected a gas tap by the easicool and solid piping inside to that..
Does the cooker frame also have leg plates on the bottom of it to allow the cooker to be stood outside?
Are there any flushmount fittings on the door panels so you could use it on the open door?
Also I was surprised at the short cut off legs. I have one/ two from a Bay I think but think they may be slightly longer.
I thought someone had butchered mine because they have no feet. I was disappointed but now understand.
Looks like someone took a saw to a standard leg after the bus was in use. Now I recognise Devon craftsman ship...
Maybe they just sawed ones they had in two!
I have seen a perfectly formed short leg on a Moortown conversion. Just one in Terry clip mount with a foot. Used to hold the lid of the cooker cupboard horizontal for the cooker to sit on.
So much detail from just one new source.
I love the flintstone flooring too. Will be refitting in Peebles.
type21f
SSVC Member
Posts: 7409
Joined: Tue May 29, 2007 12:55 pm
Re: Torvette Help Please
by tsunamivw » Sat Jan 10, 2015 2:59 pm
Right you Devon detectives now starts the challenge
I can figure out some bits but others are leaving me completely lost so I'll put up pic by pic questions if thats ok? On the curtains they are no use to me, approximately 31 x 18 inches and seem structural sound, I'd rather trade inside the club than sell so watch this space.
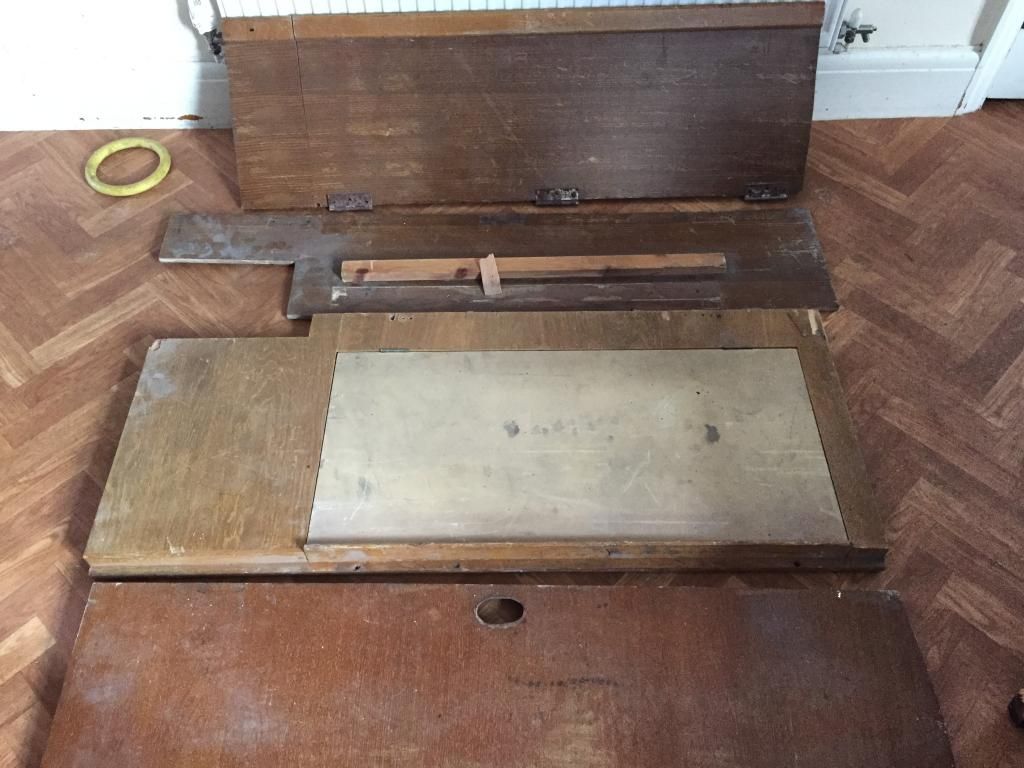
1st Pic I think this is fairly straightforward, 2 rear cupboards and a top cupboard all seem intact

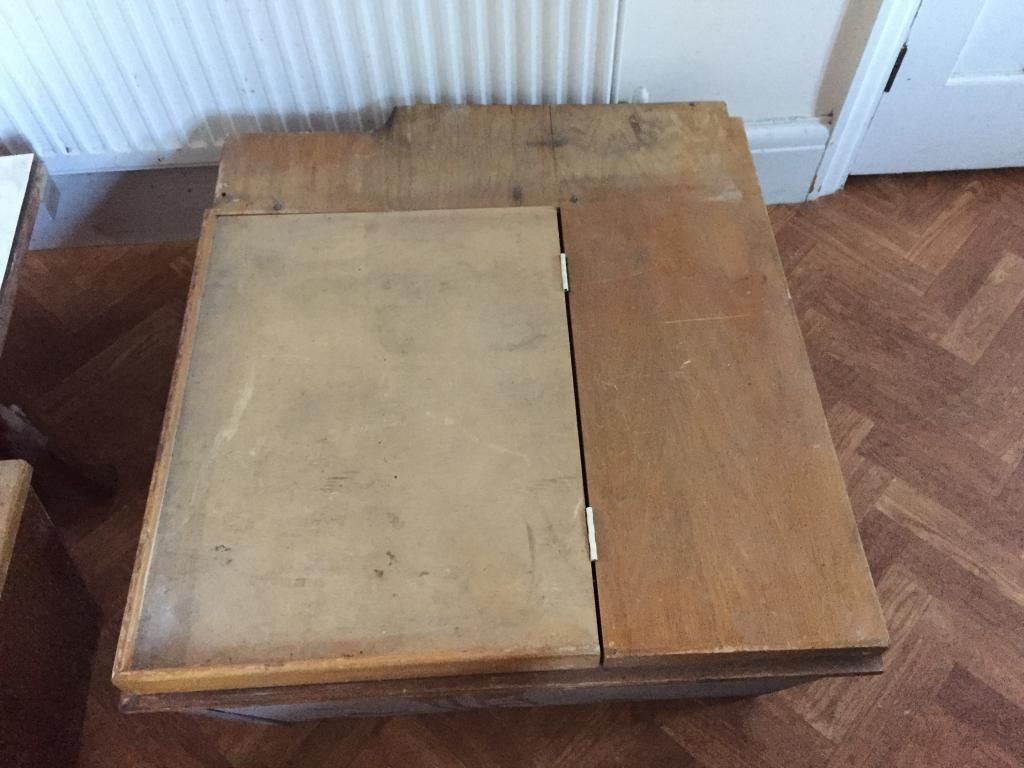
2nd pic Again I'm reasonable happy with this one, a rear seat back support base and kick panel, I'm assuming the easicool and surround go at the end.
3rd pic - this is more complicated, clearly they're the seat tops/back and they seem to be for a walkthrough rather than a bulkhead, but how would the sliders work? how would the water pump work? and why is there a speaker on the top? I've laid them out in that arrangement as they match colours in the middle.
End of part 1
1st Pic I think this is fairly straightforward, 2 rear cupboards and a top cupboard all seem intact

2nd pic Again I'm reasonable happy with this one, a rear seat back support base and kick panel, I'm assuming the easicool and surround go at the end.

3rd pic - this is more complicated, clearly they're the seat tops/back and they seem to be for a walkthrough rather than a bulkhead, but how would the sliders work? how would the water pump work? and why is there a speaker on the top? I've laid them out in that arrangement as they match colours in the middle.

End of part 1
tsunamivw
SSVC Member
Posts: 256
Joined: Sun Sep 16, 2012 10:11 am
Re: Torvette Help Please
by tsunamivw » Sat Jan 10, 2015 3:07 pm
Detective questions part 2
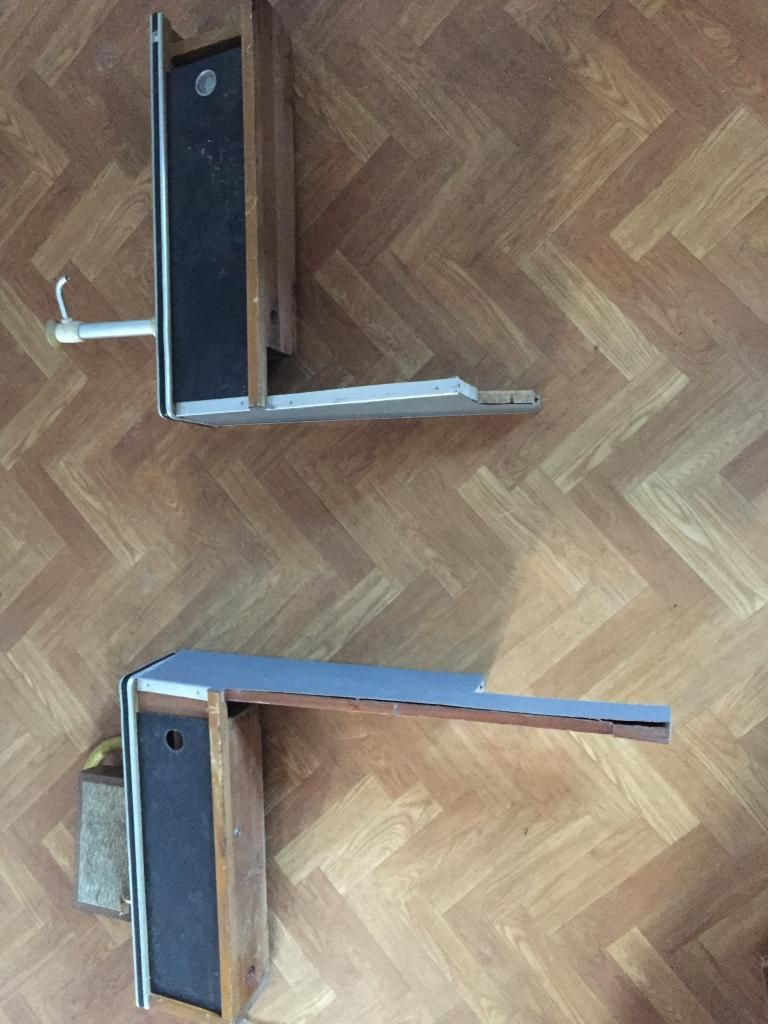
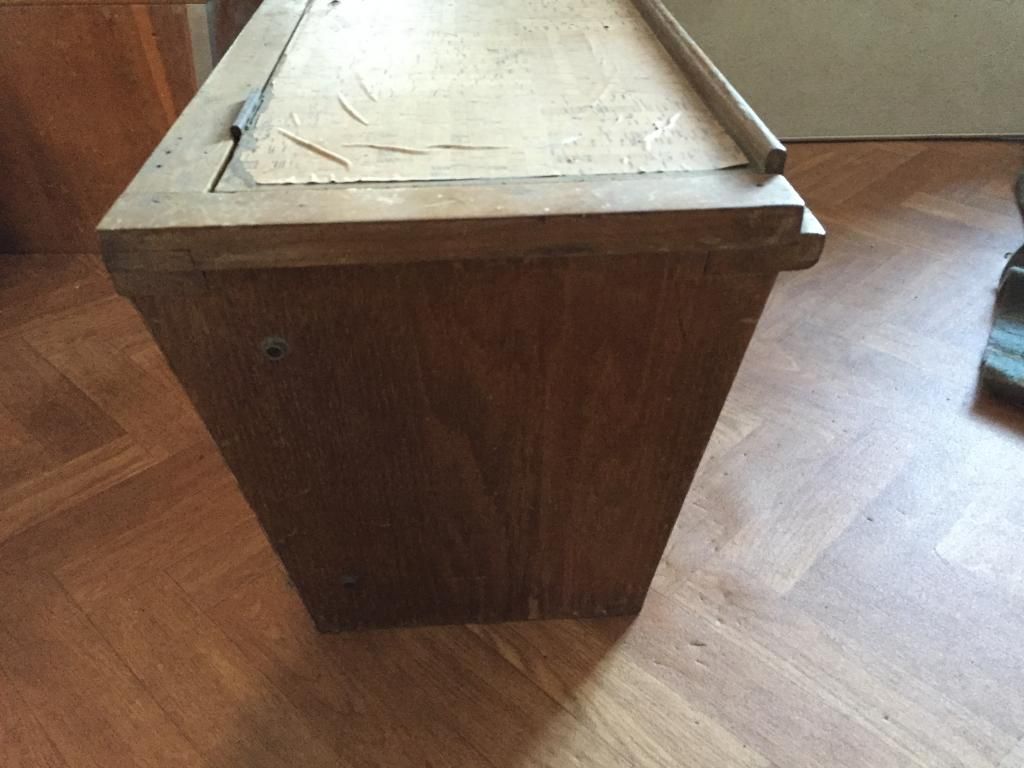
Pic 4 - I thought this was part of the walkthrough seats behind the driver but I can't see it, anyone know?
Pic 5- again I can see this as part of a walkthrough seat but how?

Pic 7 - Isn't this part of the seat near the door?
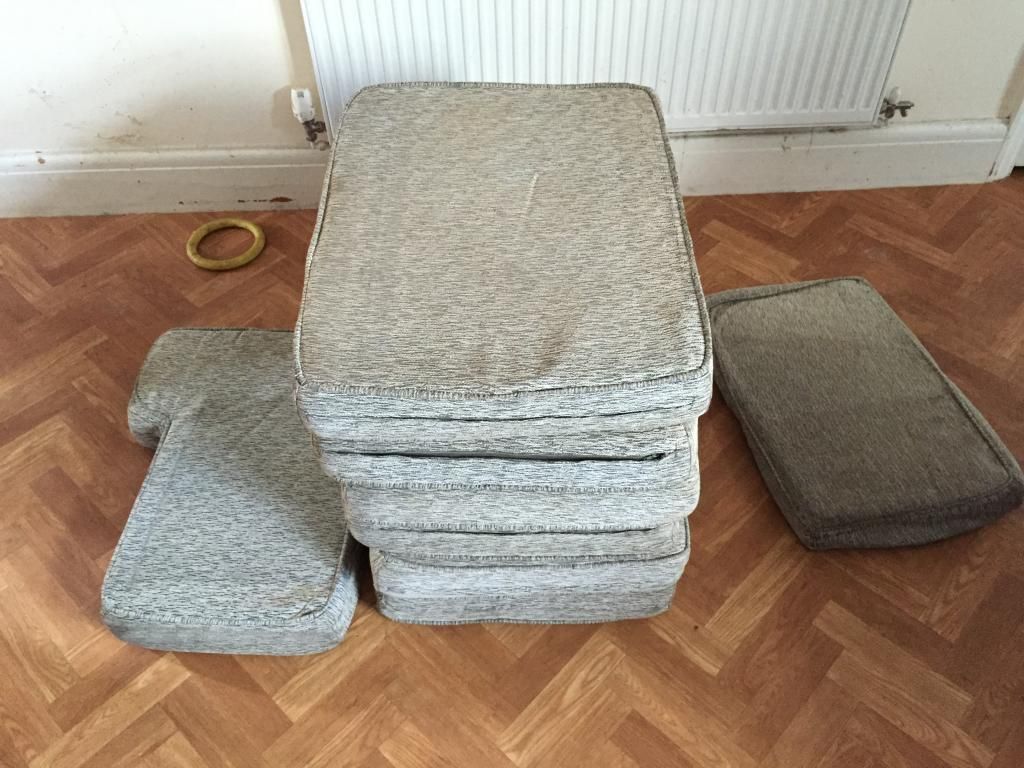
Pic 8 - Lots of cushions, 6 smaller rectangles, an 'L' shaped one and one with no covering on the bottom plus two longer ones that seem to be the long seat back and base, the rectangles I can see as the walkthrough seat and the bottomless one I assume goes on the cooler cover but what are they all the rest for?
Cheers all, I'm beginning to think it might be wrong to convert this to LHD
Pic 4 - I thought this was part of the walkthrough seats behind the driver but I can't see it, anyone know?

Pic 5- again I can see this as part of a walkthrough seat but how?

Pic 7 - Isn't this part of the seat near the door?

Pic 8 - Lots of cushions, 6 smaller rectangles, an 'L' shaped one and one with no covering on the bottom plus two longer ones that seem to be the long seat back and base, the rectangles I can see as the walkthrough seat and the bottomless one I assume goes on the cooler cover but what are they all the rest for?

Cheers all, I'm beginning to think it might be wrong to convert this to LHD
tsunamivw
SSVC Member
Posts: 256
Joined: Sun Sep 16, 2012 10:11 am
Re: Torvette Help Please
by type21f » Sat Jan 10, 2015 4:06 pm
Answers - or lack of them!
My answers are based on the fact this was made for a RHD bus and so passenger = NS
Driver = OS
Picture 1
RHD as you have it laid out with tall cupboard on passenger side
The rear cupboards look fine to be restored!
Picture 2
RHD as you have it laid out
I would have expected the seat back to have been one piece.. but this looks to have been modfied and cut to have a fixed peice on the driver's side and hinges fitted so that the seat back can be hinged forwards or back wards..
This may have been to allow the luggage are to be in the bed? or to carry long things?
The cut looks to be where the top of the slope finishes to the over engine panel.
This looks like a PO modification?
Picture 3
I reckon this was a Division long slider doored cupboard.. on the driver RHD side the short piece coming down and the gap is just like a standard Caravette slider.
Maybe the speaker cupboard was a headrest as well?
Looks like the drop down pieces were designed to be that depth to retain the cushion?
Picture 4
Looks to be driver side on a RHD bus along the long side... The short side is against the division is where your radiator is! LOL. The long side is down the long panel of the bus
I would have expected the flap to have the lip on the front and the hinge to been down the surface wih the fixed bit at the back...But it is fitted with the flap lip pointing to the centre. So the small notch cut out to corrspond to the rib between the division and the long side panel. I believe the large cut out has been made to allow it to sit up against the wheel well. So this one is driver's side i.e OS
So you will want to swap this round to go on the passenger side in your LHD
Picture 5
Ditto
The indent is where the wheel well on the division fits
Is the white top you show a loose panel on the top...so looks like the spec way picture zip have posted in the link...
Picture 6
MISSING
Picture 7
Does look like the one by the RHD door shown in the picture above from tractionman of the seats less the cushions...there are holes on the LH edge of the picture to take the hinges to hold the flap... Also looks to have the popper on the edge..to hold the triangular cover..
Do you have the flap?
Picture 8
Cushions
Each buddy seat a back and a base oblong = 4
Rear seat a longer back and base =2
Over engine area/ luggage area three cushioms and L and two oblongs =3
The one with the material missing on the bottom would be to go onto the wooden slider over the easicool. I think the wooden top has a fold away metal leg under it but I always believed it slid inside the top of the easicool housing so why a cushion with no bottom = 1 material maybe where the material used for speaker came from?
What sizes are these oblongs and the longer ones please?
Want to If my cushions are the same sizes..
Total =10?
Maybe take pictures with all sides
PART 1 all three sides so we can see all aspects and screw holes and lips..
PART 2 etc.
PART 3 etc.
This is the BJ1 spaceway RHD WT interior in a LHD bus...shows how the rear seat and the easicool would look.
viewtopic.php?f=51&t=95223&hilit=spaceway
BJ1 did a thread on converting the buddy seat somehwere...will look for it.. so when you try the seats you can decide..
I posted pictures of a cooker on a WT division somewhere...looking
here..
viewtopic.php?f=46&t=83551&start=30
At a tangent here is the buddy seat arangement pictures with the cooker on the division
viewtopic.php?f=46&t=52668&hilit=buddy
type21f
SSVC Member
Posts: 7409
Joined: Tue May 29, 2007 12:55 pm
Re: Torvette Help Please
by tsunamivw » Sun Jan 18, 2015 5:05 pm
Thanks for the reply, I'm beginning to conclude that I have a collection of Devon stuff as the buddy seat bits don't seen to fit together.
The rear cupboards and seats make sense but with I have too many bit for the buddy seats or some don't make sense.
I could reconstruct the rear seat with the easicool and its sliding seat which I think would be cool but I can't see any way to sensibly reconstruct the buddy seats from RHD to LHD
Does anyone want to trade? Perhaps for some LHD bits? Depending on what you have part or all of the pieces I have are available. Let me know your thoughts
Cheers
Sean
tsunamivw
SSVC Member
Posts: 256
Joined: Sun Sep 16, 2012 10:11 am
Re: Torvette Help Please
by type21f » Sun Jan 18, 2015 9:12 pm
Well it is a RHD interior and designed for a RHD bus...
I only know of a very very few LHD Devons..Rippers has a genuine LHD 63 Devon interior..
To make this work..
I would do it by stages...
Looking from the back..
The tall rear cupboard is made for the LHS of the bus and the double cupboard the RHS so I would leave that as is.
Then I would make a new rear seat back to suit and move the bench seat base over so that the easicool is on the door side.
Then look at the buddy seats so that the bed works...
You couild play with flipping the photos to see what each one would look like!
Like this!

I can flip them all and post them on the page if you want...LOL
type21f
SSVC Member
Posts: 7409
Joined: Tue May 29, 2007 12:55 pm
Re: Torvette Help Please
by tsunamivw » Sun Jan 18, 2015 9:50 pm
I get what you mean, nice lateral thinking on the photo flip
, but I can't make sense of the walkthrough seats as RHD, I don't think there a coherent set of seats and it looks to me like I'd have to essentially trash them to get them to work LHD if i can figure them out and I'm loath to trash them as there are some good bits.
I agree on the rear cupboards and I think I can recreate the bench seat but the walkthrough bit is beating me
I agree on the rear cupboards and I think I can recreate the bench seat but the walkthrough bit is beating me
tsunamivw
SSVC Member
Posts: 256
Joined: Sun Sep 16, 2012 10:11 am