You are viewing the Split Screen Van Club forum archive.
The forum archive is read-only.Unfortunately in 2021 the Split Screen Van Club forum suffered a ransomware attack and lots of the forum data was lost.
What threads that have been recovered are now searchable on this site. Some threads may be incomplete and some images are still being recovered.
Forum archive search
Some pics of my home made interior.
by matt d » Sun May 13, 2012 6:59 pm
It's not finished yet but is getting there slowly.
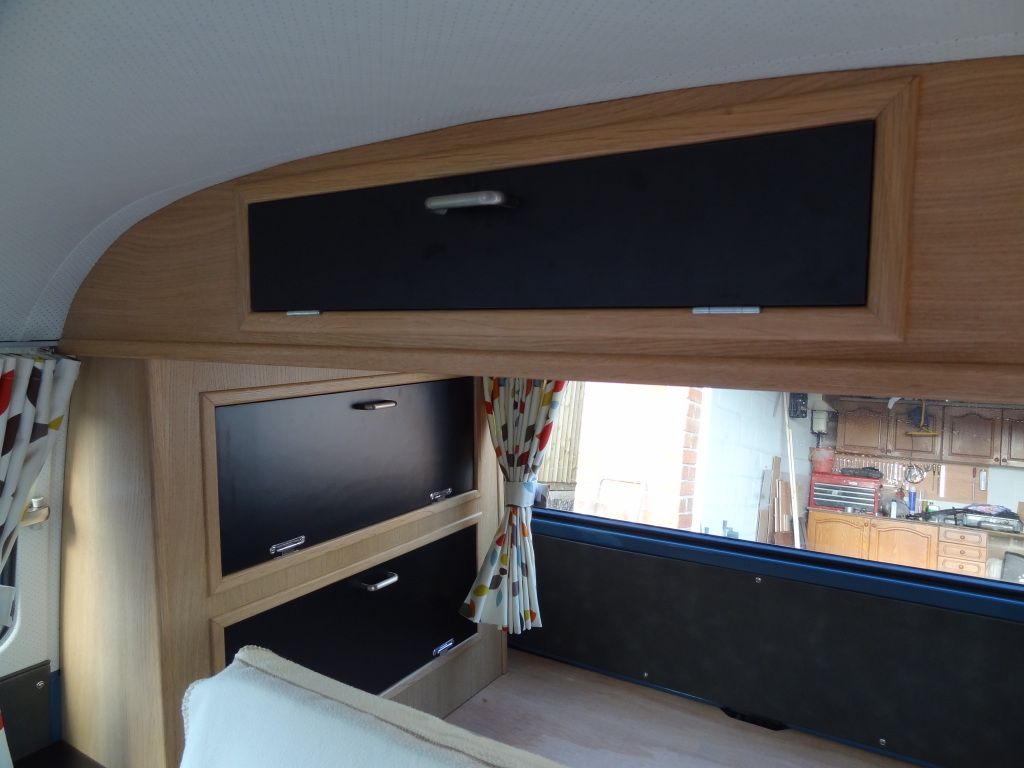
It's basically 12mm ply cut and screwed together and then oak veneered. Father-in-law gets me the black laminate from his work and i glue and trim it in place. No real creature comforts, just the fridge to go in which we will sit next to the bulkhead seat when we want to use it.
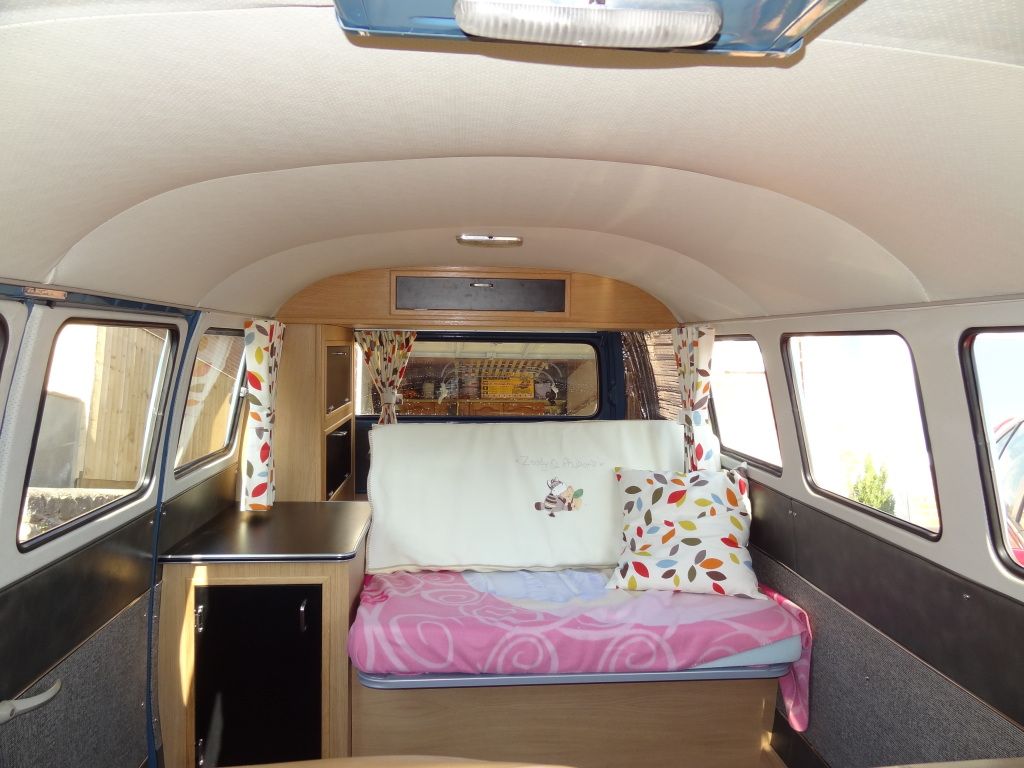

I'm going to make another cabinet to cover the remaining bulkhead you can see.
Father-in-law has a nice piece of black laminate for the top of the bulkhead seat which i'm going to trim in the same aluminium edging as the countertop.
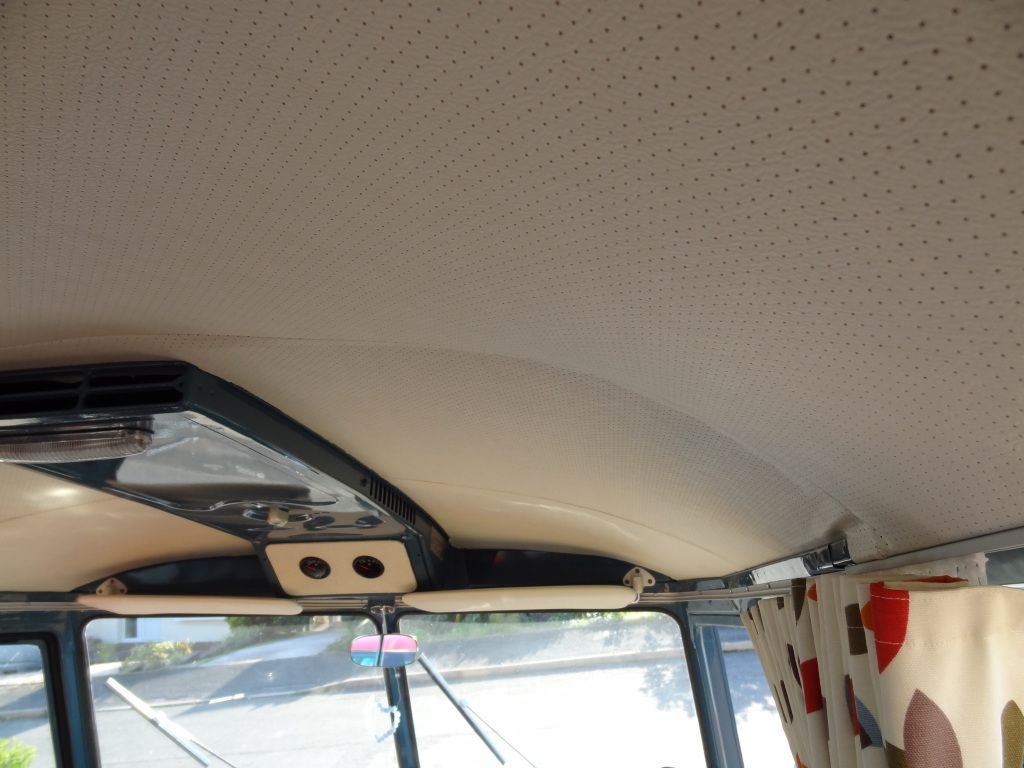
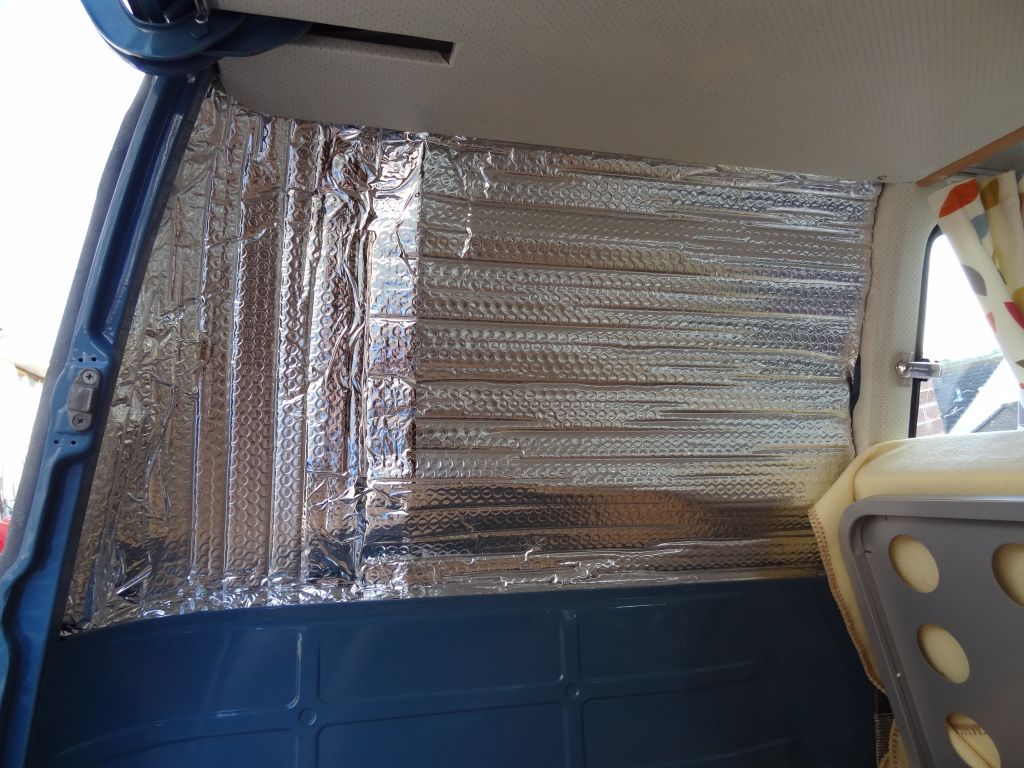
A shot of how we fitted the headliner with the channels that usually the boards slot into either side of the fresh air vent.
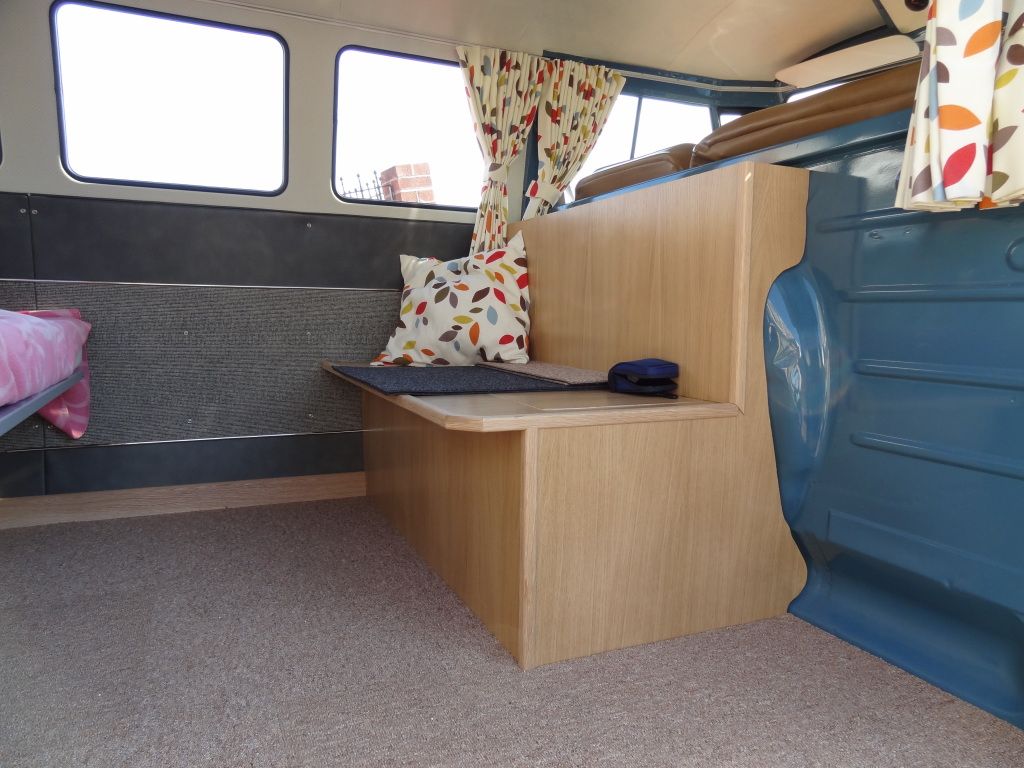
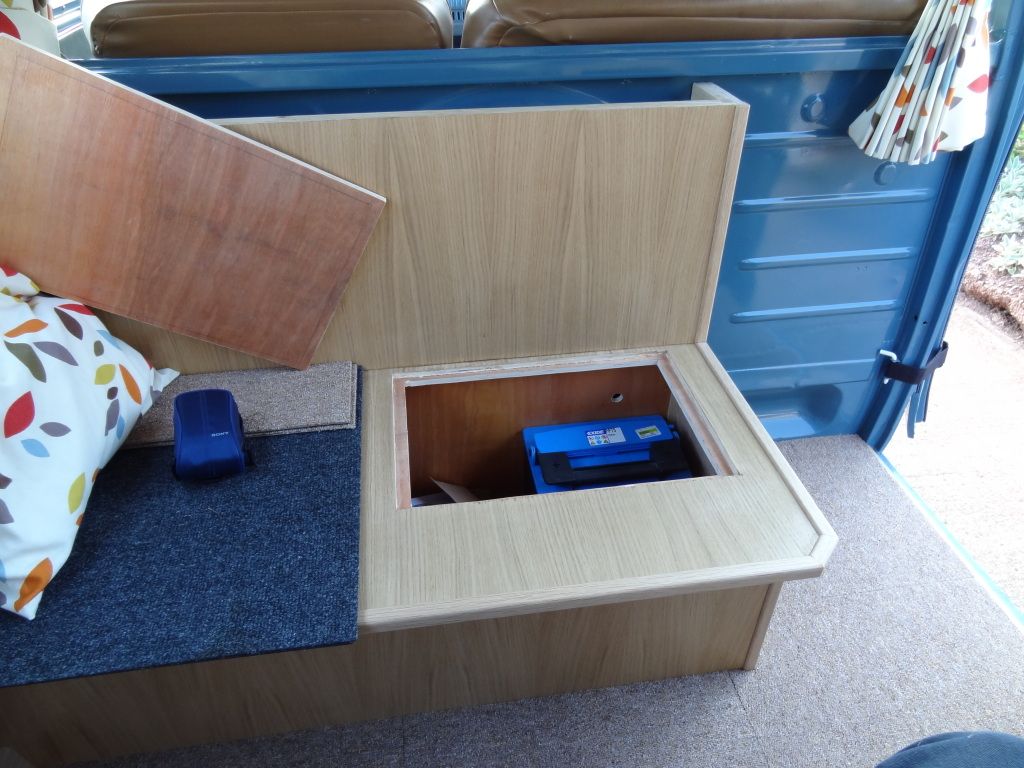
Going to put the leisure battery out of the way here. I'd prefer it not in the engine bay.
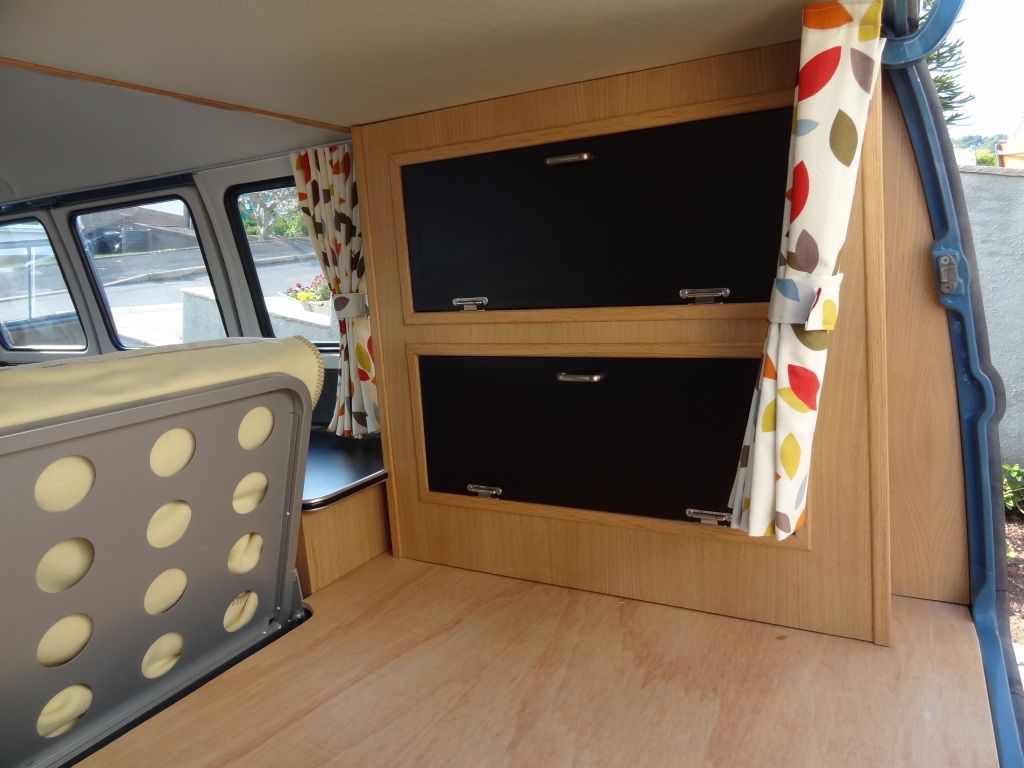
The leisure battery will be powering my new beer fridge. These are a lot of money but are efficient and work really well which is nice if you like cold beer

Been putting off the awkward rear quarter panel trim. Will tackle it when i've run out of other things to do.
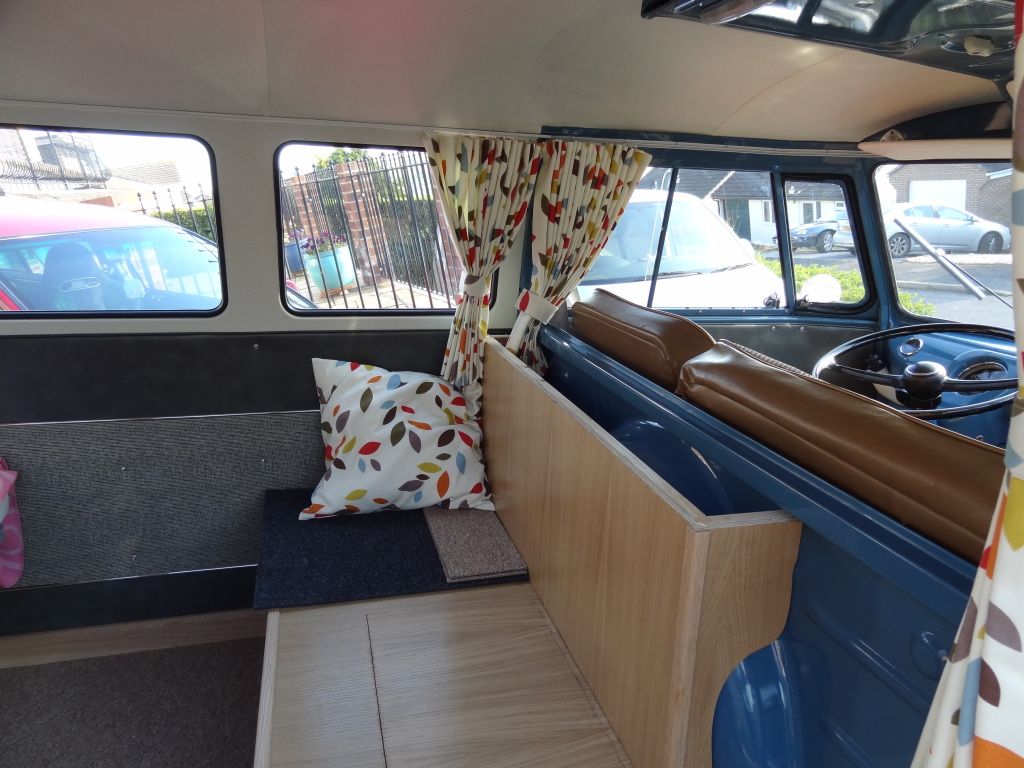
I should be having a delivery of foam for the bulkhead seat and rear shelf tomorrow so i'll get the missus to start on the covers. I have mesh grey covers to go on the front seats but i need to have the frames powder coated and the padding replaced so that's a job for the winter months.
Hope you all like the pics.
It's basically 12mm ply cut and screwed together and then oak veneered. Father-in-law gets me the black laminate from his work and i glue and trim it in place. No real creature comforts, just the fridge to go in which we will sit next to the bulkhead seat when we want to use it.
I'm going to make another cabinet to cover the remaining bulkhead you can see.
Father-in-law has a nice piece of black laminate for the top of the bulkhead seat which i'm going to trim in the same aluminium edging as the countertop.
A shot of how we fitted the headliner with the channels that usually the boards slot into either side of the fresh air vent.
Going to put the leisure battery out of the way here. I'd prefer it not in the engine bay.
The leisure battery will be powering my new beer fridge. These are a lot of money but are efficient and work really well which is nice if you like cold beer
Been putting off the awkward rear quarter panel trim. Will tackle it when i've run out of other things to do.
I should be having a delivery of foam for the bulkhead seat and rear shelf tomorrow so i'll get the missus to start on the covers. I have mesh grey covers to go on the front seats but i need to have the frames powder coated and the padding replaced so that's a job for the winter months.
Hope you all like the pics.
matt d
Registered user
Posts: 1773
Joined: Tue Nov 30, 2010 6:00 pm
Re: Some pics of my home made interior.
by markp » Sun May 13, 2012 7:24 pm
WOW Matt

thank looks great !!!
some nice skills
well done dude
Mark
thank looks great !!!
some nice skills
well done dude
Mark
markp
SSVC Member
Posts: 4690
Joined: Wed Jul 20, 2011 9:56 pm
Re: Some pics of my home made interior.
by matt d » Sun May 13, 2012 7:35 pm
Thanks mark, it's great fun building your own interior and very satisfying.
Should give you some ideas for yours.
Should give you some ideas for yours.
matt d
Registered user
Posts: 1773
Joined: Tue Nov 30, 2010 6:00 pm
Re: Some pics of my home made interior.
by thesickness » Sun May 13, 2012 7:44 pm
Very nice

thesickness
Registered user
Posts: 459
Joined: Sun Nov 28, 2010 8:30 pm
Re: Some pics of my home made interior.
by andy f » Sun May 13, 2012 7:47 pm
That is fantastic, really nice job
Andy
Andy
andy f
SSVC Member
Posts: 2106
Joined: Mon Oct 23, 2006 10:45 am
Re: Some pics of my home made interior.
by WILL » Sun May 13, 2012 7:55 pm
Well done, very nice
WILL
SSVC Member
Posts: 4635
Joined: Tue Jun 14, 2005 8:20 pm
Re: Some pics of my home made interior.
by Marvelwear » Sun May 13, 2012 8:37 pm
Wow. ,I just used oak faced ply ,that's very nice.
Marvelwear
SSVC Member
Posts: 3930
Joined: Thu Aug 27, 2009 9:12 pm
Re: Some pics of my home made interior.
by markp » Sun May 13, 2012 8:39 pm
matt d wrote:Thanks mark, it's great fun building your own interior and very satisfying.
Should give you some ideas for yours.
Sure does dude
Love the beer fridge too mmmmmmmmmmmmmmmmmmmmm
Mark
markp
SSVC Member
Posts: 4690
Joined: Wed Jul 20, 2011 9:56 pm
Re: Some pics of my home made interior.
by LODGE » Sun May 13, 2012 9:06 pm
Nice
LODGE
Registered user
Posts: 1466
Joined: Sat Jul 11, 2009 7:22 pm
Re: Some pics of my home made interior.
by matt d » Sun May 13, 2012 9:18 pm
Marvelwear wrote:Wow. ,I just used oak faced ply ,that's very nice.
Thanks. Veneering is quite easy. And hides a multitude of sins. I bought a large roll from an eBay shop for £50 and it arrived damaged although it was mostly usable so I complained and they sent me another one and didn't want the other one back. So I had enough to do the lot
Will keep you all updated.
matt d
Registered user
Posts: 1773
Joined: Tue Nov 30, 2010 6:00 pm
Re: Some pics of my home made interior.
by matt d » Mon May 21, 2012 7:20 pm
The foam has arrived for the seat and the rear pad for the shelf over the engine

Threshhold strip fitted over the weekend.

Beer fridge split charge and leisure battery wired up (I know the battery has yet to be secured)
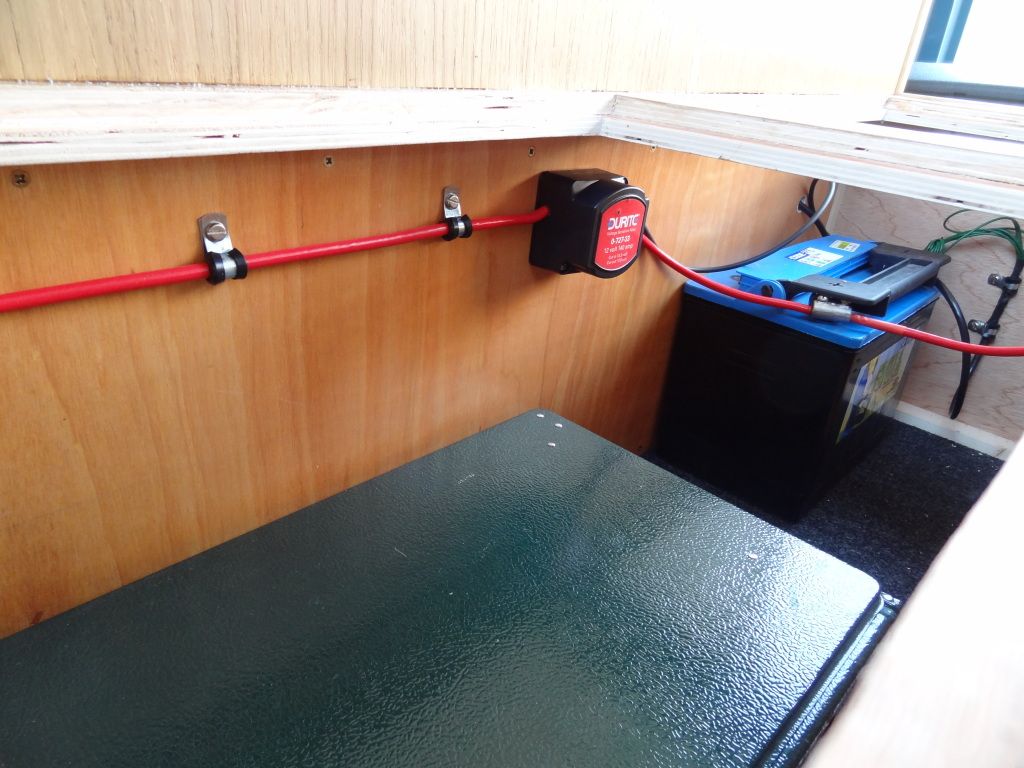
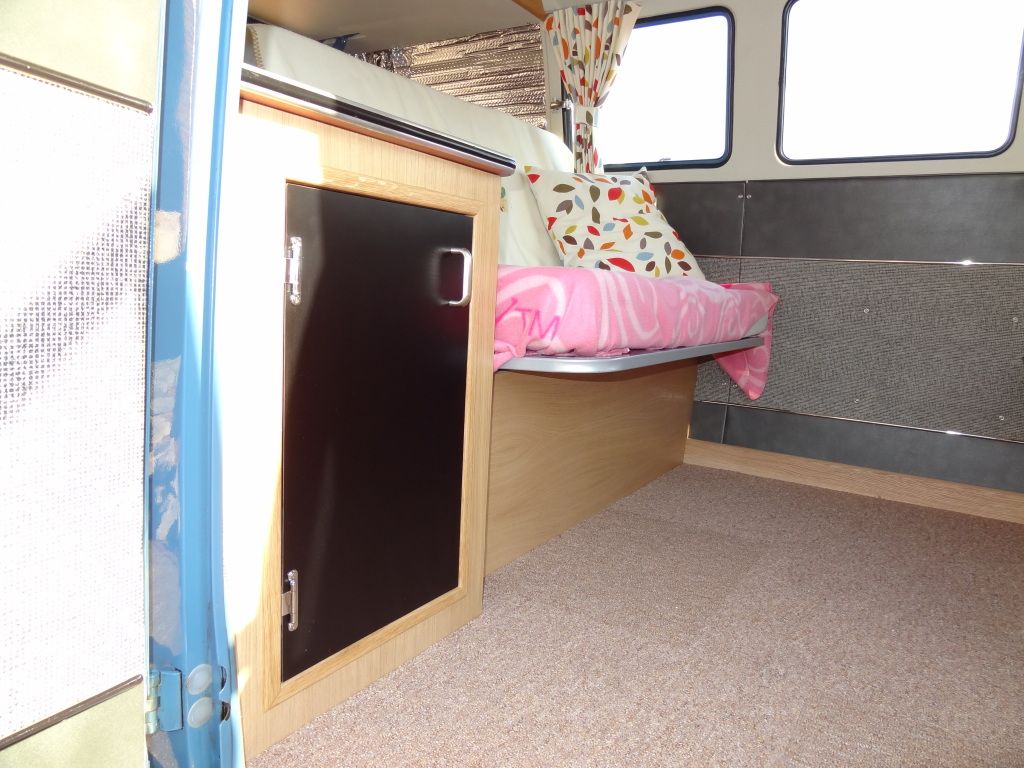
The beer fridge plugs in here. I've had it running for much of the weekend and it works a treat. Very efficient and doesn't drain the battery too quick.

Threshhold strip fitted over the weekend.
Beer fridge split charge and leisure battery wired up (I know the battery has yet to be secured)
The beer fridge plugs in here. I've had it running for much of the weekend and it works a treat. Very efficient and doesn't drain the battery too quick.
matt d
Registered user
Posts: 1773
Joined: Tue Nov 30, 2010 6:00 pm
Re: Some pics of my home made interior.
by markp » Wed Jun 13, 2012 9:14 pm
Hi Matt
I'll have to try one of your beers one day mate straight out of your new fridge ....... Just to check the coldness of the beer
Just checked out all your interior pic's again ...... you did a wicked job there bud ......fantastic skills
ark
Mark
I'll have to try one of your beers one day mate straight out of your new fridge ....... Just to check the coldness of the beer
Just checked out all your interior pic's again ...... you did a wicked job there bud ......fantastic skills
ark
Mark
markp
SSVC Member
Posts: 4690
Joined: Wed Jul 20, 2011 9:56 pm
Re: Some pics of my home made interior.
by ally5443 » Wed Jun 13, 2012 9:22 pm
Looks good mate, welldone,
what did you use for your threshold plate?
what did you use for your threshold plate?
ally5443
SSVC Member
Posts: 258
Joined: Mon Mar 15, 2010 4:30 pm
Re: Some pics of my home made interior.
by matt d » Thu Jun 14, 2012 7:16 am
ally5443 wrote:Looks good mate, welldone,
what did you use for your threshold plate?
Hi, I Got it from b+q. Was in there for something else and it caught my eye, cost less than a tenner.
Mark, there's a few beers in there waiting for you.
matt d
Registered user
Posts: 1773
Joined: Tue Nov 30, 2010 6:00 pm
Re: Some pics of my home made interior.
by Florence » Thu Jun 14, 2012 8:00 am
Looks brilliant

Florence
SSVC Member
Posts: 179
Joined: Sat Mar 20, 2010 12:34 pm