You are viewing the Split Screen Van Club forum archive.
The forum archive is read-only.Unfortunately in 2021 the Split Screen Van Club forum suffered a ransomware attack and lots of the forum data was lost.
What threads that have been recovered are now searchable on this site. Some threads may be incomplete and some images are still being recovered.
Forum archive search
Filly our 59 11w, winter refurb
by snapy » Sat Oct 25, 2014 8:45 pm
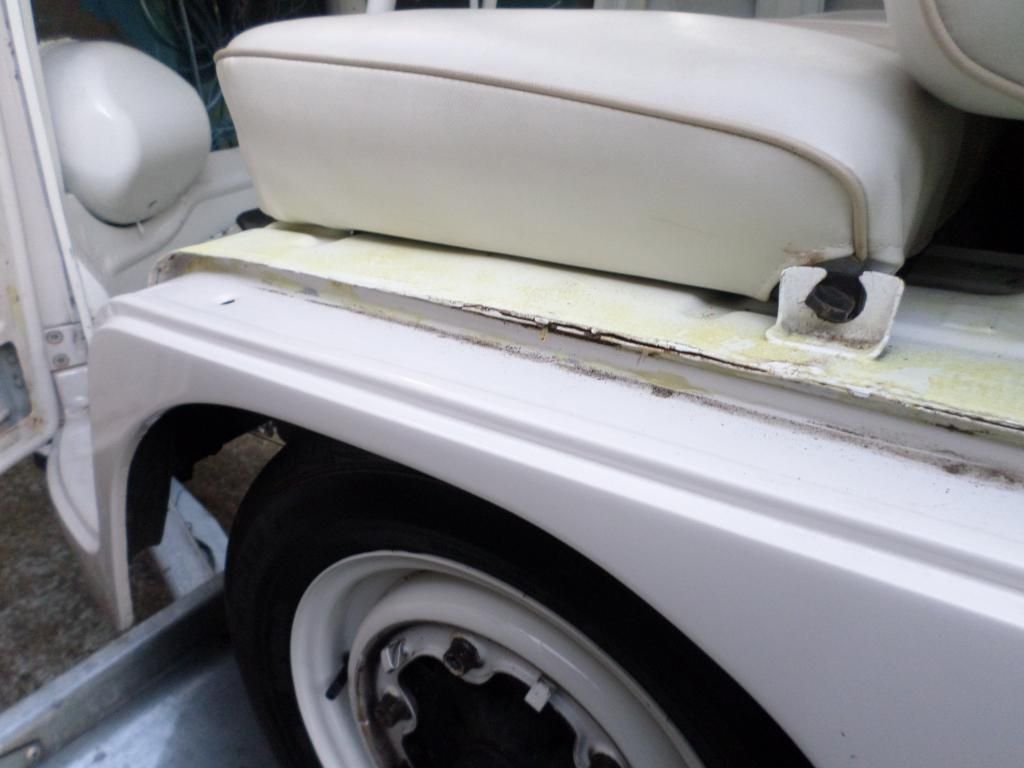
After a busy season and a few months of not so many weddings coming up we are having our 11w refurbished.
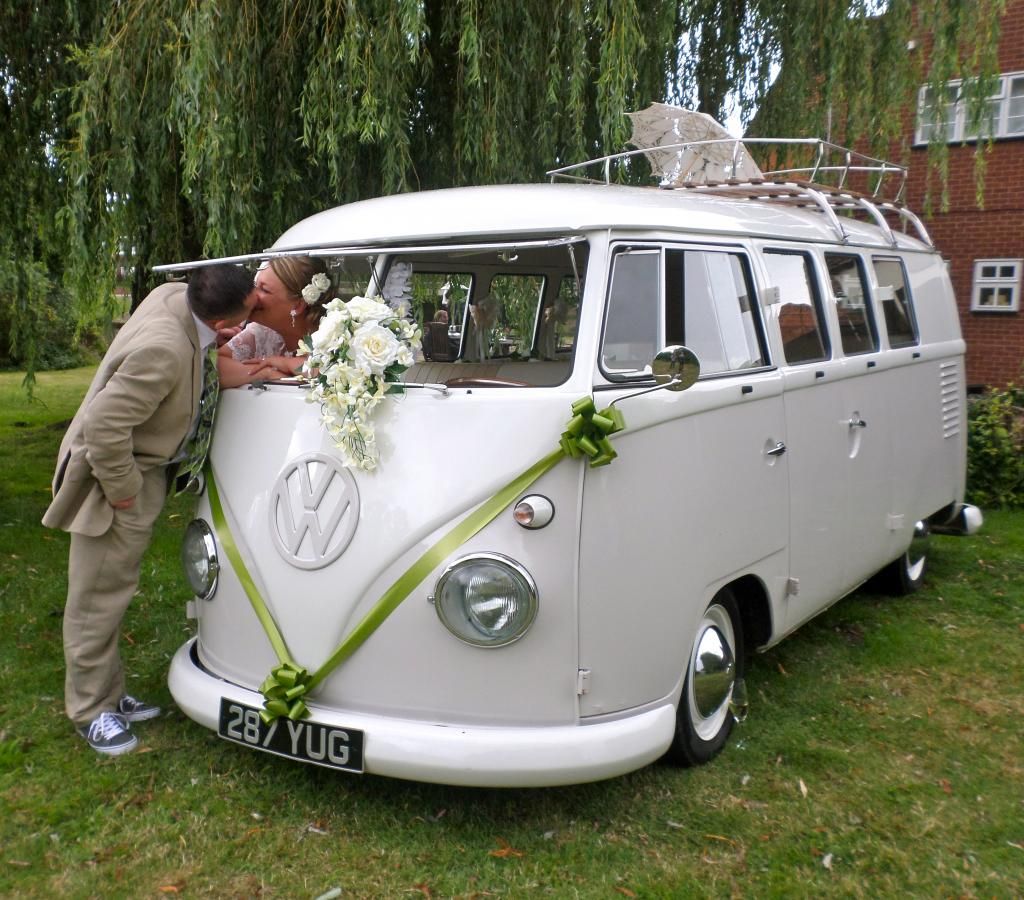
Filly as we call her is 59 11 window that came from switzerland some years ago, she had a makeover then and was turned into a wedding bus.
We have owned her for a couple of years and she has been a popular bus with many a bride in that time.
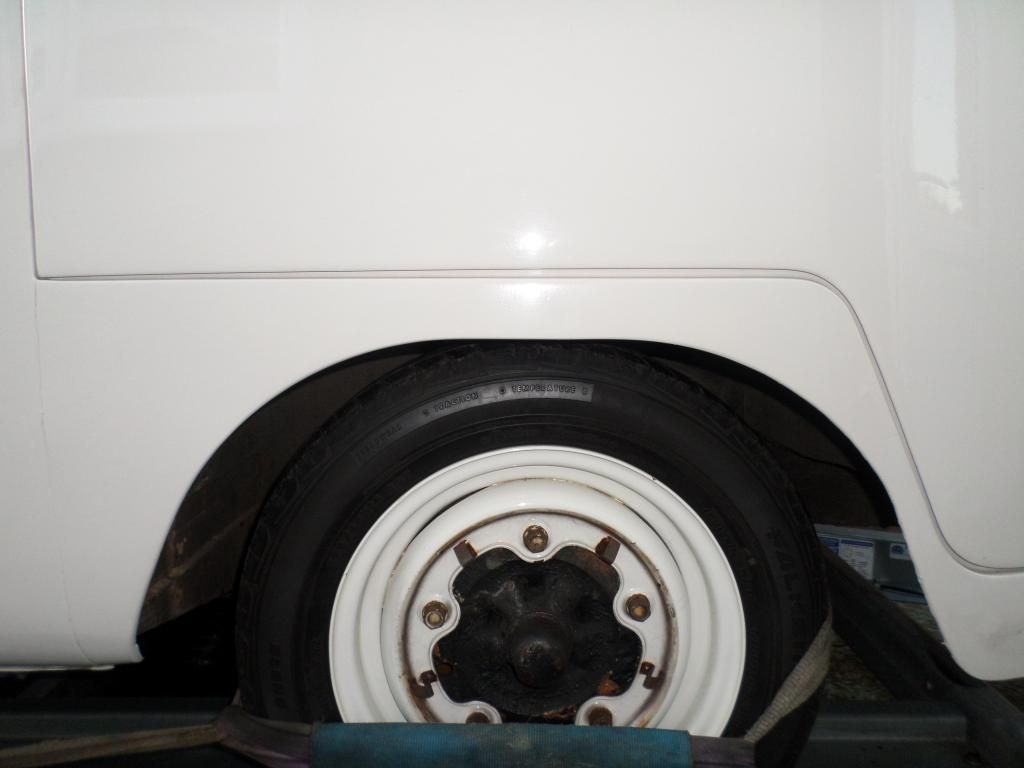
She's now looking a bit tired so it's time for a proper rebuild and not just a makeover.
Rob's our man based in Syresham who will do the panelwork, he has years of experiance and is very thorough and dedicated in doing a job correctly.
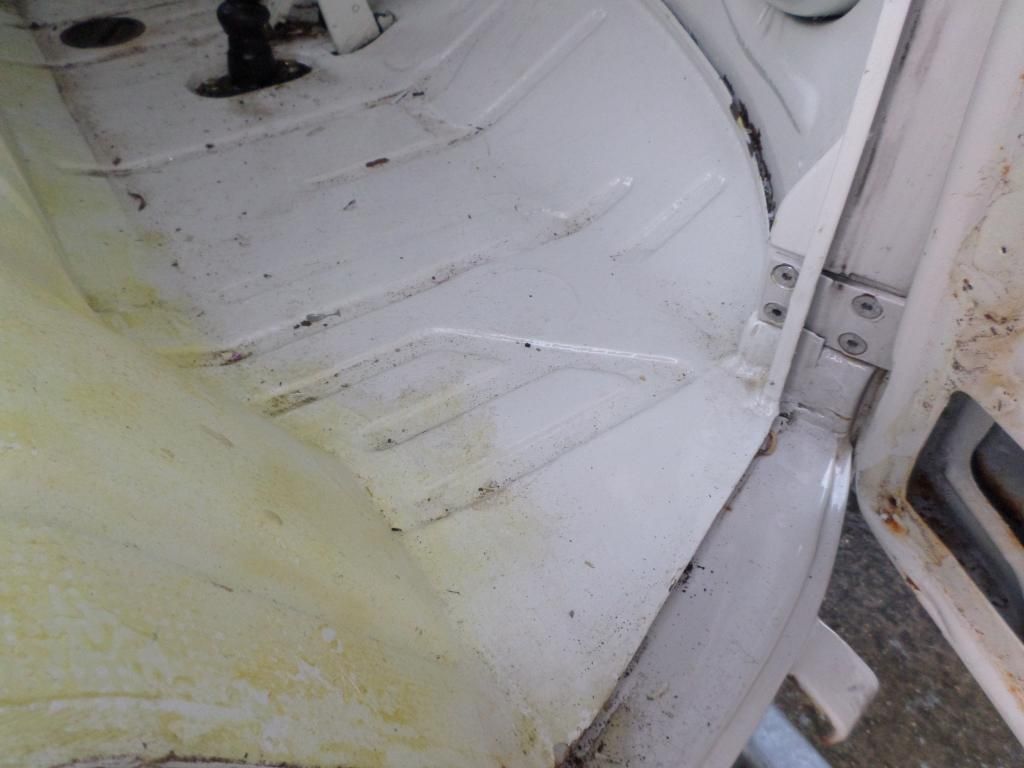
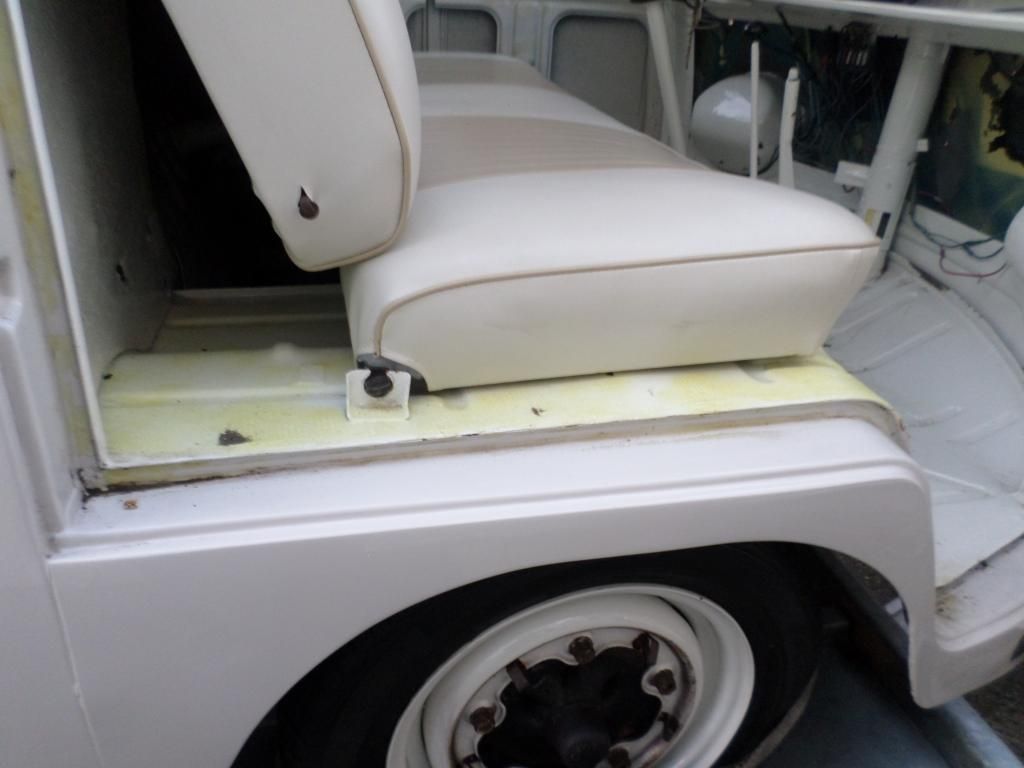
I'm sure he'll find some horrors once he starts stripping back but what we do know so far is she'll need the usual front inner/outer front valance some cargo floor
repairs and outer floor supports, sills are unknown as they look good but that might change once there stripped.
front dog legs, now here's a thing, it has odd ones, one thick lip, one thin !!!!!!!!!!!. I'm sure someone out there can tell me what's correct for a 59 ?
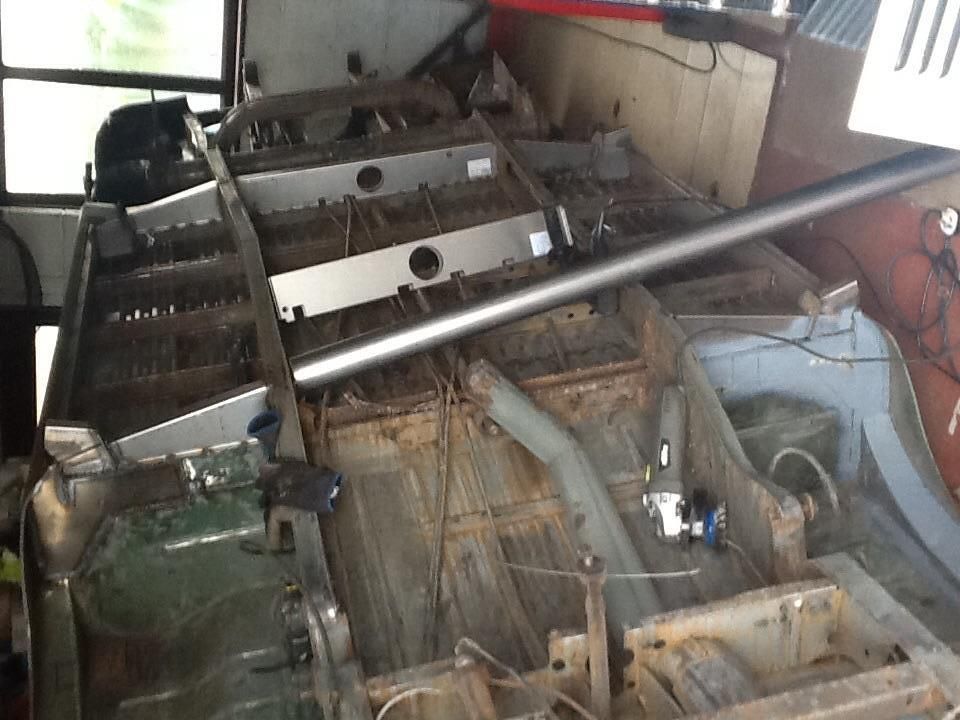
Anyway here's some pics to start............................... update as we go .
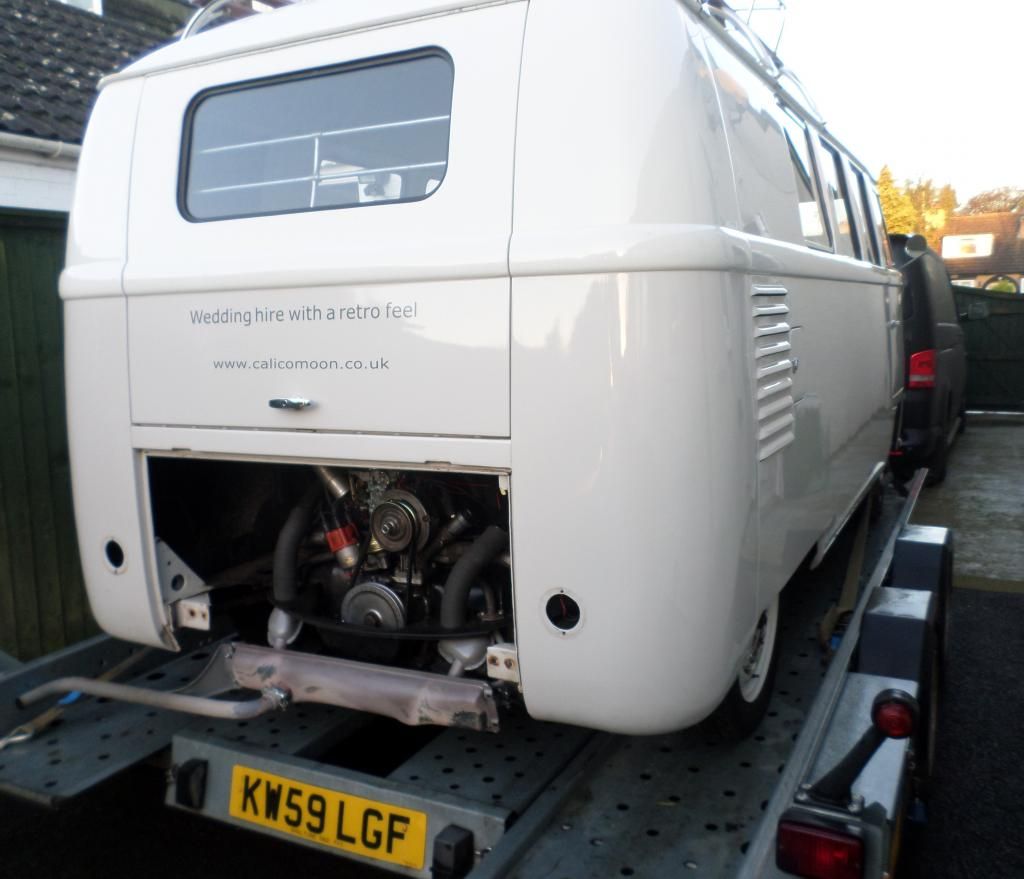
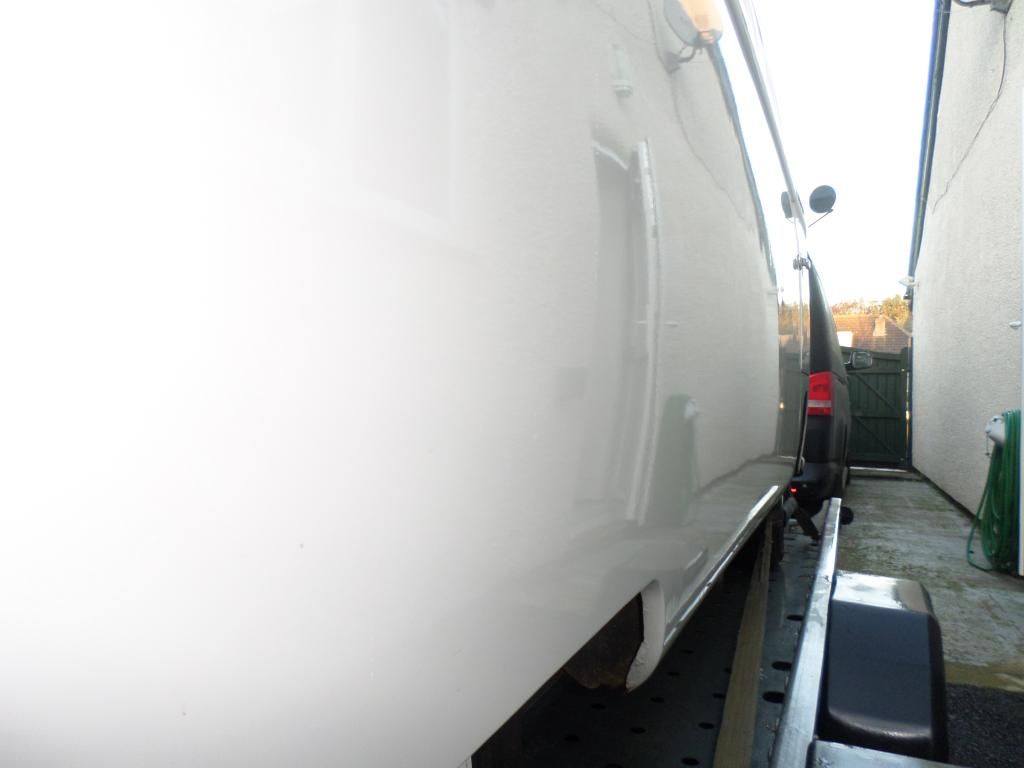
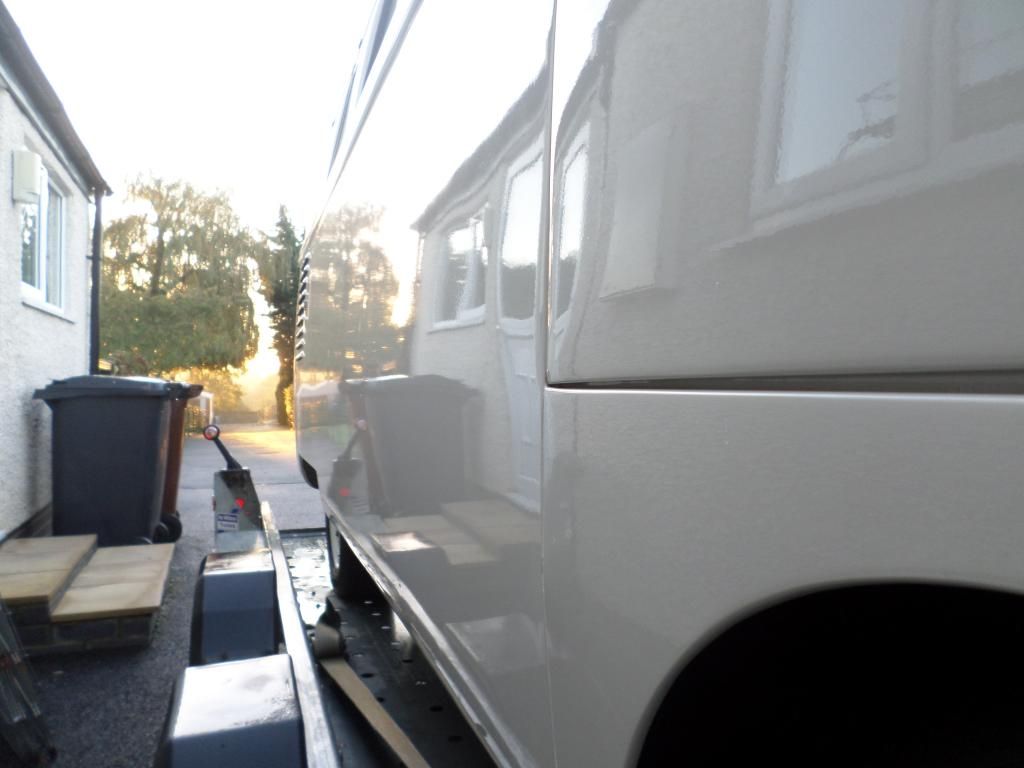
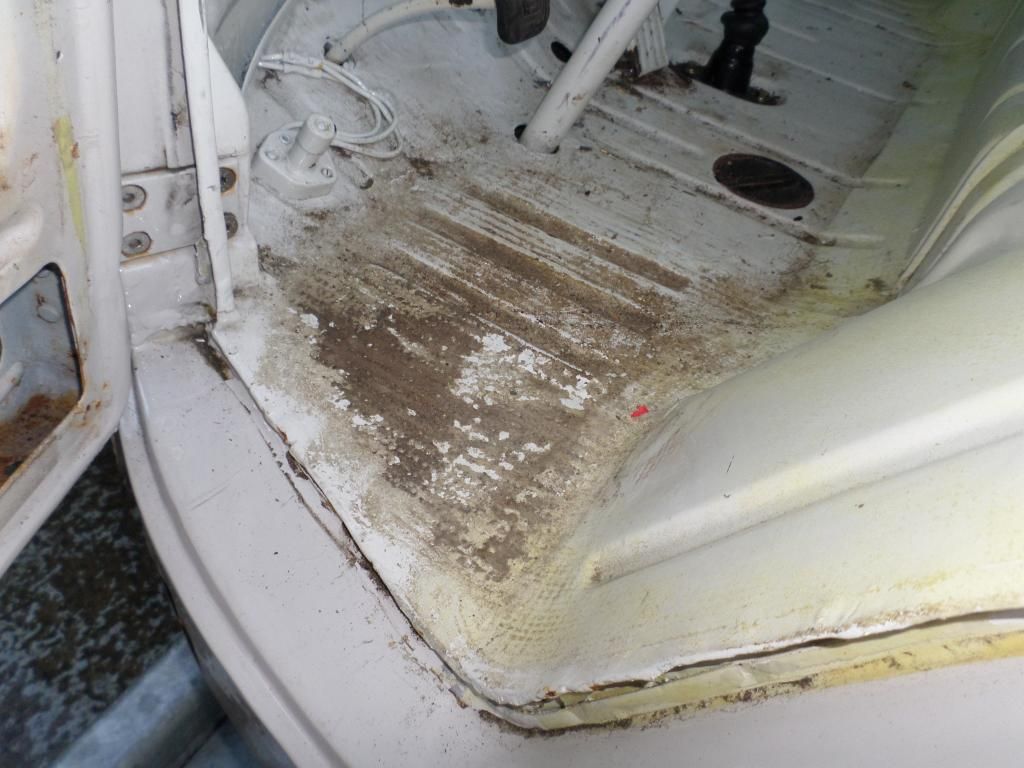
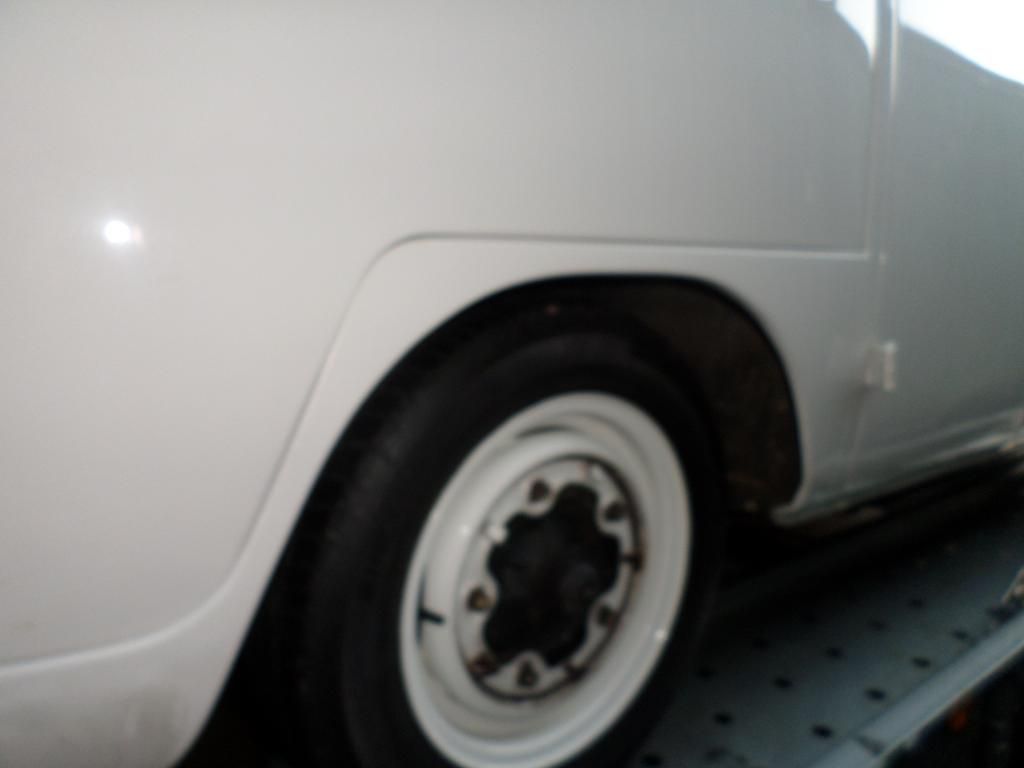


snapy
-
Posts: -
Joined: -
Re: Filly our 59 11w, winter refurb
by snapy » Wed Oct 29, 2014 7:08 pm
No going back now for Filly.
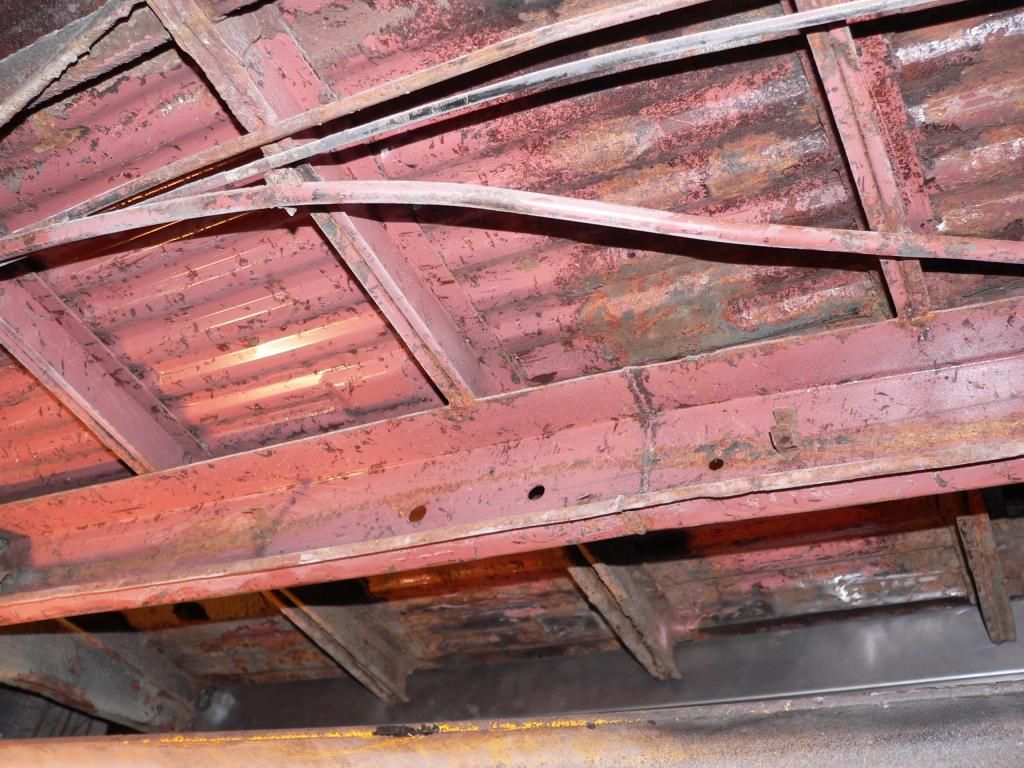
Rob has a made a start and has been busy cleaning off the underseal ready to assess what's going to need doing.
I suppose being a swiss bus it was coated with underseal from new which has helped keep the majority of the floor area free
from moisture and salt. The age of the underseal has helped in getting it off easily as it's dried out and comes off without to much effort.
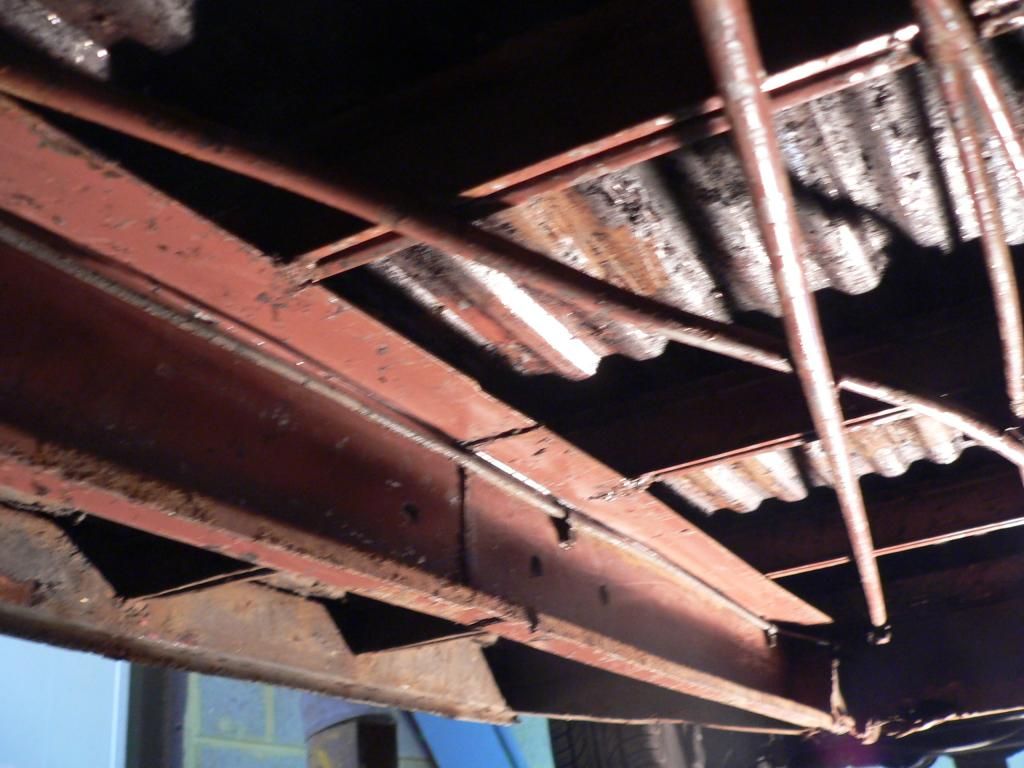
The centre area inside the chassis is in great condition although it does have a strange colour (sort of pink/red) under the crud.
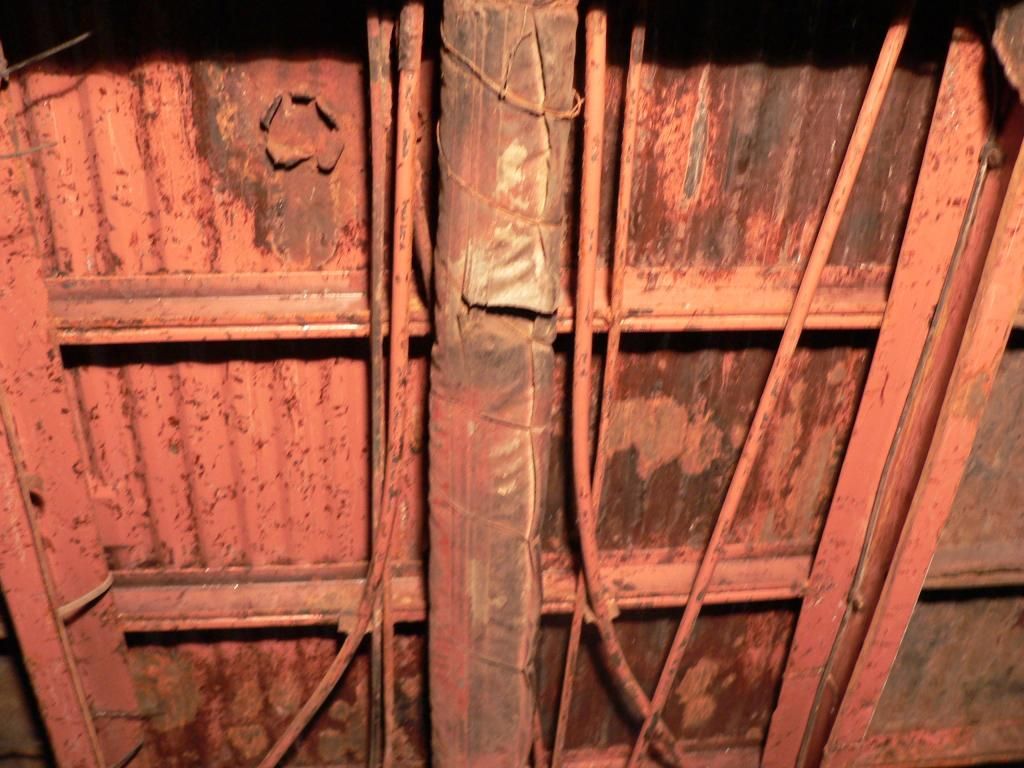
The outer cab floor both sides have been patched previously so we'll redo them with correct floor sections, the cargo floor sides
have some patches from previous repairs and the outer I beams are blown so they will be replaced.
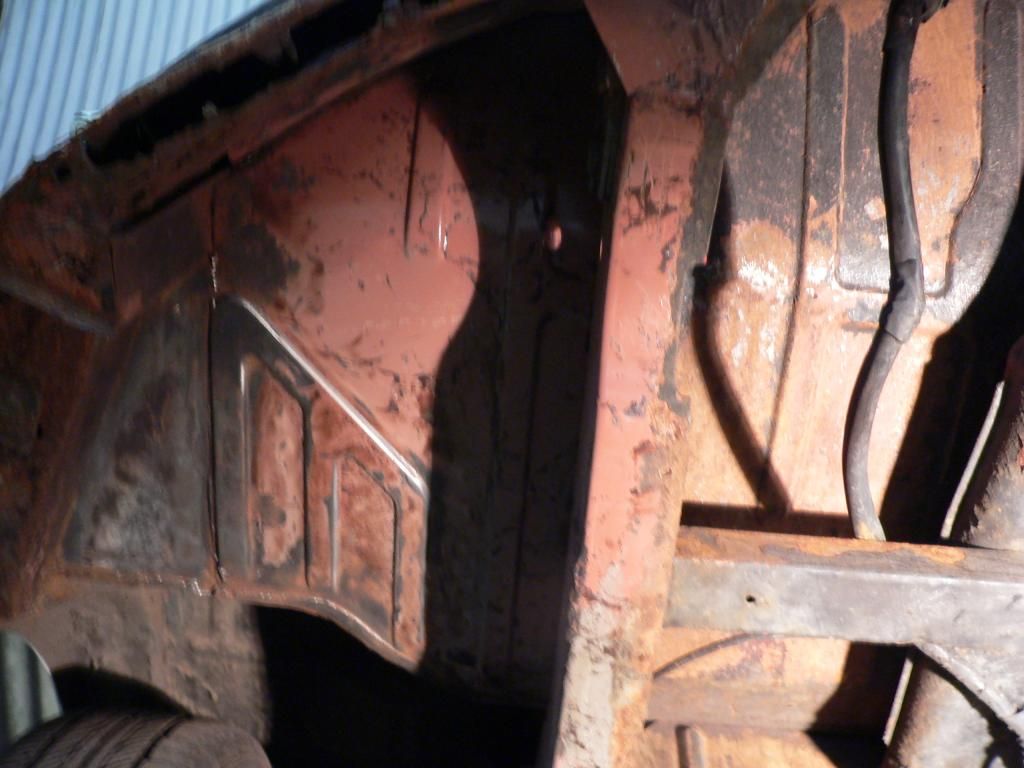
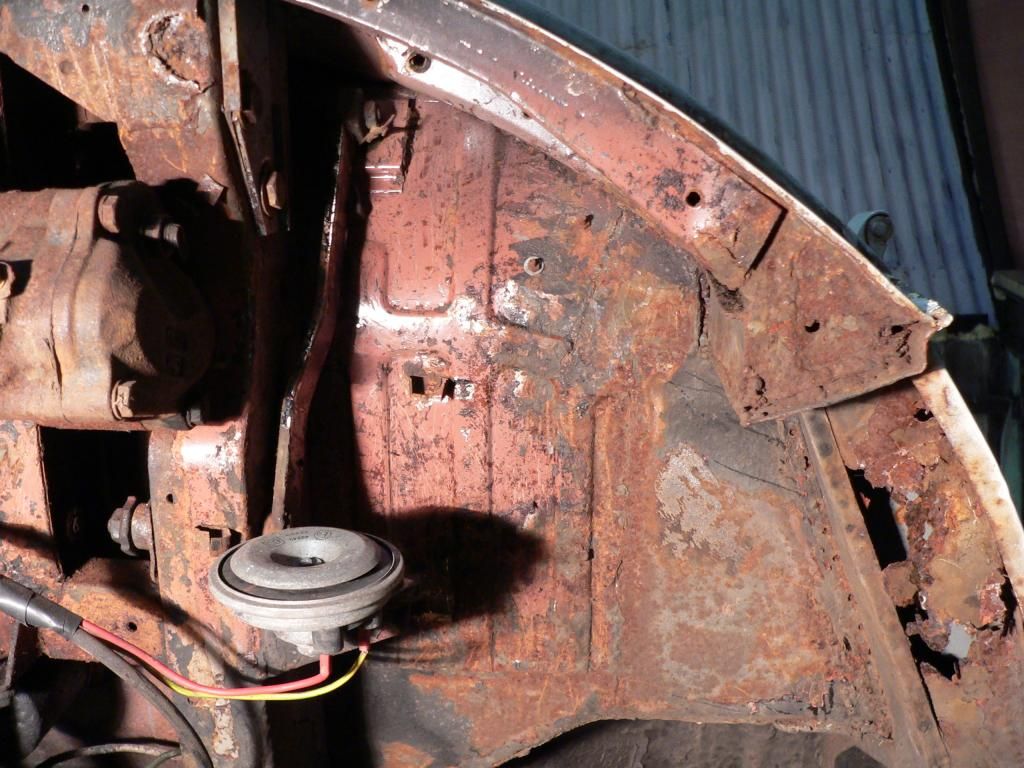
Inner/outer sills have patches from previous repairs so out they come and repalce with new.
The cross beams (sorry not sure of the correct technical term for these) have been repaired previously and it look likes they just overlaid new ones or made them up.
whatever was done will come of and be replaced with new sections, hopefully these can be bought from one of the usual suppliers.
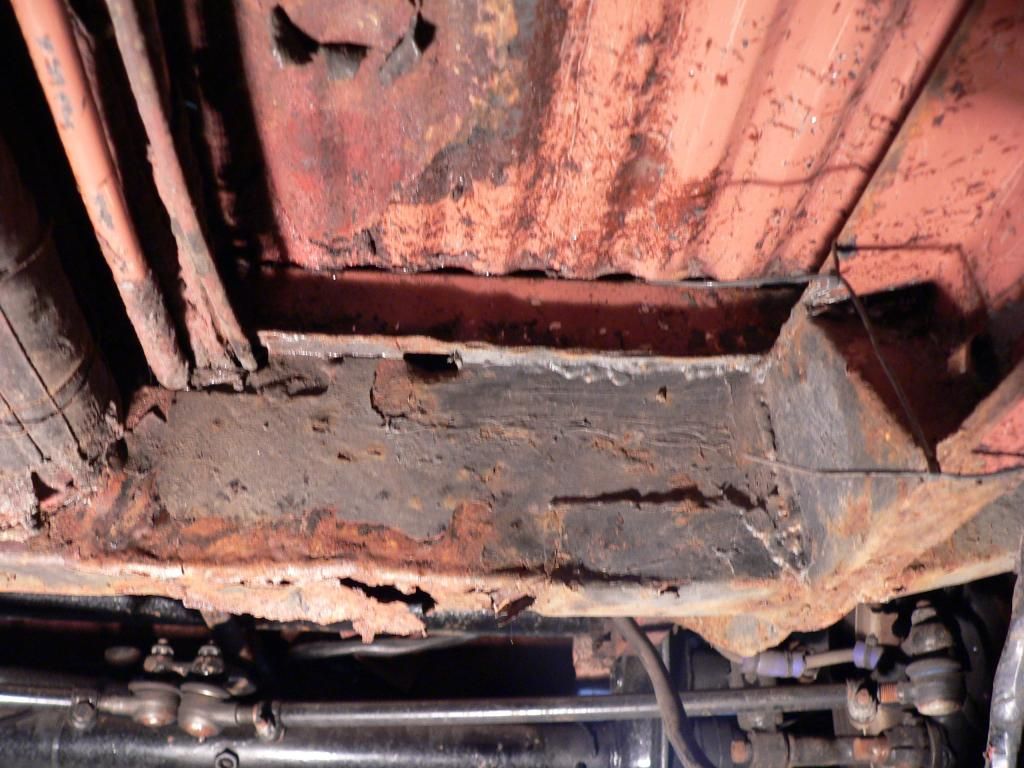
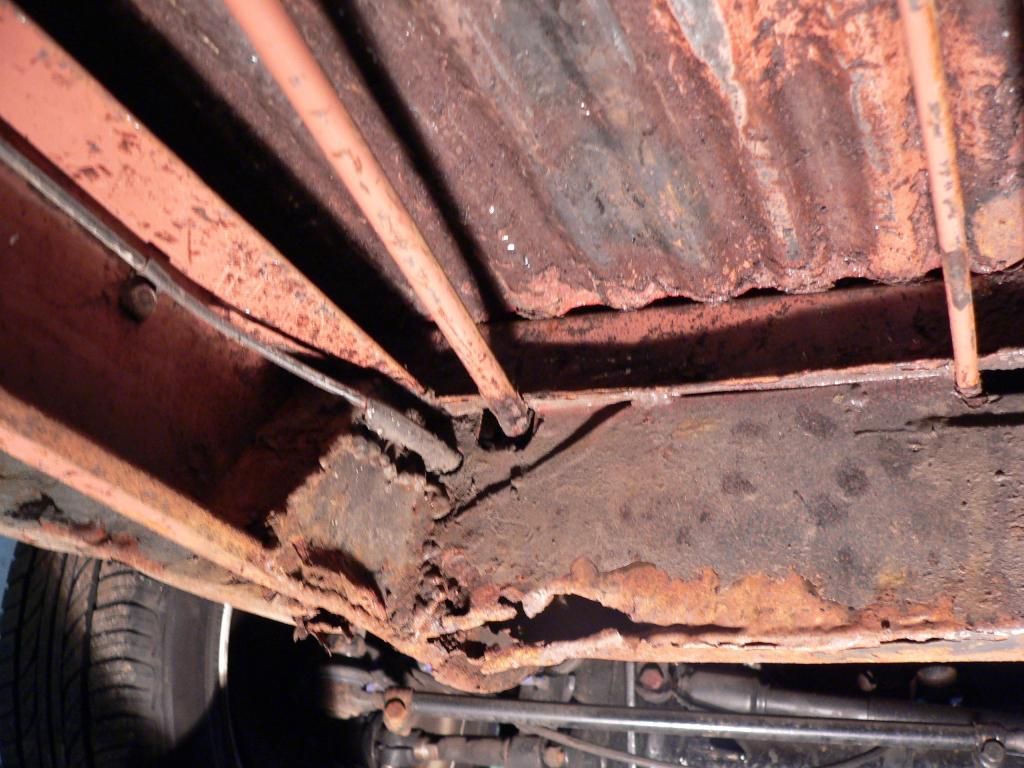
Lower doglegs and the box section behind will be replaced and as we already new a complete front inner and outer valance will be needed.
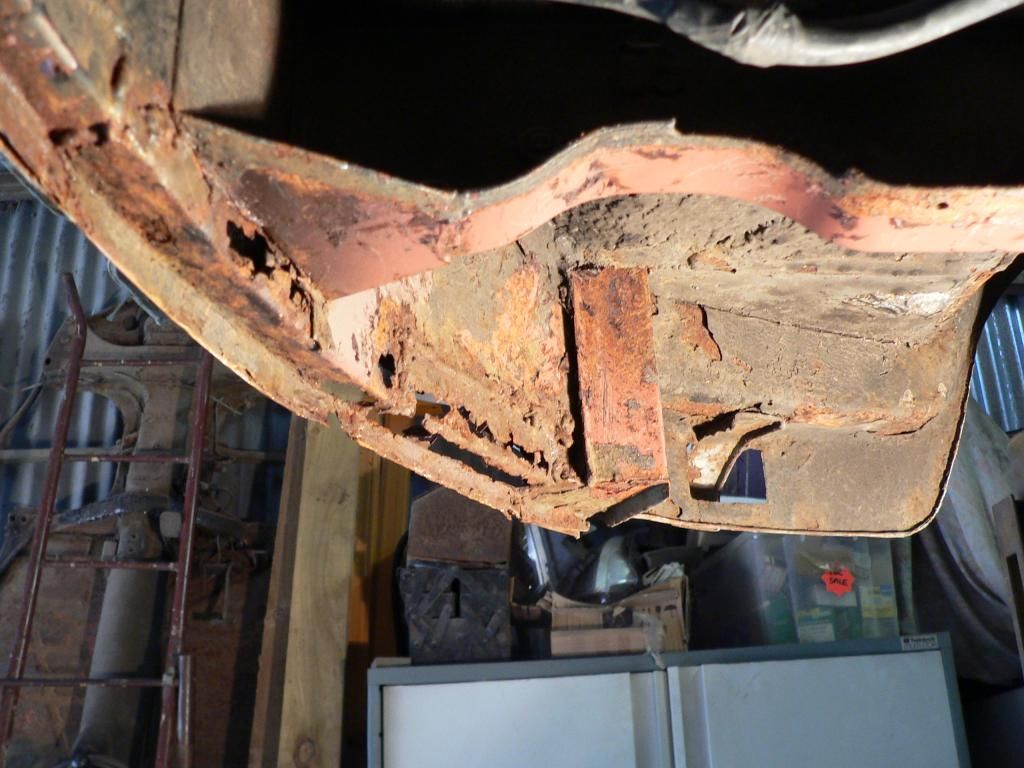
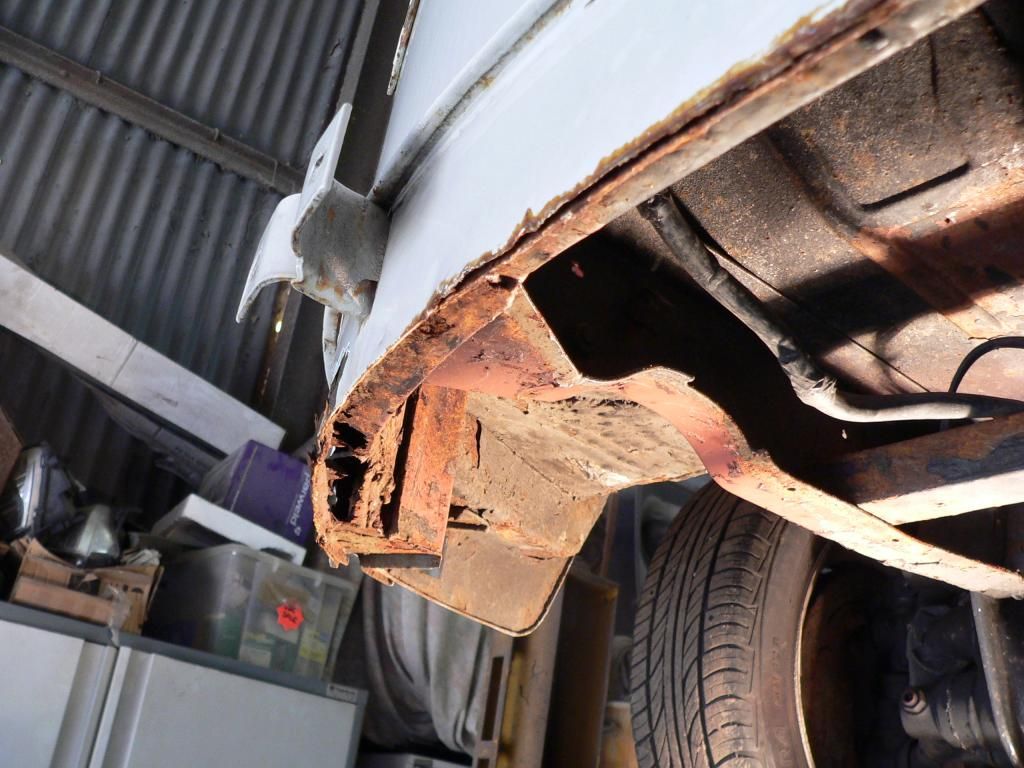
Not nice seeing your bus exposed like this but at least once the cutting out starts you know the rots gone and once replaced with new metal,treated,sealed and painted it'll just be a great feeling.
Rob has a made a start and has been busy cleaning off the underseal ready to assess what's going to need doing.
I suppose being a swiss bus it was coated with underseal from new which has helped keep the majority of the floor area free
from moisture and salt. The age of the underseal has helped in getting it off easily as it's dried out and comes off without to much effort.

The centre area inside the chassis is in great condition although it does have a strange colour (sort of pink/red) under the crud.

The outer cab floor both sides have been patched previously so we'll redo them with correct floor sections, the cargo floor sides
have some patches from previous repairs and the outer I beams are blown so they will be replaced.


Inner/outer sills have patches from previous repairs so out they come and repalce with new.
The cross beams (sorry not sure of the correct technical term for these) have been repaired previously and it look likes they just overlaid new ones or made them up.
whatever was done will come of and be replaced with new sections, hopefully these can be bought from one of the usual suppliers.


Lower doglegs and the box section behind will be replaced and as we already new a complete front inner and outer valance will be needed.


Not nice seeing your bus exposed like this but at least once the cutting out starts you know the rots gone and once replaced with new metal,treated,sealed and painted it'll just be a great feeling.
snapy
-
Posts: -
Joined: -
Re: Filly our 59 11w, winter refurb
by markp » Wed Oct 29, 2014 8:18 pm
Good times Steve
Good to see ya taking the steps to make sure the bus is done correctly
Well done buddy
Mark
Good to see ya taking the steps to make sure the bus is done correctly
Well done buddy
Mark
markp
-
Posts: -
Joined: -
Re: Filly our 59 11w, winter refurb
by snapy » Thu Oct 30, 2014 7:15 pm
markp wrote:
Good times Steve
Good to see ya taking the steps to make sure the bus is done correctly
Well done buddy
Mark
Good to see ya taking the steps to make sure the bus is done correctly
Well done buddy
Mark
How you doing Mark,
You're right the only way to do it is correctly.
Filly's earns her keep so now winters here we thought we'd plough the income back in and put right what bodget and scarper did or rather didn't do a few years ago.
It'll be nice knowing what's been done and we'll have put our own stamp on it.
Now I know your watching it'll keep me on my toes with the updates ( won't want to suffer the wrath of Mr P ) LOL
While we're on the subject any advice on panels,? do I just go to one supplier for all or are some better from one and some from another? .
Just caught up with your trailer resto. Cracking!!!! Super job as we'd all expect now you've set your own bar so high !!!!!!!!!!!! Lol
Speak soon
Steve
snapy
-
Posts: -
Joined: -
Re: Filly our 59 11w, winter refurb
by Nik » Thu Oct 30, 2014 7:55 pm
Getting stuck in there Steve, nice one

The 59 would have had thick lip dog legs (mine's late December '59 and has factory thick lips)
In fact my 62 crossover split had thick lips too, so yours is squarely in the right range for these.
Hope this helps mate.
Cheers.
Nik
The 59 would have had thick lip dog legs (mine's late December '59 and has factory thick lips)
In fact my 62 crossover split had thick lips too, so yours is squarely in the right range for these.
Hope this helps mate.
Cheers.
Nik
Nik
-
Posts: -
Joined: -
Re: Filly our 59 11w, winter refurb
by clymoj » Thu Oct 30, 2014 8:59 pm
Scary seeing it all stripped back isn't it and you'll have few big gulps before the cutting's finished but will be worth it to know it's done right.
Thick lip for <62 yes, thin lip 63<. Thick lip only started being available fairly recently so older work will have incorrectly used thin lip regardless. I had the same on my bus (but on both sides).
I was told use Autocraft for everything they make, so bought everything from there and have been very pleased. Excellent service and the panels fit!
I've also heard from good body shops that Schofields are good and stock the best available panel by panel whether that be autocraft or others; but I don't have first hand experience. They have an excellent reputation for general parts, advice and service which I can confirm.
clymoj
-
Posts: -
Joined: -
Re: Filly our 59 11w, winter refurb
by snapy » Fri Oct 31, 2014 4:59 pm
Nik wrote:
Getting stuck in there Steve, nice one

The 59 would have had thick lip dog legs (mine's late December '59 and has factory thick lips)
In fact my 62 crossover split had thick lips too, so yours is squarely in the right range for these.
Hope this helps mate.
Cheers.
Nik
The 59 would have had thick lip dog legs (mine's late December '59 and has factory thick lips)
In fact my 62 crossover split had thick lips too, so yours is squarely in the right range for these.
Hope this helps mate.
Cheers.
Nik
Hi Nik,
Thanks for that, as we expected,
Thick lips rule
Steve
snapy
-
Posts: -
Joined: -
Re: Filly our 59 11w, winter refurb
by snapy » Fri Oct 31, 2014 5:23 pm
clymoj wrote:
Scary seeing it all stripped back isn't it and you'll have few big gulps before the cutting's finished but will be worth it to know it's done right.
Thick lip for <62 yes, thin lip 63<. Thick lip only started being available fairly recently so older work will have incorrectly used thin lip regardless. I had the same on my bus (but on both sides).
I was told use Autocraft for everything they make, so bought everything from there and have been very pleased. Excellent service and the panels fit!
I've also heard from good body shops that Schofields are good and stock the best available panel by panel whether that be autocraft or others; but I don't have first hand experience. They have an excellent reputation for general parts, advice and service which I can confirm.
Thick lip for <62 yes, thin lip 63<. Thick lip only started being available fairly recently so older work will have incorrectly used thin lip regardless. I had the same on my bus (but on both sides).
I was told use Autocraft for everything they make, so bought everything from there and have been very pleased. Excellent service and the panels fit!
I've also heard from good body shops that Schofields are good and stock the best available panel by panel whether that be autocraft or others; but I don't have first hand experience. They have an excellent reputation for general parts, advice and service which I can confirm.
Hiya,
thanks for post,scary day today as we cut out the outer front valance
looks like your spot on with the thick/thin lip saga, couldn't understand why anyone would have fitted a thin as it looks so wrong when you know it should be thick.
Thanks for the advice on panels, my man Rob is only a short ride from Autocraft so might make sense for him to go buy the panels direct, save any possible issues with being supplied wrong bits etc.
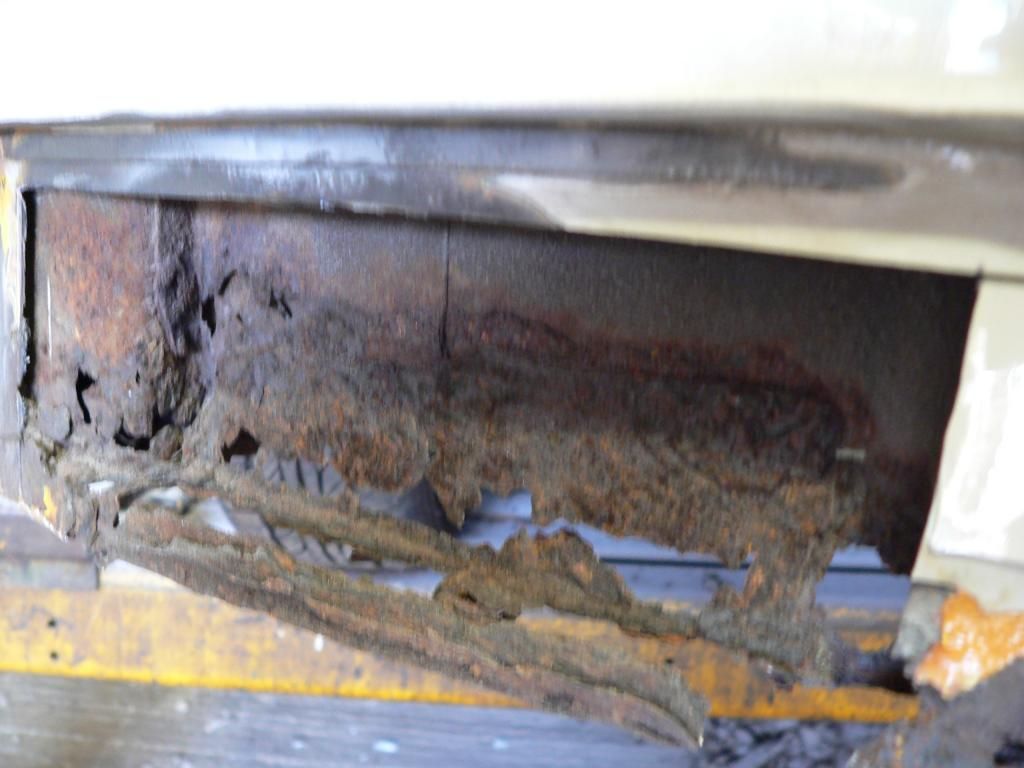
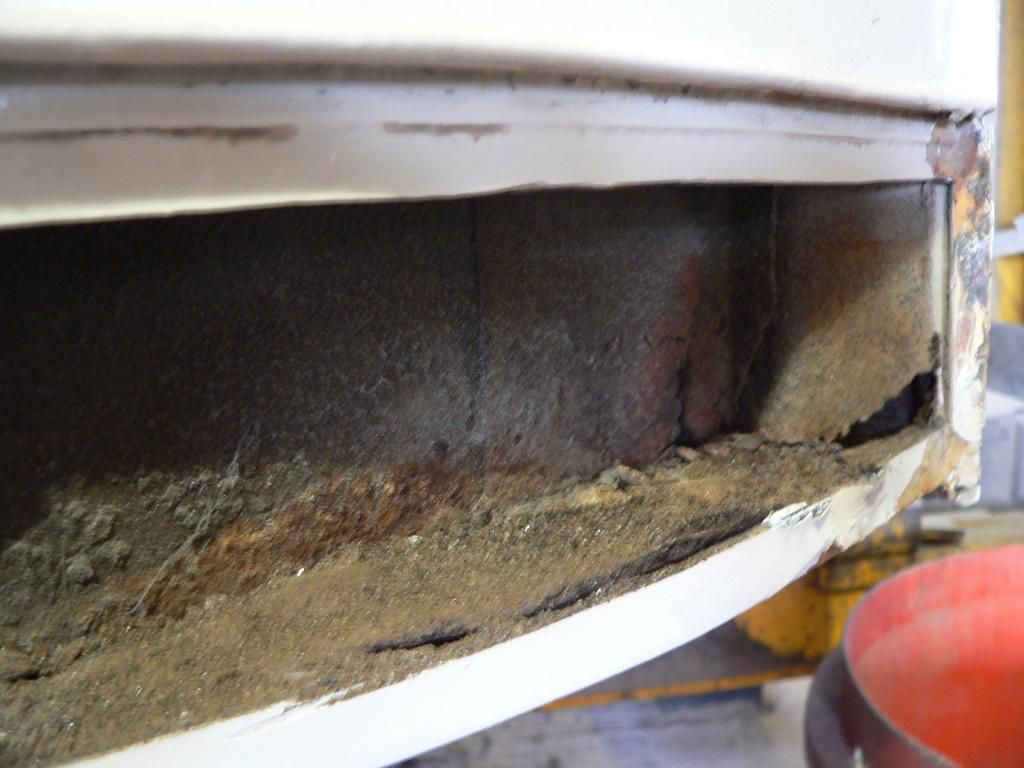
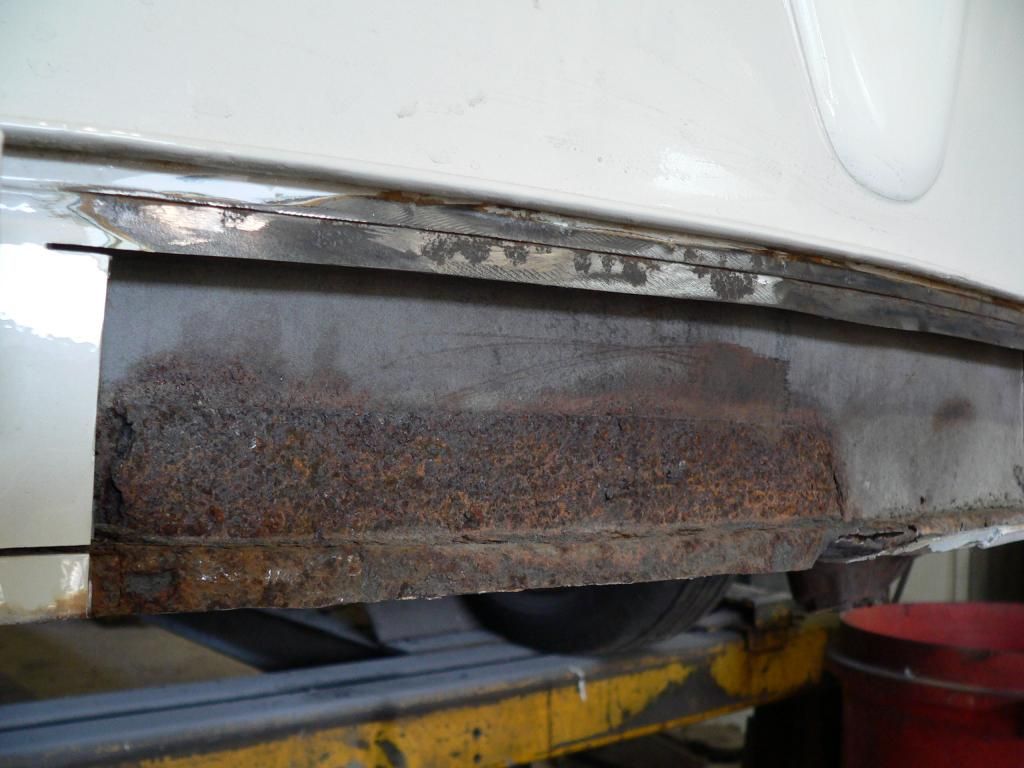
Inner valance to come out yet but above the valance and lower nose are spot on
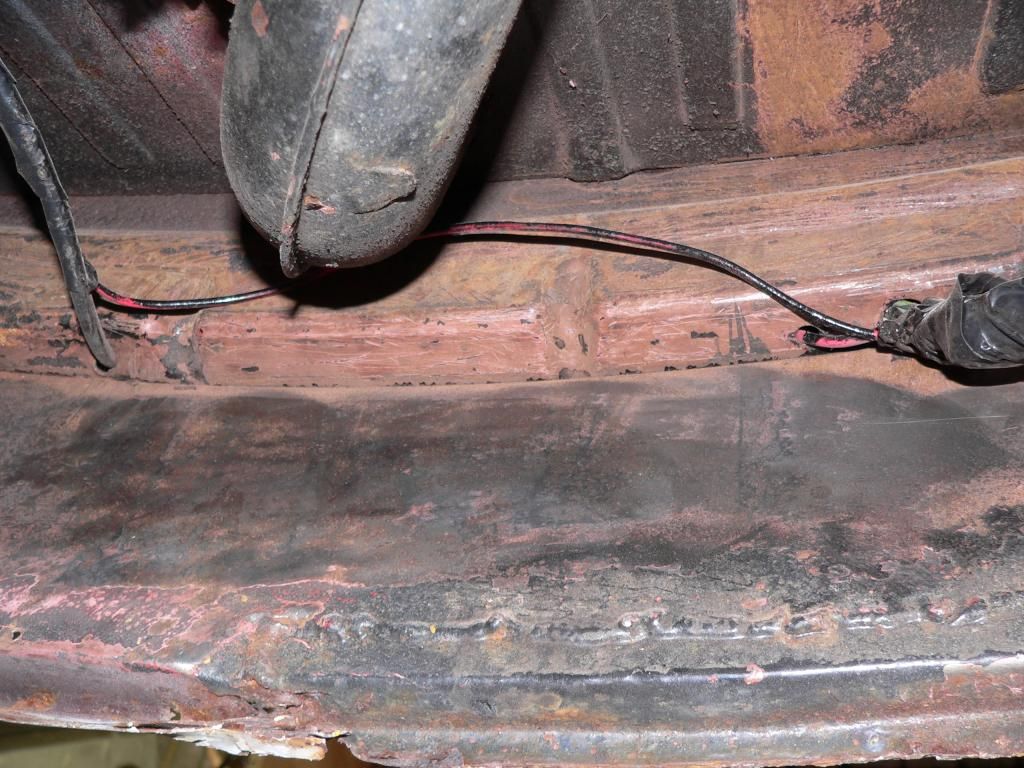
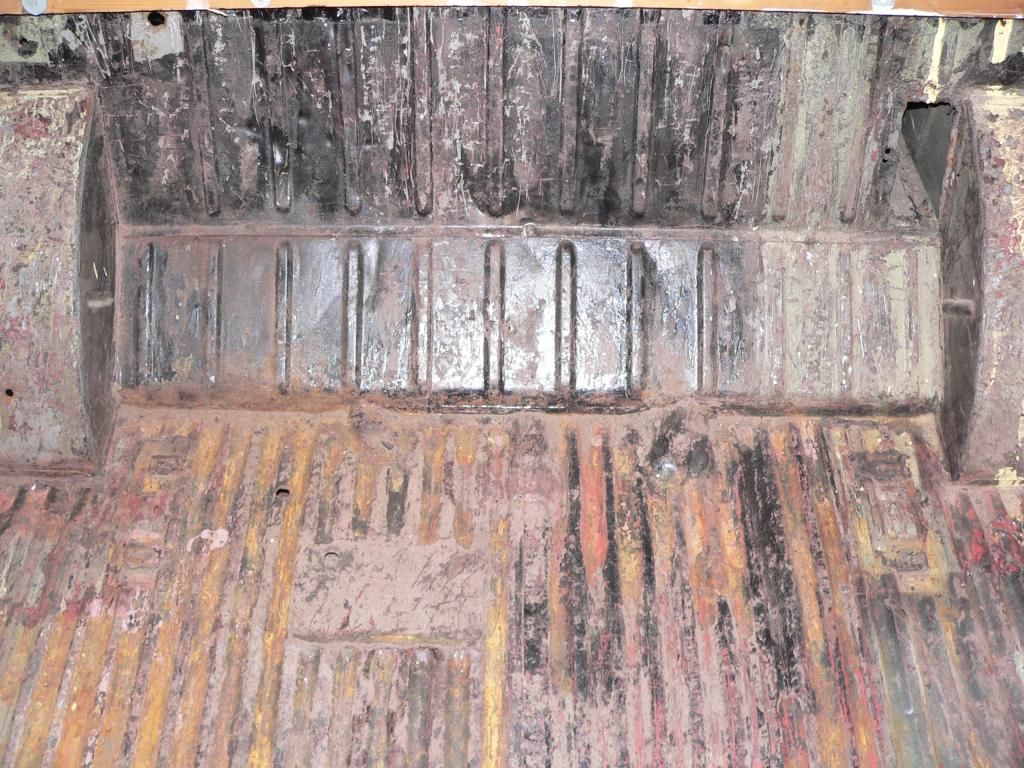
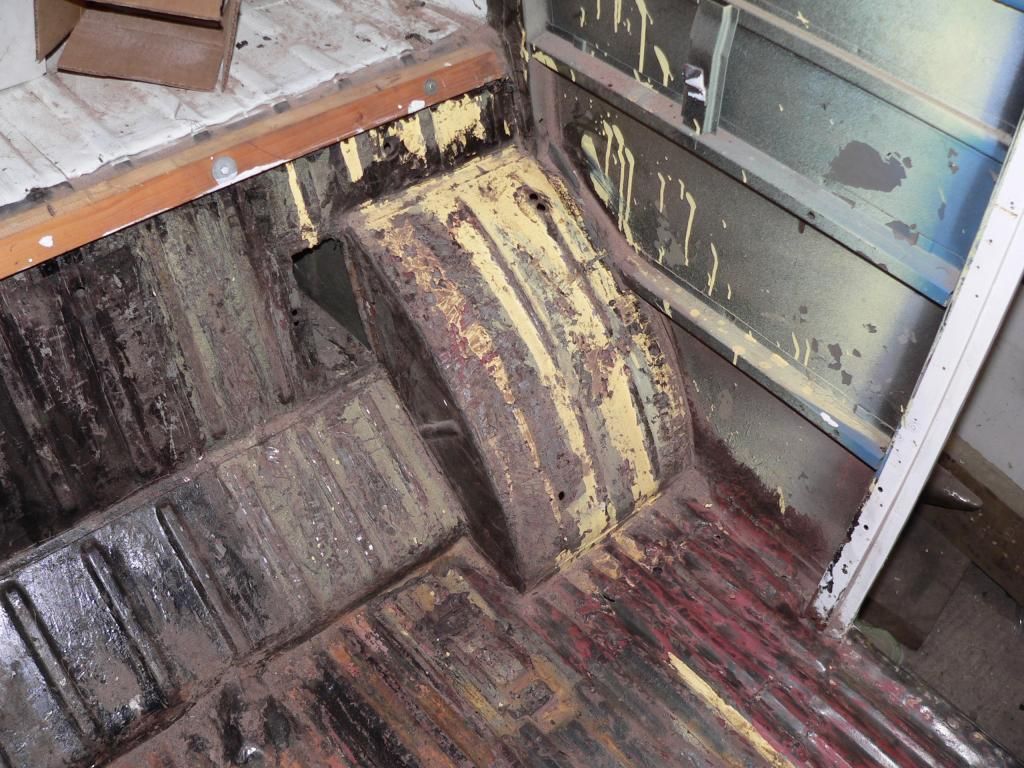
Spent a few ours to save a bit of labour cost and srtipped the cargo floor of a ton of roofing mastic black gunge (lovely job ,not), No real rot here just a few old holes to fill where the propex was fitted. now to clean it up with the old wire wheel, but that'll have to wait till next week.
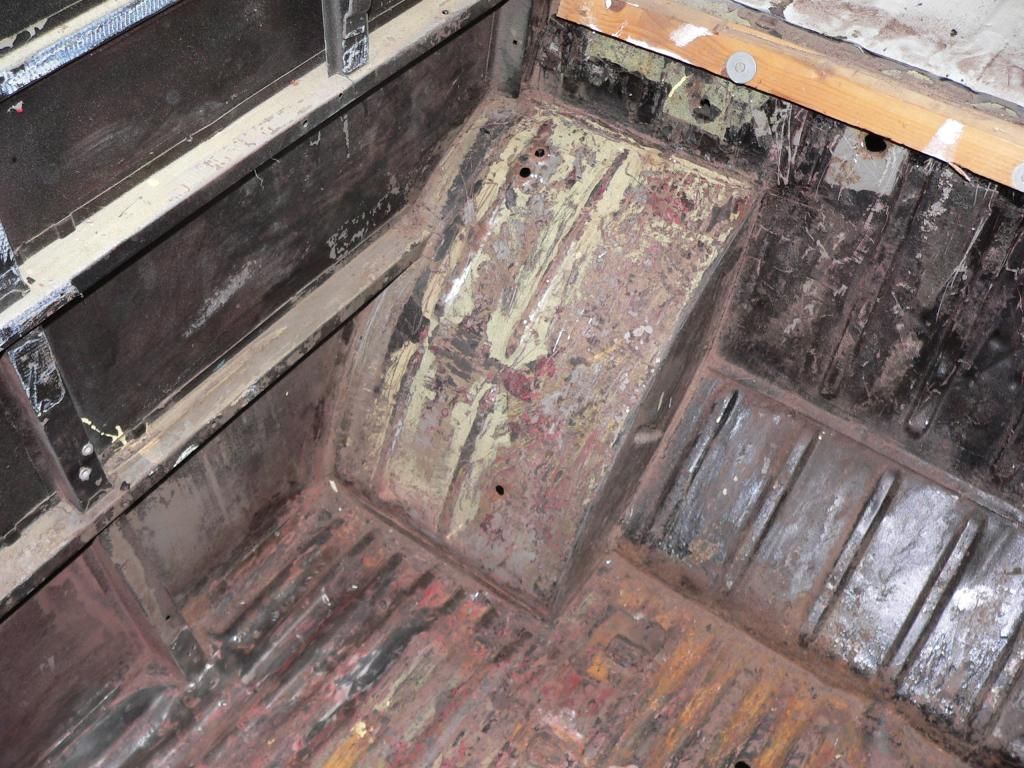
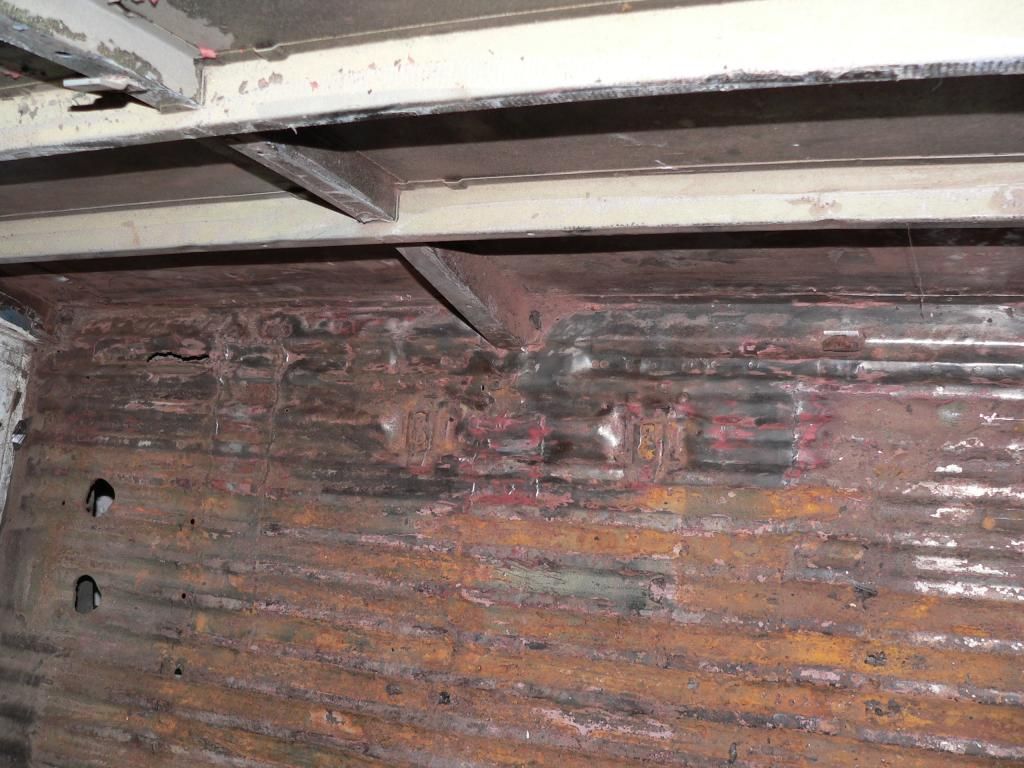
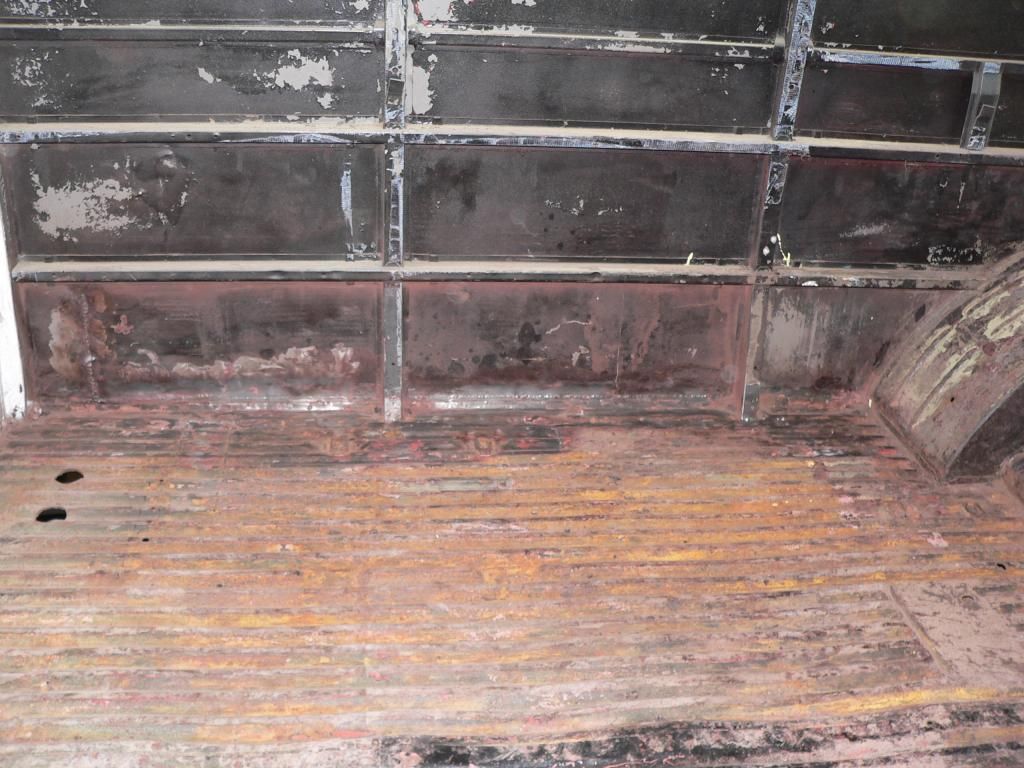
snapy
-
Posts: -
Joined: -
Re: Filly our 59 11w, winter refurb
by snapy » Fri Nov 07, 2014 4:53 pm
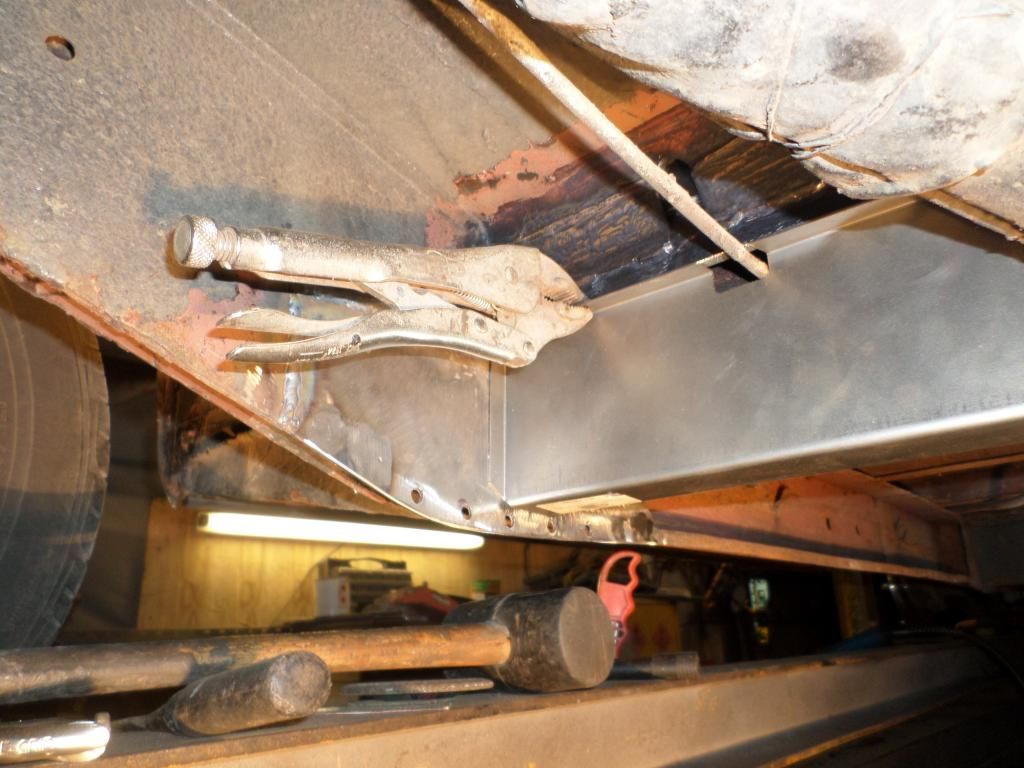
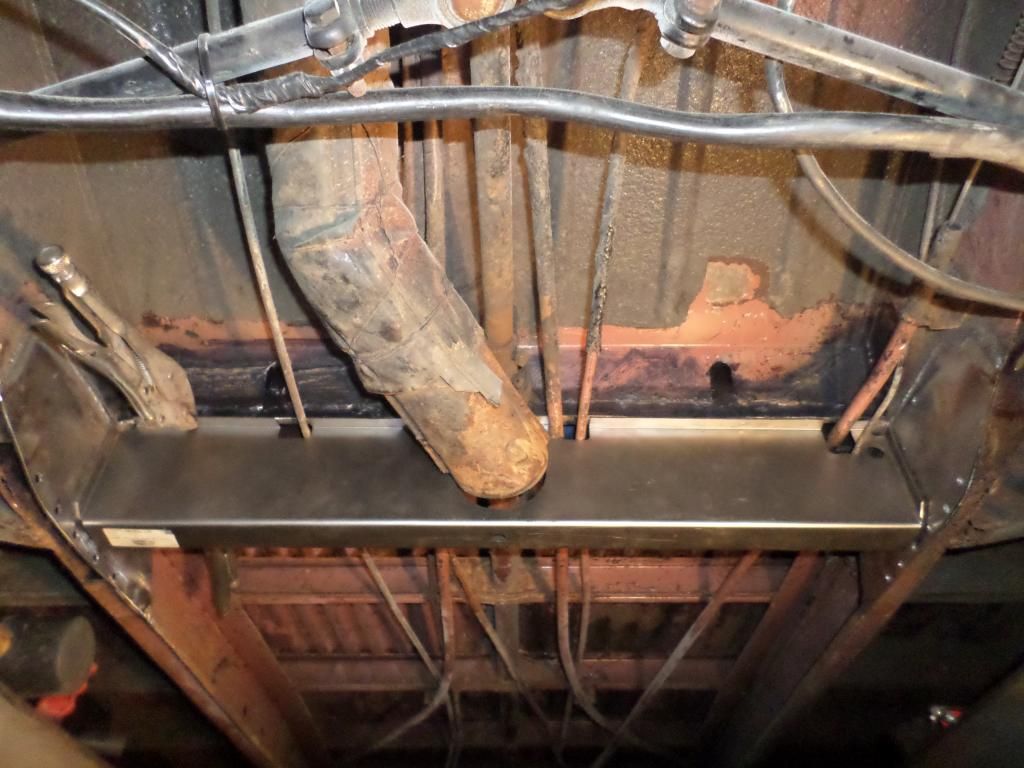
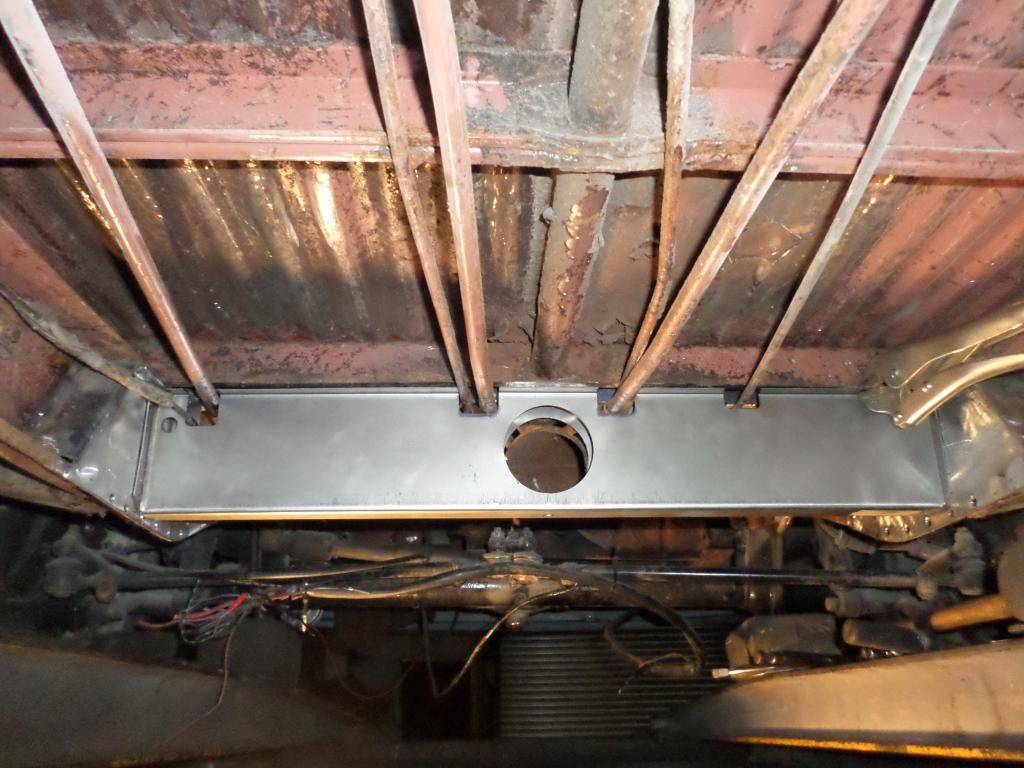
Spent the day with Rob the welder and got a lot more done today, chassis cleaning,cargo floor cleaning, and Rob made progress on replacing the cut out inner/outer front valance.
The Crud Thug, tool of choice
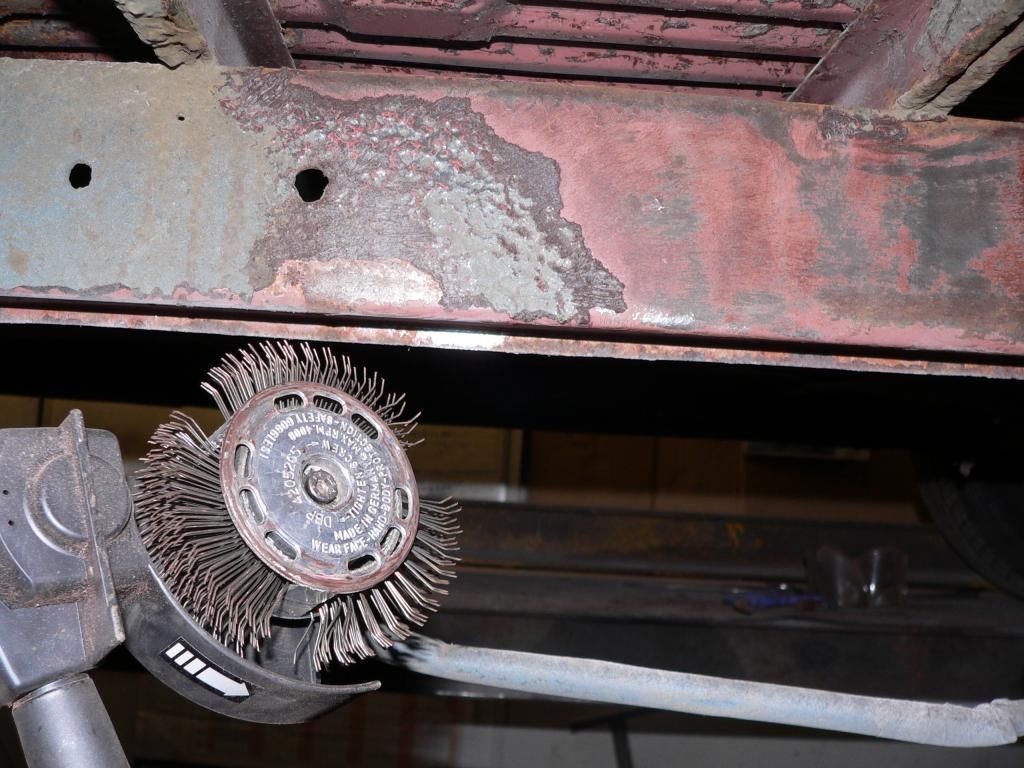
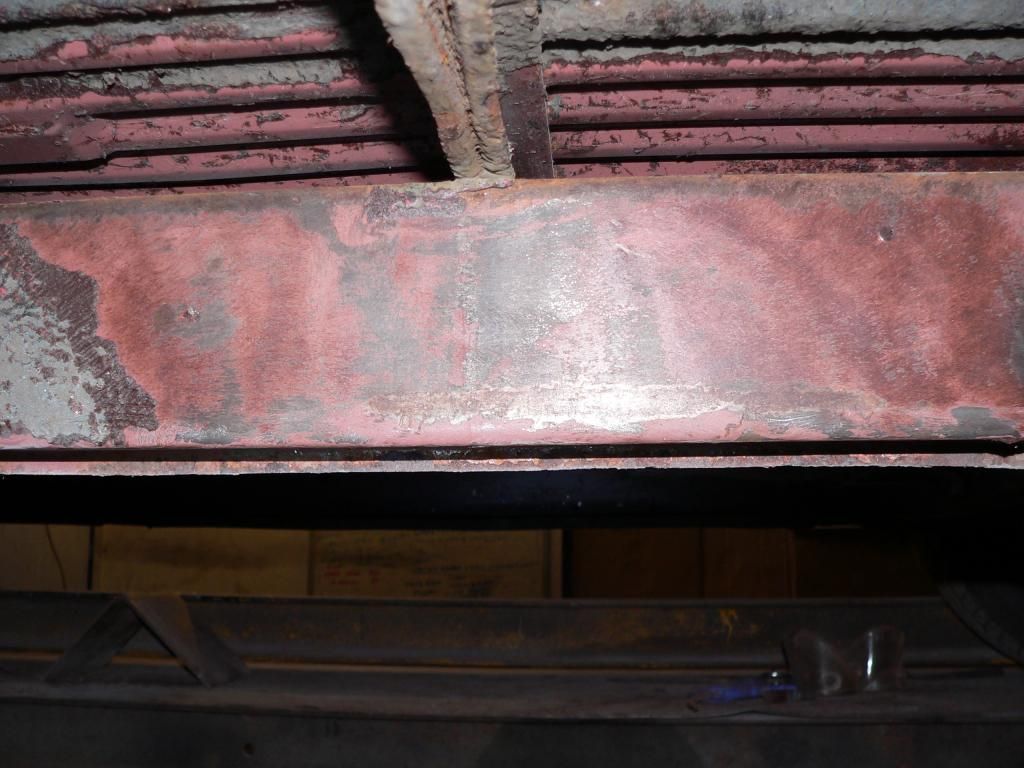
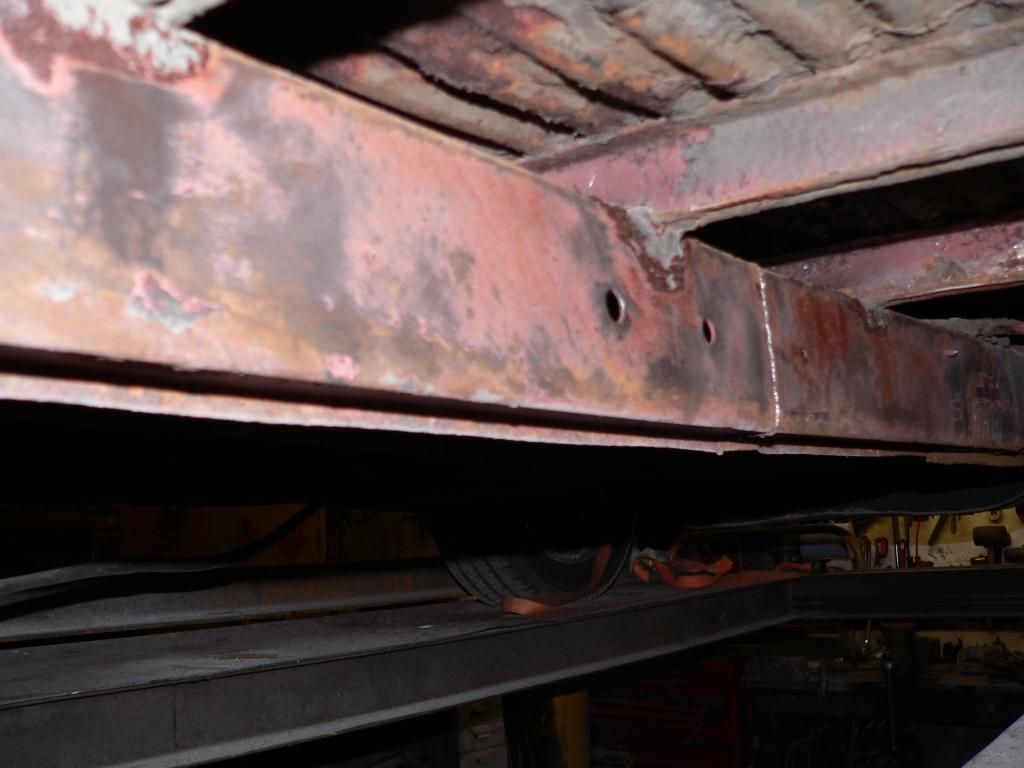
We decided not remove the whole valance section where it meets the fold at the front panel as you can see from the pics it's in perfect condition with no rot from below or down from above in the cab.
Rob cut out what he had to leaving enough behind to seam weld a trimmed and joggled valance back in making sure the measurements were spot on.
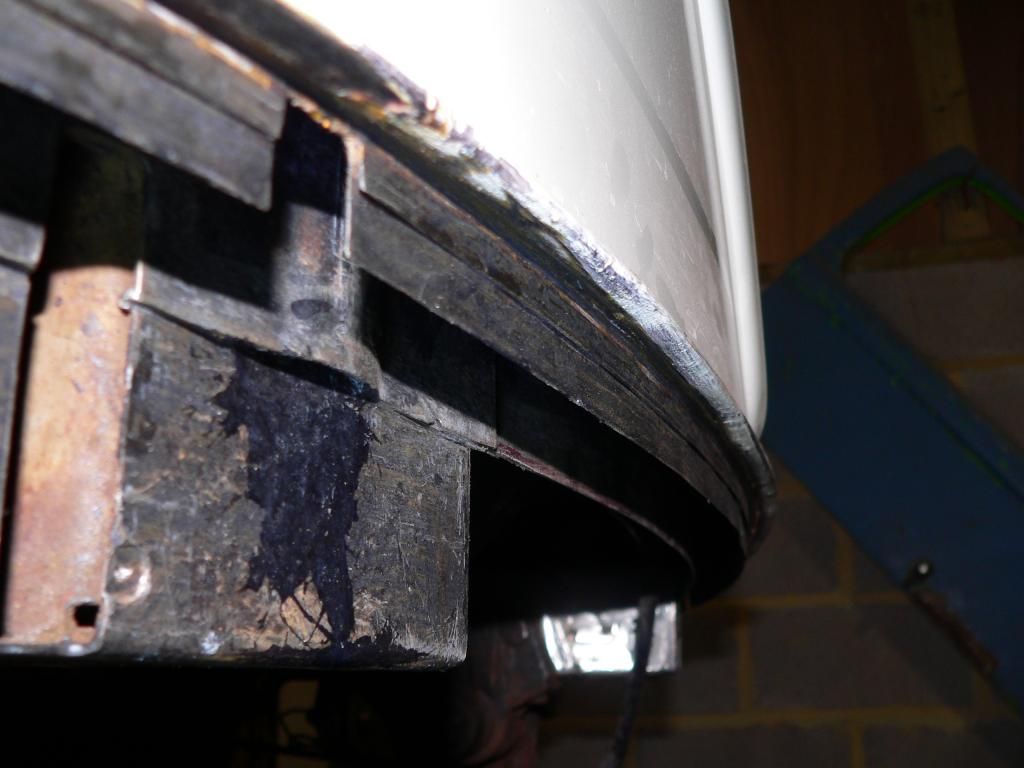
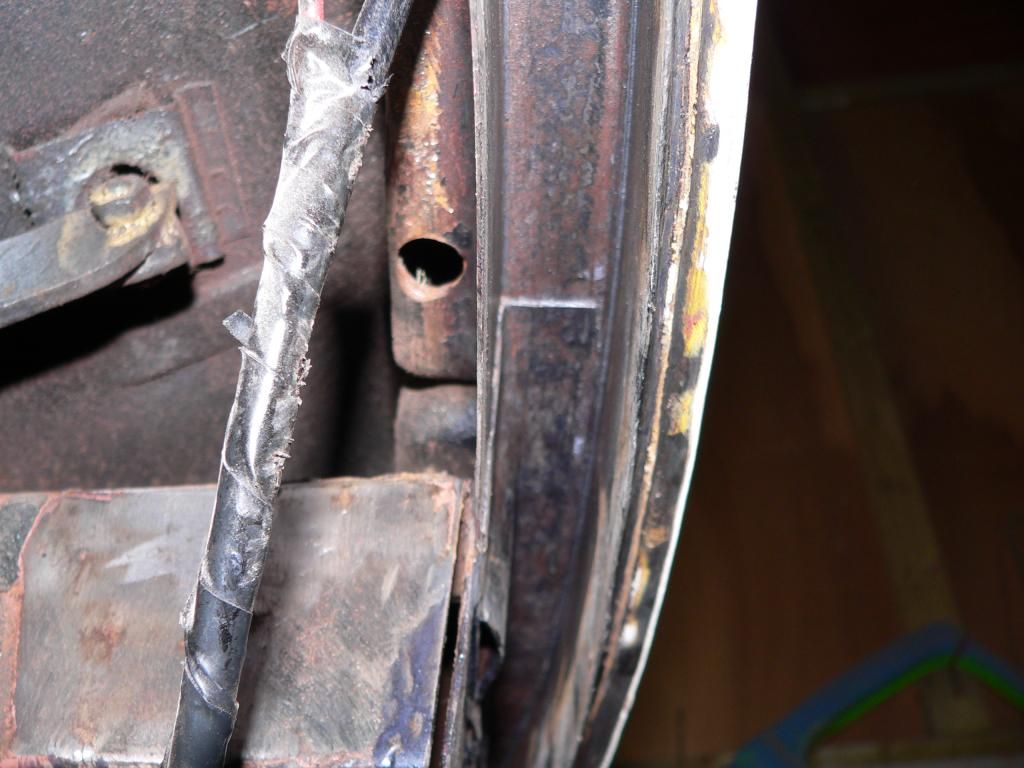
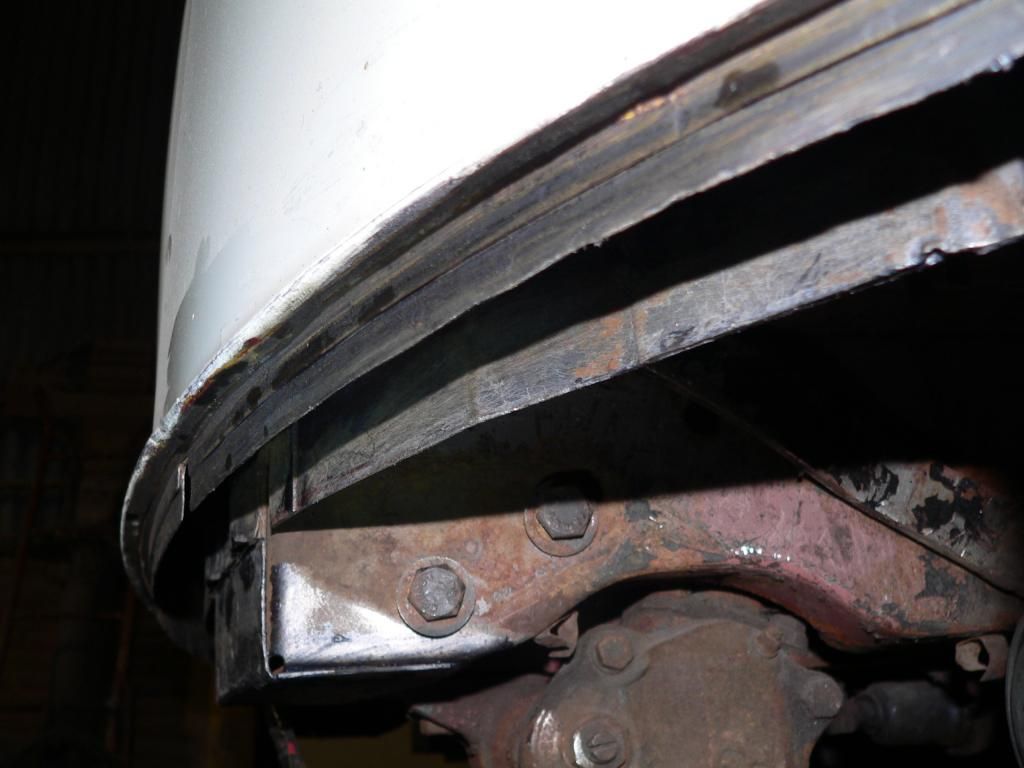
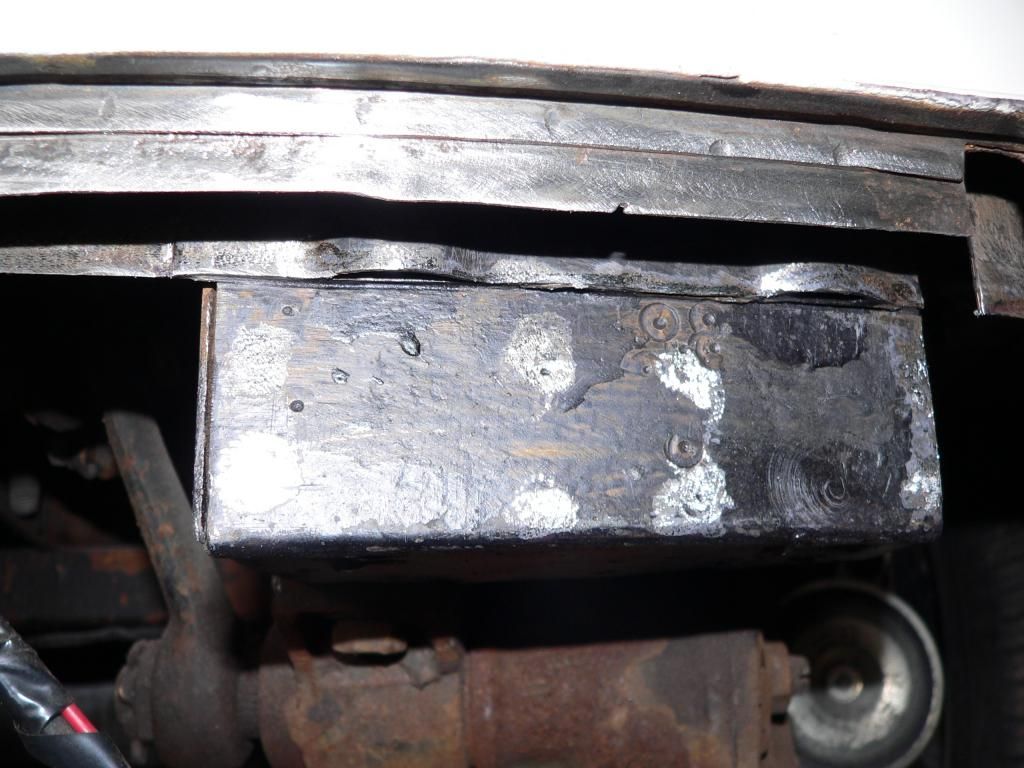
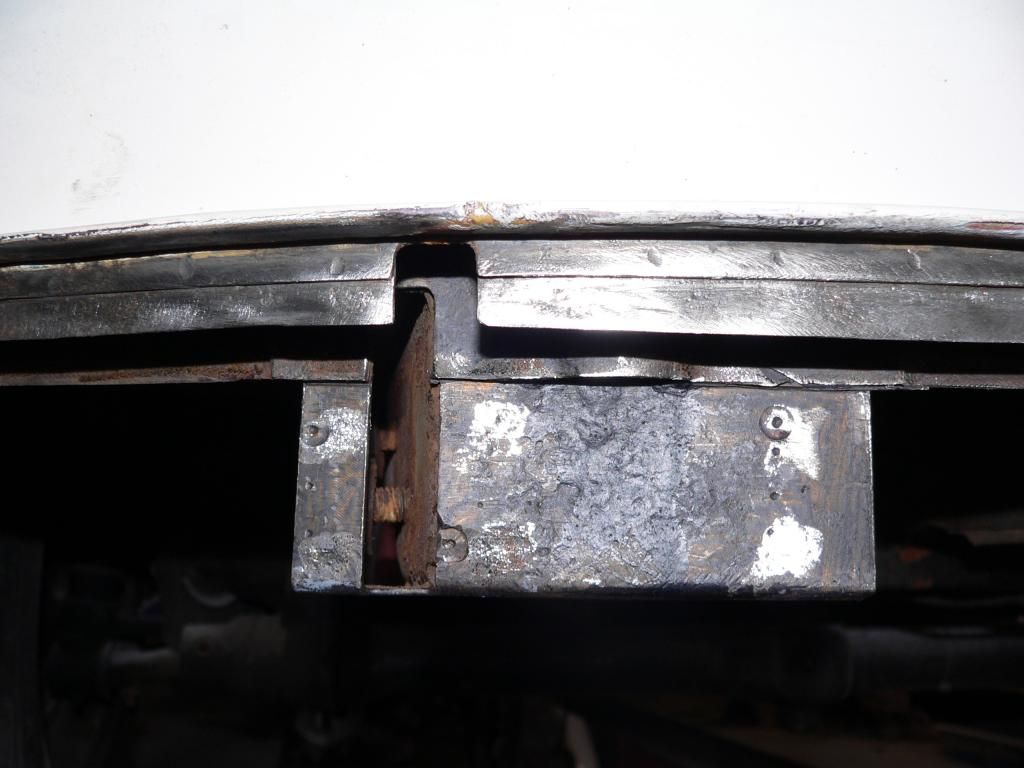
Then time to offer up the valance after a trim.
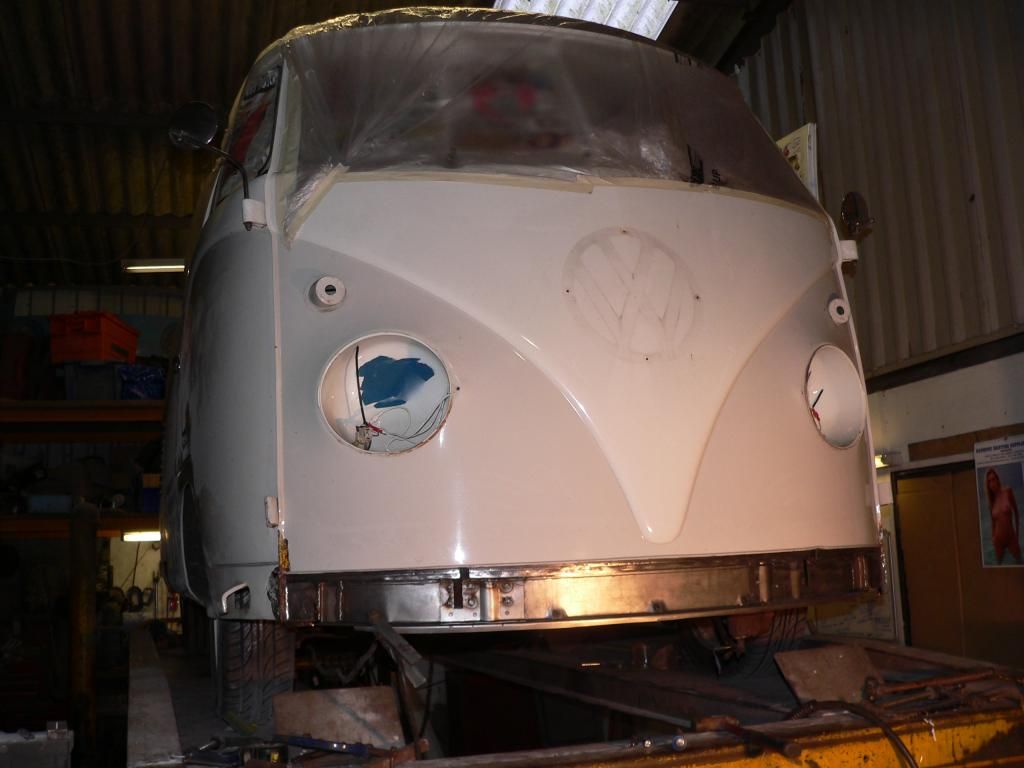
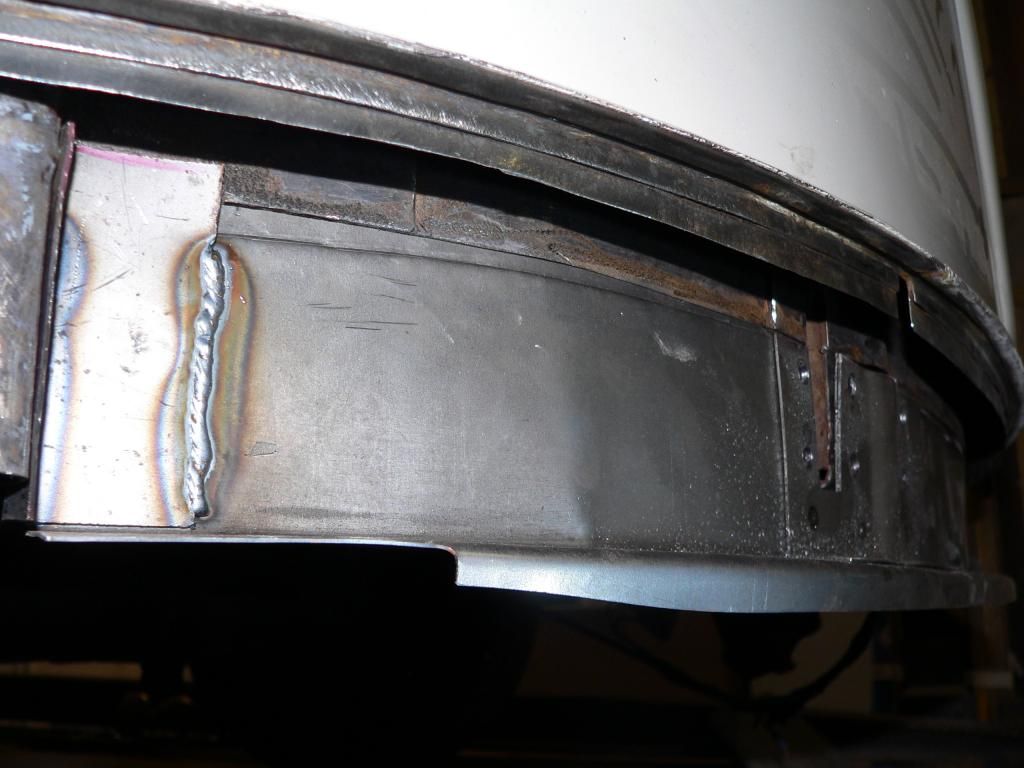
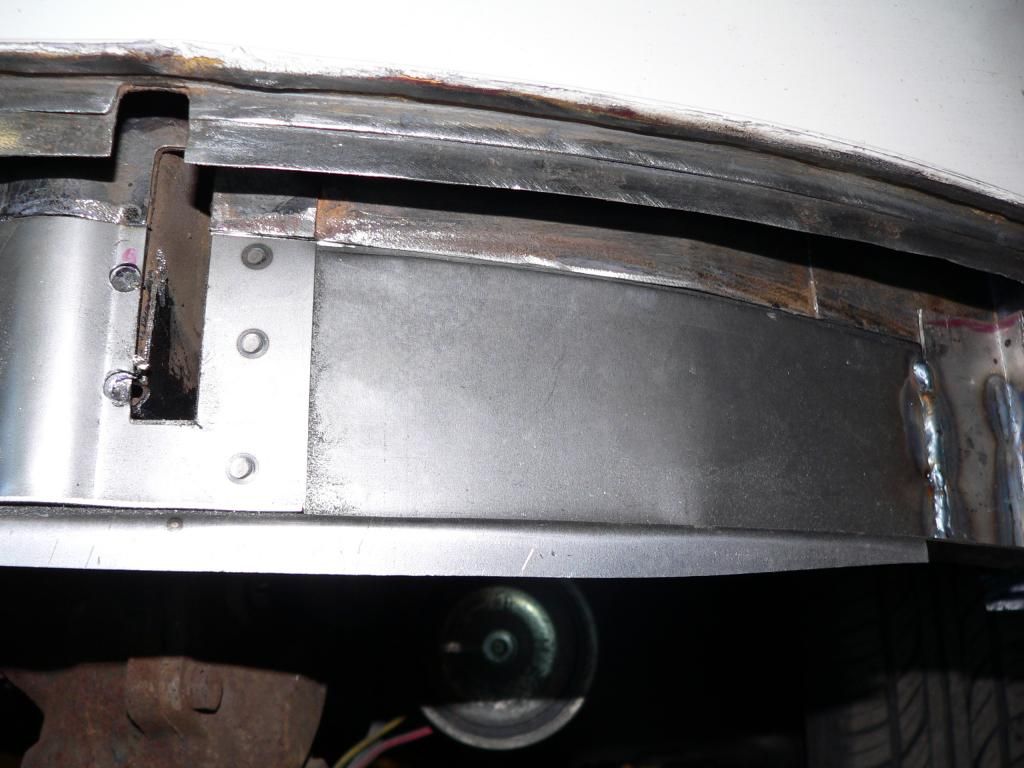
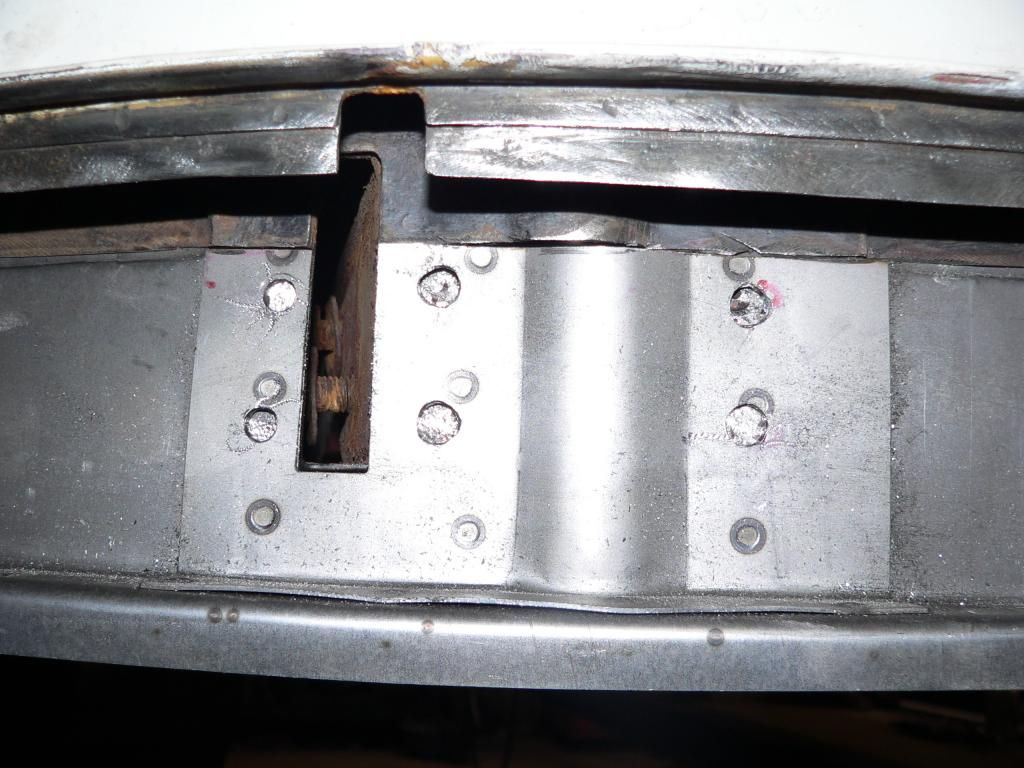
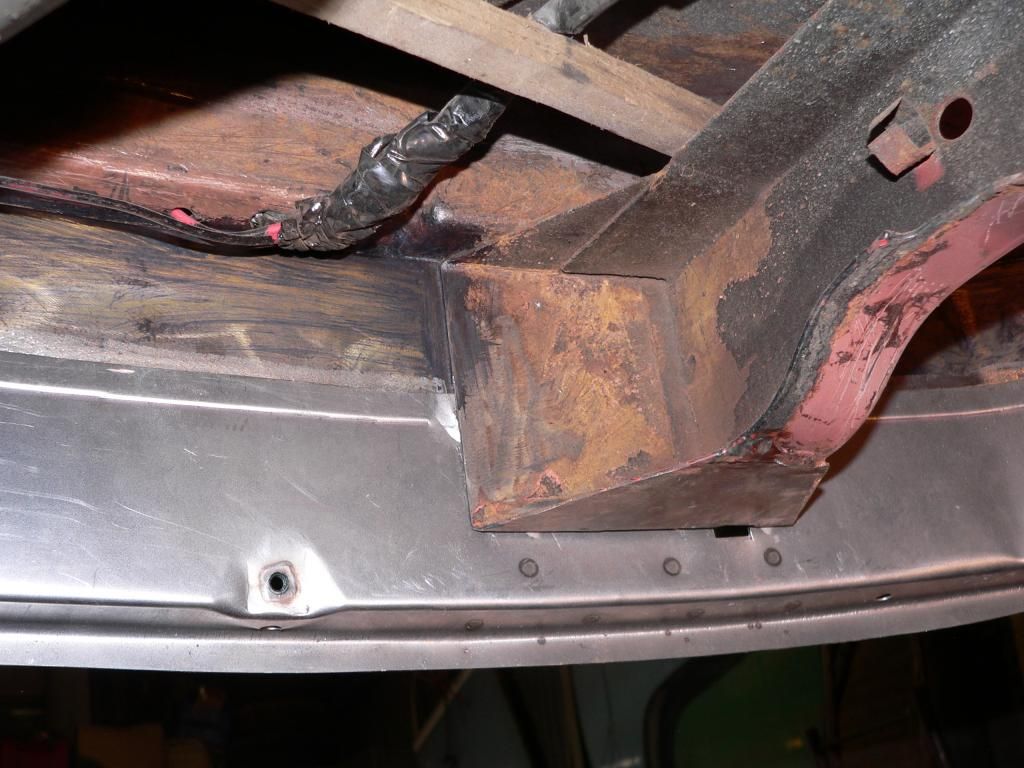
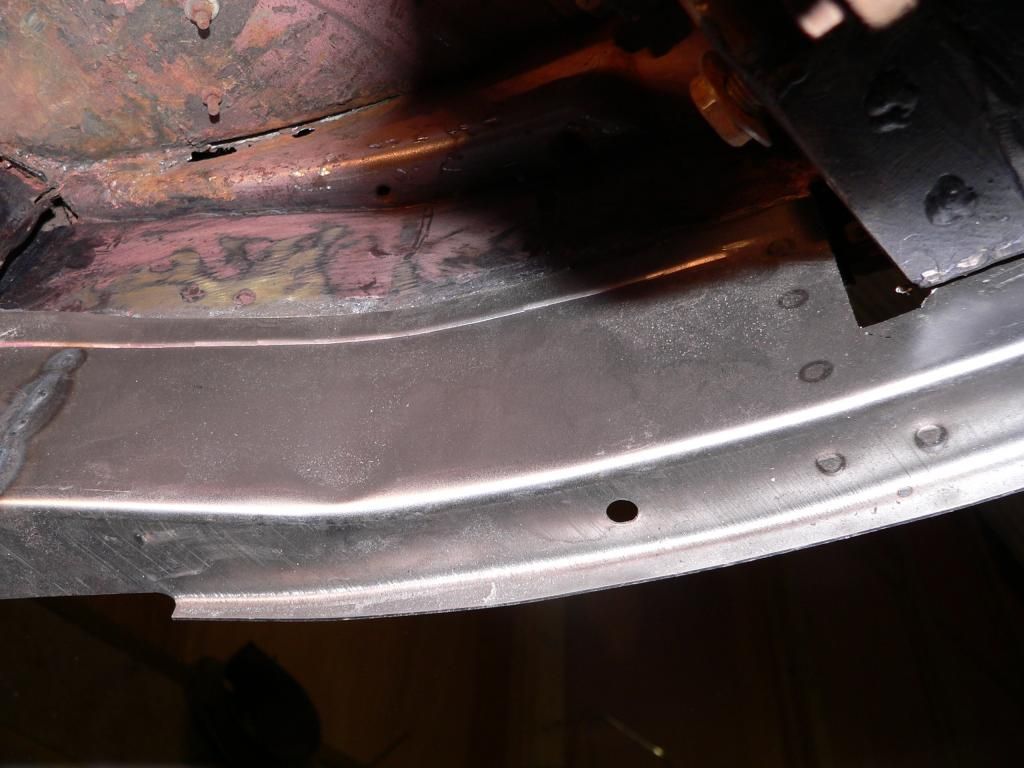
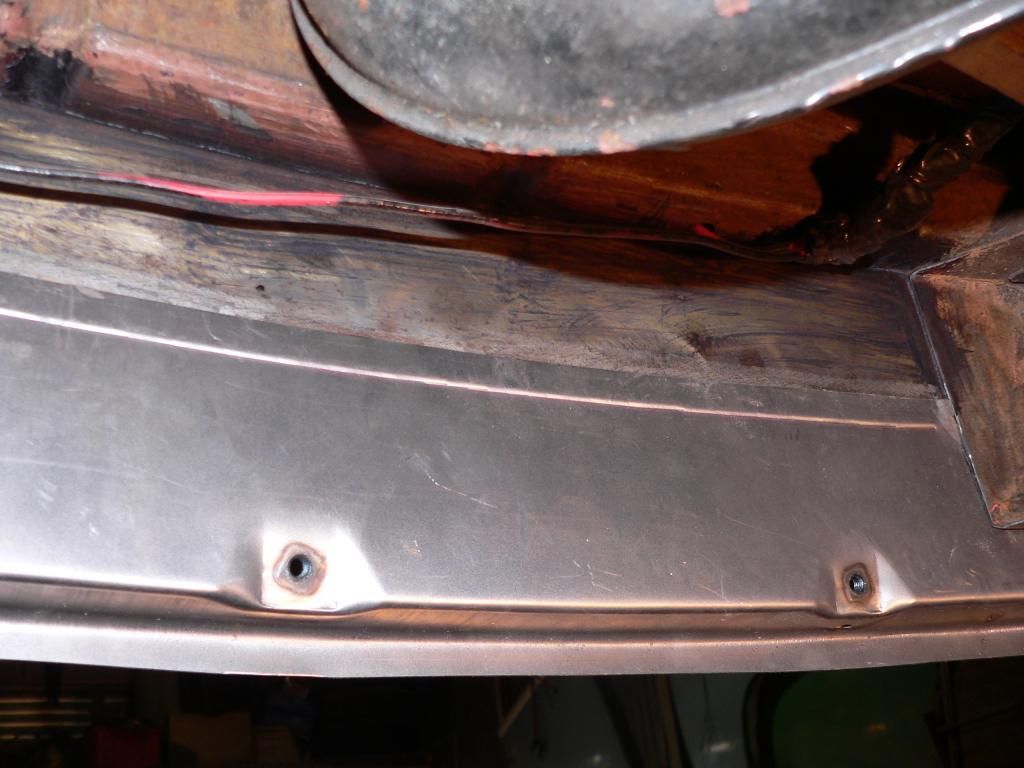
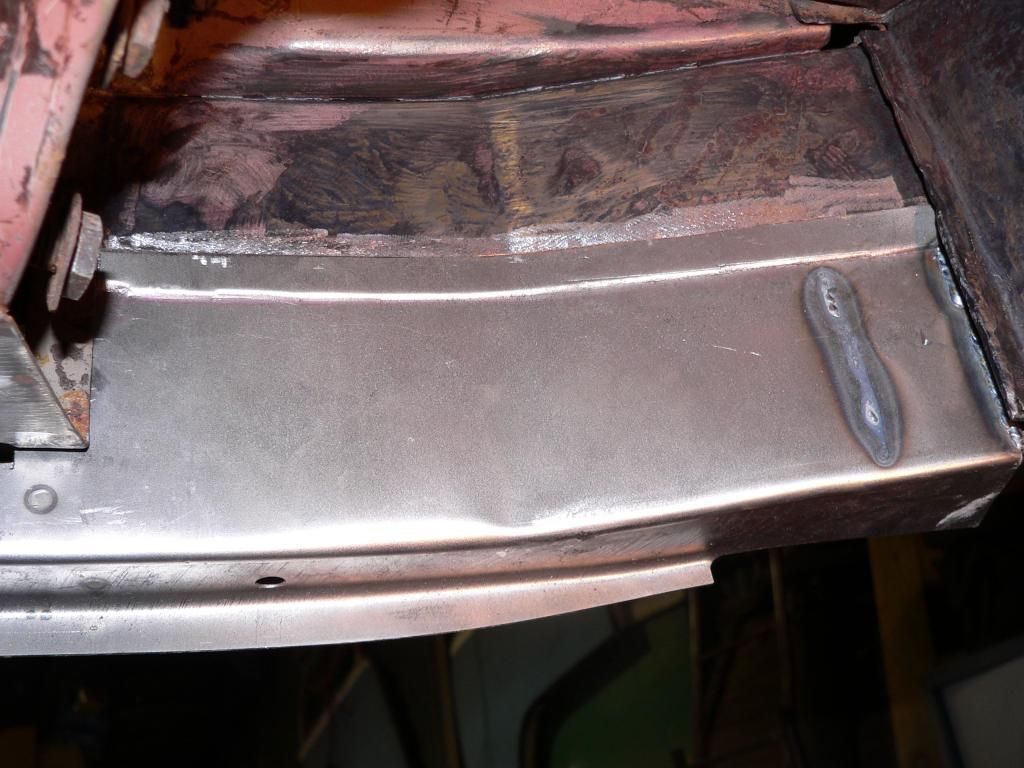
Just the front closing panel to fit after some etch anti rust treatment. once the weldings done we'll inject all the hollow sections with a good inner seal.
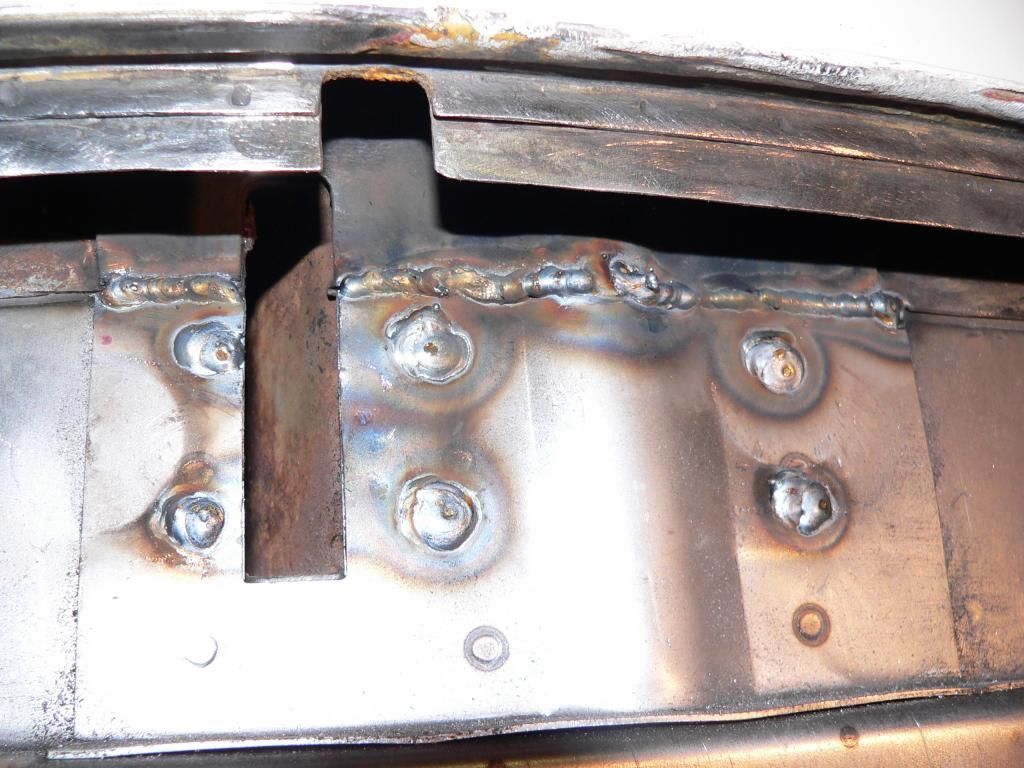
Rob will get the closing panel on,close off the bottom of the A posts and then it's on to the next bit, not sure if he's going to repalce the dog legs next or the centre chassis sections.
Some of the previous colour schemes LOL
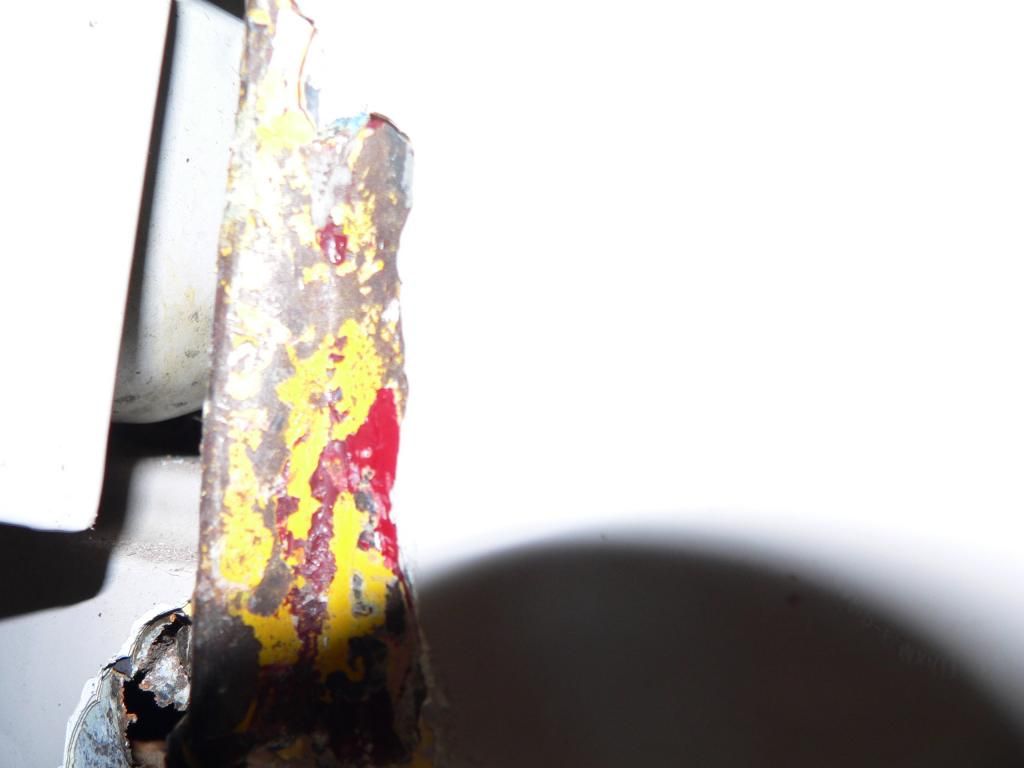
Updates to follow.
Steve
The Crud Thug, tool of choice


We decided not remove the whole valance section where it meets the fold at the front panel as you can see from the pics it's in perfect condition with no rot from below or down from above in the cab.
Rob cut out what he had to leaving enough behind to seam weld a trimmed and joggled valance back in making sure the measurements were spot on.


Then time to offer up the valance after a trim.


Just the front closing panel to fit after some etch anti rust treatment. once the weldings done we'll inject all the hollow sections with a good inner seal.

Rob will get the closing panel on,close off the bottom of the A posts and then it's on to the next bit, not sure if he's going to repalce the dog legs next or the centre chassis sections.
Some of the previous colour schemes LOL

Updates to follow.
Steve
snapy
-
Posts: -
Joined: -
Re: Filly our 59 11w, winter refurb
by Kitesurfer1683 » Fri Nov 07, 2014 6:05 pm
Just doing the same front panel on my own bus, got to say it's a real bar steward to get off but it's all off now and cleaned back ready for the new autokraft panel when it arrives, having replaced all outriggers, Central cross members front and rear, inner and outer sills both sides and jacking points x 4 plus the cargo floor and louvre panels I have found this cross member and bottom a pillars to be the the worst/ difficult job. The work looks good that you've had done but got to say it seems a shame to cut up new panels to meld in..good luck with the rest of the resto..
Kitesurfer1683
-
Posts: -
Joined: -
Re: Filly our 59 11w, winter refurb
by snapy » Fri Nov 07, 2014 6:35 pm
Hi there,
Looks like we got the same work load LOL, have been looking at your thread and your doing a great job.
Know what you mean about not using all of a repair panel but you could look at it another way, we are keeping as much og as possible and in this case making the job a lot easier.
Cutting out the whole valance out would have been a bigger job as you have found and I suppose if you don't have to disturb any seams you don't run the risk of future problems with the dreaded
moisture ingress etc.
Going to pour a glass of red and catch up on your thread now as we'll have the sills/crossmembers etc to do next.
Thanks for the comments and keep up the good work.
Steve
snapy
-
Posts: -
Joined: -
Re: Filly our 59 11w, winter refurb
by snapy » Sat Nov 15, 2014 6:07 pm
Good couple of days on the bus, here's the progress so far
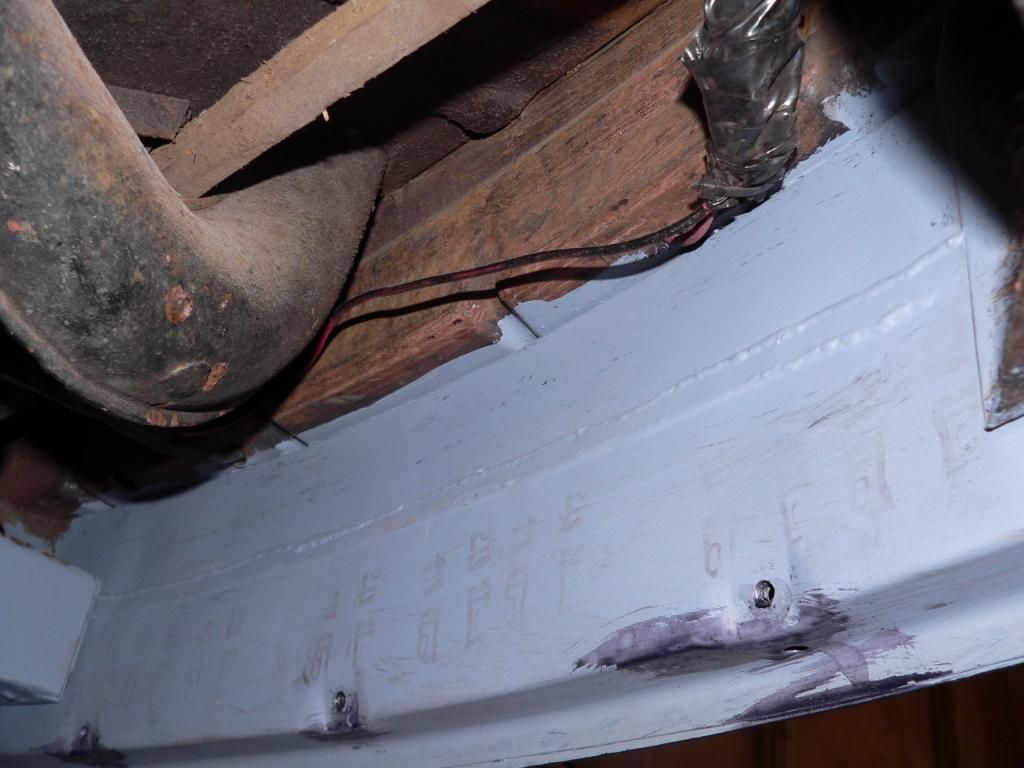
Front valance finished, treated and primed.
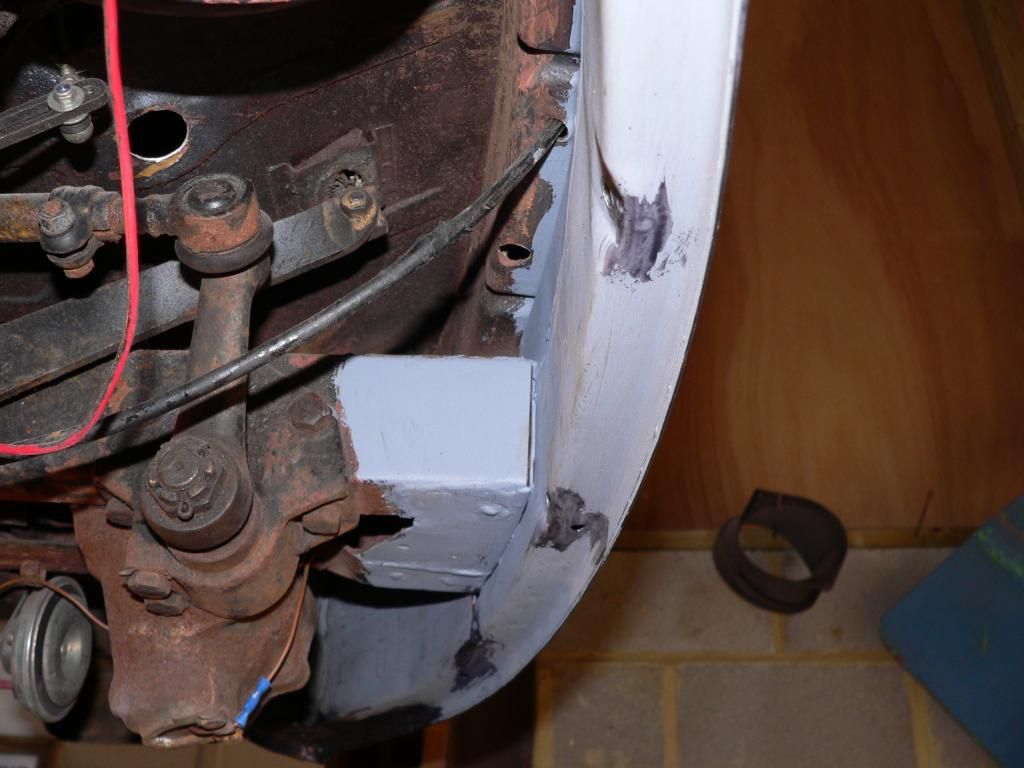
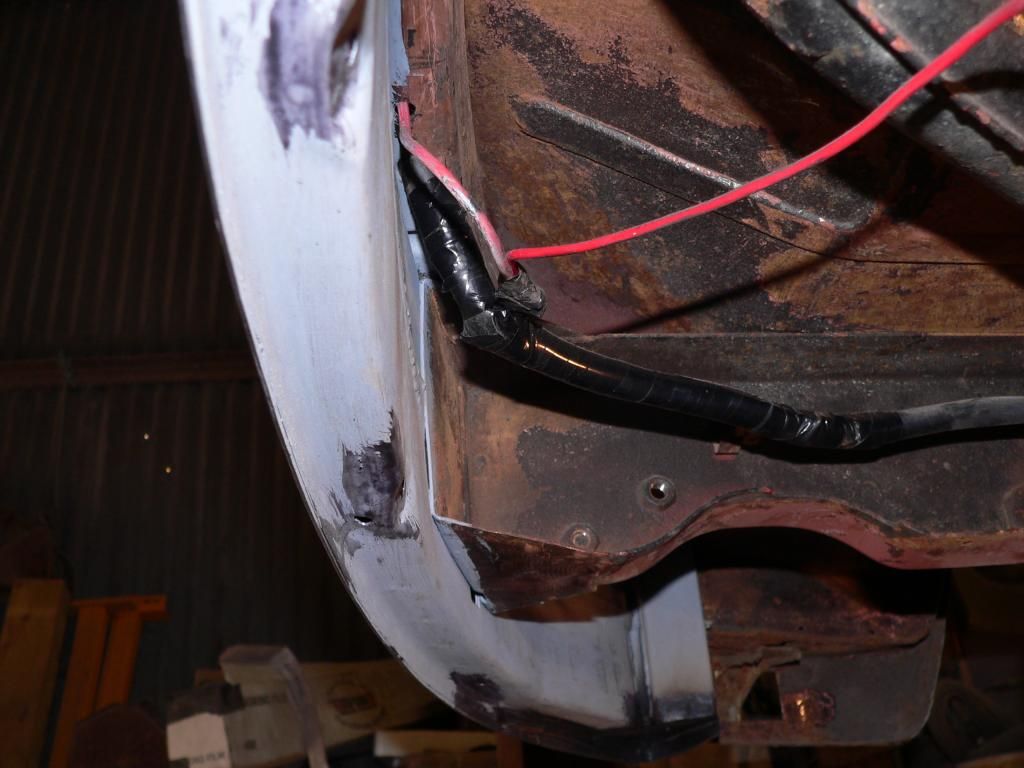
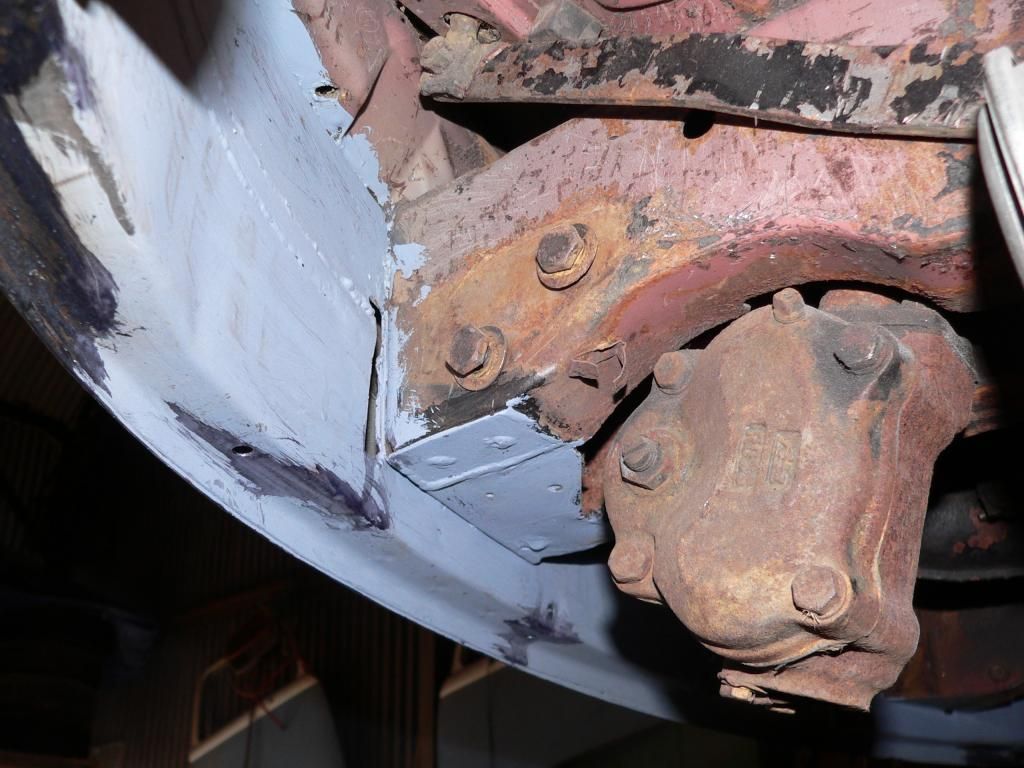 [URL=http:
//s1080.photobucket.com/user/snapy1/media/P1090155_zpse23491da.jpg.html]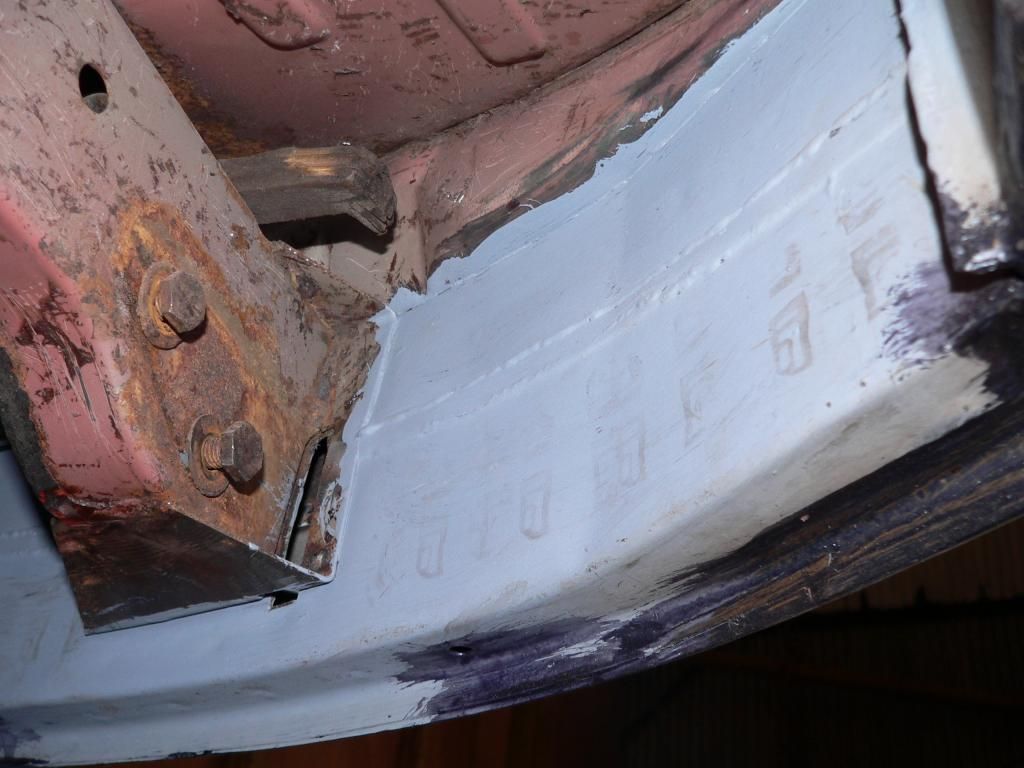 [/URL]
Now to tackle the long sill
how to be brutal here as a previous repair was slapped over the original with copius amounts of bondo to blend it in, we'll have to be carefull fitting a tall sill and trying to keep the panel straight,
should be fun !!!!
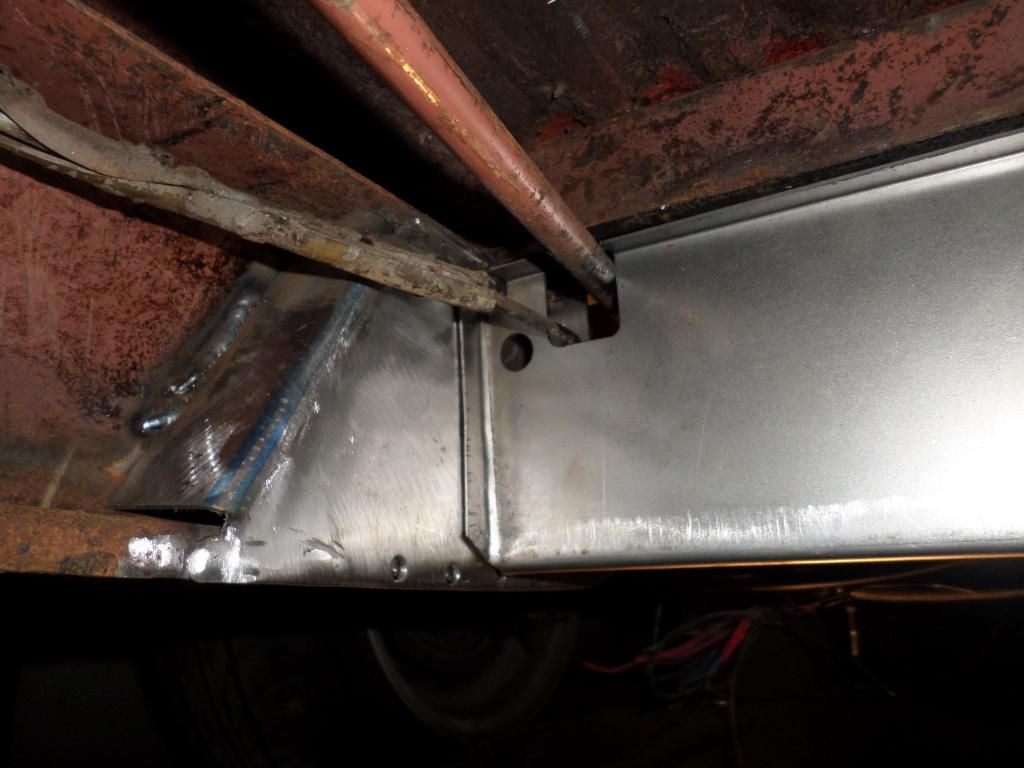
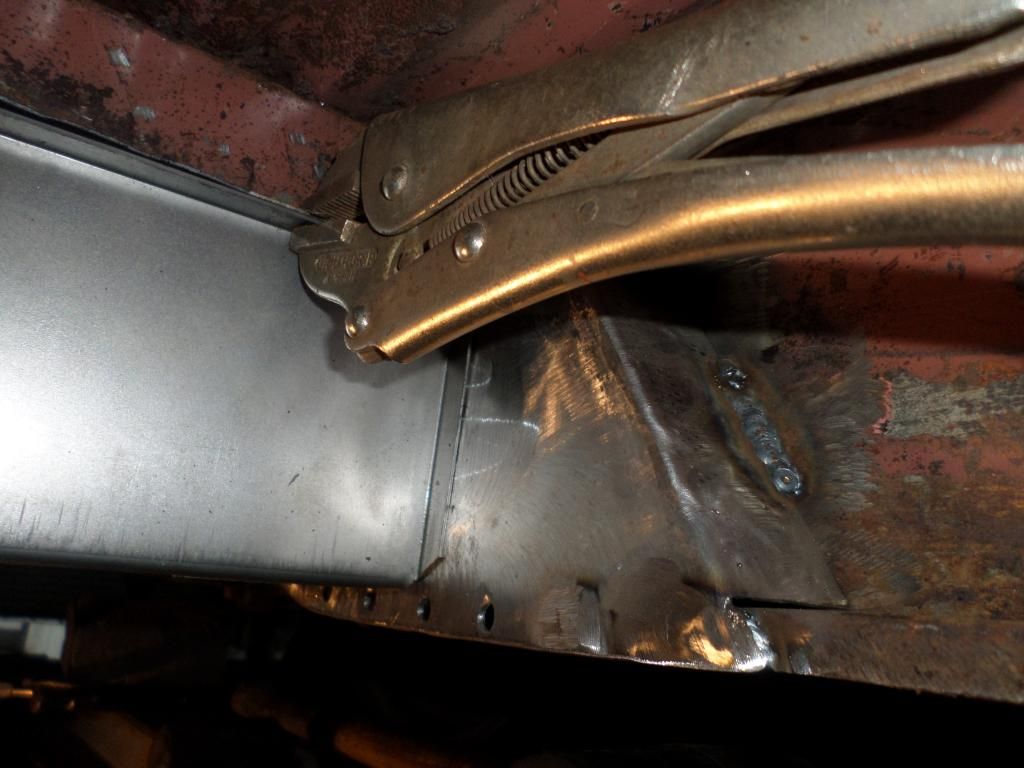
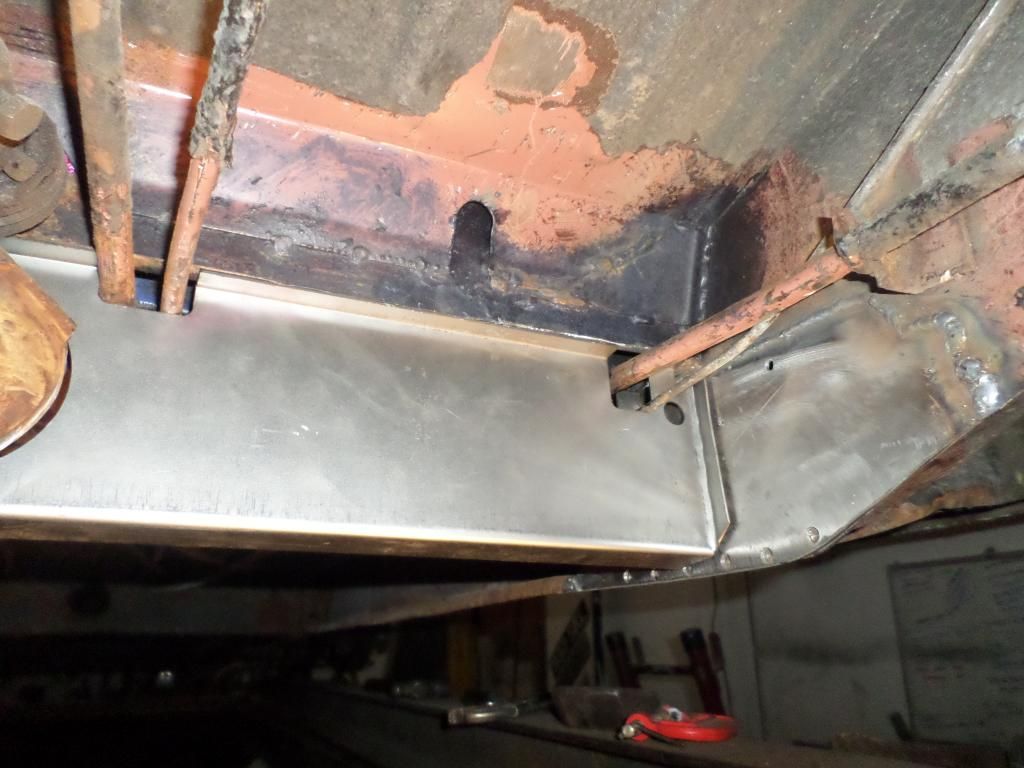
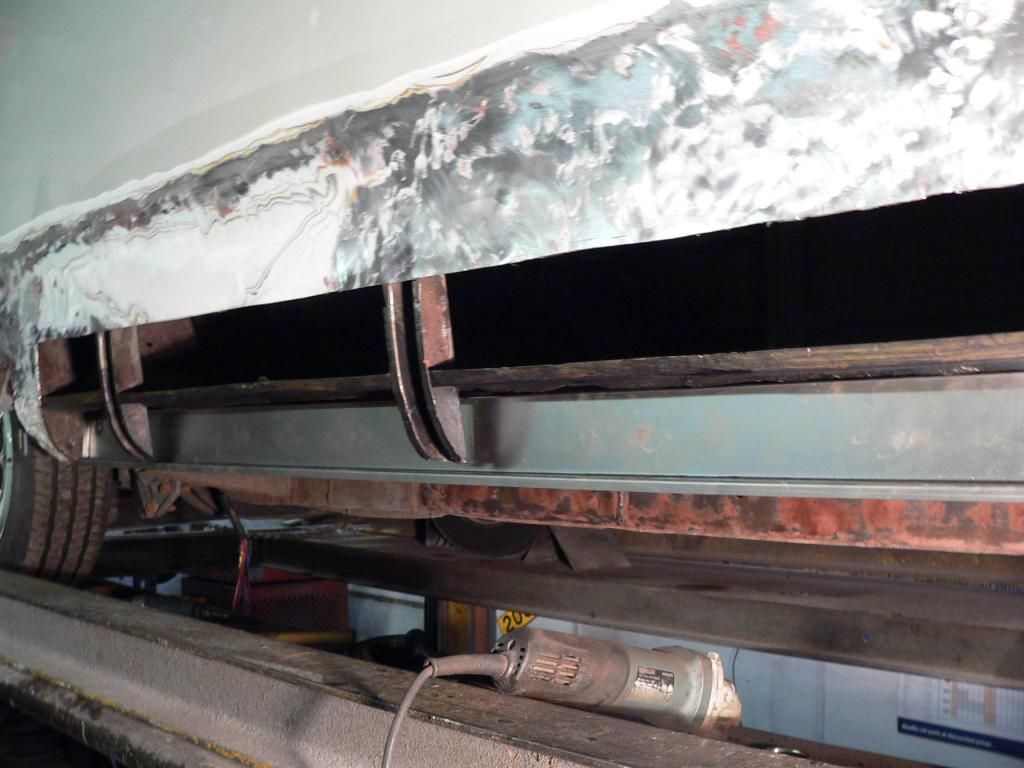
Trial fit other new inner
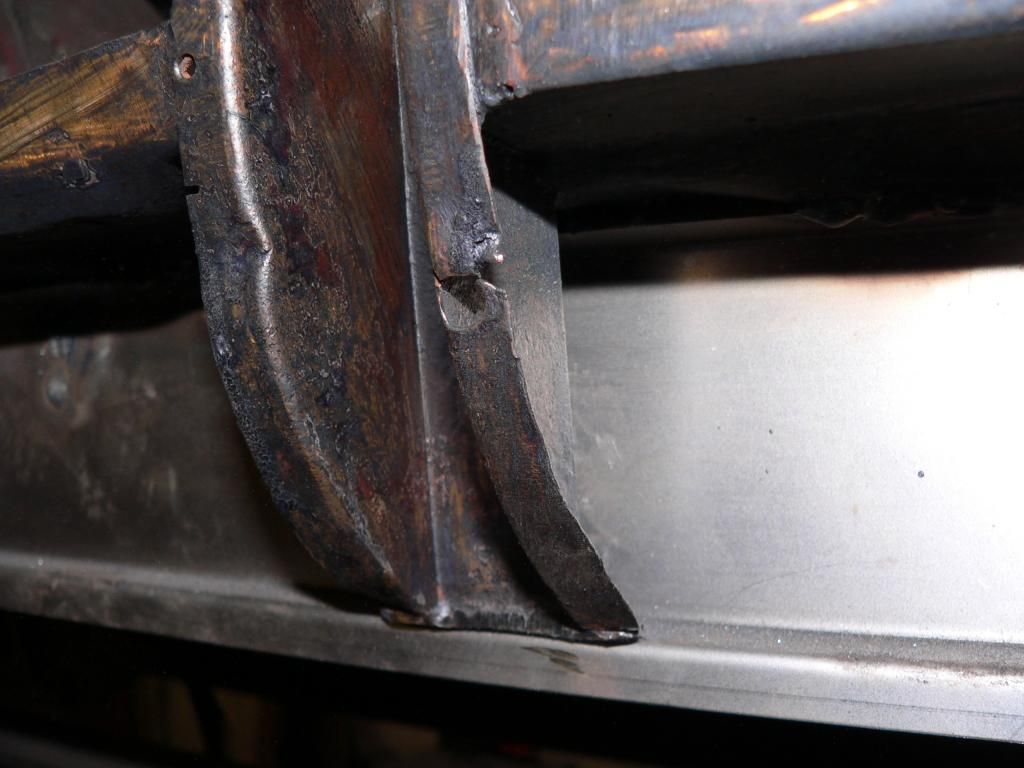
Some repairs needed to lower supports
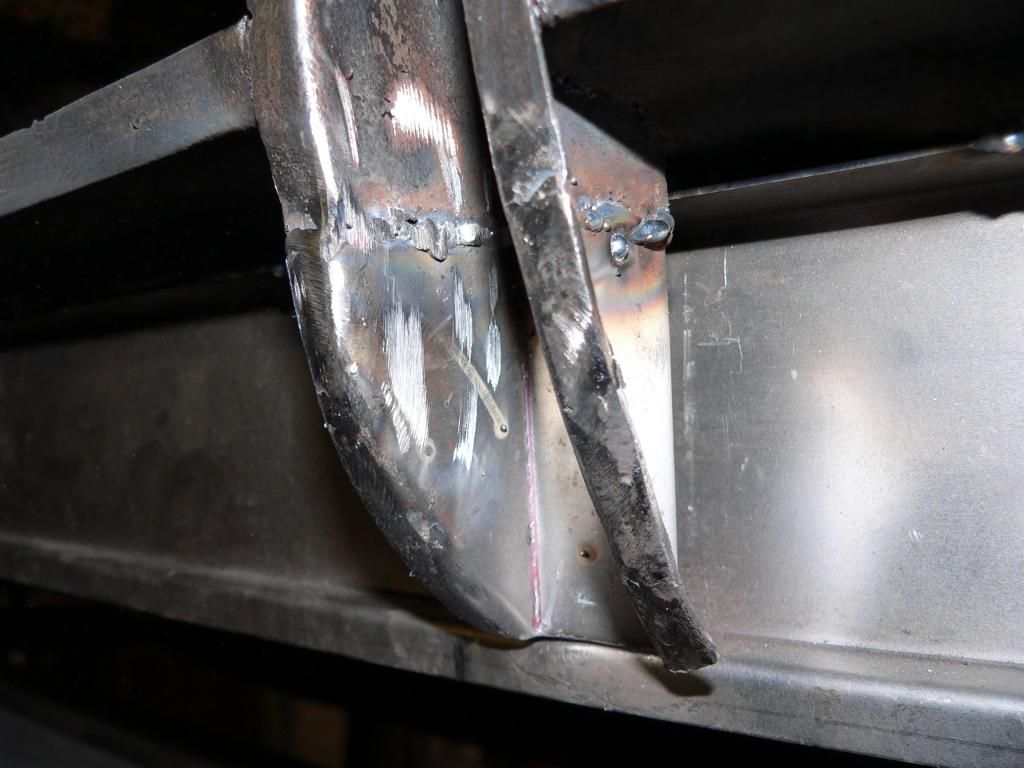
New floor beams to go in
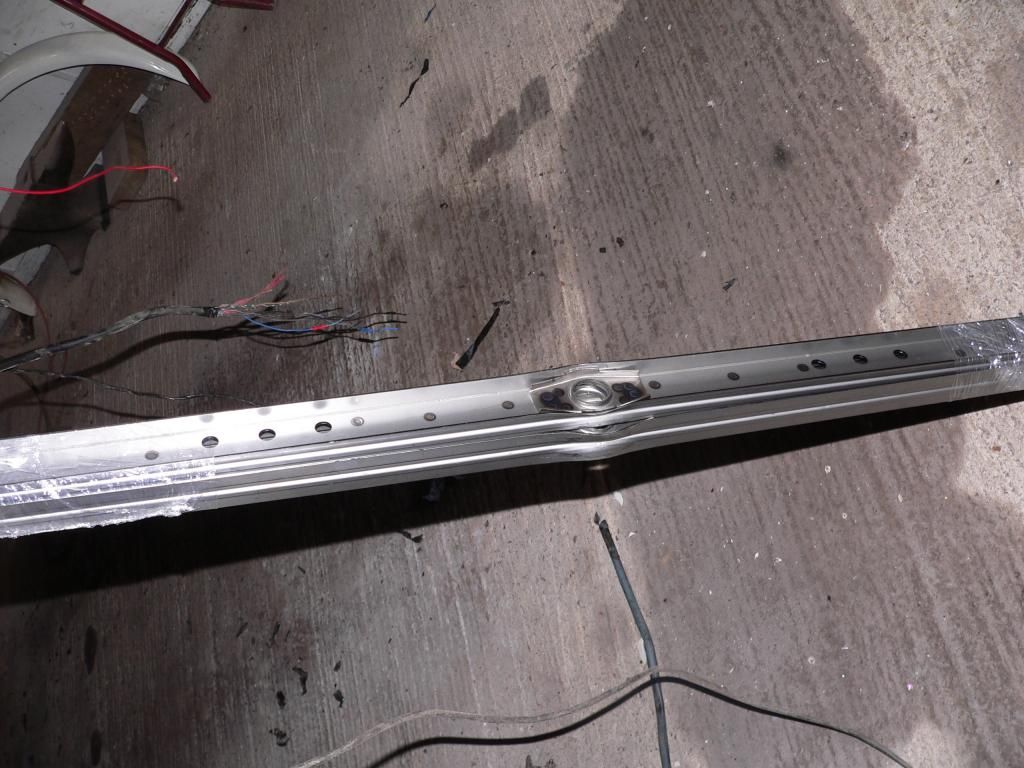
While the expert was doing his thing I got stuck in removing more old swiss underseal, seems a shame to remove it as it's done a good job of protecting all the flat surfaces, just a shame they never
injected the hollow and box sections as this seems to be the only real rotten bits.
Still it's got to come off so we can see any problem areas that need to be dealt with.
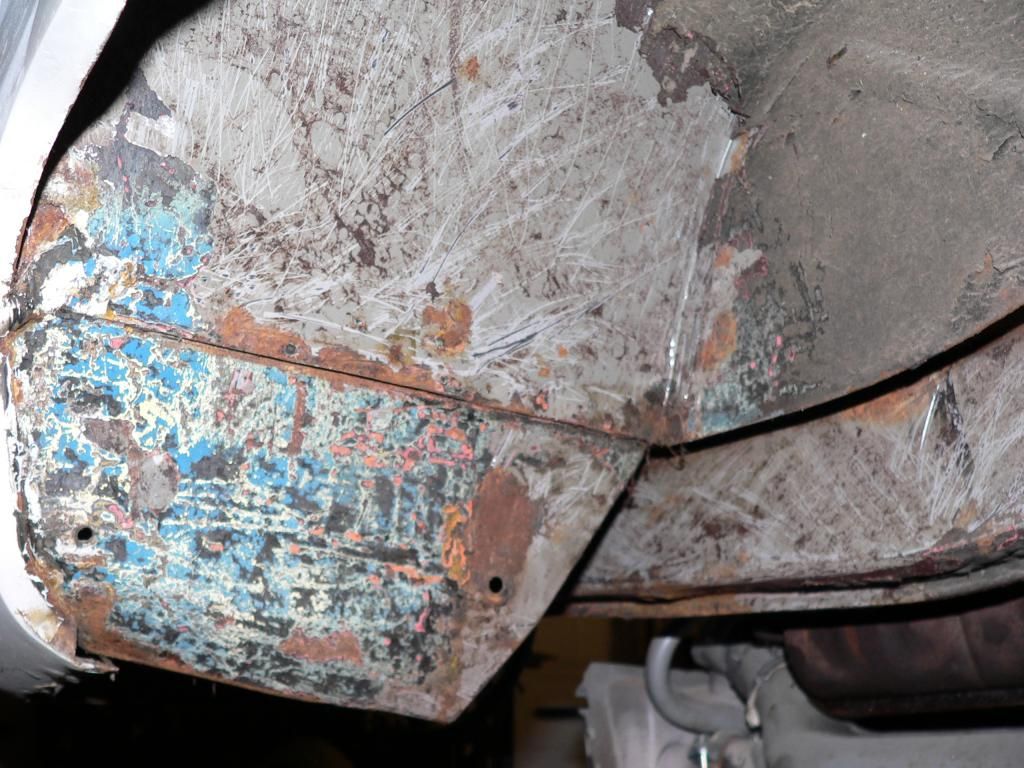
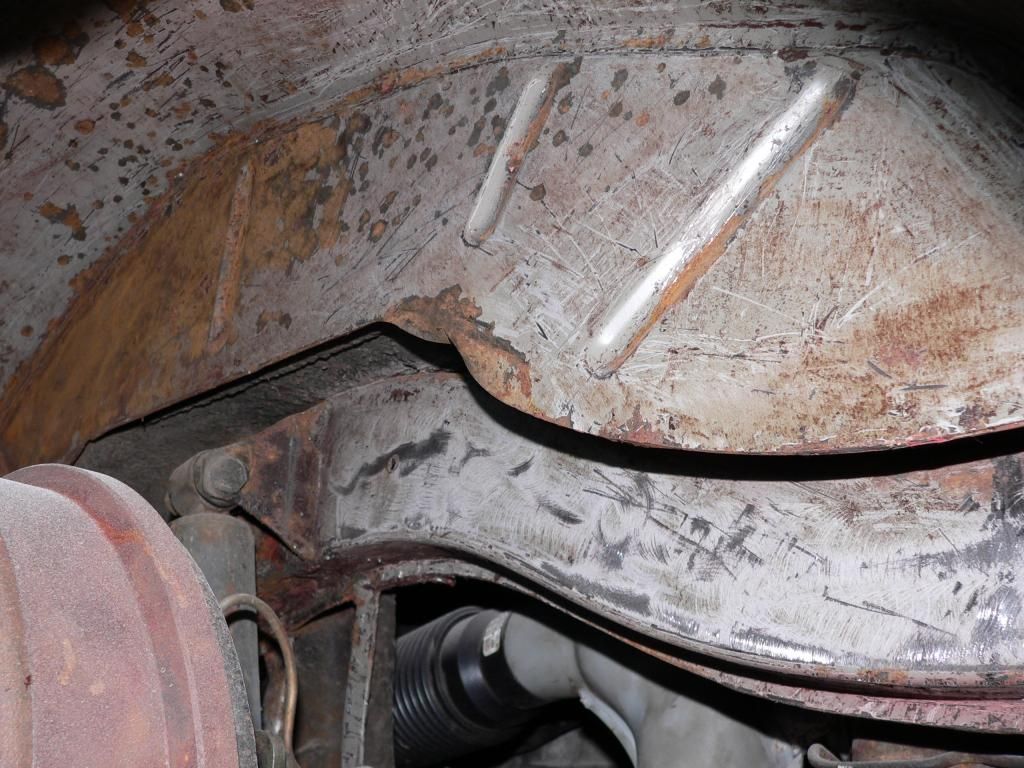
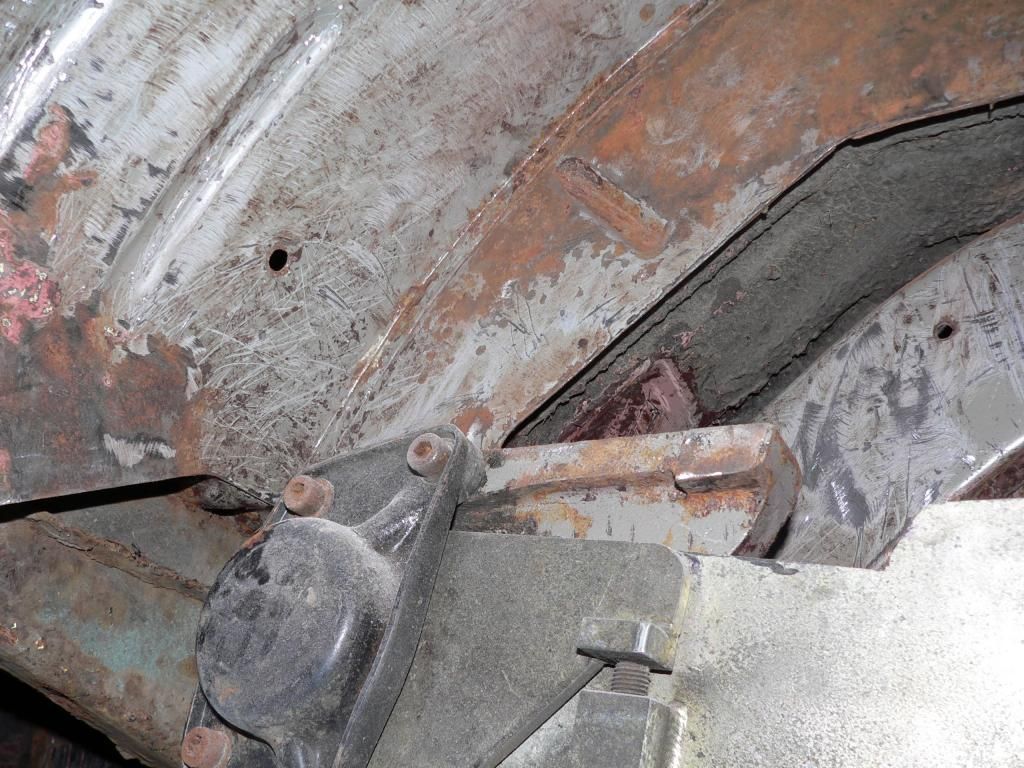
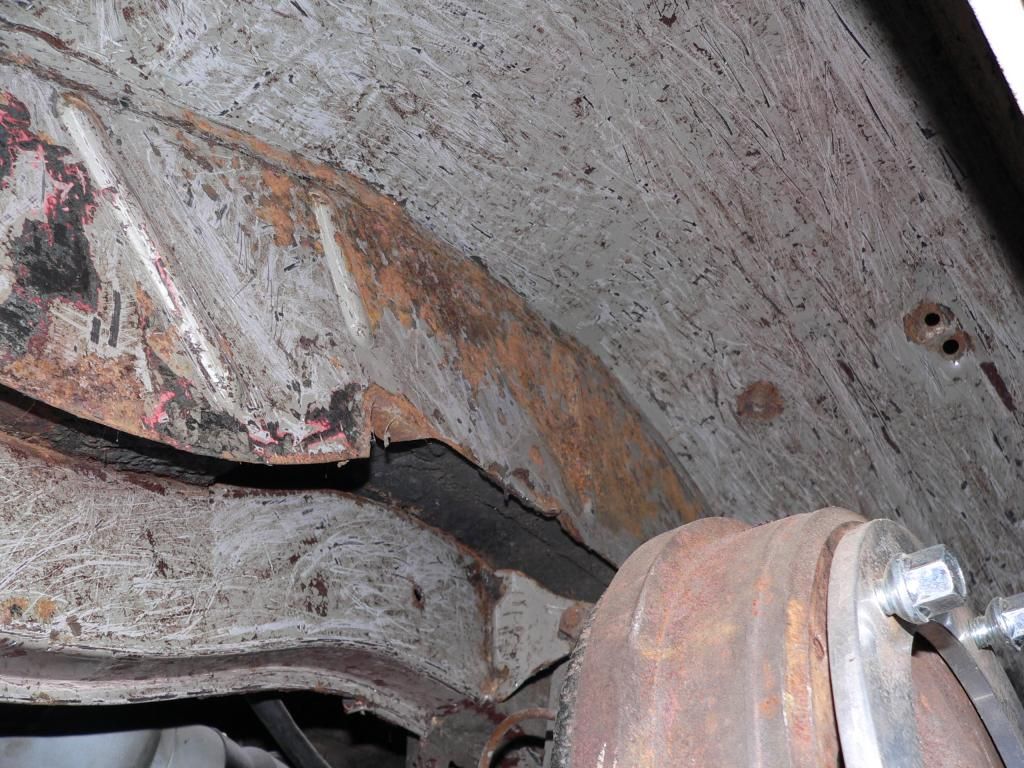
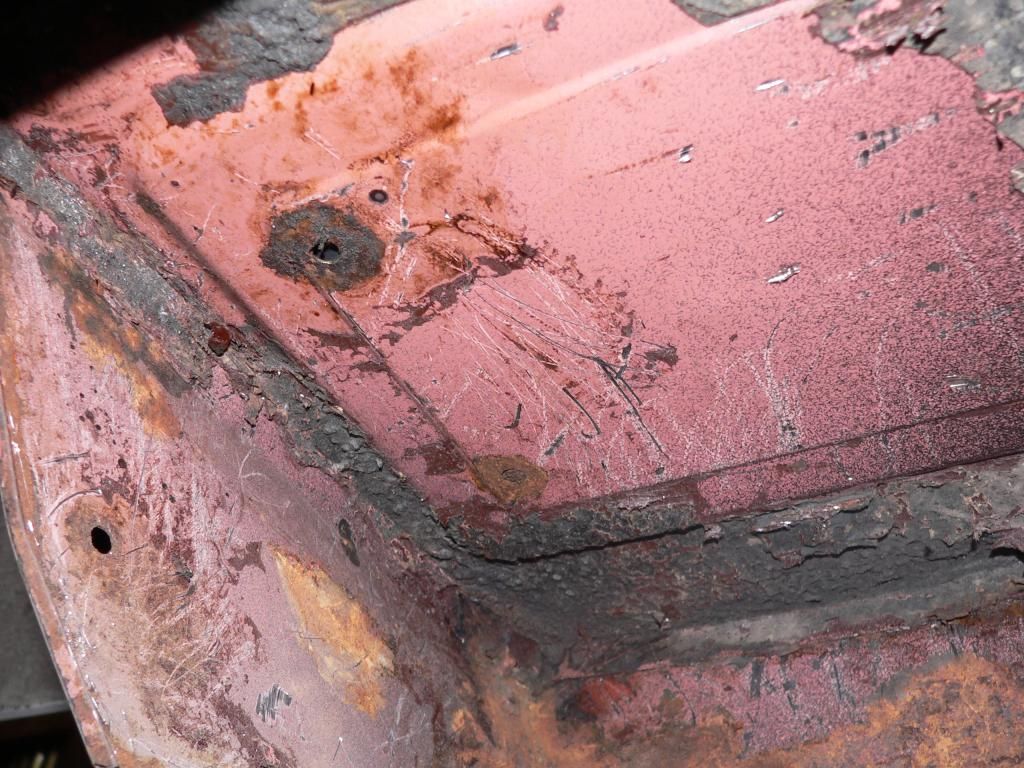
Original battery tray in original primer WOW
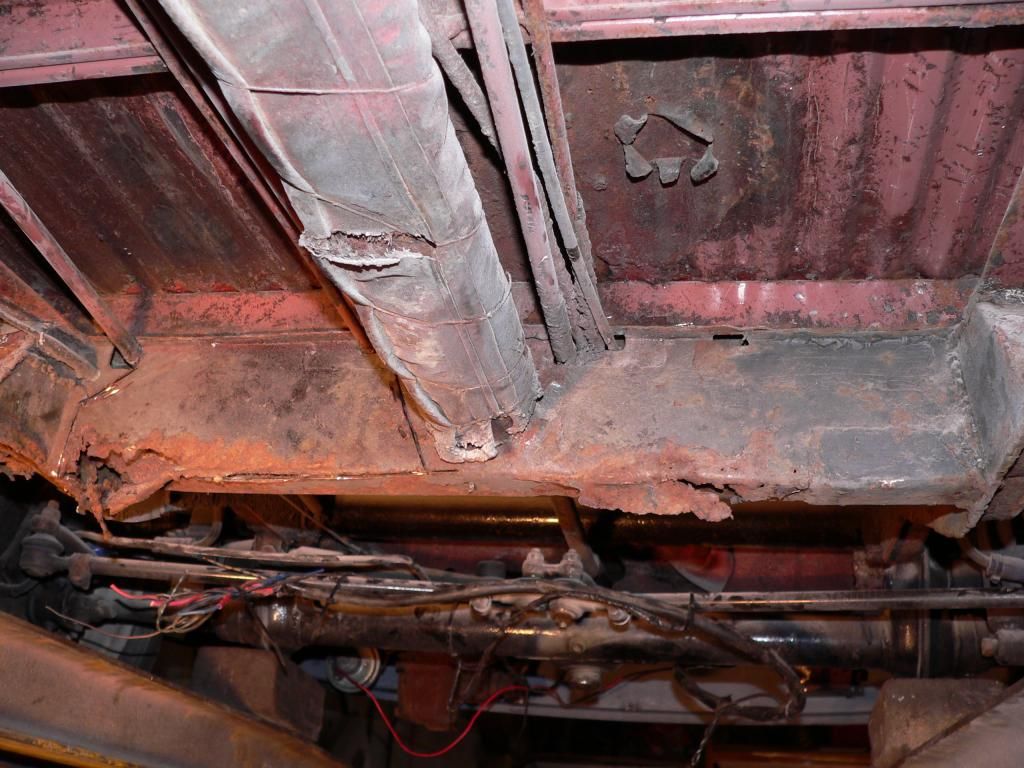
Now time to cut out more rot........... front crossmember
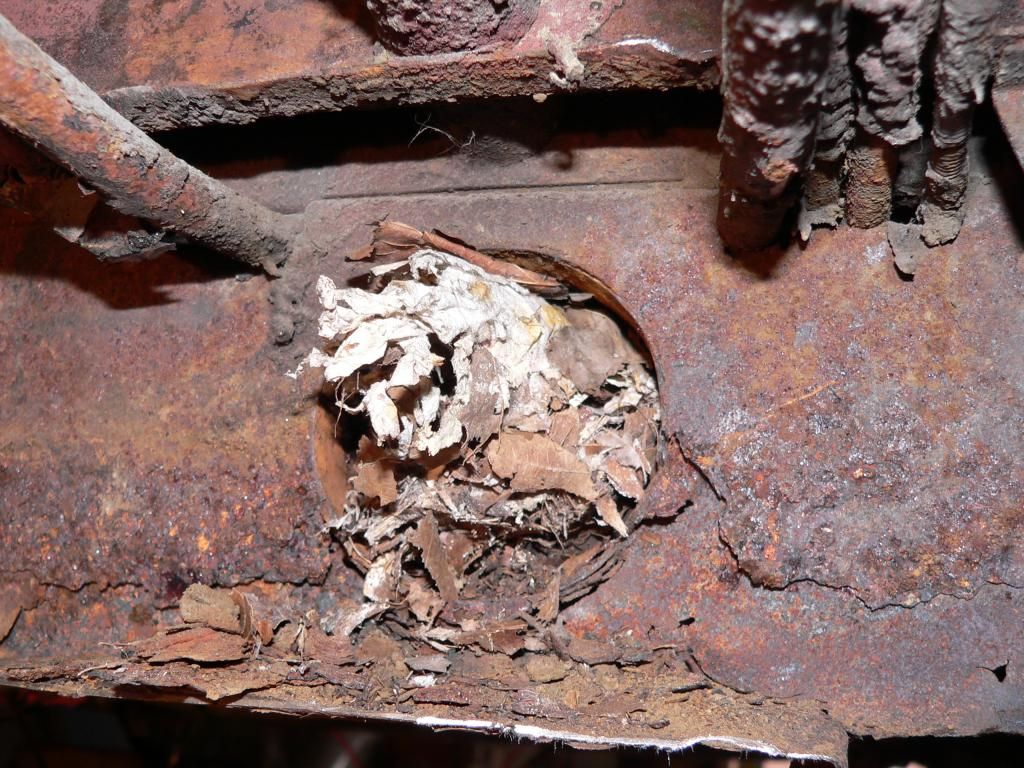
Check out the old faithull, they all have them.................... Mouse nests in the heater tube lol
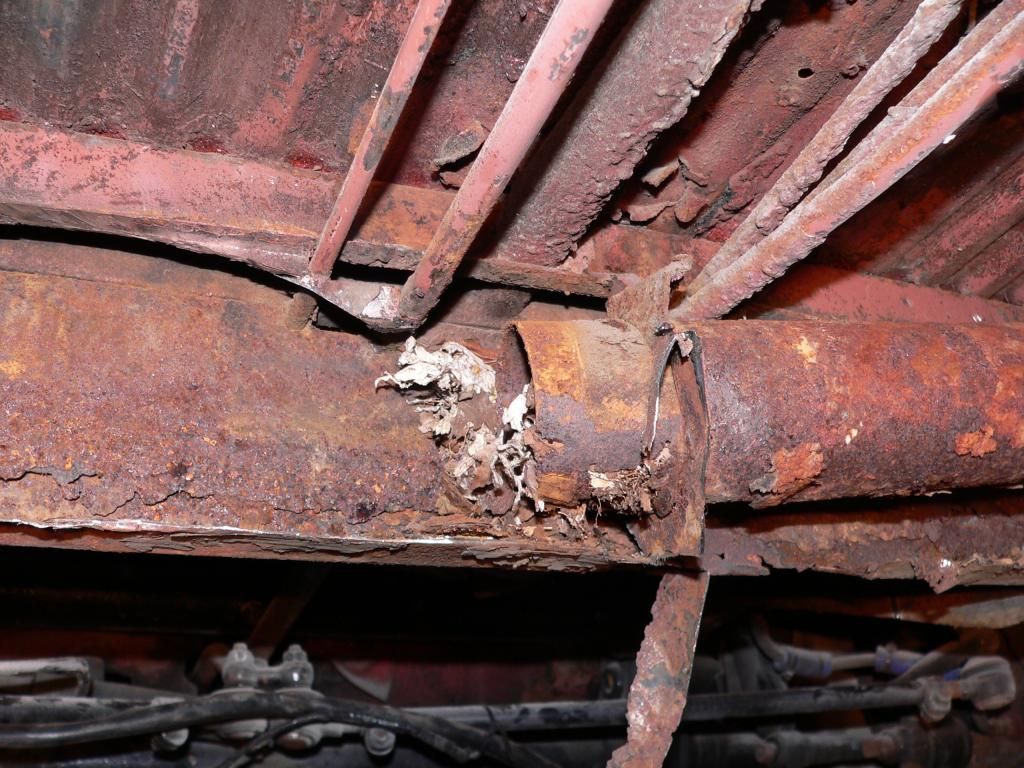
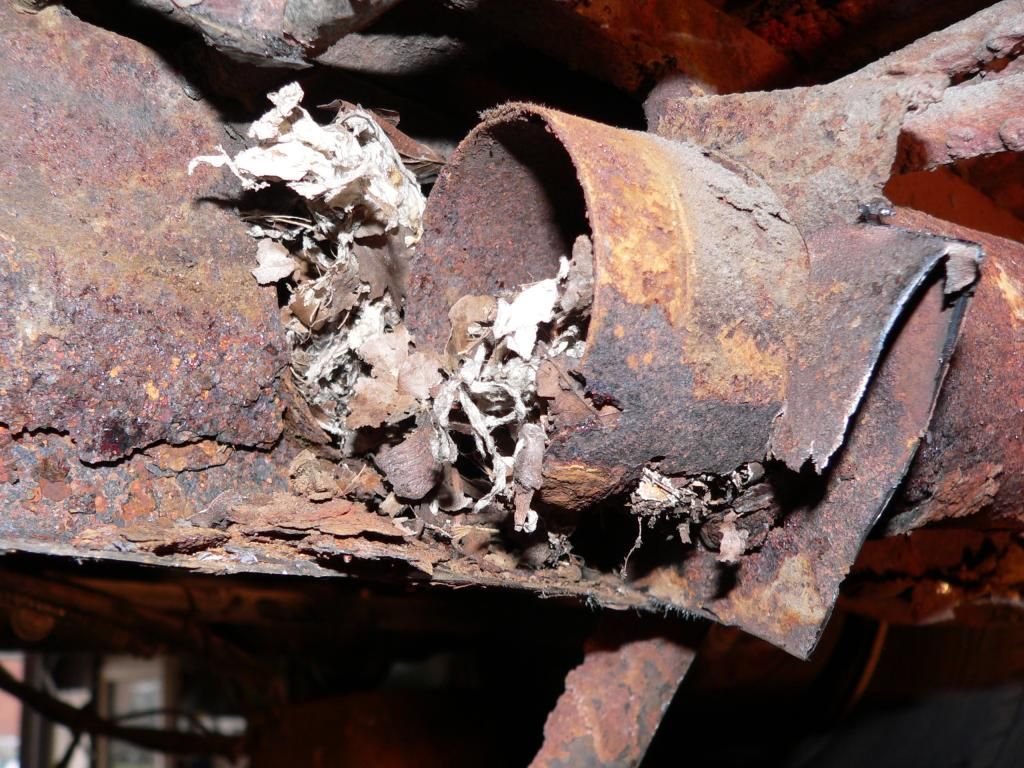
Crossmember out
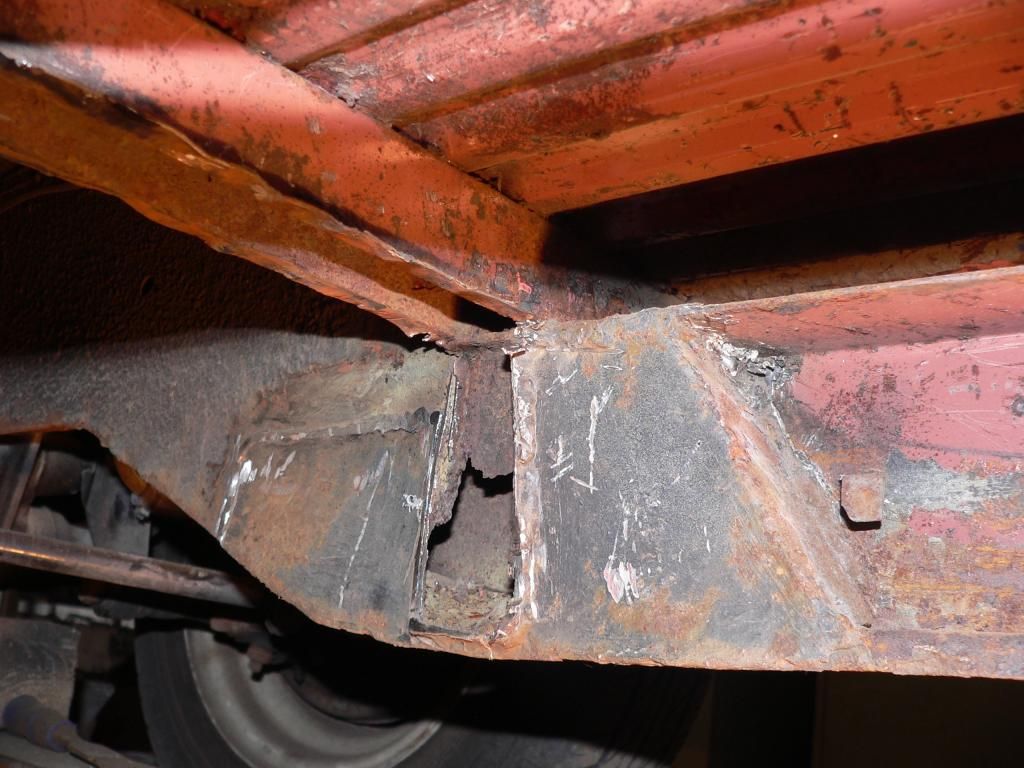
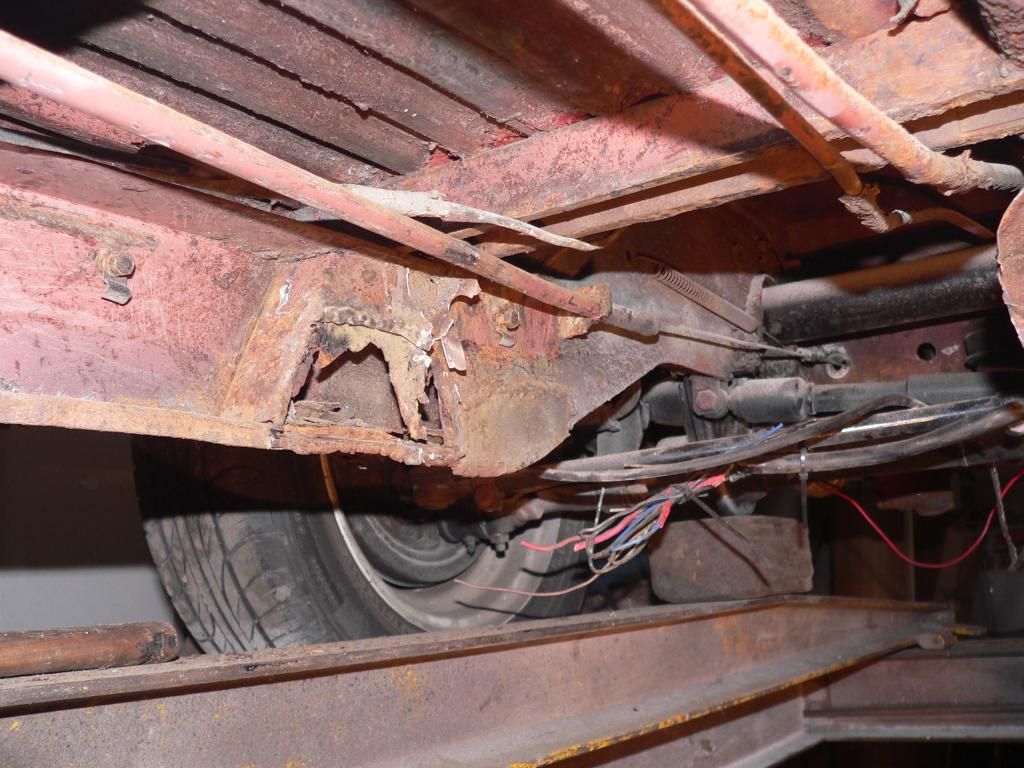
That's all folks
Front valance finished, treated and primed.


 [URL=http:
//s1080.photobucket.com/user/snapy1/media/P1090155_zpse23491da.jpg.html]
 [/URL]


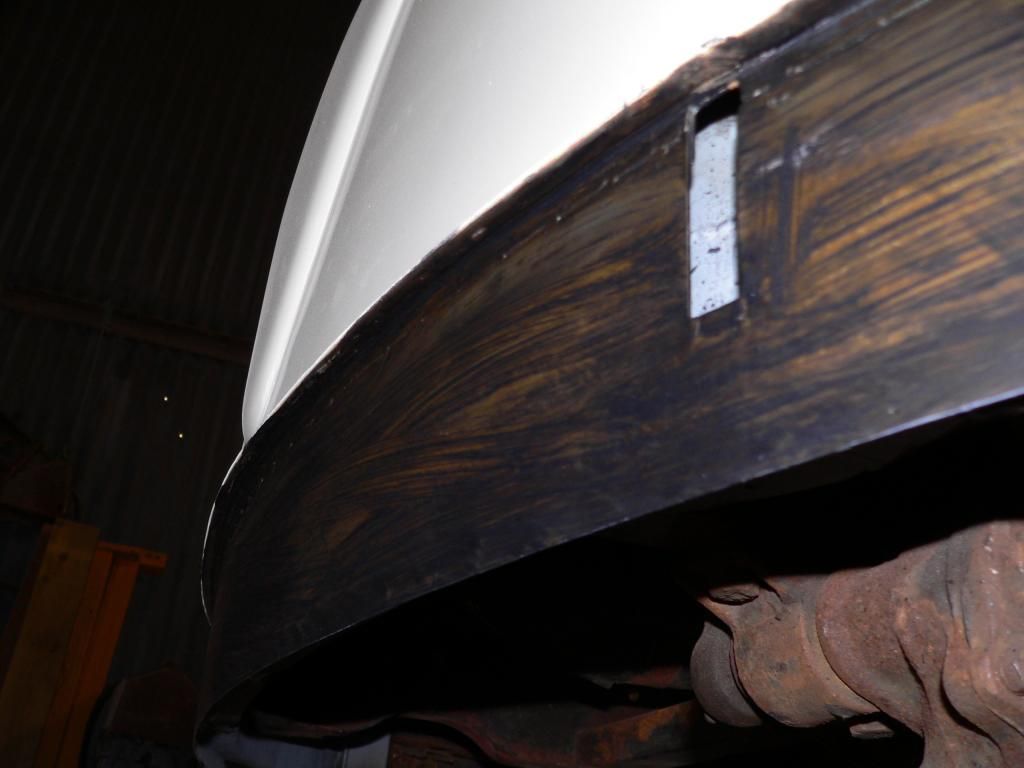
Now to tackle the long sill
how to be brutal here as a previous repair was slapped over the original with copius amounts of bondo to blend it in, we'll have to be carefull fitting a tall sill and trying to keep the panel straight,
should be fun !!!!

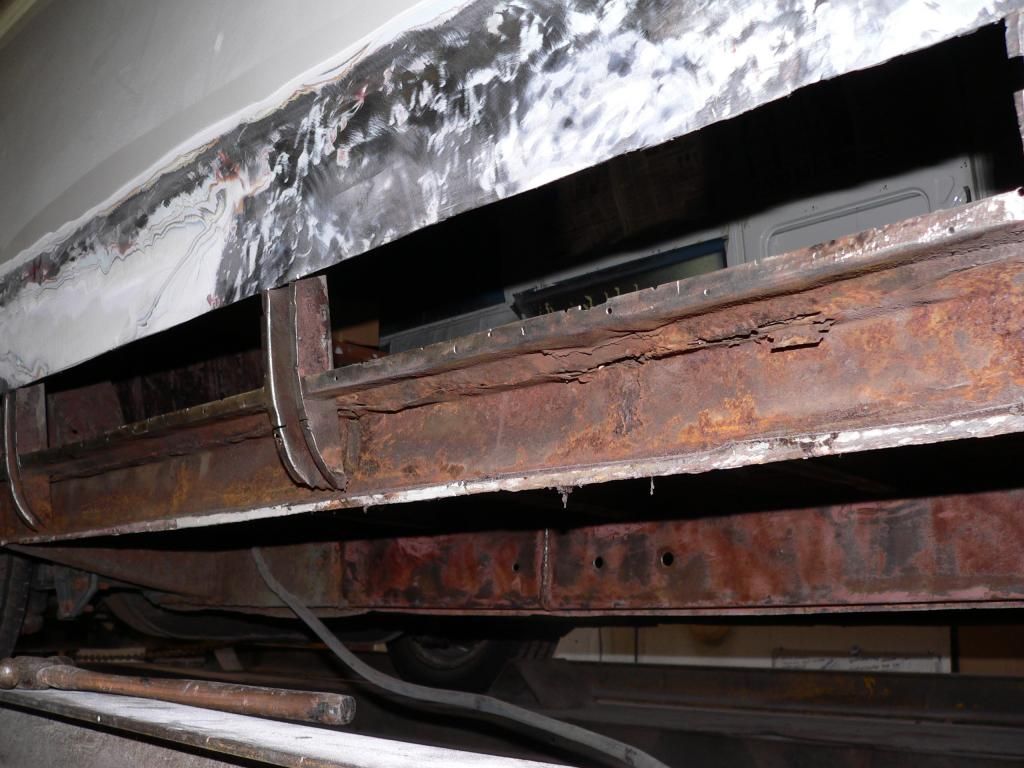
Trial fit other new inner

Some repairs needed to lower supports


New floor beams to go in

While the expert was doing his thing I got stuck in removing more old swiss underseal, seems a shame to remove it as it's done a good job of protecting all the flat surfaces, just a shame they never
injected the hollow and box sections as this seems to be the only real rotten bits.
Still it's got to come off so we can see any problem areas that need to be dealt with.


Original battery tray in original primer WOW

Now time to cut out more rot........... front crossmember

Check out the old faithull, they all have them.................... Mouse nests in the heater tube lol


Crossmember out


That's all folks
snapy
-
Posts: -
Joined: -
Re: Filly our 59 11w, winter refurb
by Kitesurfer1683 » Sun Nov 16, 2014 6:21 pm
Kitesurfer1683
-
Posts: -
Joined: -
Re: Filly our 59 11w, winter refurb
by snapy » Mon Nov 17, 2014 8:23 pm
Looks a lot easier with your bus upside down,

New I should have got a spit.
New I should have got a spit.
snapy
-
Posts: -
Joined: -
Re: Filly our 59 11w, winter refurb
by snapy » Wed Nov 19, 2014 6:55 pm
snapy
-
Posts: -
Joined: -

