You are viewing the Split Screen Van Club forum archive.
The forum archive is read-only.Unfortunately in 2021 the Split Screen Van Club forum suffered a ransomware attack and lots of the forum data was lost.
What threads that have been recovered are now searchable on this site. Some threads may be incomplete and some images are still being recovered.
Forum archive search
Swedish 66 Crew Cab
by mabbo » Fri Dec 21, 2018 9:38 pm
Alex bought his Swedish 66 crew cab to us for metalwork and paint.
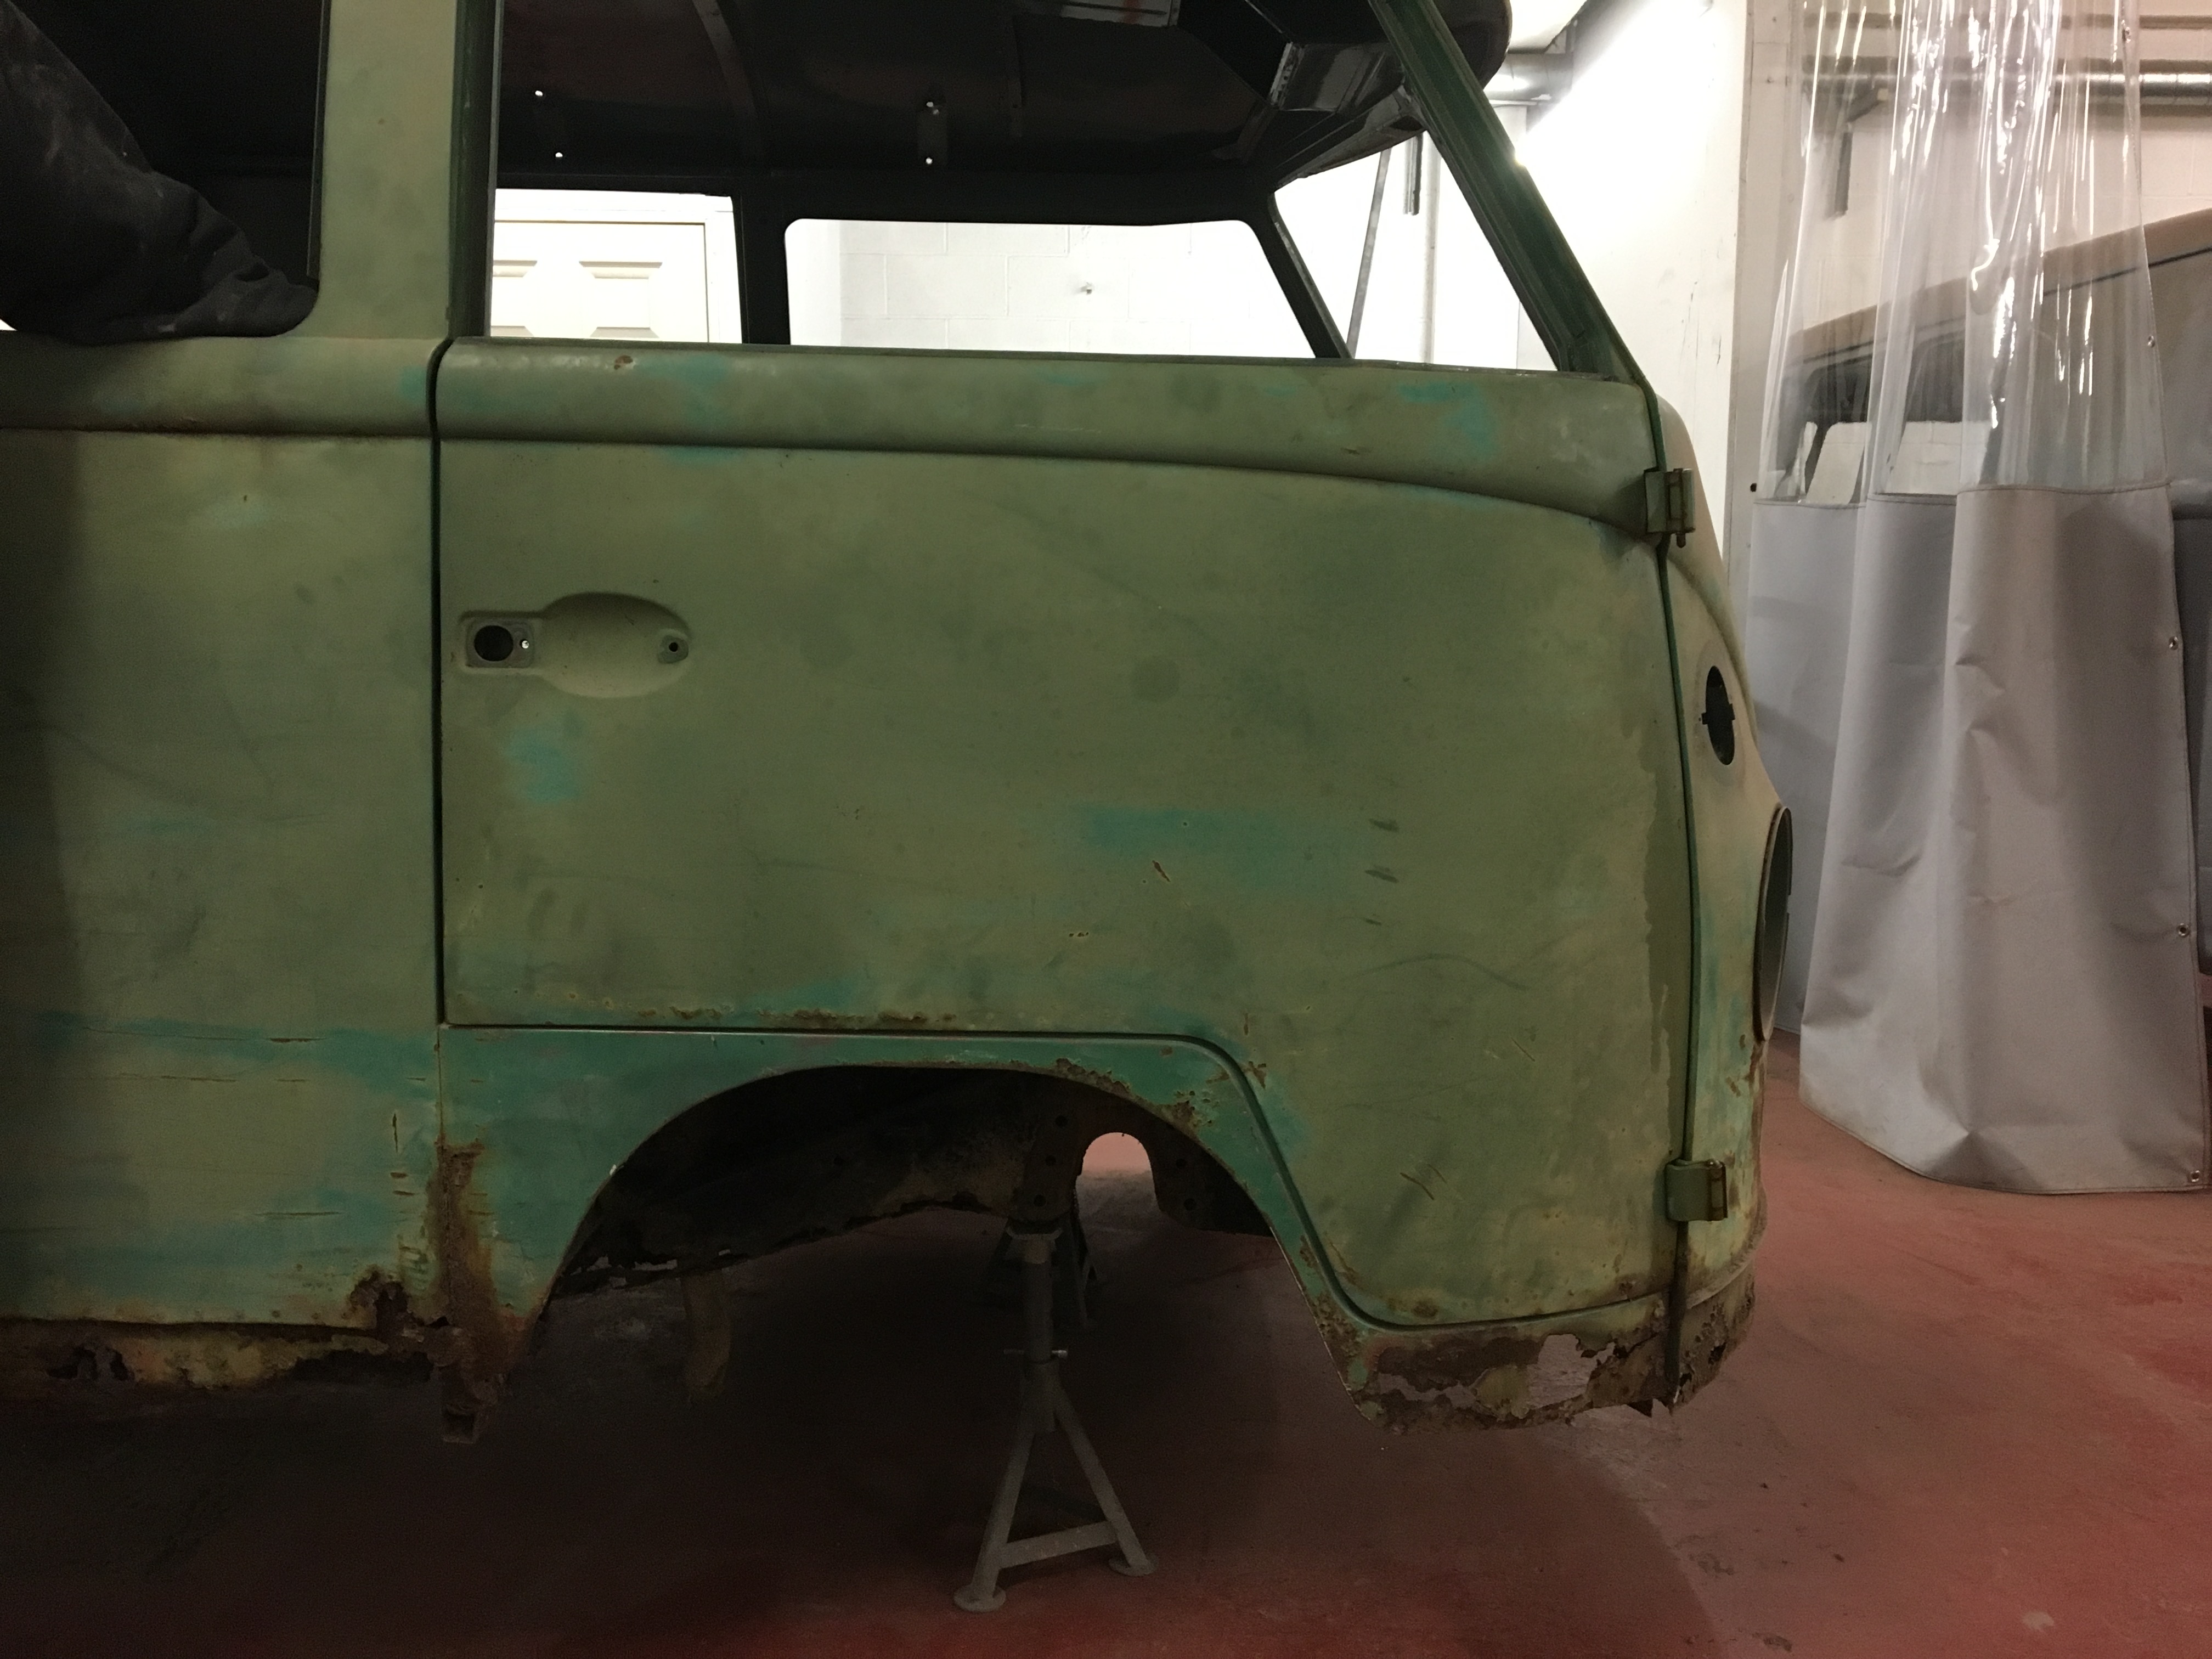
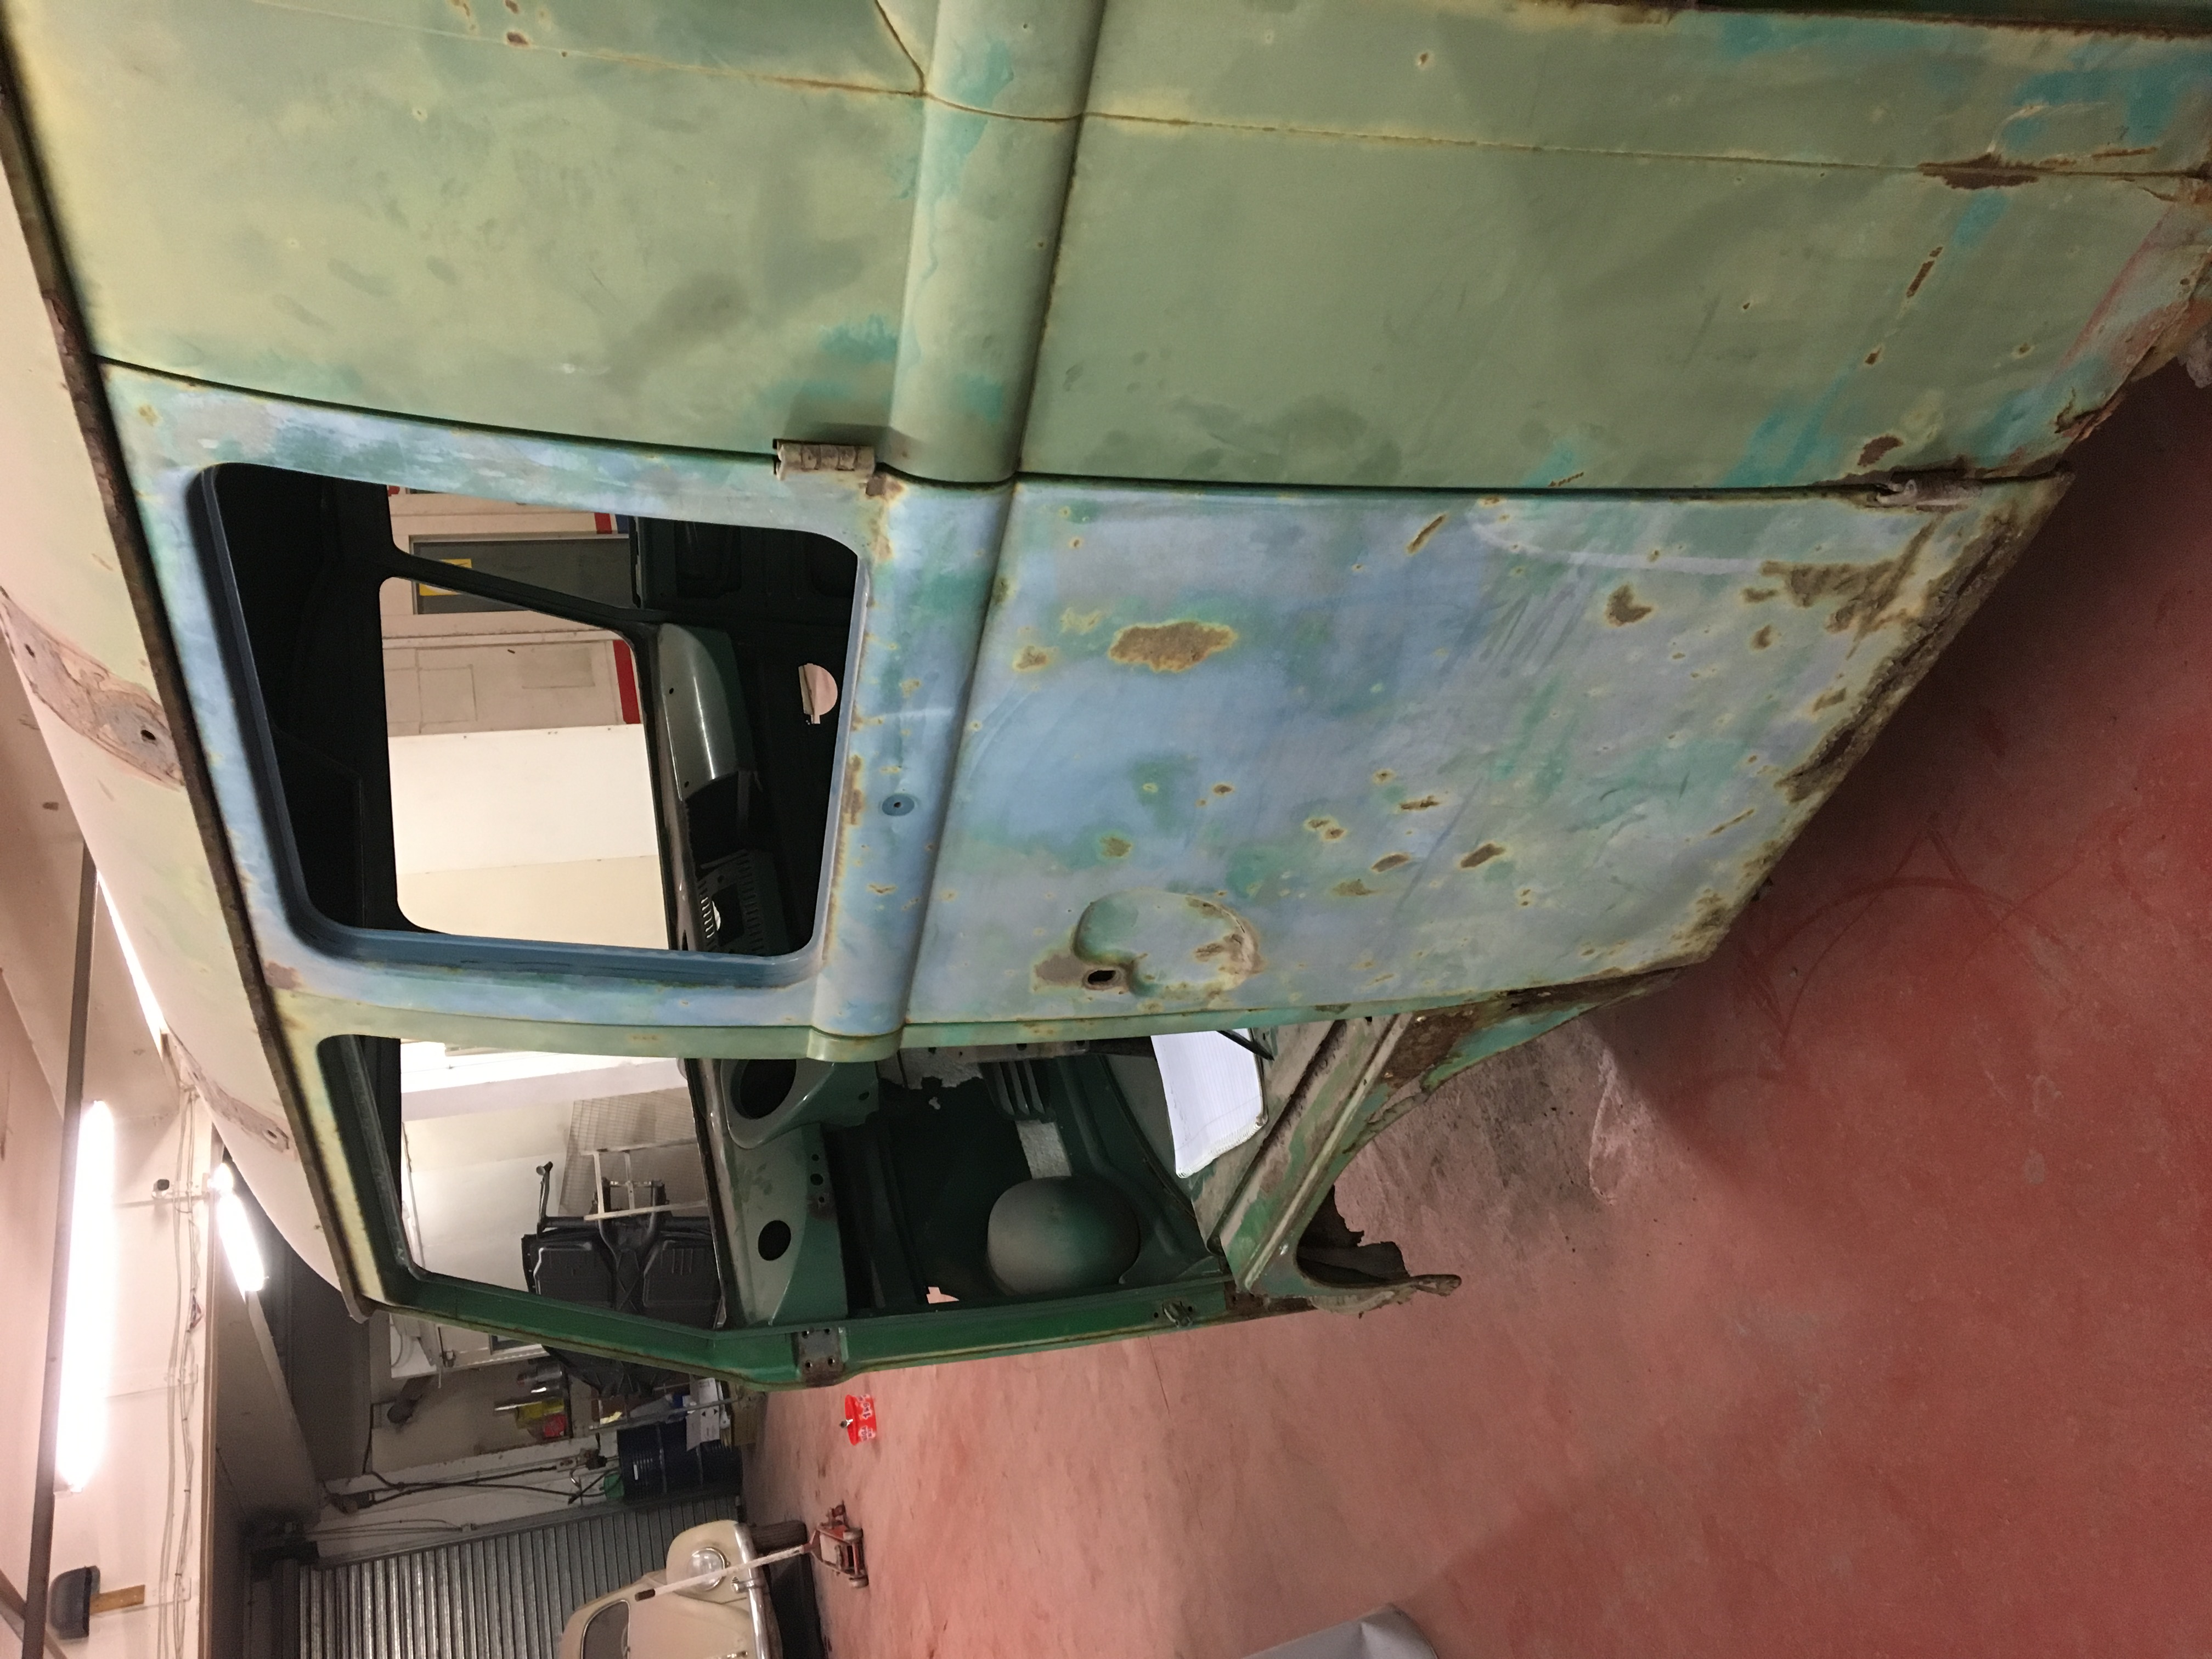
As you can see, the chassis is in a bad way:
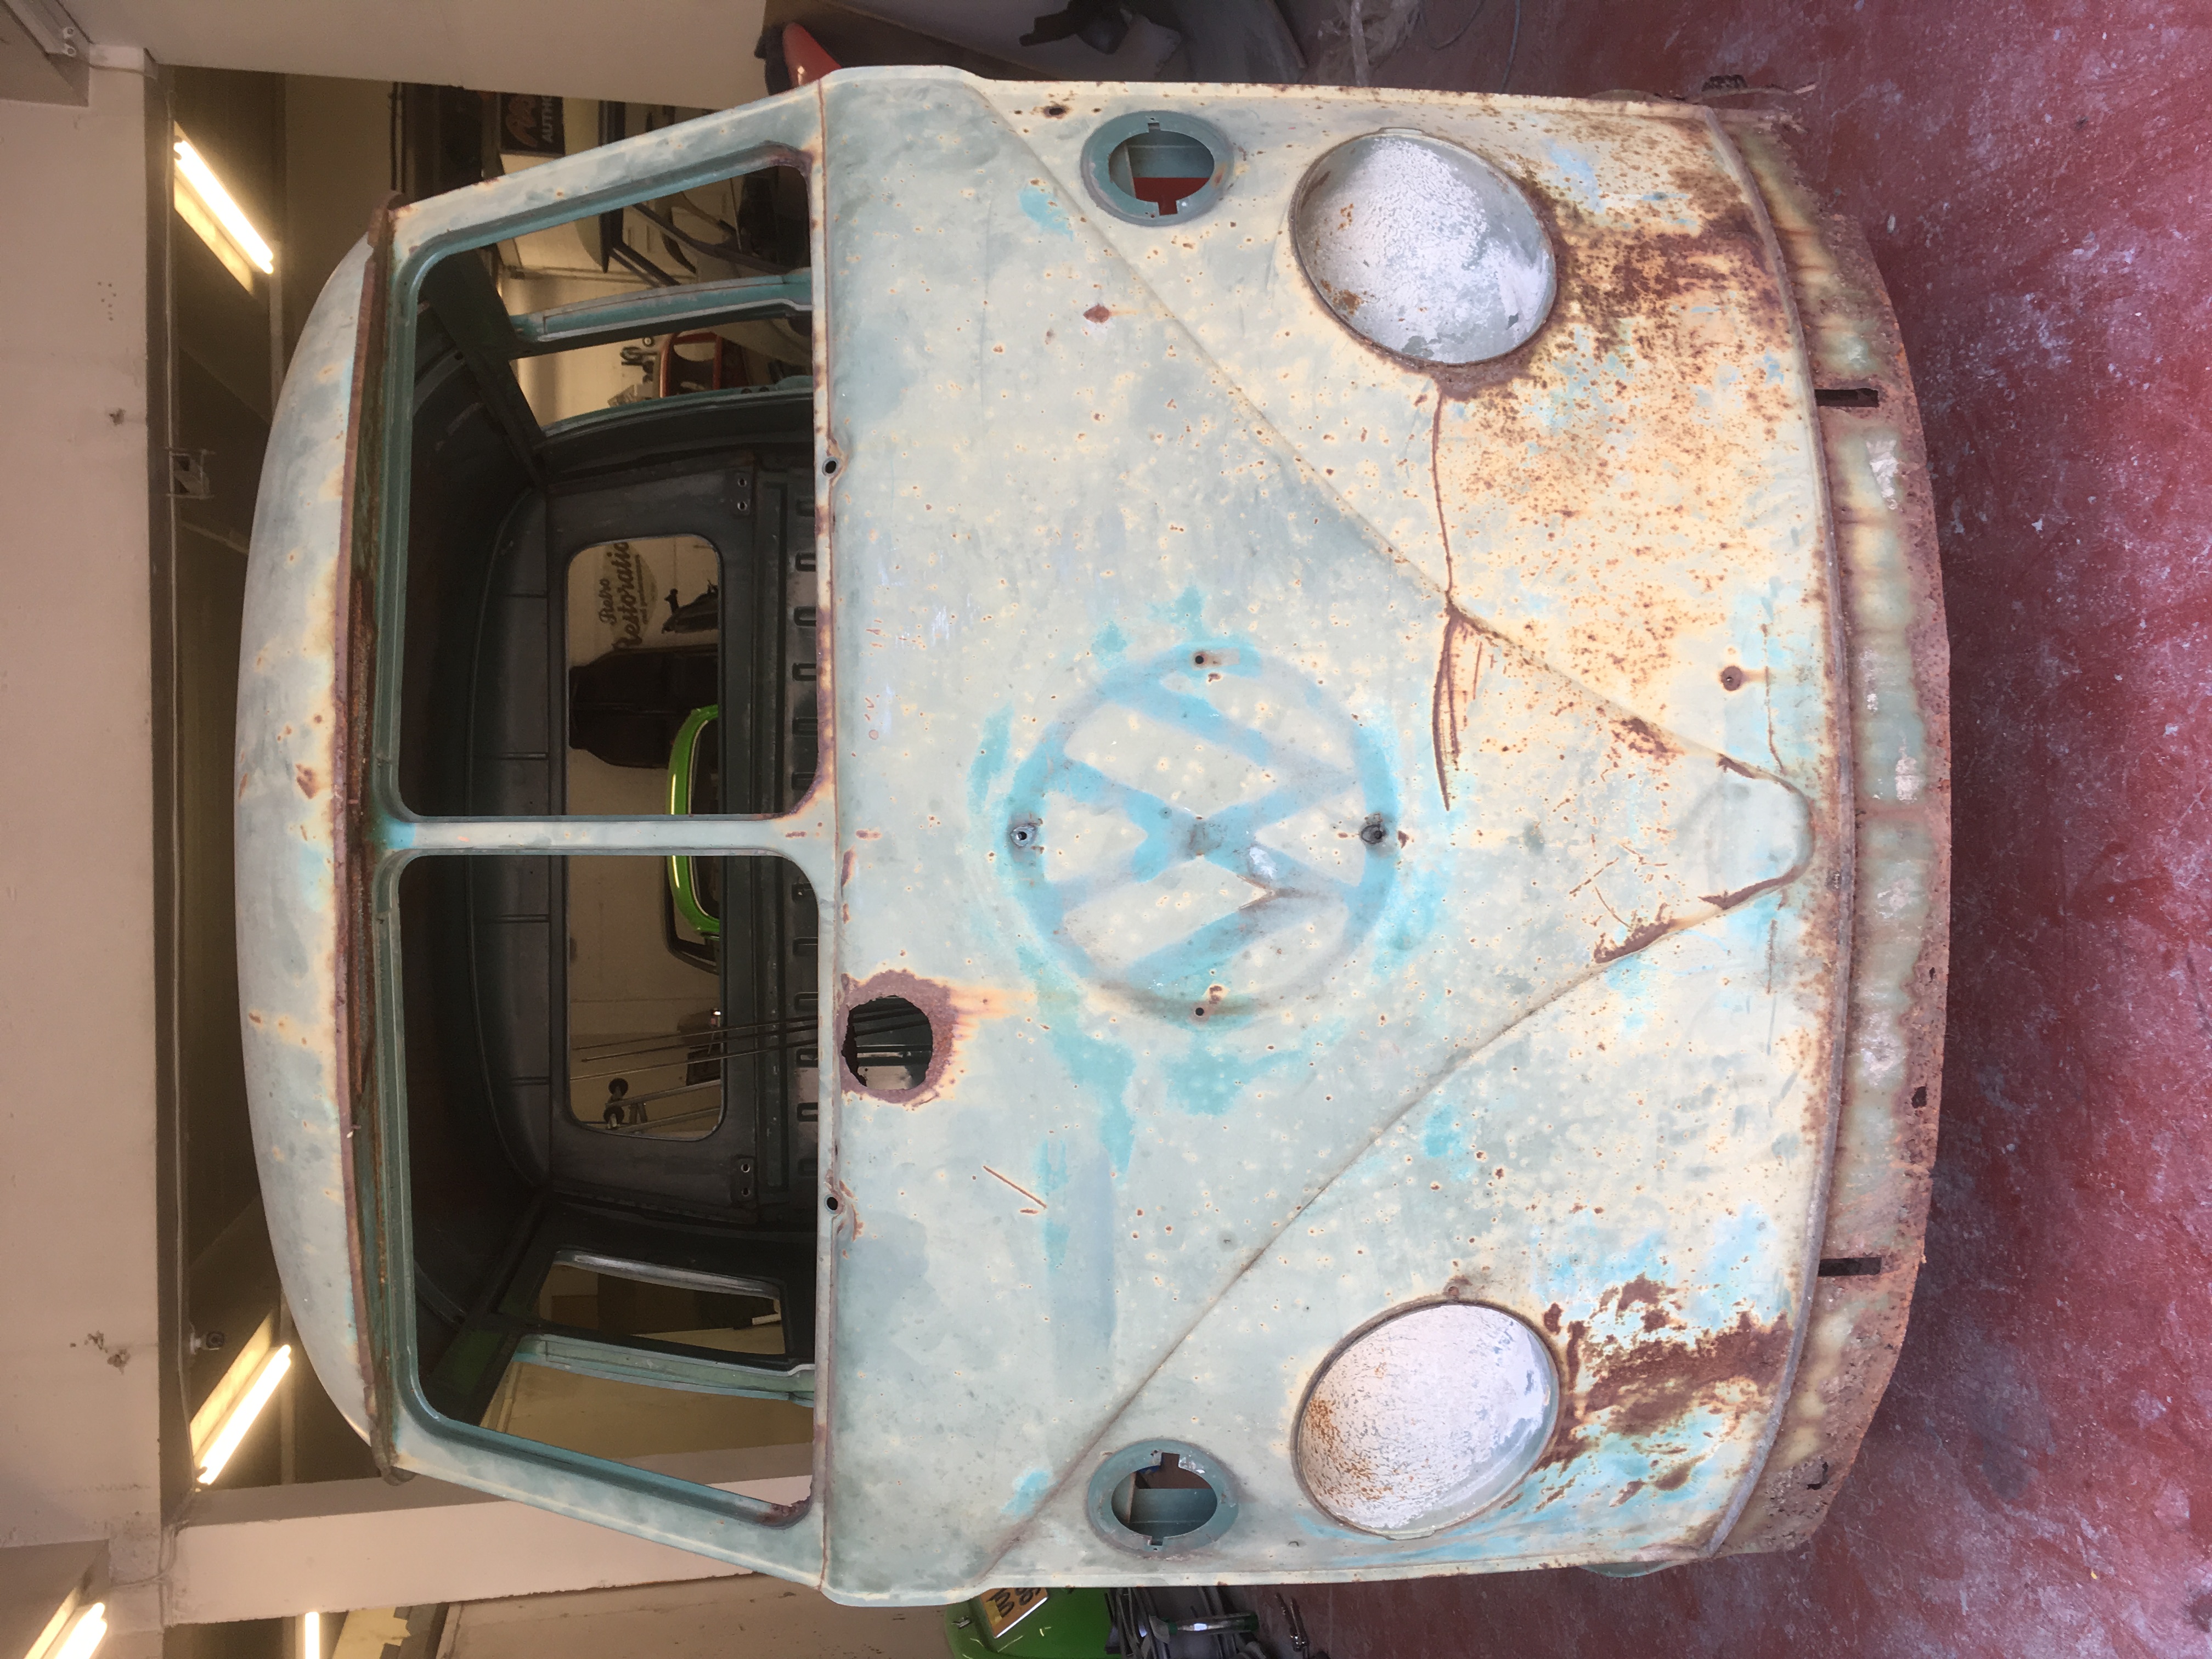
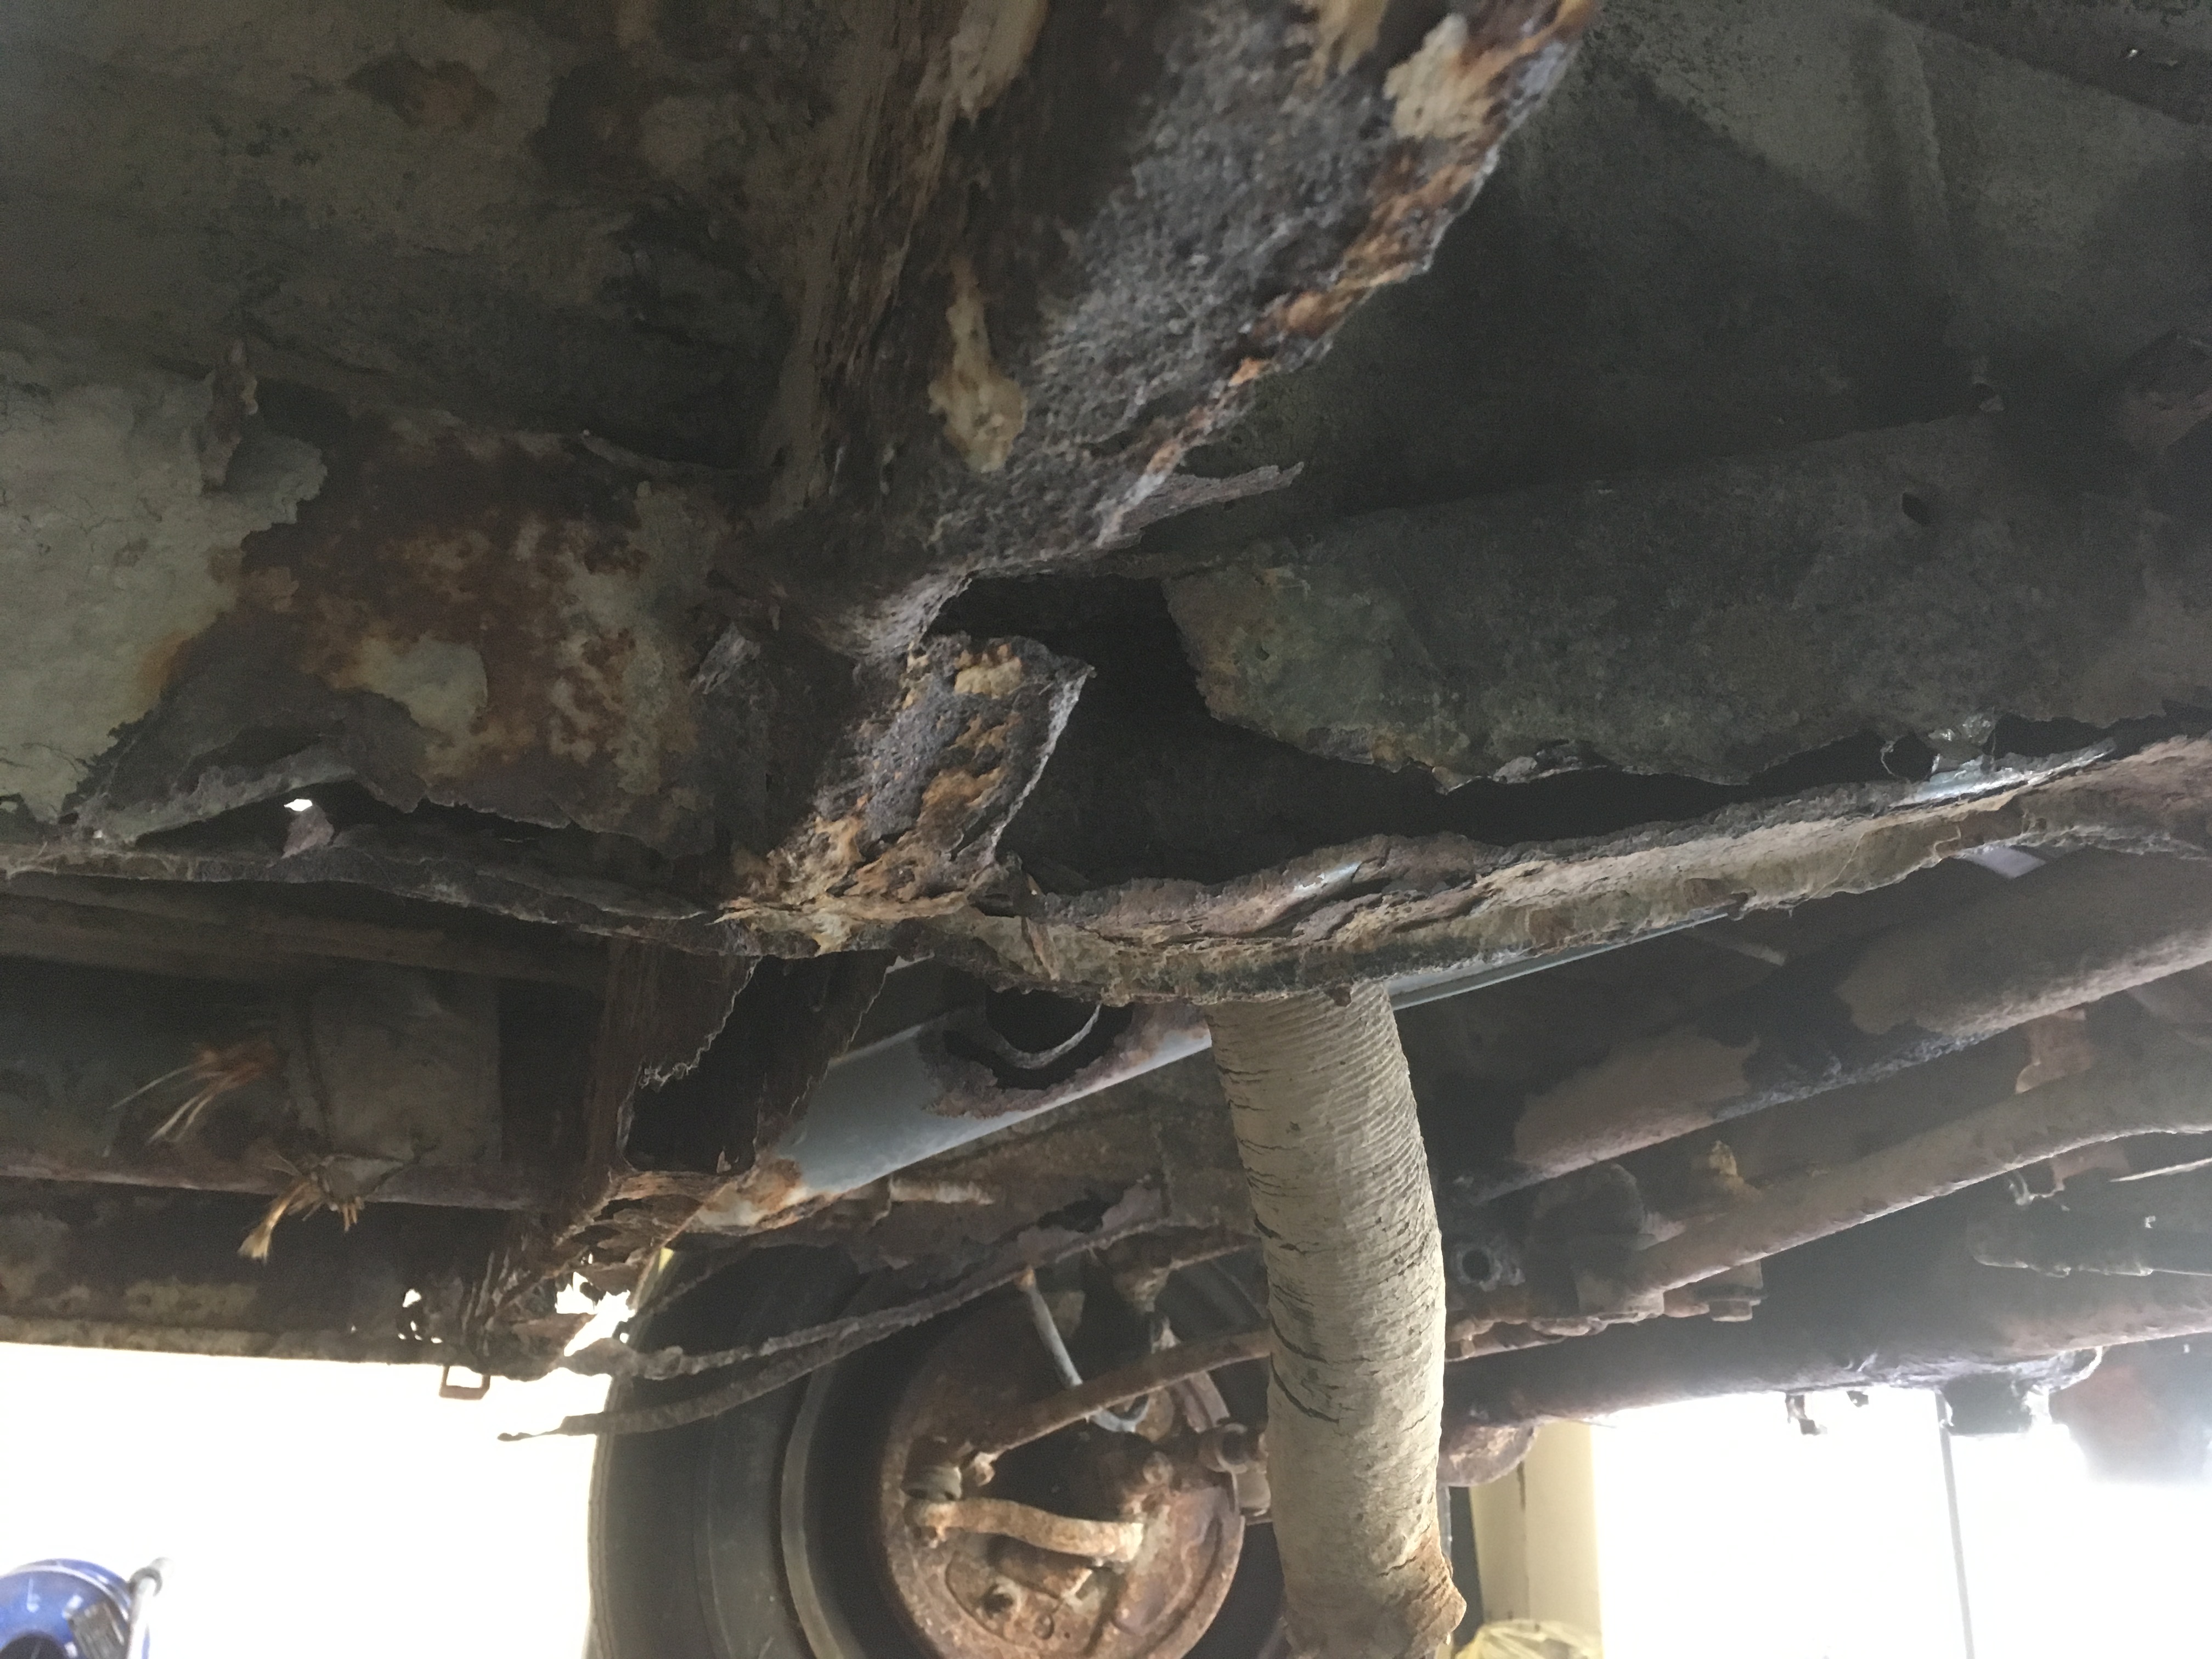
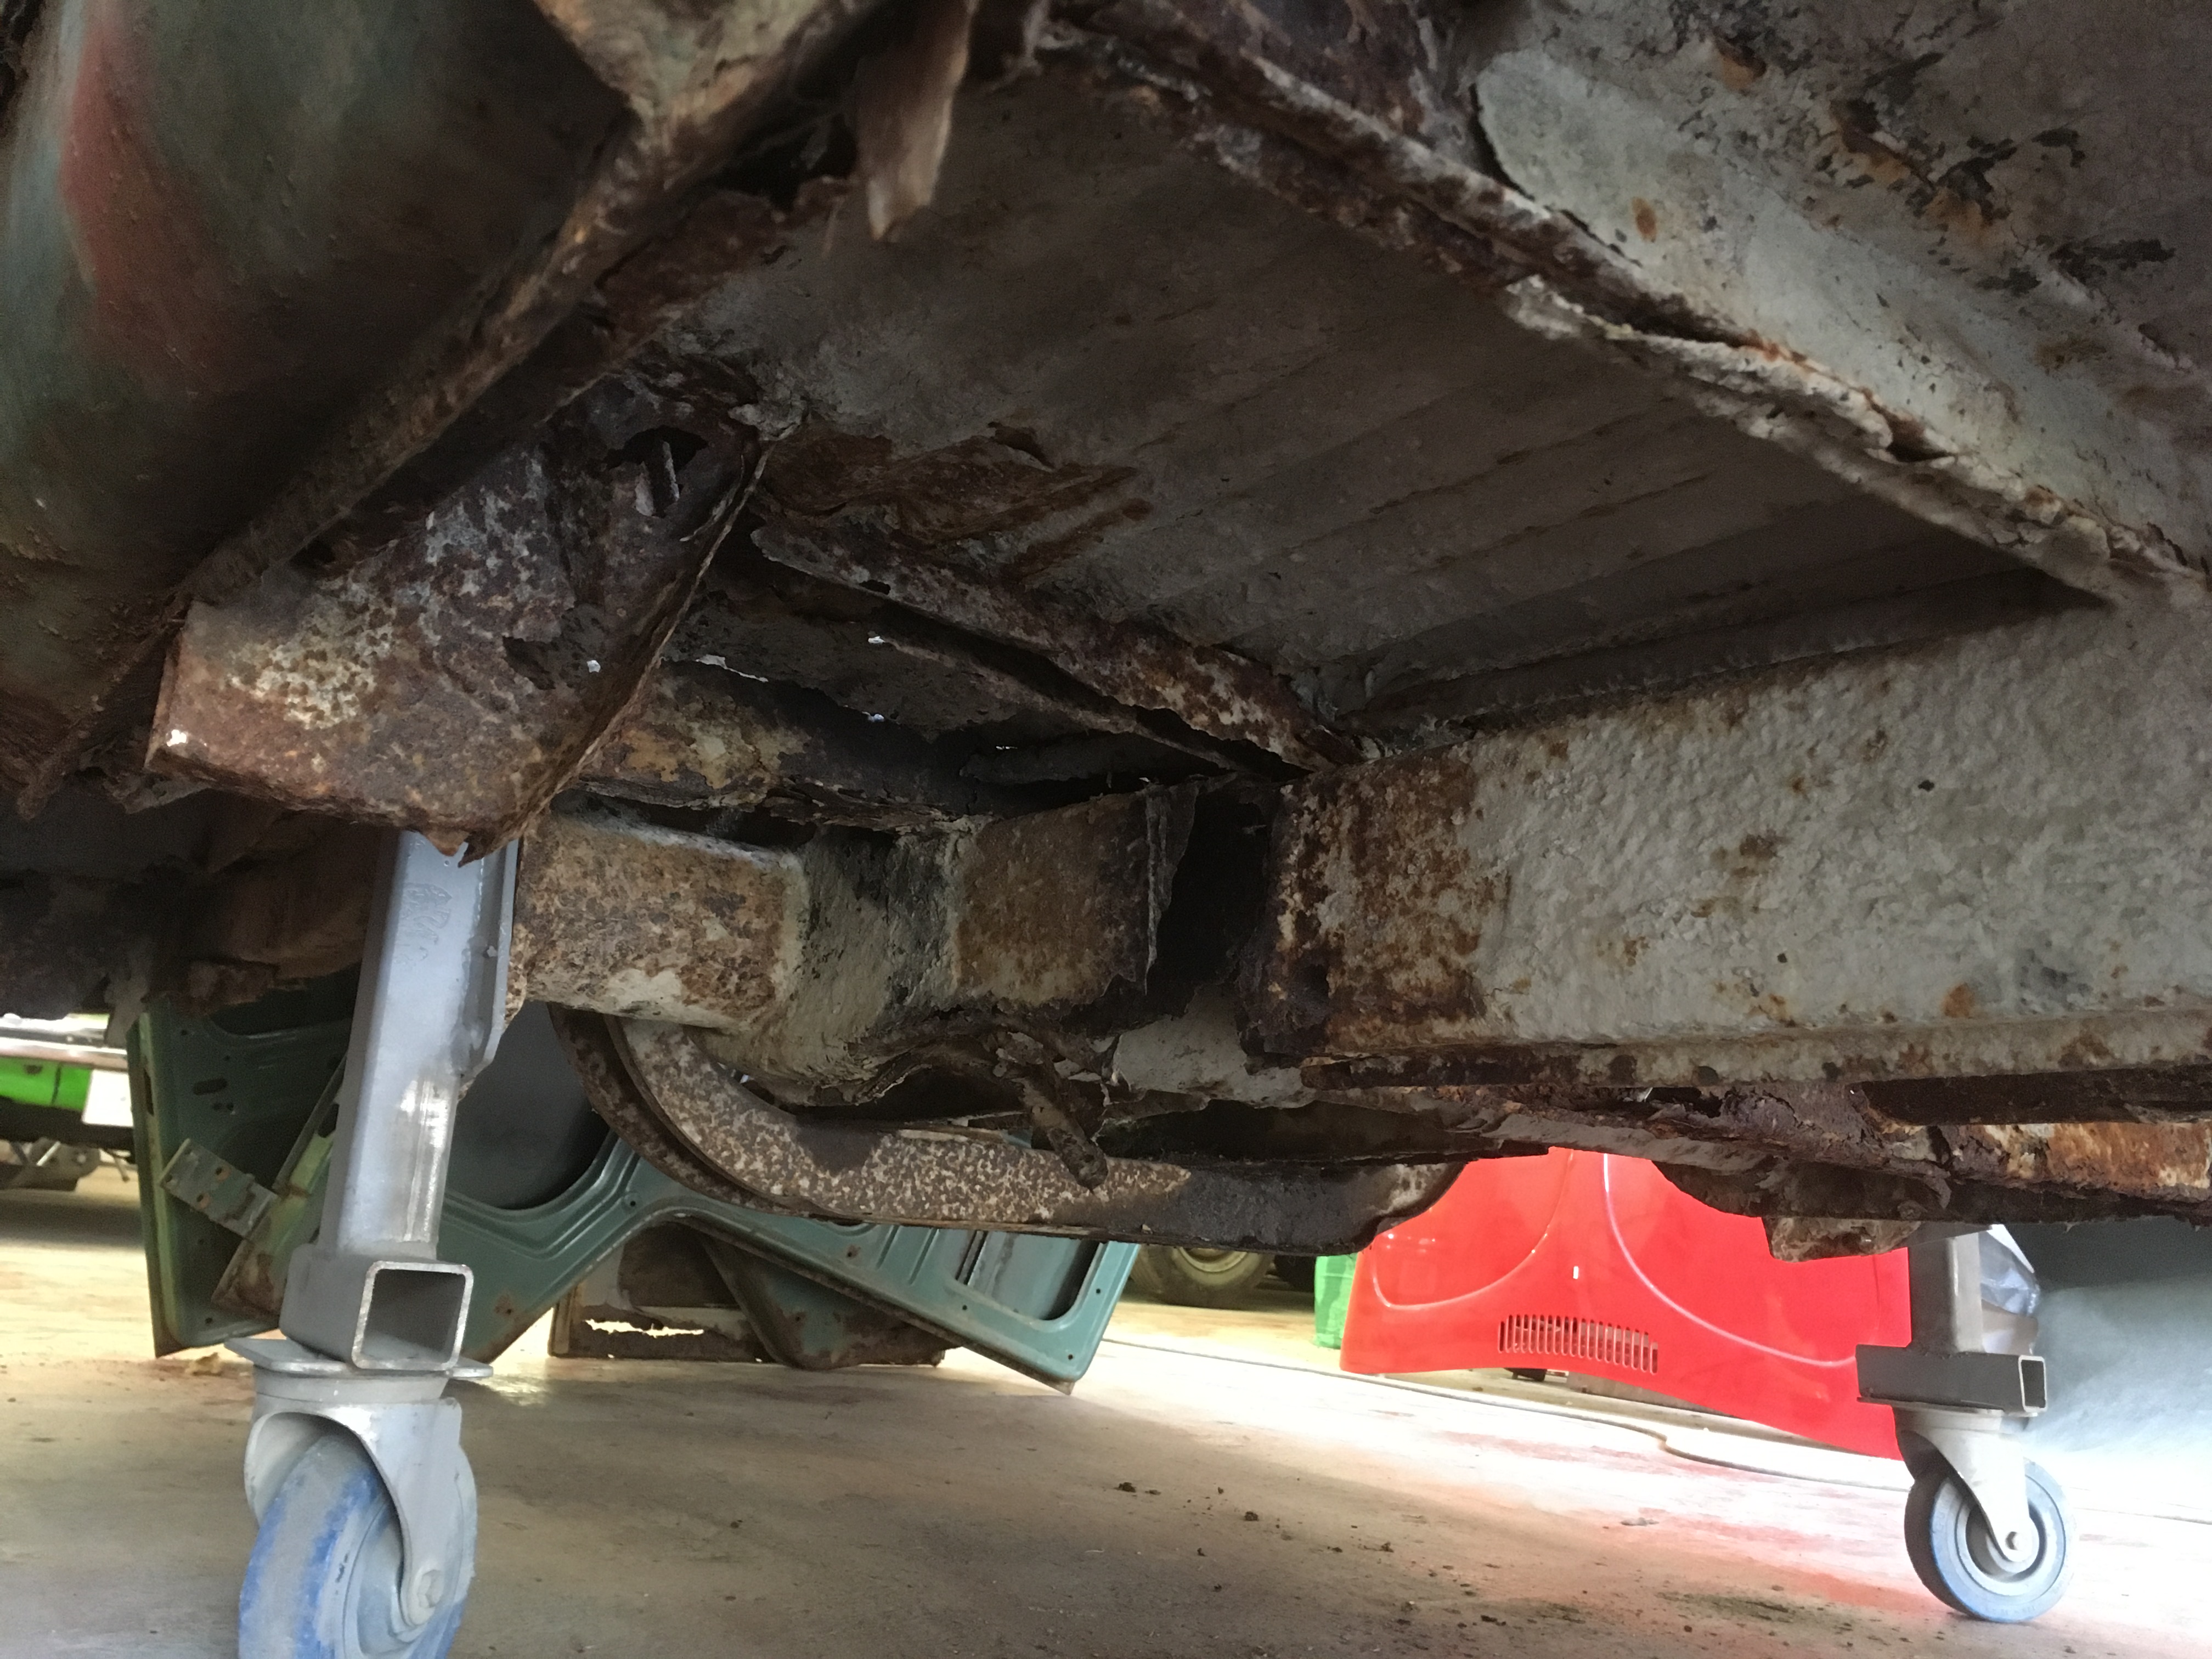
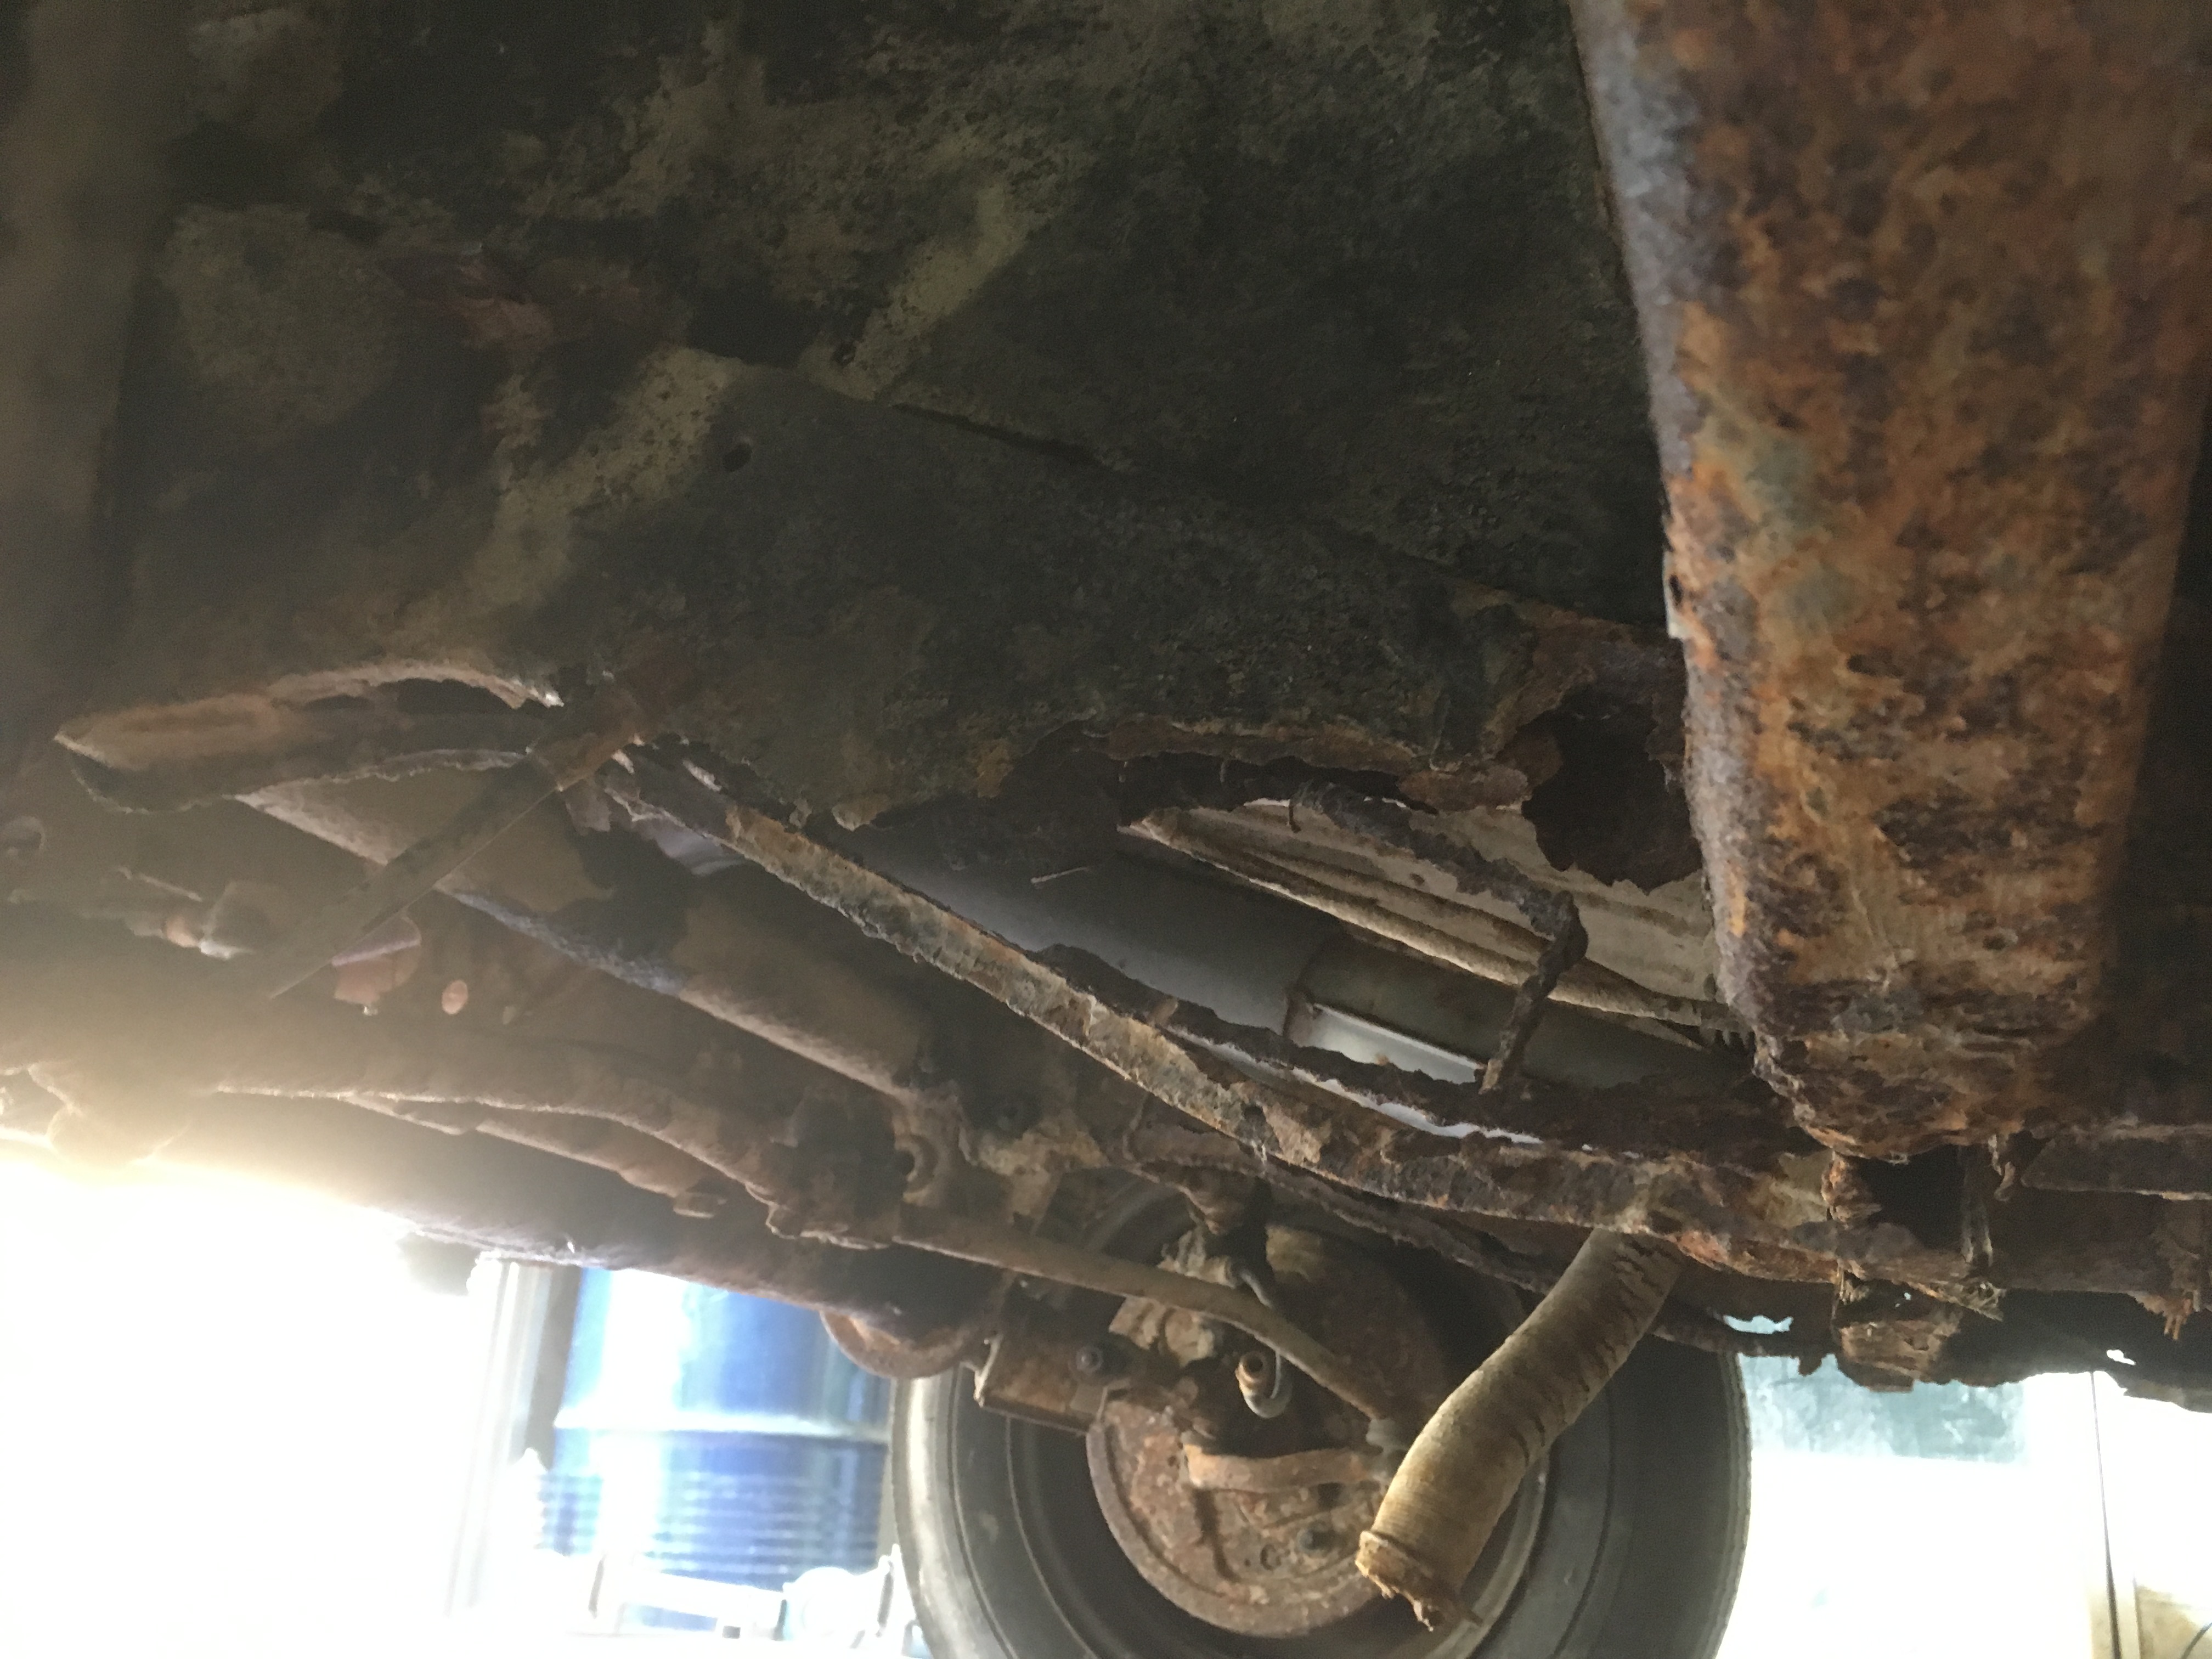
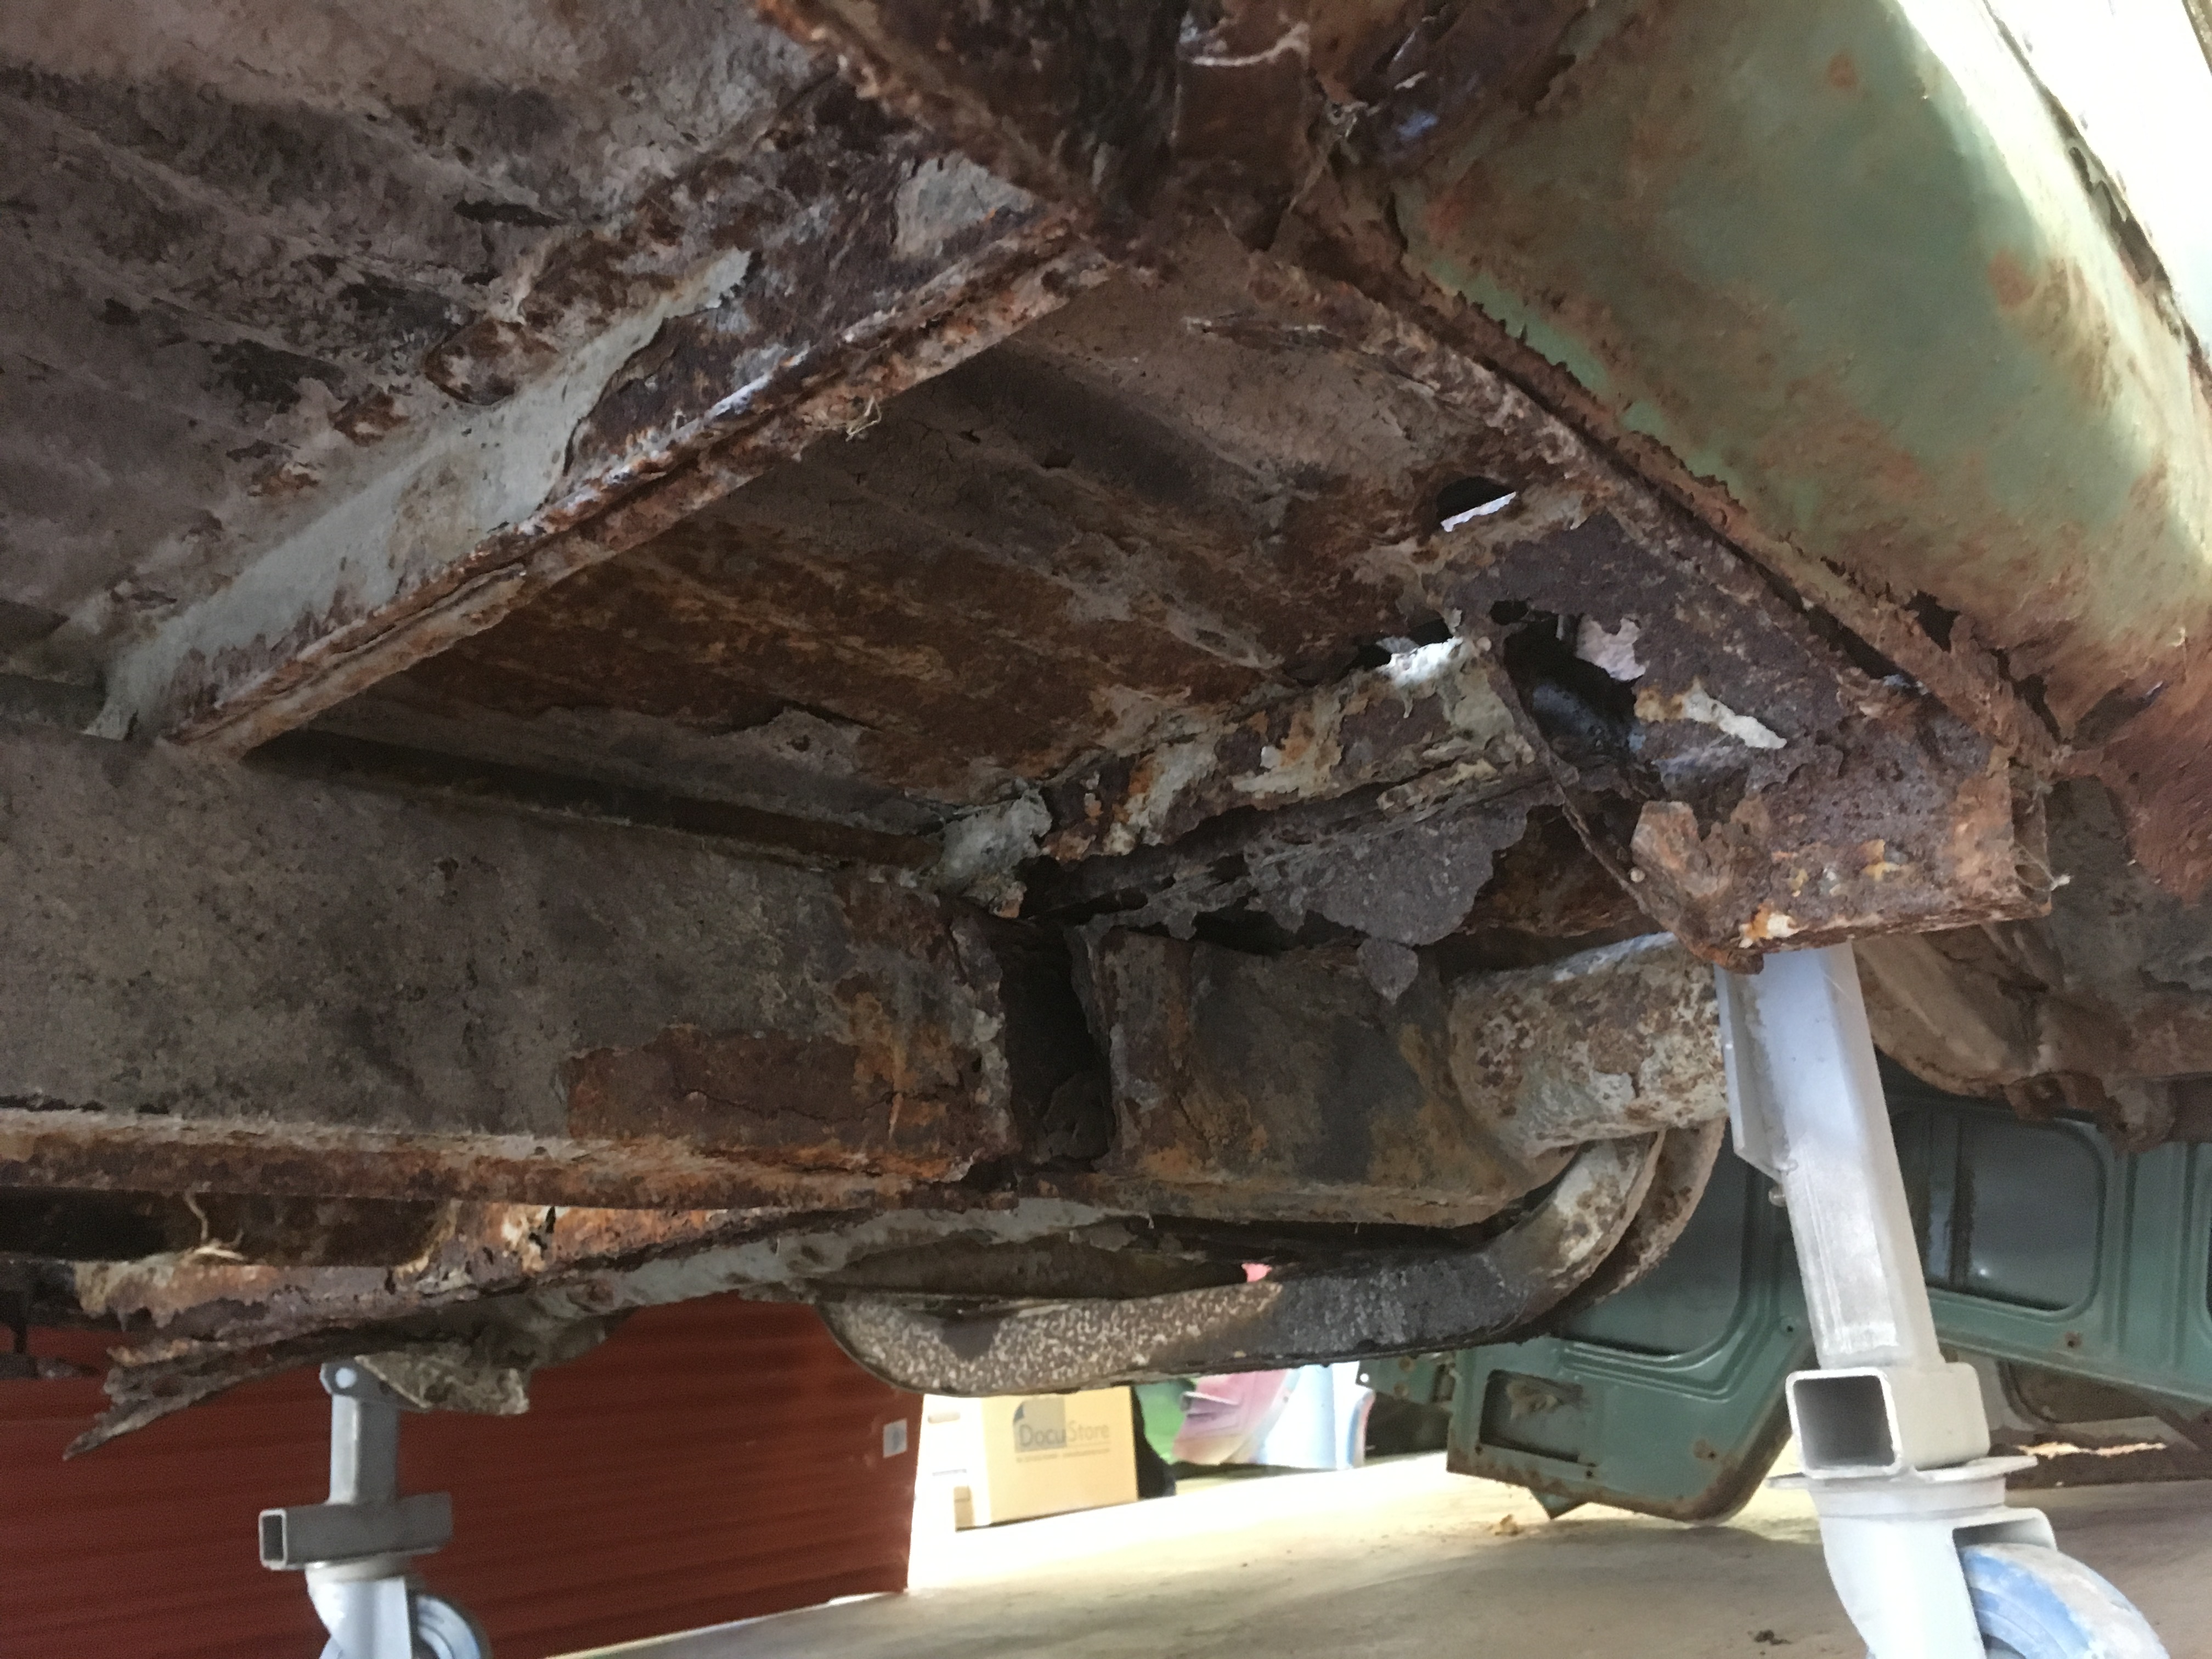
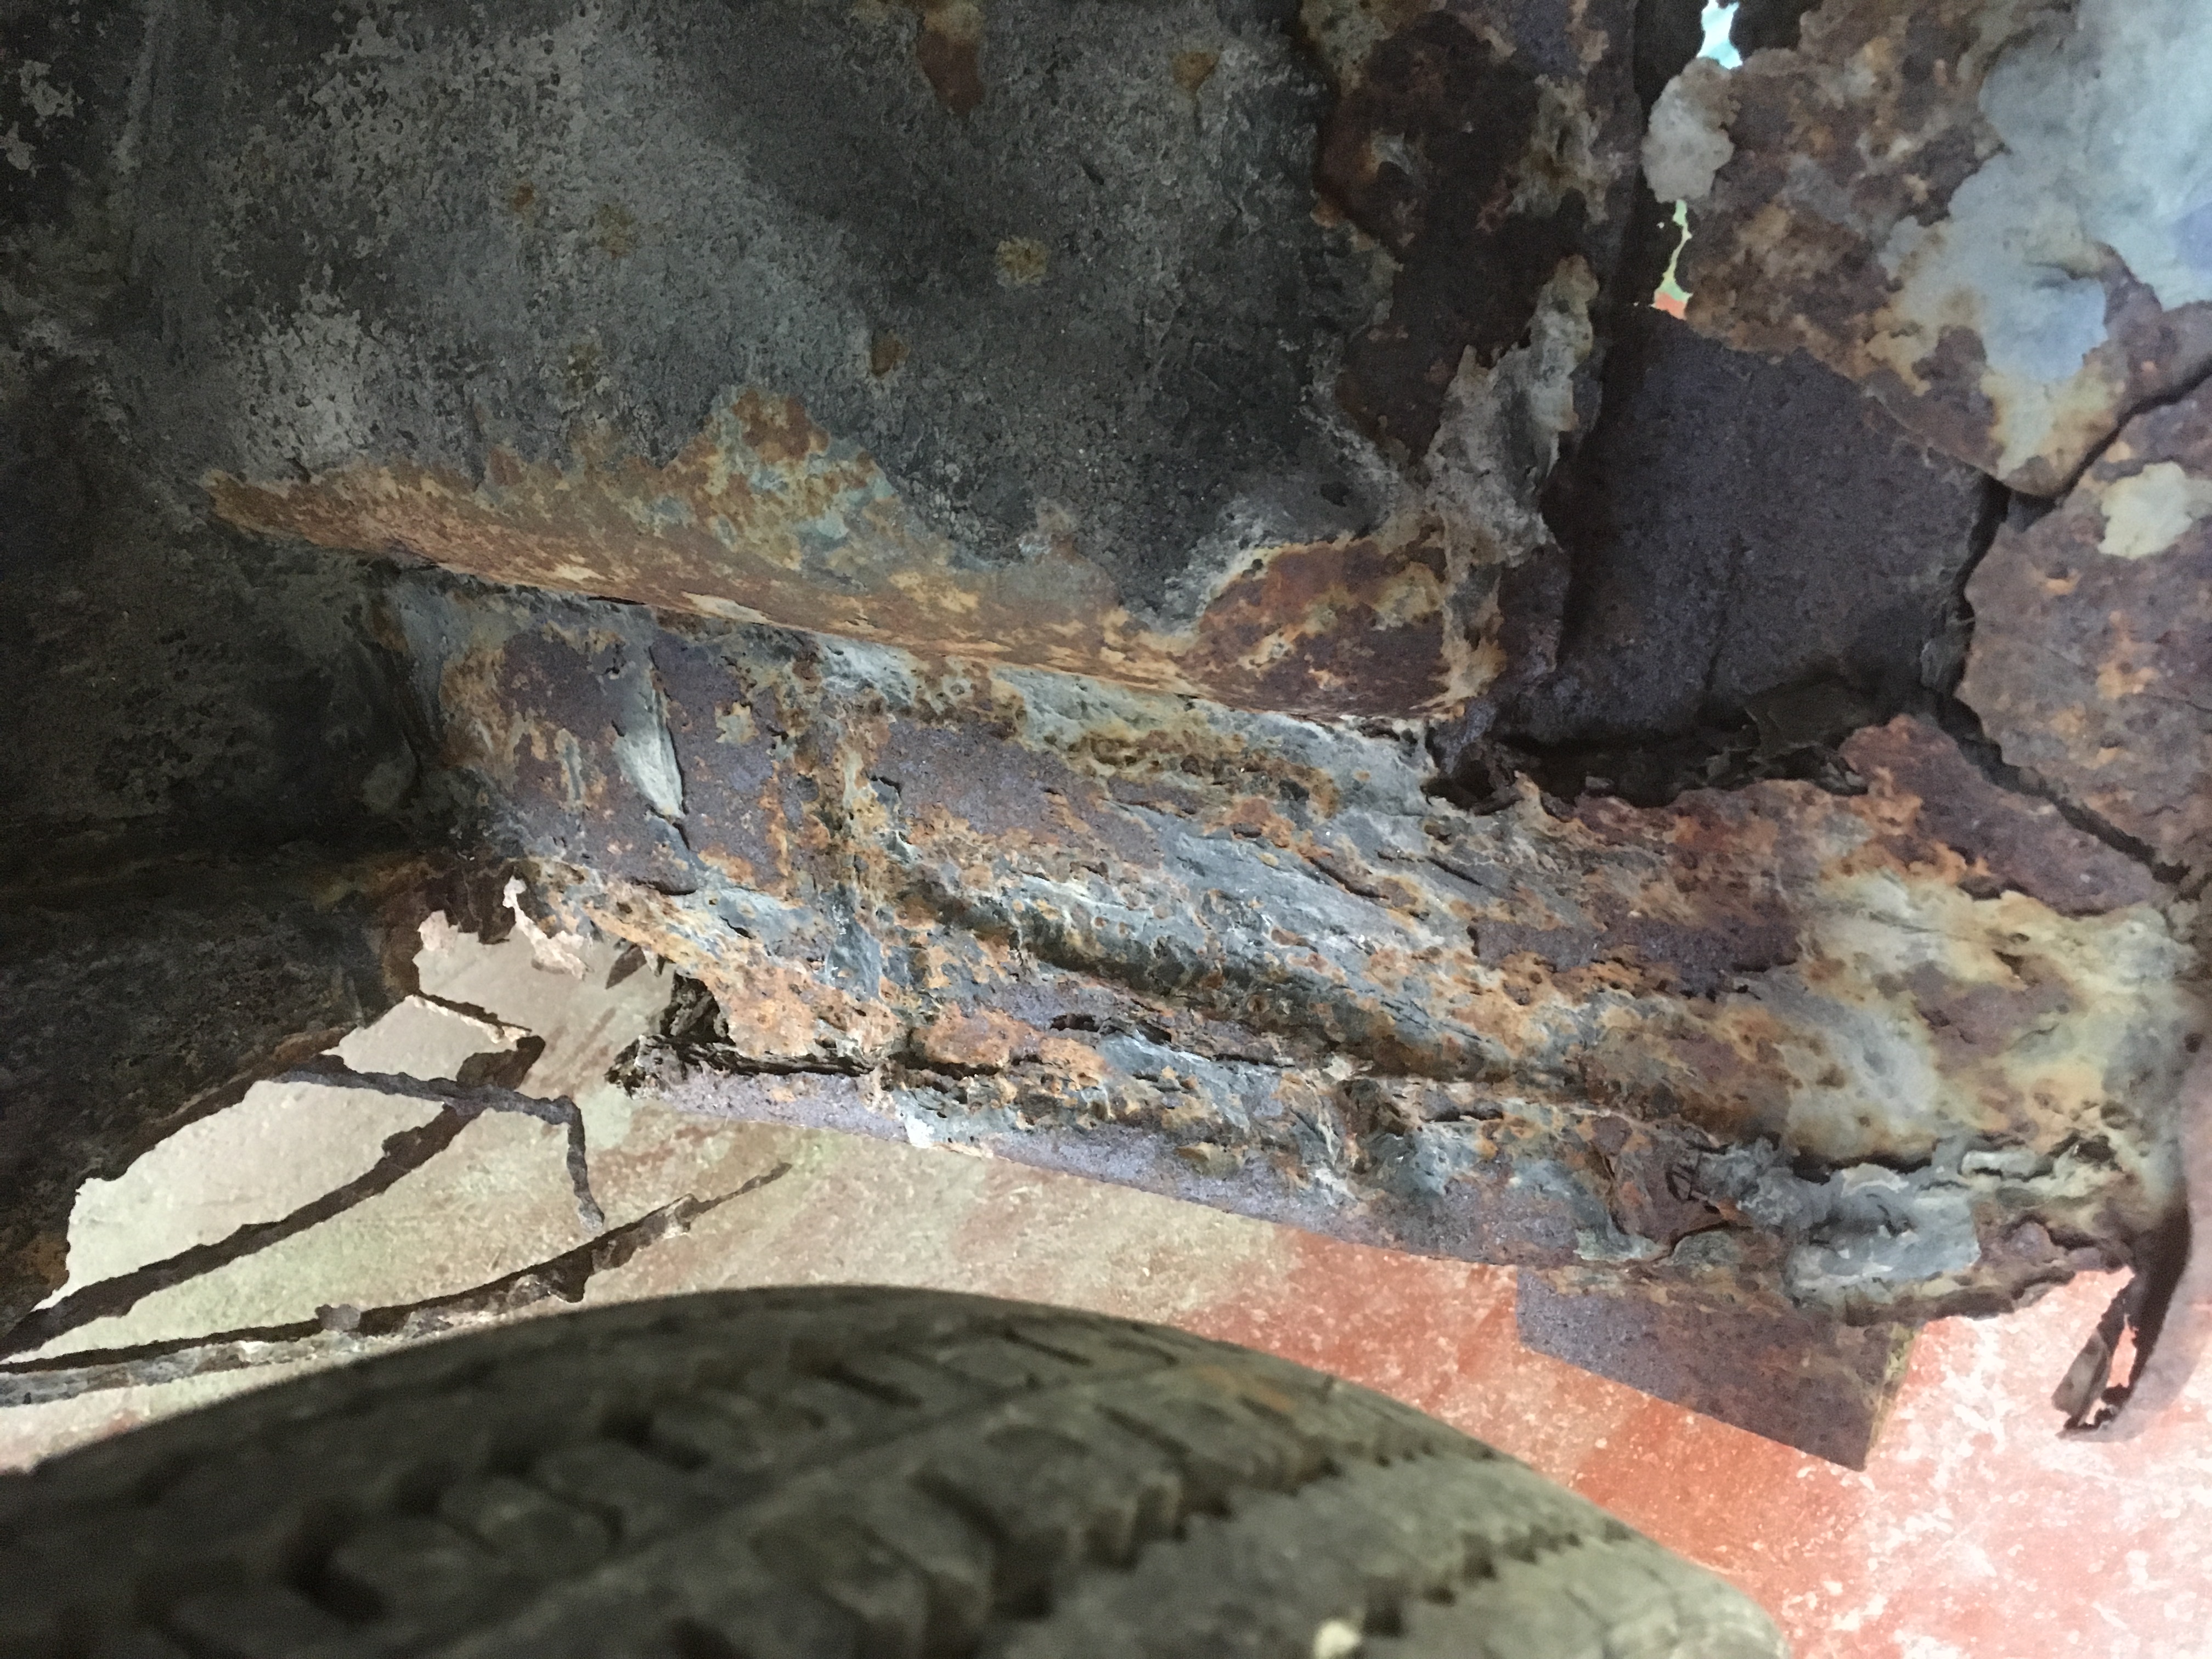
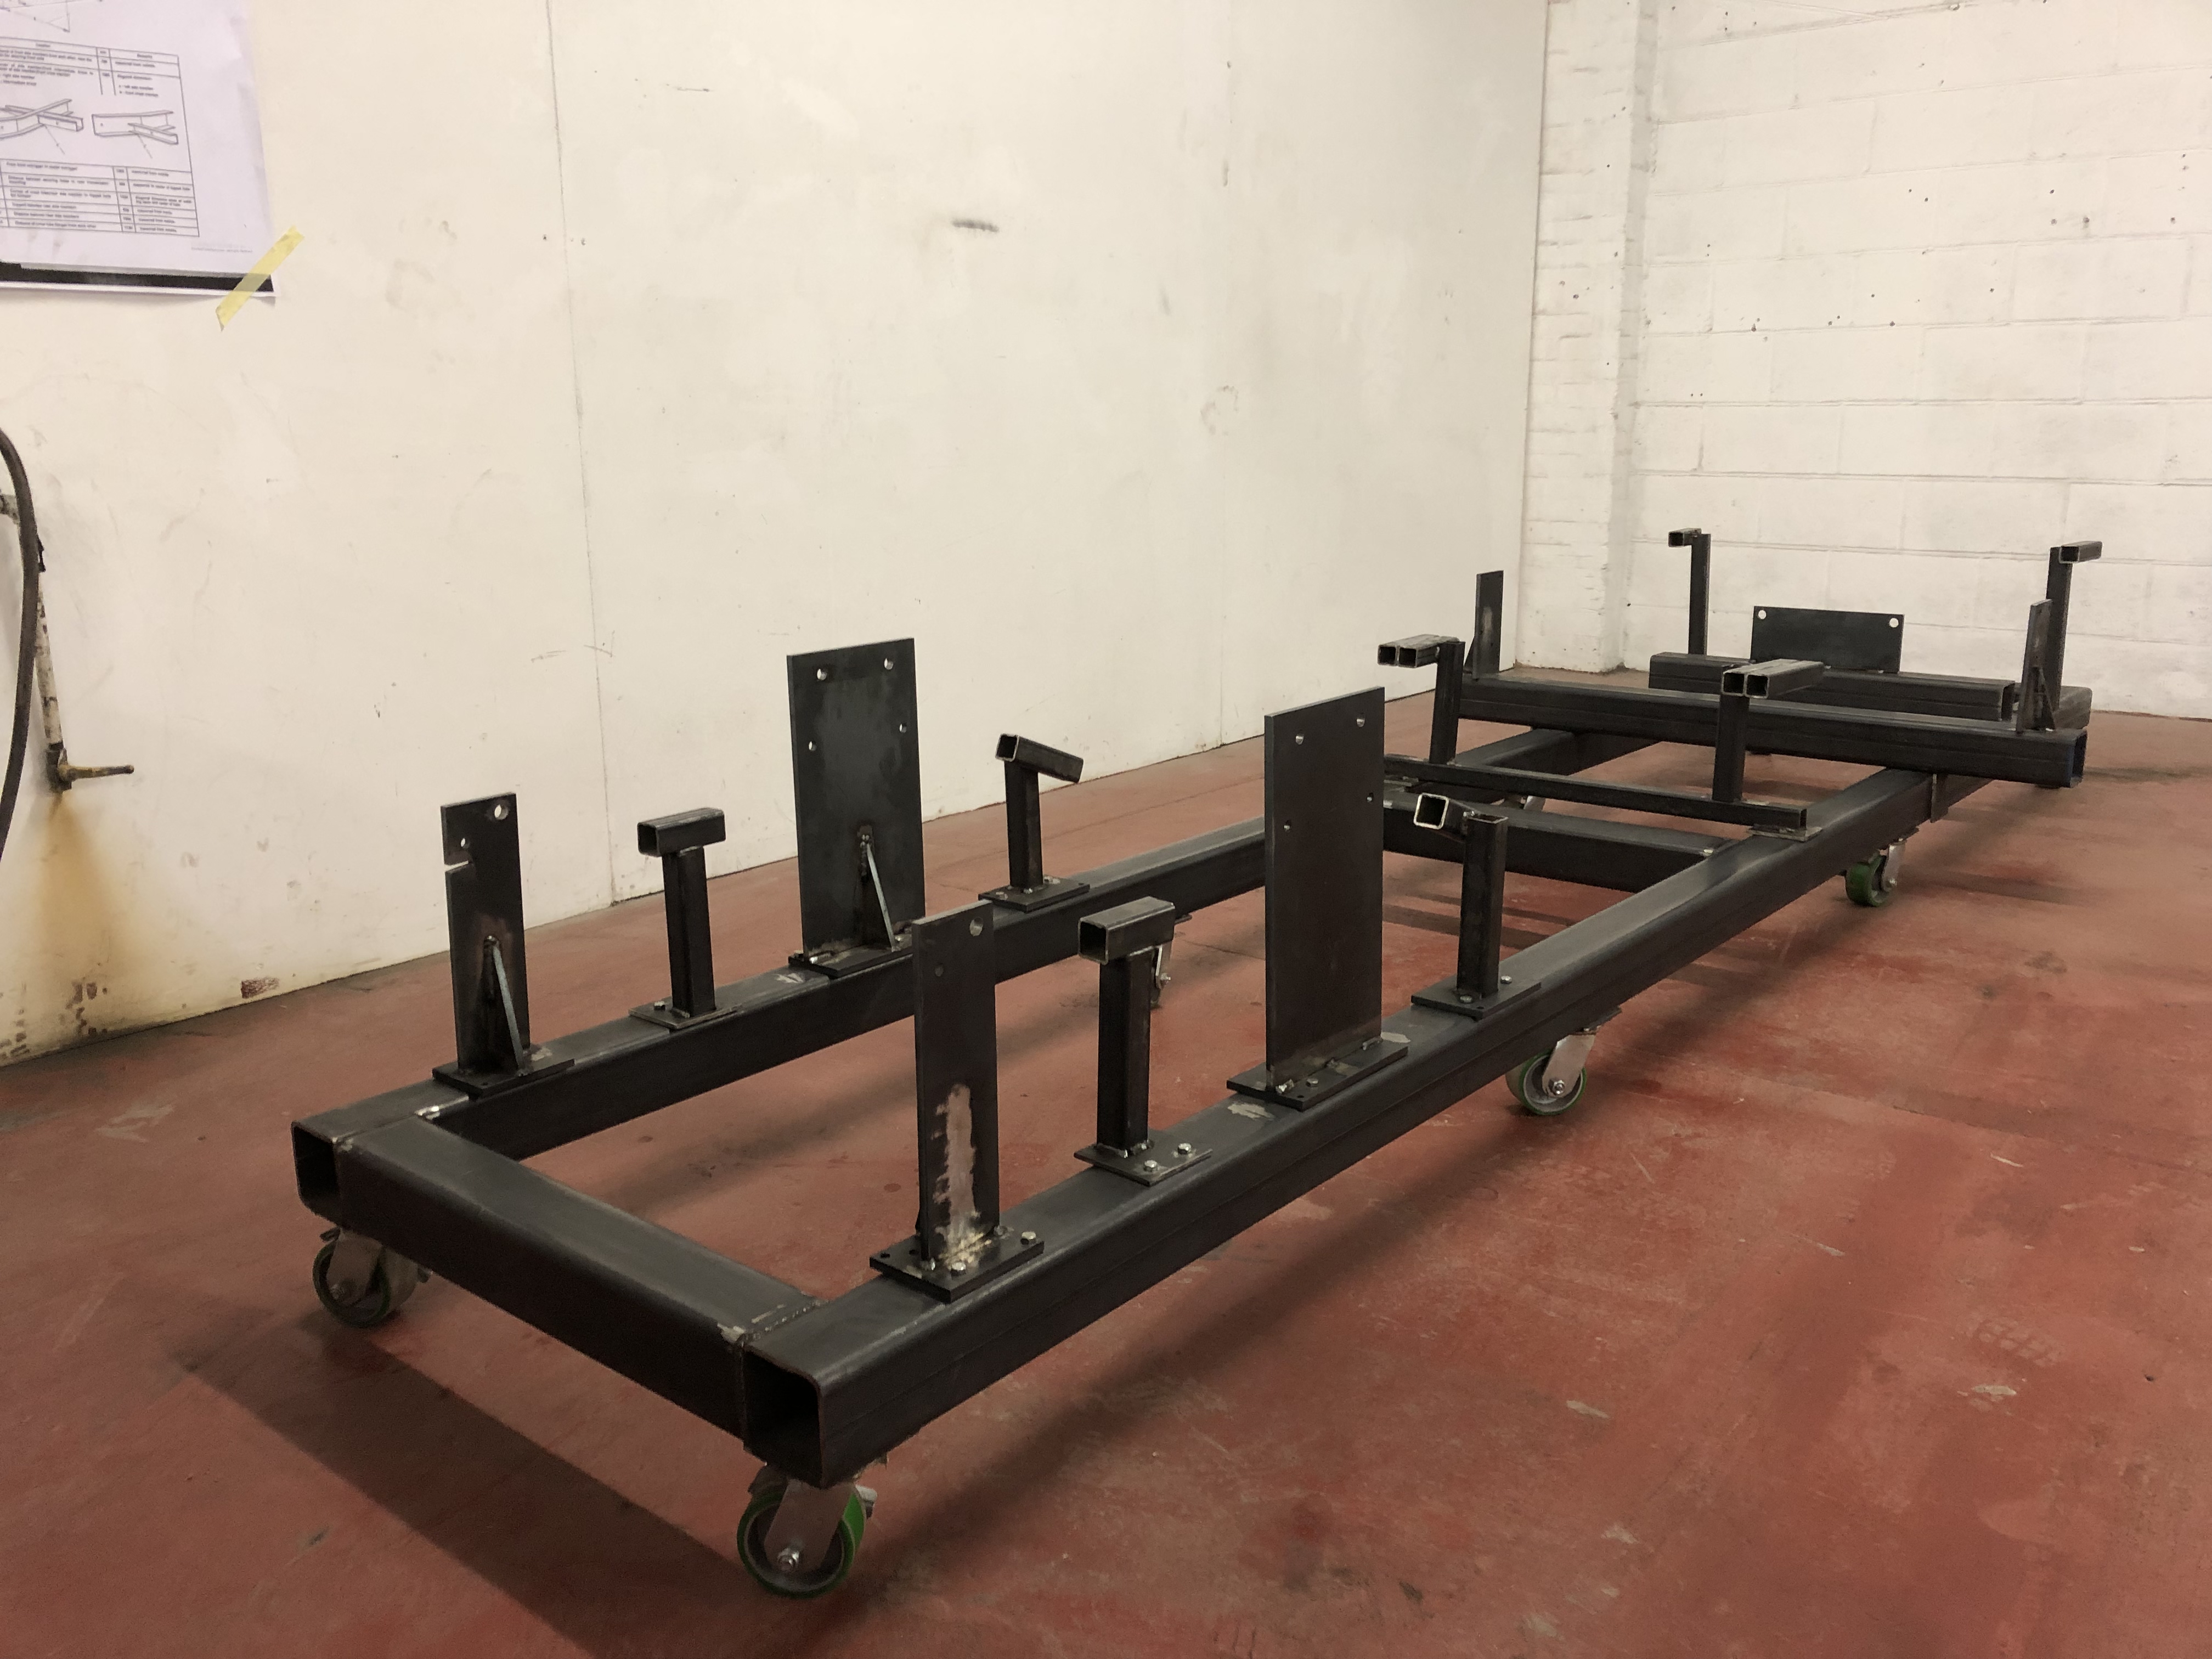
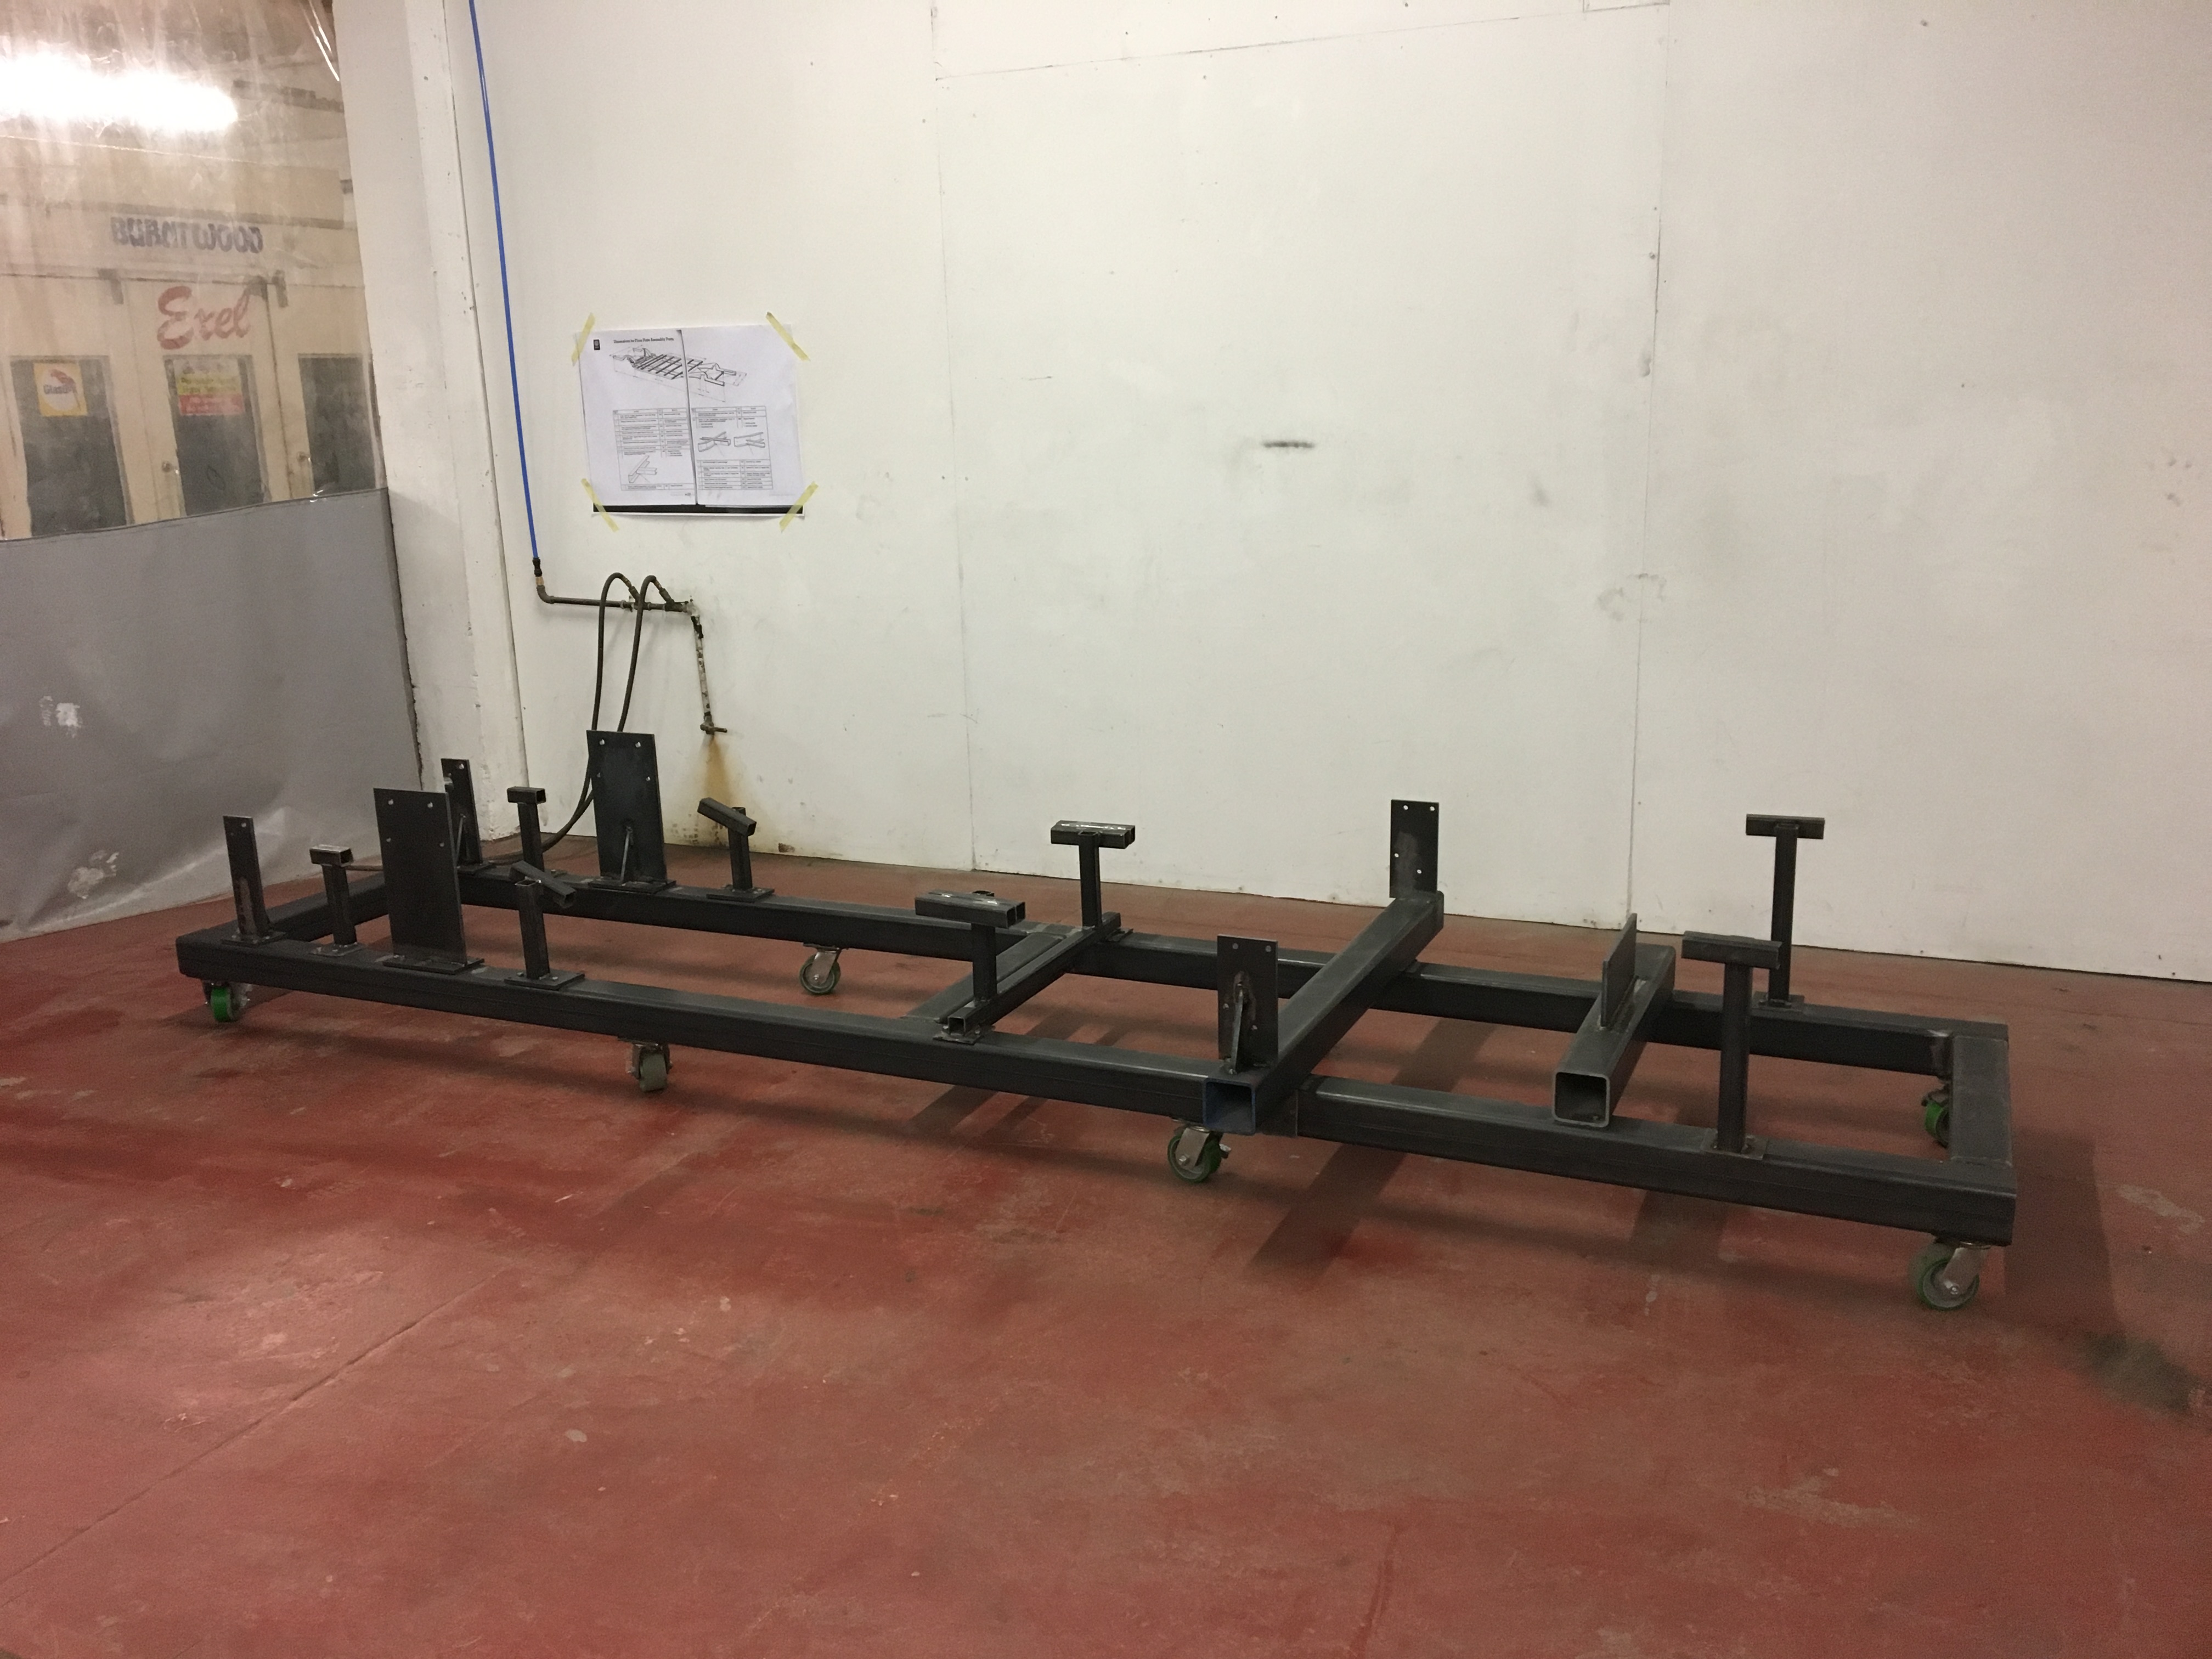
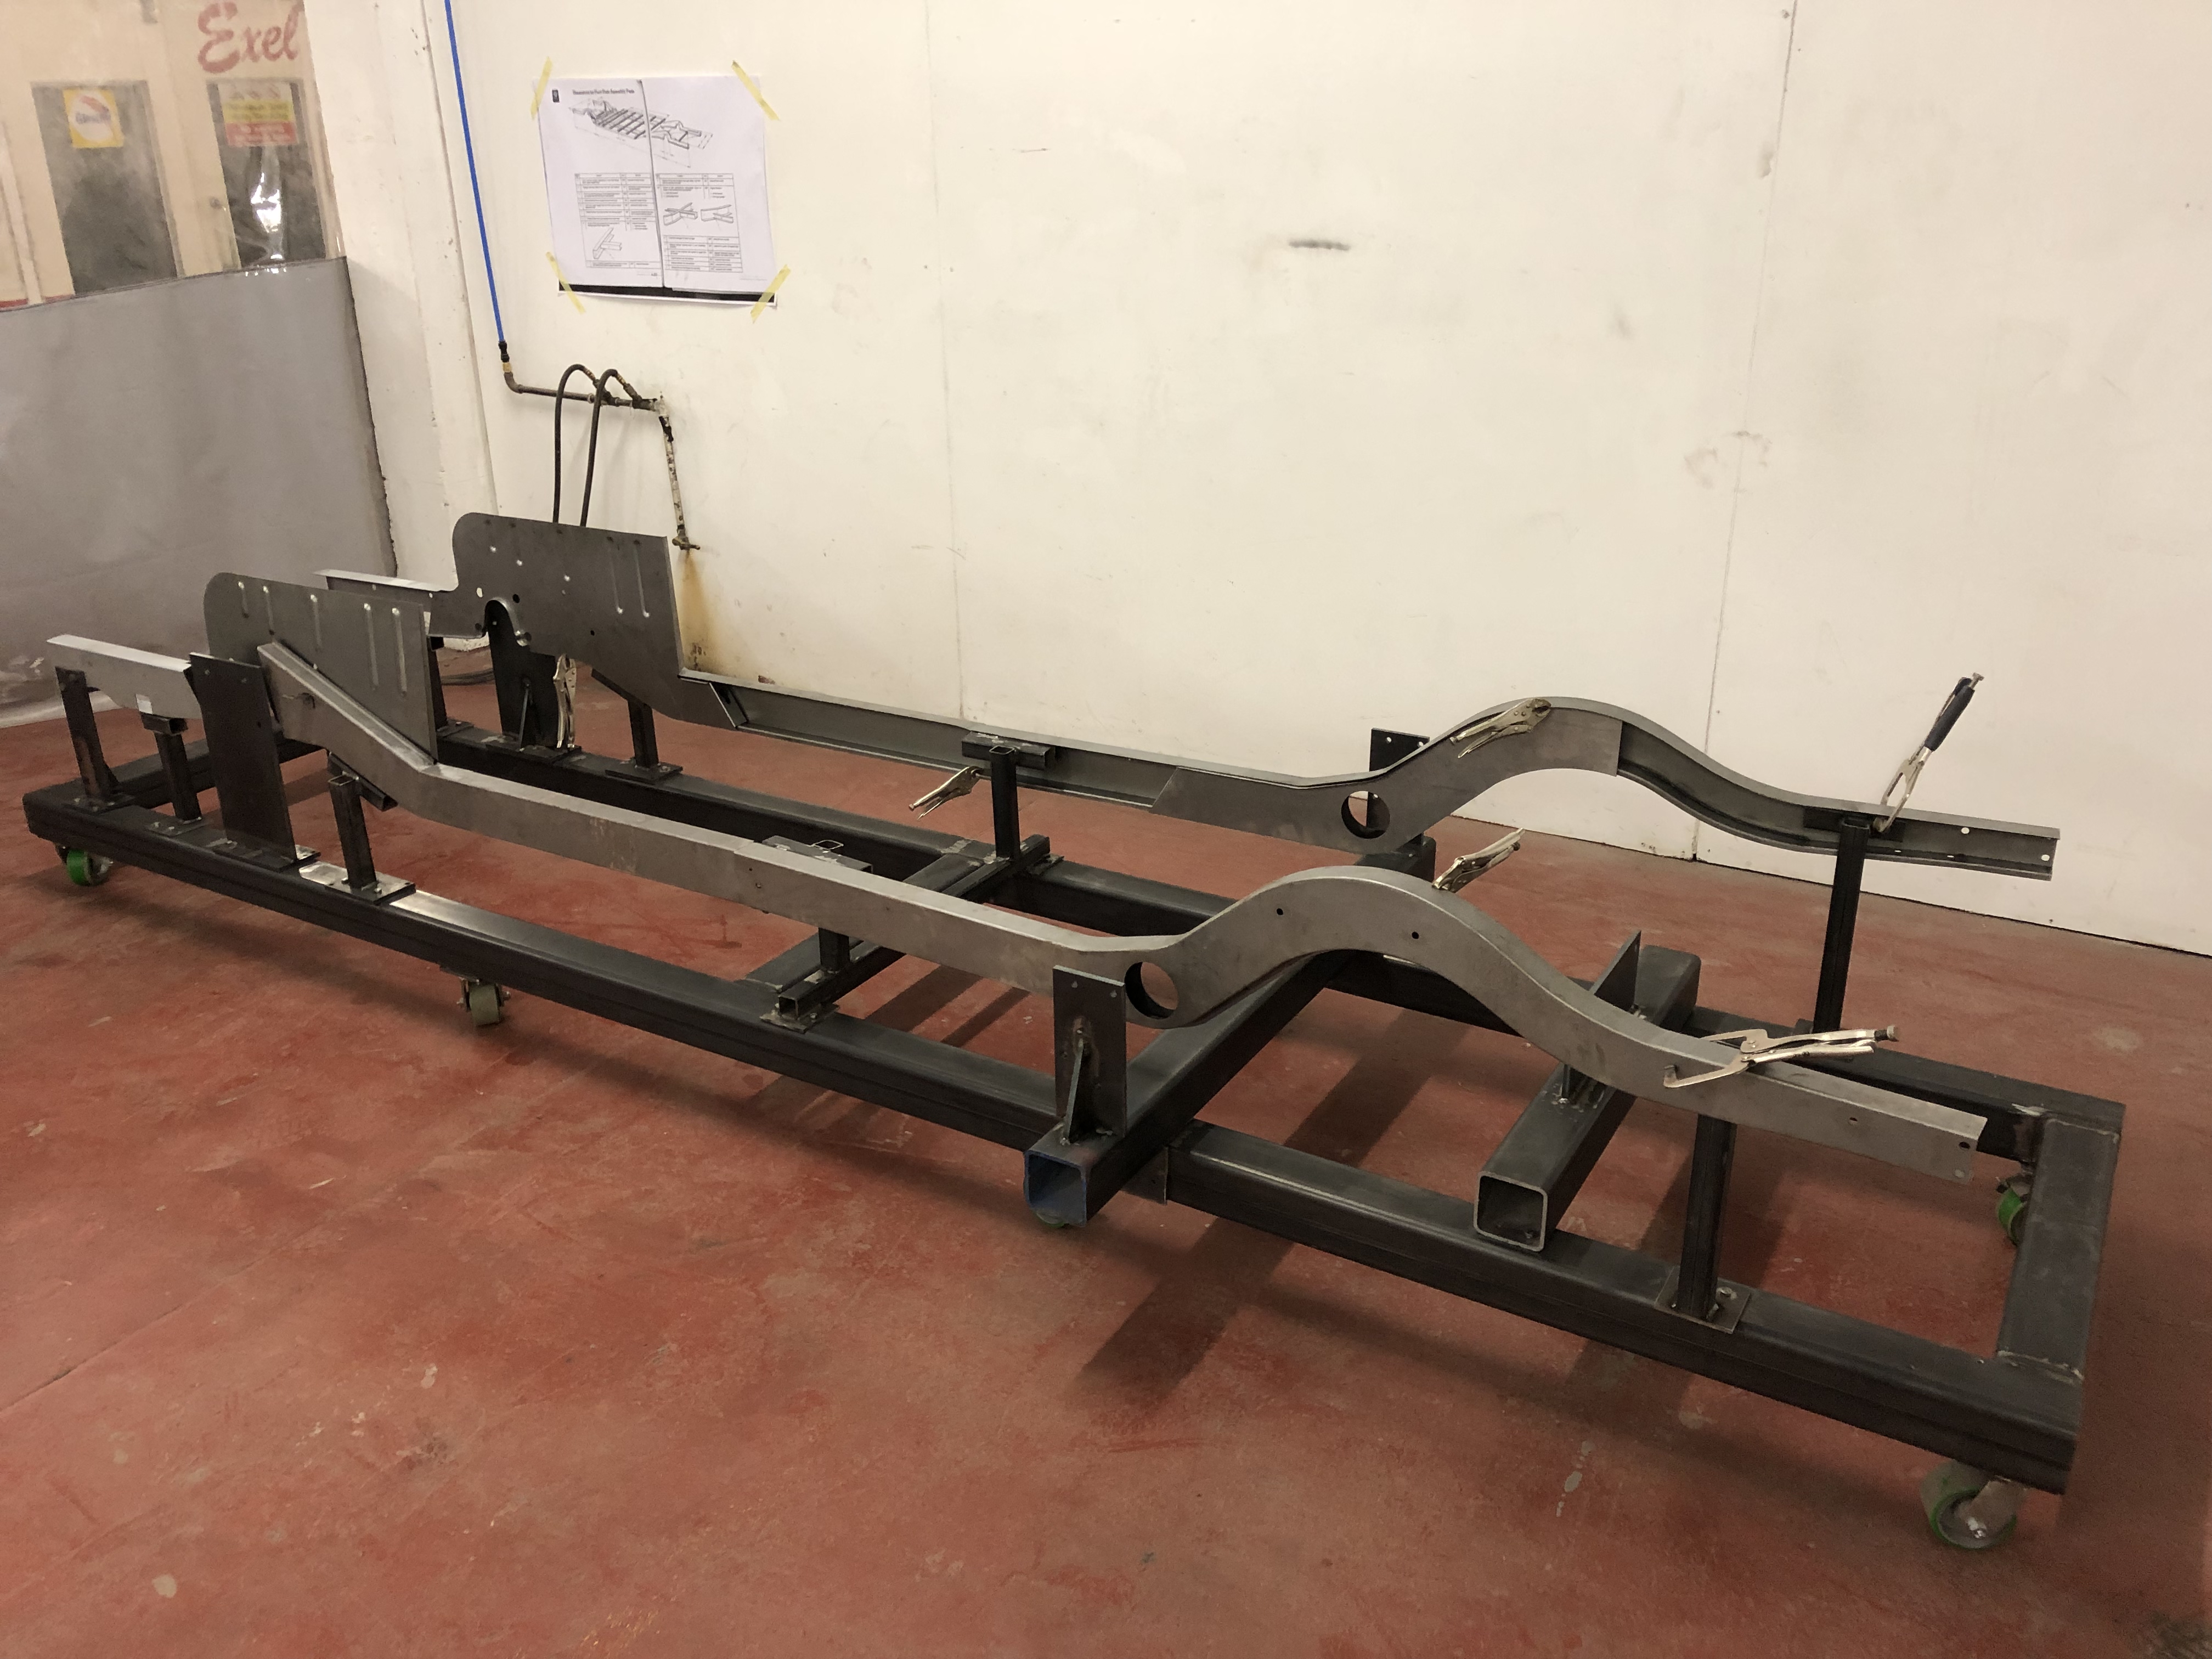
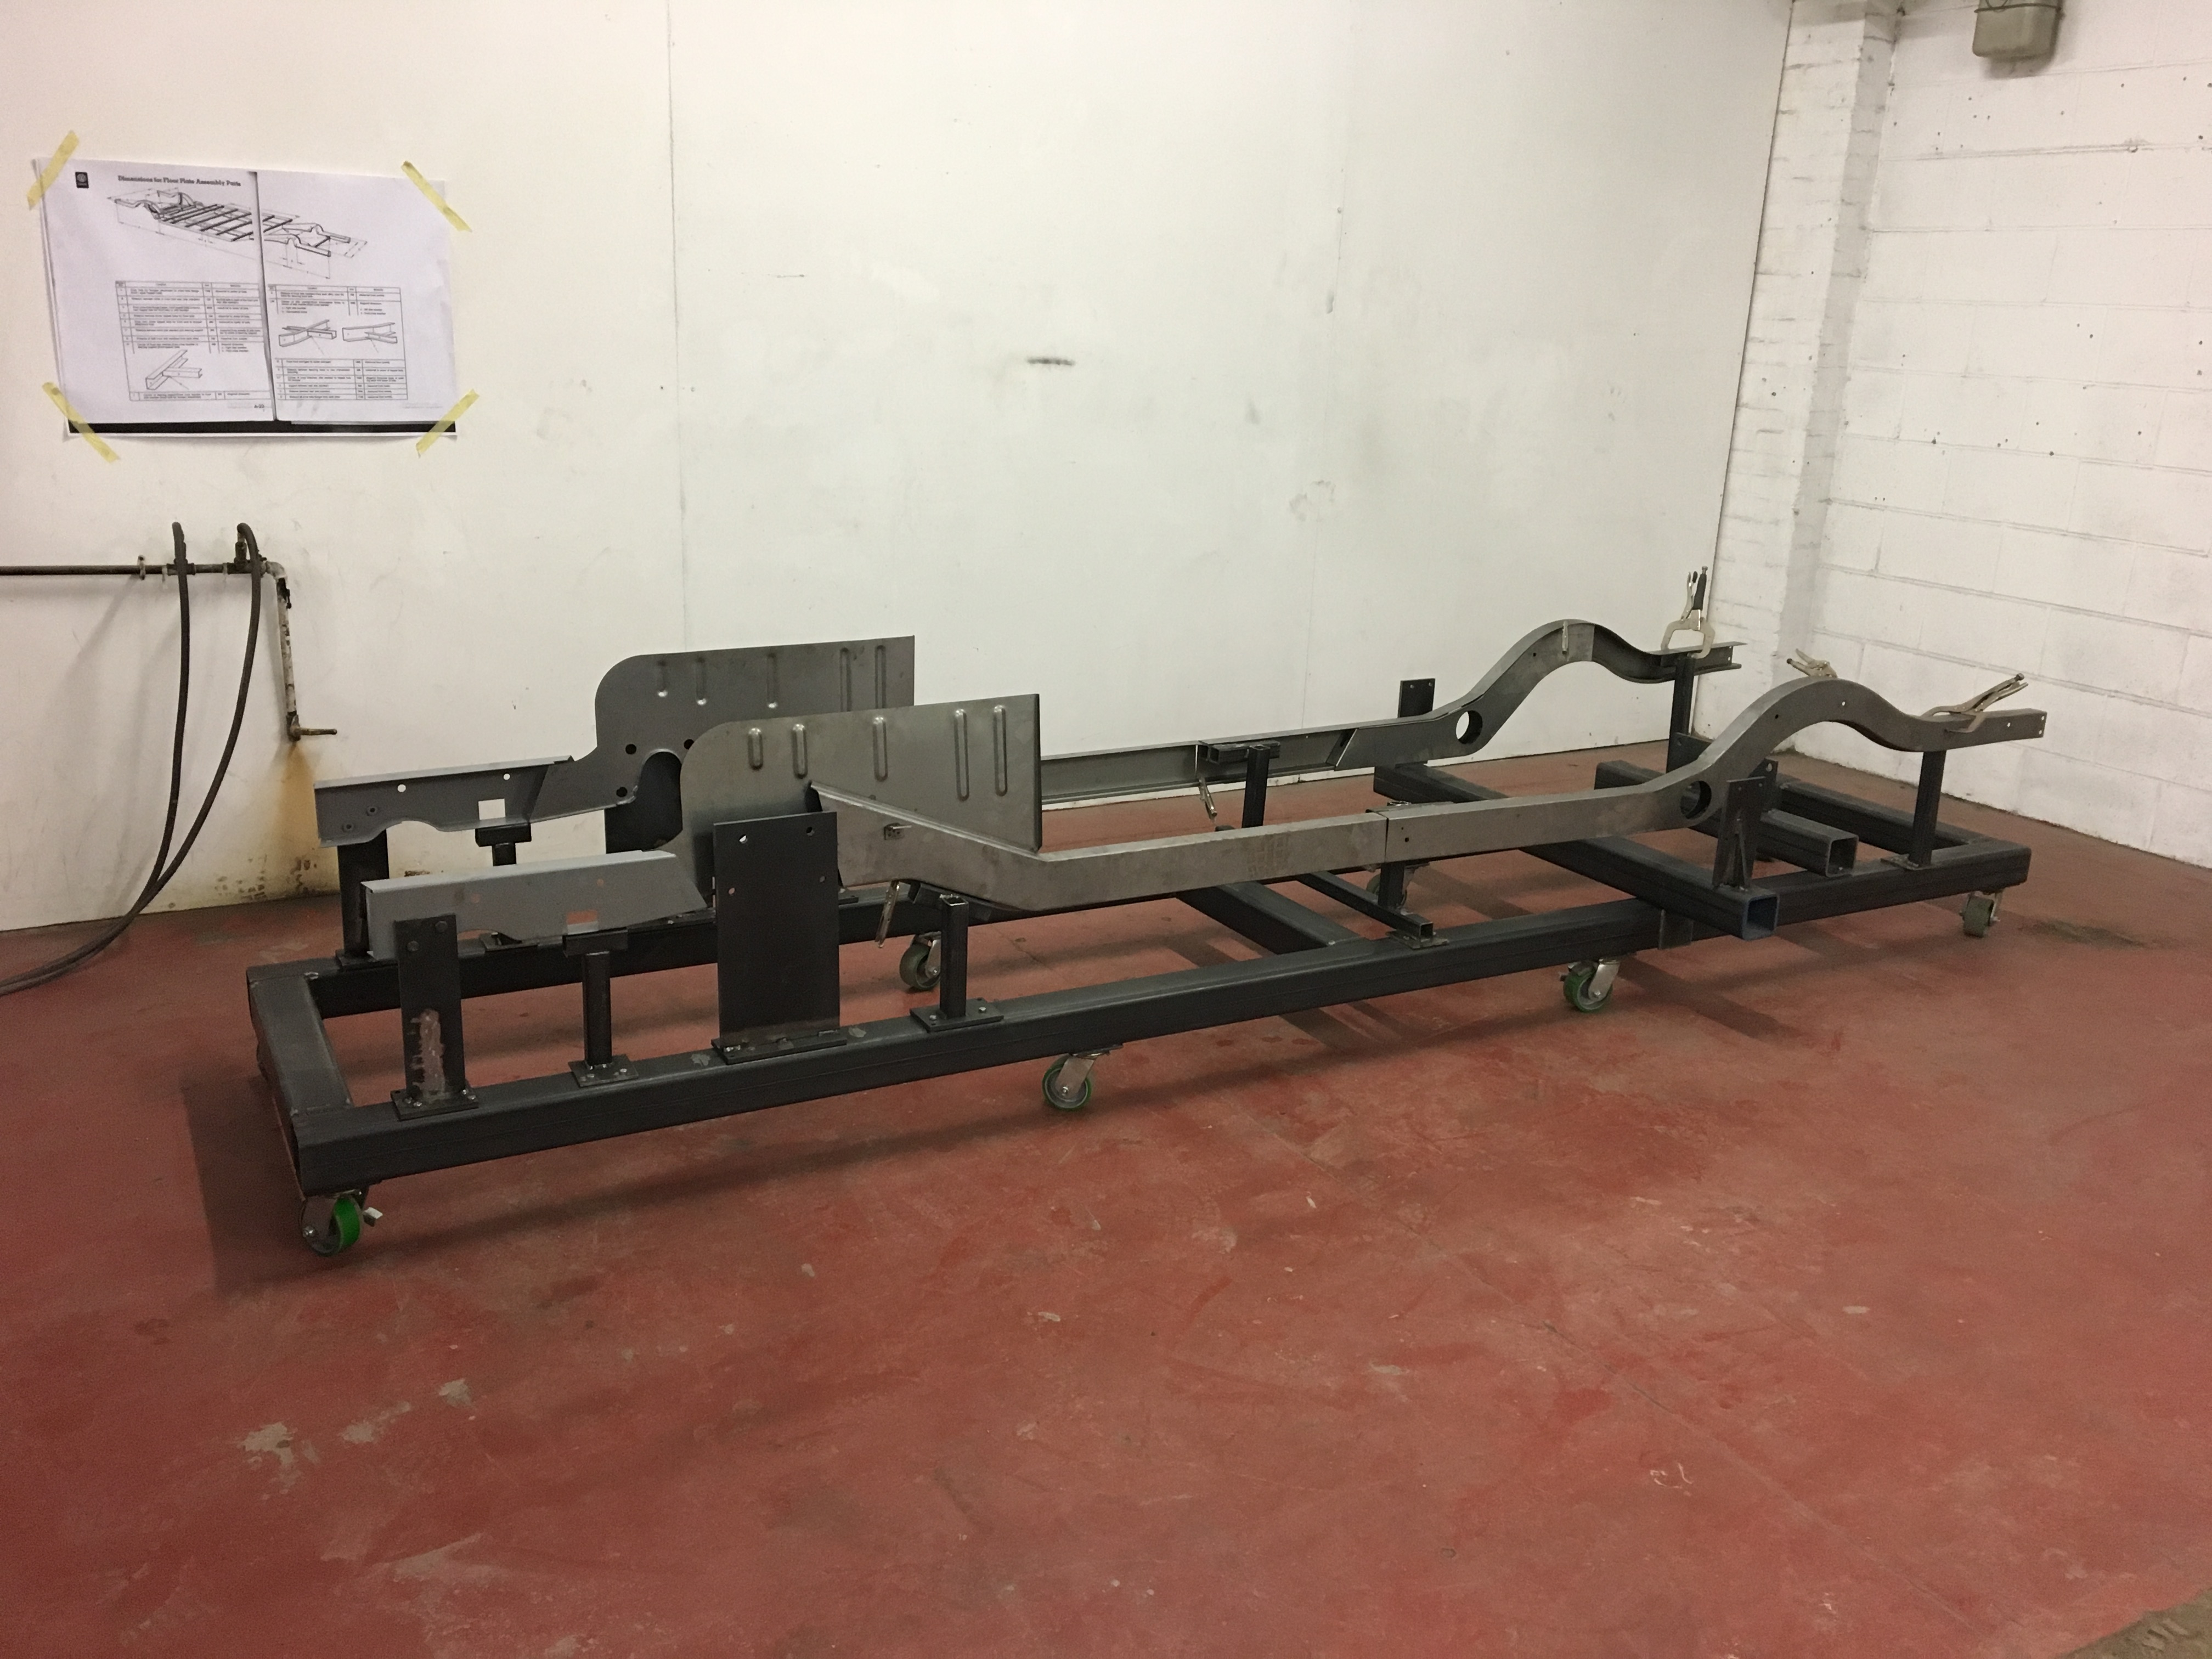
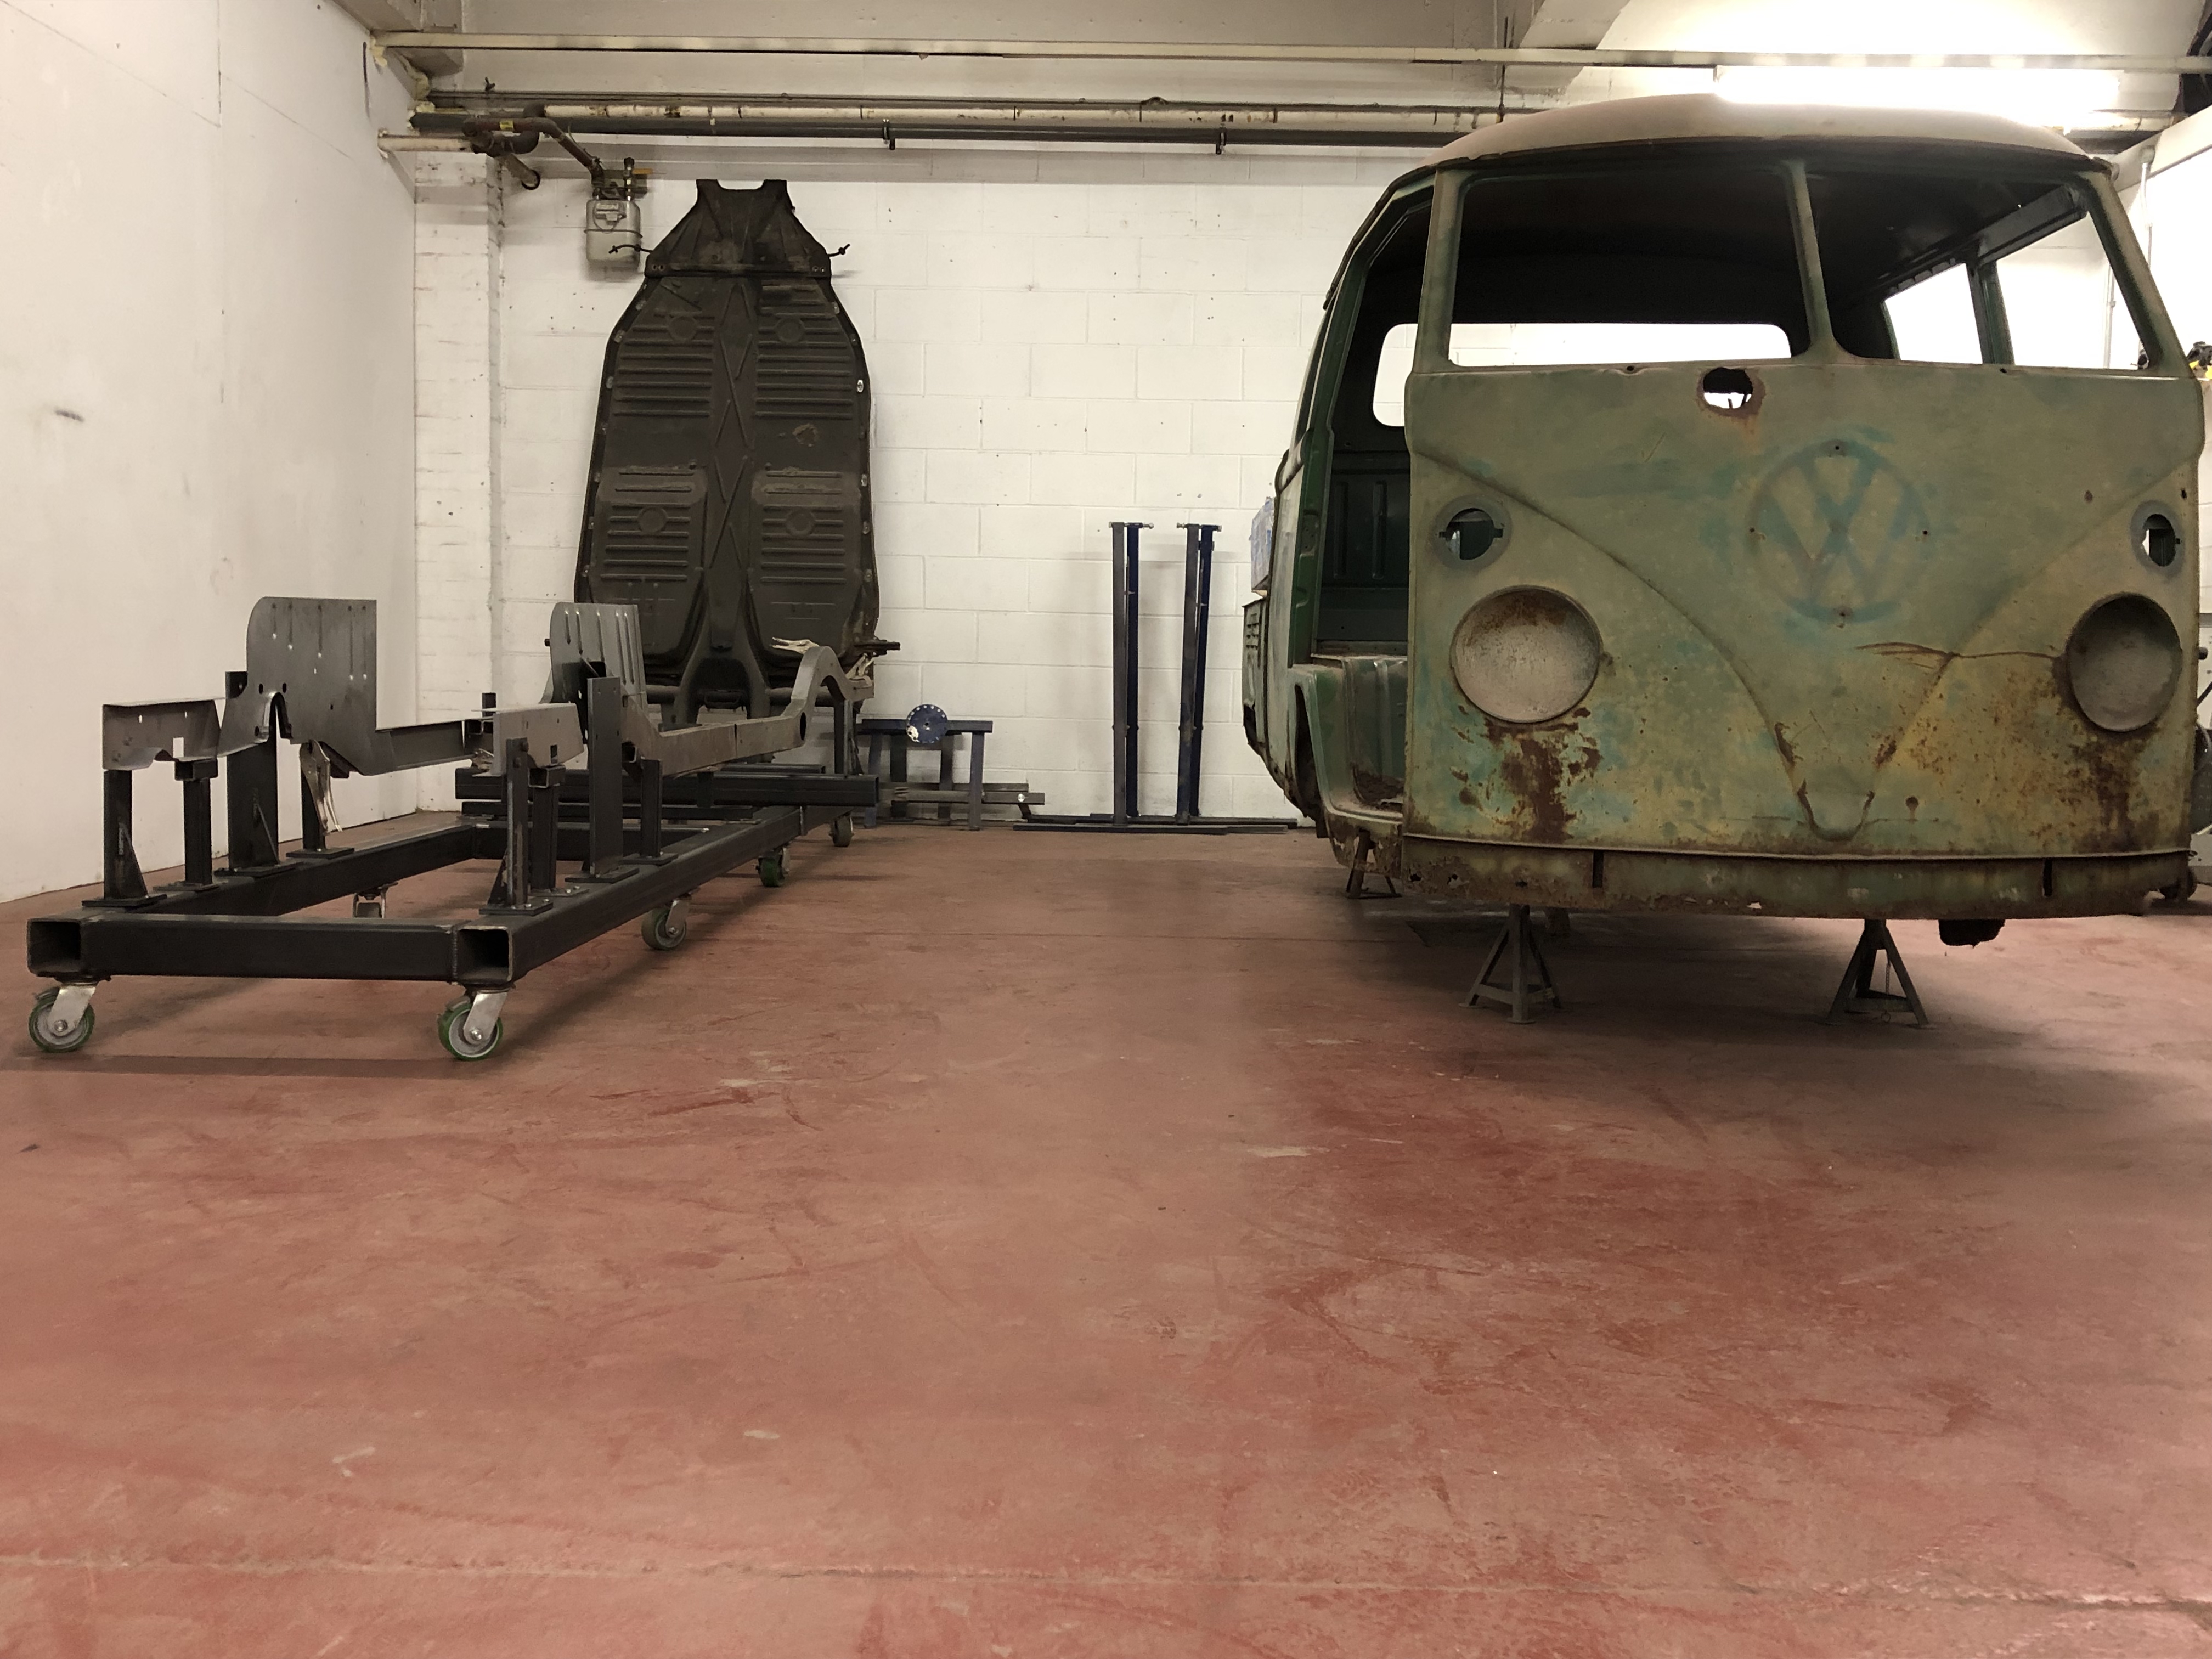
We decided the best way to approach this was to build a new chassis. I had been looking for a Celette or Car O Liner chassis jig for ages but couldnt find one so made one, and had a few brackets cut out which were welded up. We used my 61 split to build the jig and brackets as my chassis is nice and original / straight. Here is the finished jig / brackets, and with the replacement chassis trial fitted to the jig:
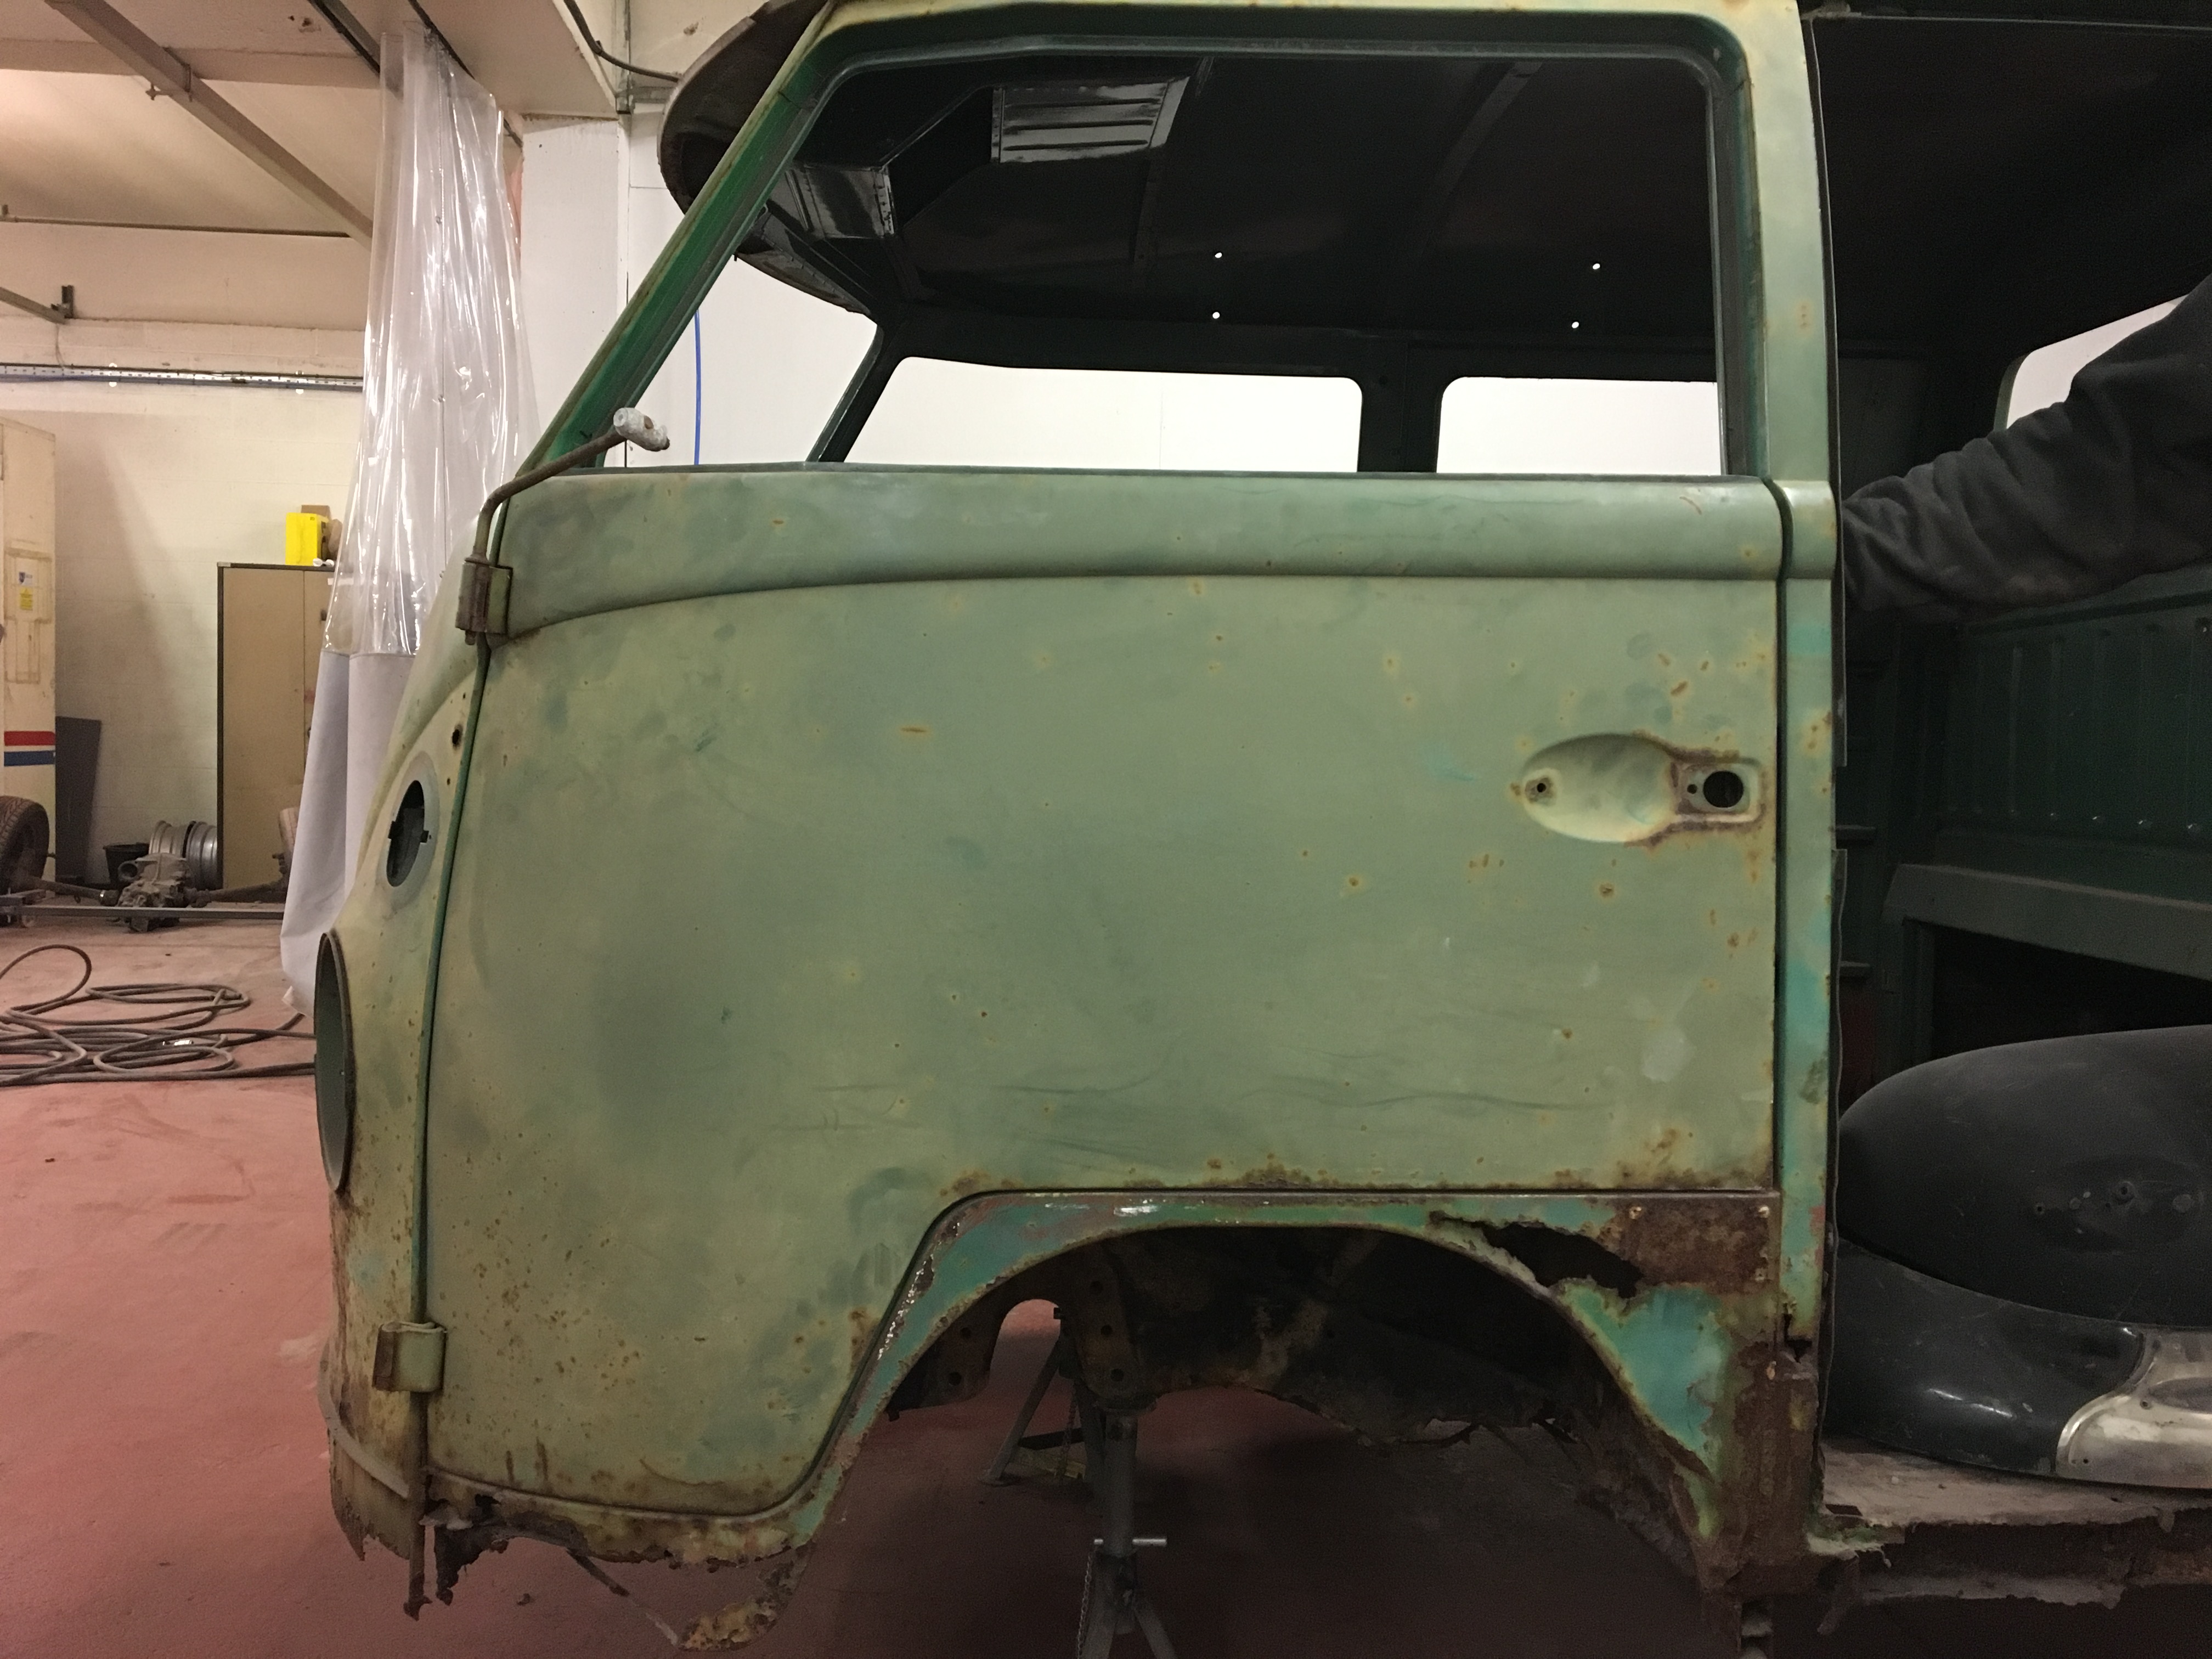
Fitted the cab doors to check the gaps were all good before anything was braced or cut out. They are pretty good considering how bad the rest of the van is. The cargo door and gap needs some work. The door is pretty badly twisted:
Broke up now till the new year and I cant wait to get in and get stuck into this
Mabbo
As you can see, the chassis is in a bad way:


We decided the best way to approach this was to build a new chassis. I had been looking for a Celette or Car O Liner chassis jig for ages but couldnt find one so made one, and had a few brackets cut out which were welded up. We used my 61 split to build the jig and brackets as my chassis is nice and original / straight. Here is the finished jig / brackets, and with the replacement chassis trial fitted to the jig:


Fitted the cab doors to check the gaps were all good before anything was braced or cut out. They are pretty good considering how bad the rest of the van is. The cargo door and gap needs some work. The door is pretty badly twisted:


Broke up now till the new year and I cant wait to get in and get stuck into this
Mabbo
mabbo
SSVC Member
Posts: 80
Joined: Wed Jun 01, 2011 7:09 pm
Re: Swedish 66 Crew Cab
by mabbo » Tue Jan 08, 2019 8:55 pm
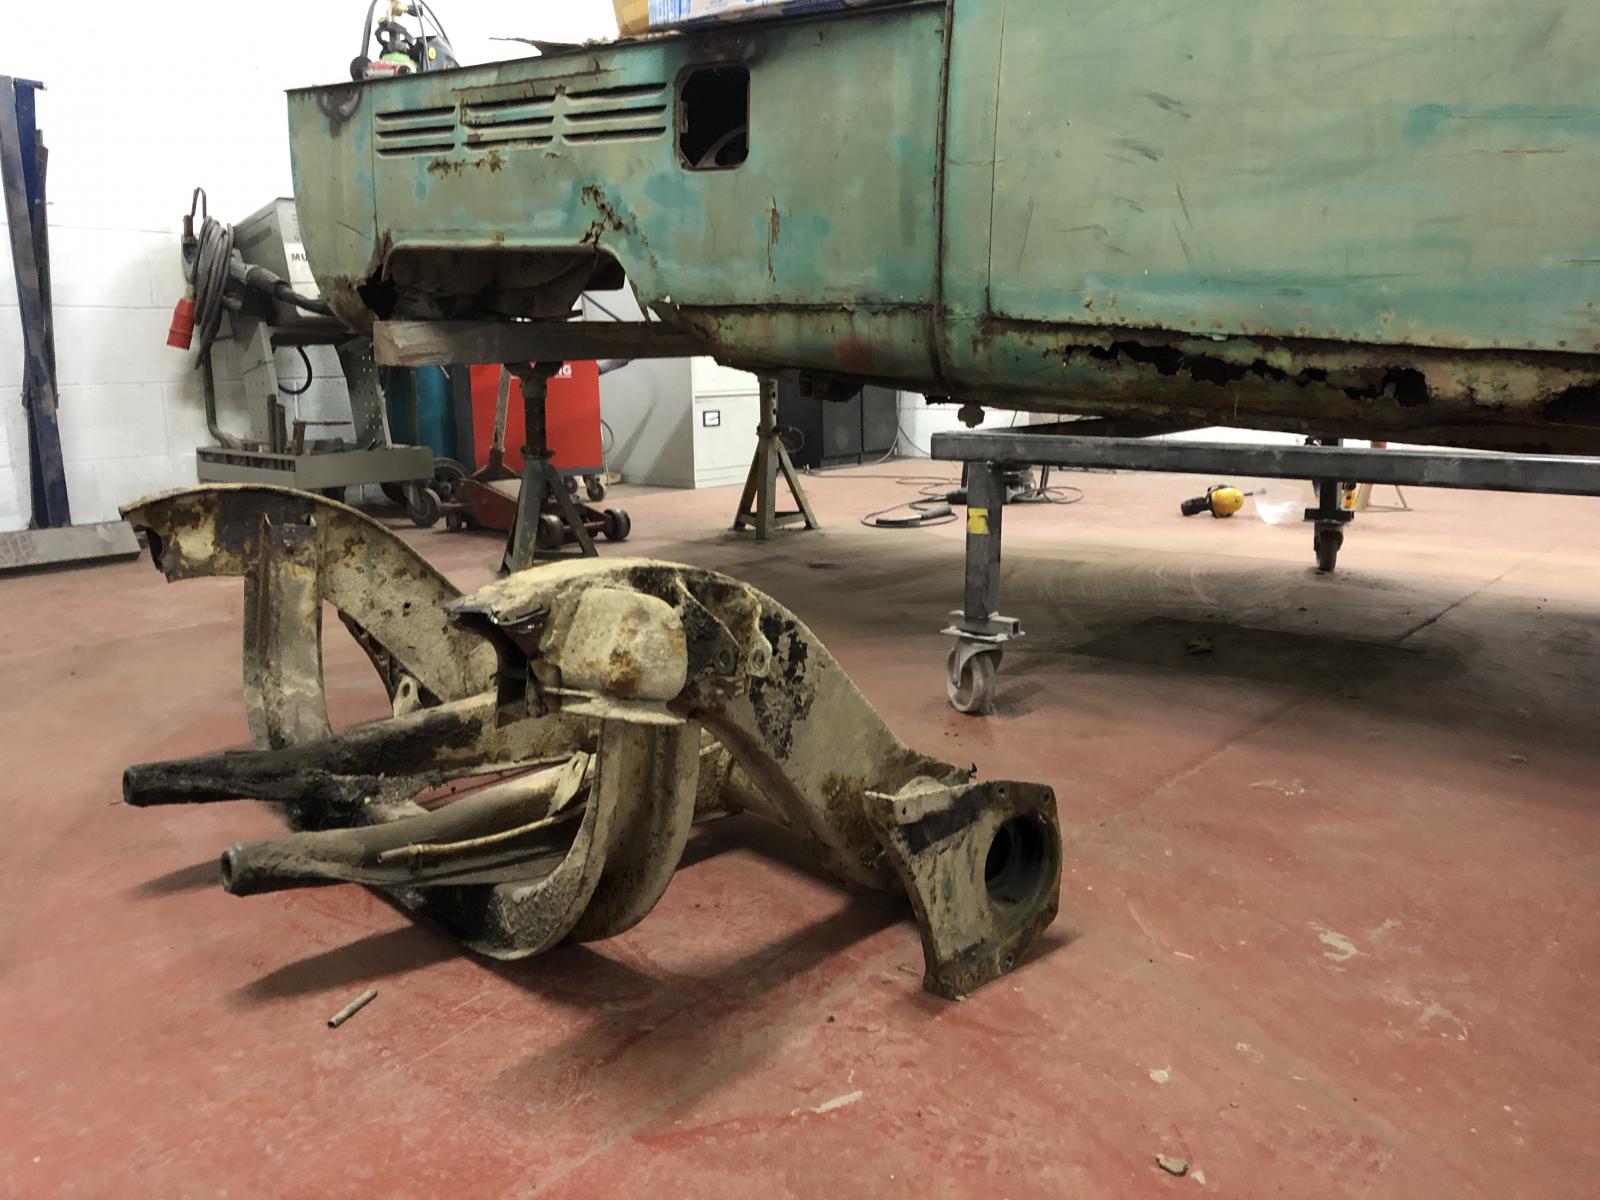
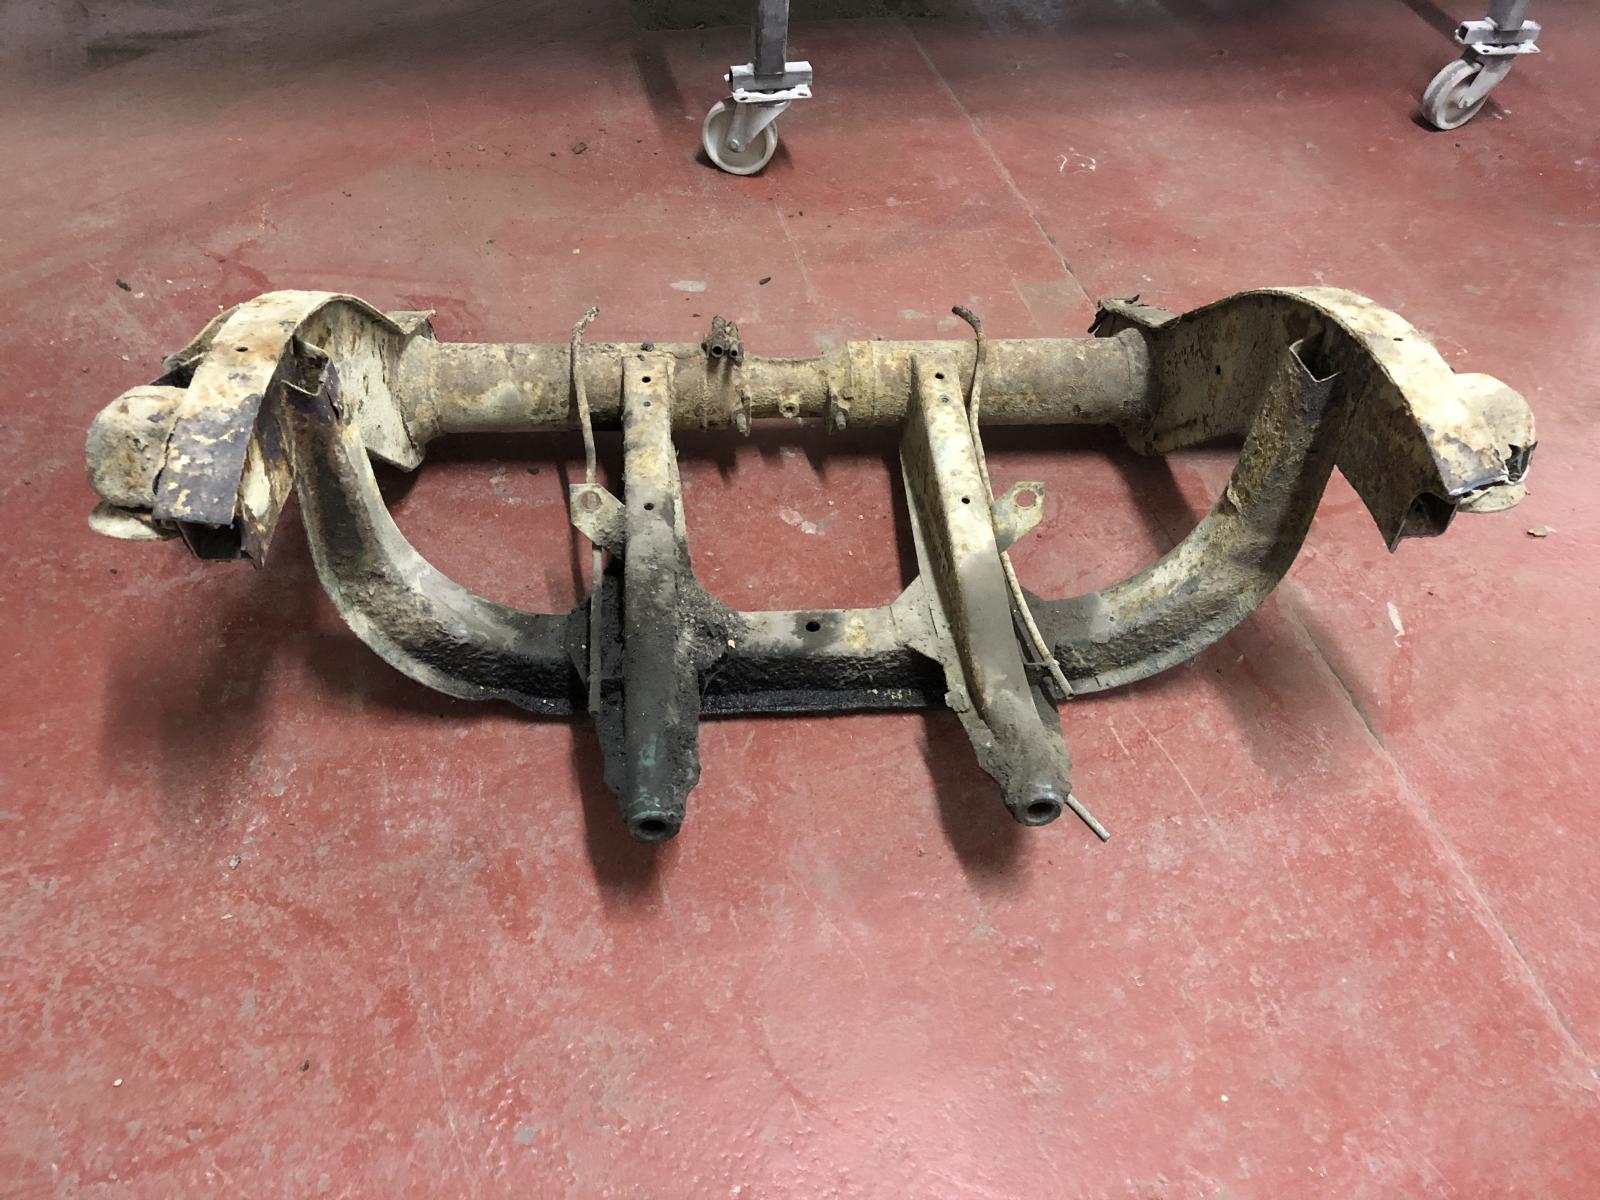
Got the rear chassis section removed:
Started stripping the old chassis rails and handbrake tubes etc off:
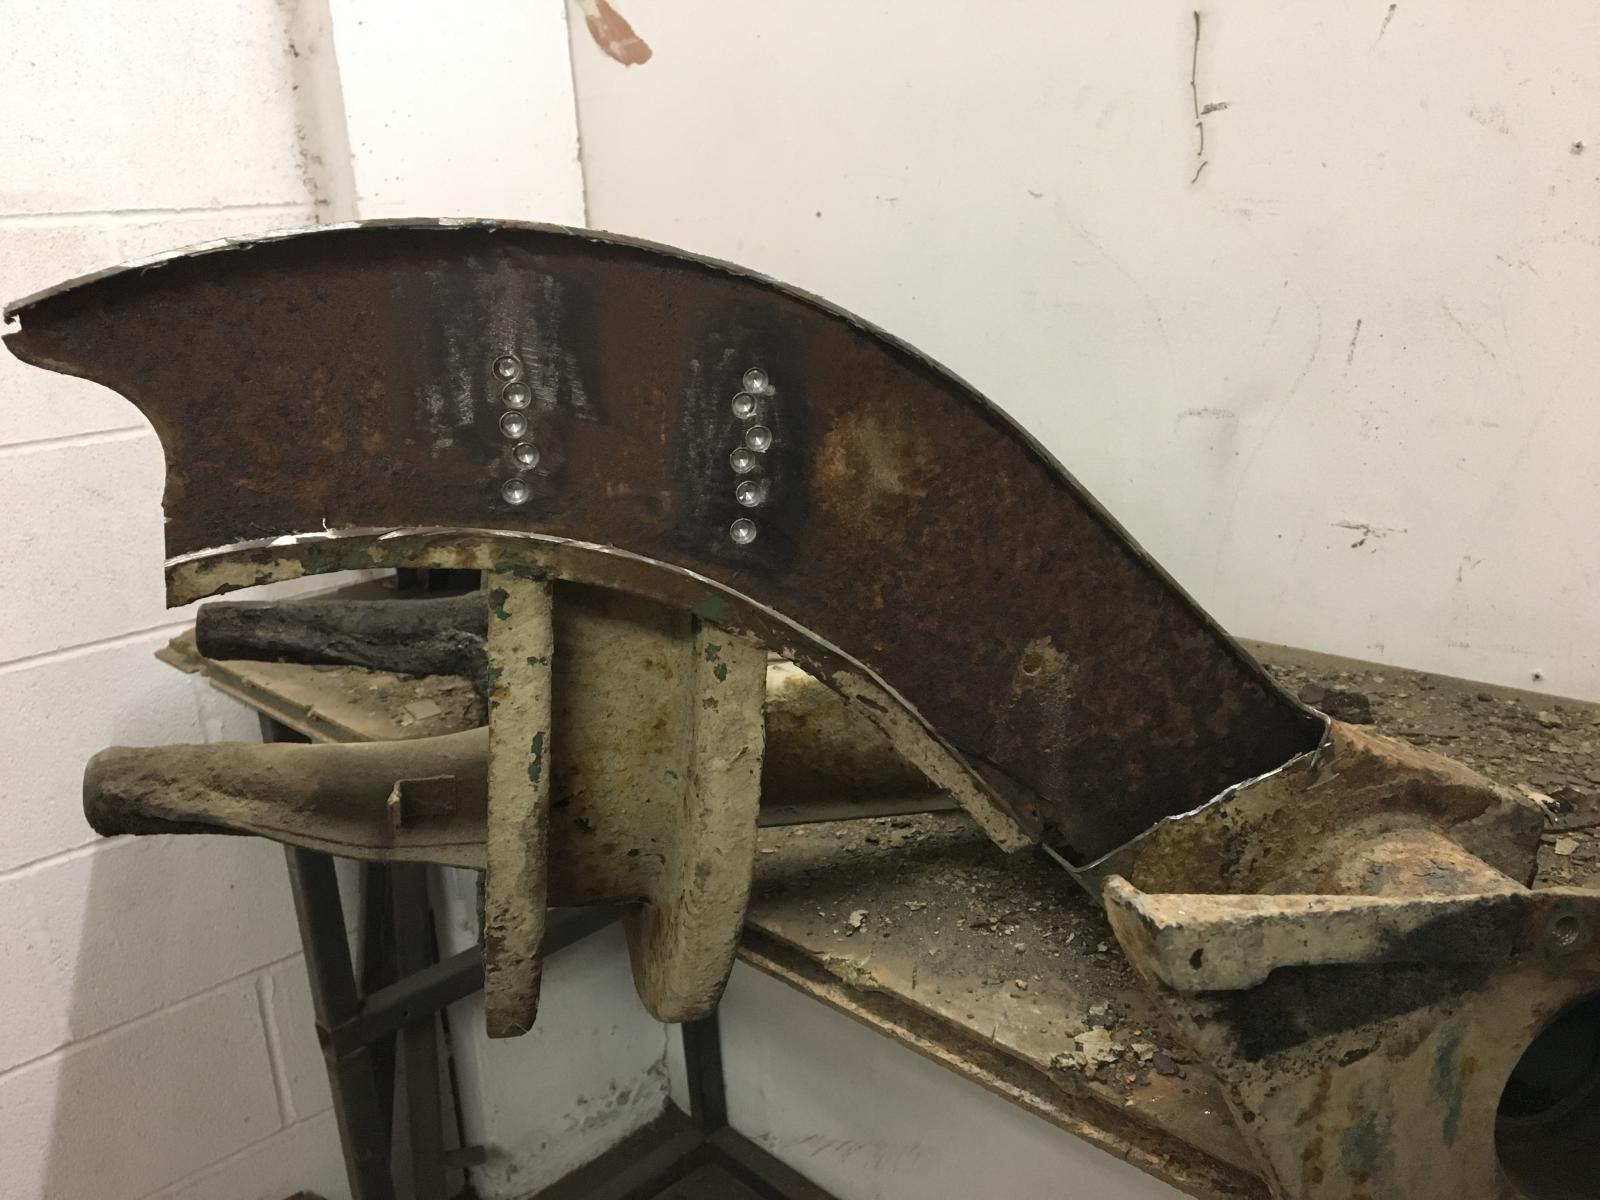
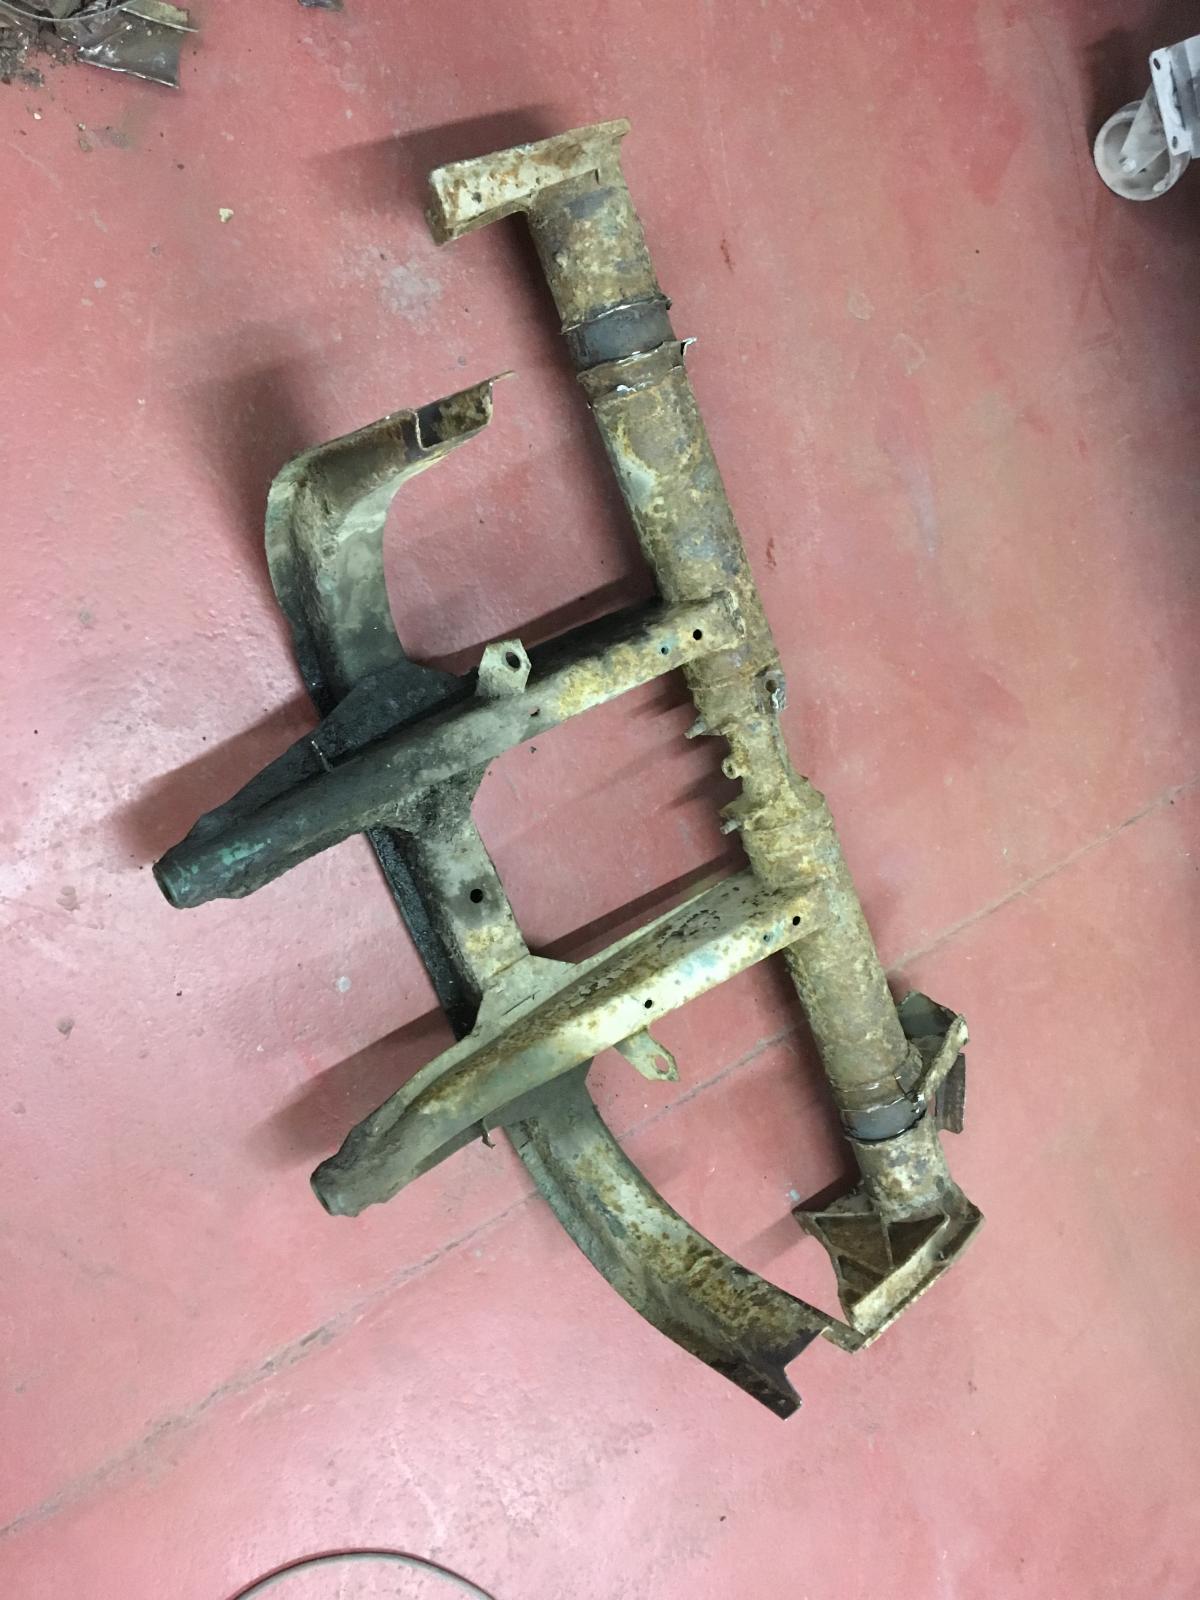
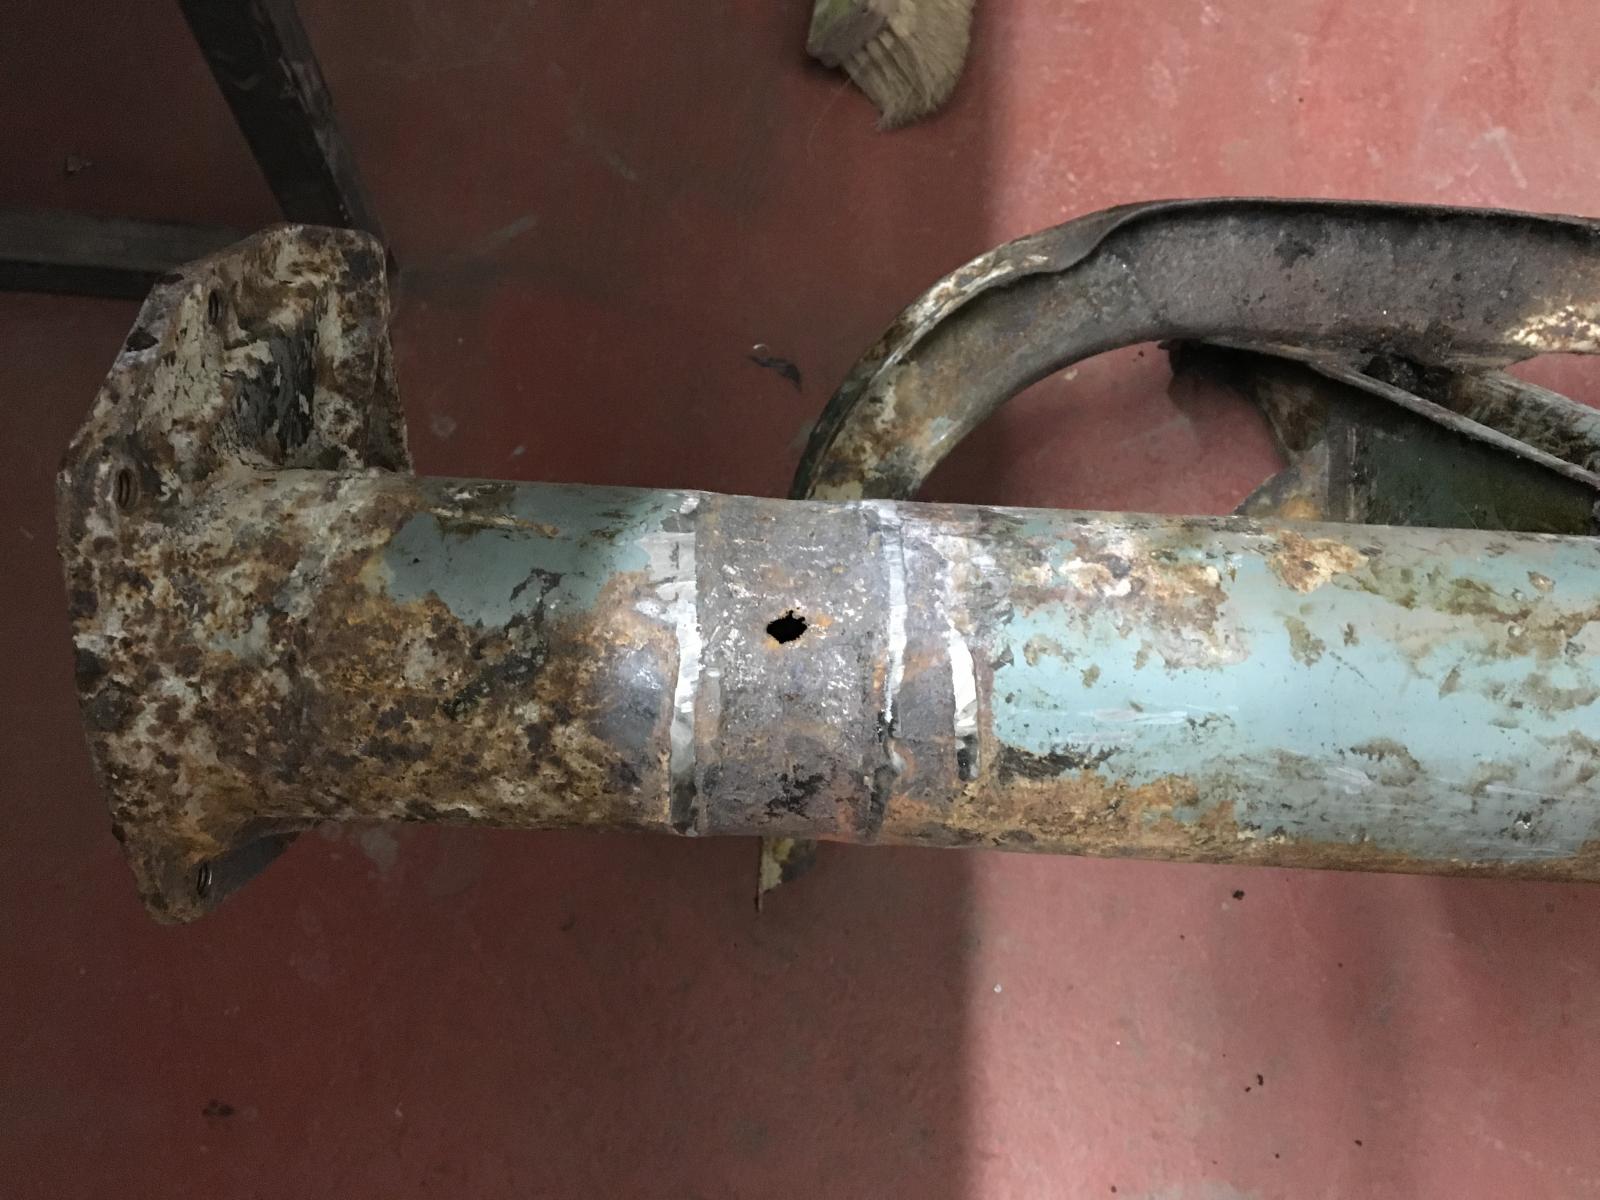
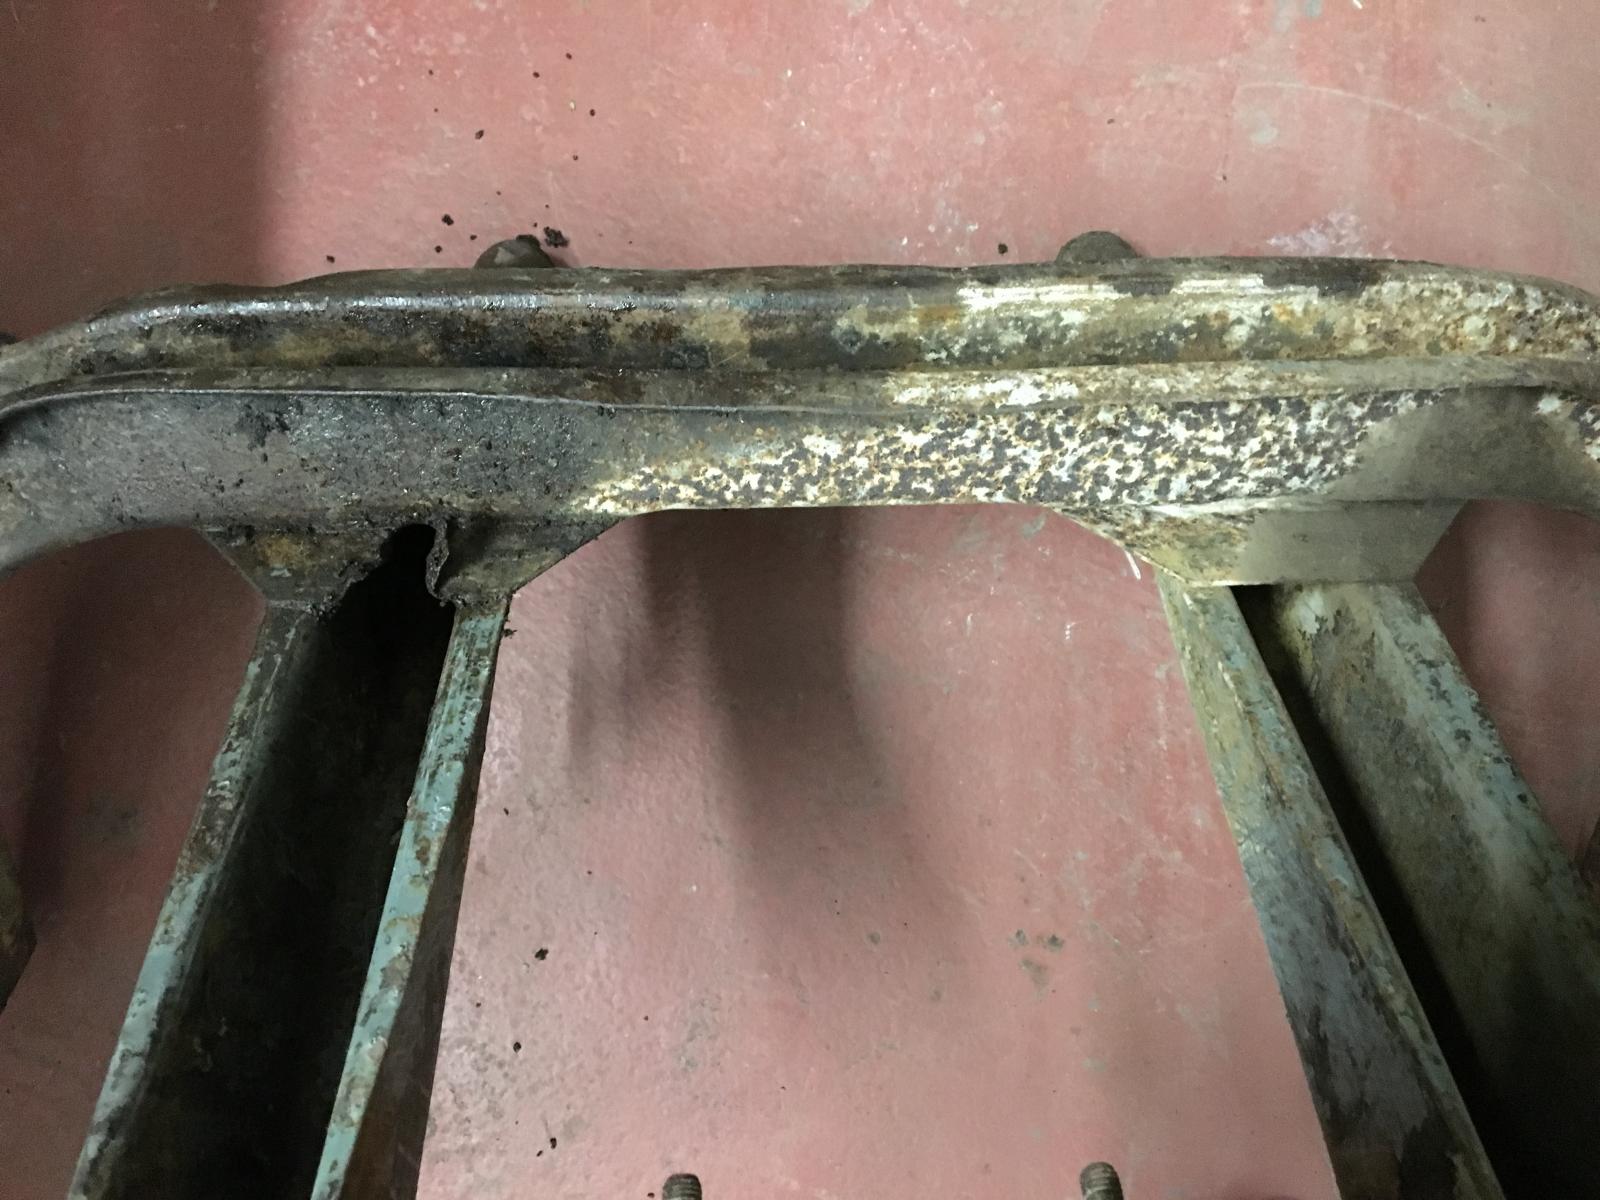
Ready to go to the dippers. Gonna have a few repairs to do though... Was hoping this section was going to be better than it is, oh well:
Should get back on it the end of the week


Started stripping the old chassis rails and handbrake tubes etc off:


Ready to go to the dippers. Gonna have a few repairs to do though... Was hoping this section was going to be better than it is, oh well:


Should get back on it the end of the week
mabbo
SSVC Member
Posts: 80
Joined: Wed Jun 01, 2011 7:09 pm
Re: Swedish 66 Crew Cab
by mabbo » Thu Jan 24, 2019 10:12 pm
Moved onto removing the front section of chassis.
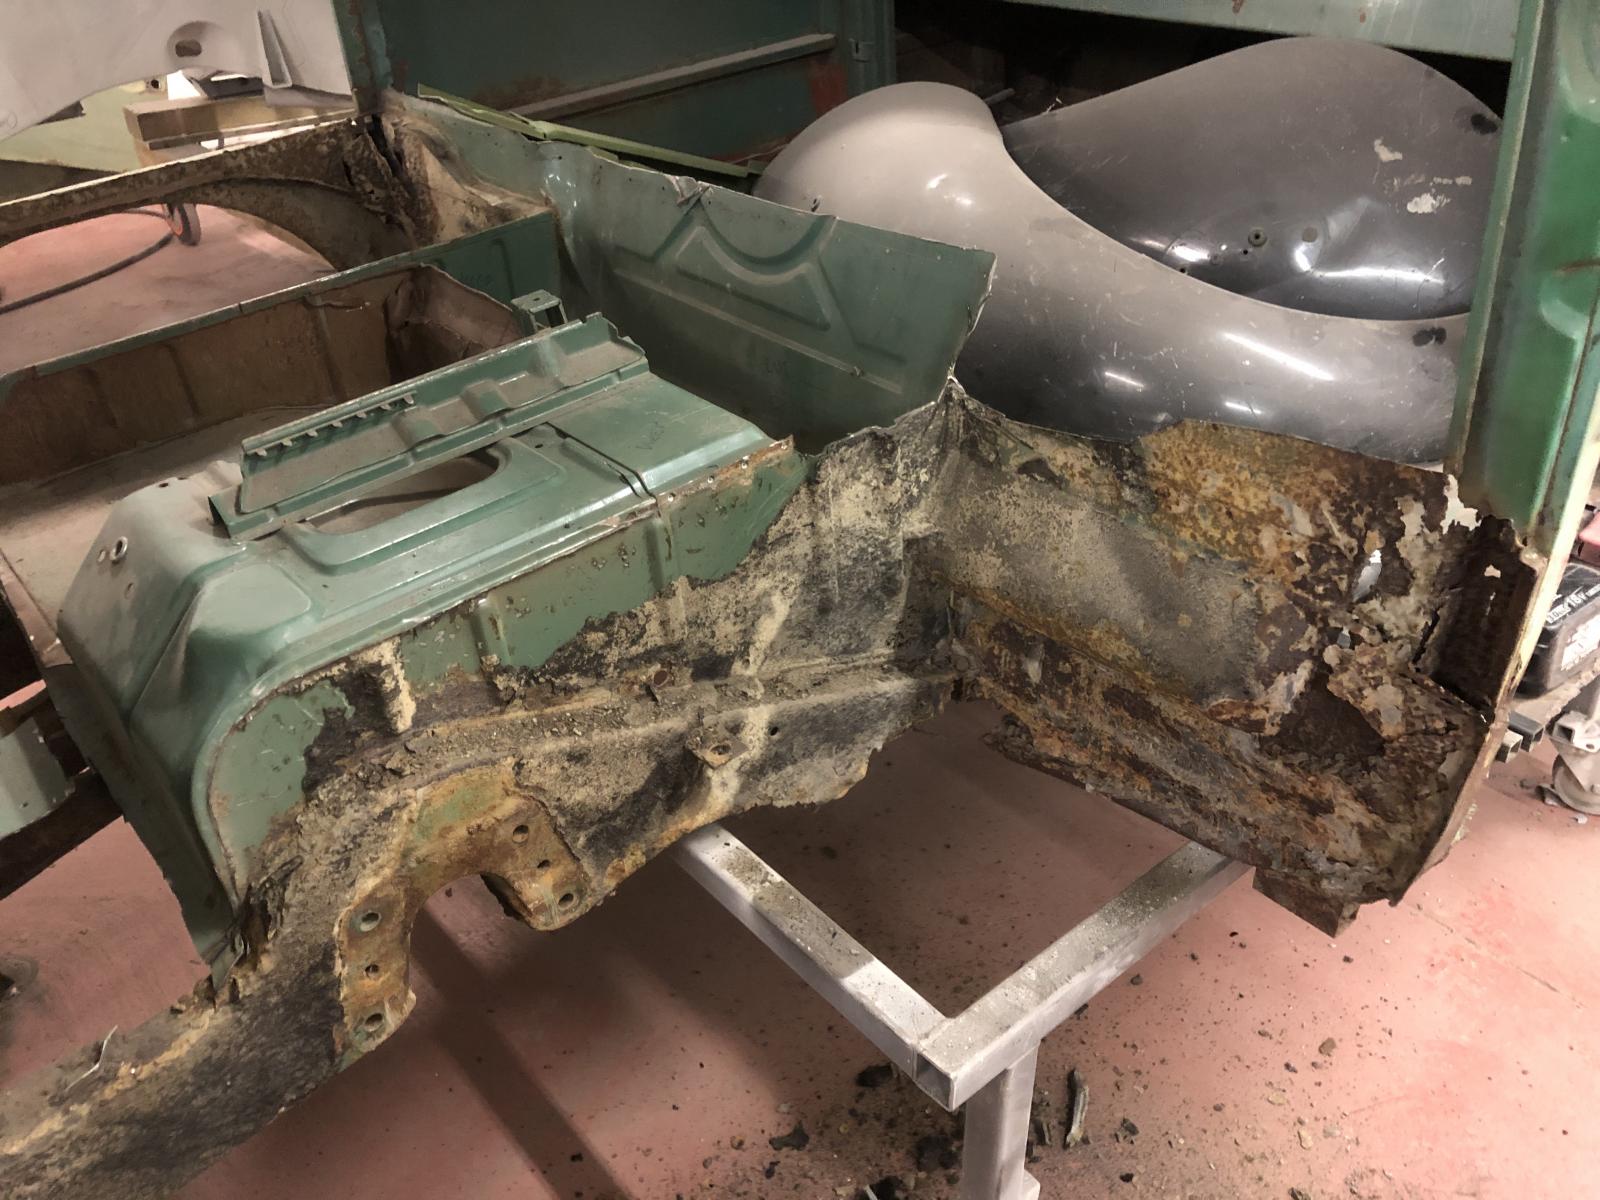
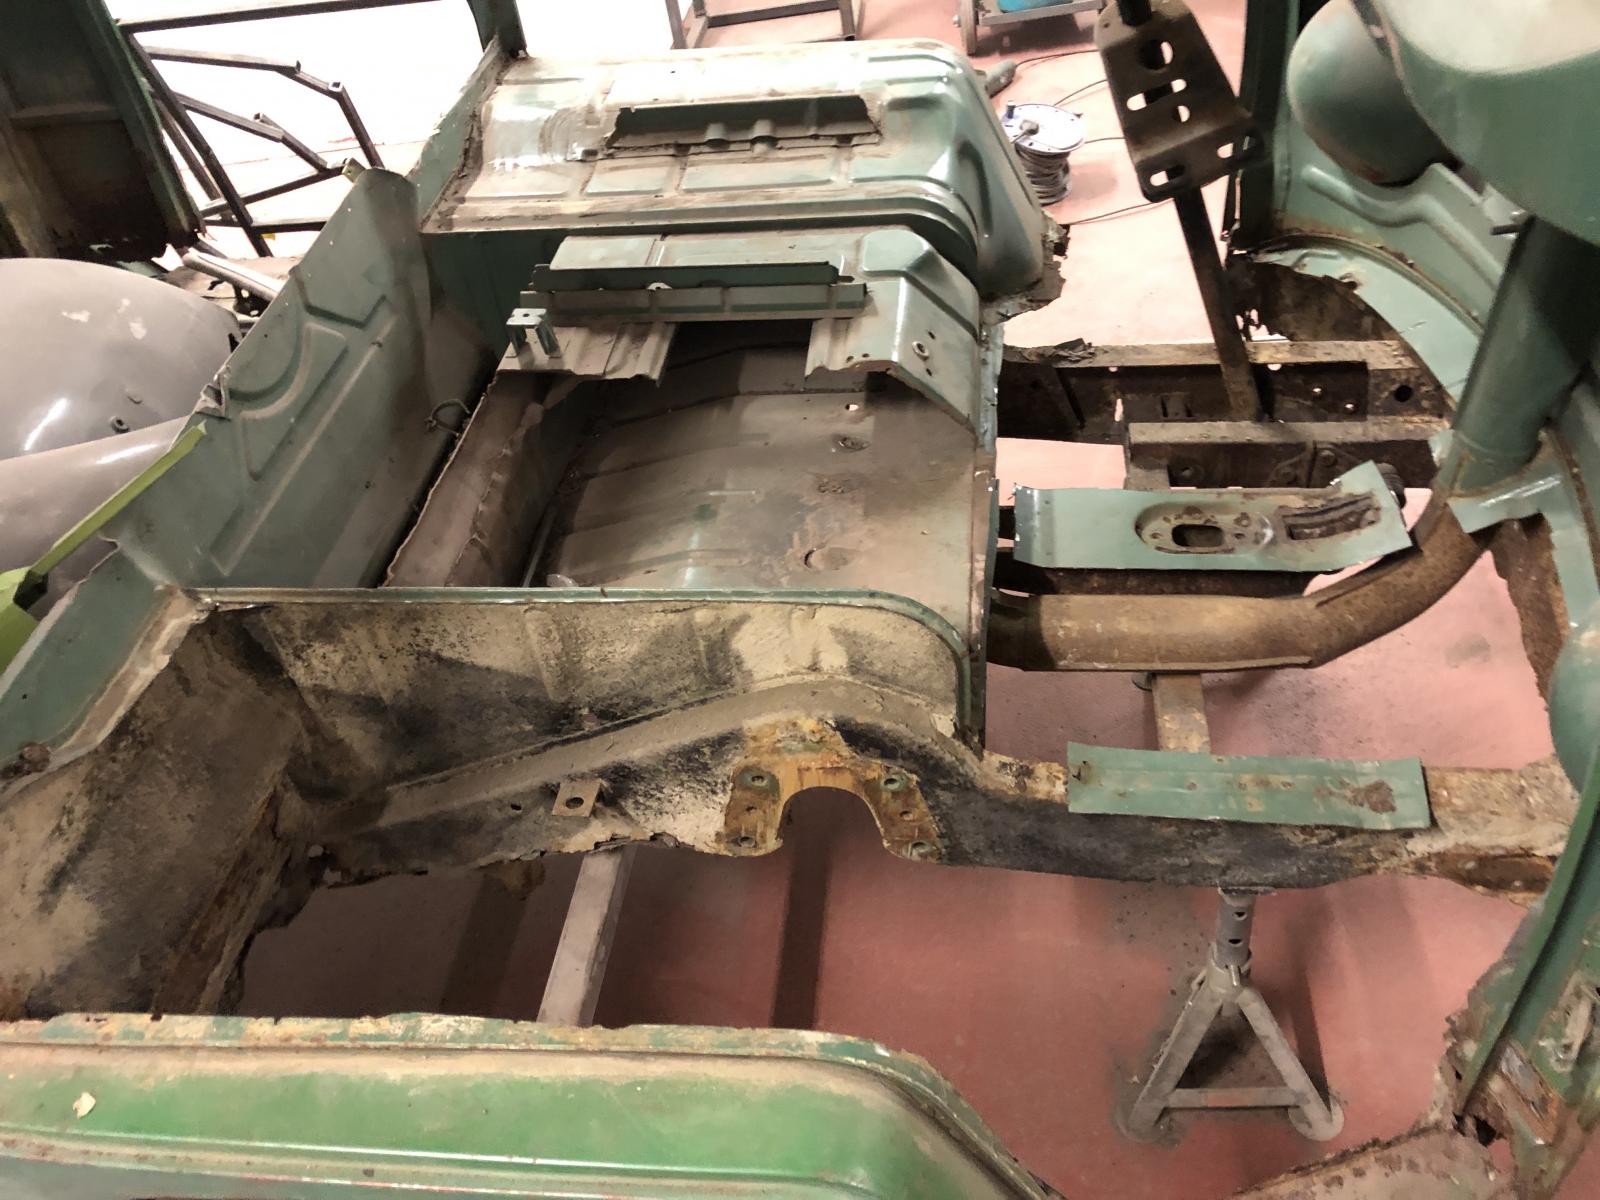
Got the doglegs, tubs and cab floor out. They needed replacing and were in the way. Bulkhead needs a bit of work too:
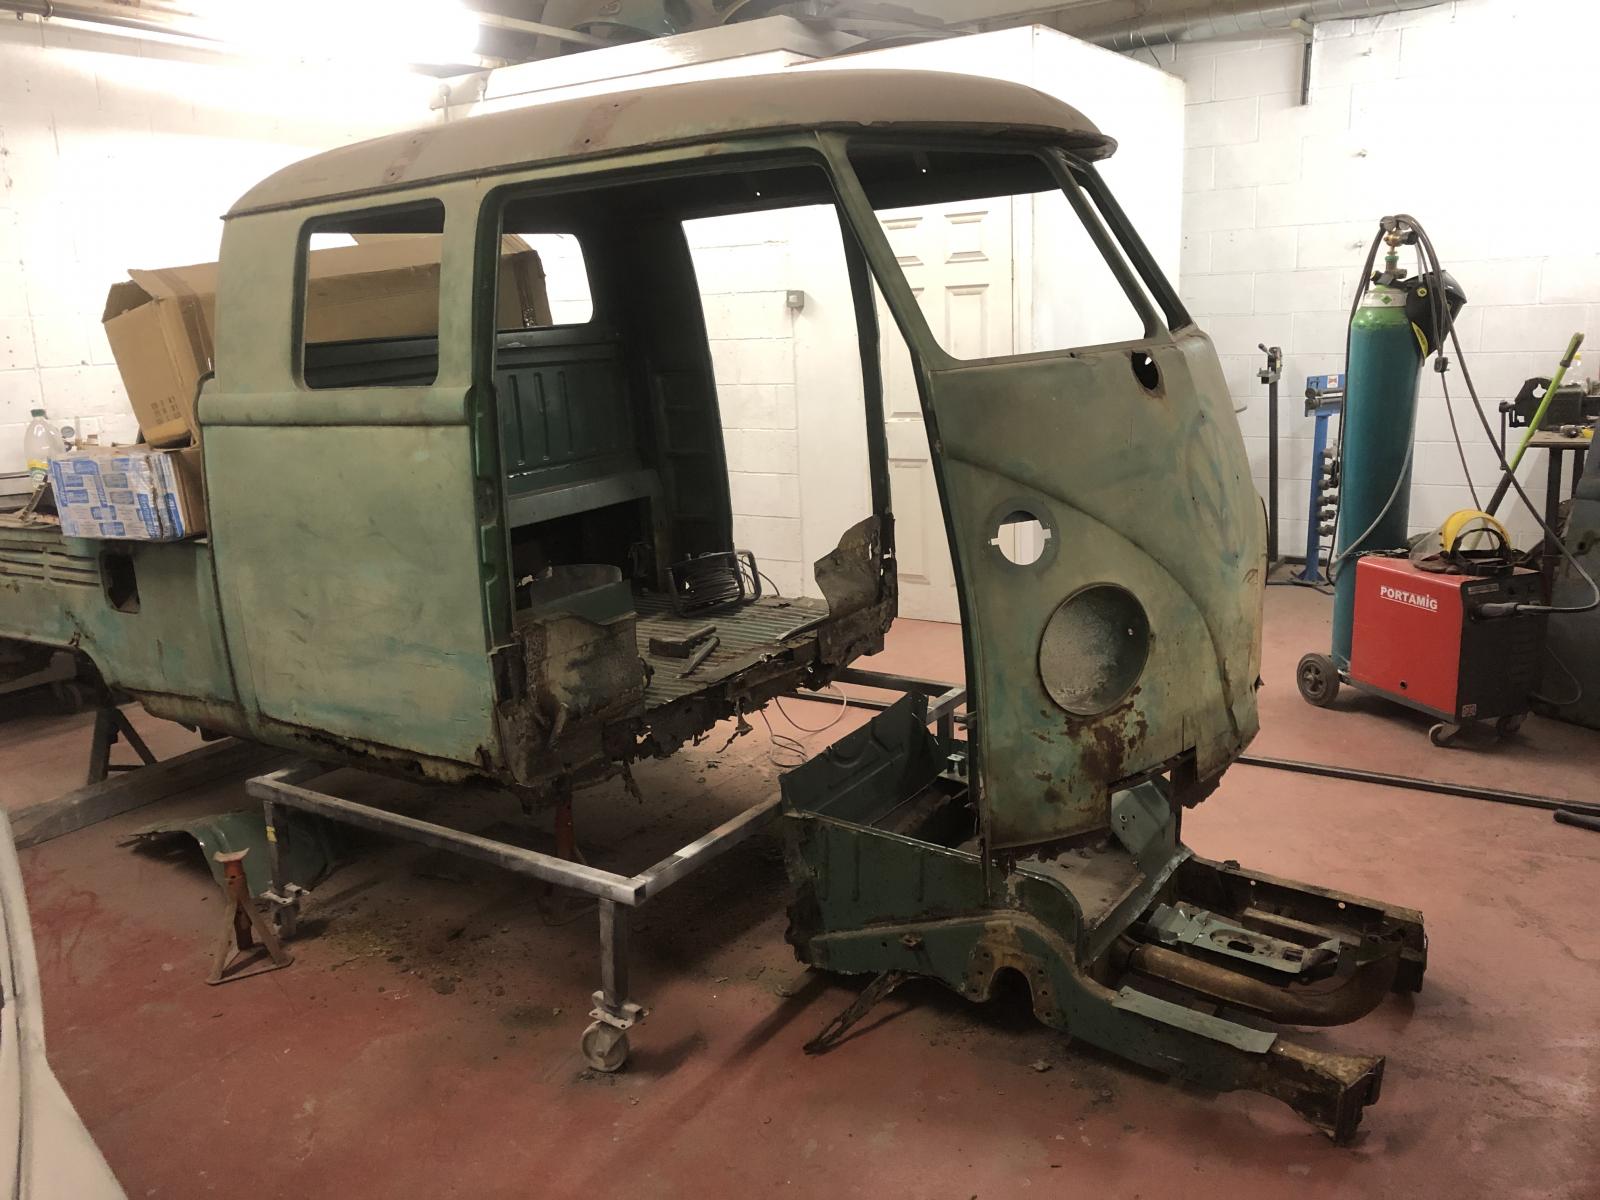
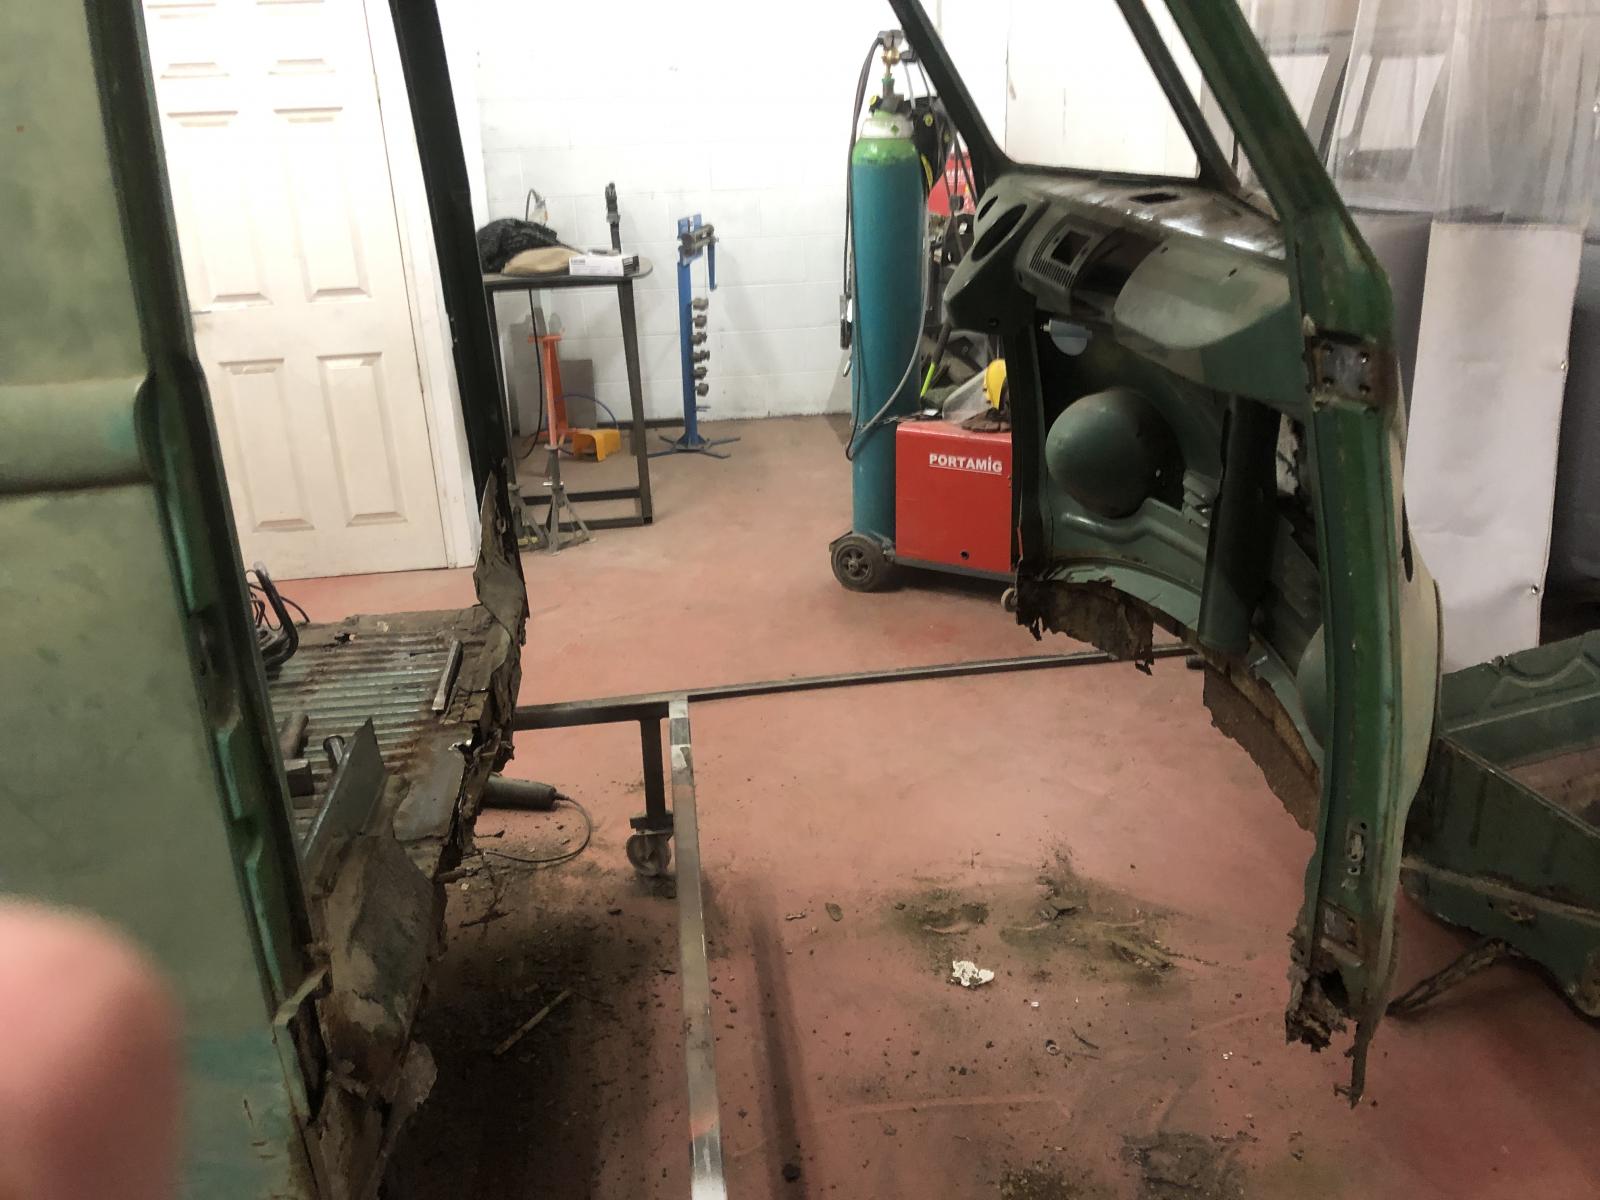
Then got the front chassis section out:
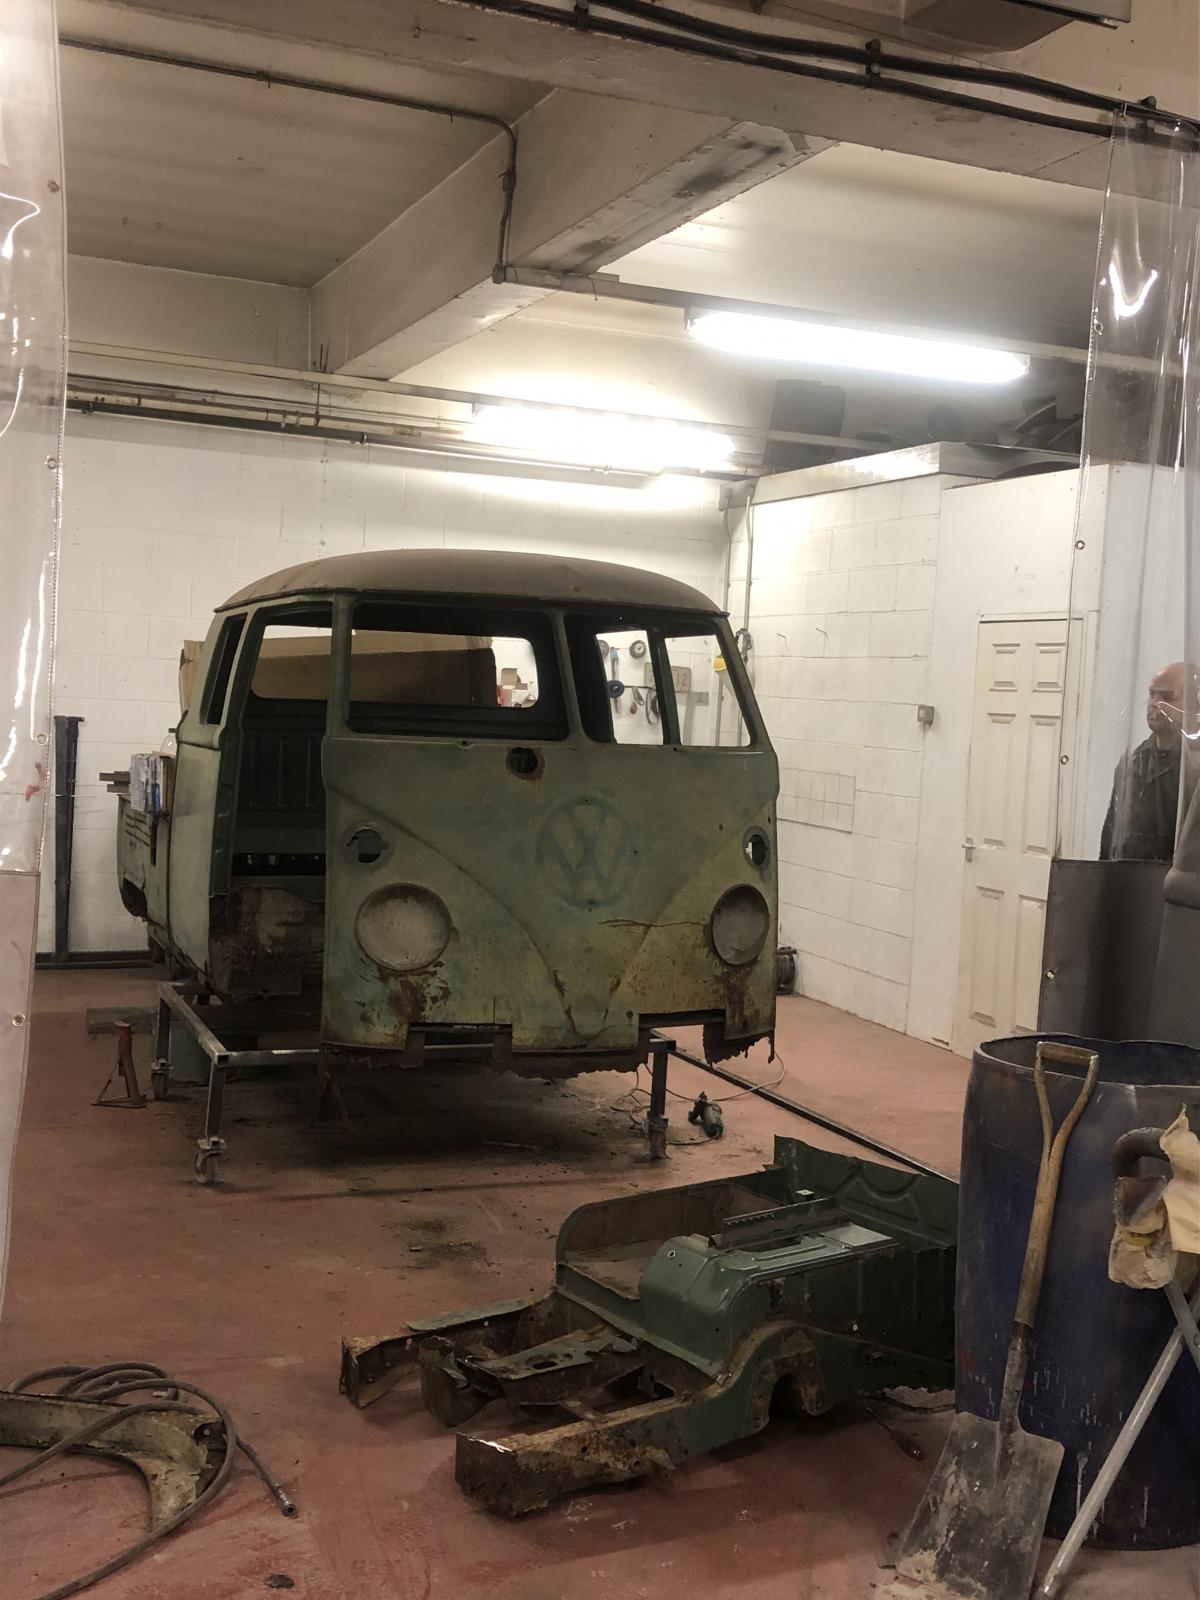
Need to get this cleaned up and off to be blasted ready to fit to the new chassis rails.

Got the doglegs, tubs and cab floor out. They needed replacing and were in the way. Bulkhead needs a bit of work too:


Then got the front chassis section out:


Need to get this cleaned up and off to be blasted ready to fit to the new chassis rails.
mabbo
SSVC Member
Posts: 80
Joined: Wed Jun 01, 2011 7:09 pm
Re: Swedish 66 Crew Cab
by vwJim » Fri Jan 25, 2019 8:28 am
Great to see another resto place taking the effort to build a chassis jig.
vwJim
SSVC Committee Member
Posts: 20060
Joined: Thu Apr 24, 2003 6:05 pm
Re: Swedish 66 Crew Cab
by markp » Fri Jan 25, 2019 10:55 pm
I think you'll find few people who would be happy to rent that jig once you have finished with it
Looks fab ..... good luck and ENJOY !!!!!!
Mark
Looks fab ..... good luck and ENJOY !!!!!!
Mark
markp
SSVC Member
Posts: 4955
Joined: Wed Jul 20, 2011 9:56 pm
Re: Swedish 66 Crew Cab
by mabbo » Tue Jan 29, 2019 3:41 pm
I was originally looking for a Celette or car-o-liner or similar. I missed out on one, and all the others I found were complete with the dozer that Im not too fussed about, and they were all really expensive... Building my own took ages but Im pretty pleased with it. All the brackets are removable so I can use it on Bays and Beetles too when I get around to making more brackets
mabbo
SSVC Member
Posts: 80
Joined: Wed Jun 01, 2011 7:09 pm
Re: Swedish 66 Crew Cab
by mabbo » Tue Jan 29, 2019 3:43 pm
Cheers Mark. Looks like your making good progress on your Beetle
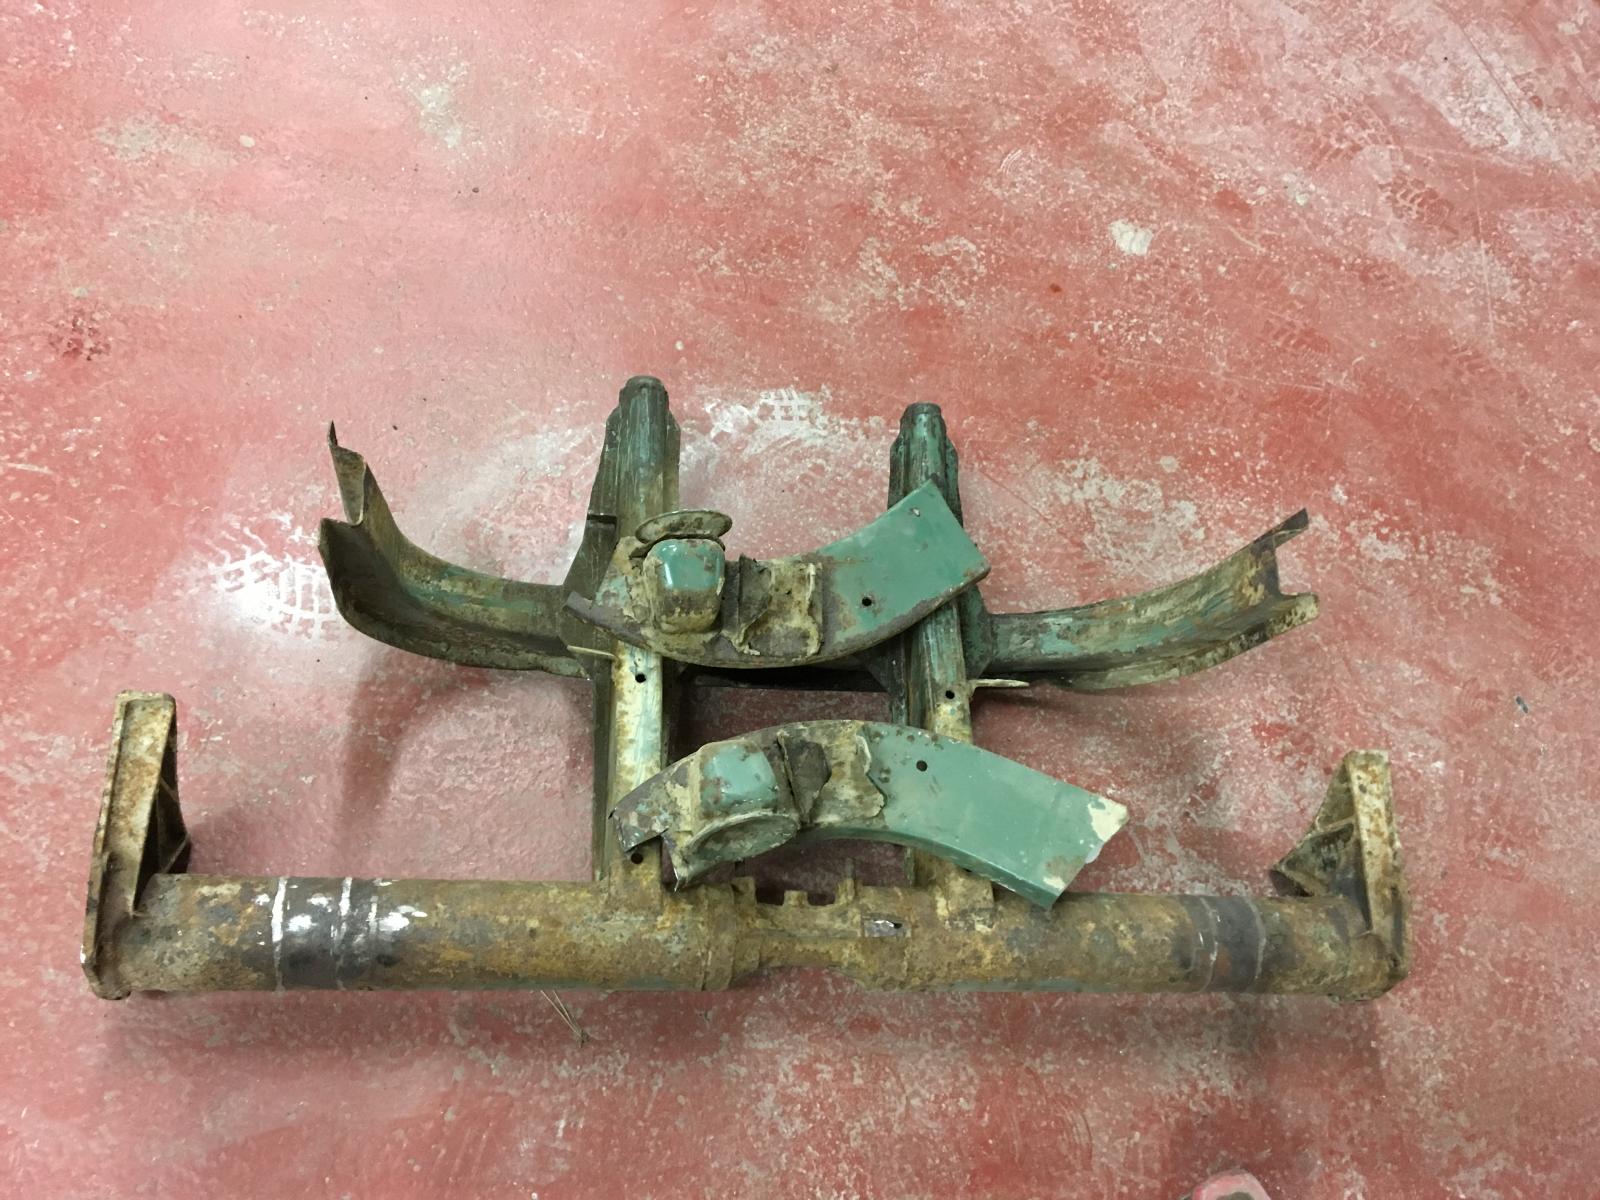
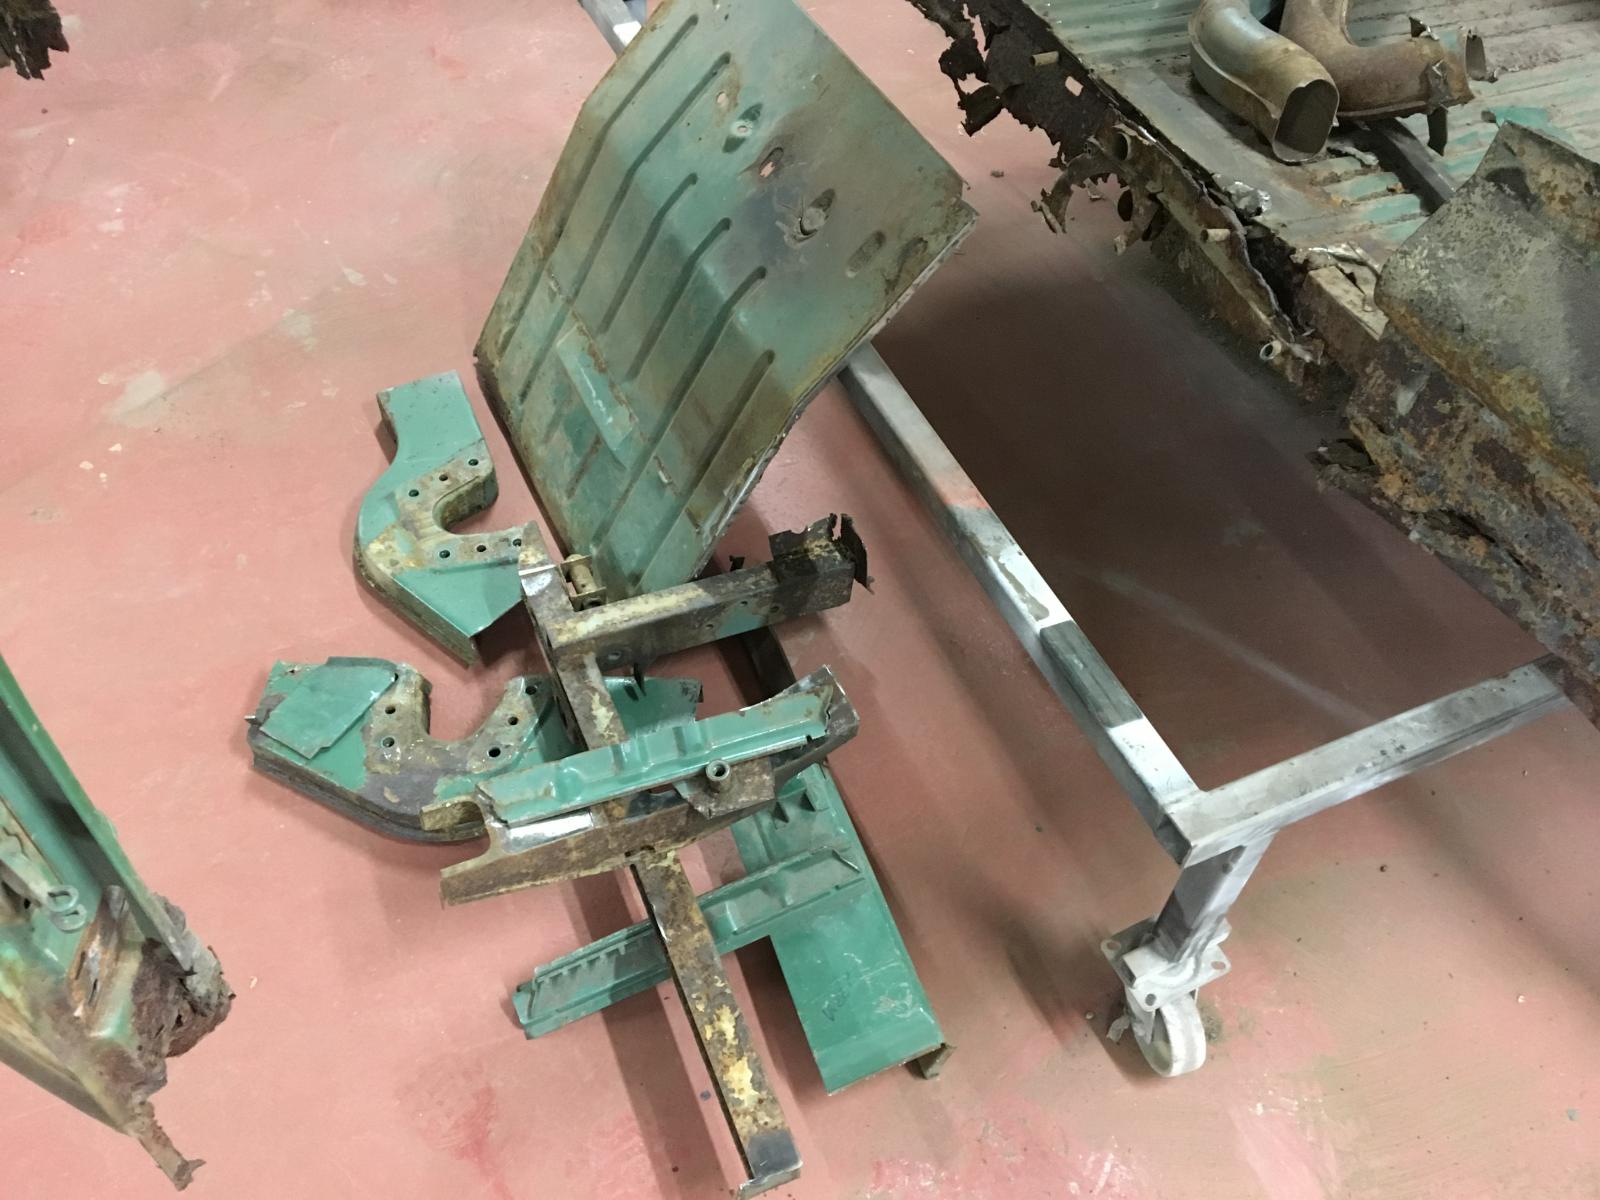
I got all the original parts that will be reused from the chassis ready for blasting.
Rear parts:
Front parts:
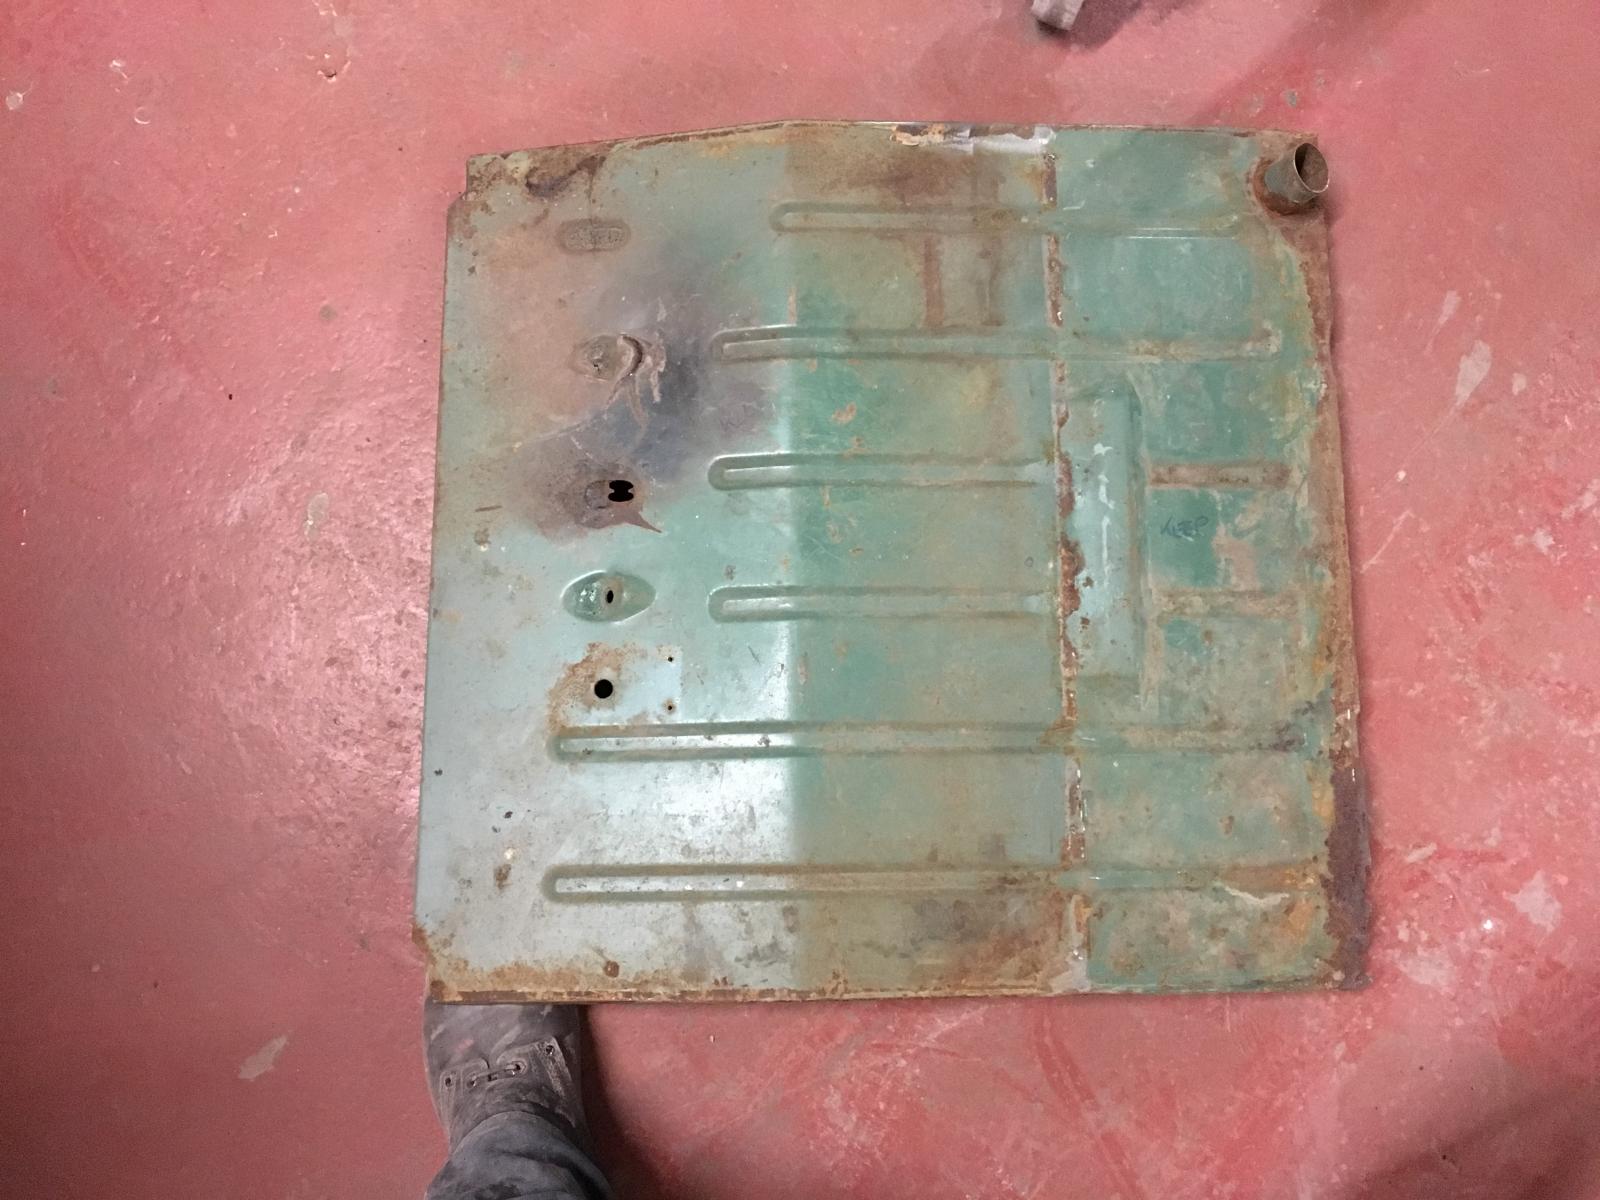
The floor section was better than I thought it would be, hopefully its just a small repair at the back corner needed:
The beam mount sections are going to need some work though:
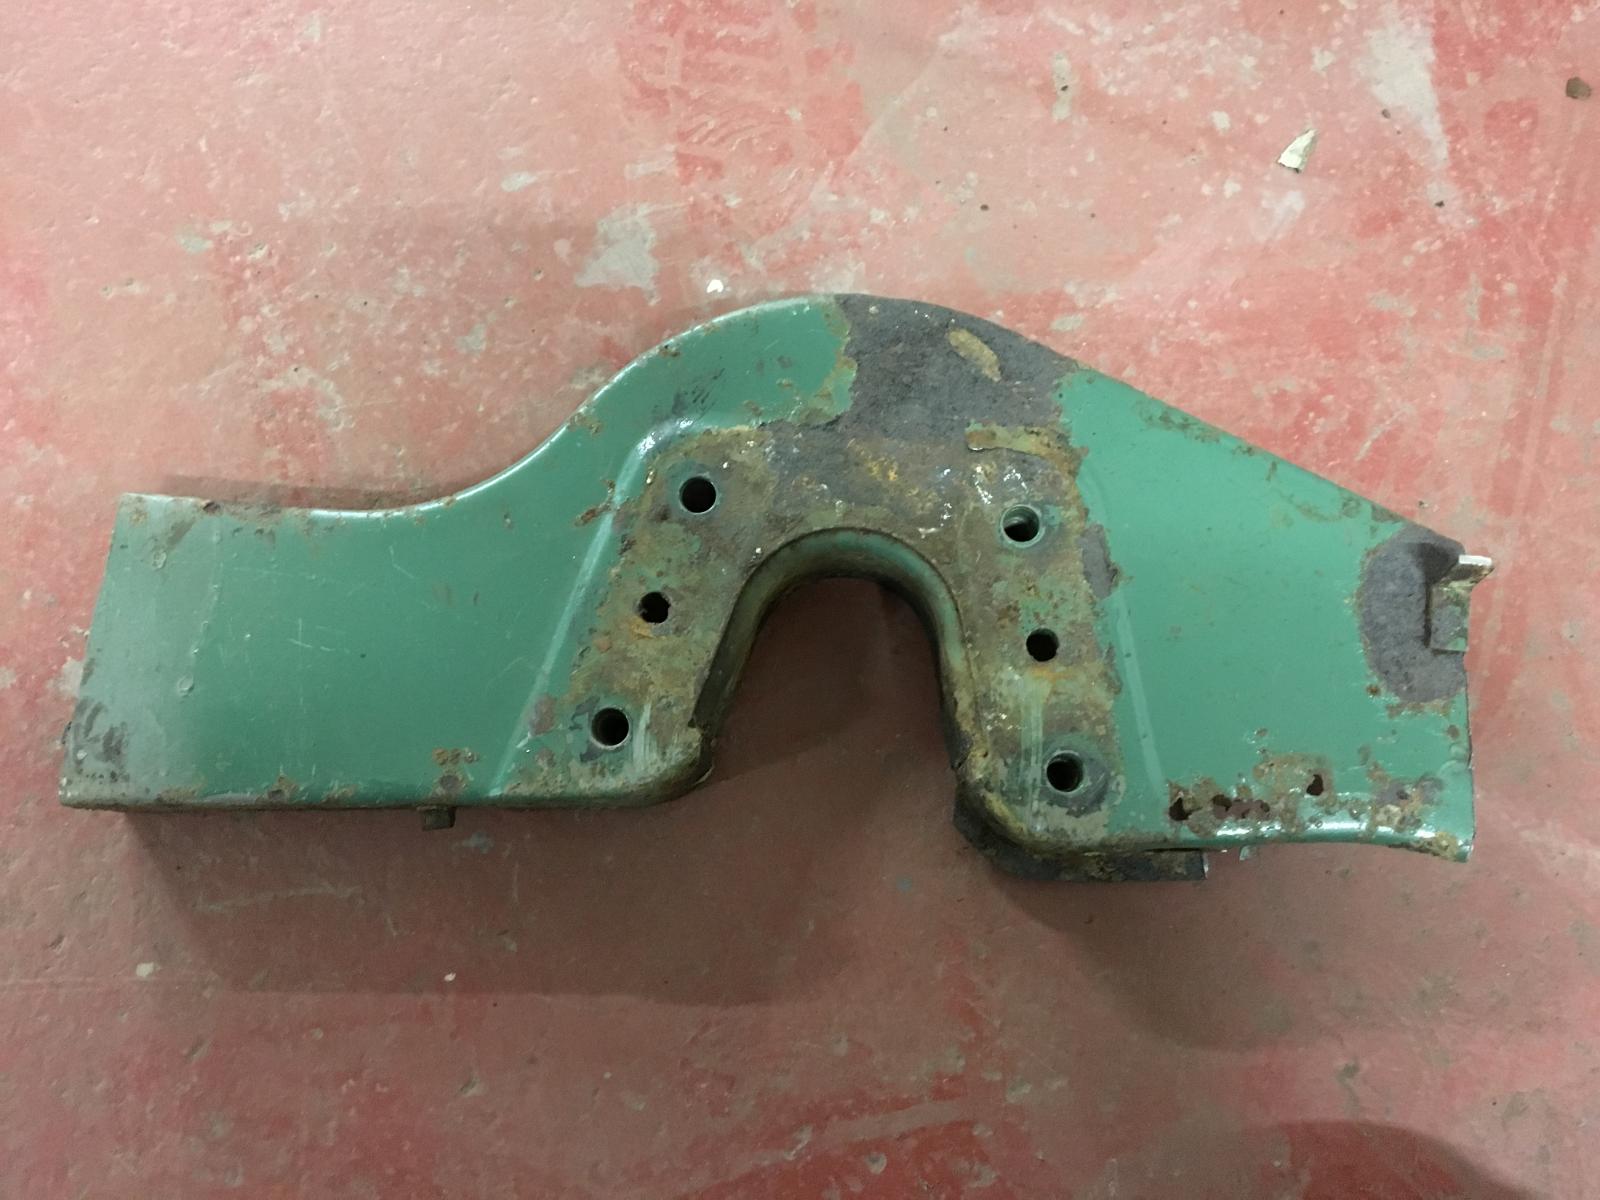
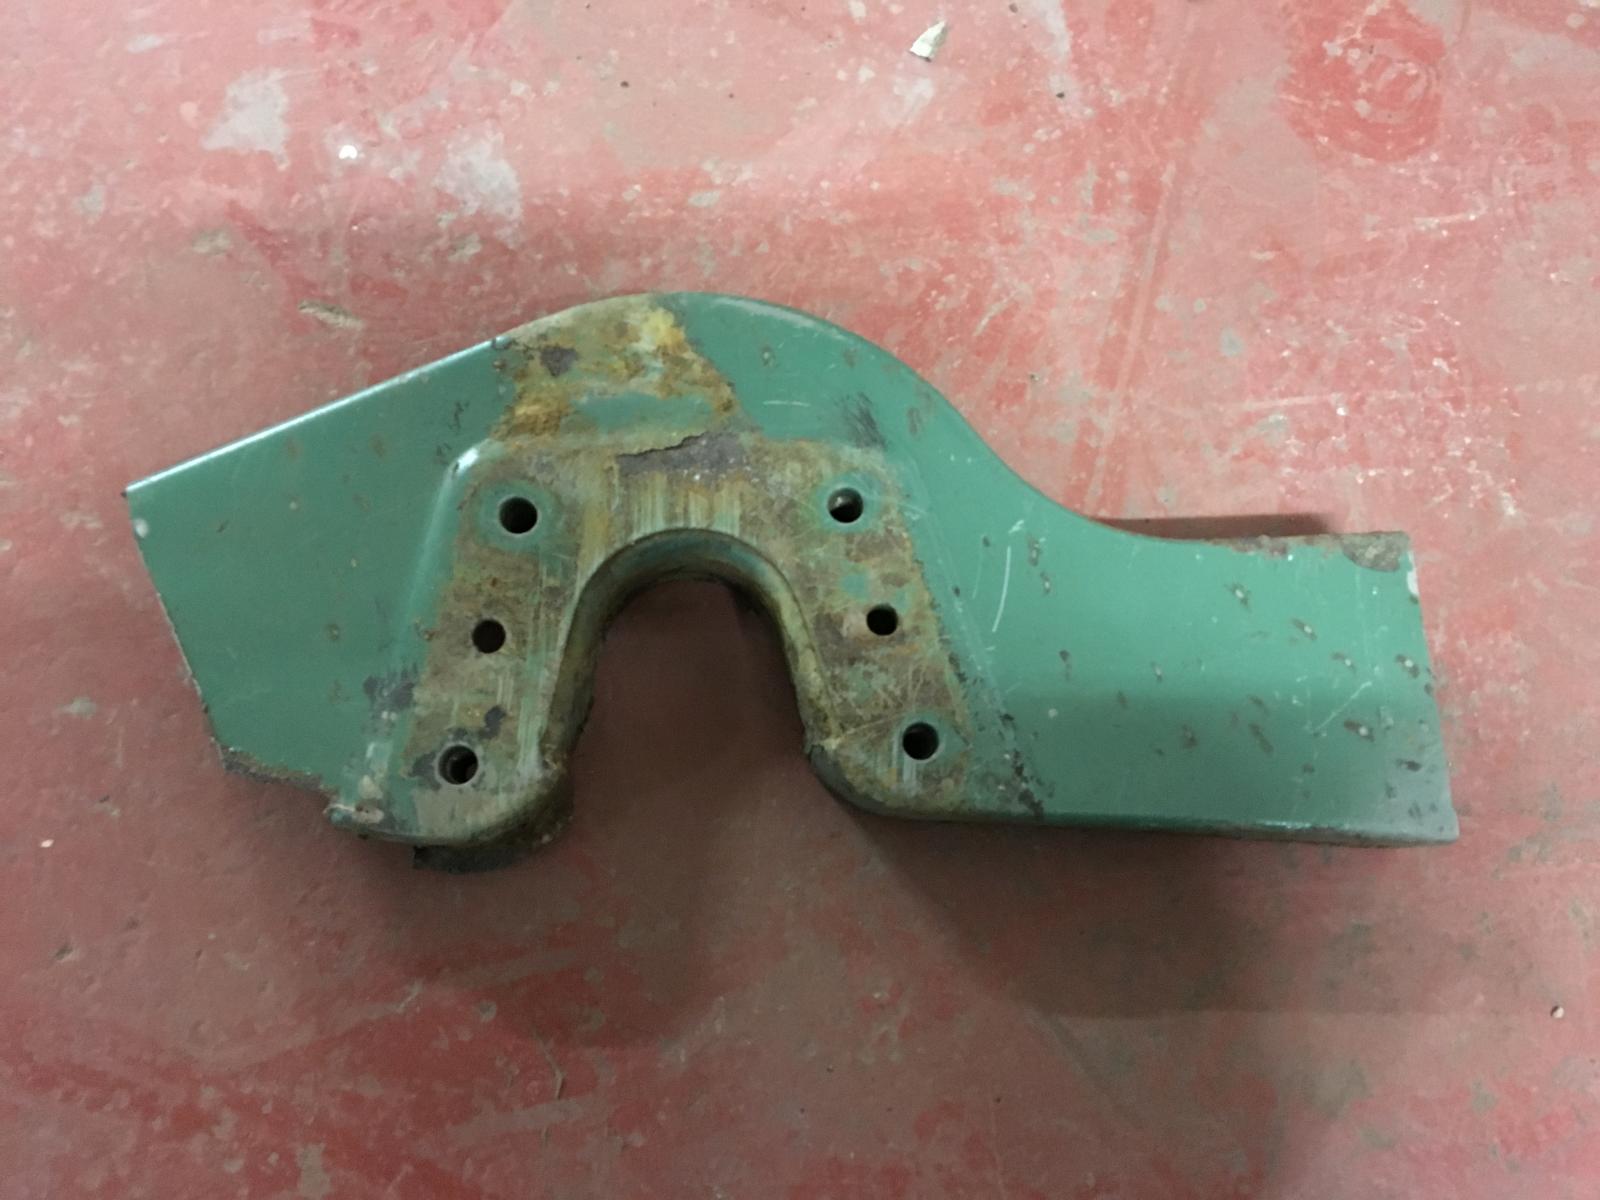
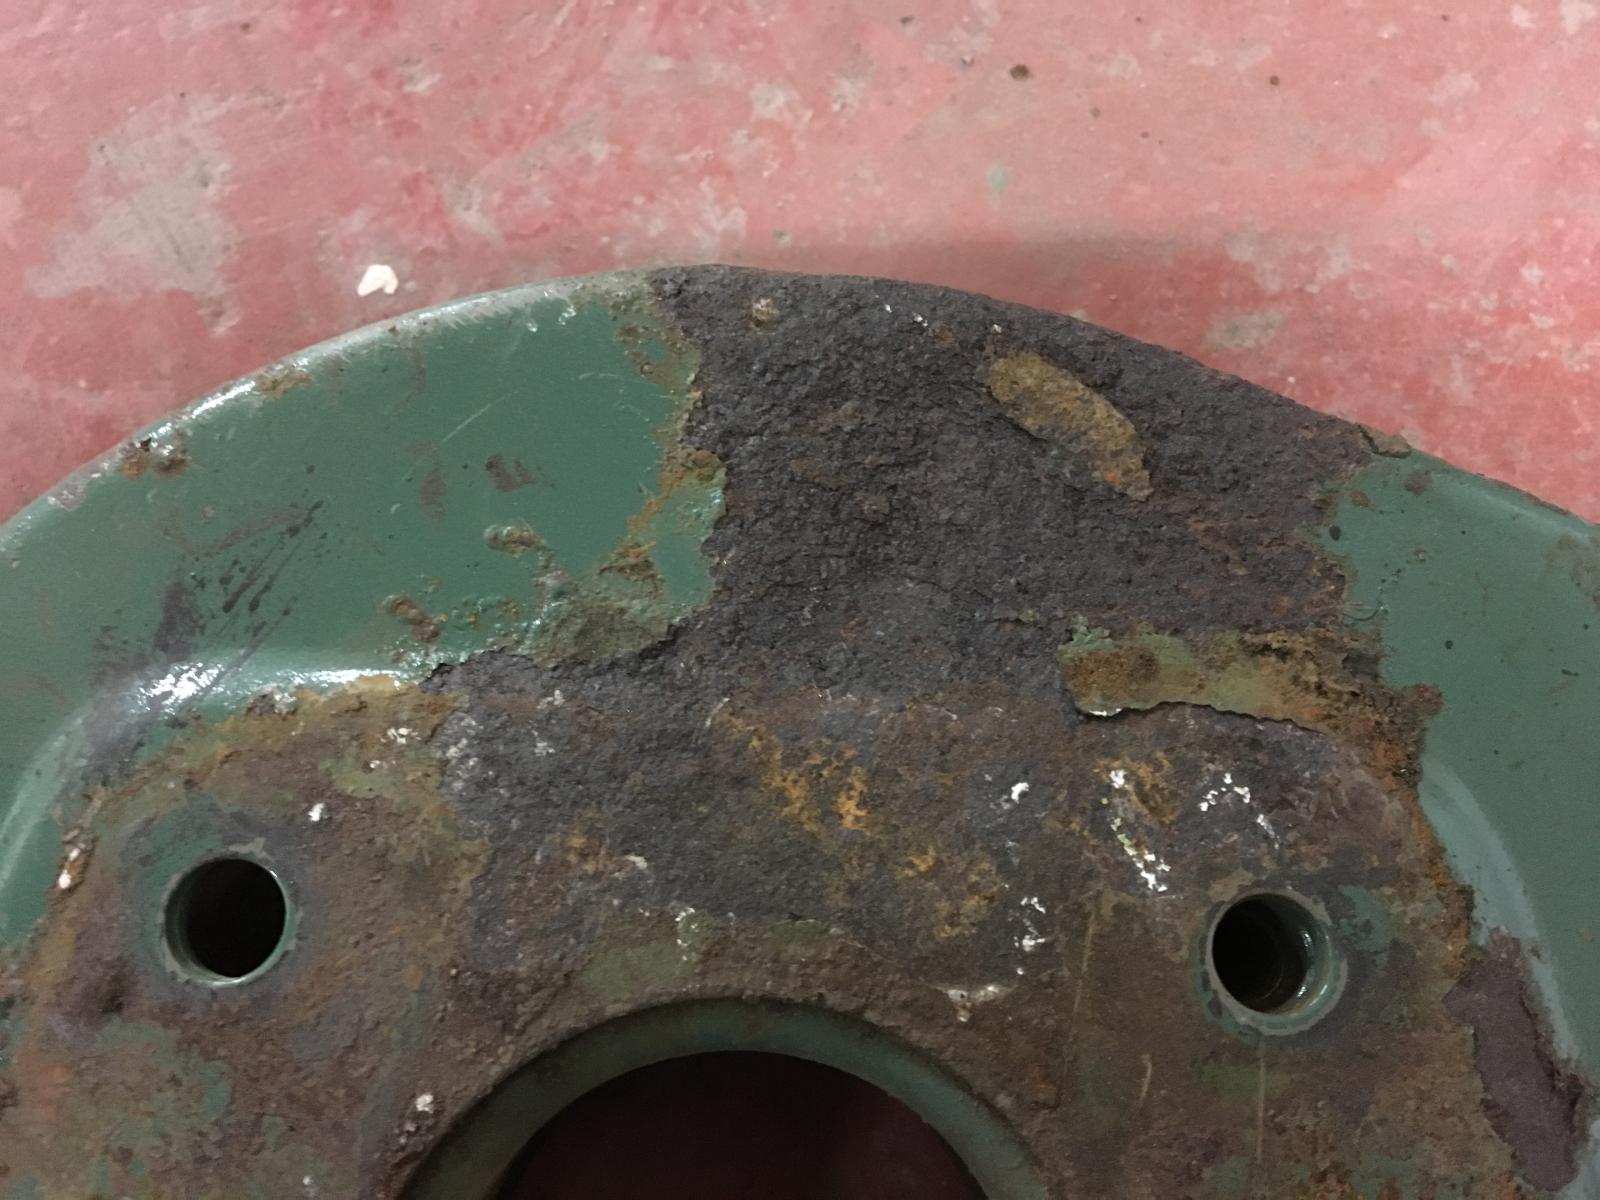
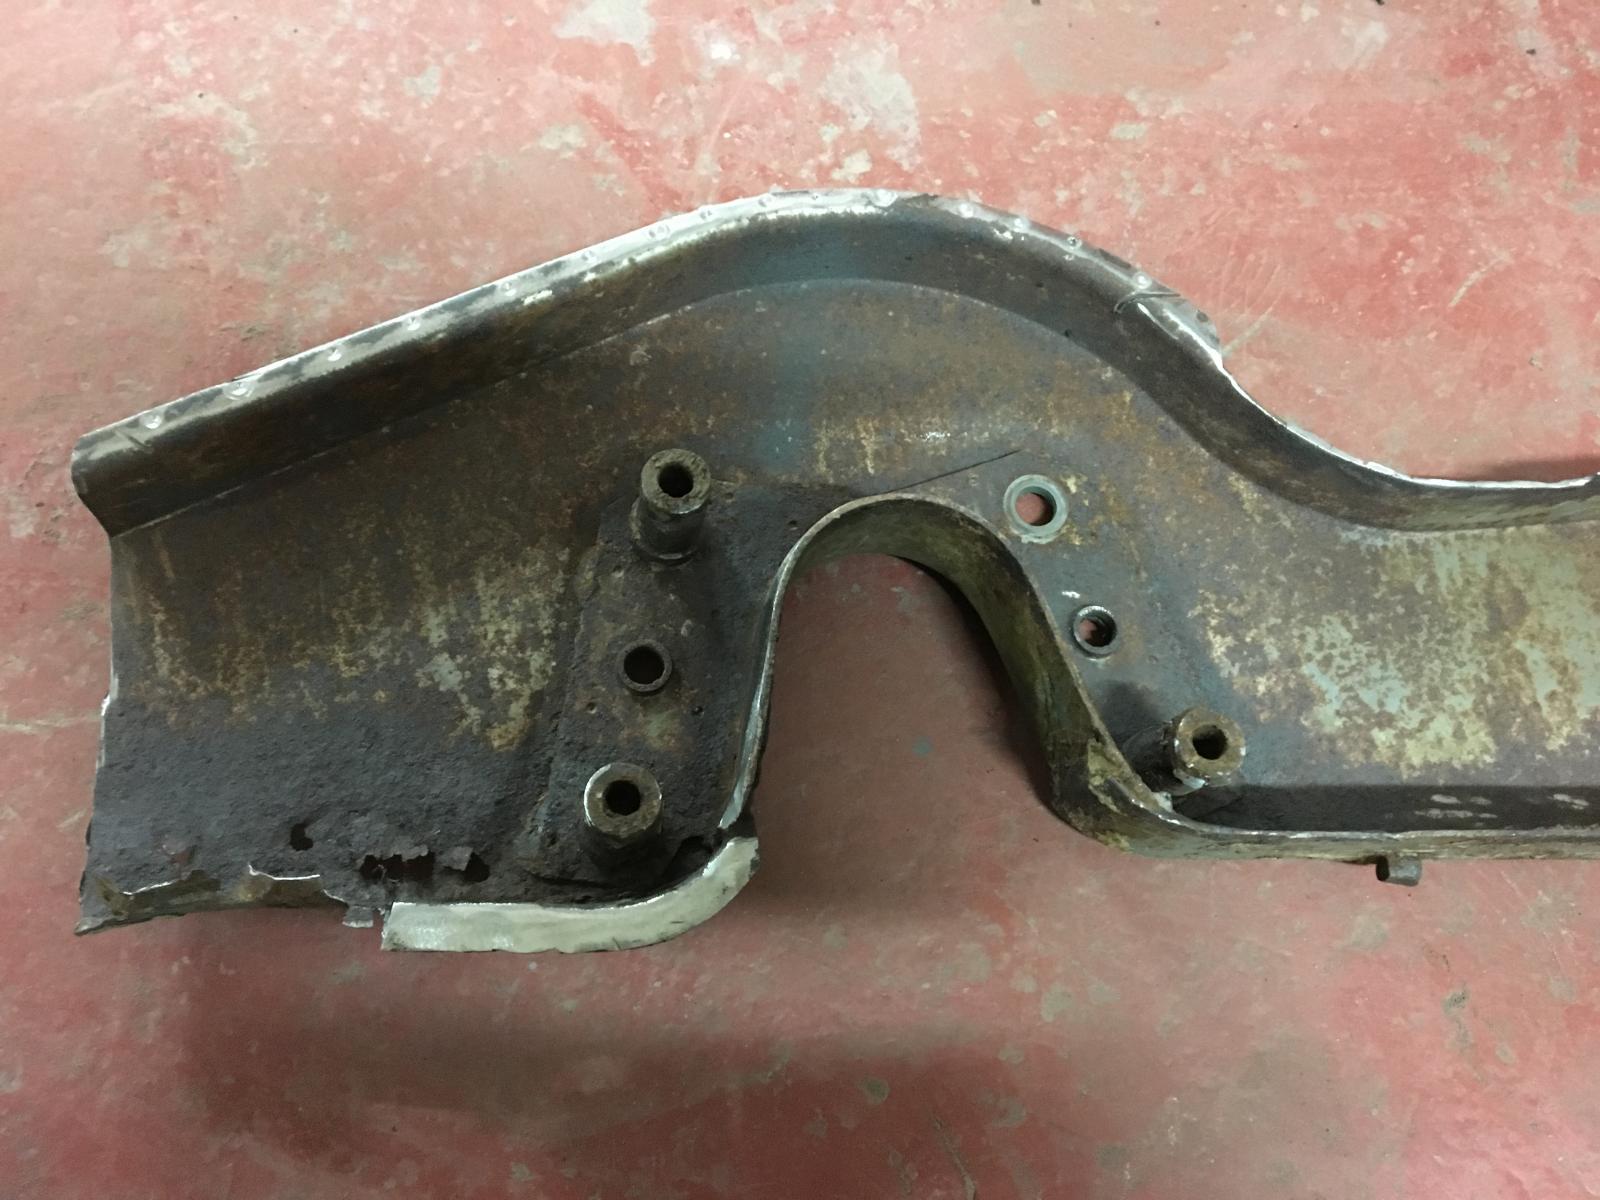
Got the seat runner and the extra section thats fitted to the cab tool chest area off and it seems to fit the new BBT panel pretty nice:
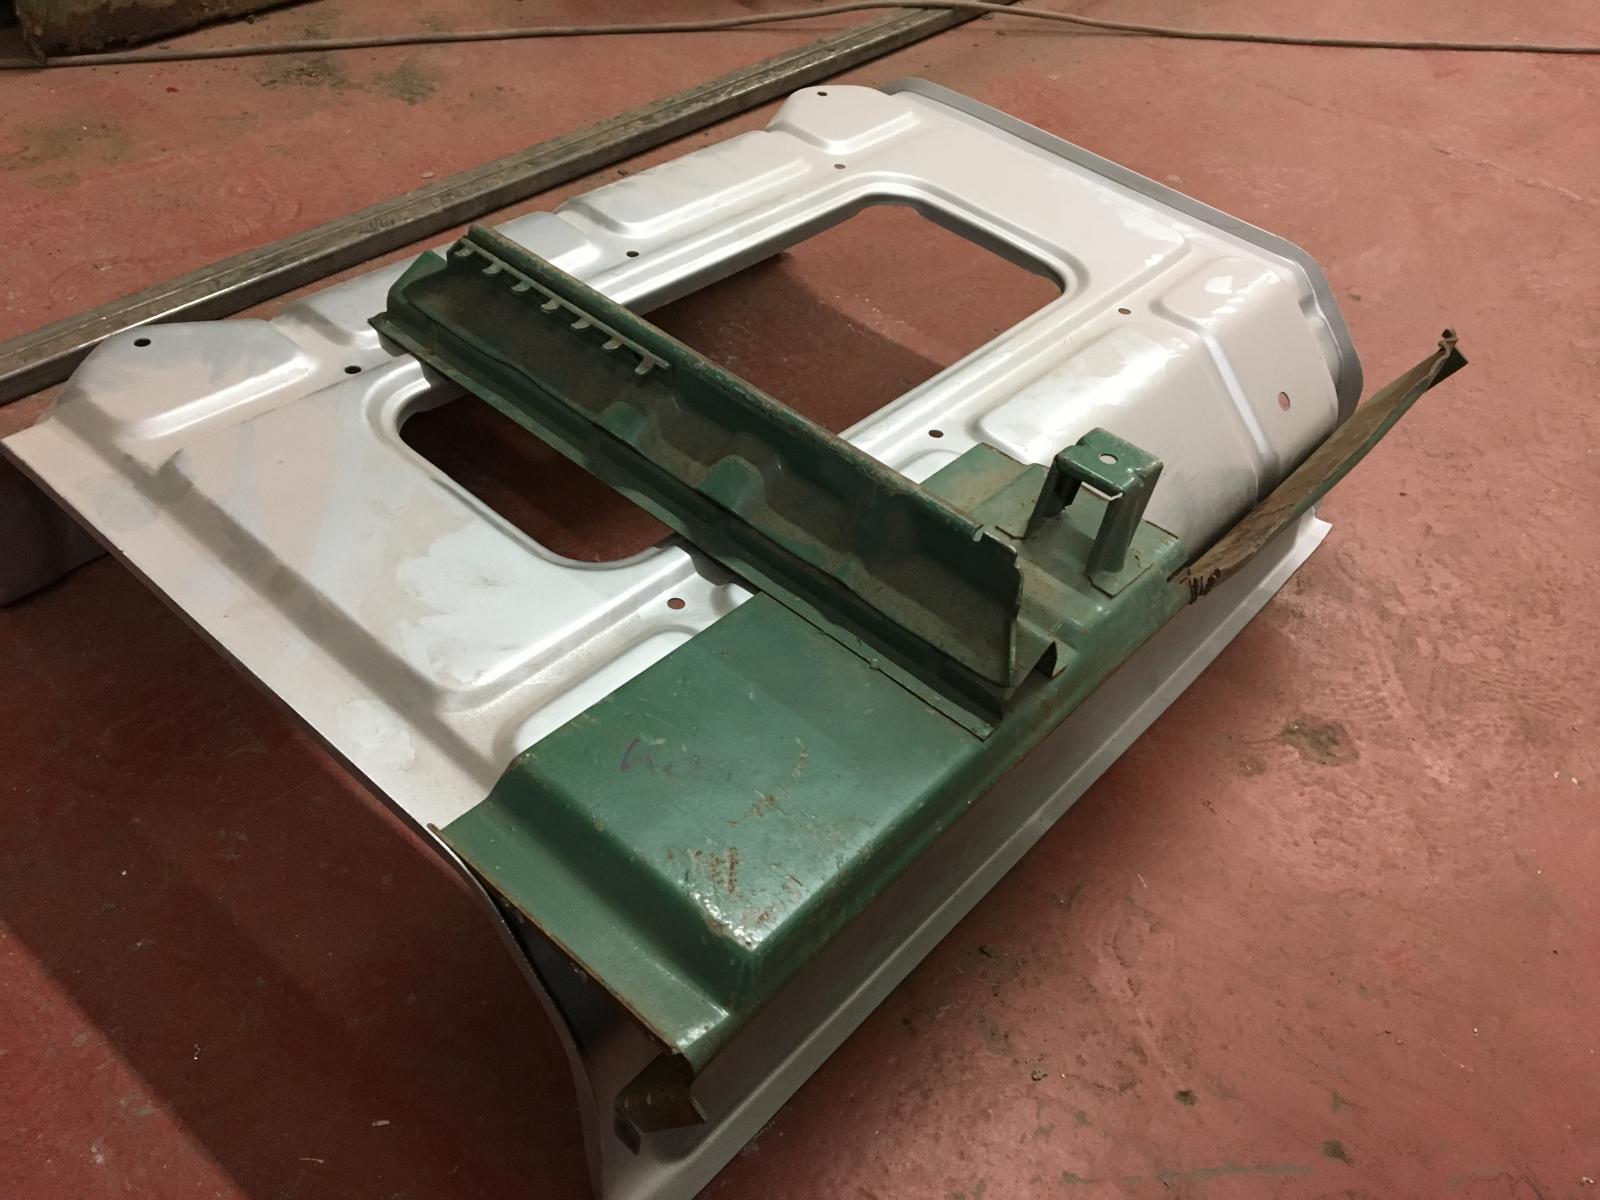
Could do with finding a pair of rear bump stop brackets if anyone has any?
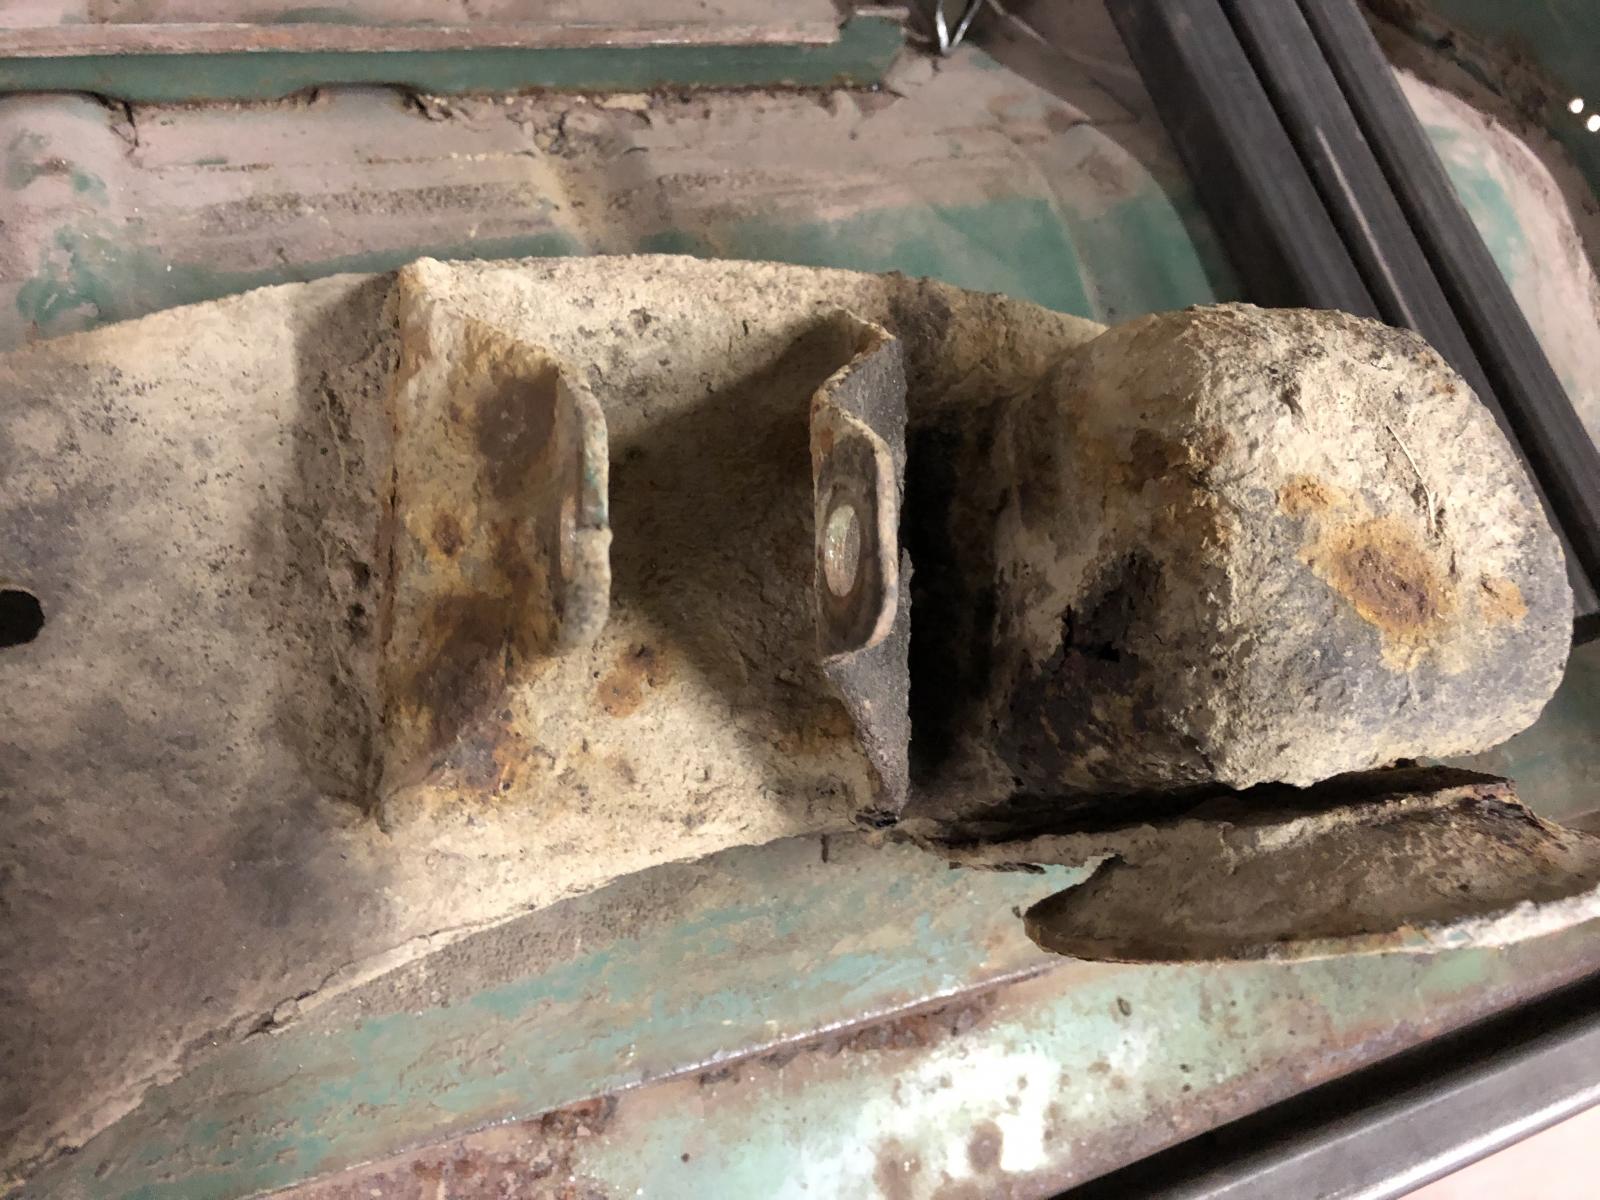
Cant wait to get the new chassis together
mabbo
SSVC Member
Posts: 80
Joined: Wed Jun 01, 2011 7:09 pm
Re: Swedish 66 Crew Cab
by mabbo » Mon Feb 25, 2019 10:23 pm
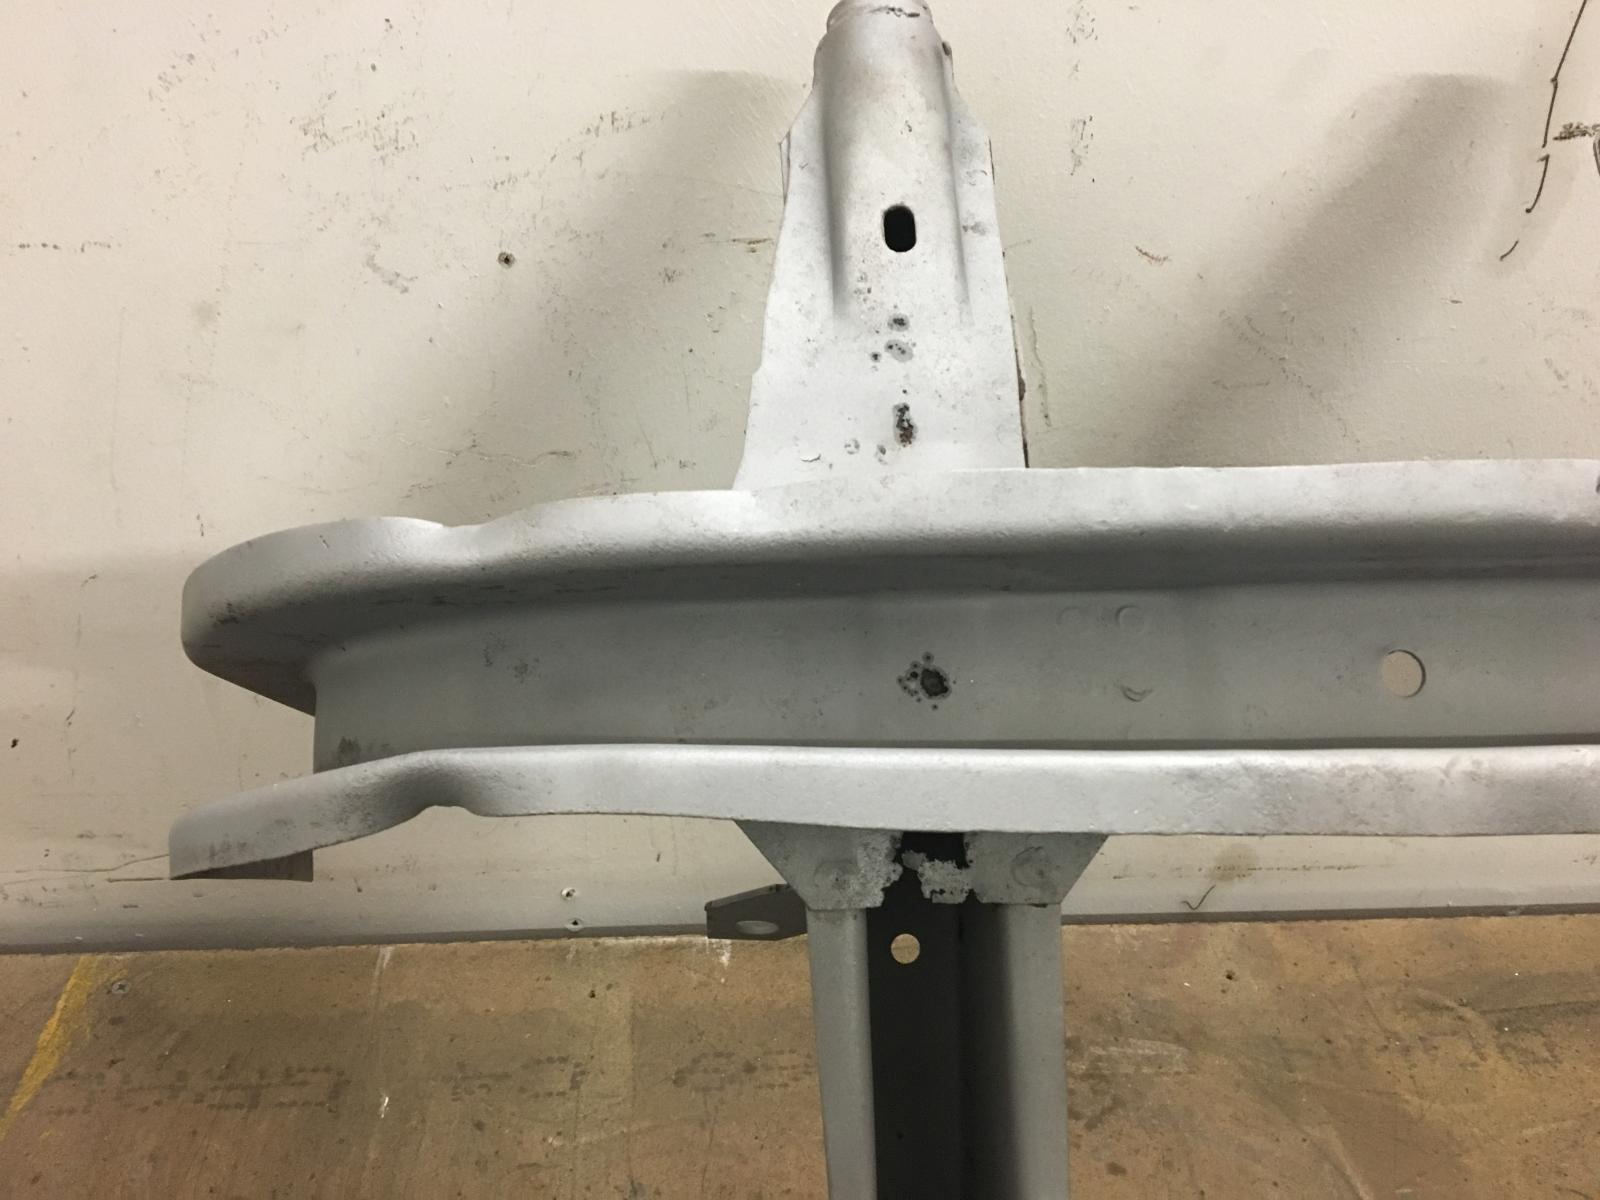
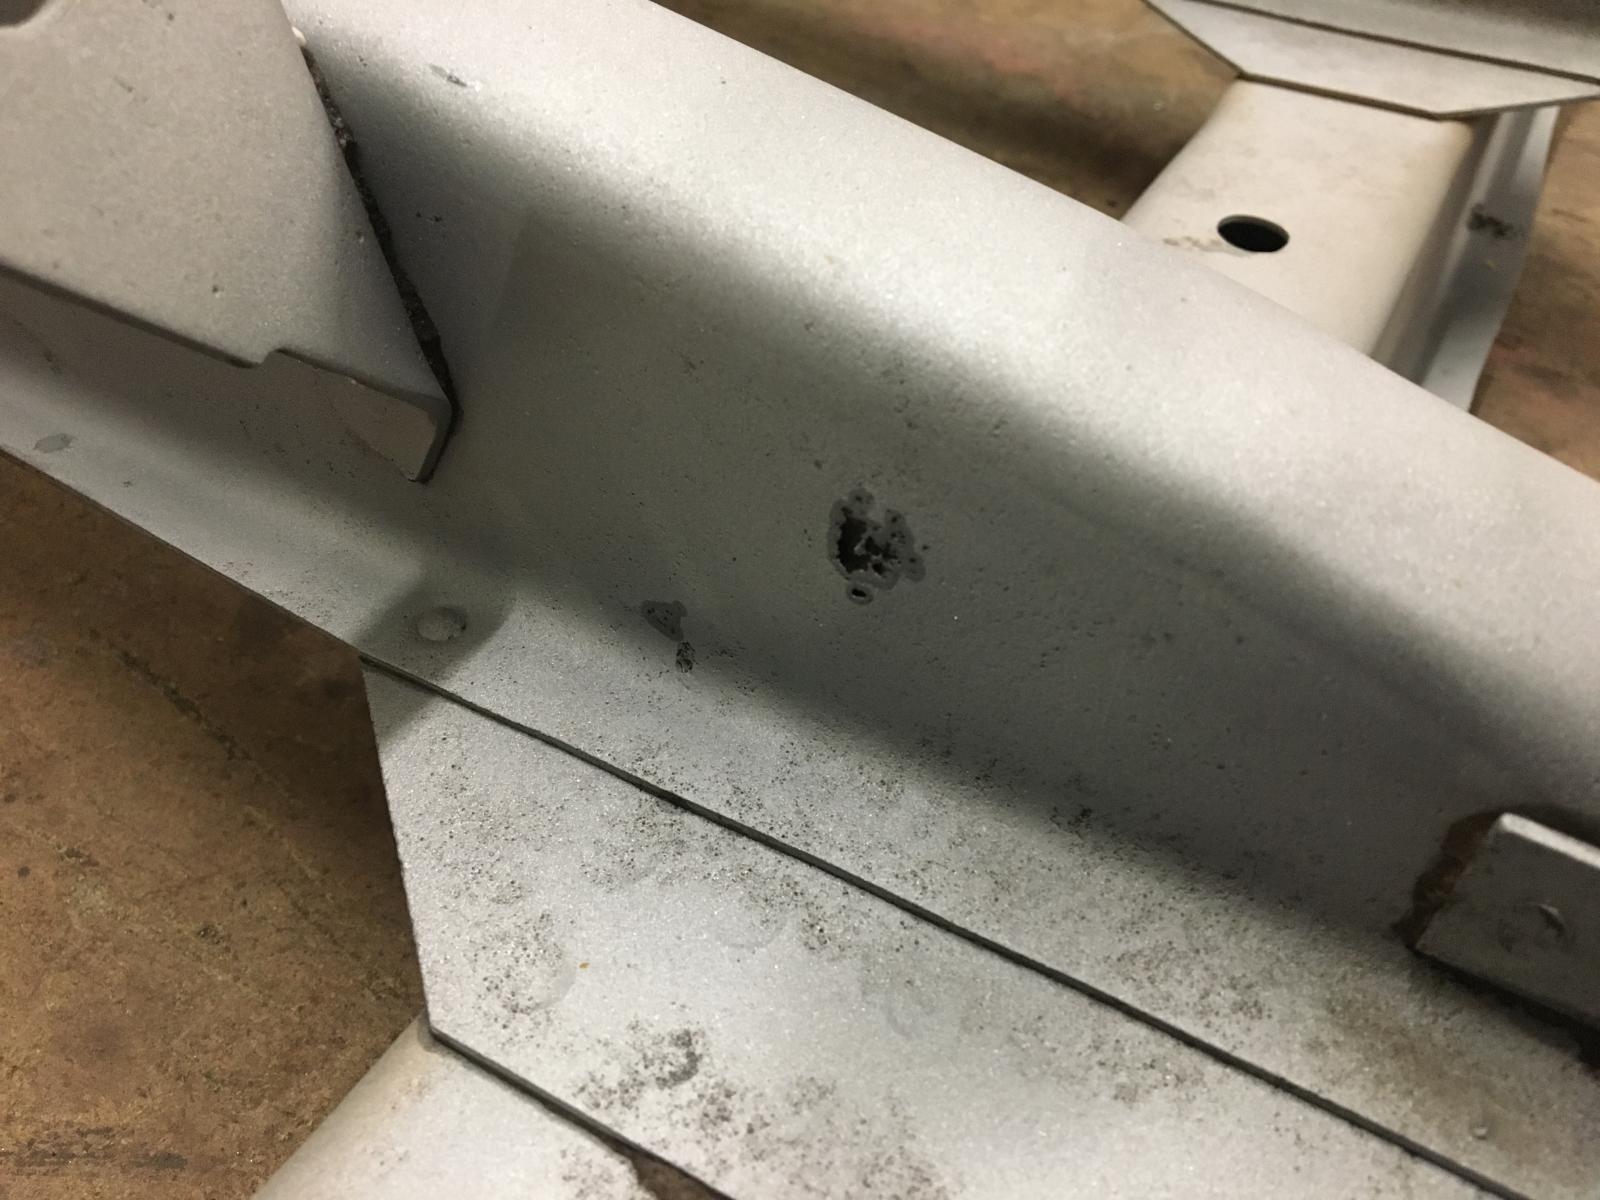
Had the chassis parts blasted:
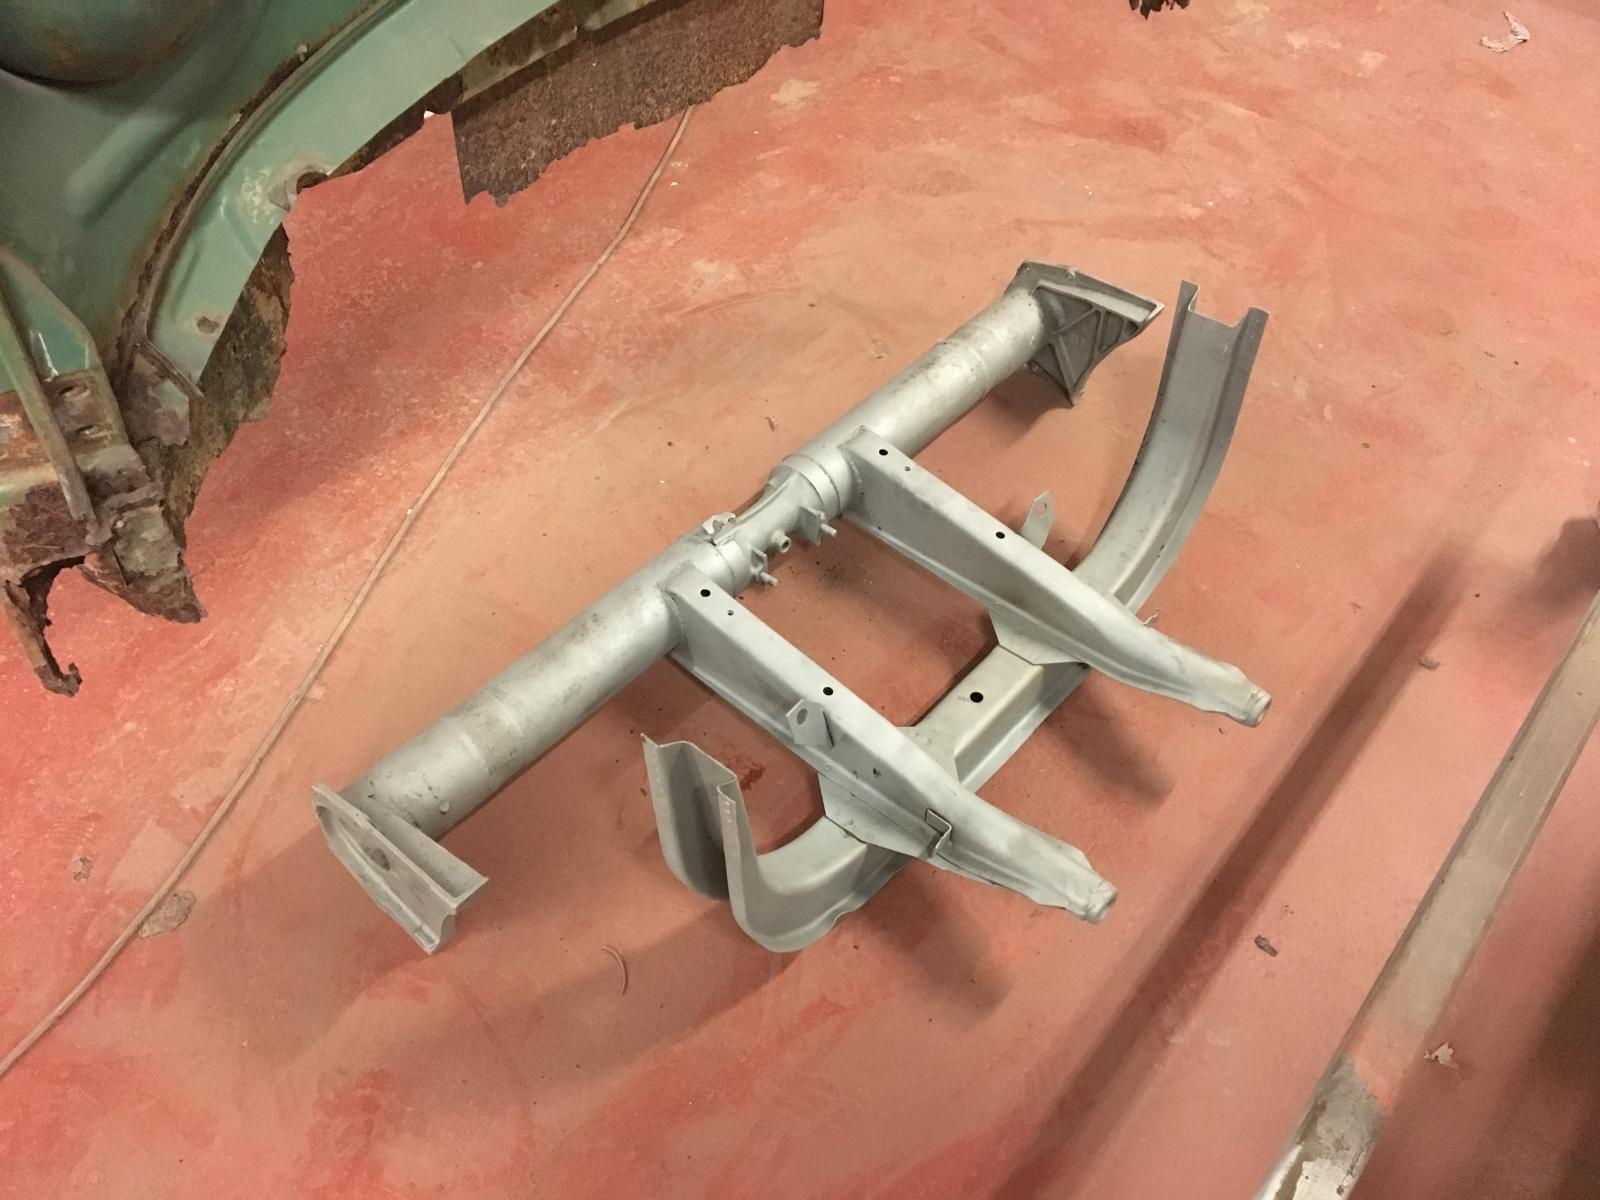
Not as nice as I had hoped. Rotten in quite a few places:
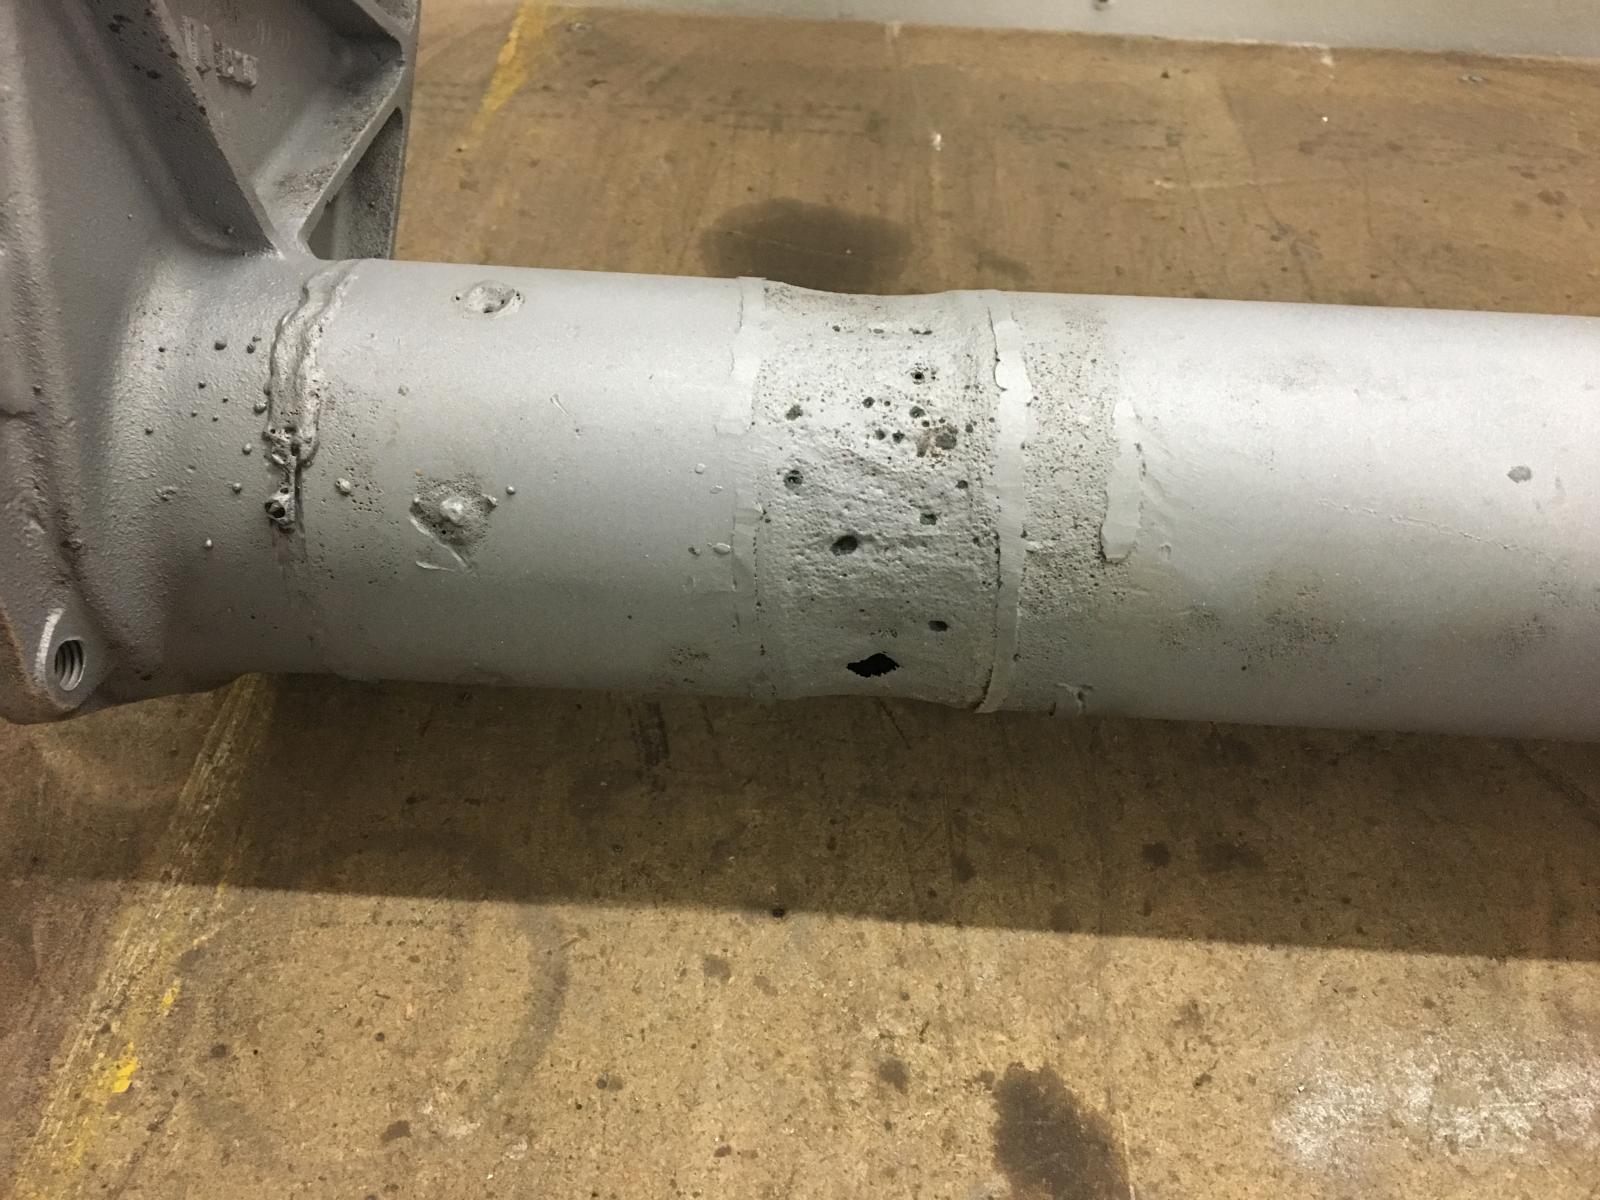
Rest of the parts:
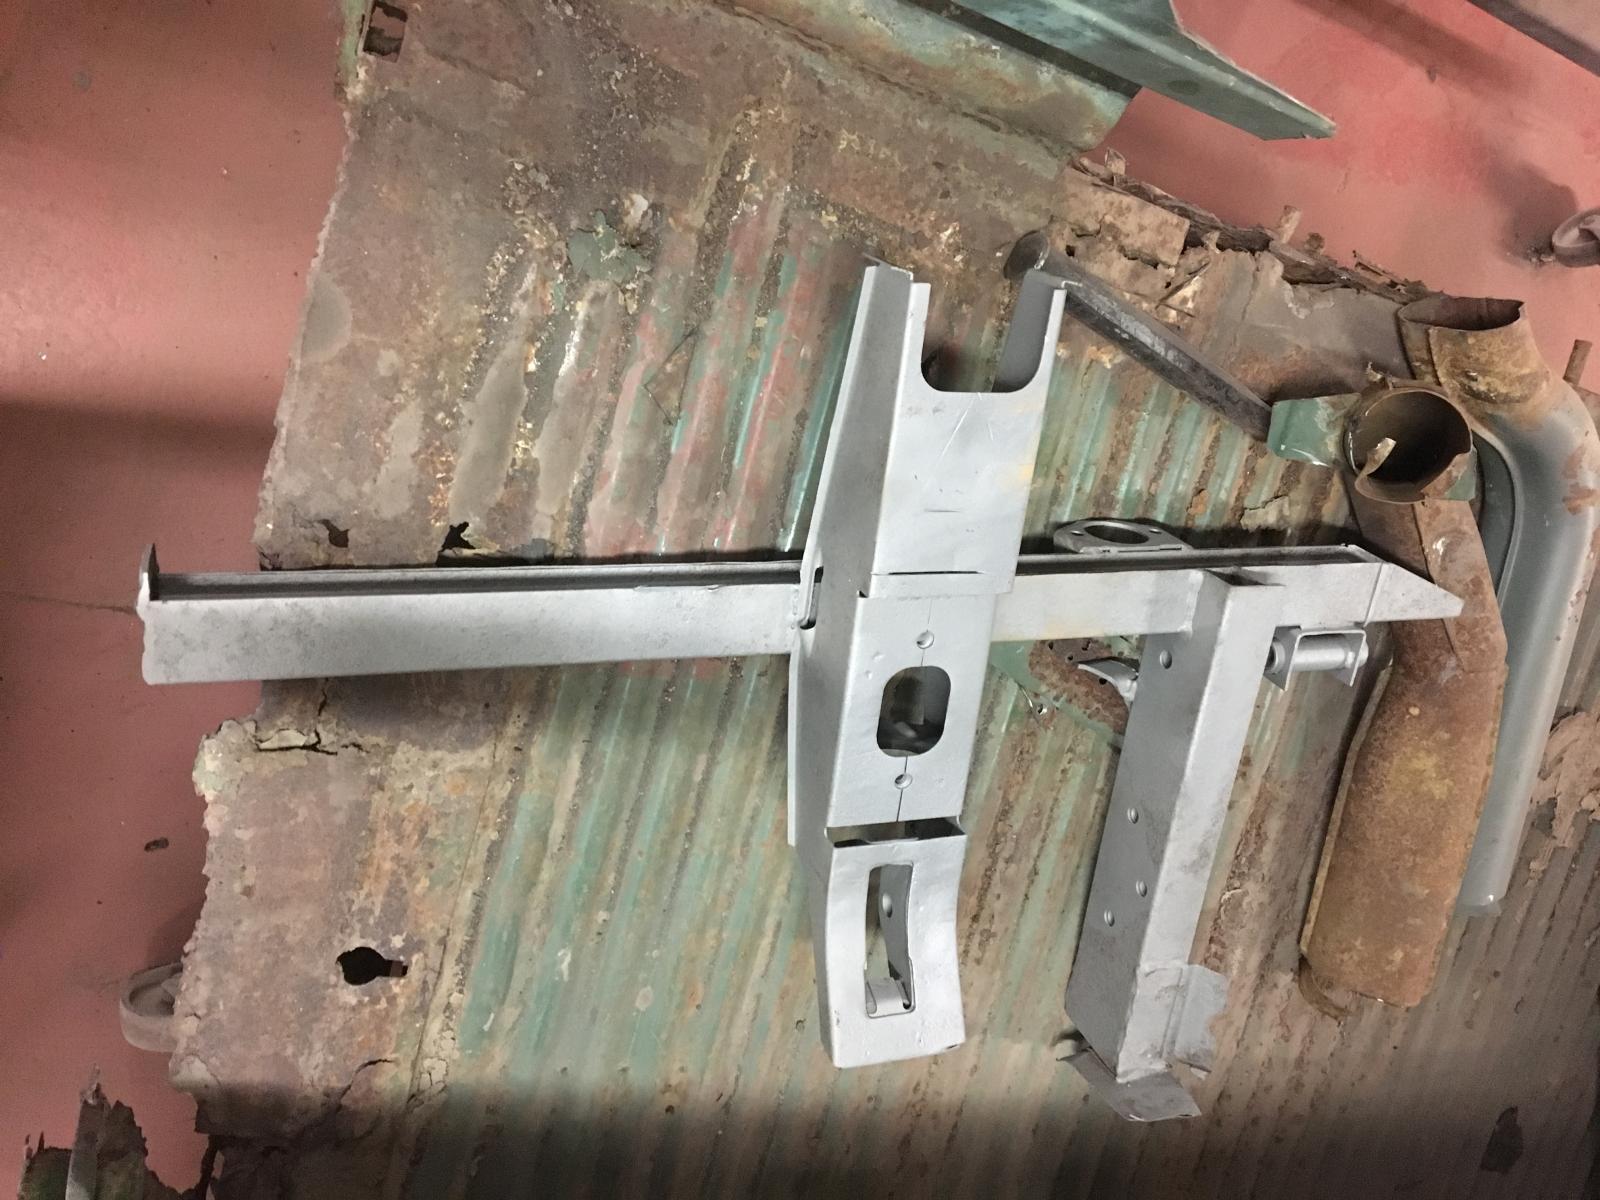
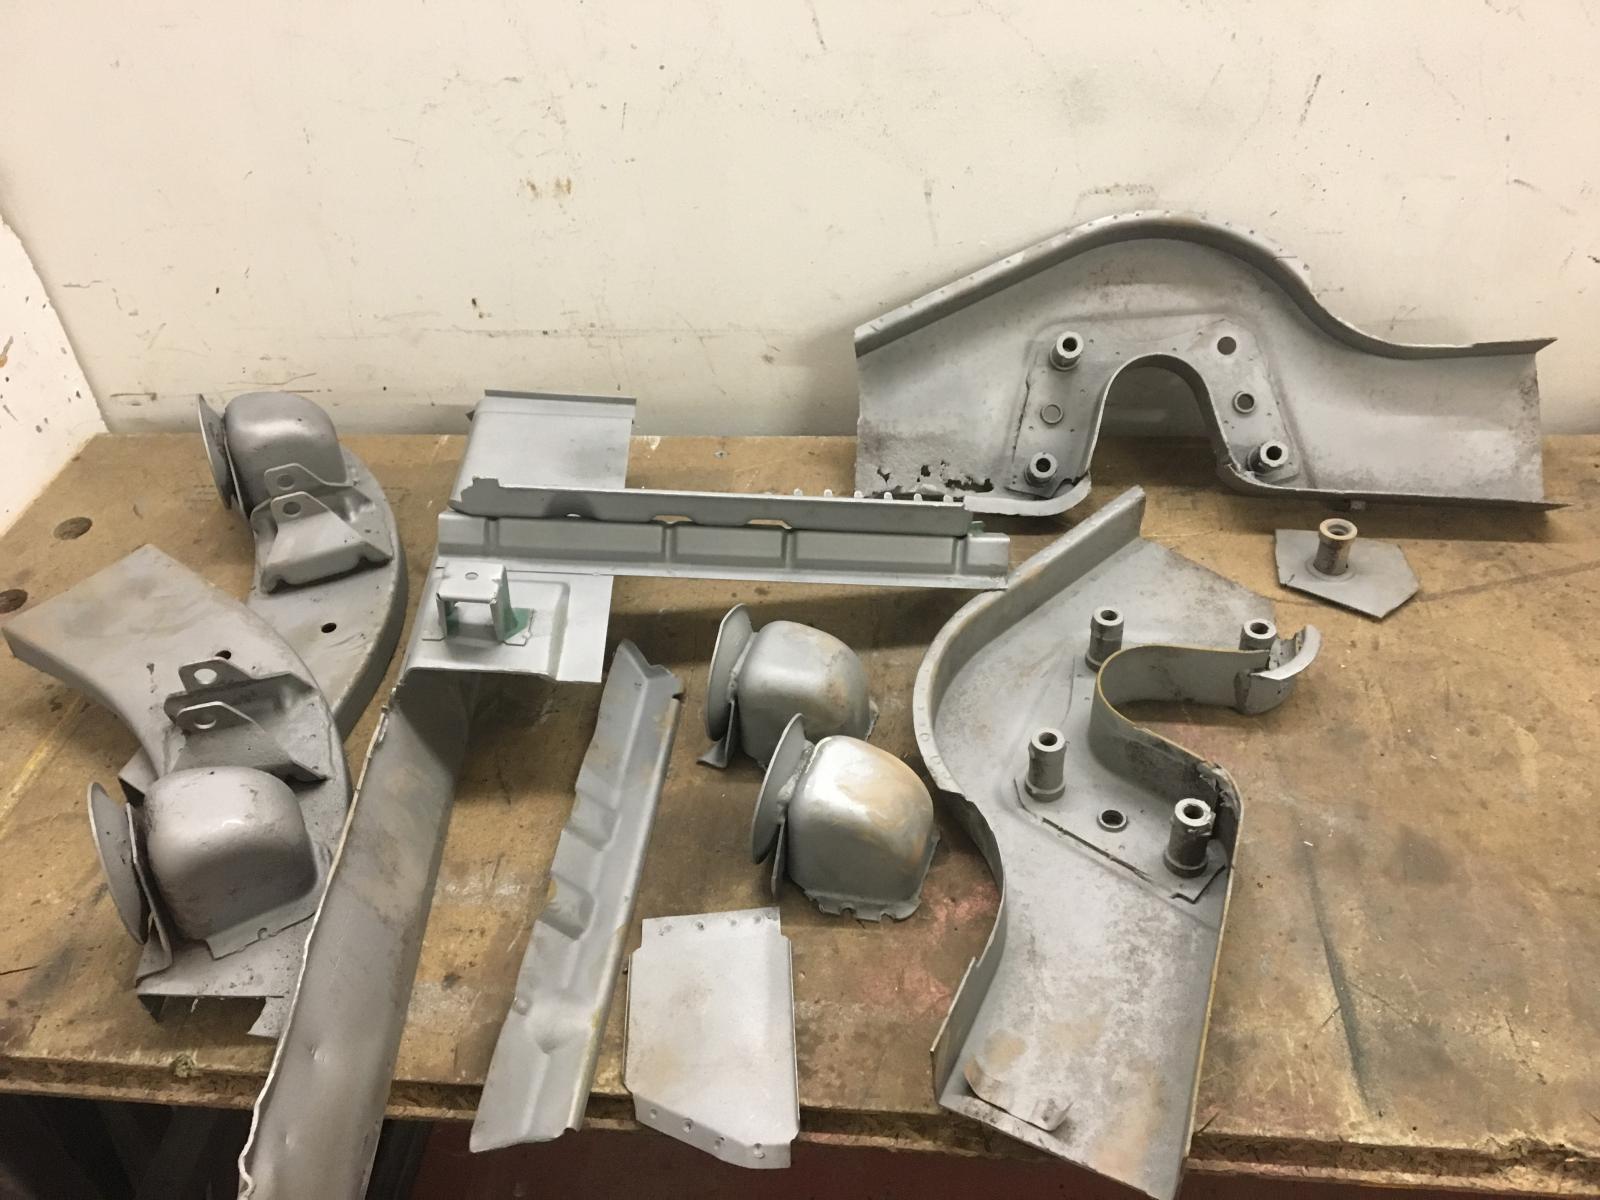
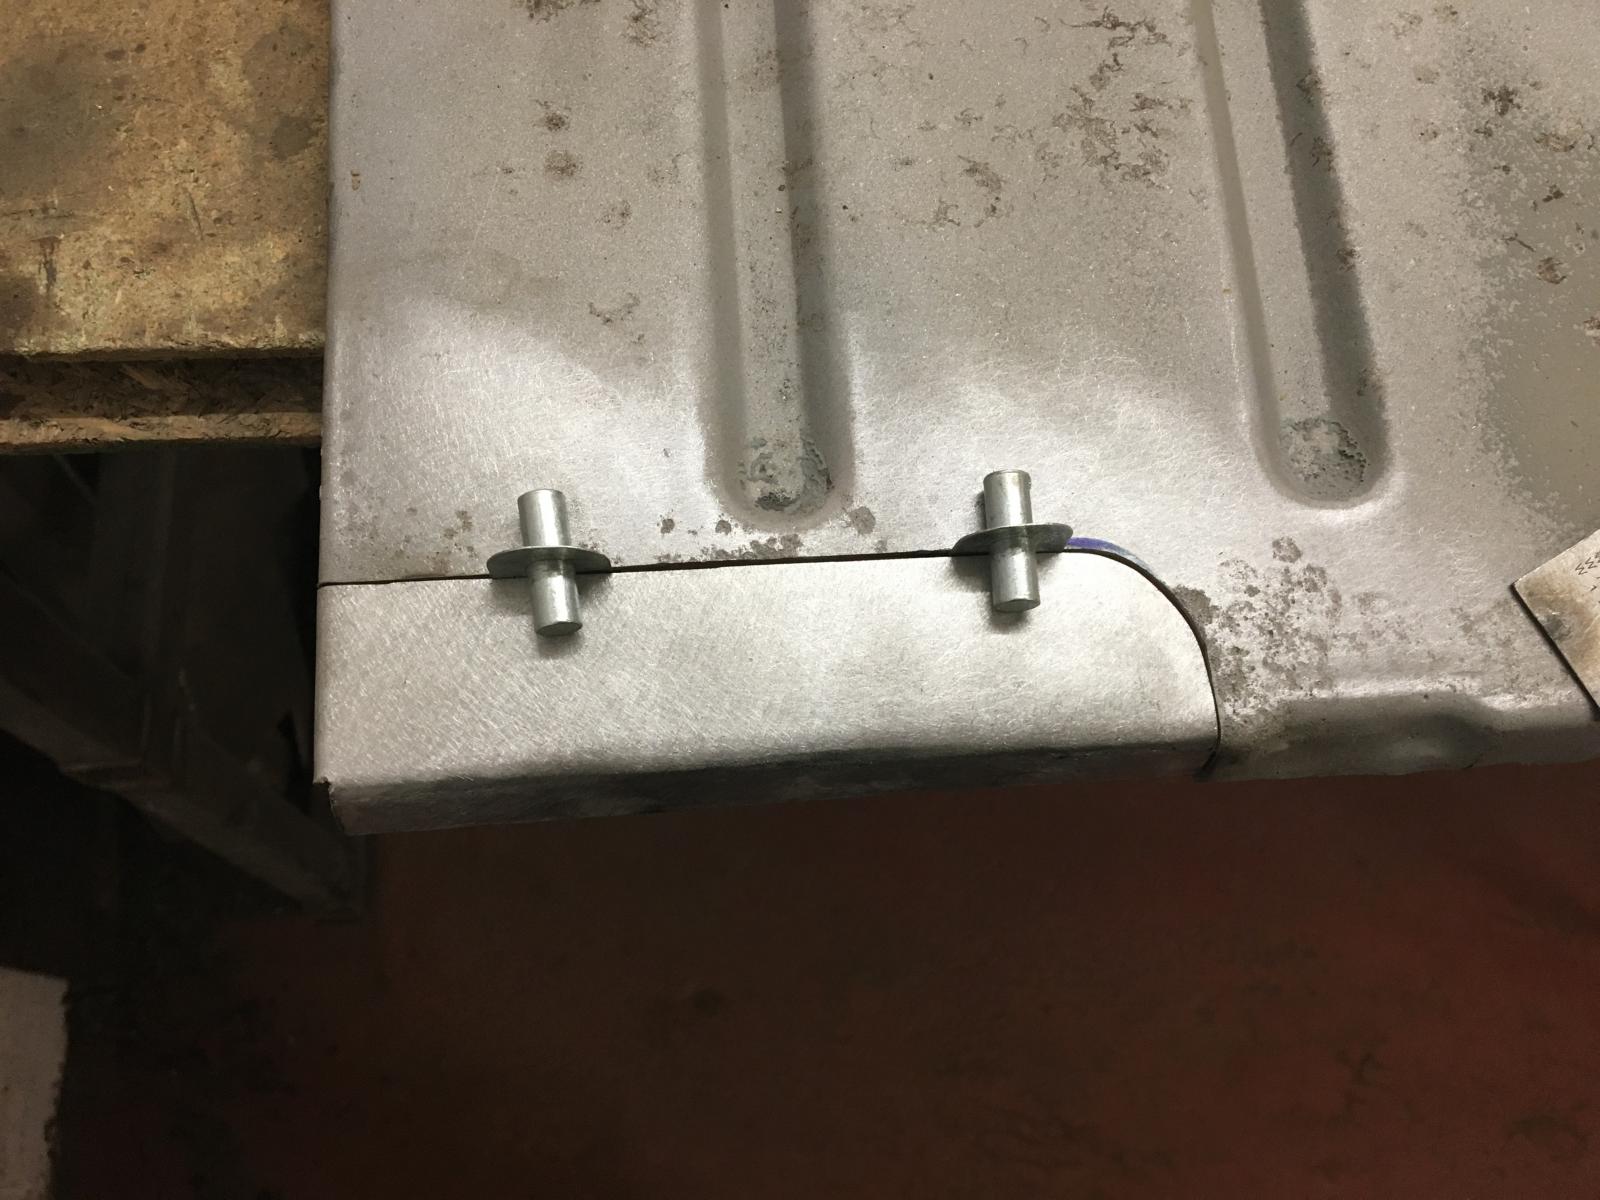
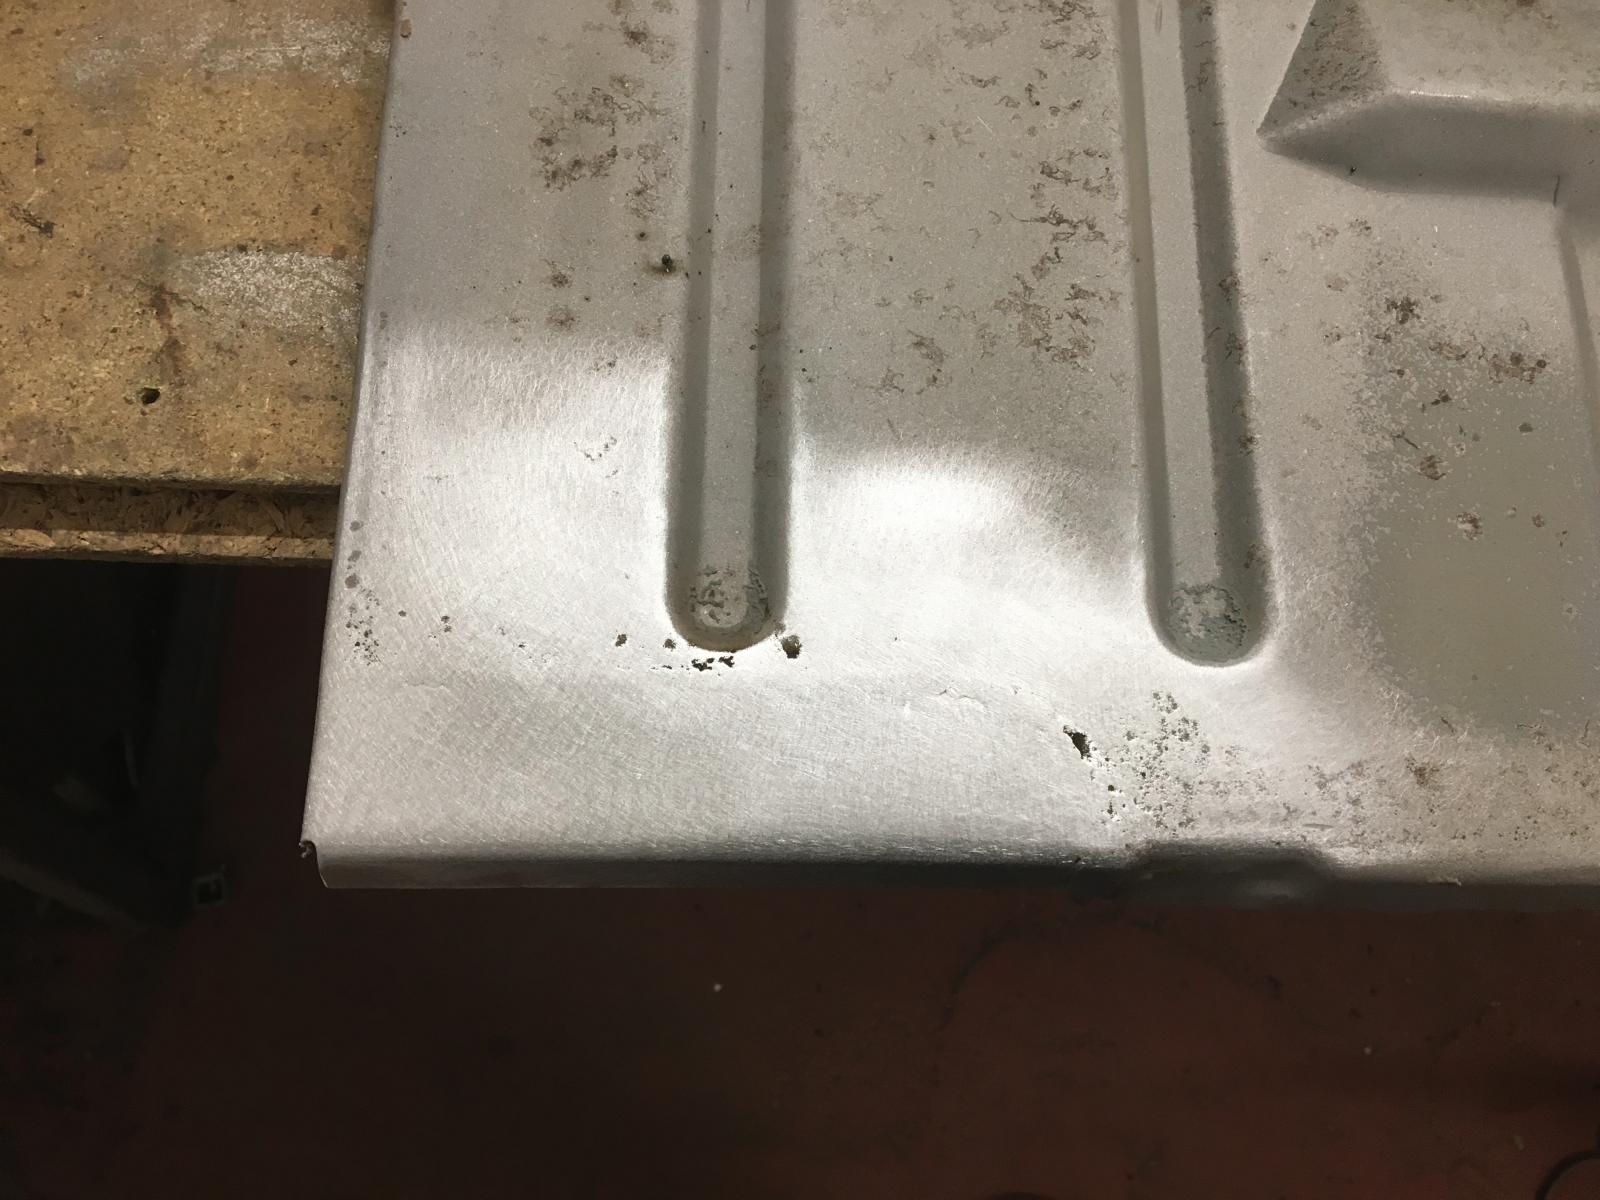
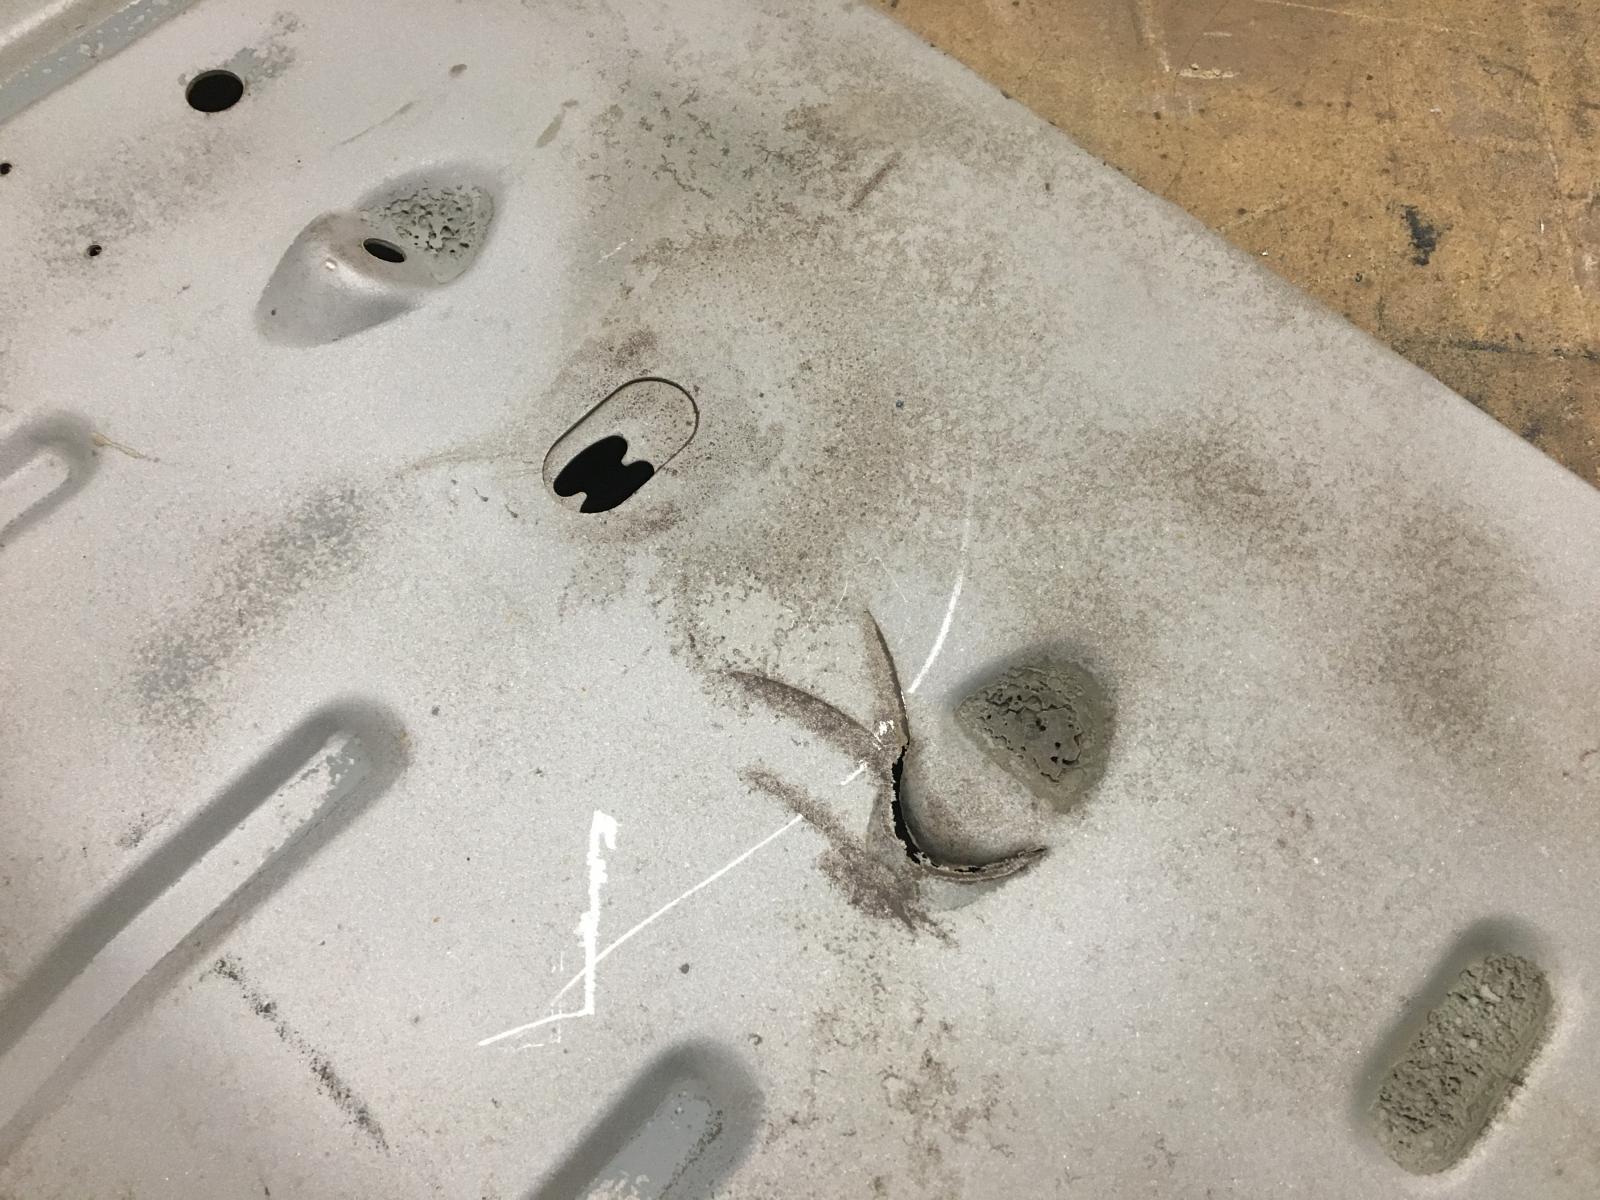
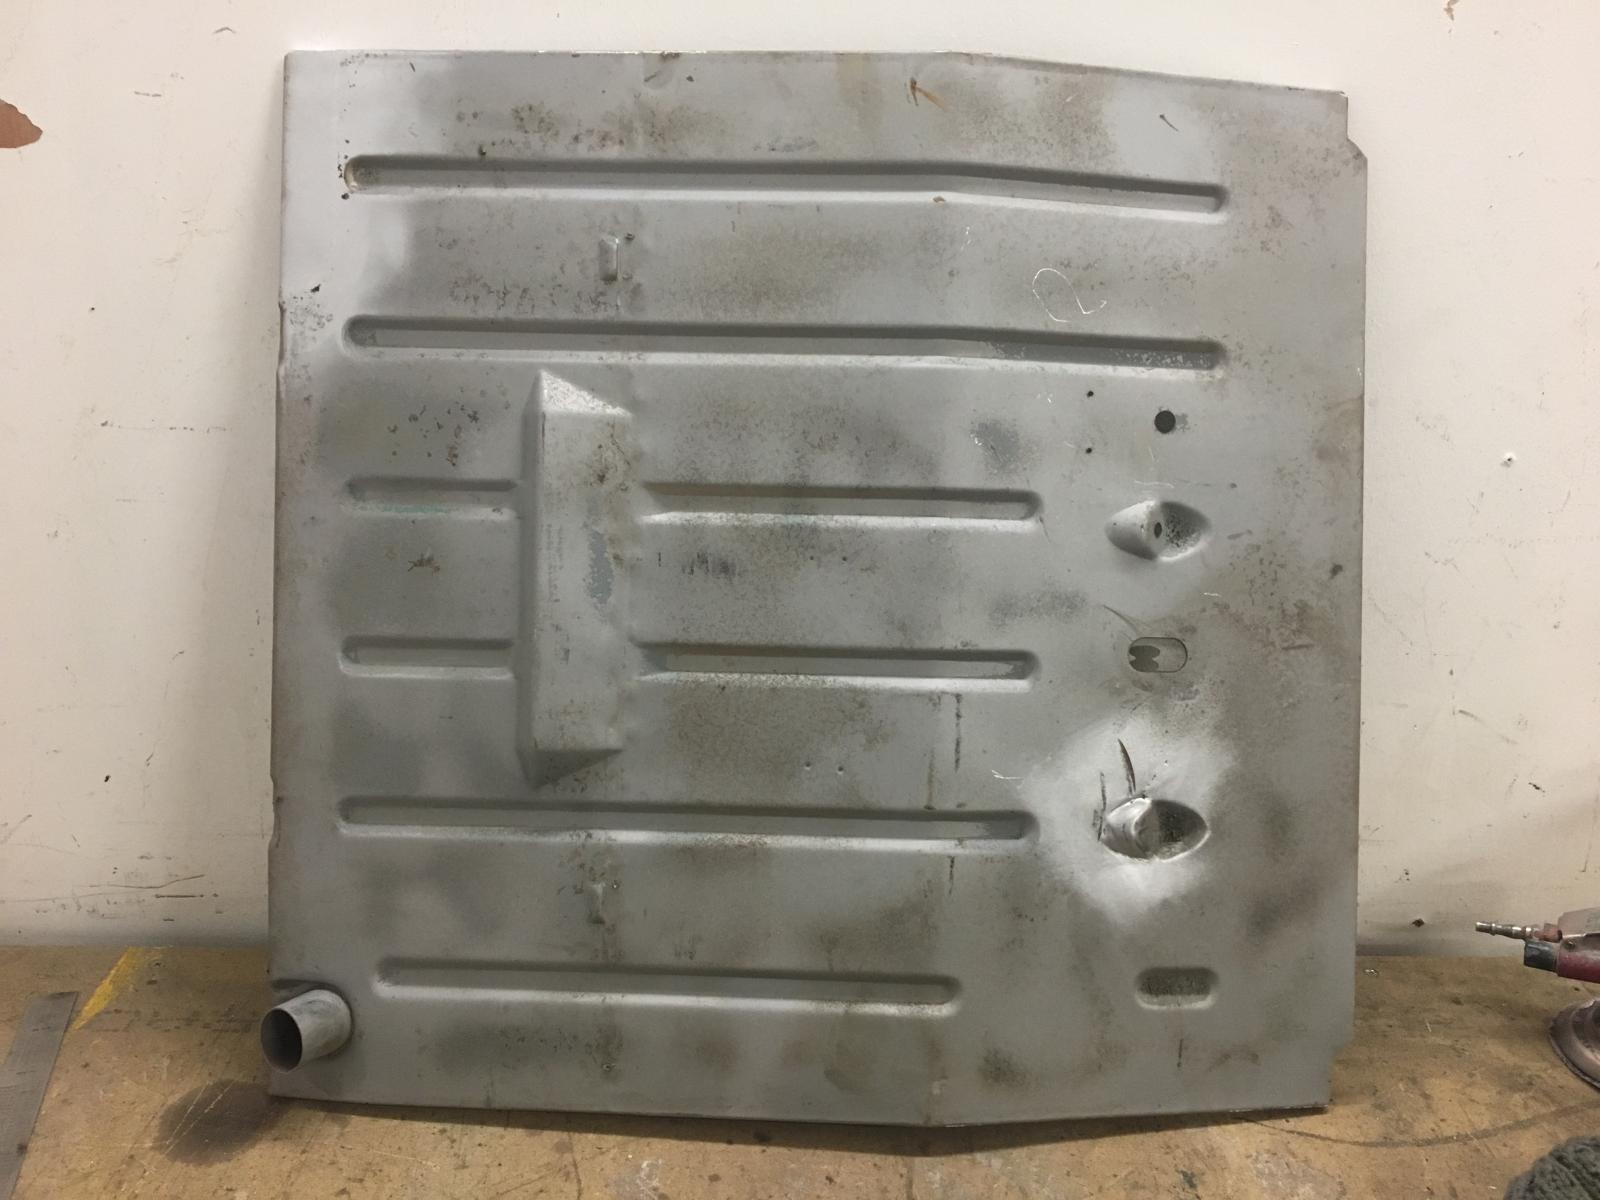
I repaired the rotten corner of the front floor section:
Trial assembly of new chassis and front section:
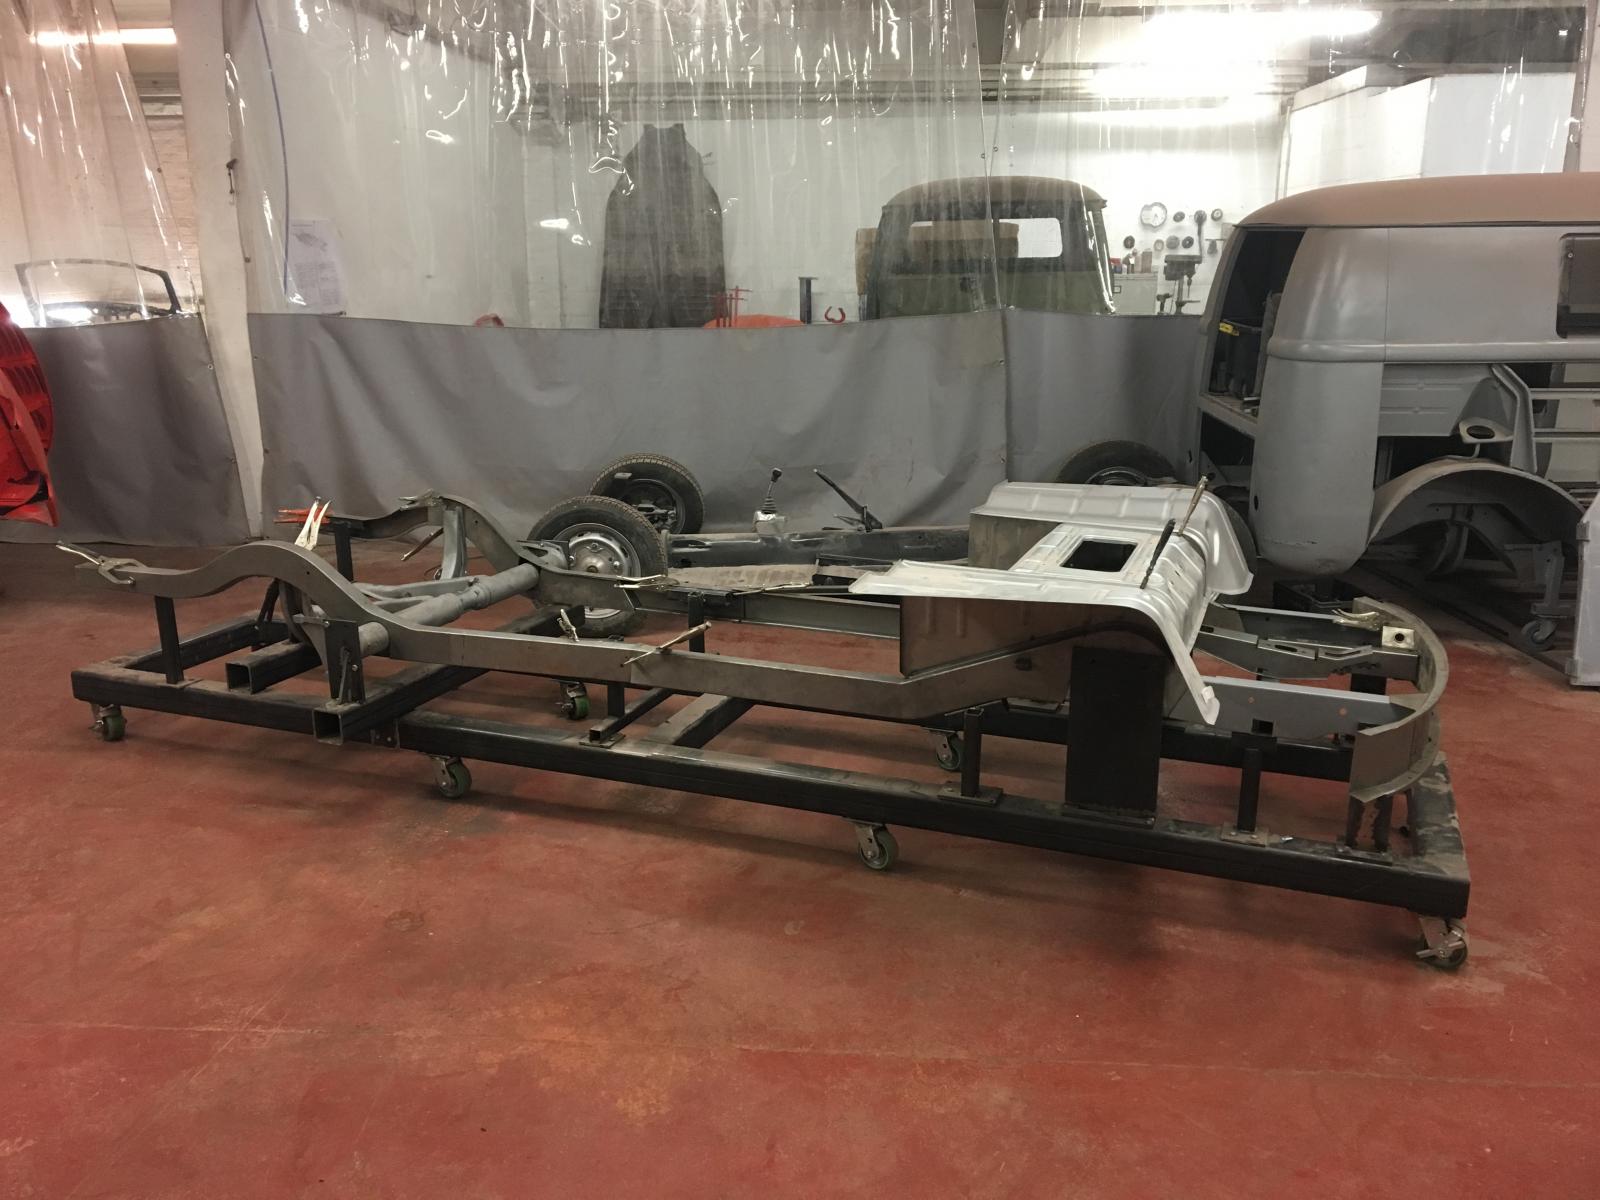
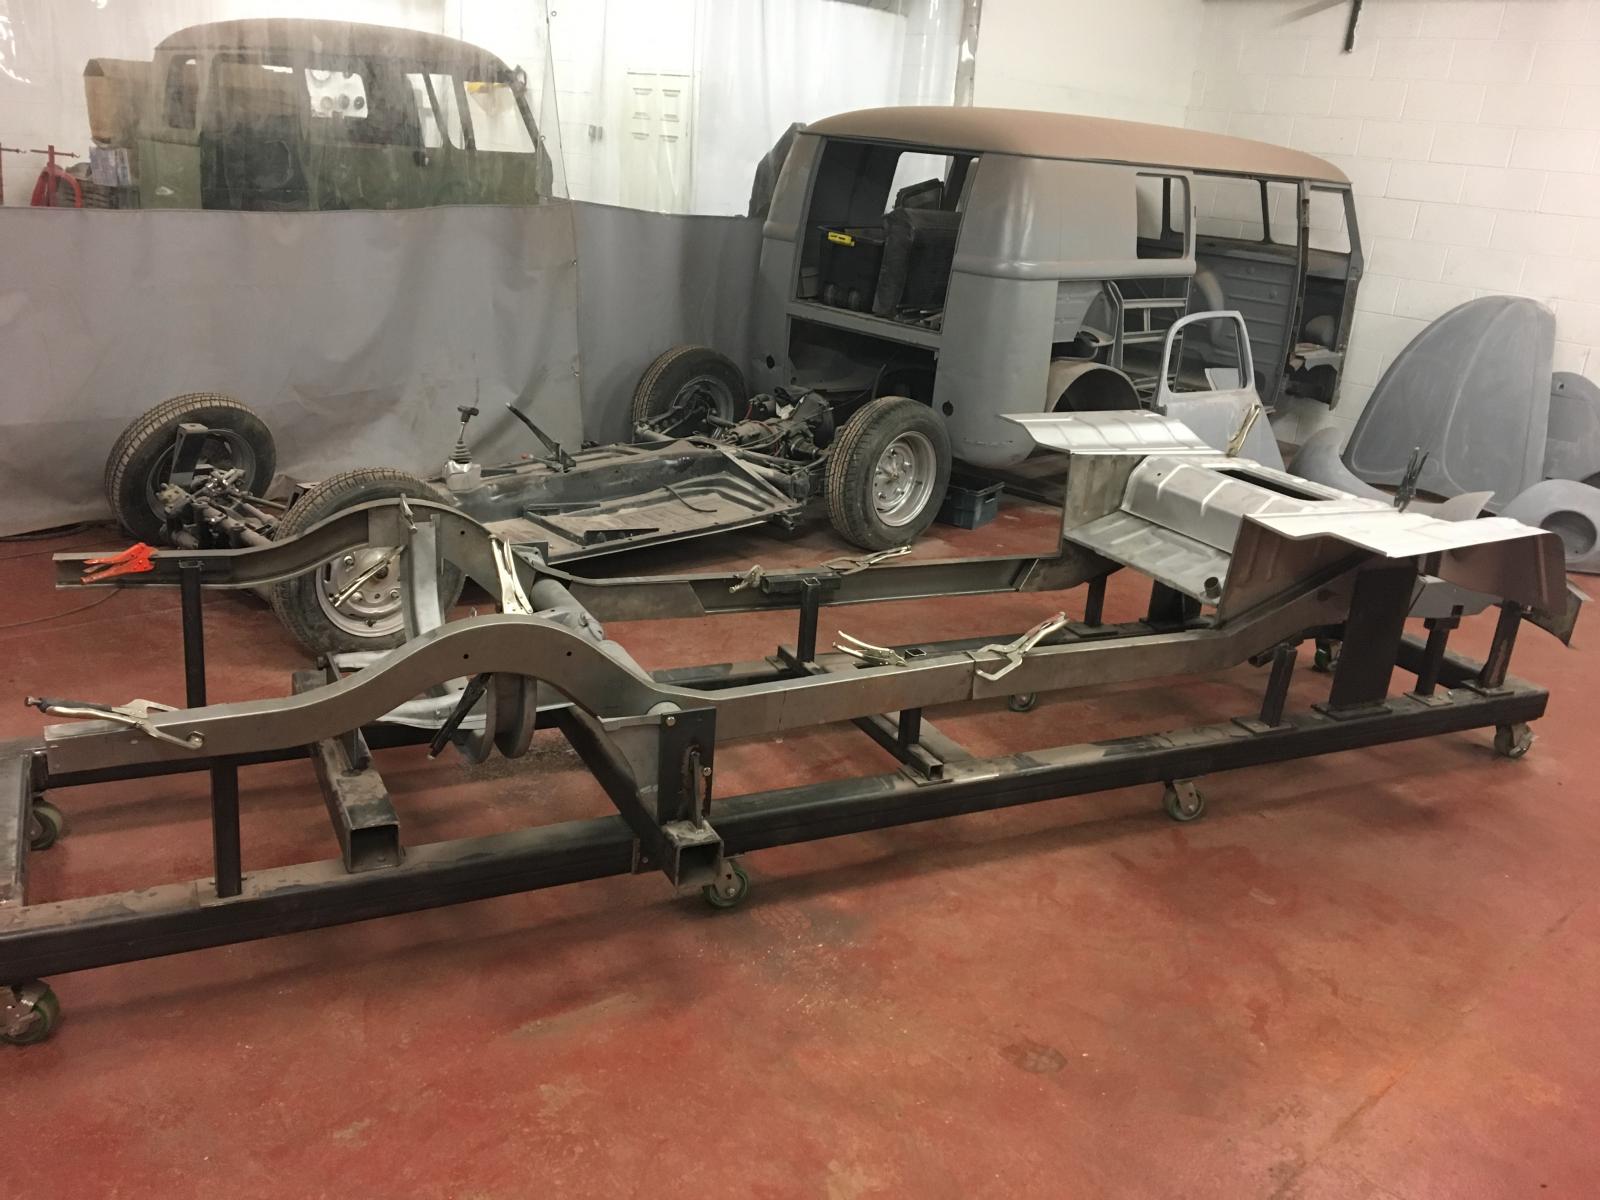
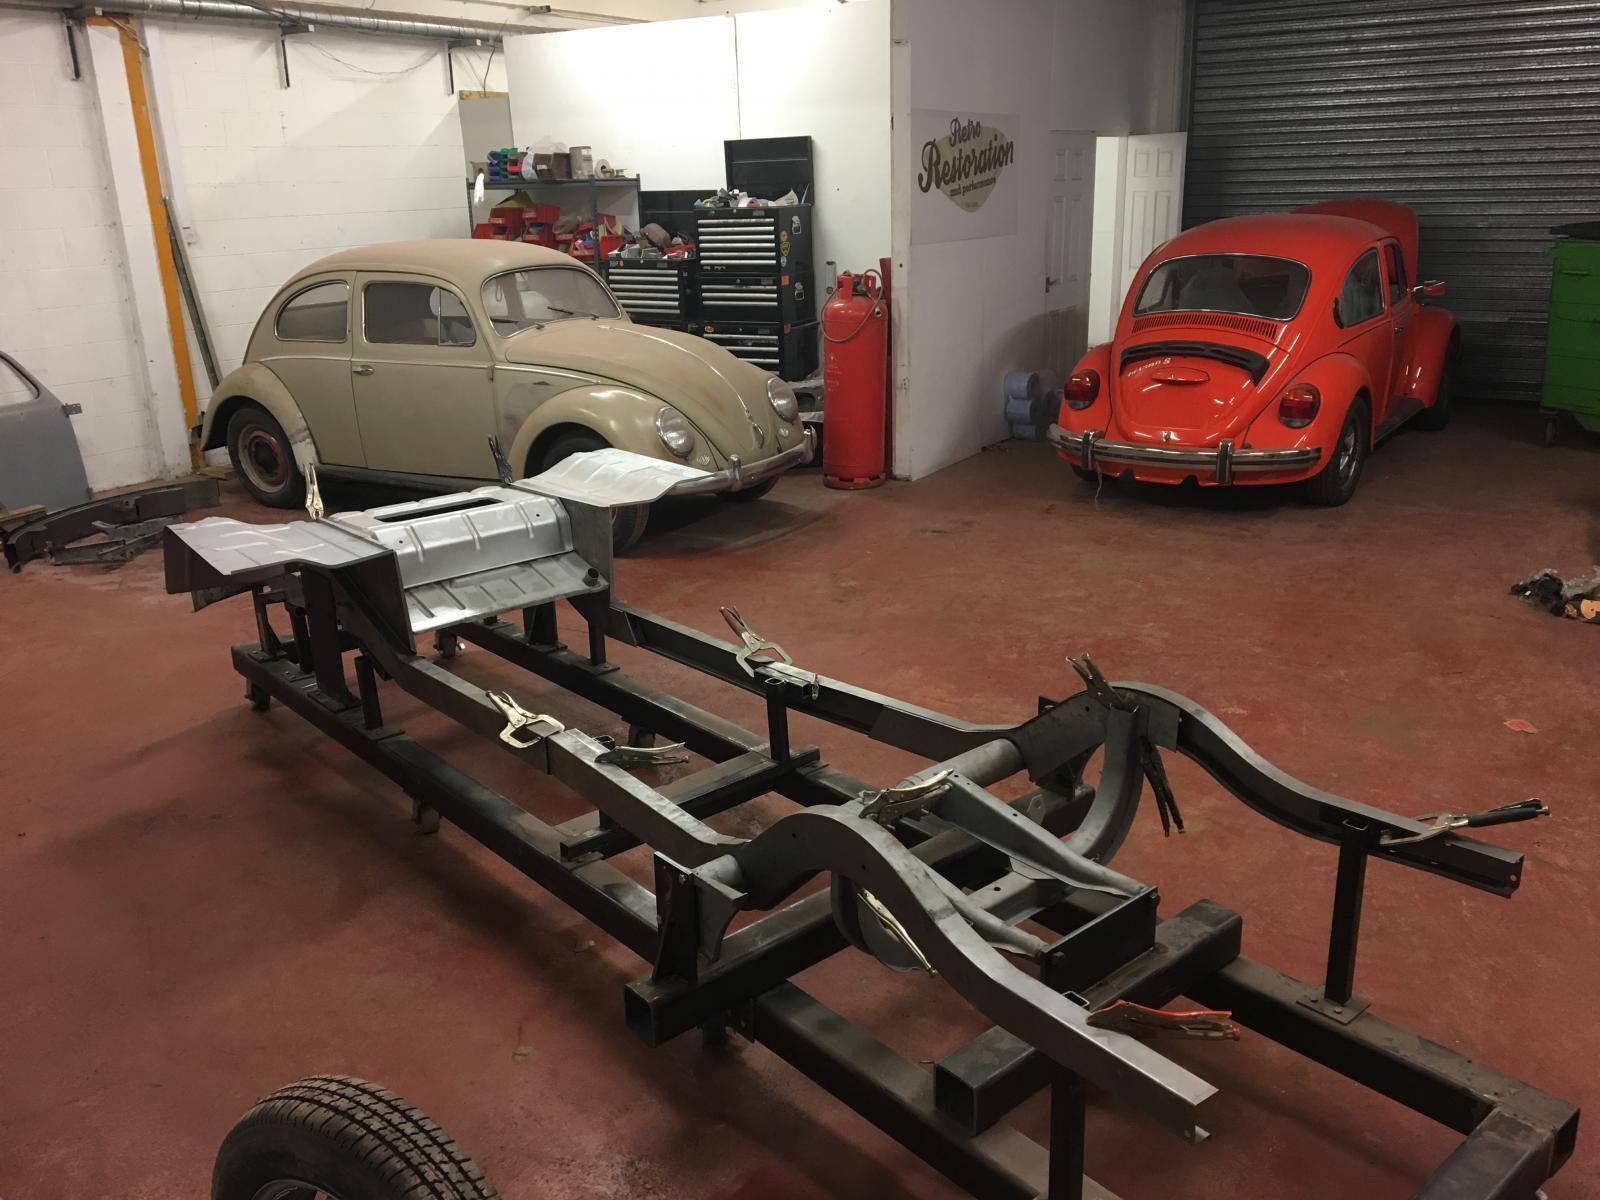
Found a solid rear cut including the complete rear chassis rails so decided to use the whole rear end as the pressings were nicer than the repro chassis rails around where the support bar is welded. New piece tacked in place temporary:
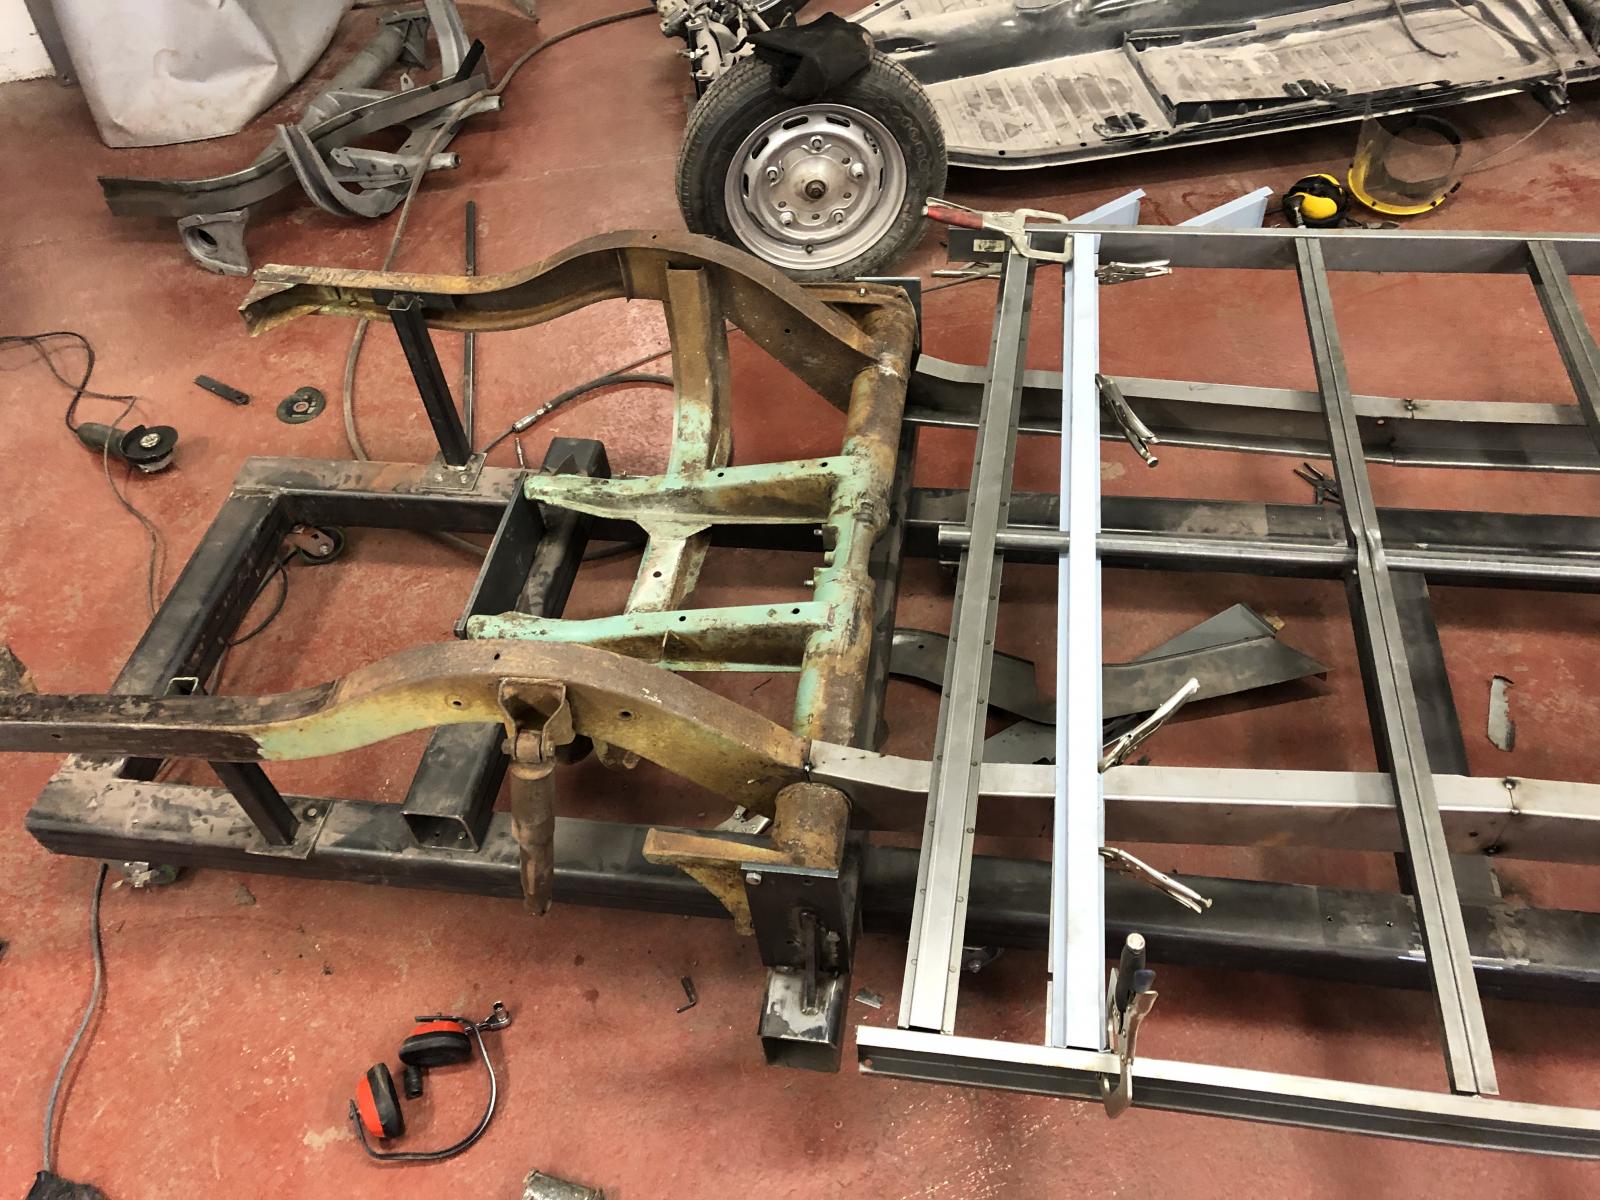
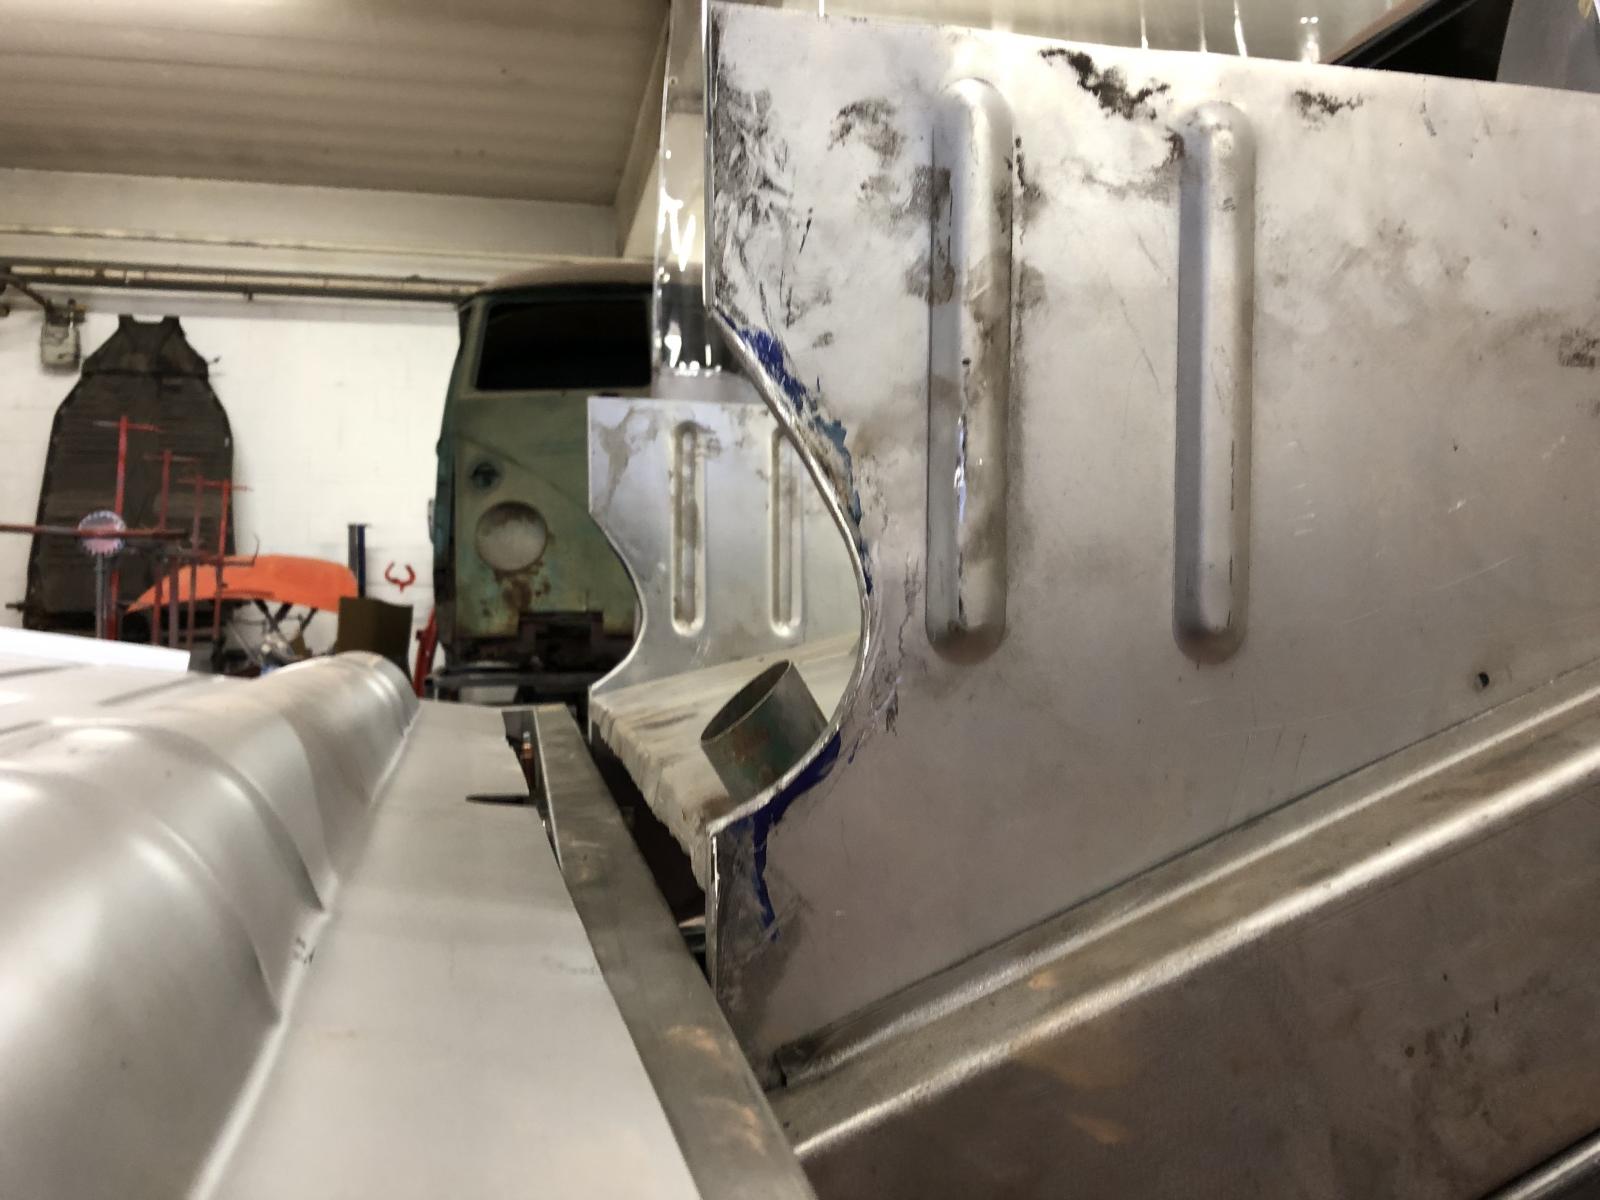
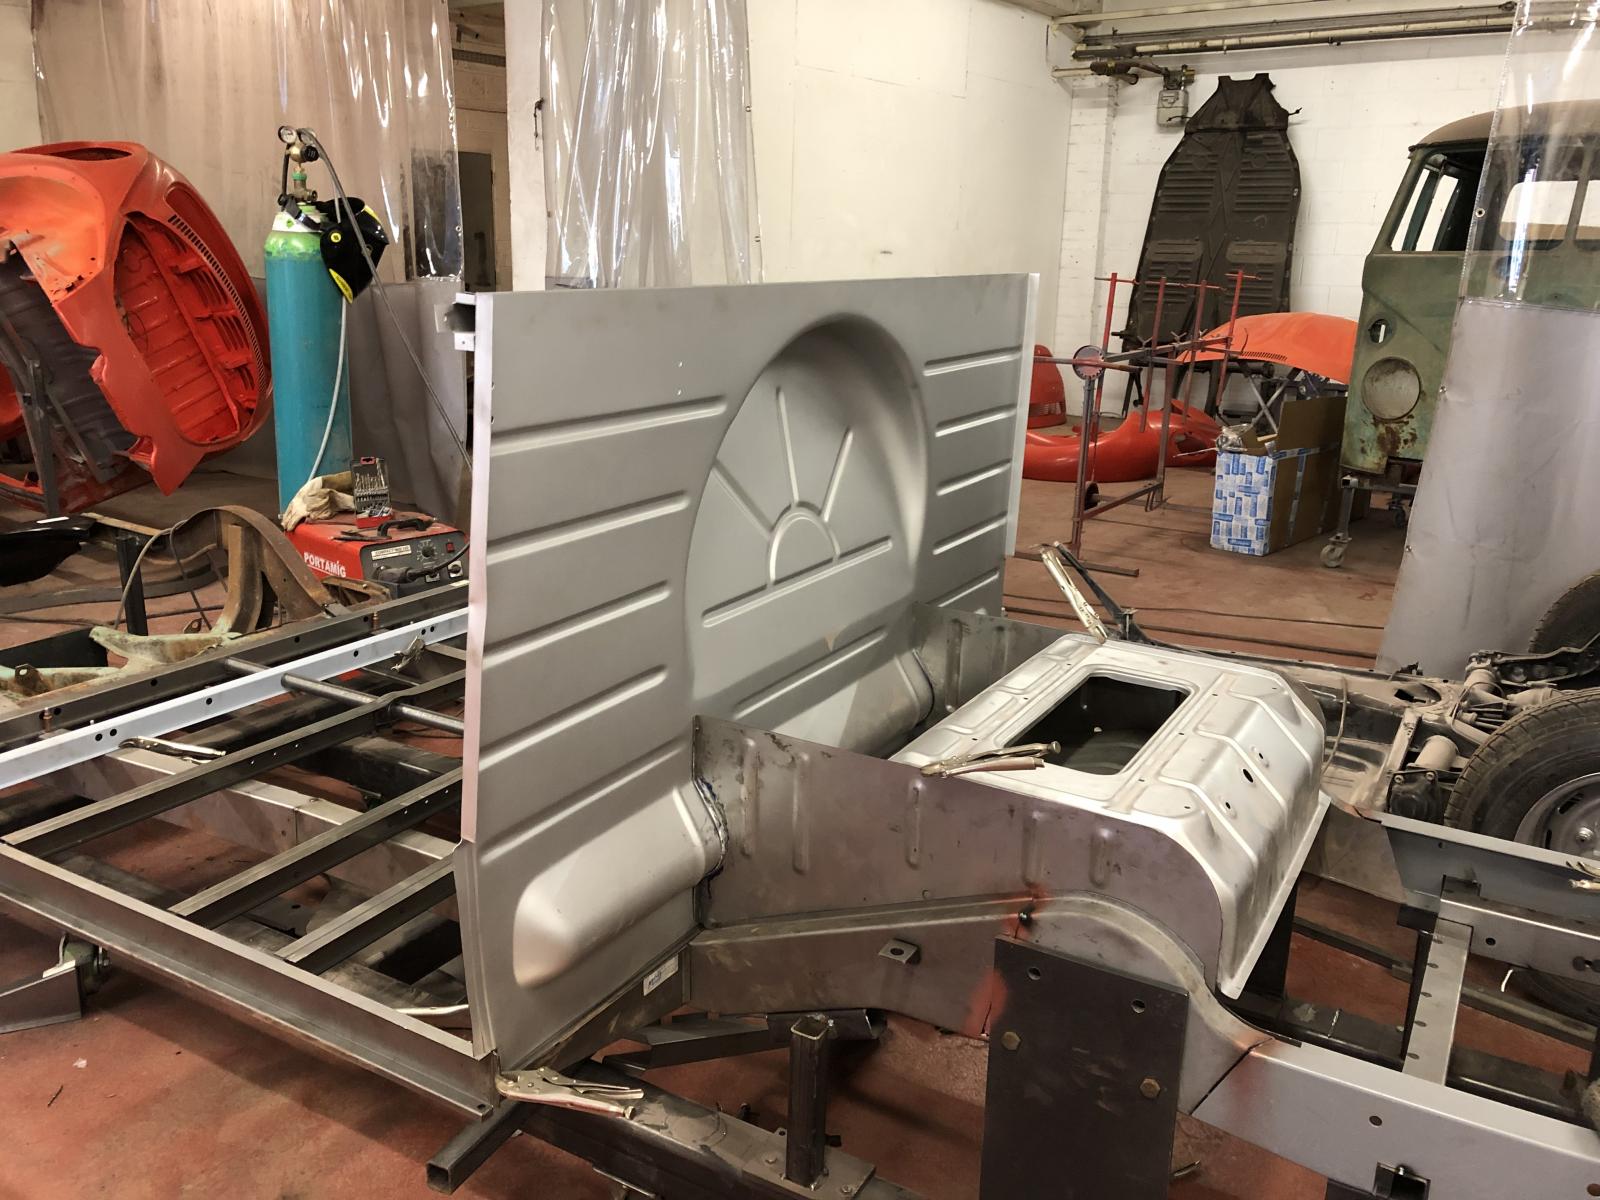
The front inner chassis legs were flat and needed shaping to fit the bulge in the bulkhead:
Thats it for now

Not as nice as I had hoped. Rotten in quite a few places:


Rest of the parts:


I repaired the rotten corner of the front floor section:


Trial assembly of new chassis and front section:


Found a solid rear cut including the complete rear chassis rails so decided to use the whole rear end as the pressings were nicer than the repro chassis rails around where the support bar is welded. New piece tacked in place temporary:

The front inner chassis legs were flat and needed shaping to fit the bulge in the bulkhead:


Thats it for now
mabbo
SSVC Member
Posts: 80
Joined: Wed Jun 01, 2011 7:09 pm
Re: Swedish 66 Crew Cab
by markp » Wed Mar 06, 2019 7:16 am
WOW
Loving this thread !!!
great work dude ,,, keep those pics coming
your doing a great job with nice detailing and fab pics
well done
Mark p
Loving this thread !!!
great work dude ,,, keep those pics coming
your doing a great job with nice detailing and fab pics
well done
Mark p
markp
SSVC Member
Posts: 4955
Joined: Wed Jul 20, 2011 9:56 pm
Re: Swedish 66 Crew Cab
by mabbo » Fri Mar 15, 2019 8:25 pm
Thanks Mark

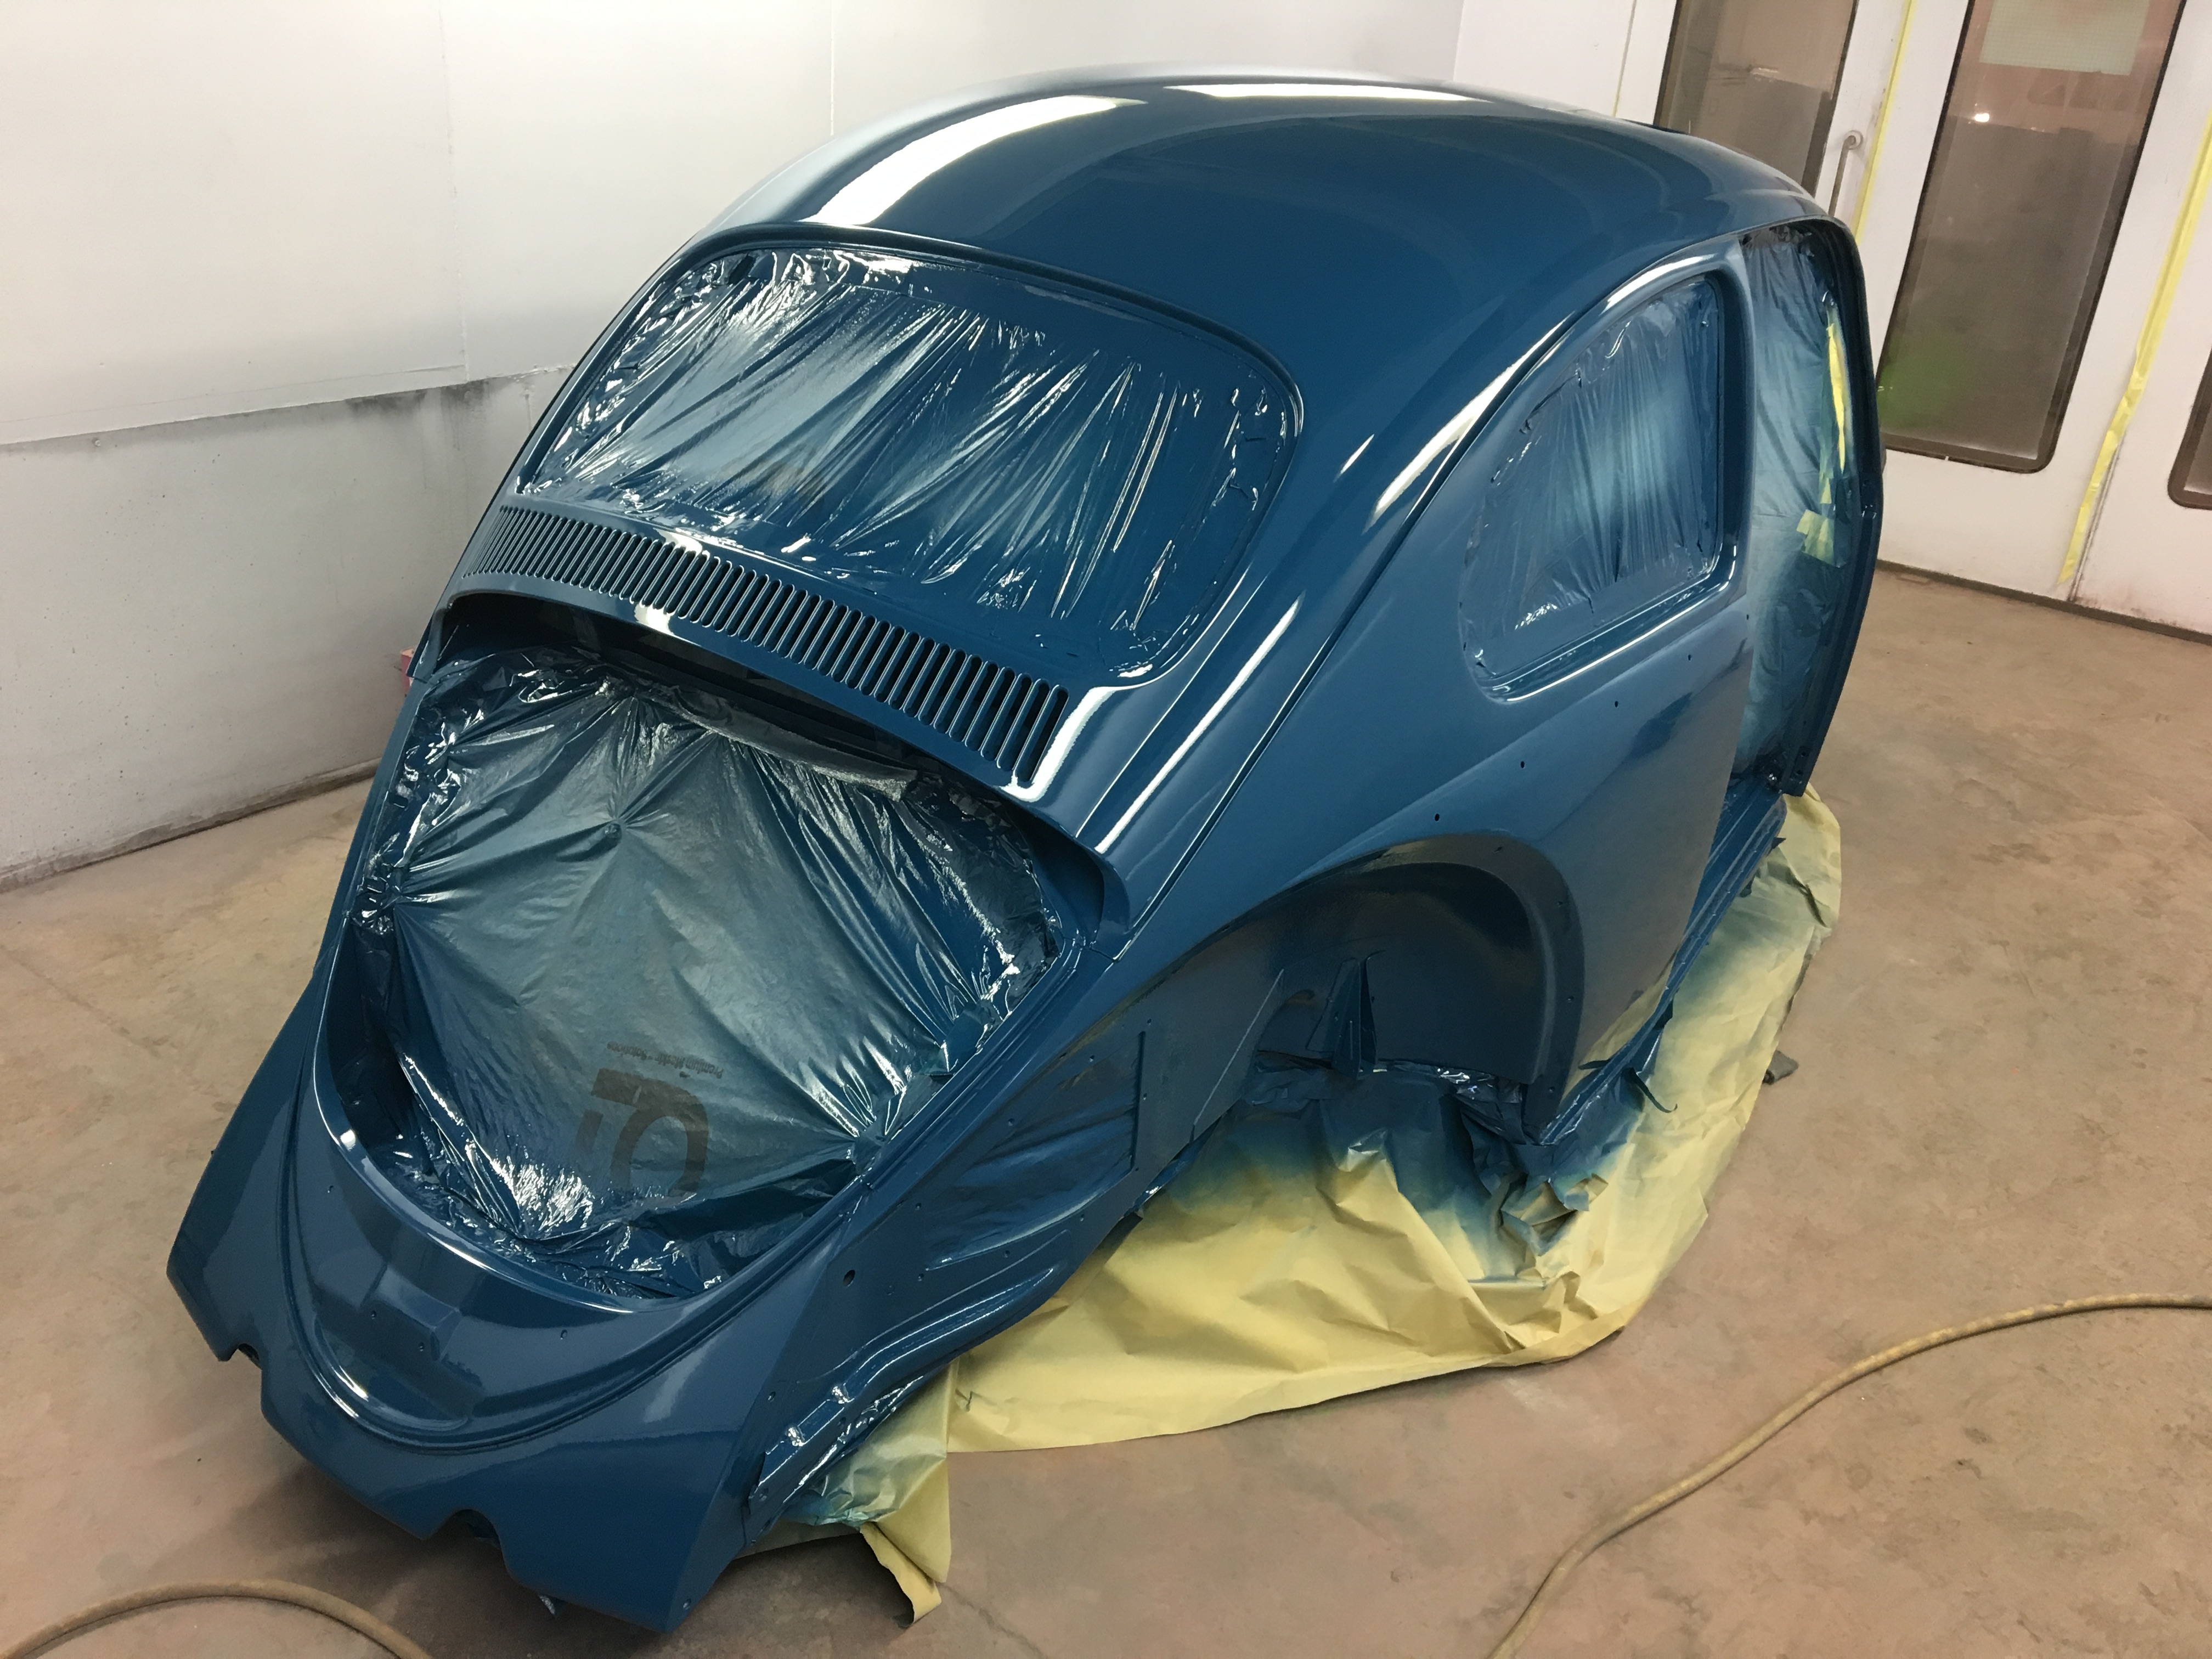
Not got anything done on it the last couple of weeks Im afraid, been getting a customers 66 Beetle painted after we finished the metalwork:
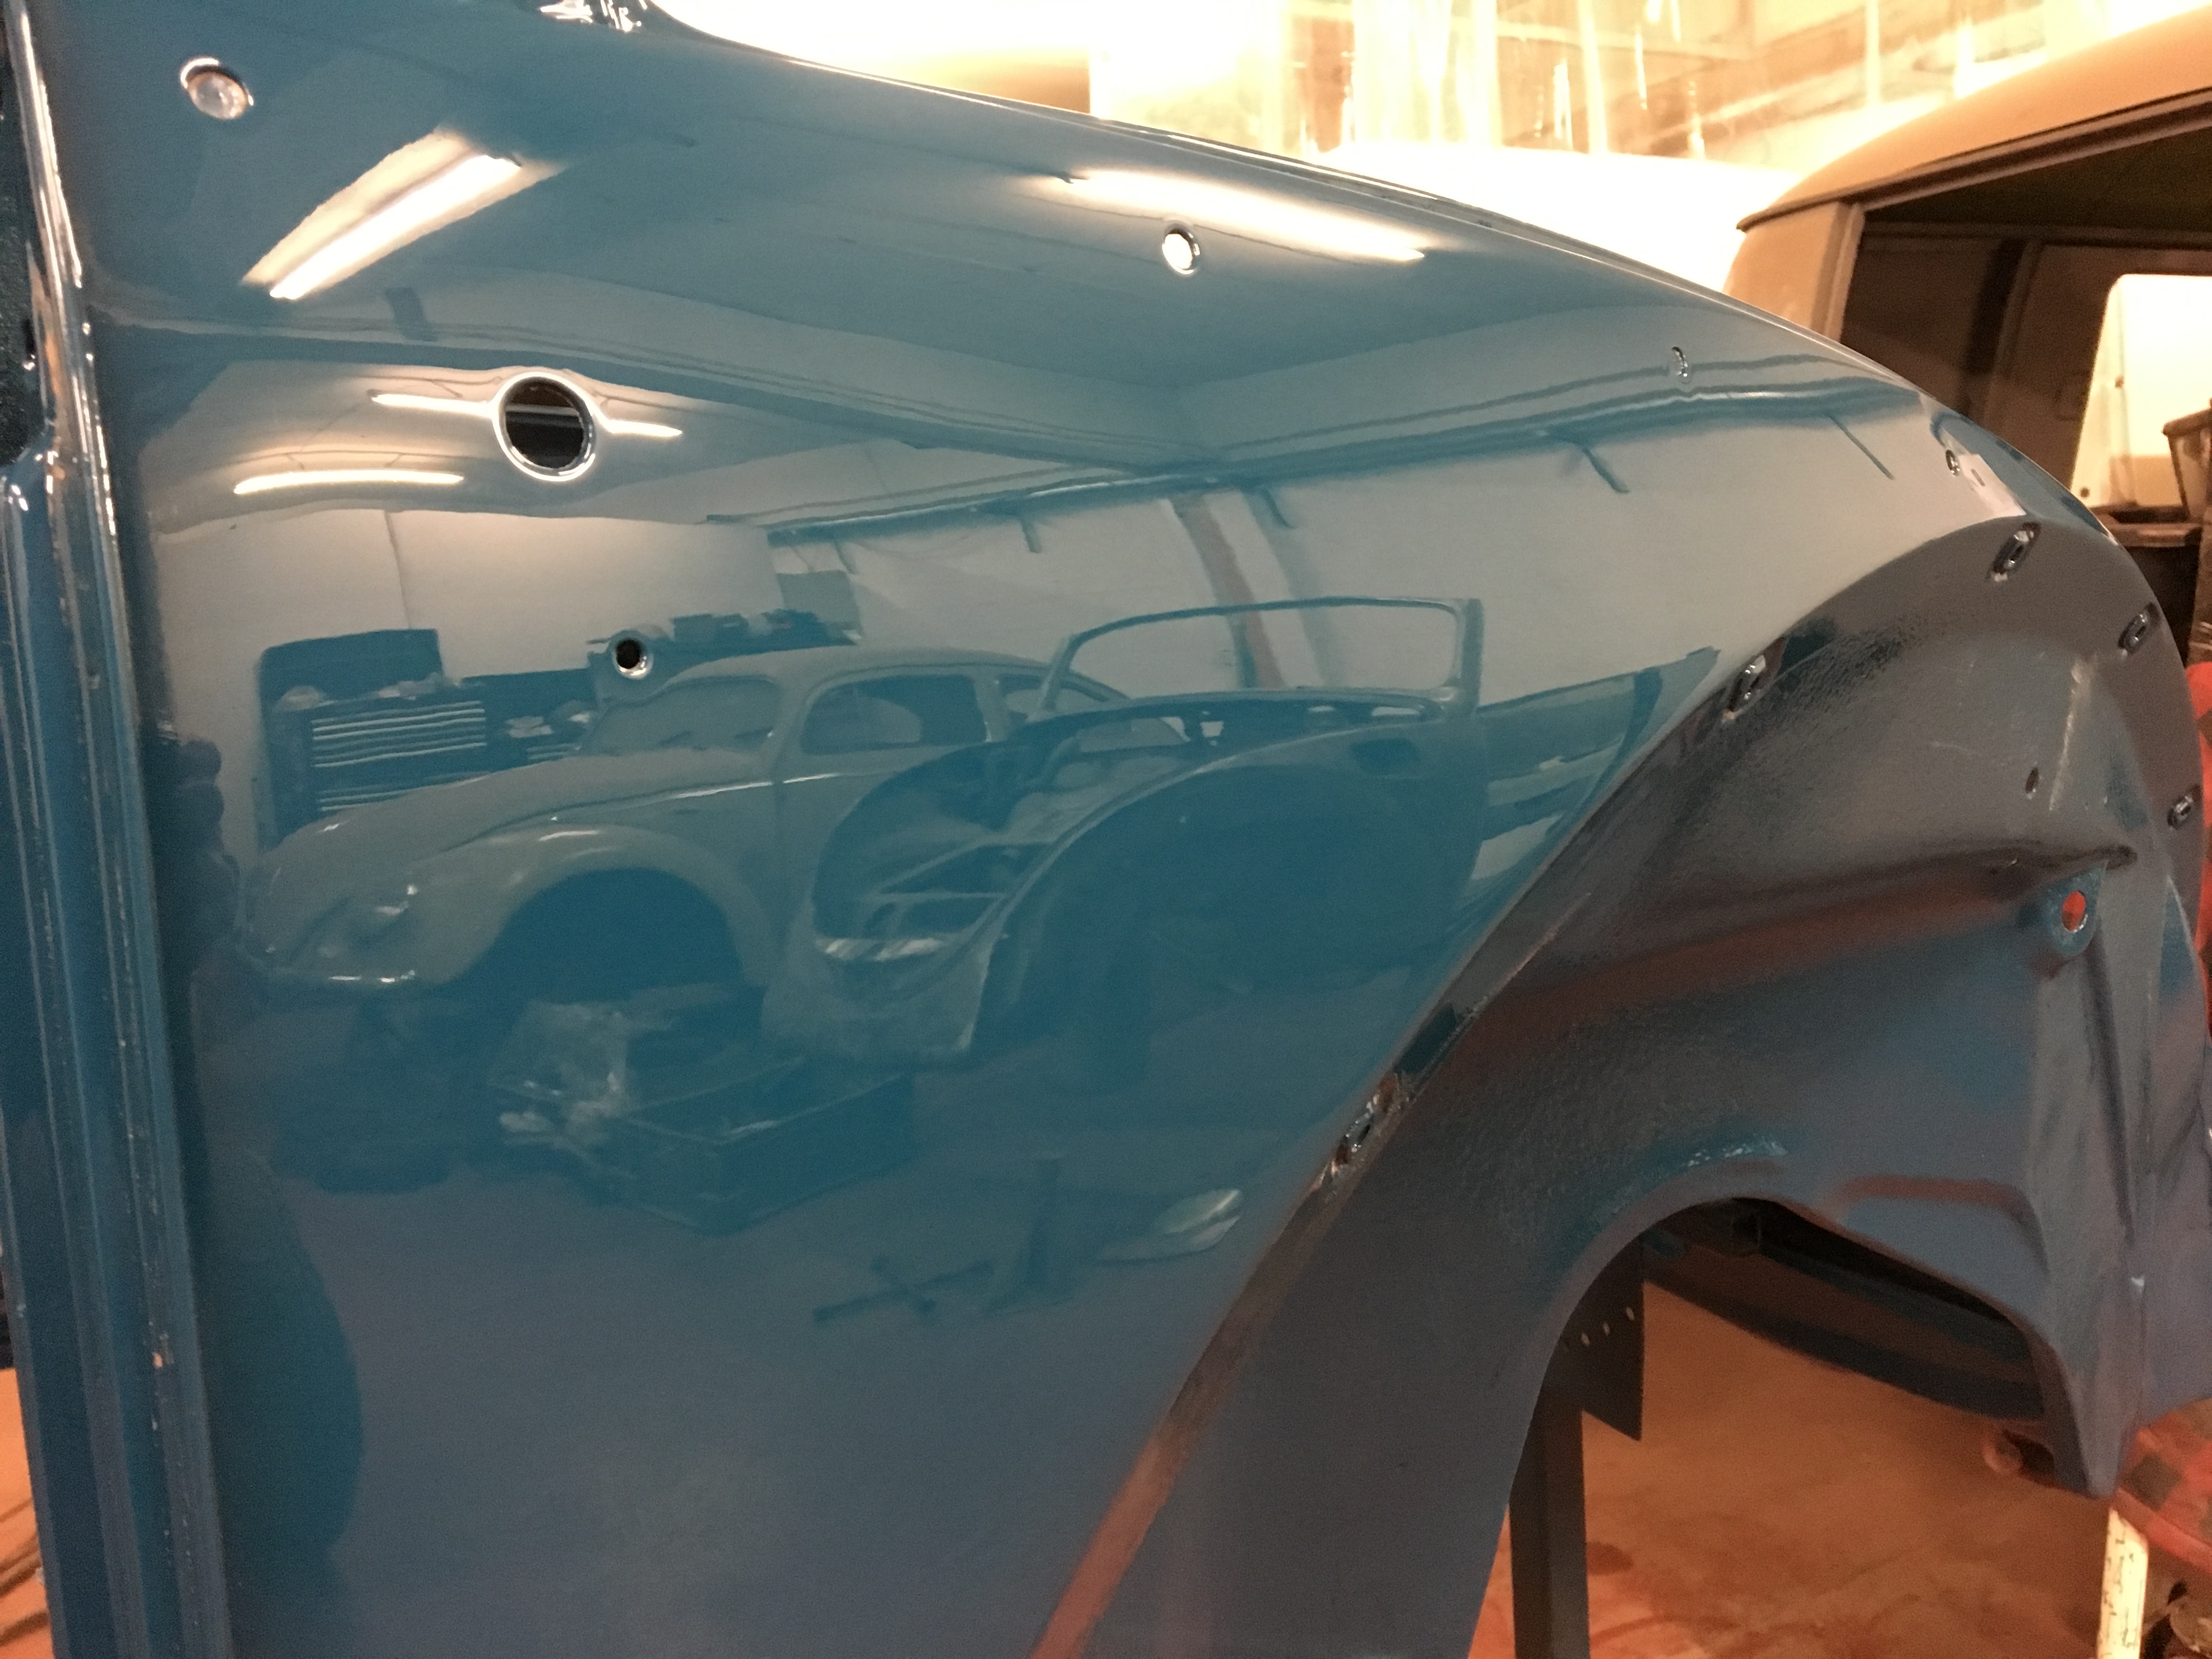
After a flat and polish:
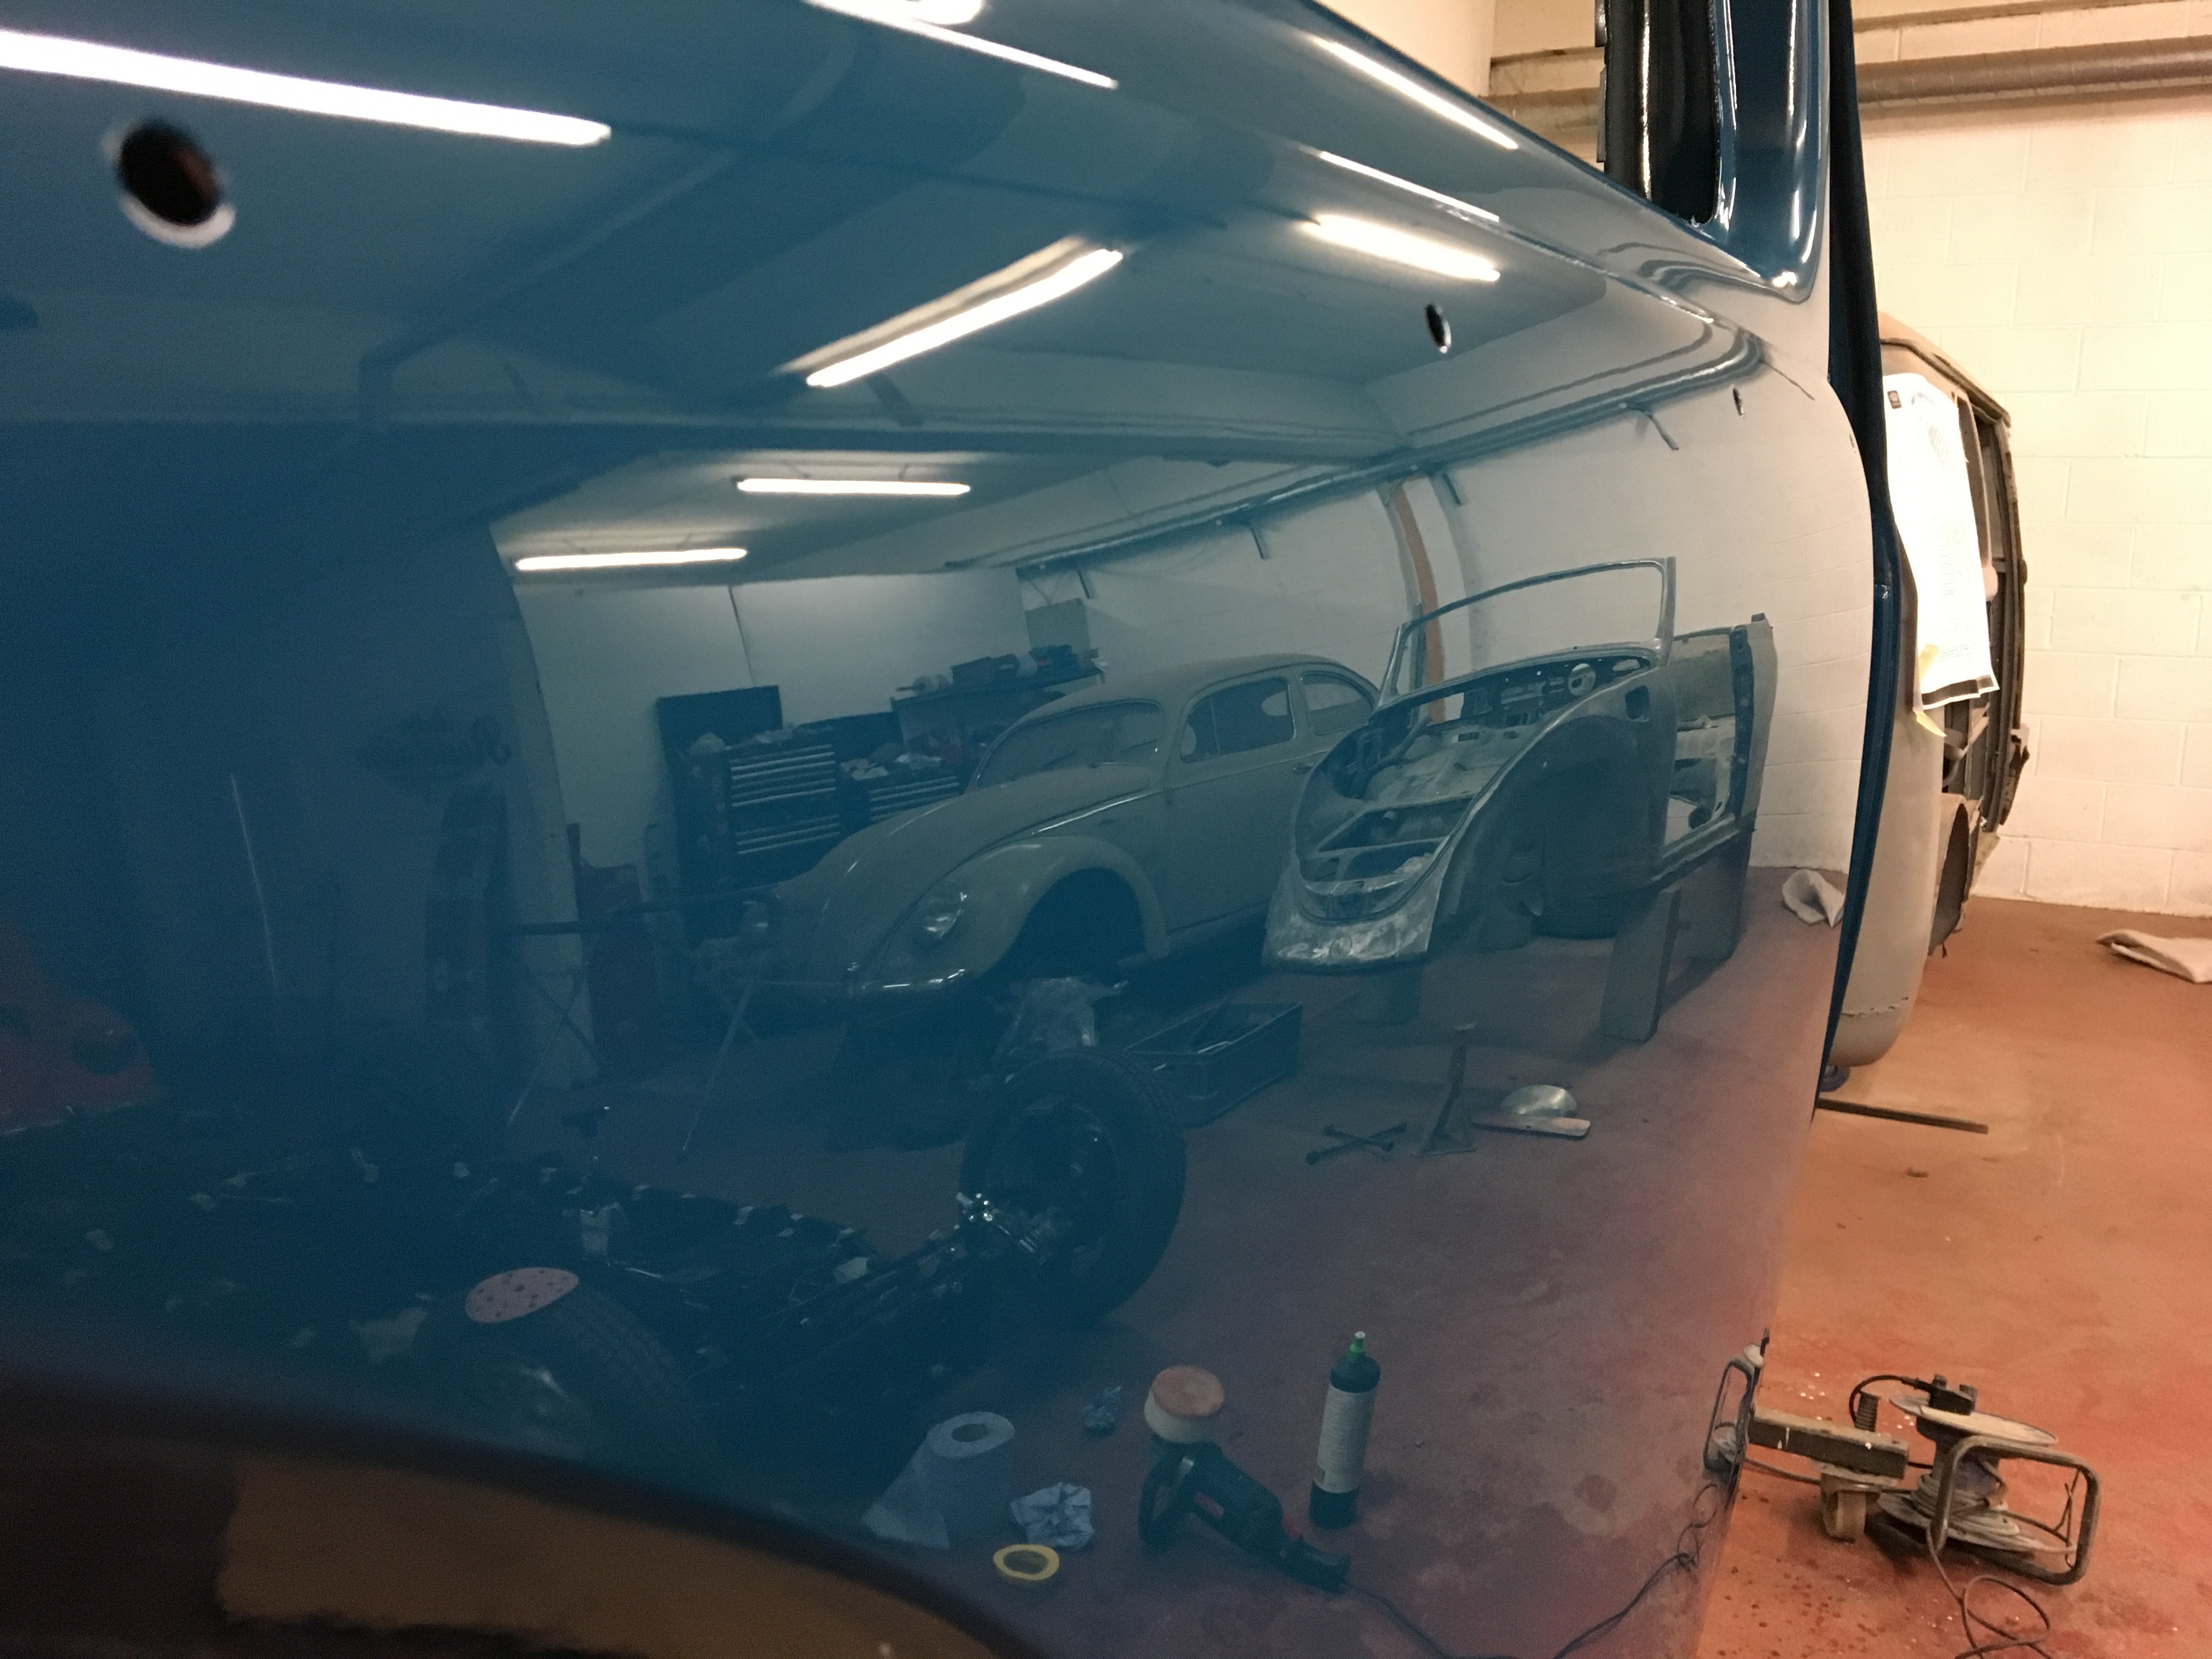
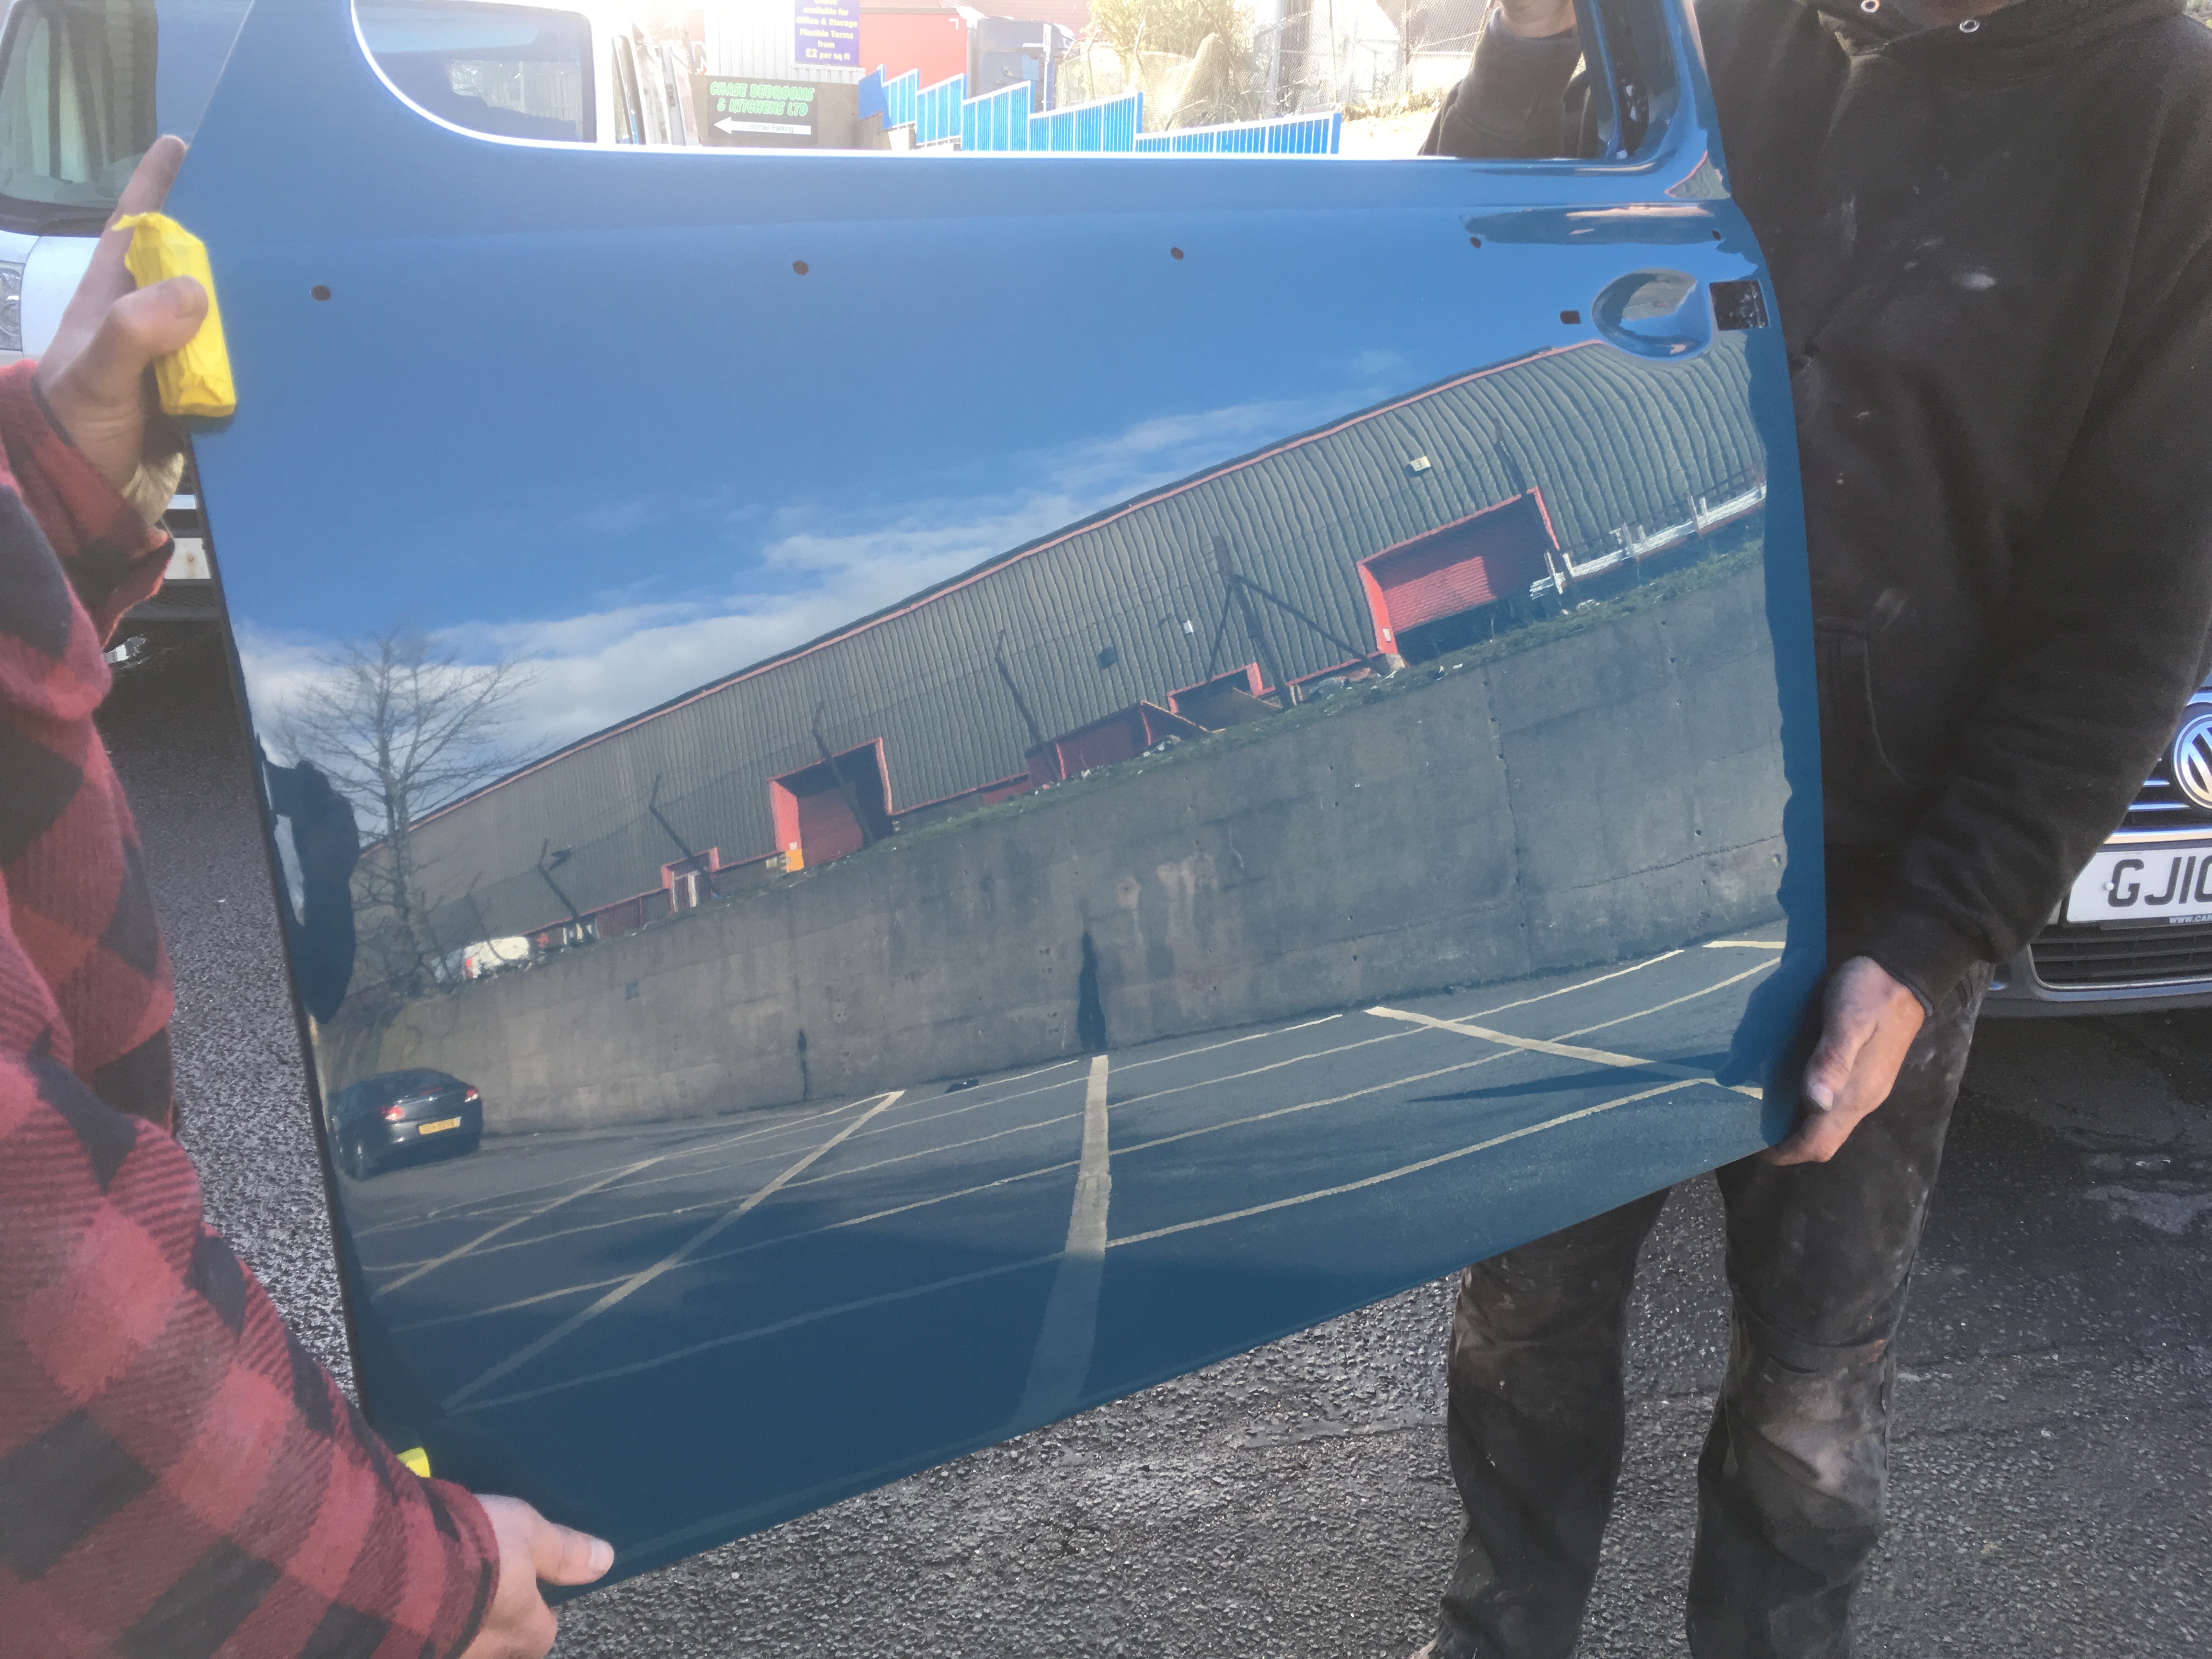
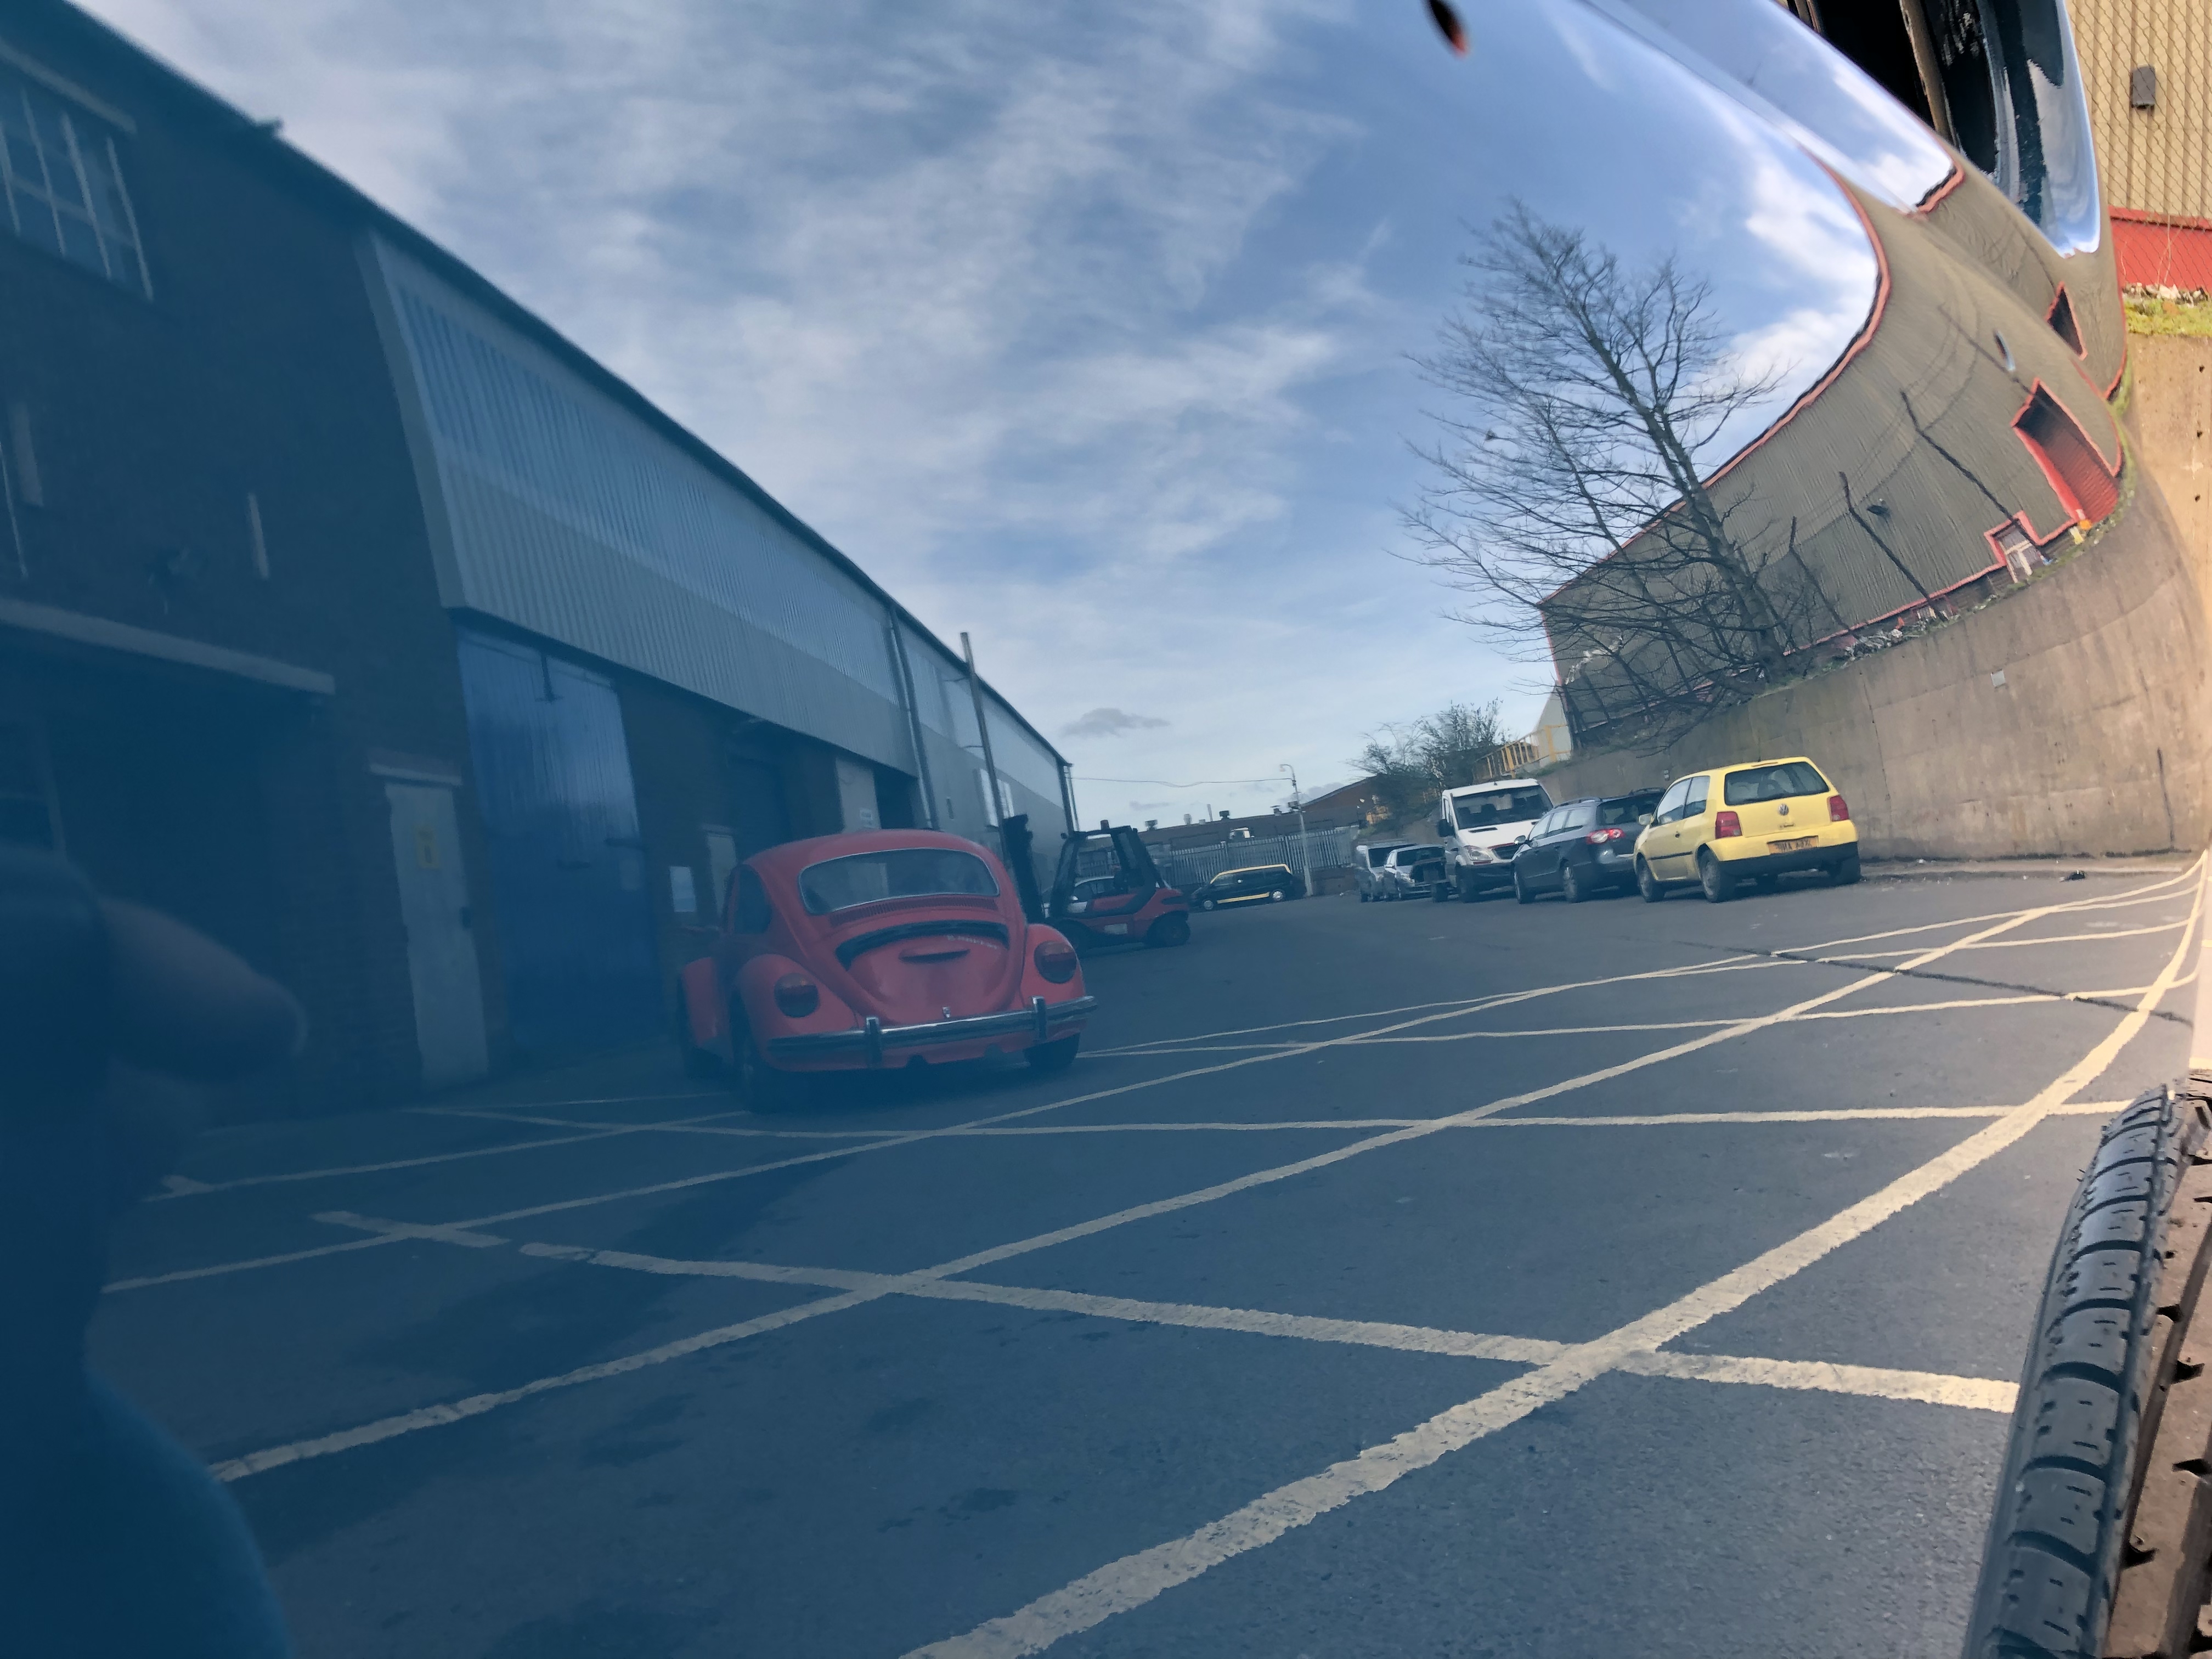
Will be back on the crewcab before the end of the month though
Not got anything done on it the last couple of weeks Im afraid, been getting a customers 66 Beetle painted after we finished the metalwork:

After a flat and polish:


Will be back on the crewcab before the end of the month though
mabbo
SSVC Member
Posts: 80
Joined: Wed Jun 01, 2011 7:09 pm
Re: Swedish 66 Crew Cab
by vwJim » Fri Mar 15, 2019 8:58 pm
Nice!!!!!
vwJim
SSVC Committee Member
Posts: 20060
Joined: Thu Apr 24, 2003 6:05 pm
Re: Swedish 66 Crew Cab
by mabbo » Wed Mar 27, 2019 8:58 pm
Had a few days on a customers 66 we restored a couple of years go. It was never built to be a show car but he did a great job of all the assembly and I love it.... Anyway, he bought it to us to sort a few issues with the engine and gearbox. I sanded and mopped a few areas and helped detail it before the show:
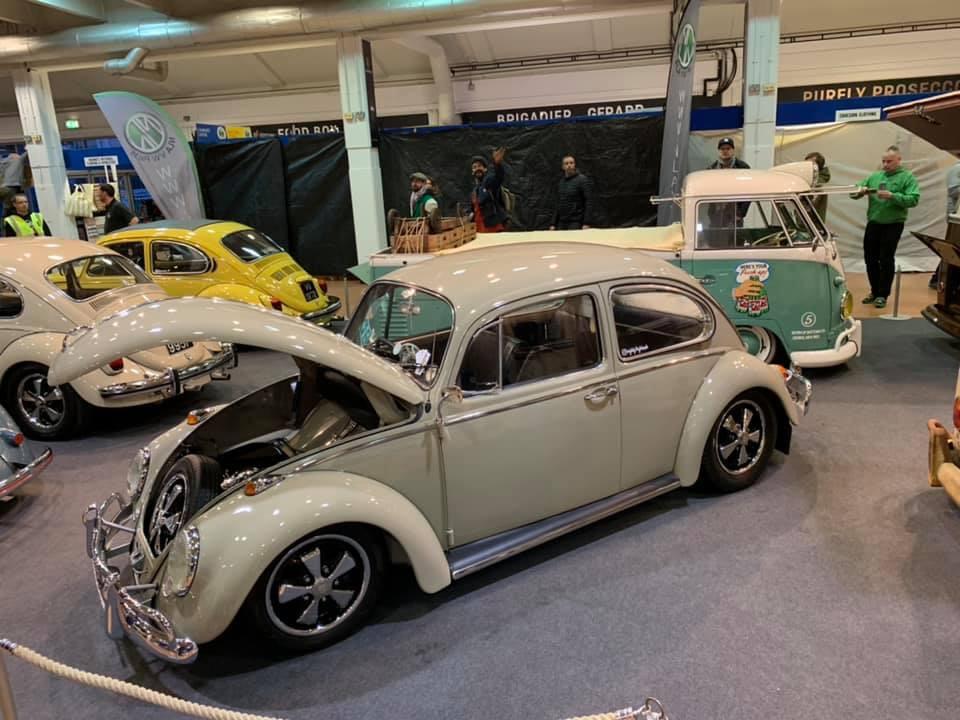
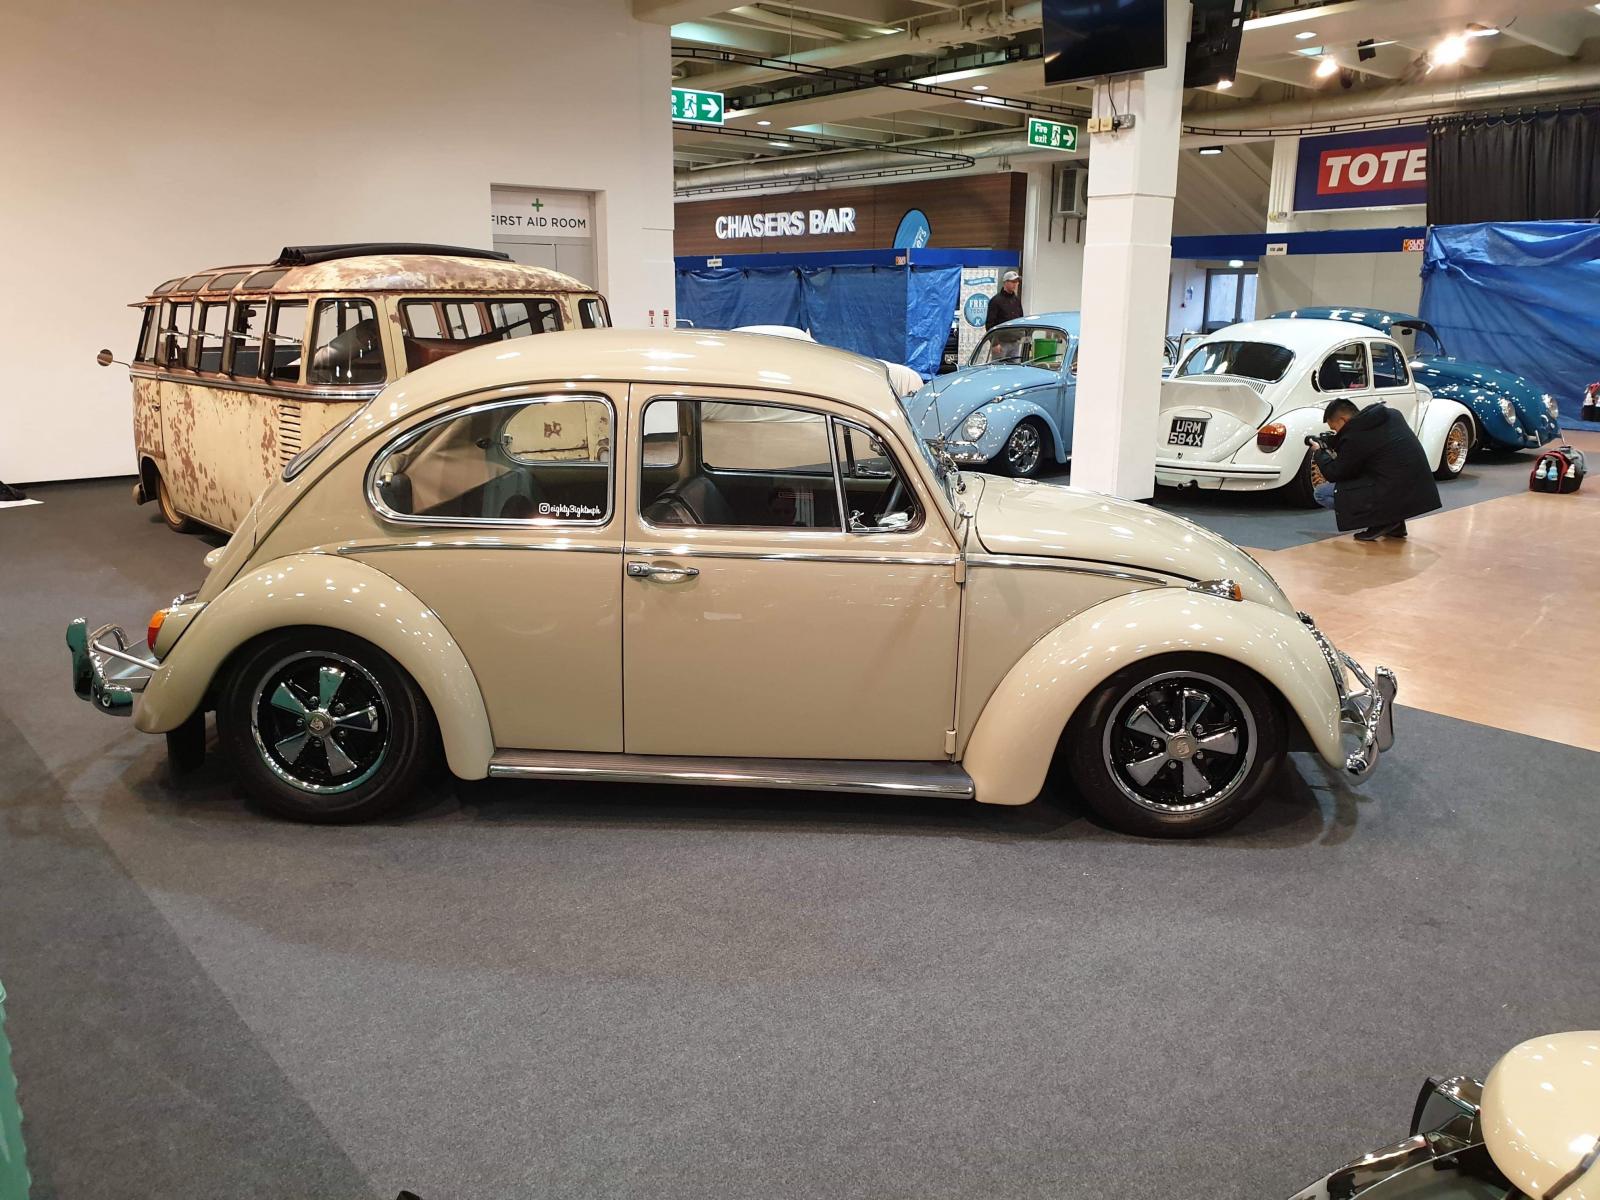
Now Volksworlds all over, its back to real work. We got a bit more done on the chassis... Loads of hours but not a lot to show for it, enjoying it though.
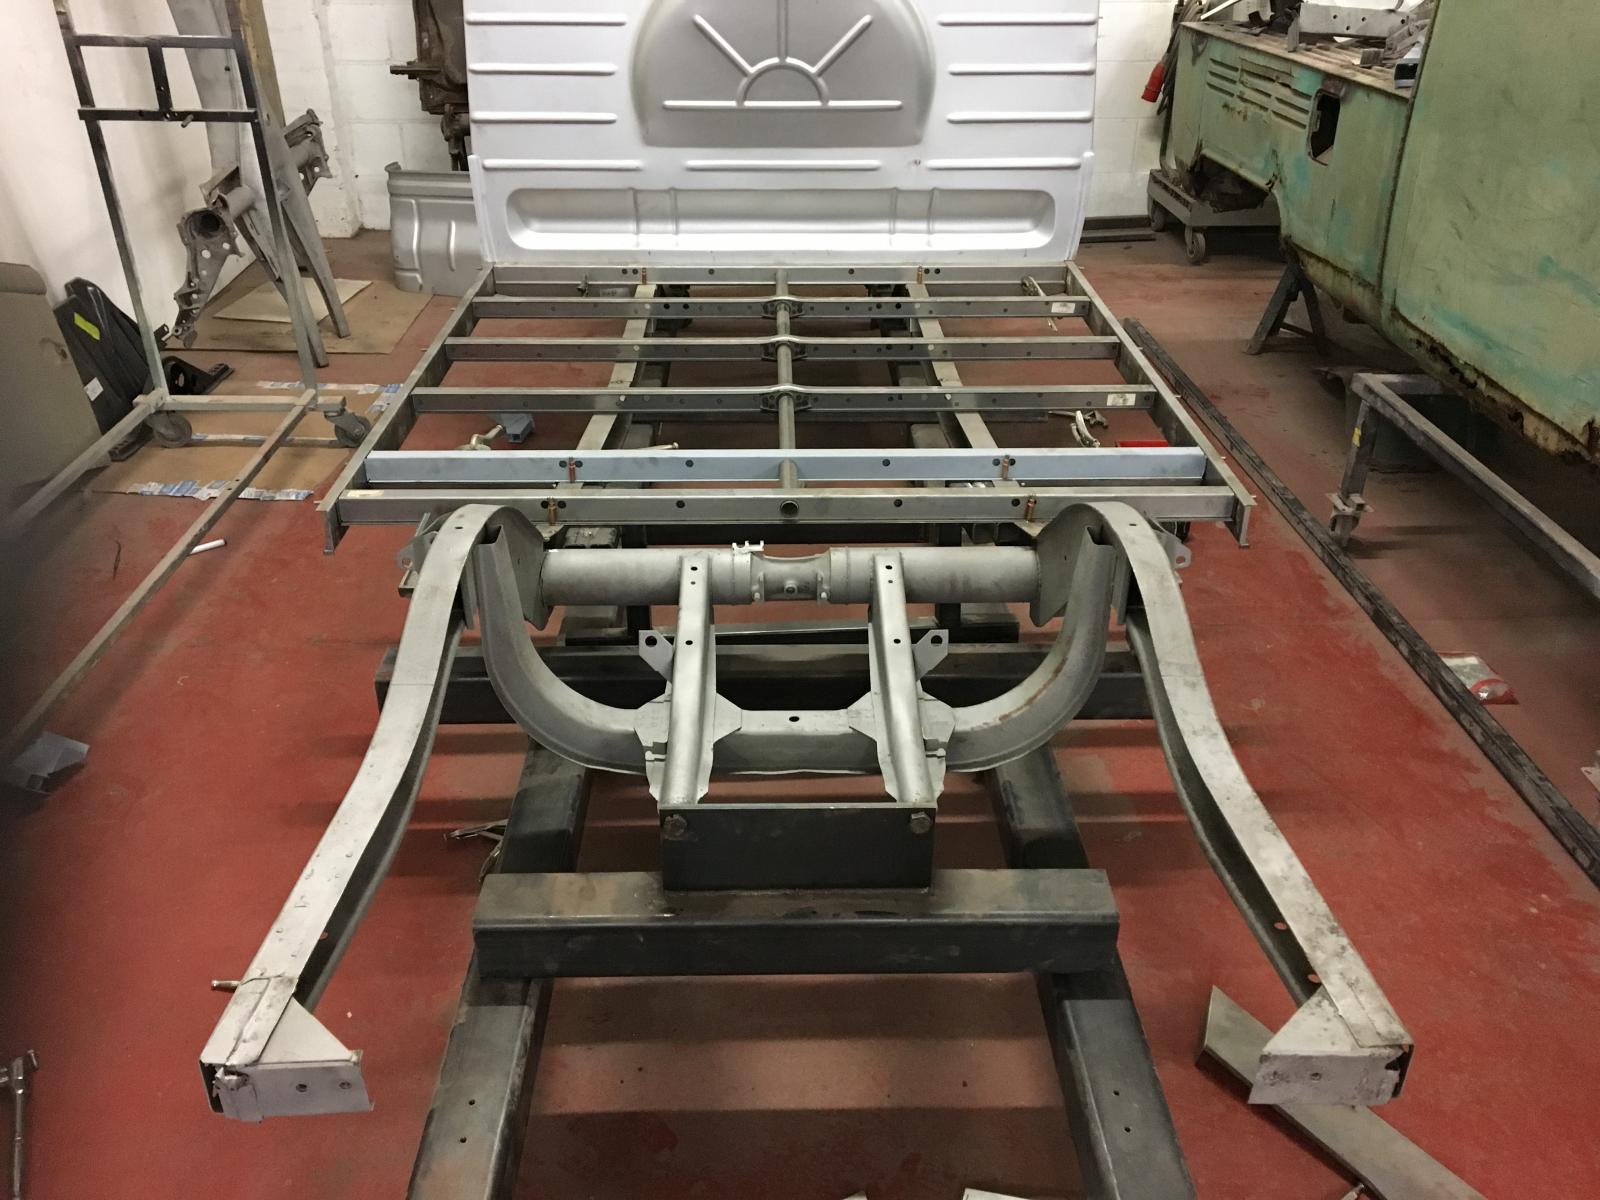
We got the rear donor chassis / torsion housing section trimmed down and tidied up. We got the new chassis rails square and lined up the rear cut before tacking everything in place. Then got the sills, I beams etc mocked up and once happy panel pinned in place:
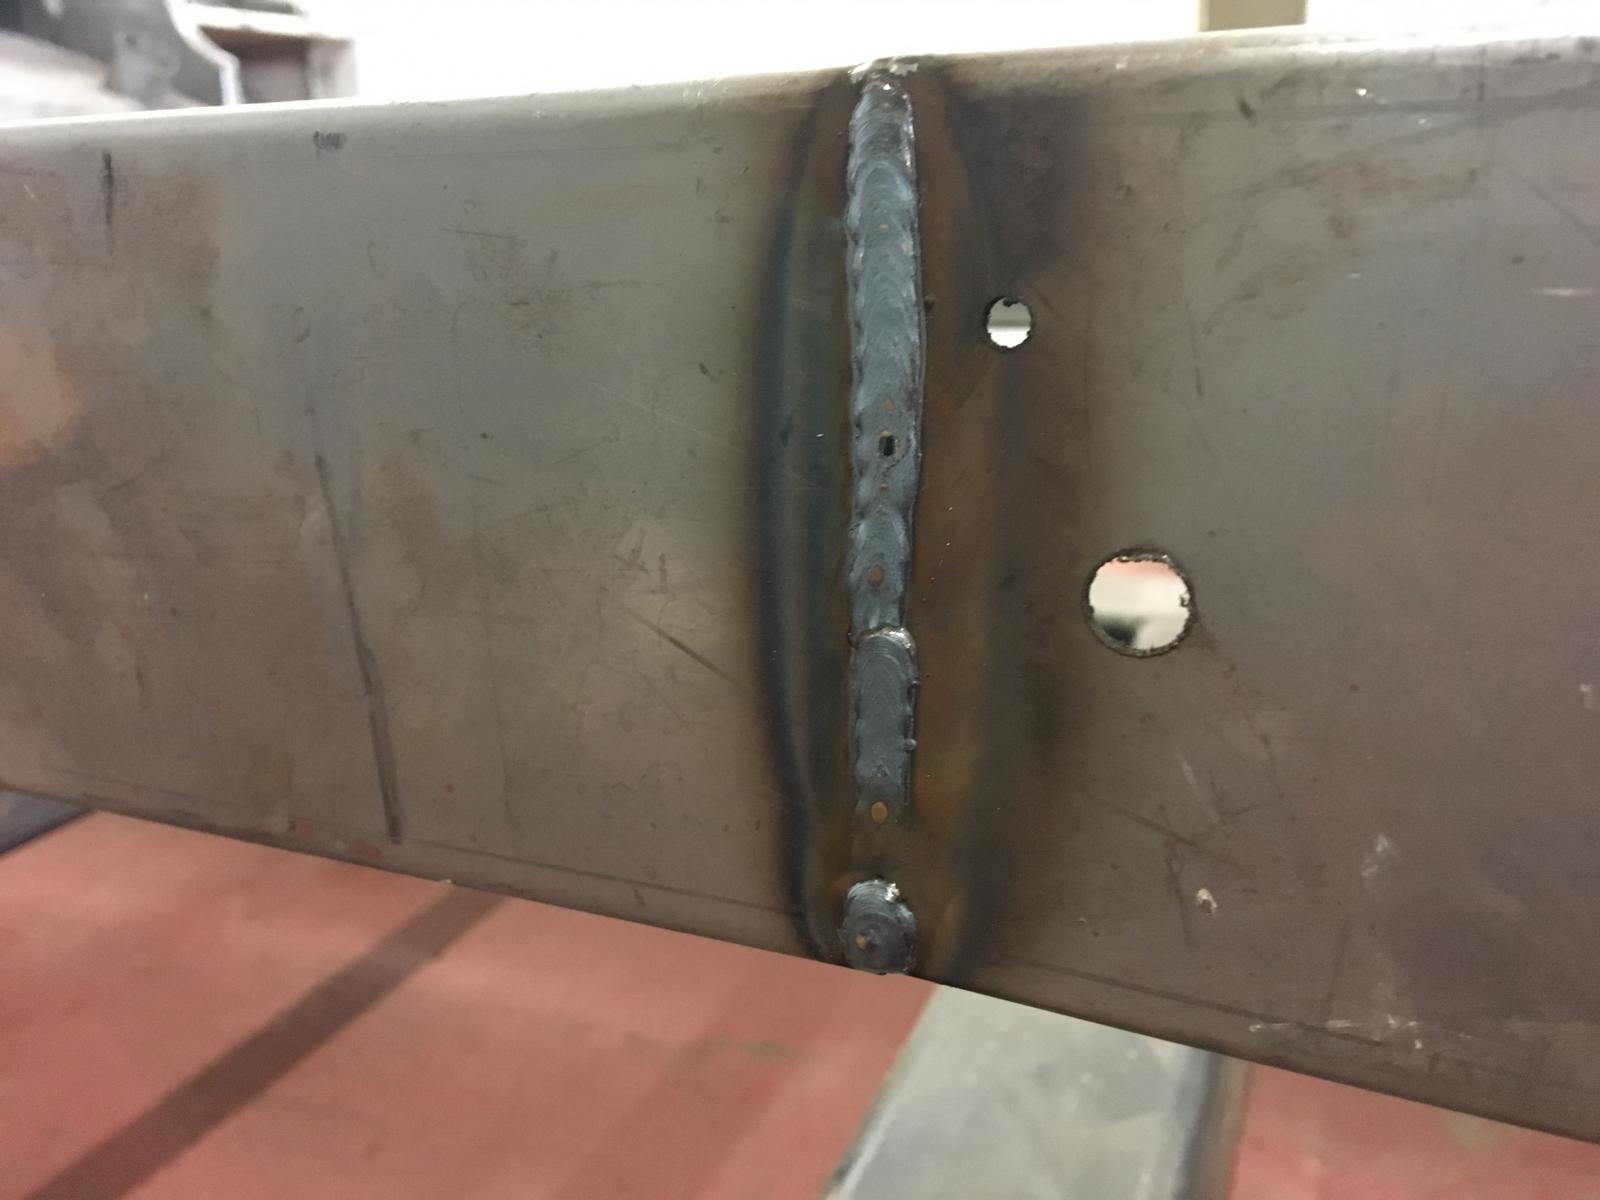
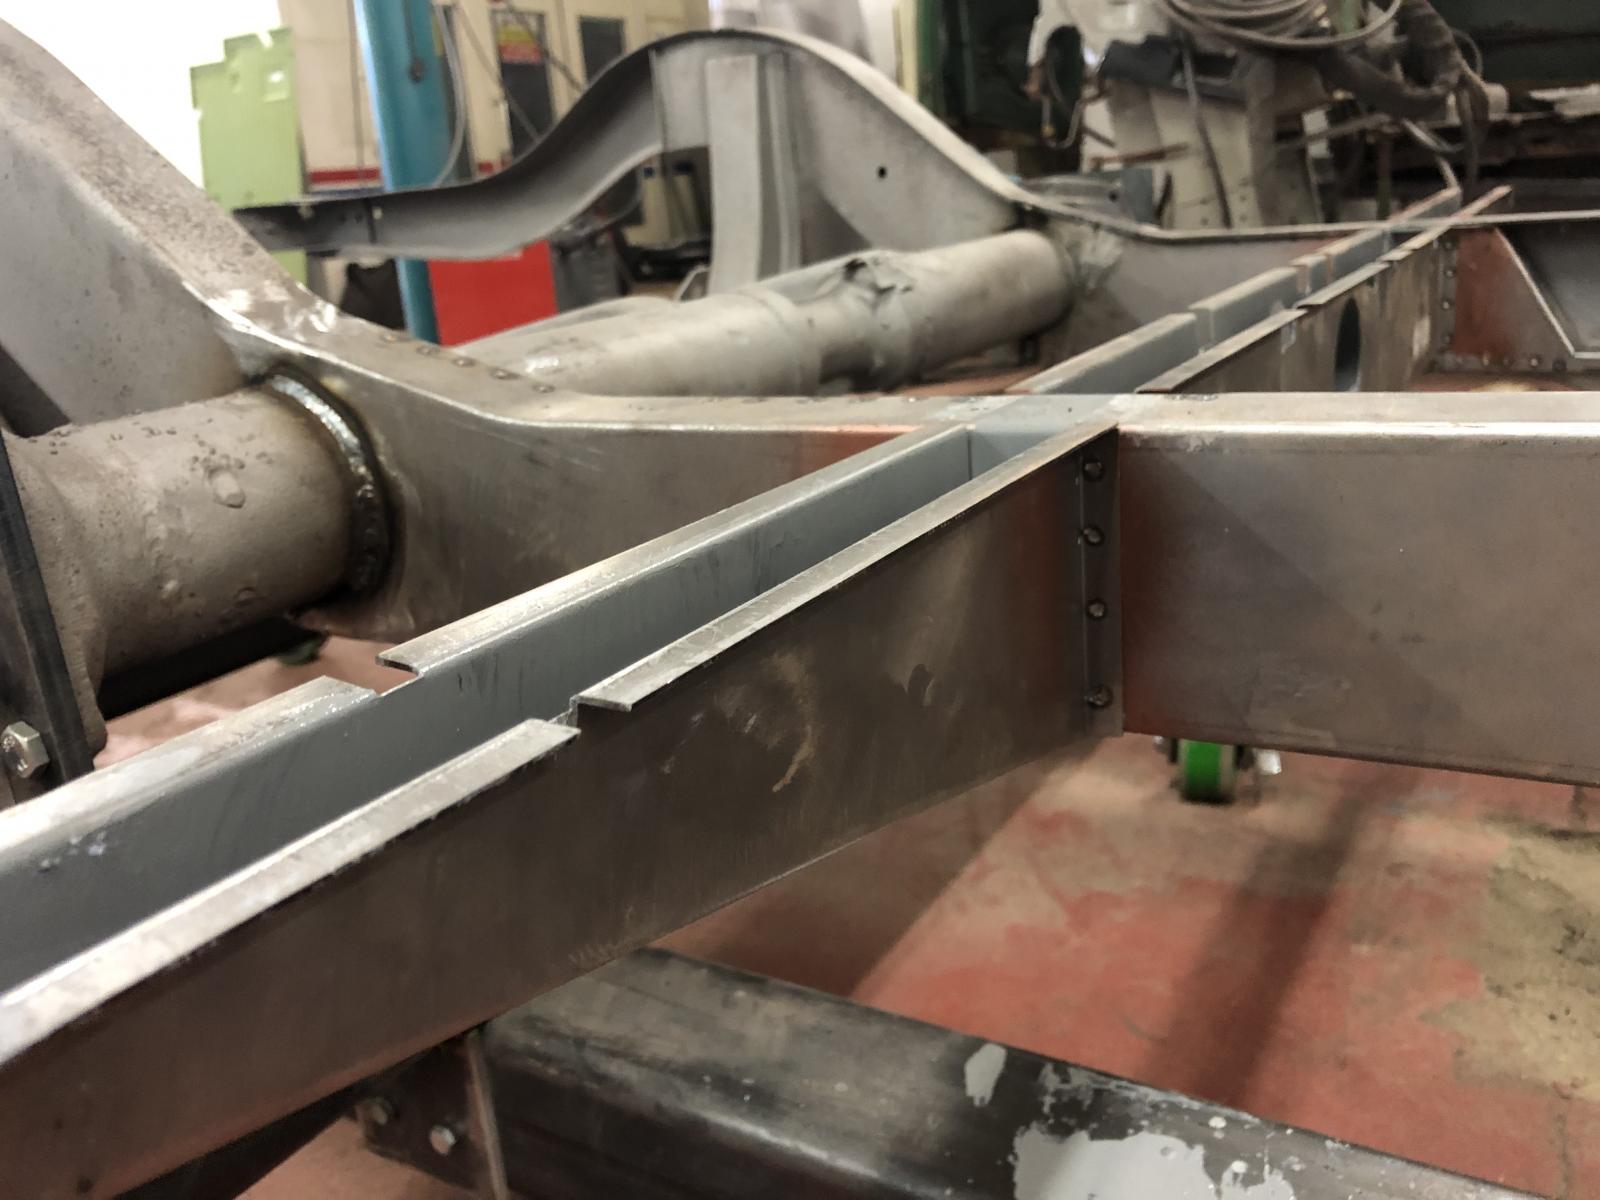
Once we were happy everything was in the right place we seamed the join in the chassis rails up where the factory join is. Bit gutted, was hoping these would come out perfect as they wont be ground flush. They are not bad, but not my best welding:
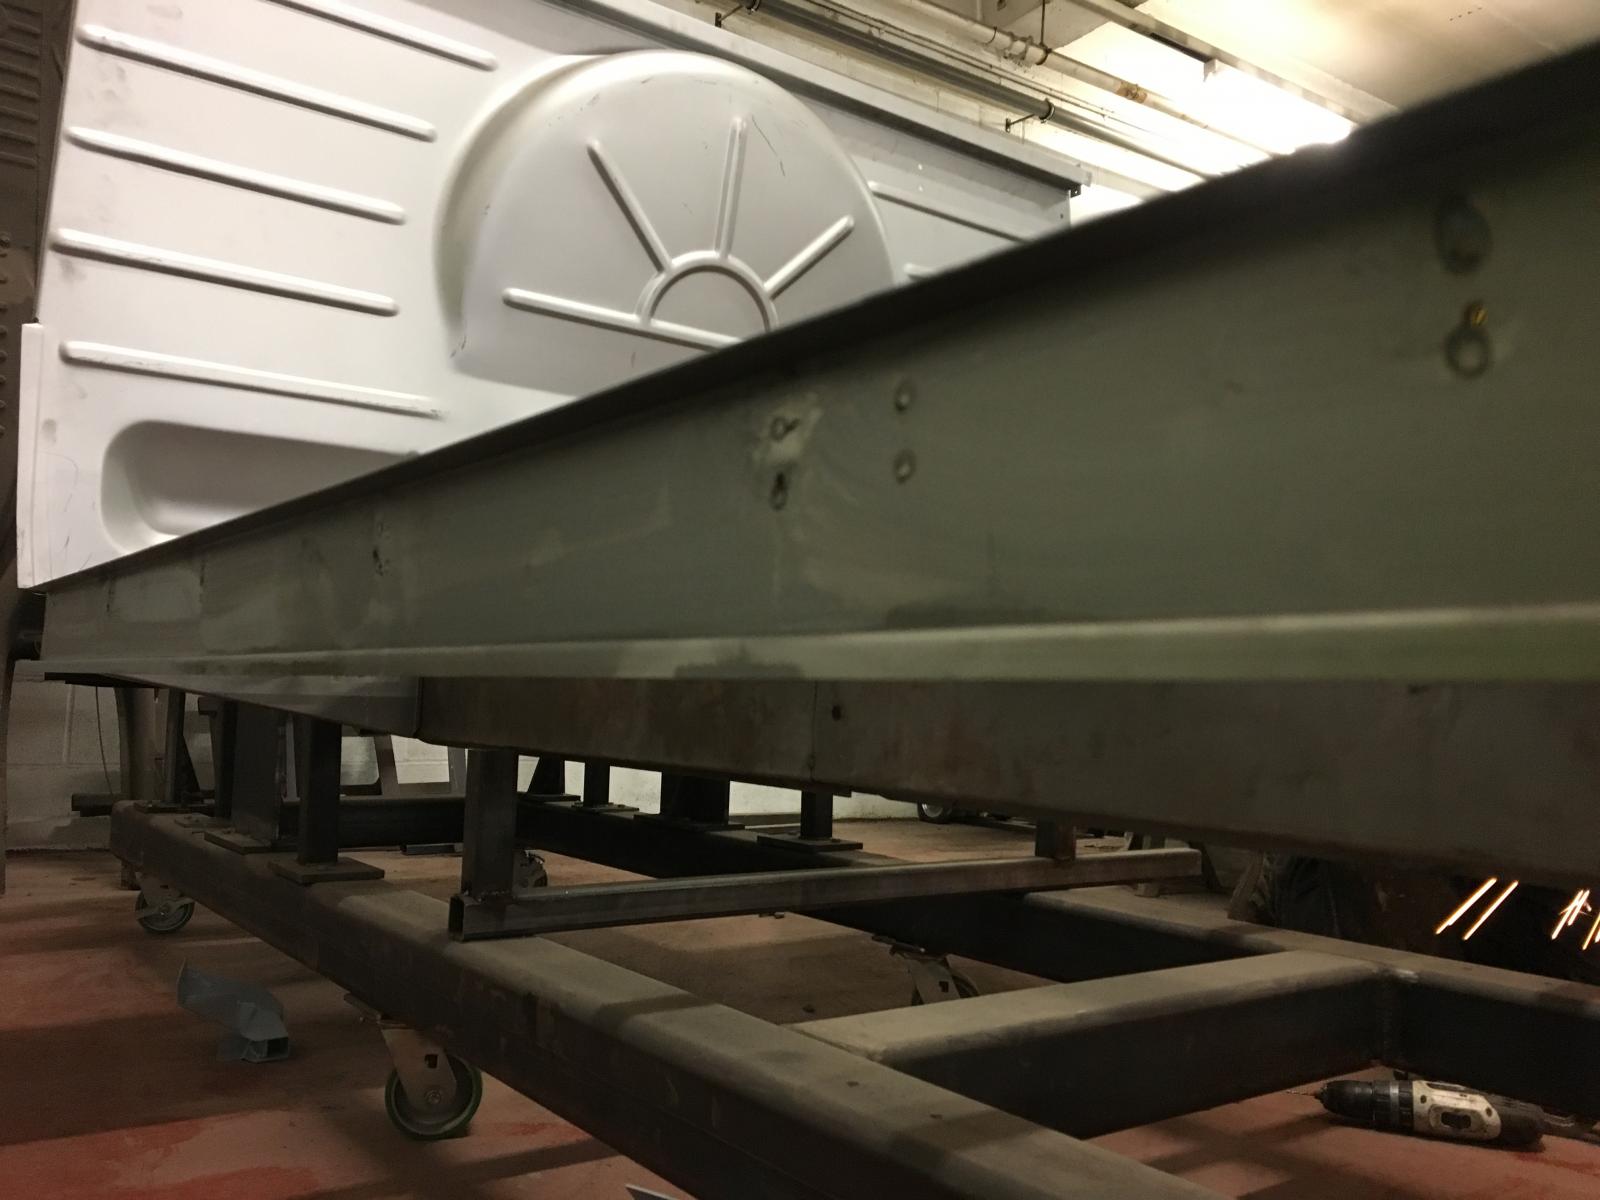
Spot welded the sills to the I beams and top hats. The complete floor support framework finished but not welded to the chassis just yet:
We got the front and rear outriggers and cross members pinned in place, once happy we took them apart and spot welded the rear cross member to the inner sections of the chassis rails before they were fitted:
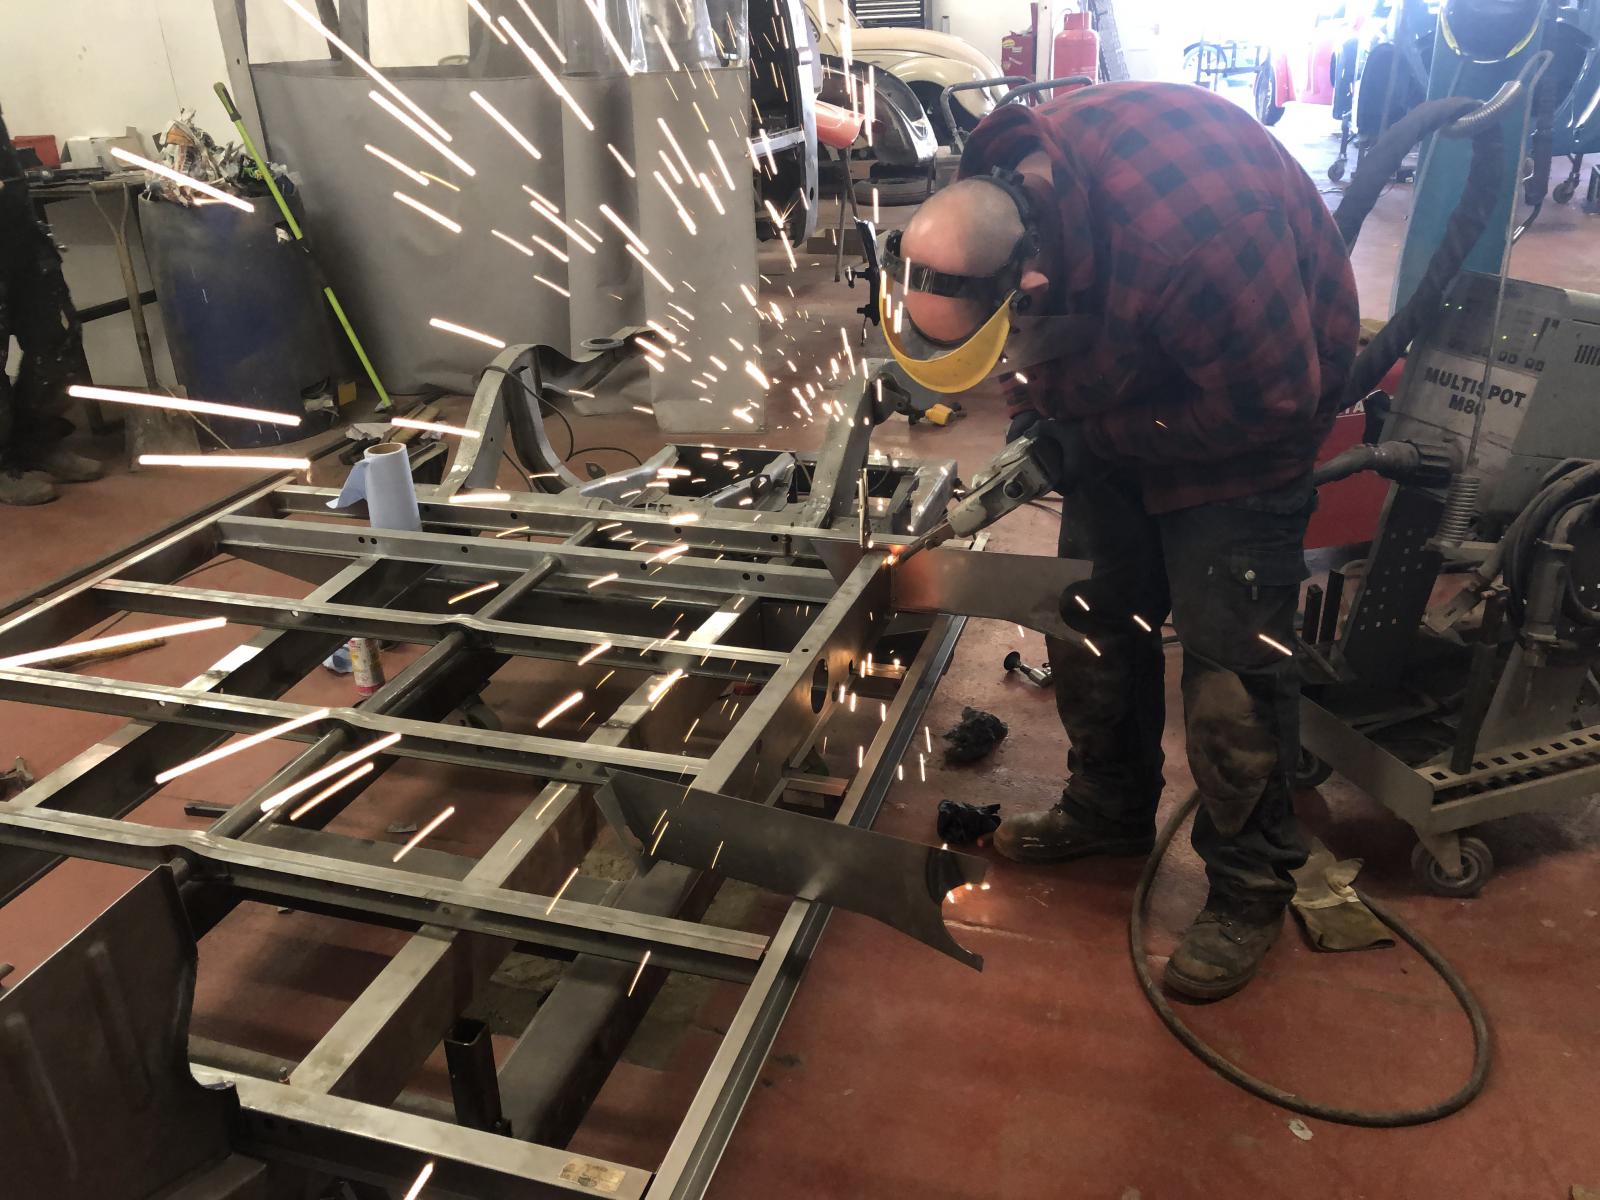
Then we spot welded the rear outriggers to the chassis before the rear crossmember 'assembly' was welded in place. We painted epoxy and weld in all the box sections, and weld through primer on all the spot welded sections before anything was welded for maximum protection.
After the outriggers were welded, we spot welded the 'cross member assembly' in place trying to make it look as factory as possible.
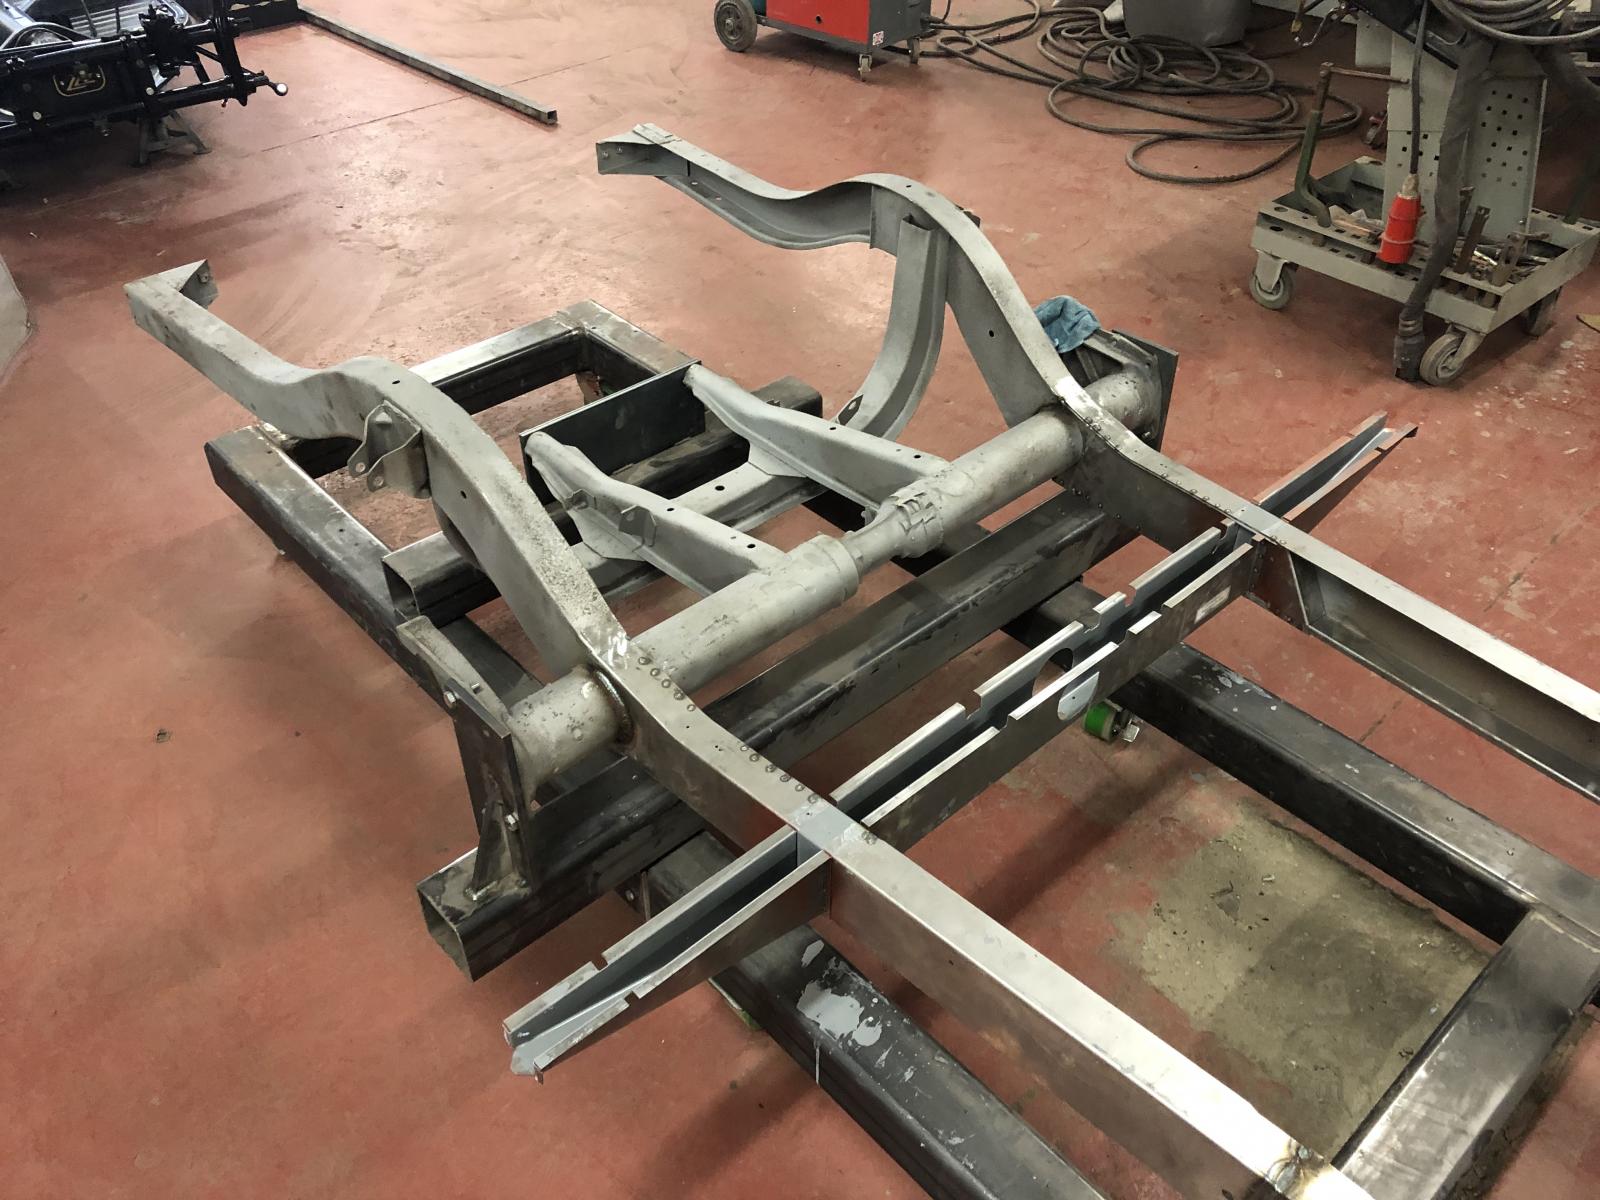
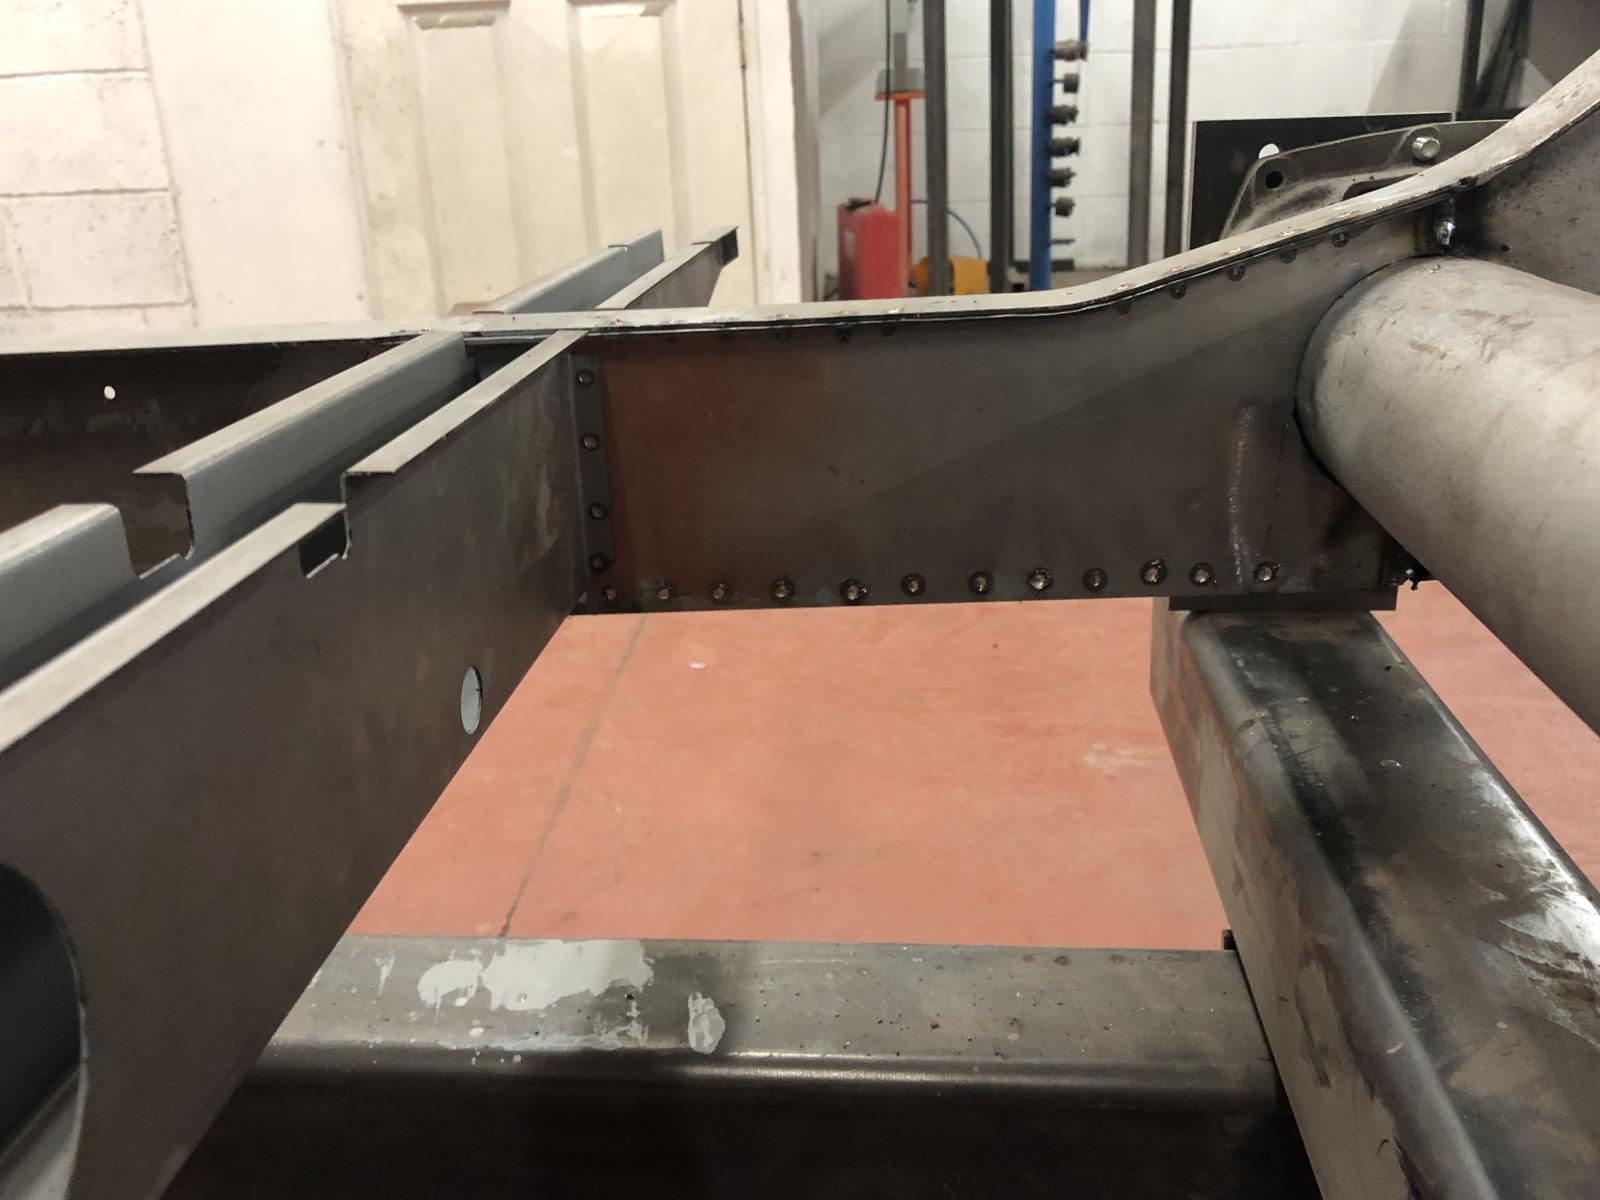
Seaming up the torsion housings:
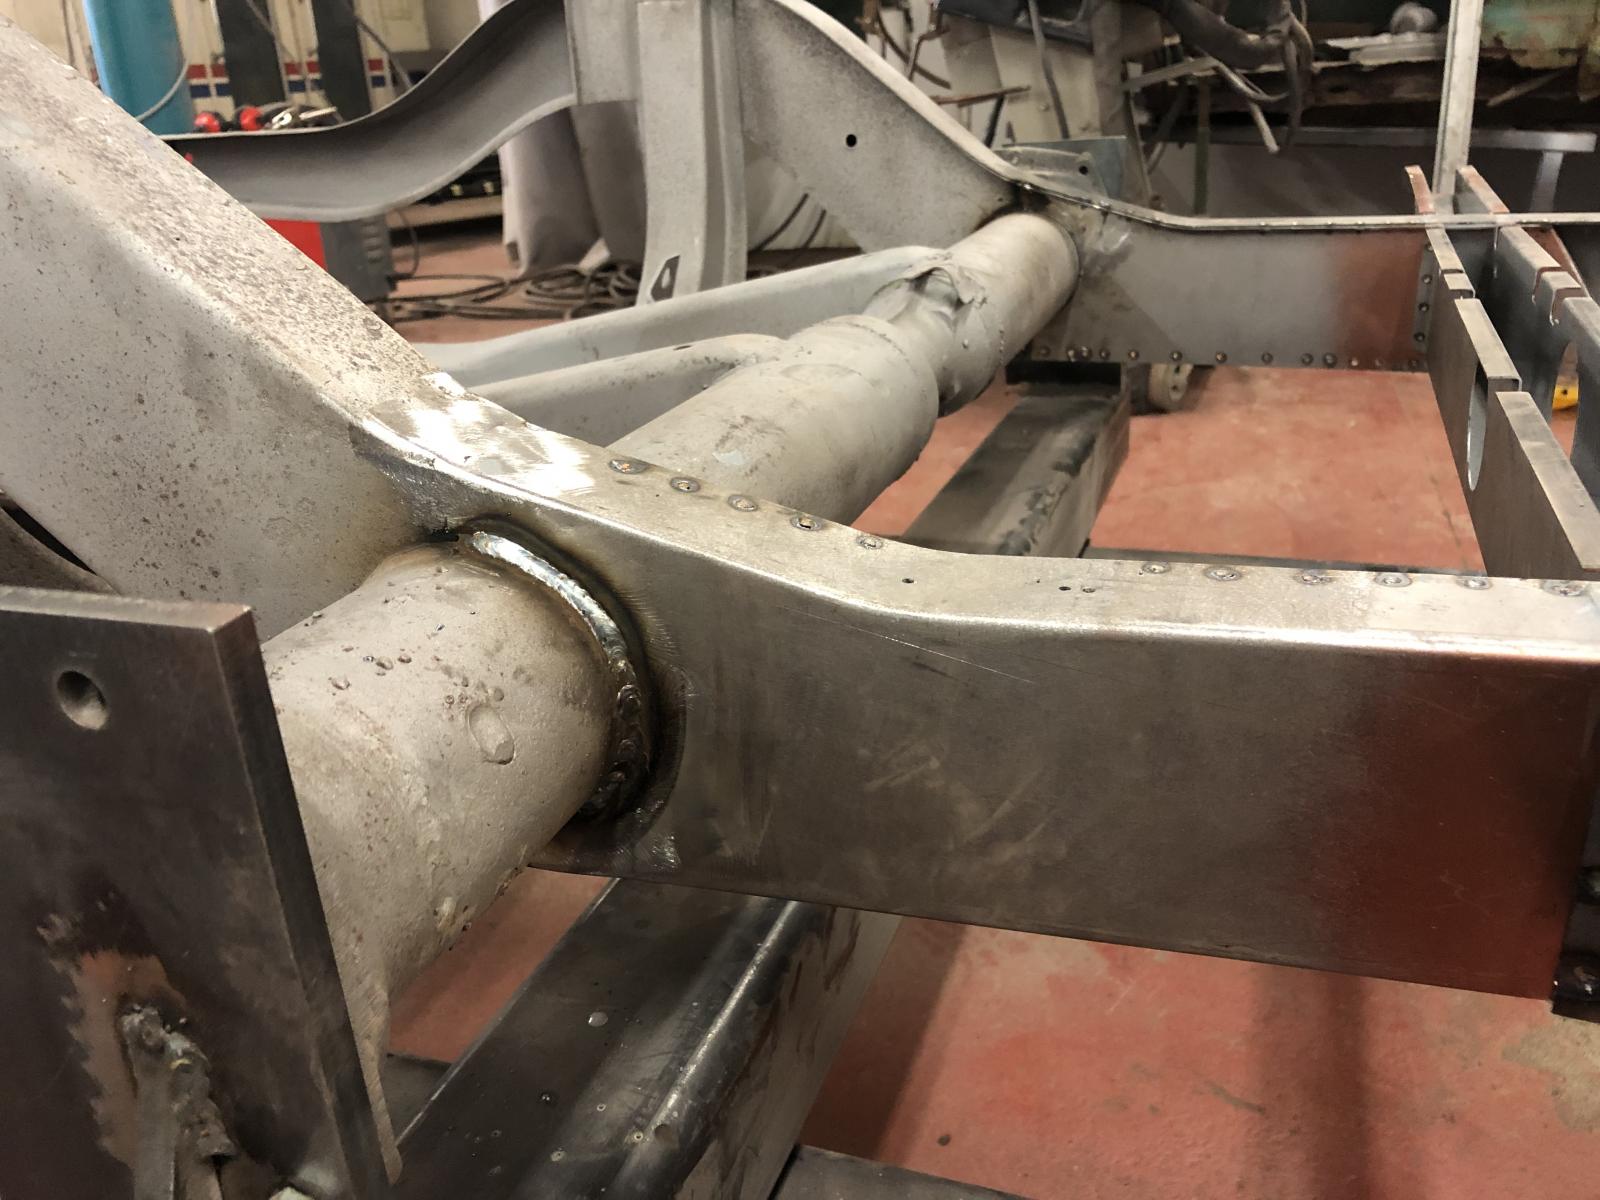
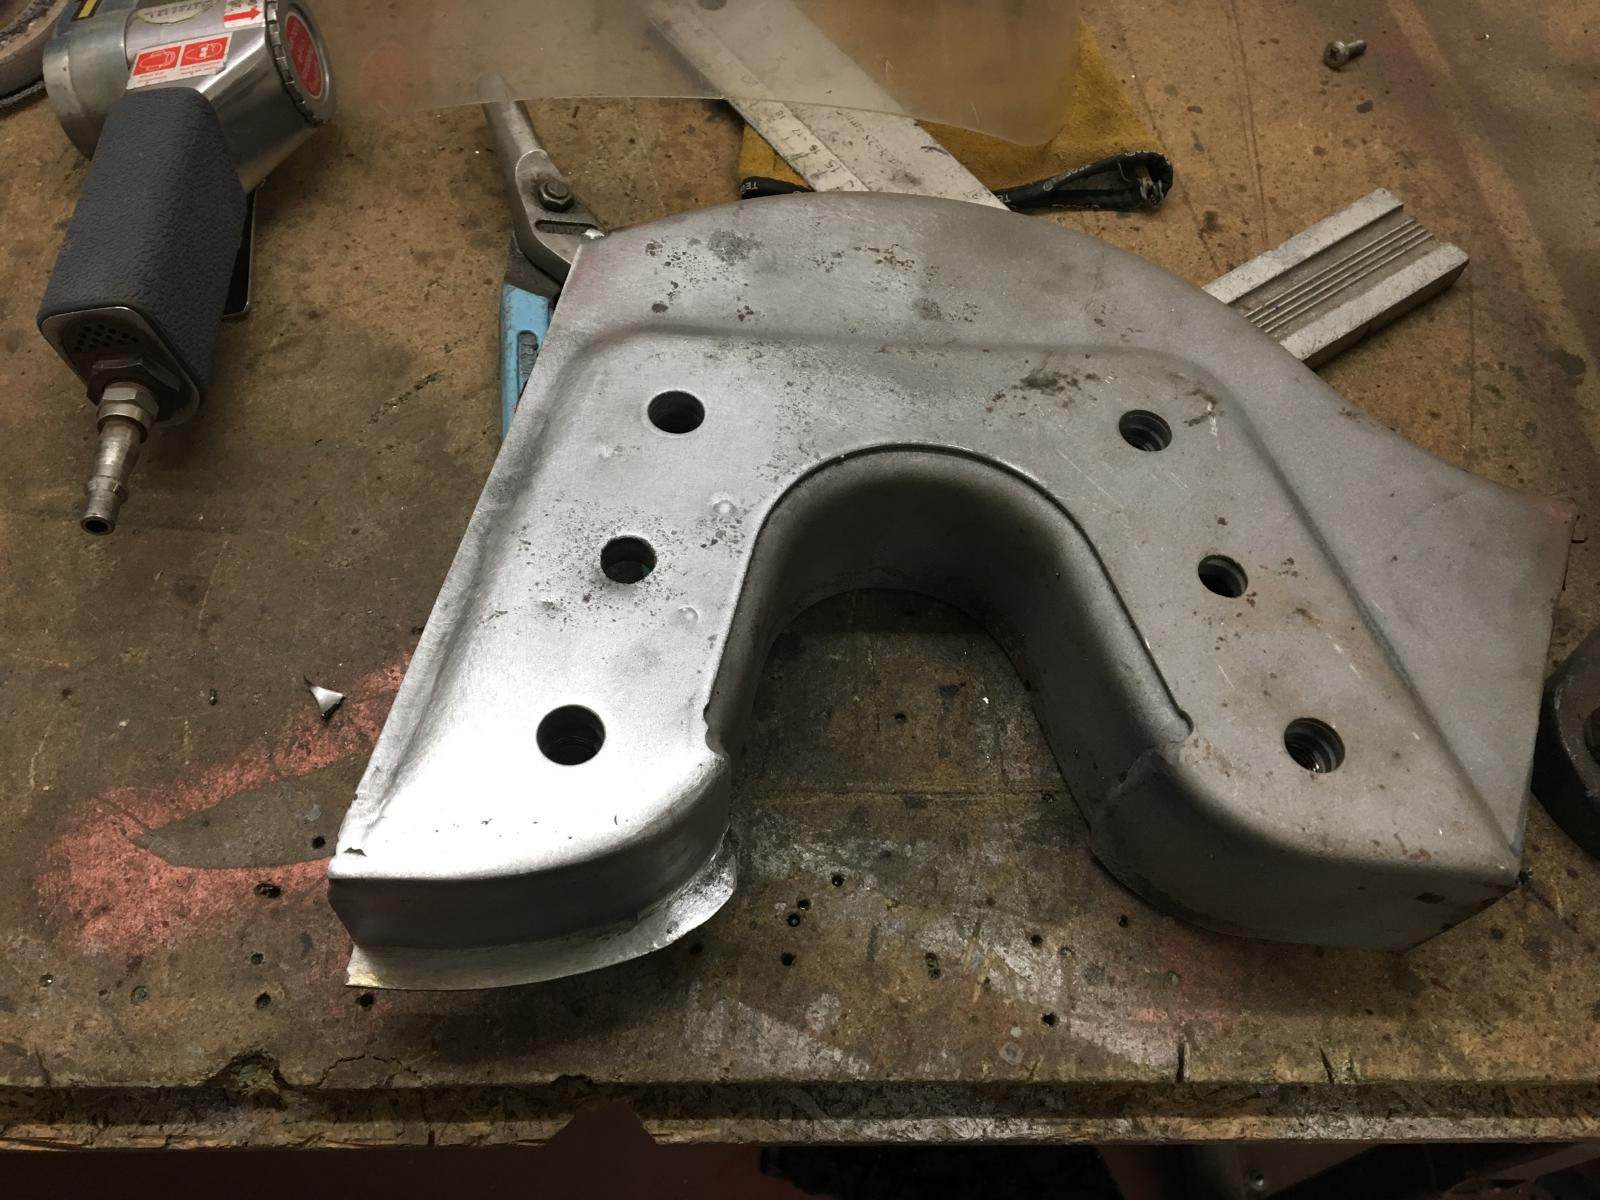
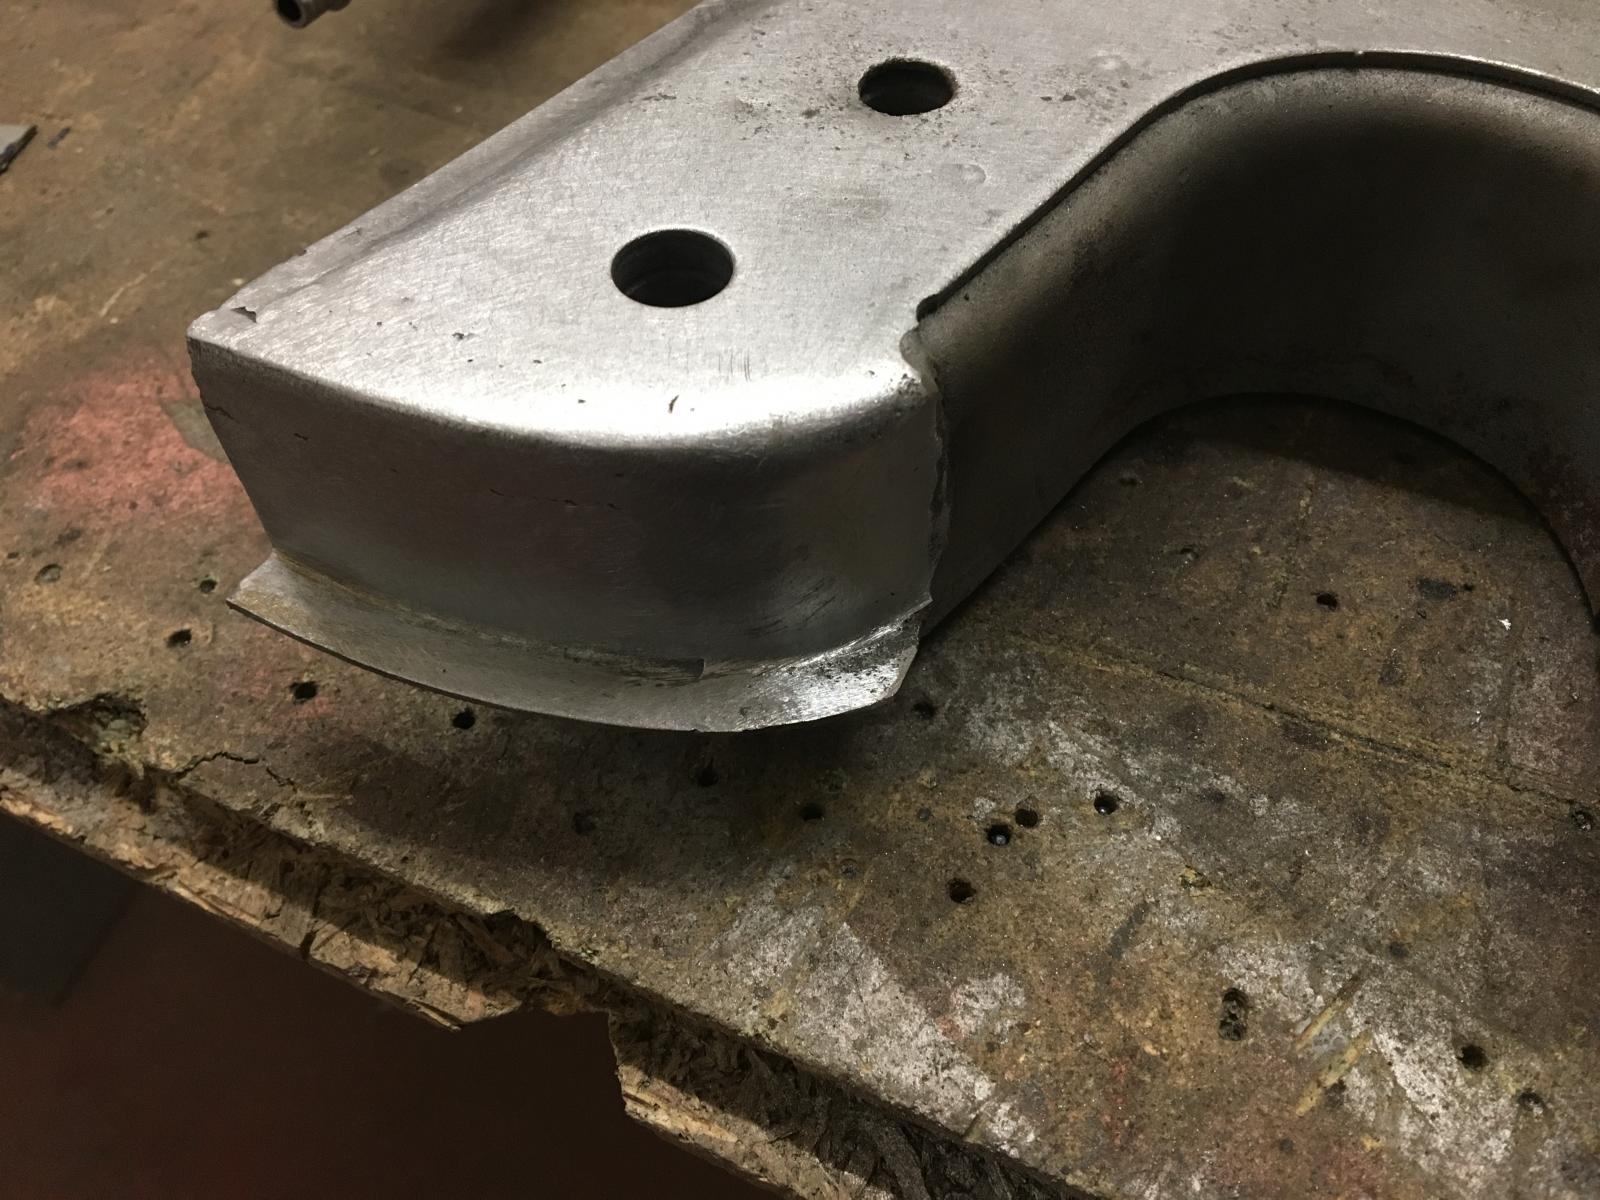
Repaired the rotten lower sections of the beam mounting plates. Now ready to fit to the new chassis rails:
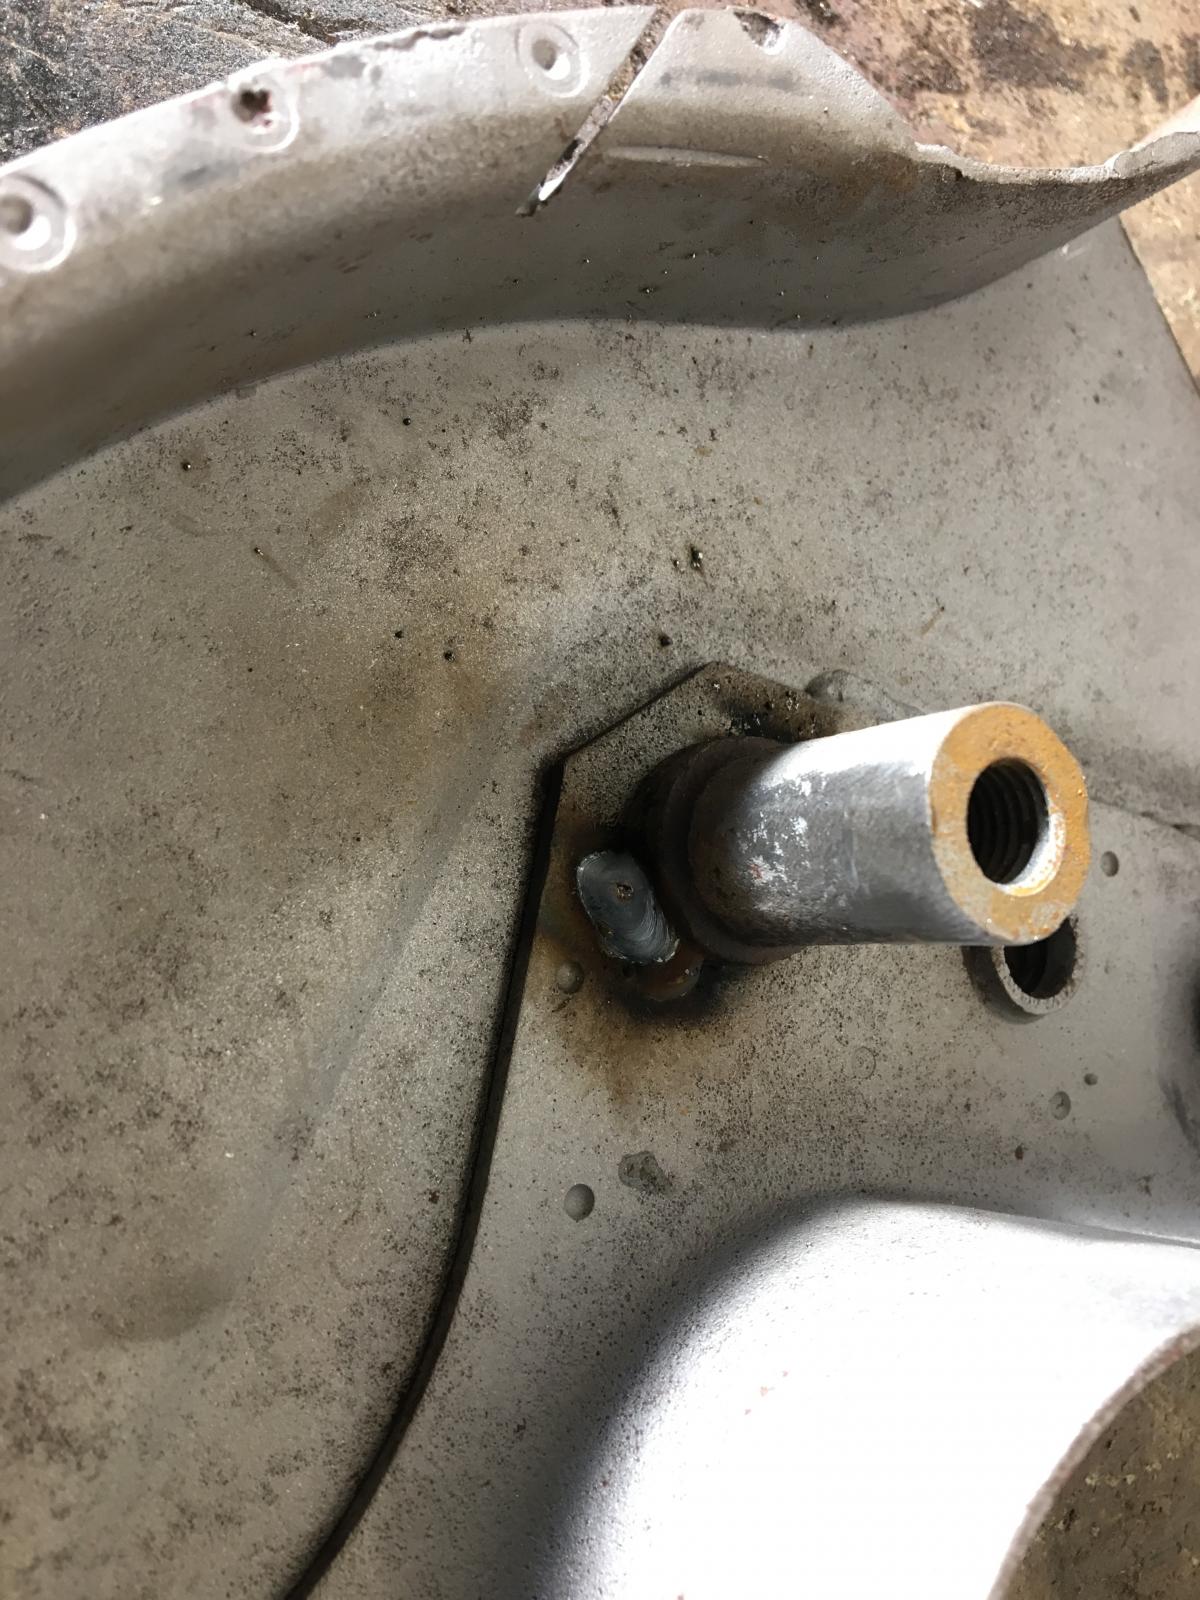
The other side needed the threaded tube welding back in place:
Outer section on the other side repaired too:
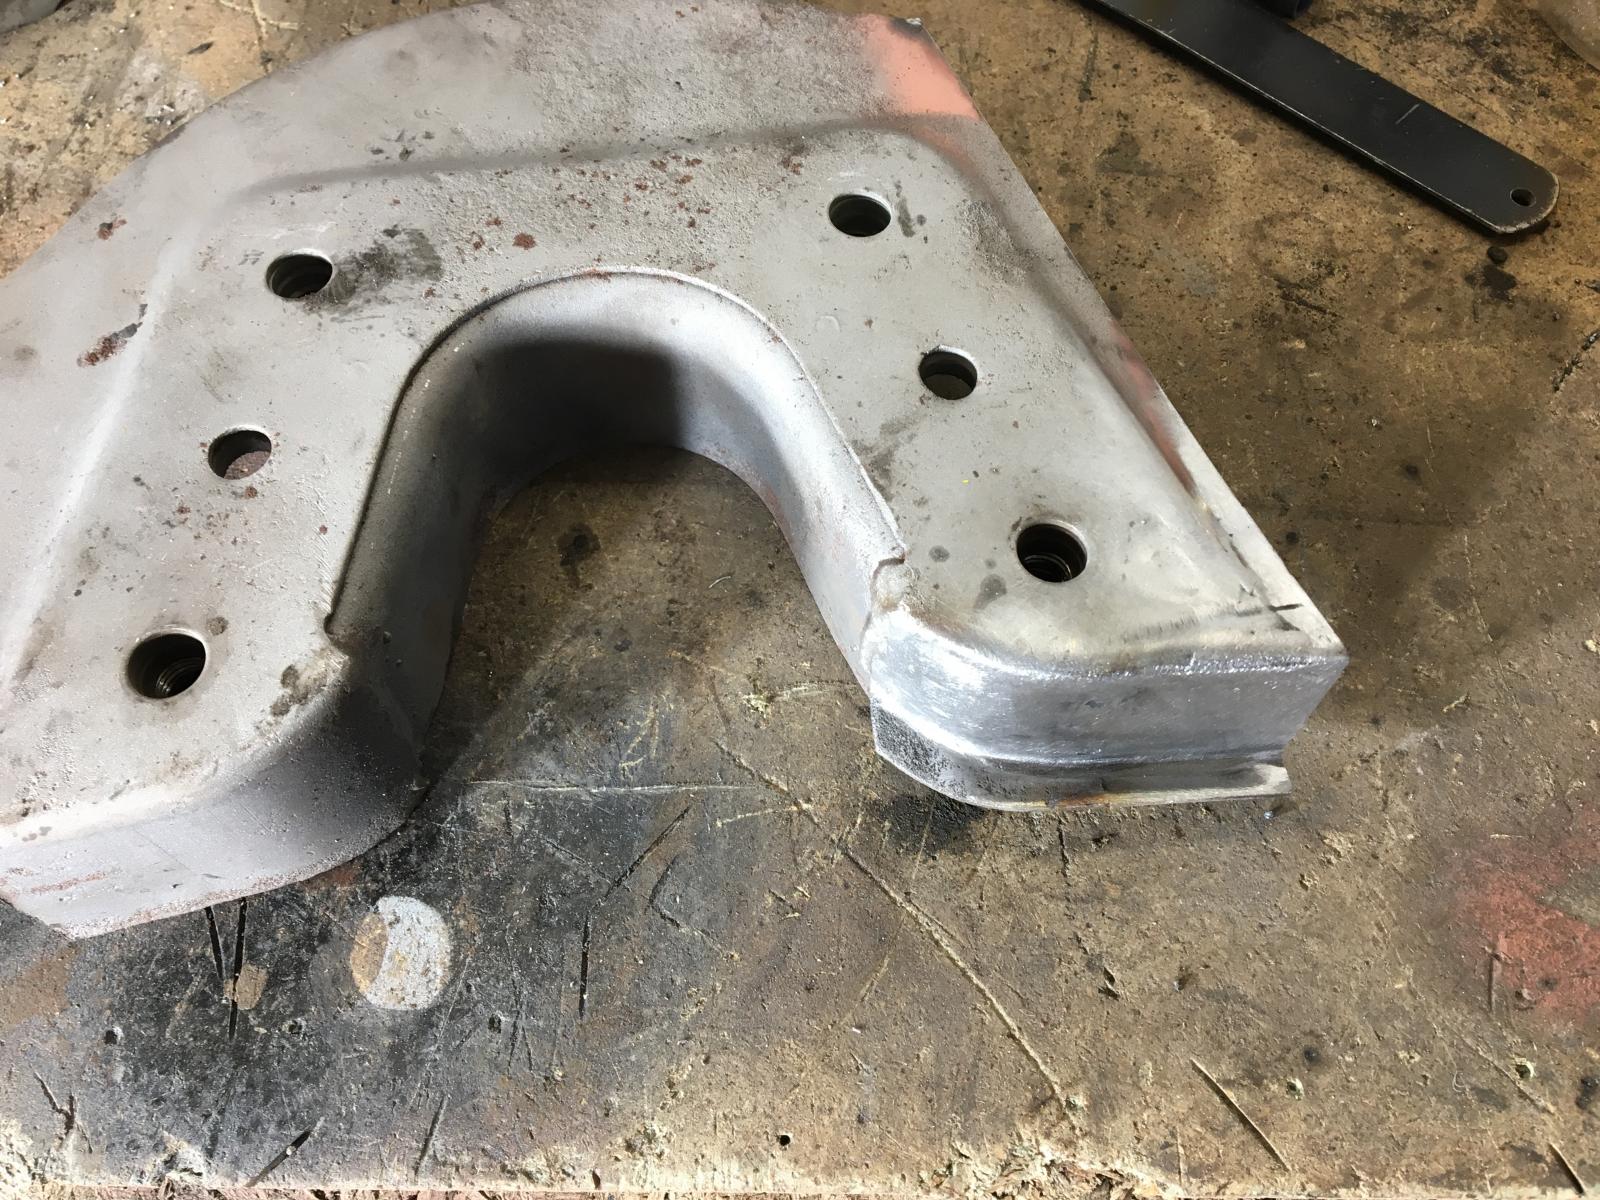
They were a slightly different profile along the top edge compared to the new chassis rails, after a bit of messing about they fit nice:
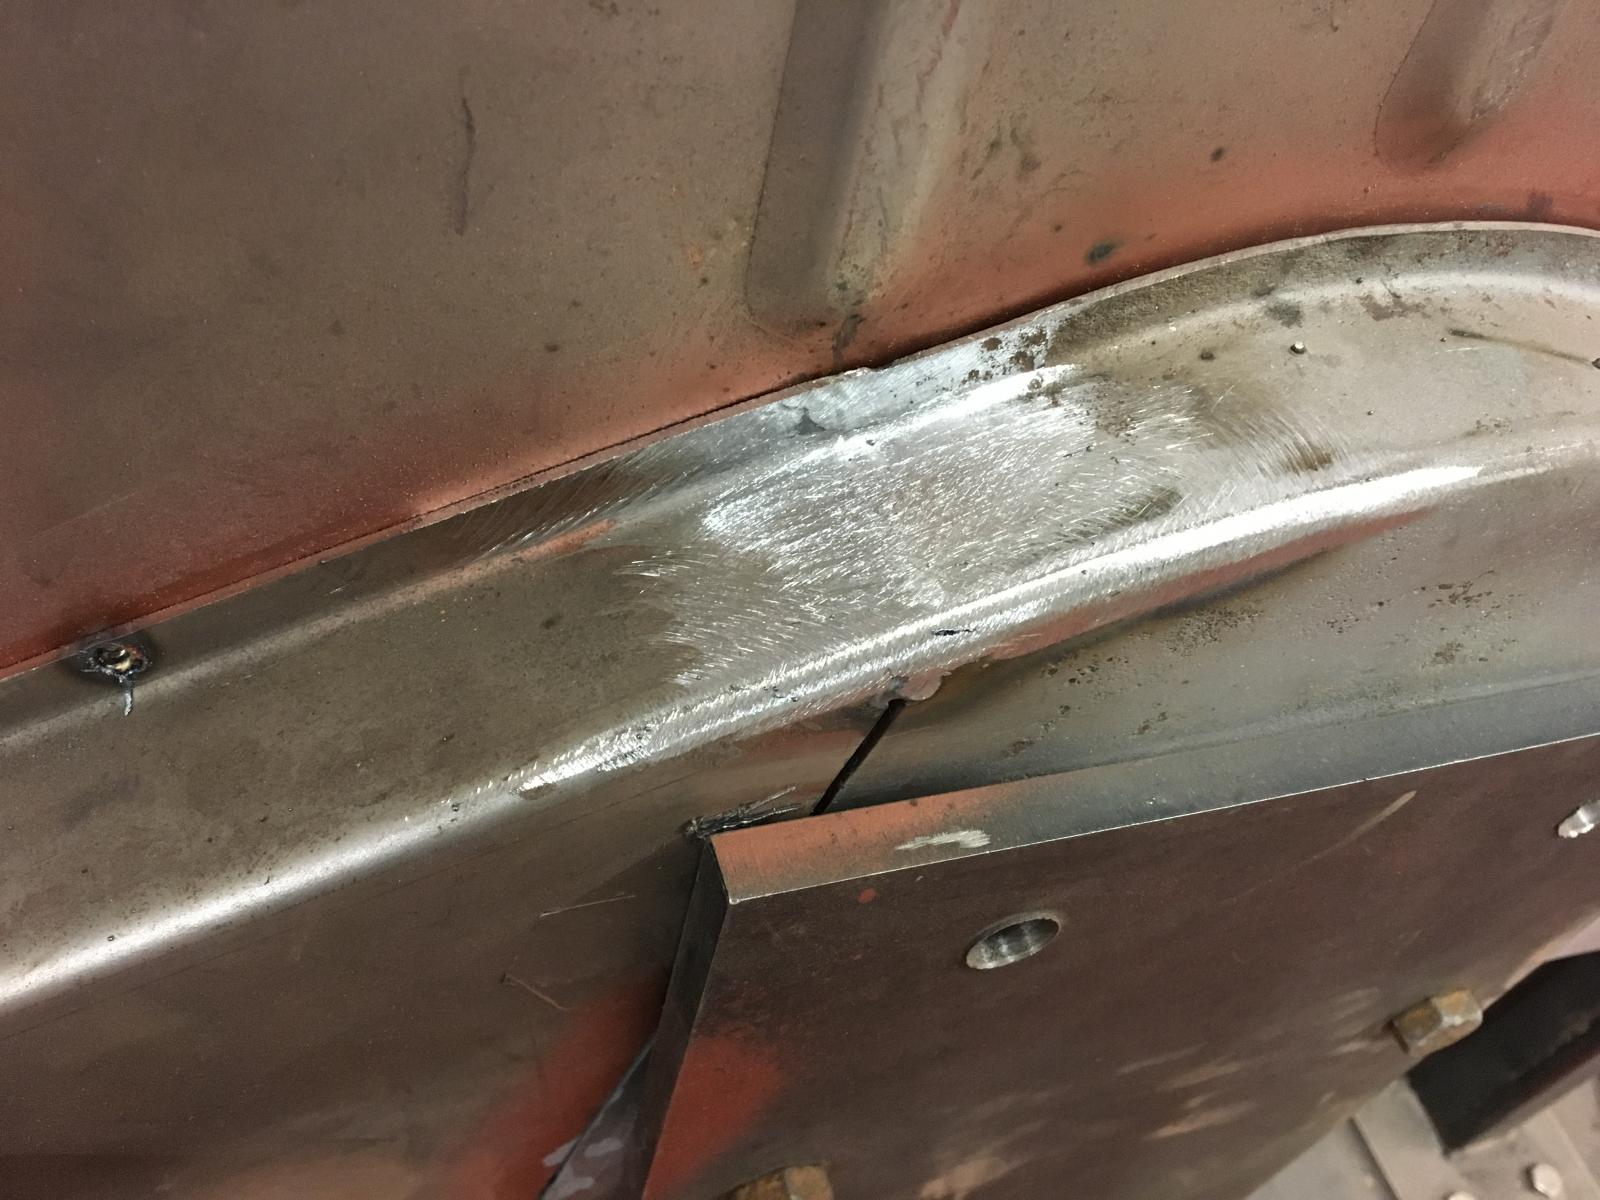
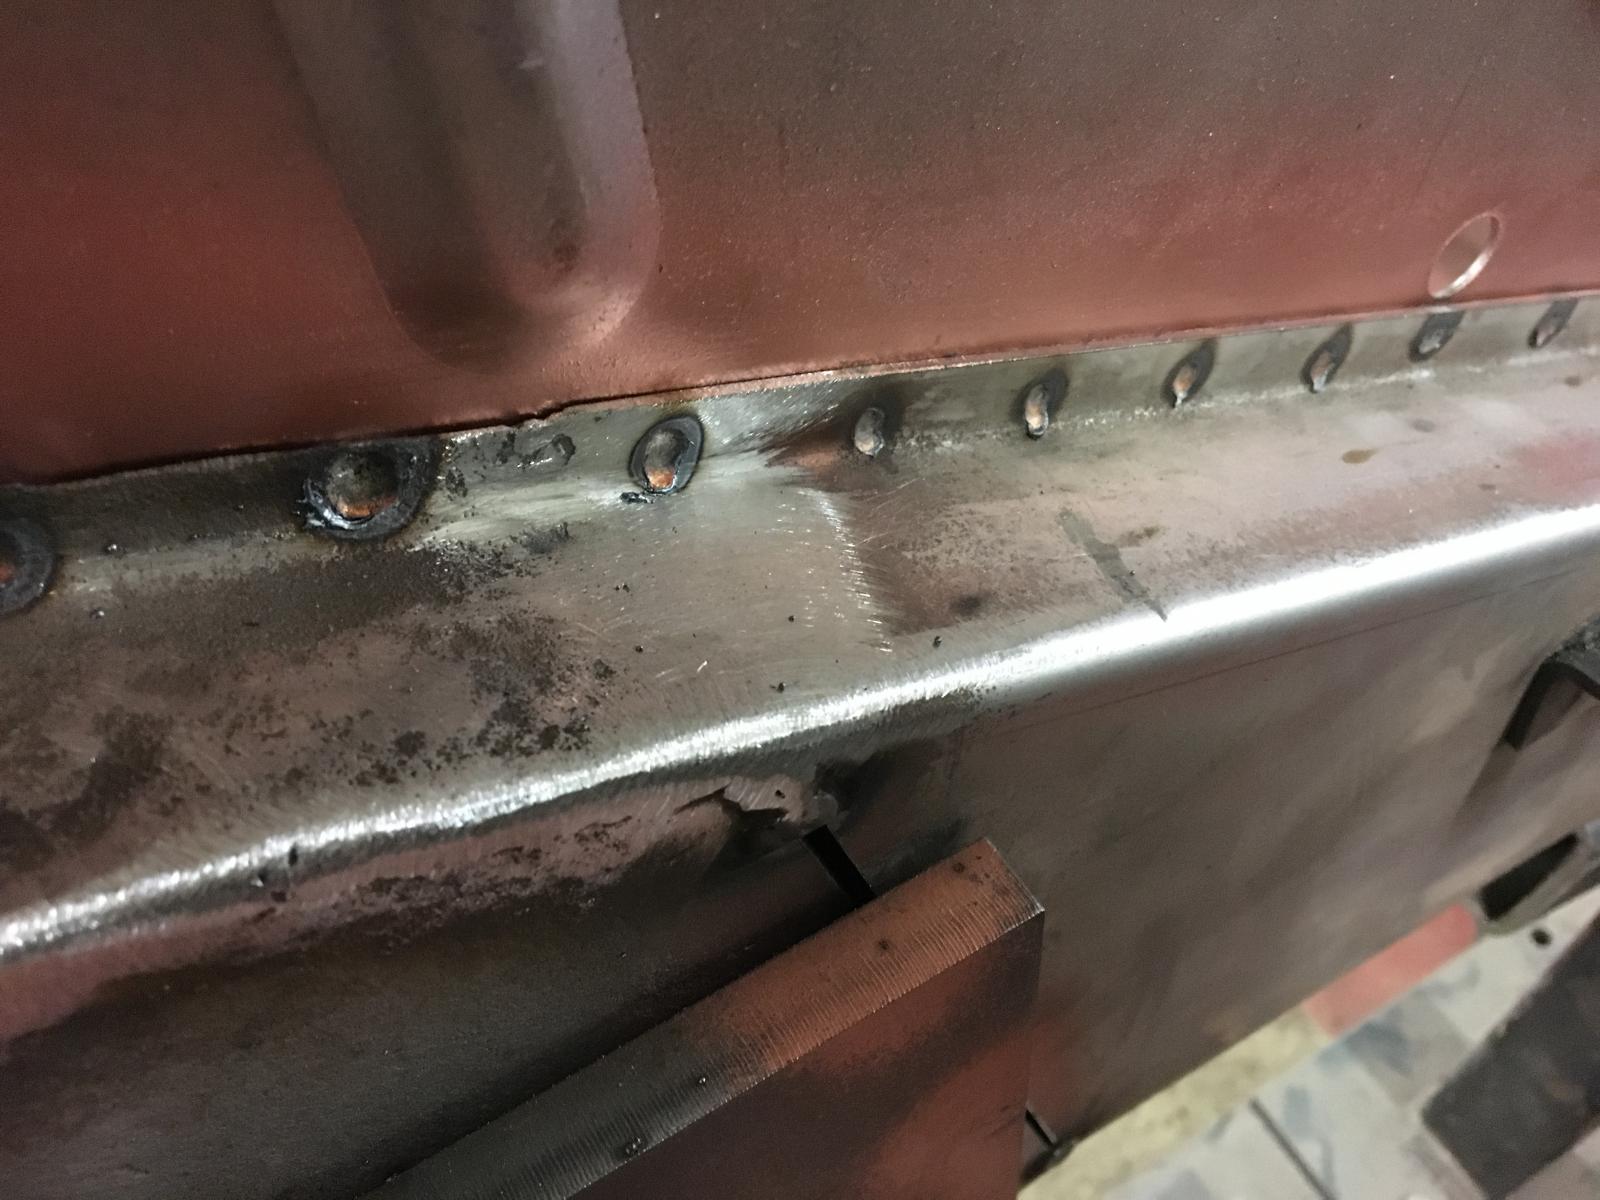
Started spot welding the inner front chassis sections in as factory:
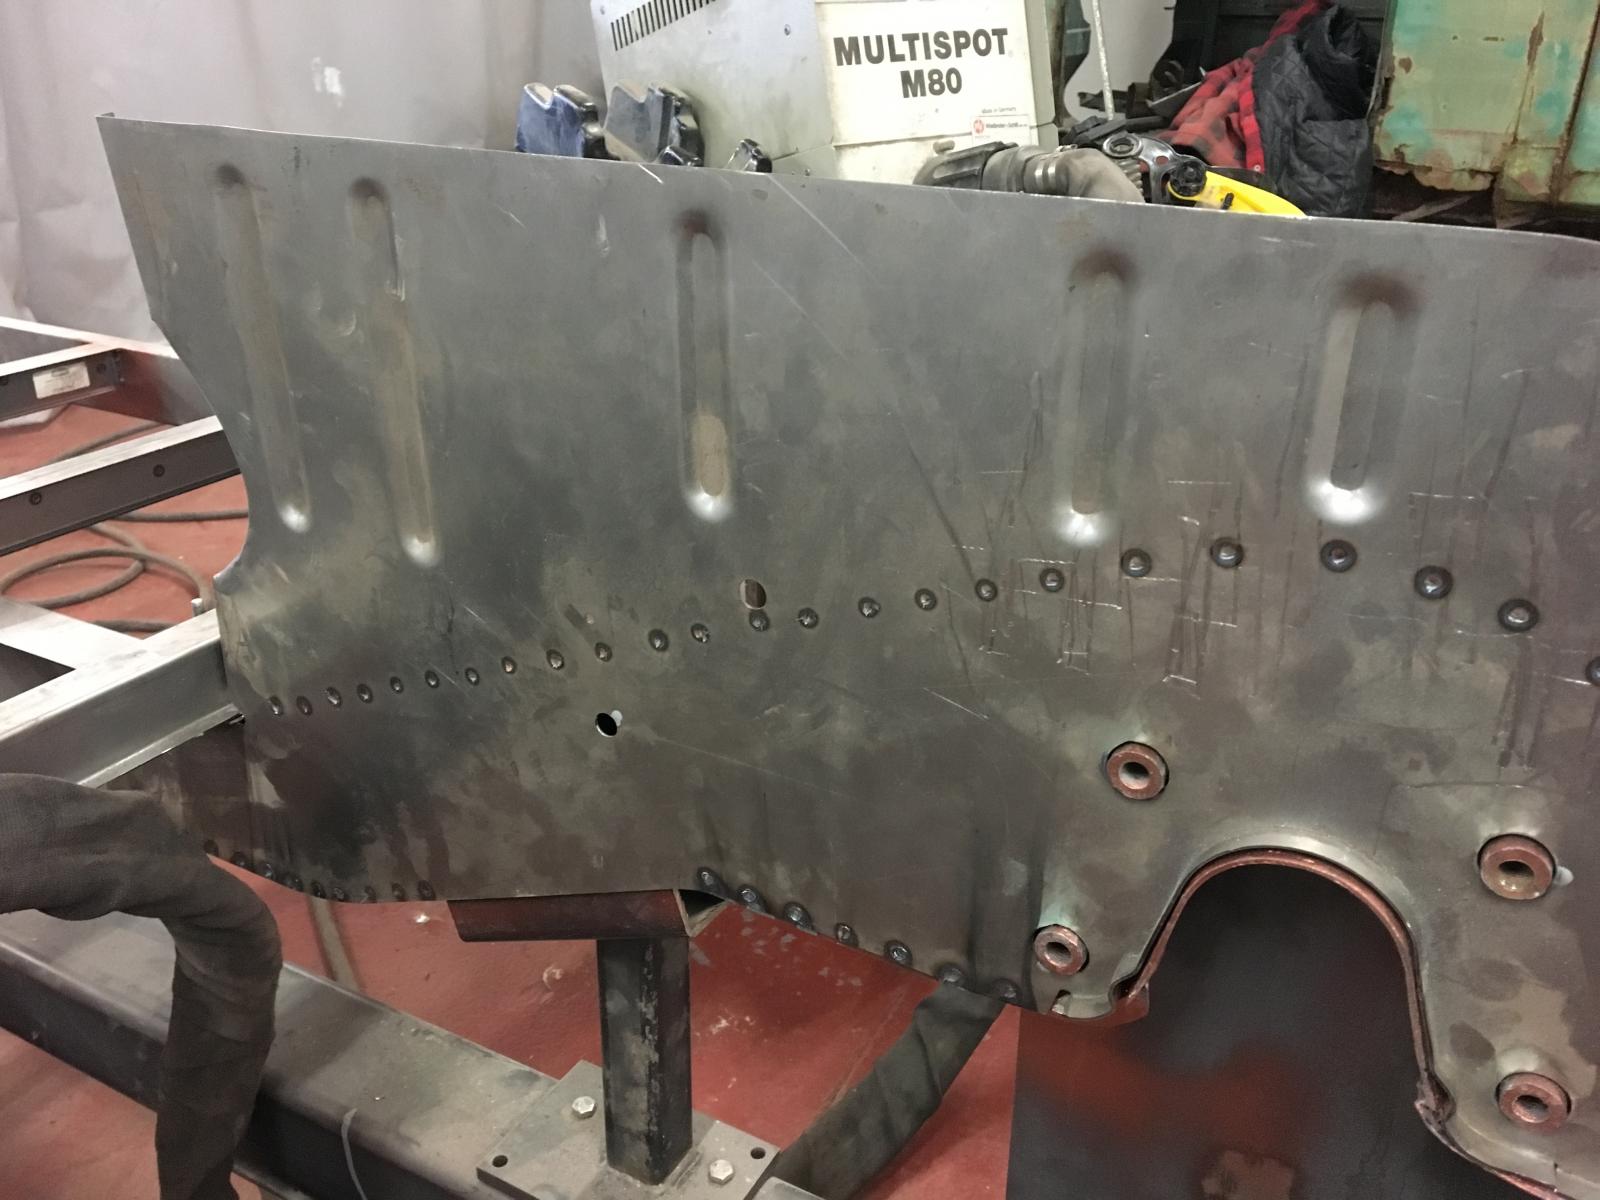
Thats it for now, back in it tomorrow


Now Volksworlds all over, its back to real work. We got a bit more done on the chassis... Loads of hours but not a lot to show for it, enjoying it though.
We got the rear donor chassis / torsion housing section trimmed down and tidied up. We got the new chassis rails square and lined up the rear cut before tacking everything in place. Then got the sills, I beams etc mocked up and once happy panel pinned in place:

Once we were happy everything was in the right place we seamed the join in the chassis rails up where the factory join is. Bit gutted, was hoping these would come out perfect as they wont be ground flush. They are not bad, but not my best welding:

Spot welded the sills to the I beams and top hats. The complete floor support framework finished but not welded to the chassis just yet:

We got the front and rear outriggers and cross members pinned in place, once happy we took them apart and spot welded the rear cross member to the inner sections of the chassis rails before they were fitted:

Then we spot welded the rear outriggers to the chassis before the rear crossmember 'assembly' was welded in place. We painted epoxy and weld in all the box sections, and weld through primer on all the spot welded sections before anything was welded for maximum protection.
After the outriggers were welded, we spot welded the 'cross member assembly' in place trying to make it look as factory as possible.


Seaming up the torsion housings:


Repaired the rotten lower sections of the beam mounting plates. Now ready to fit to the new chassis rails:


The other side needed the threaded tube welding back in place:

Outer section on the other side repaired too:

They were a slightly different profile along the top edge compared to the new chassis rails, after a bit of messing about they fit nice:


Started spot welding the inner front chassis sections in as factory:

Thats it for now, back in it tomorrow
mabbo
SSVC Member
Posts: 80
Joined: Wed Jun 01, 2011 7:09 pm
Re: Swedish 66 Crew Cab
by type21f » Wed Mar 27, 2019 10:34 pm
Nice detailed explanation of what n why!
G
G
type21f
SSVC Member
Posts: 15341
Joined: Tue May 29, 2007 12:55 pm
Re: Swedish 66 Crew Cab
by mabbo » Fri Apr 26, 2019 9:32 pm
Another update... Got loads done and prob missed out quite a bit but its all pretty much the same - welding!
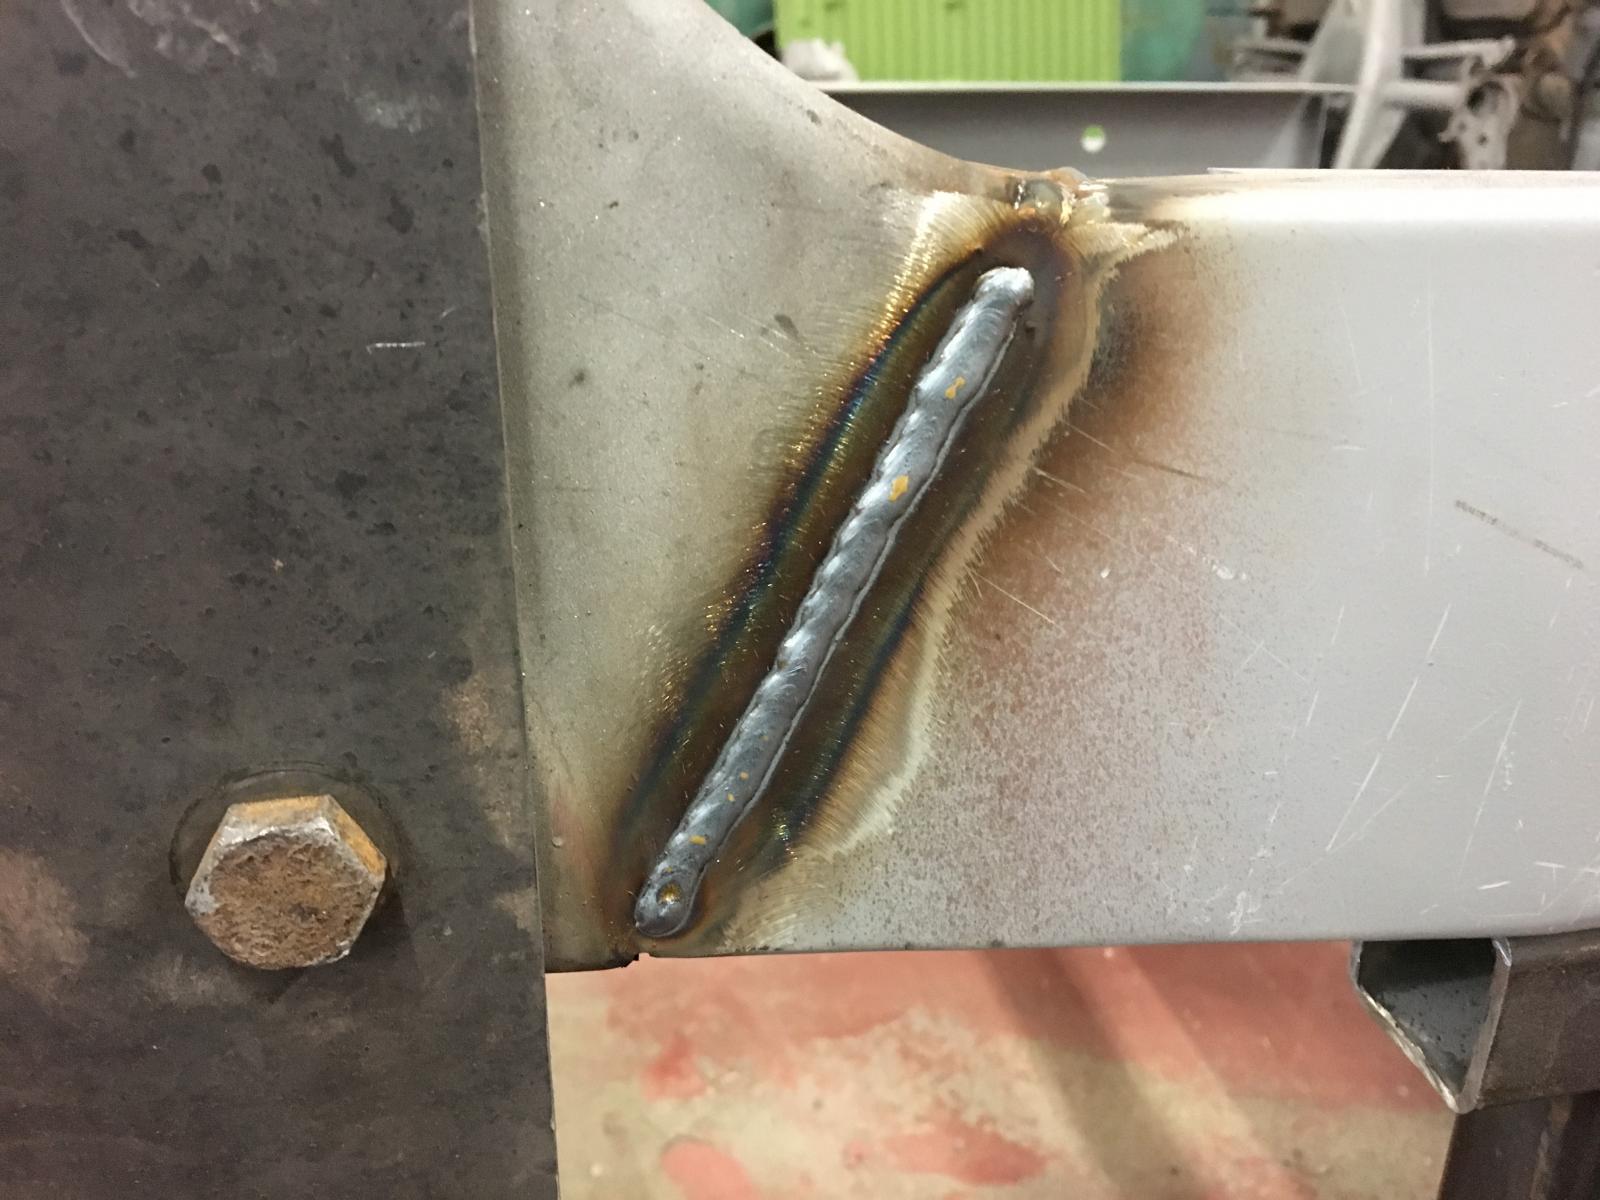
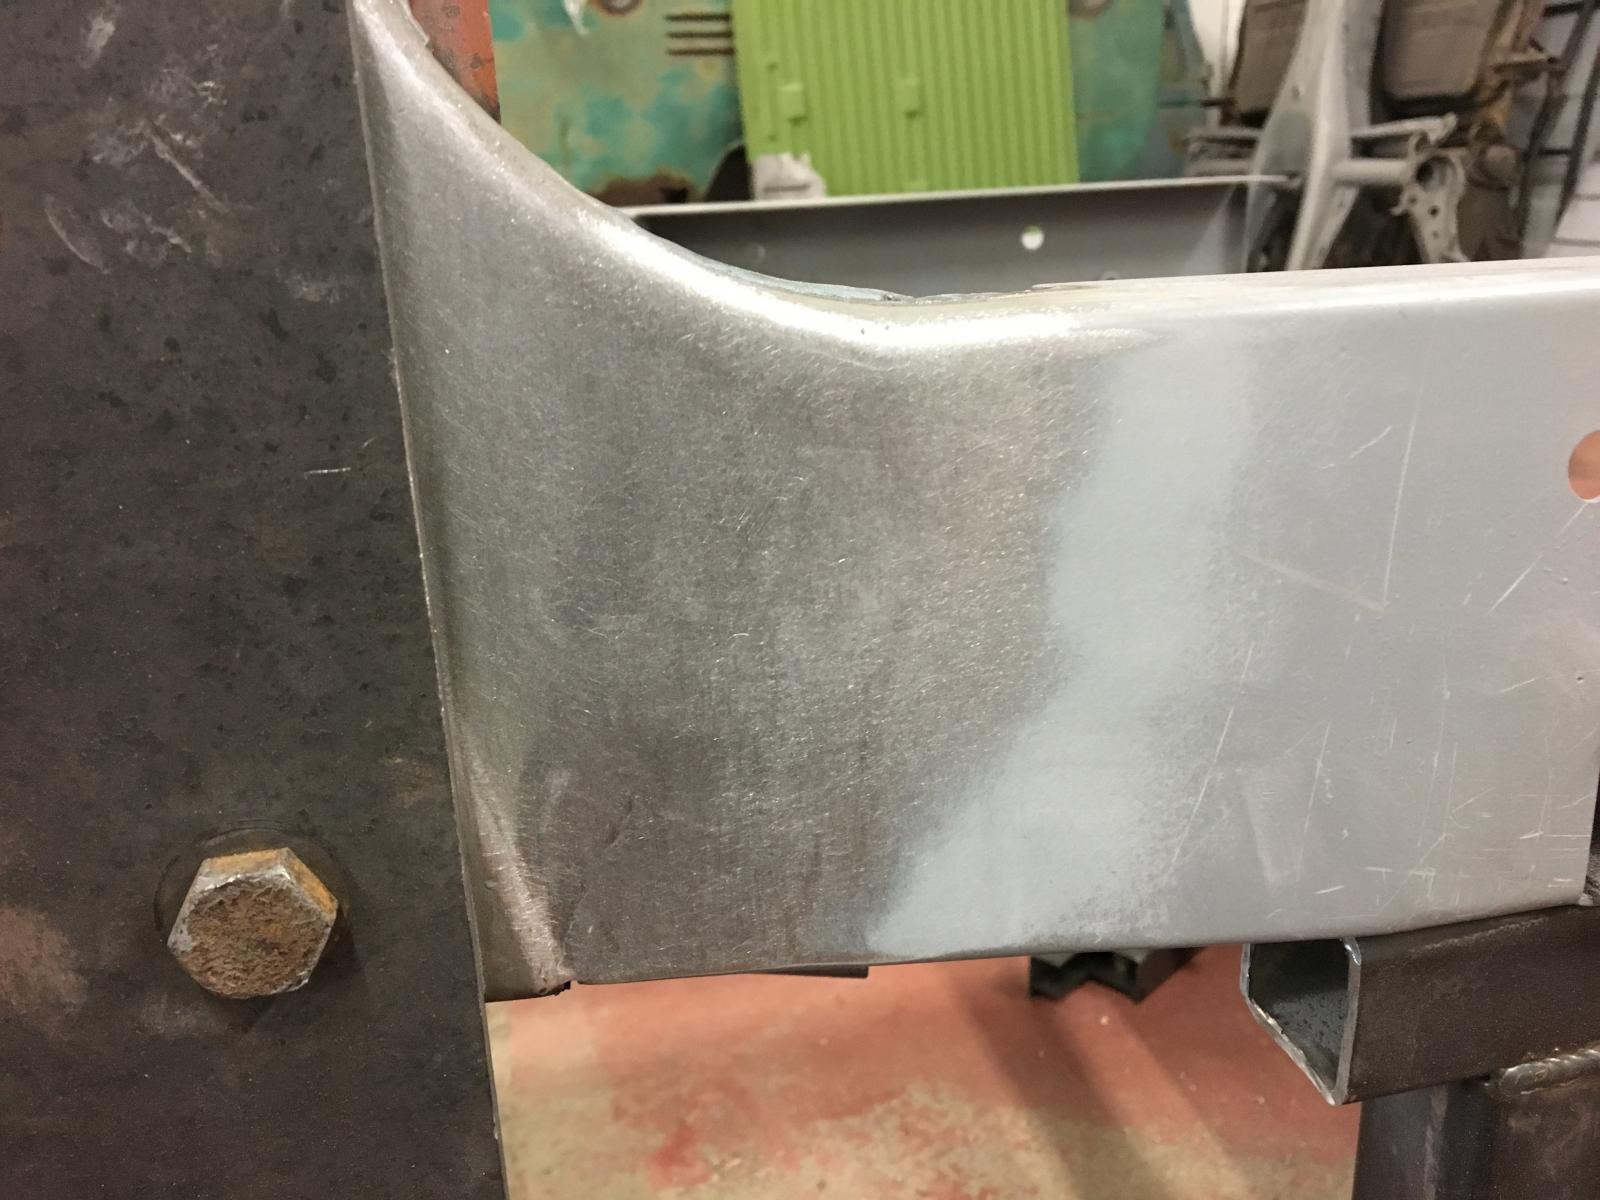
Finished seaming up the beam mounting section to the new front chassis rails:
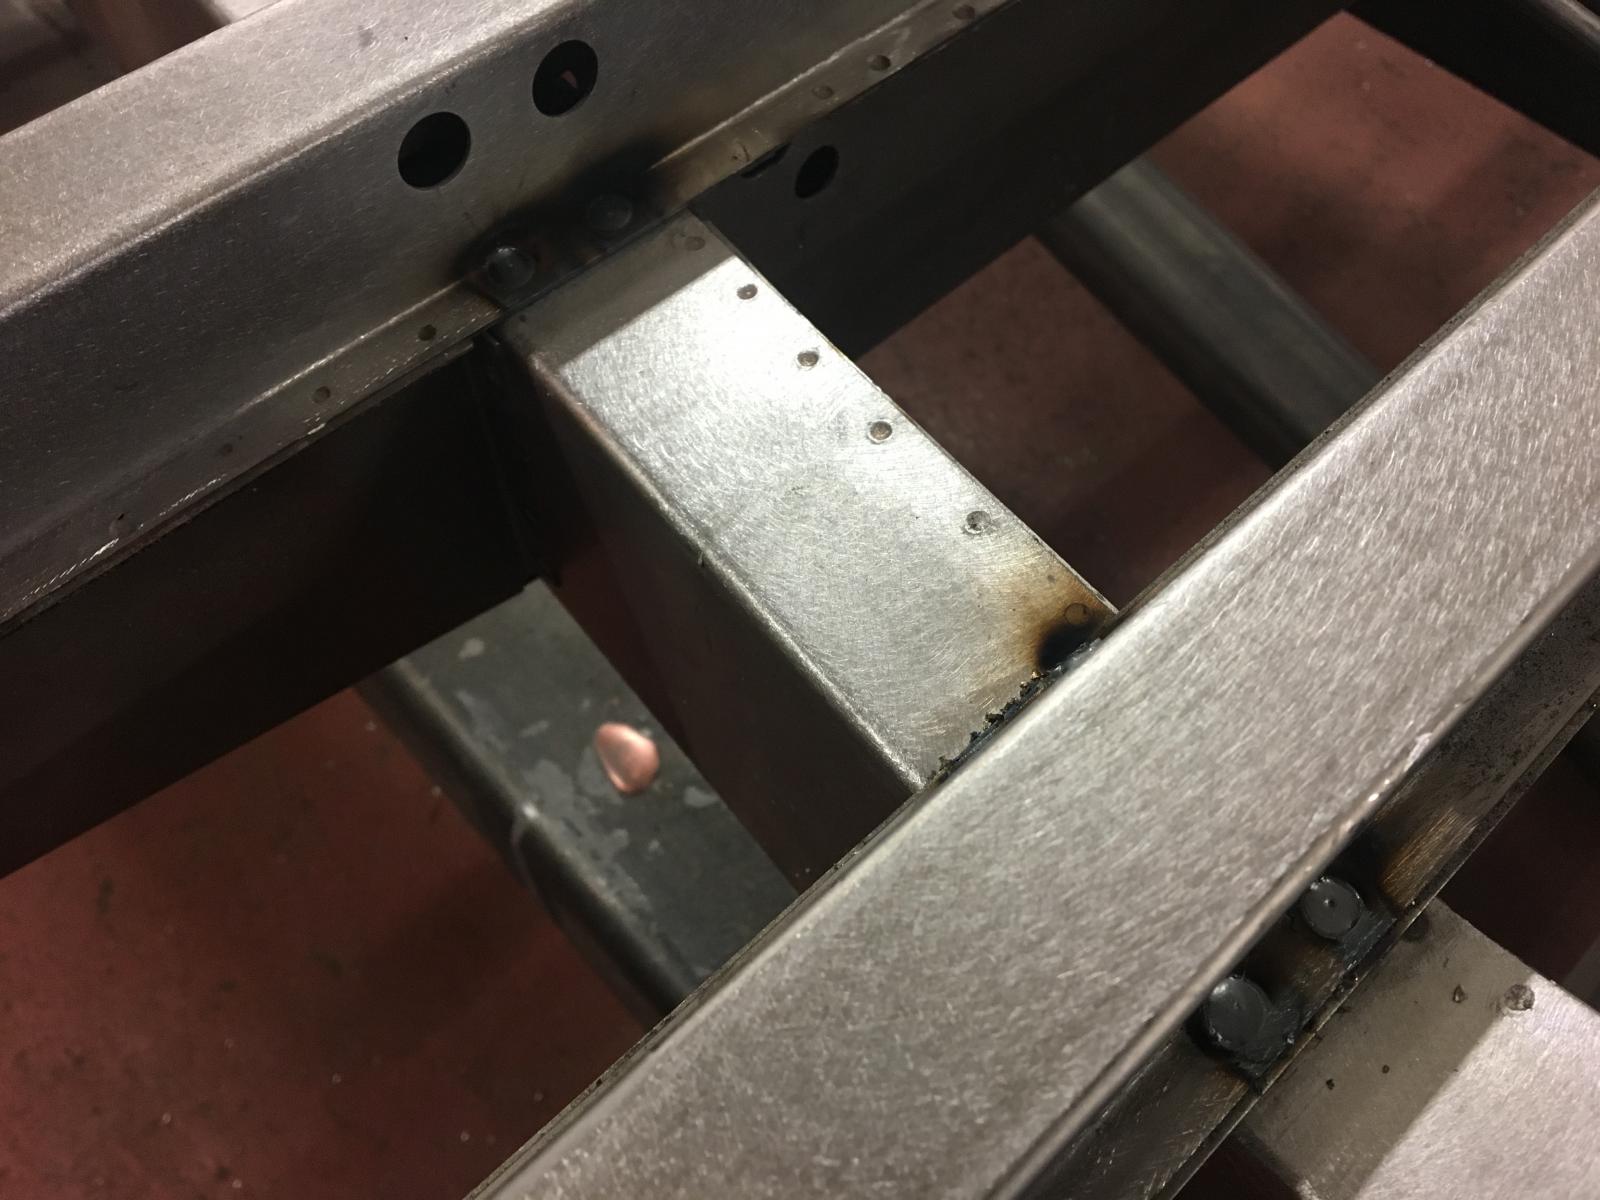
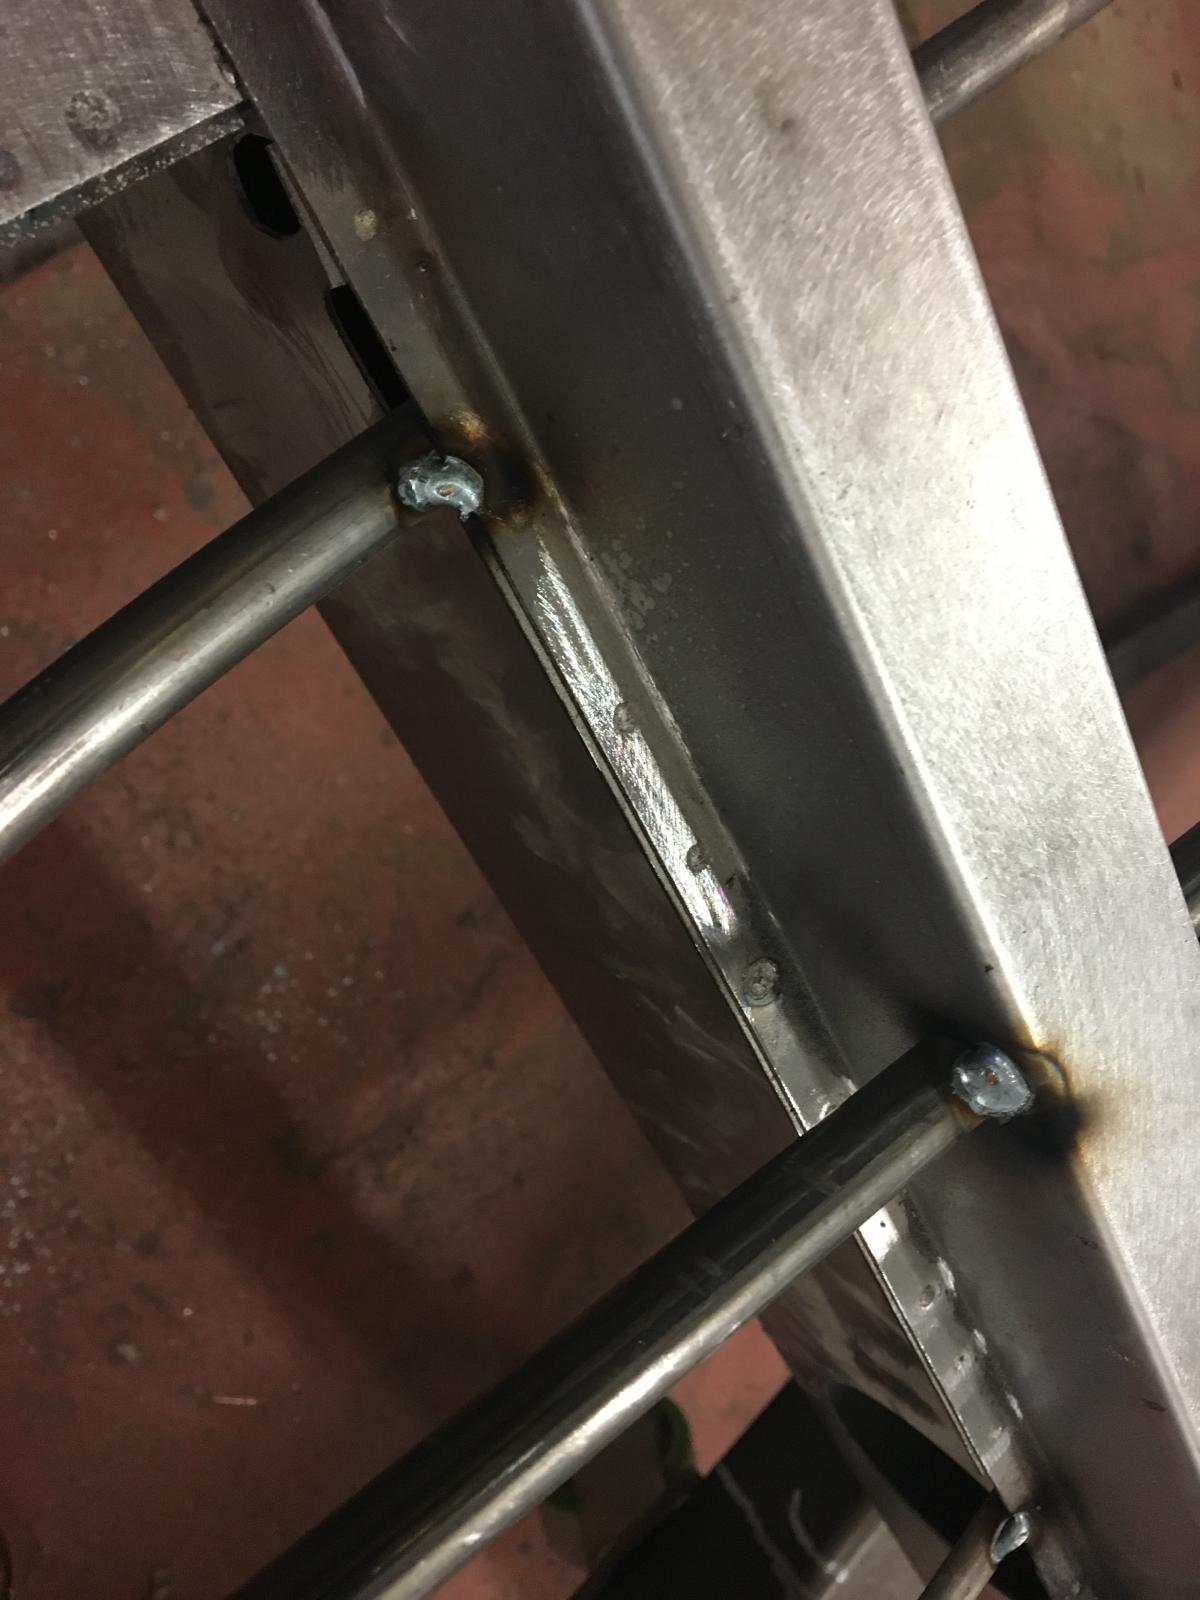
Plug welded the top hats and spot welded the I beams to the tops of the chassis rails, and welded the tubes for the cables etc:
Got the tool box and floor sections pinned in the right place, and trial fit the front tubs:
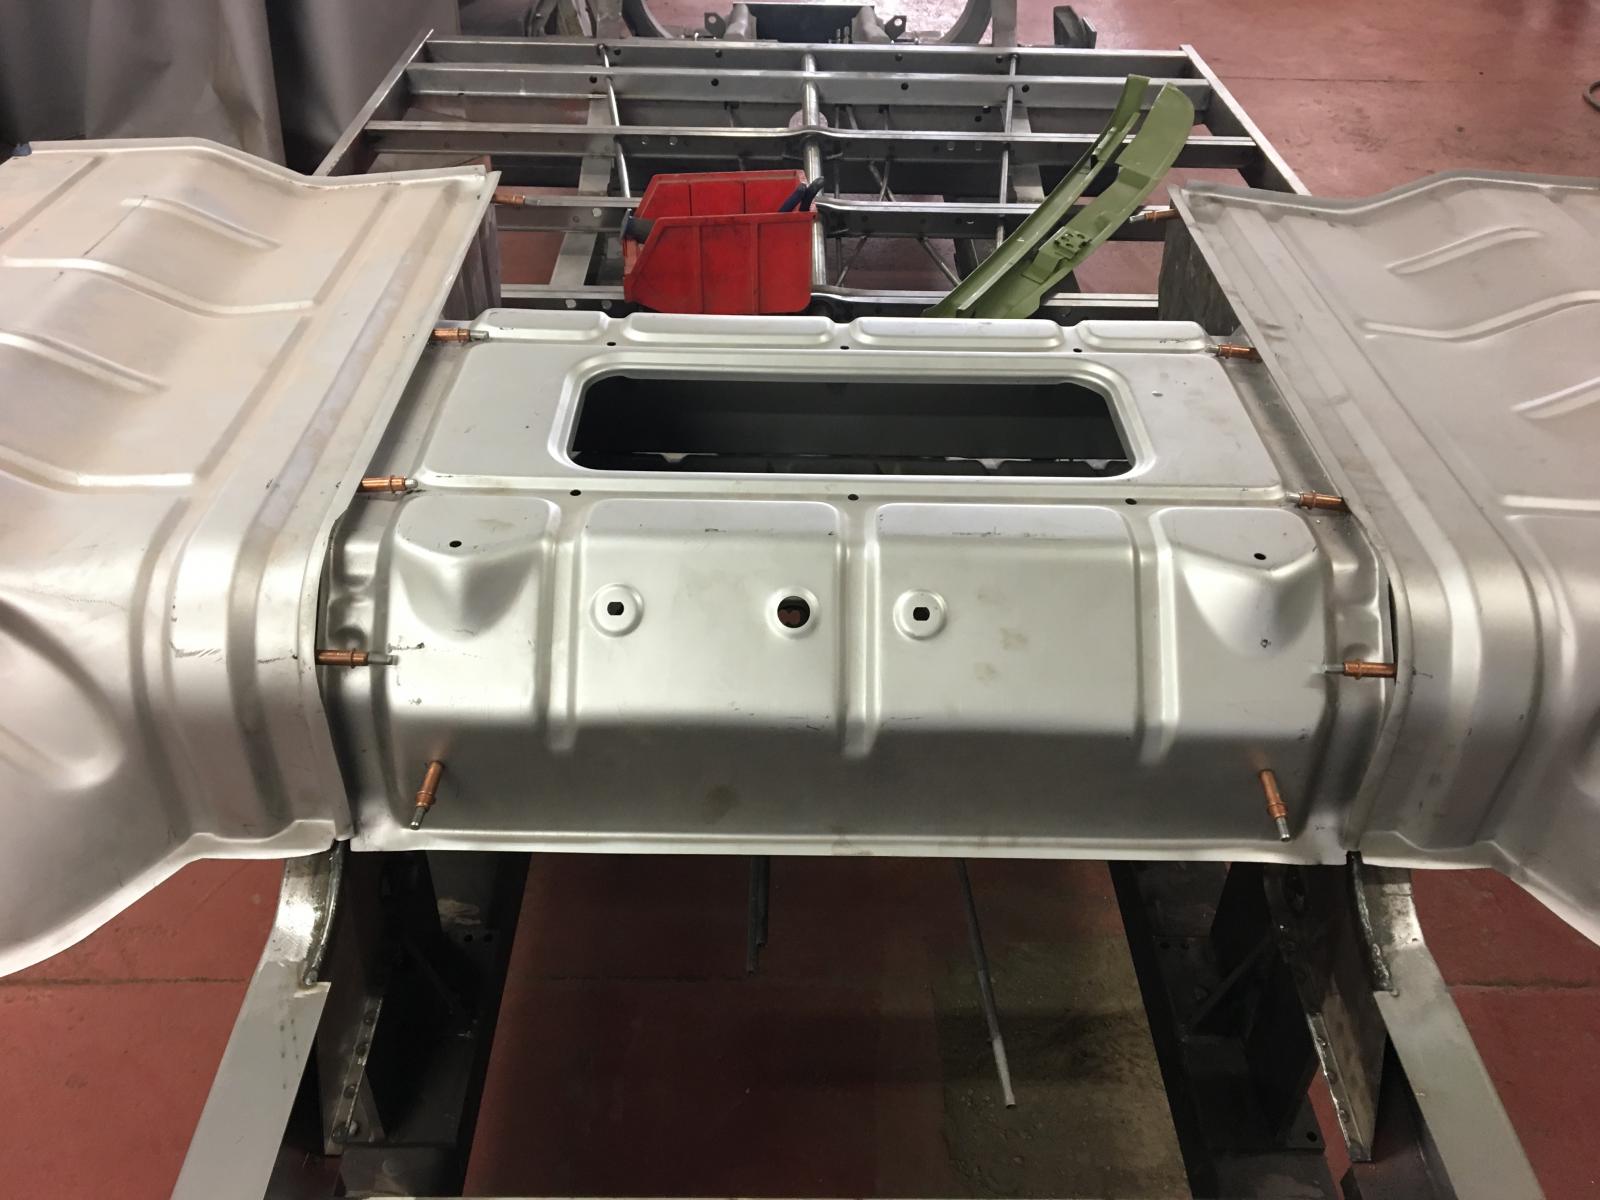
Trial fit of the front cross plate, front valance, master cylinder cross member etc to check everything is OK before welding:
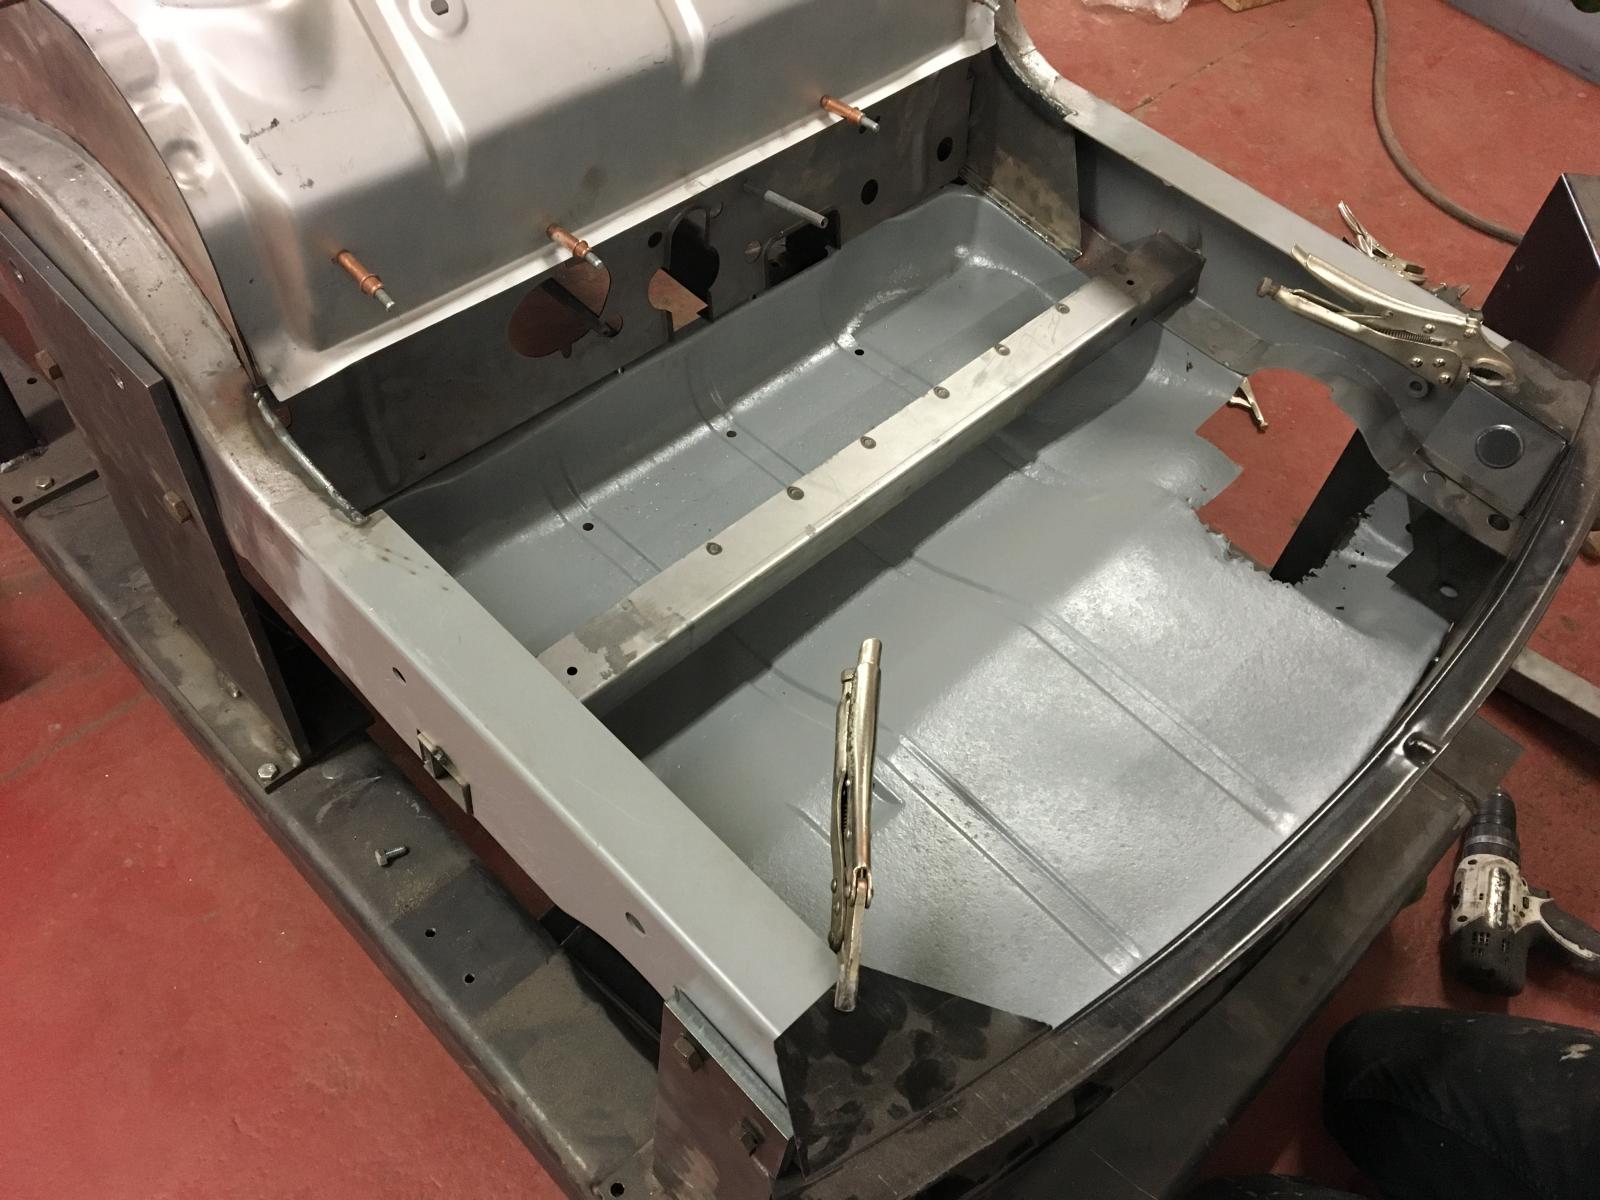
Once happy I welded in the handbrake / shifter mounting panel in place:
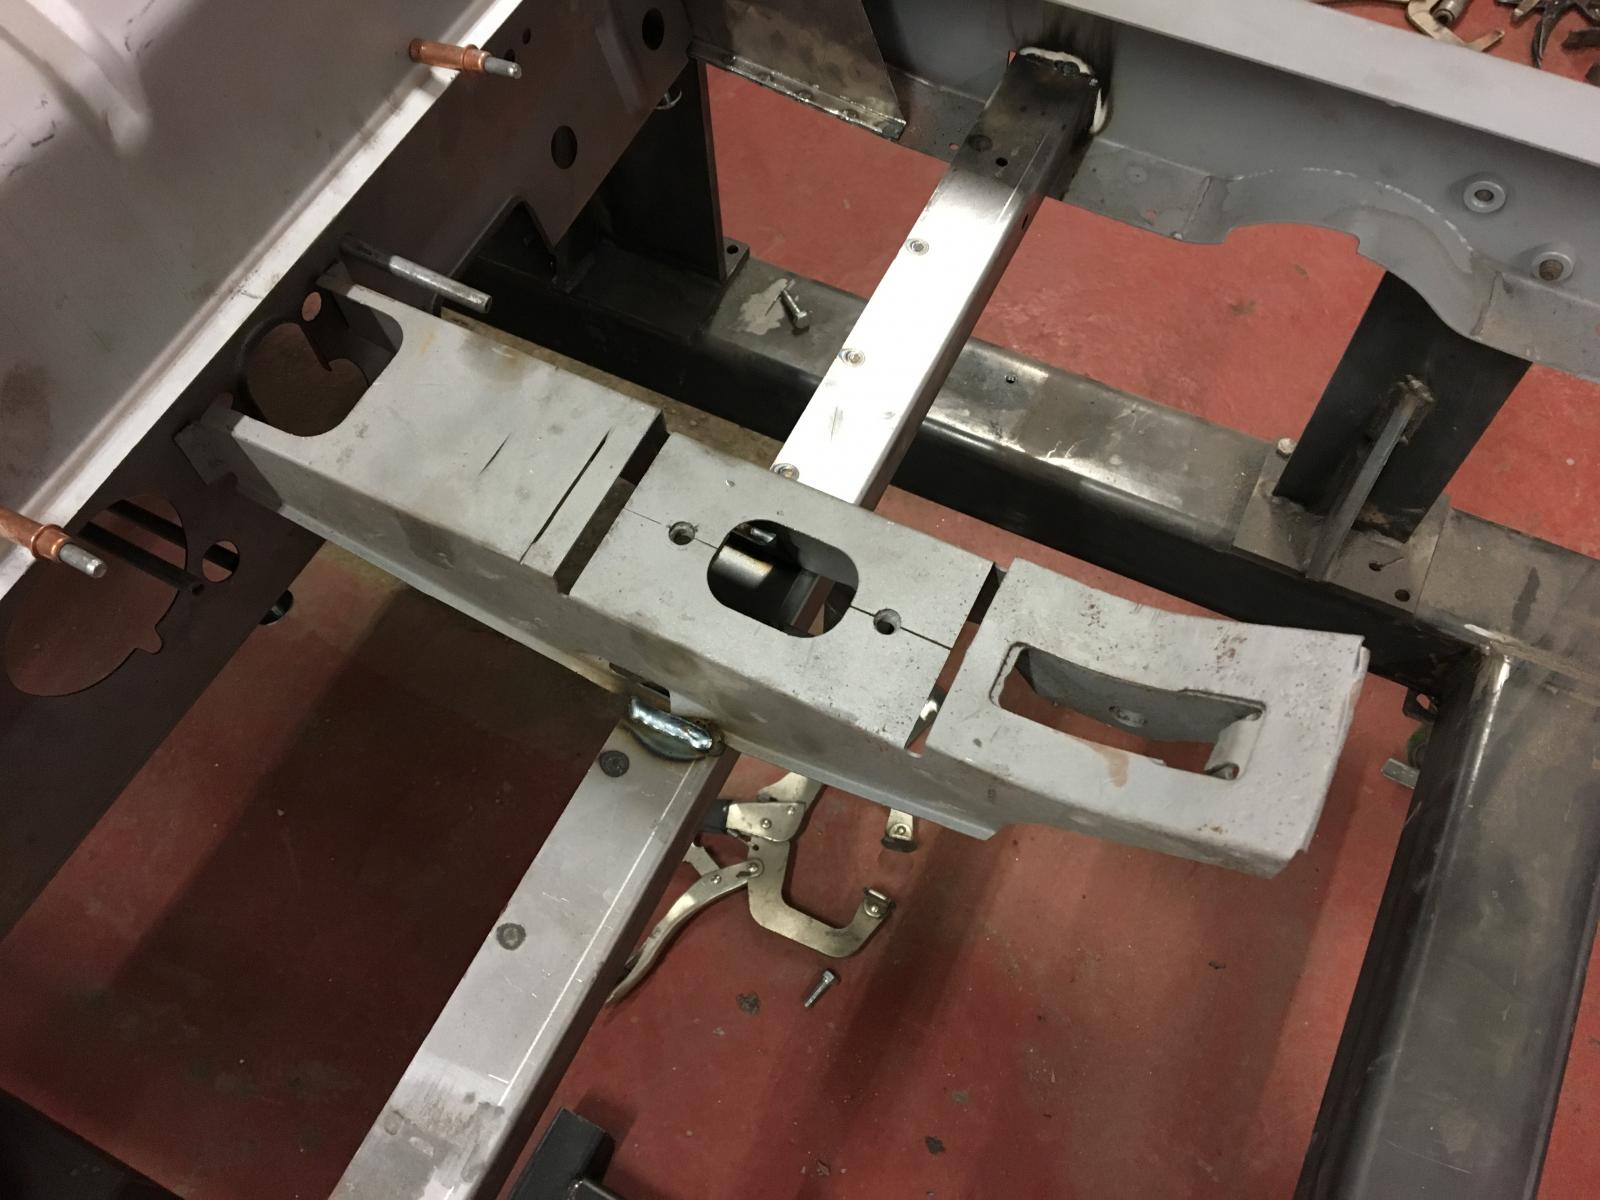
Then the steering box section:
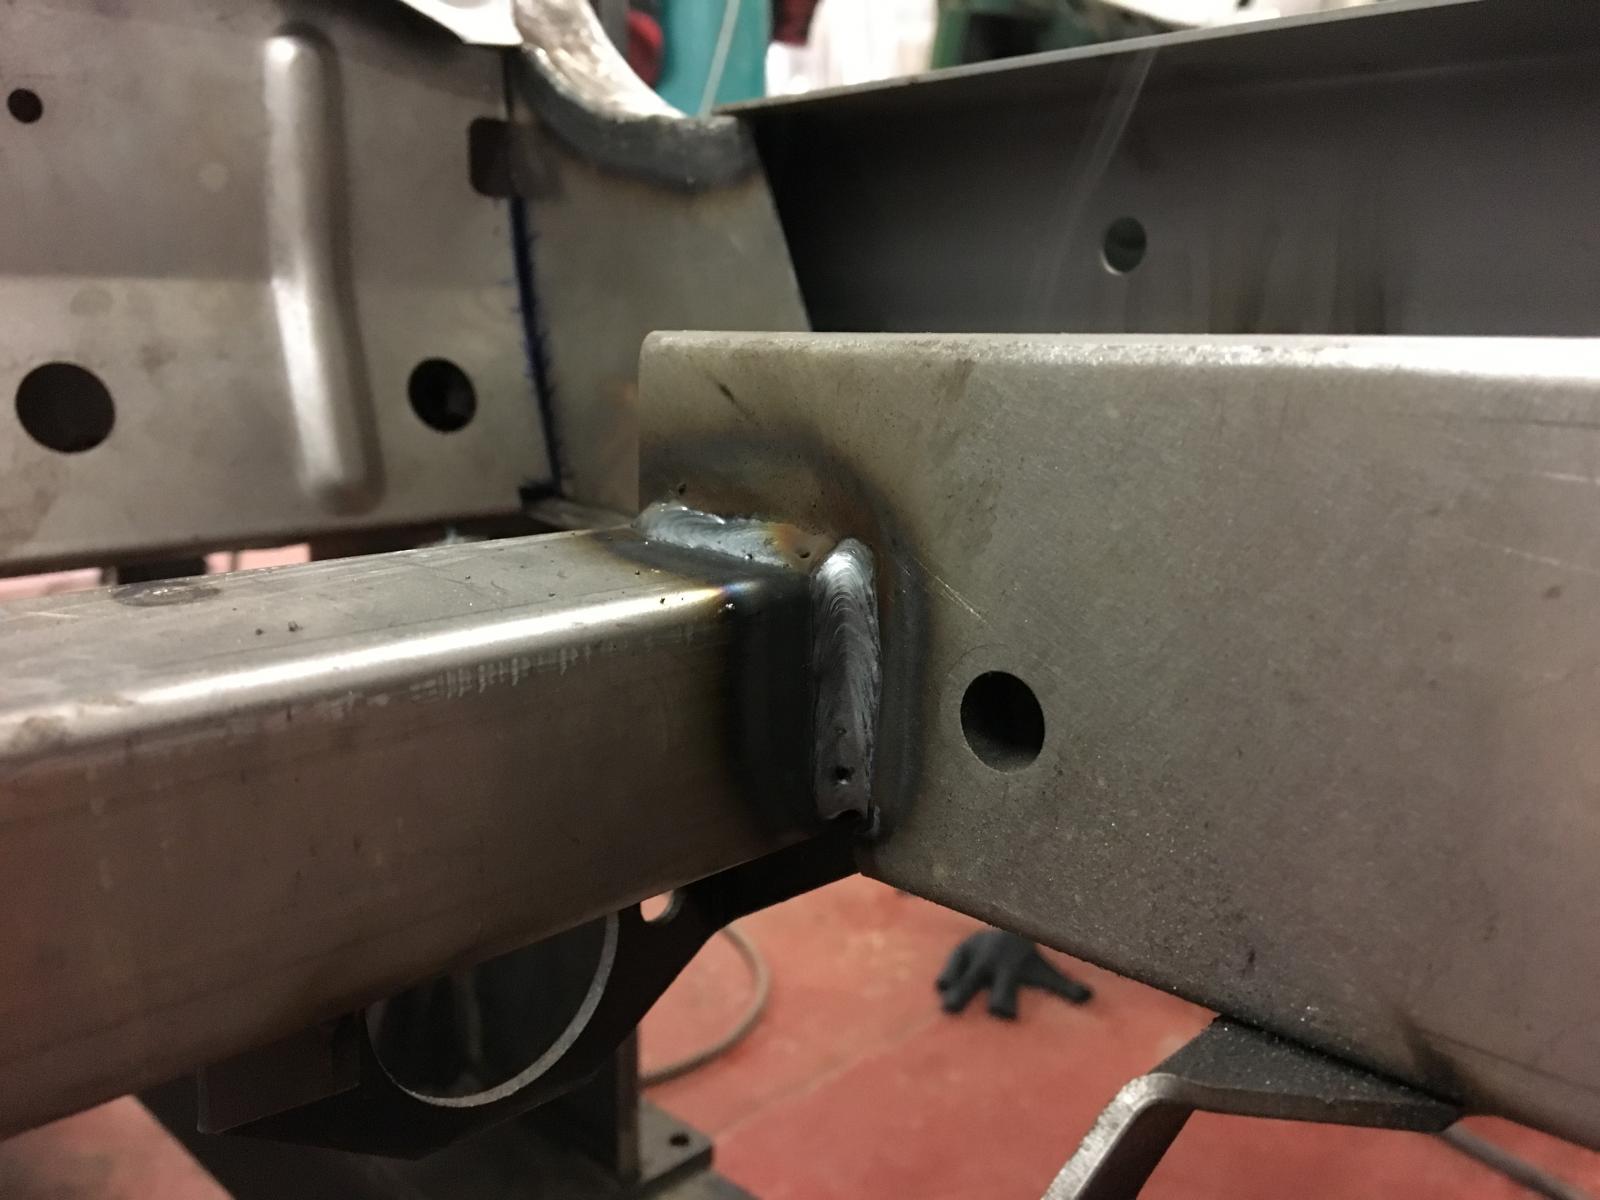
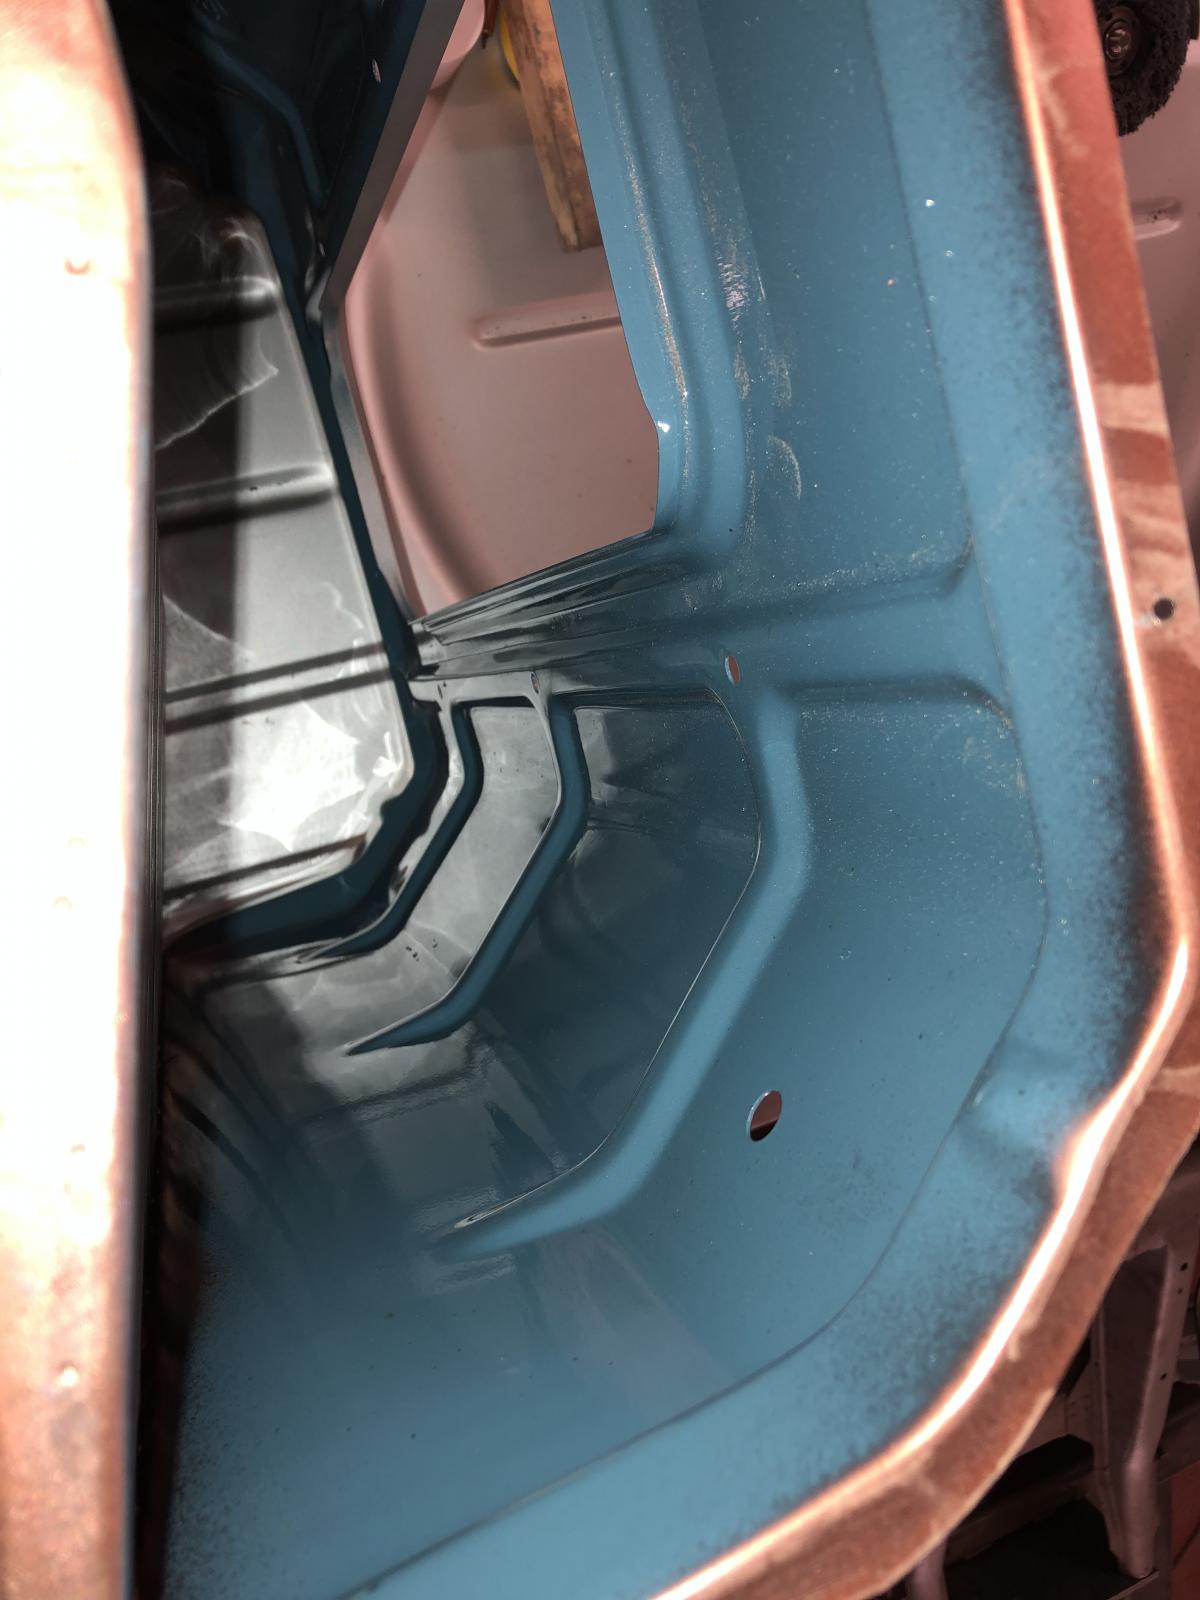
Removed the took box and floor section to paint the insides body colour before they are fitted as it would be impossible to get good paint coverage in there once welded:
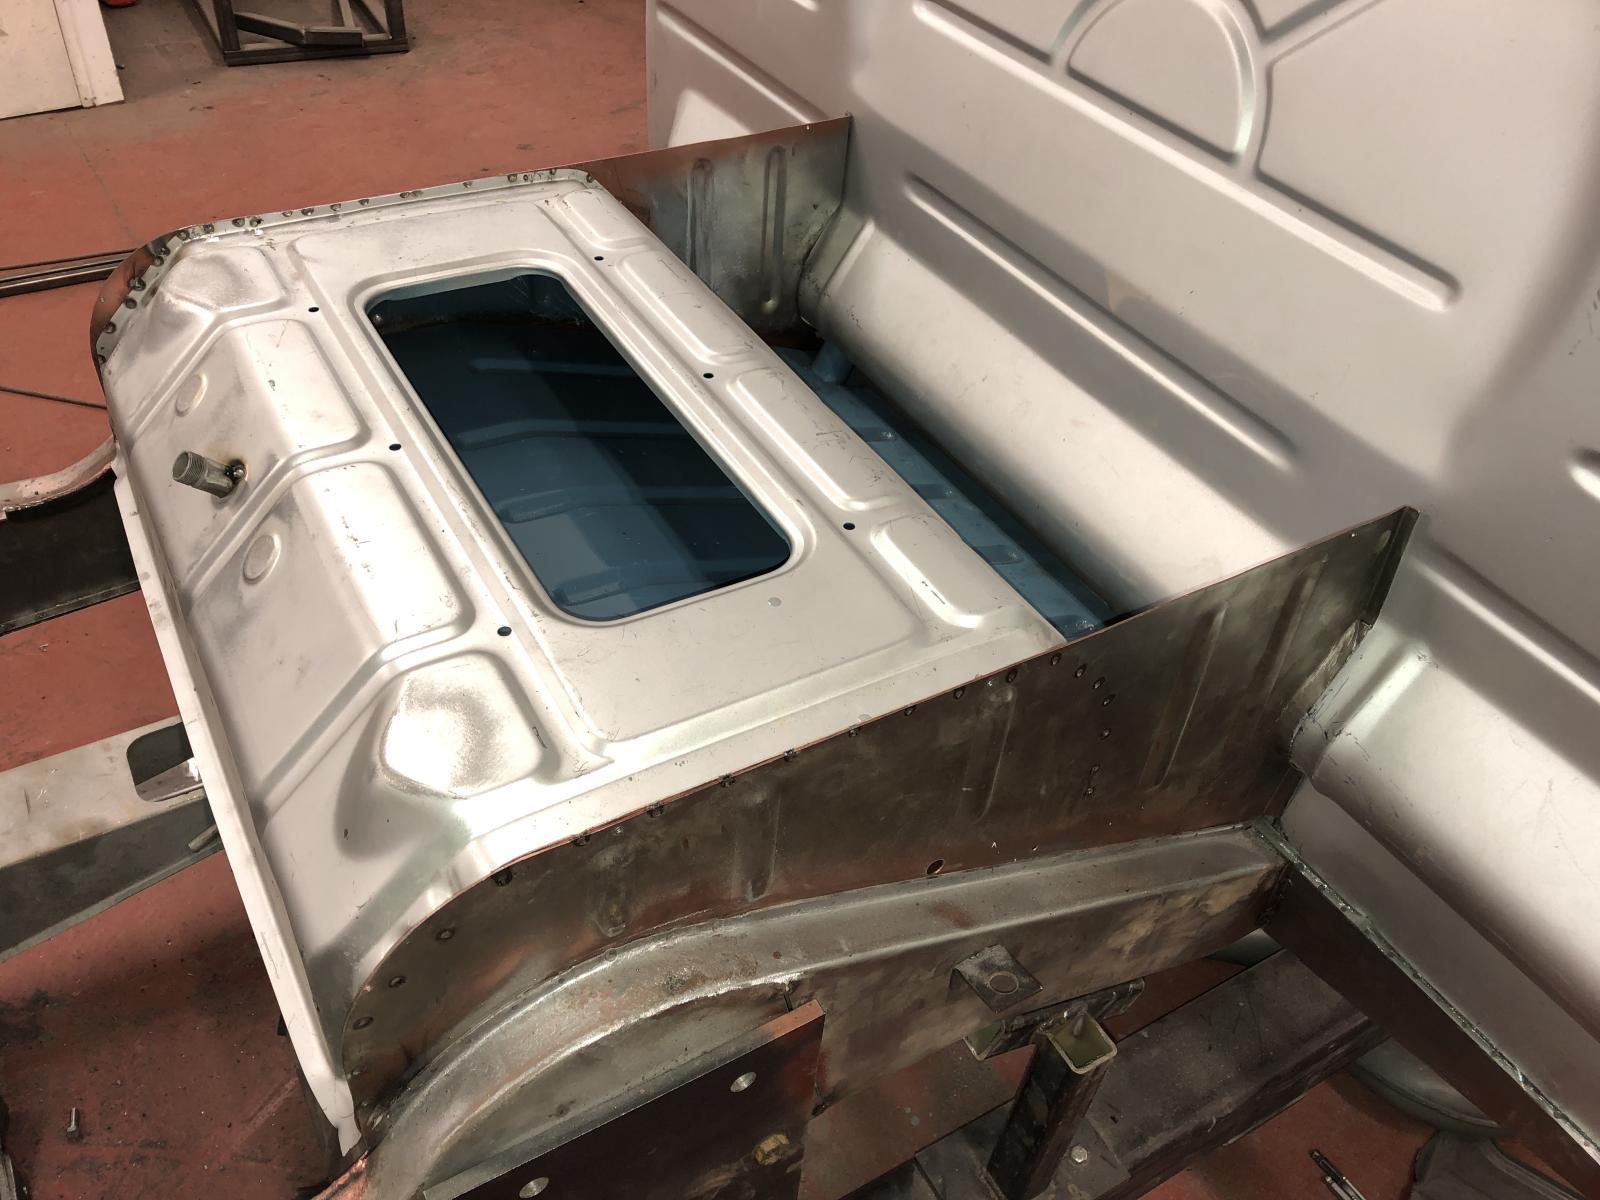
And spot welded in place:
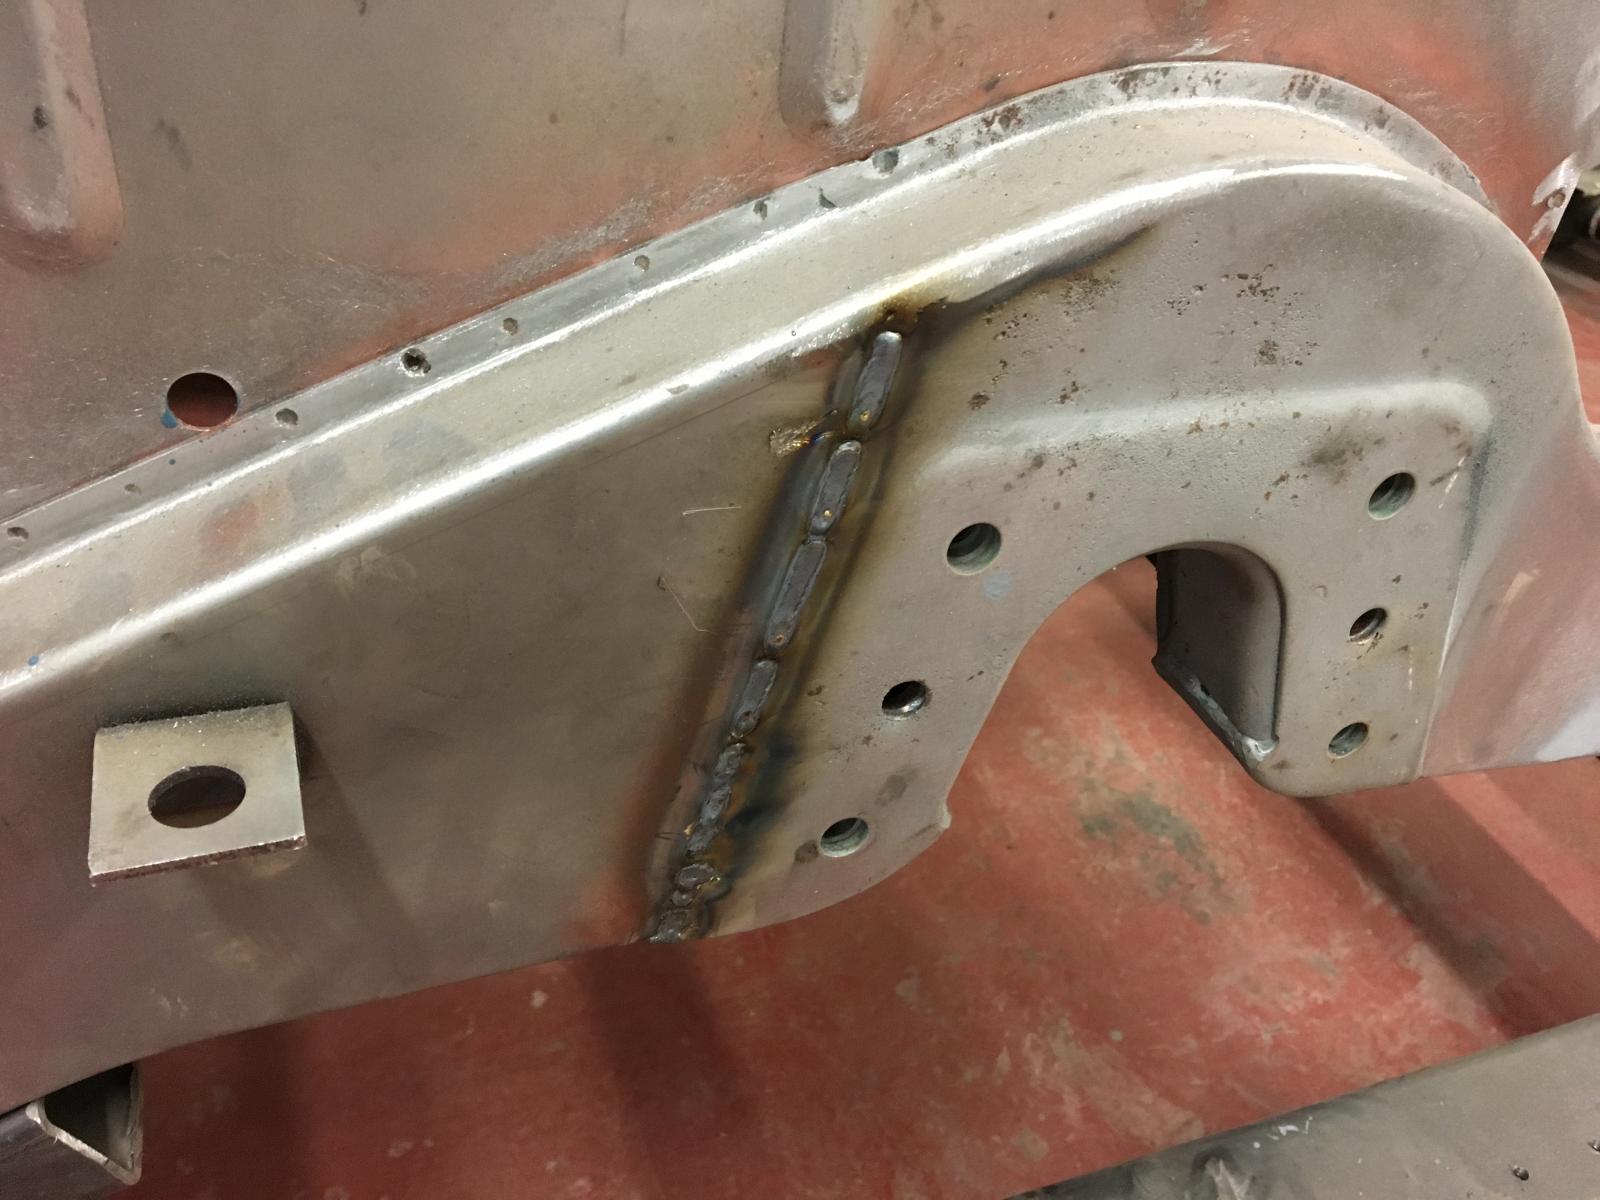
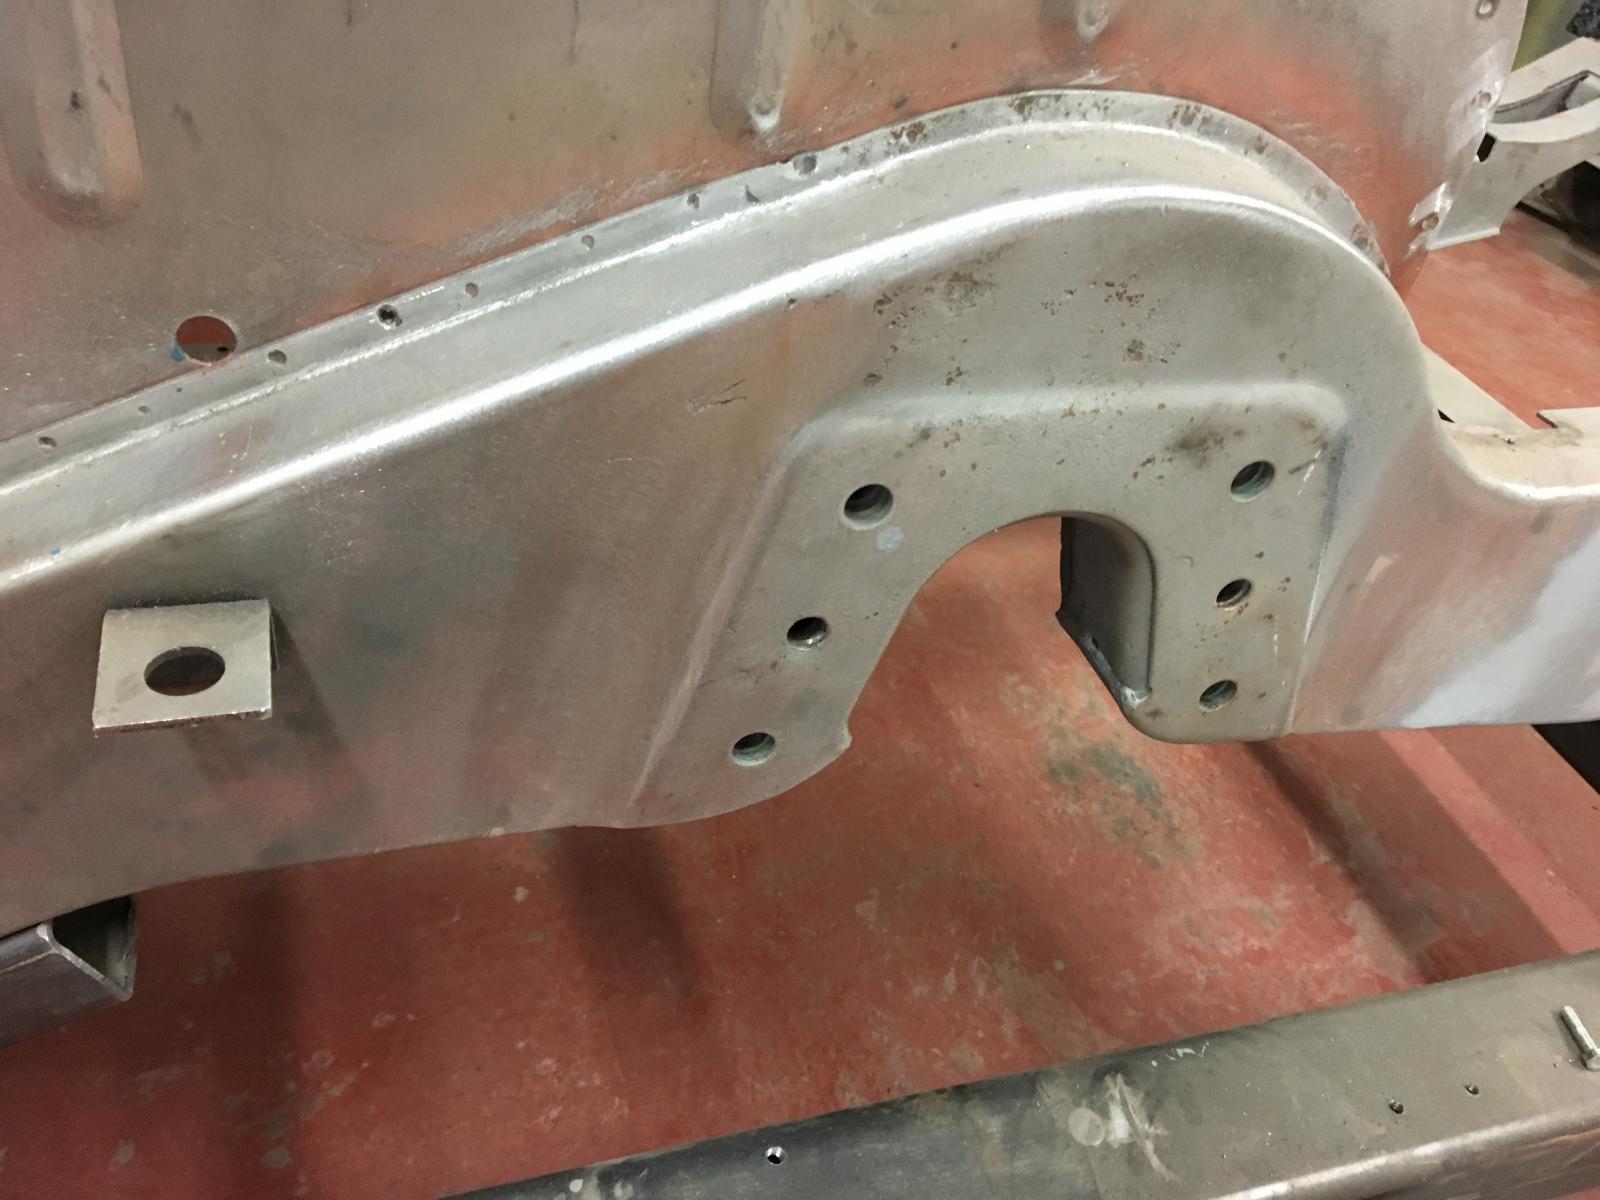
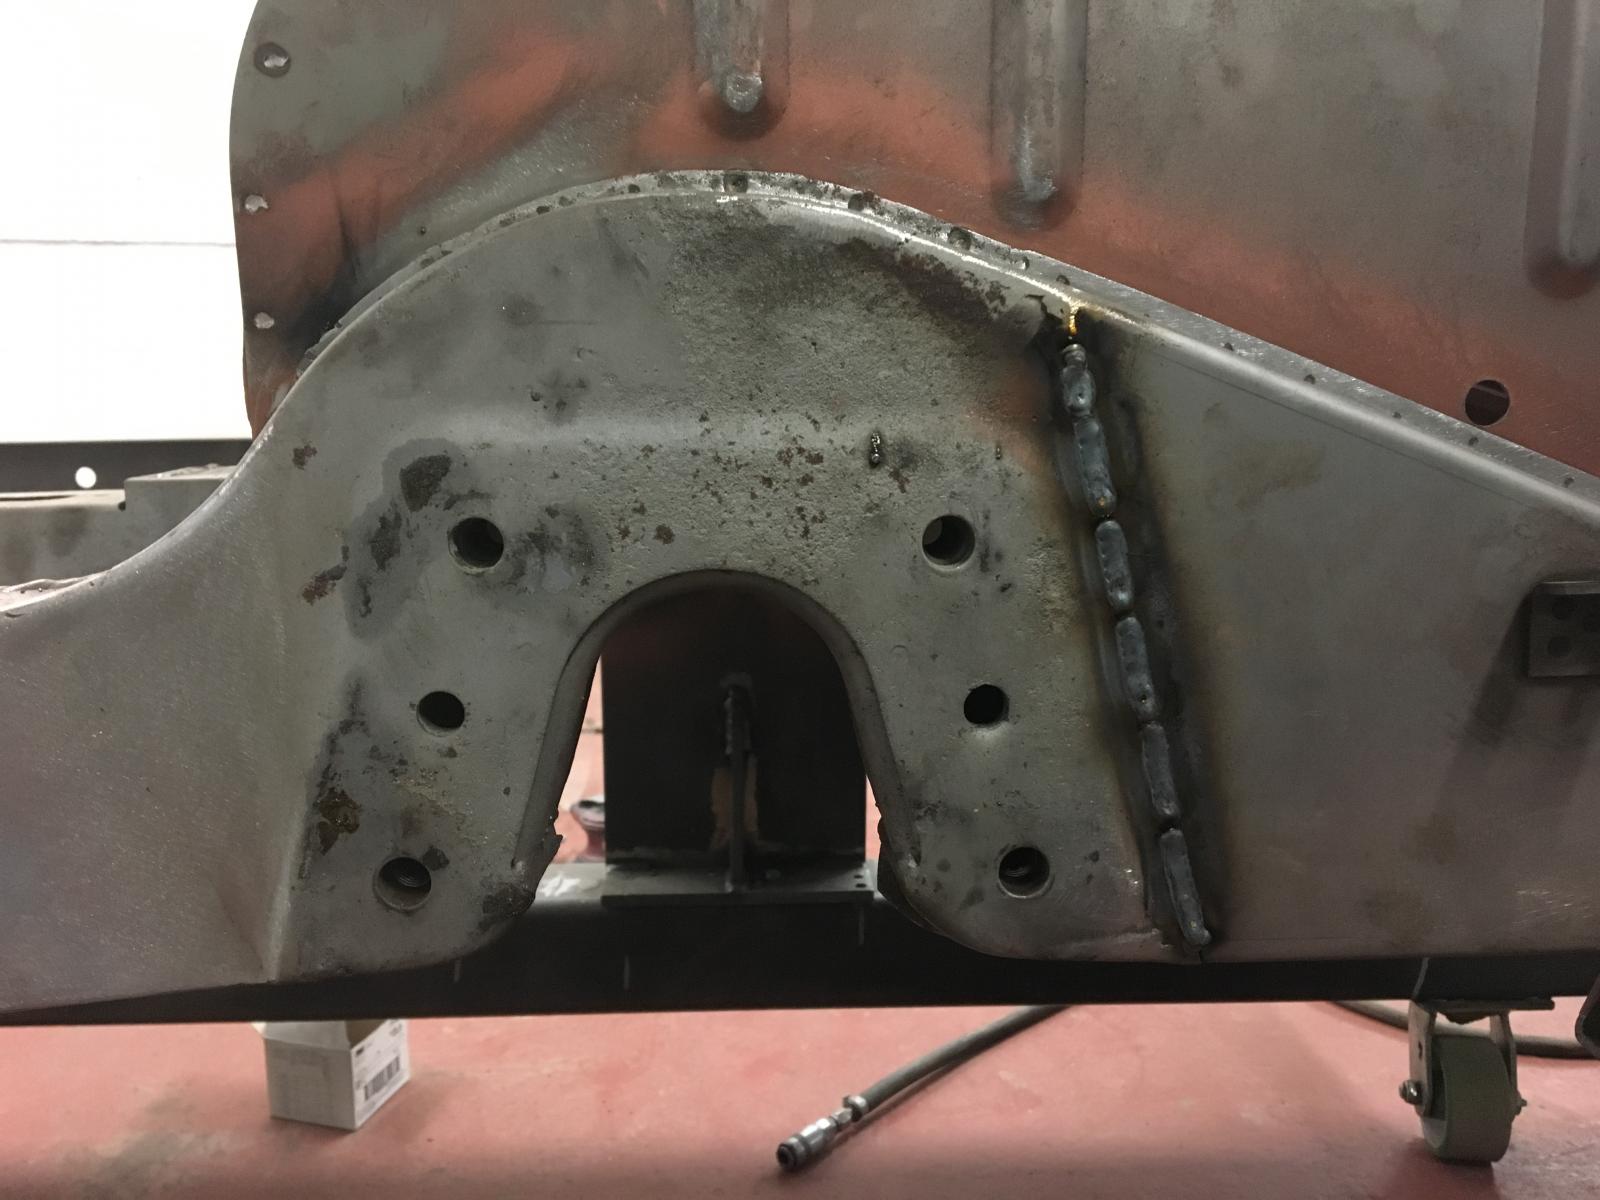
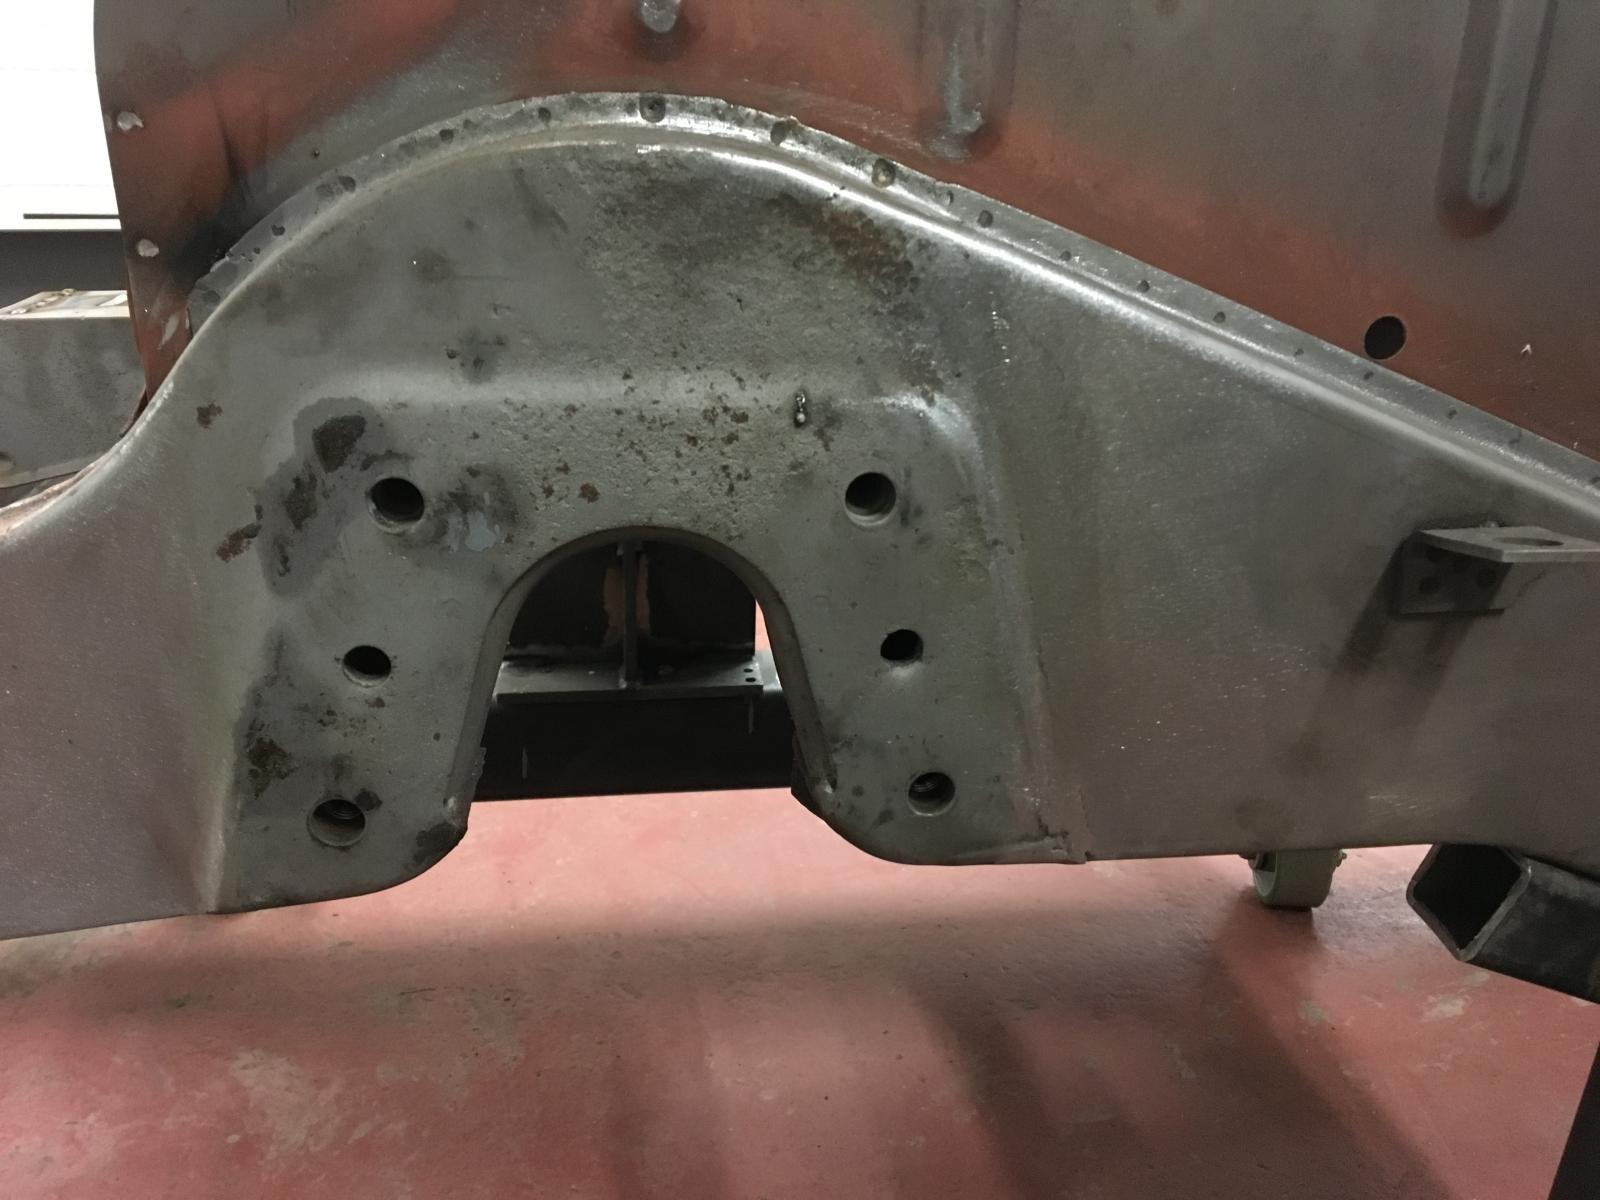
Welded the rear section of the beam mount cut to the new chassis rails:
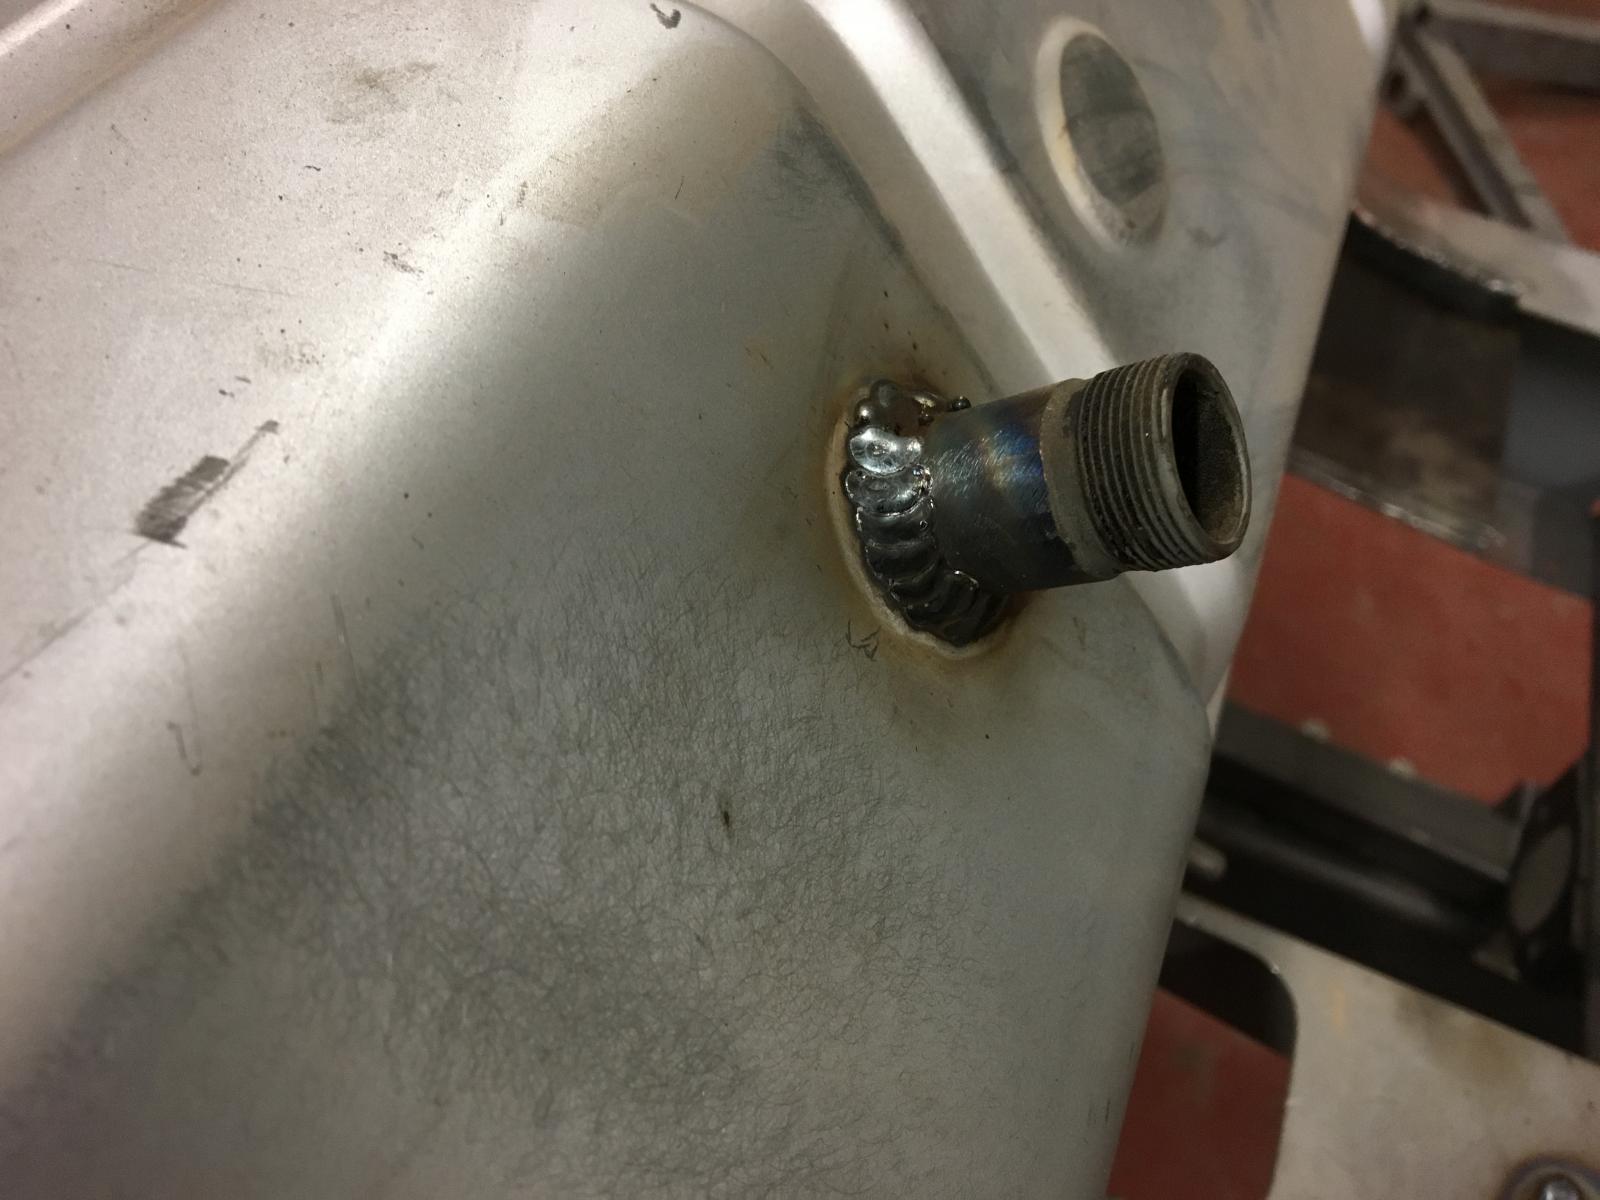
Heater control tube welded:
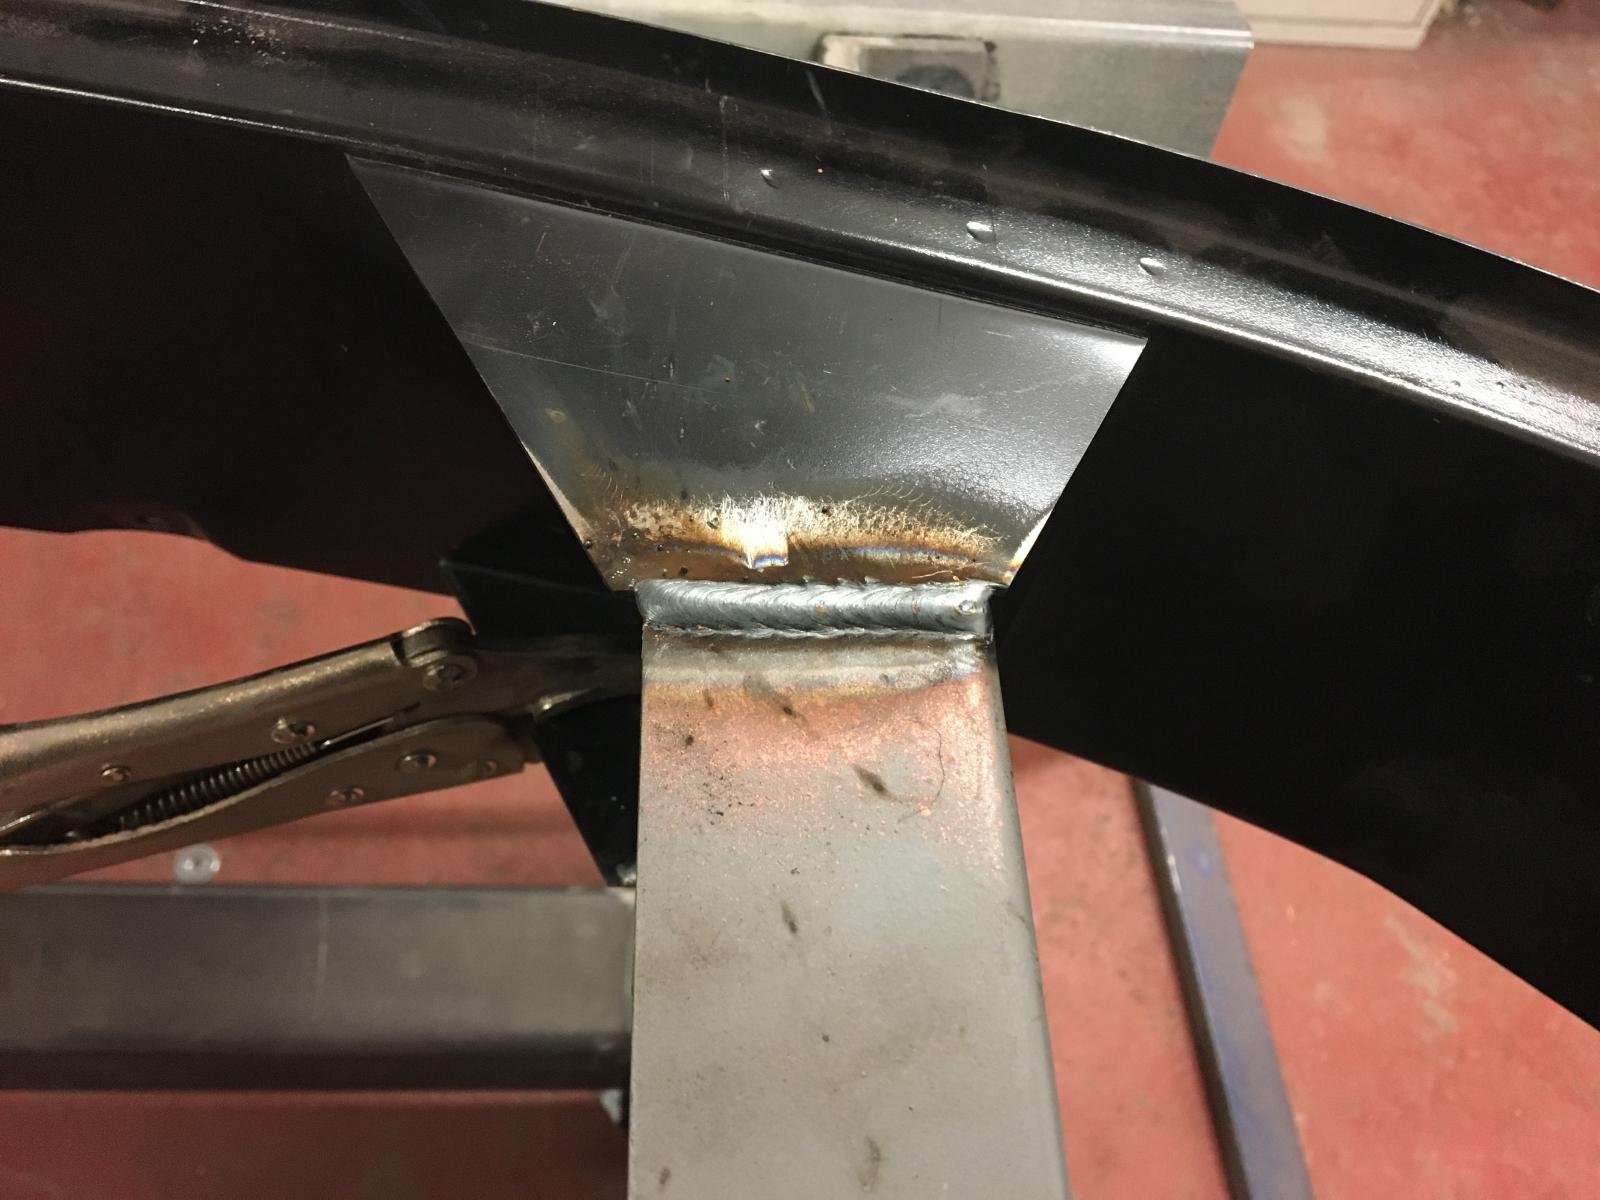
Front valance welded to the chassis rails:
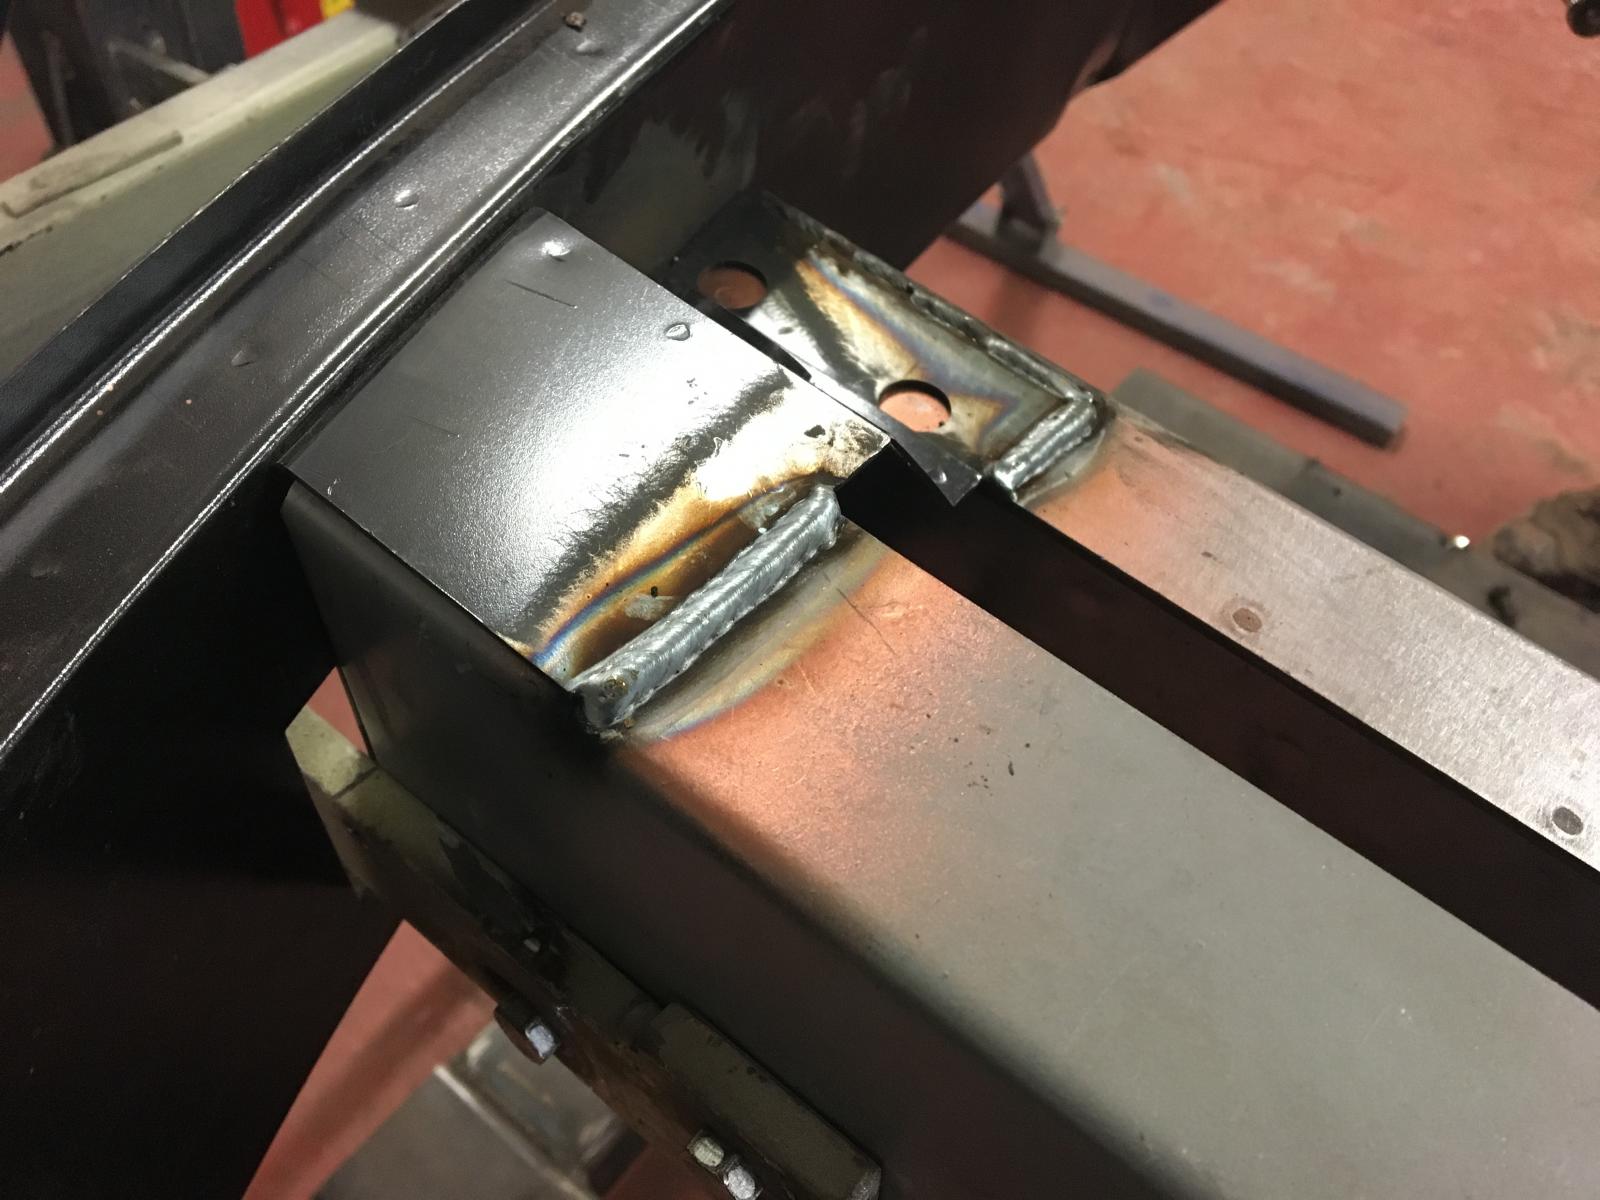
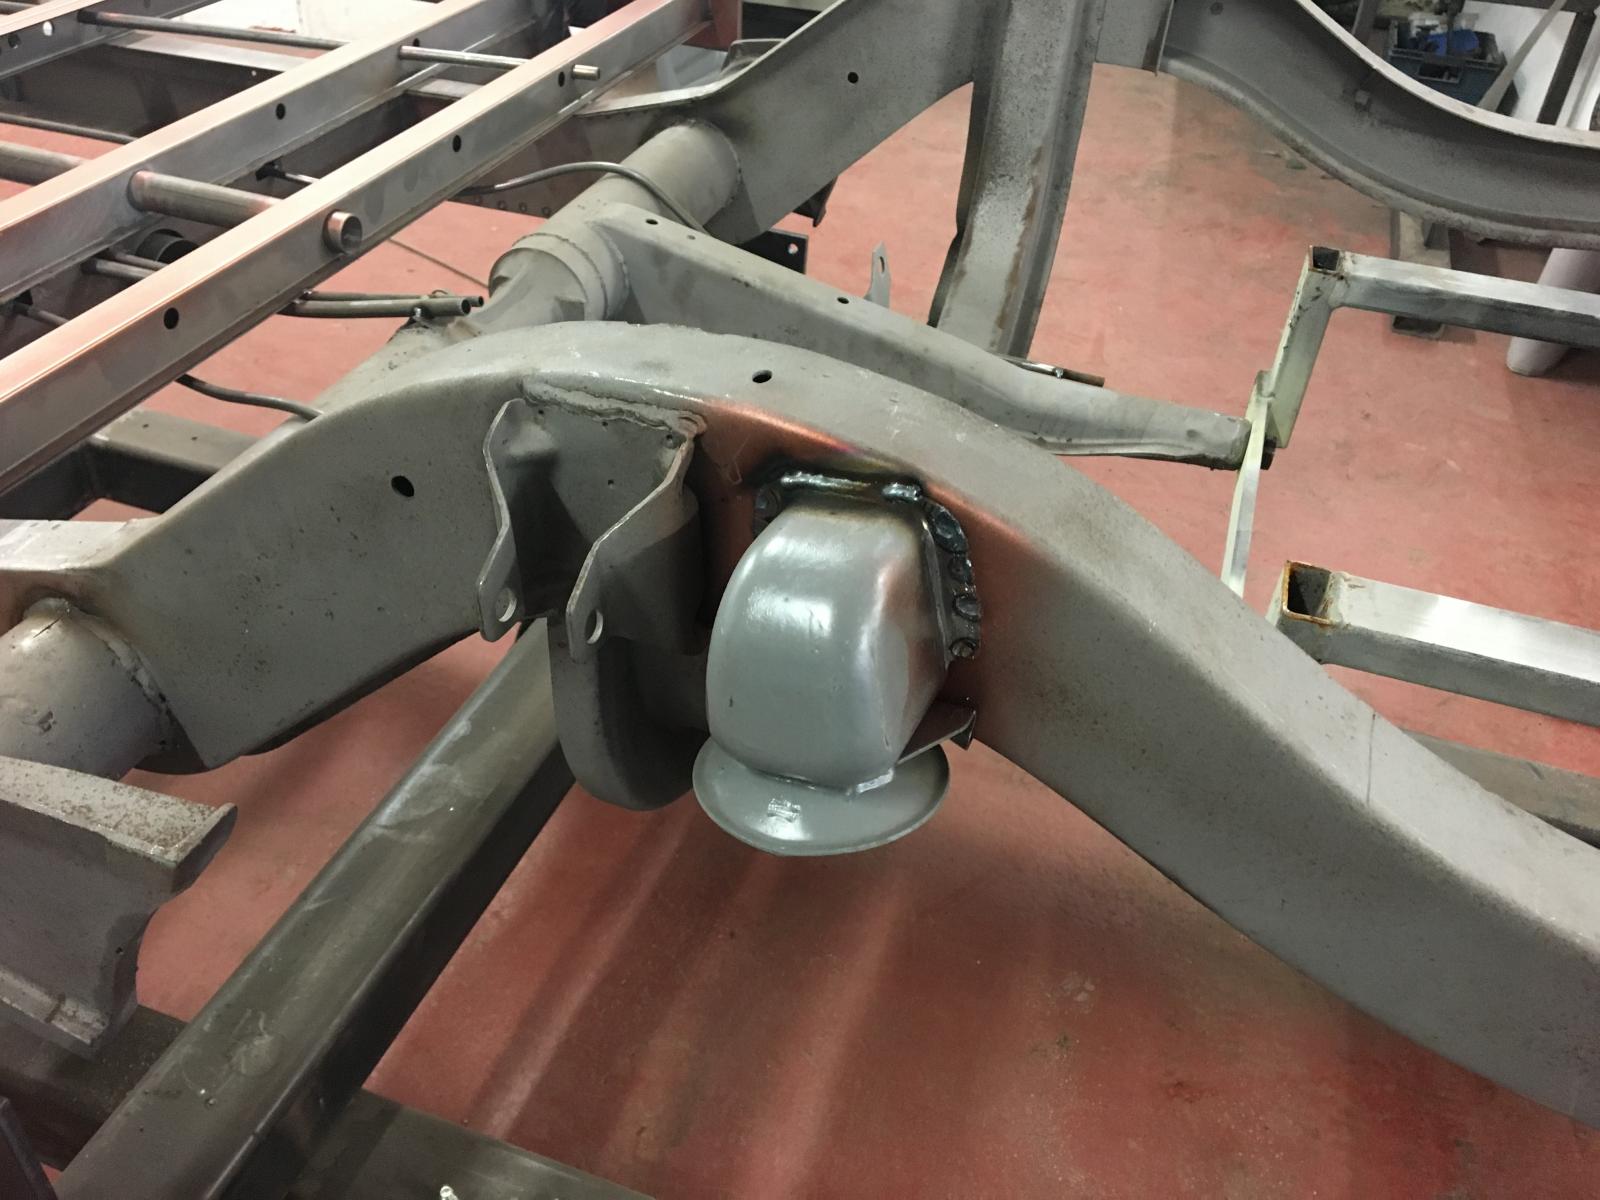
Rear donor bump stops were cleaned up, repaired and welded to the chassis as factory:
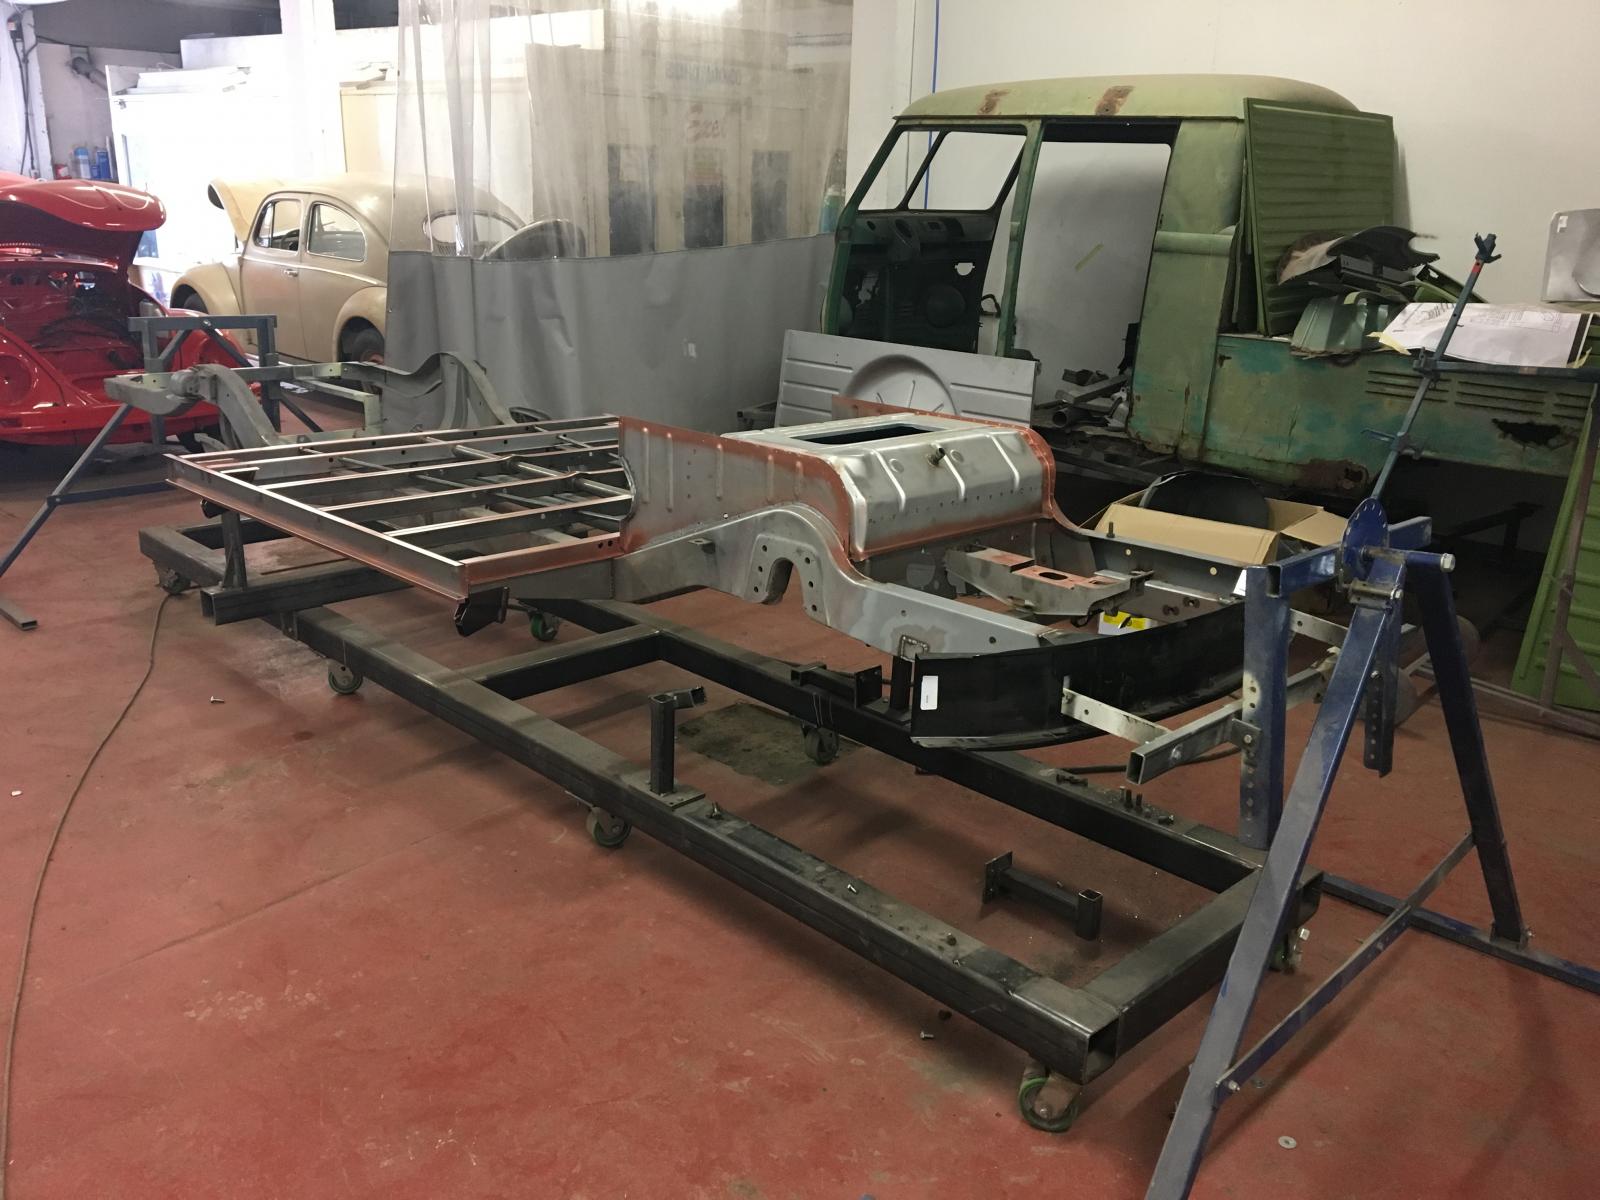
Got the chassis onto the rotisserie so we can get the underside finished. Loads of bits and bobs to get done under there:
Thats it for now
Finished seaming up the beam mounting section to the new front chassis rails:


Plug welded the top hats and spot welded the I beams to the tops of the chassis rails, and welded the tubes for the cables etc:


Got the tool box and floor sections pinned in the right place, and trial fit the front tubs:

Trial fit of the front cross plate, front valance, master cylinder cross member etc to check everything is OK before welding:

Once happy I welded in the handbrake / shifter mounting panel in place:

Then the steering box section:

Removed the took box and floor section to paint the insides body colour before they are fitted as it would be impossible to get good paint coverage in there once welded:

And spot welded in place:

Welded the rear section of the beam mount cut to the new chassis rails:


Heater control tube welded:

Front valance welded to the chassis rails:


Rear donor bump stops were cleaned up, repaired and welded to the chassis as factory:

Got the chassis onto the rotisserie so we can get the underside finished. Loads of bits and bobs to get done under there:

Thats it for now
mabbo
SSVC Member
Posts: 80
Joined: Wed Jun 01, 2011 7:09 pm
Re: Swedish 66 Crew Cab
by john&hannah » Sun Apr 28, 2019 5:24 pm
great work and the photos are really helpful for referencing to. loving this thread.
john&hannah
Registered user
Posts: 375
Joined: Tue Apr 14, 2009 2:59 pm
