You are viewing the Split Screen Van Club forum archive.
The forum archive is read-only.Unfortunately in 2021 the Split Screen Van Club forum suffered a ransomware attack and lots of the forum data was lost.
What threads that have been recovered are now searchable on this site. Some threads may be incomplete and some images are still being recovered.
Forum archive search
'63 11 window project (Aussie)
by MID WEST DUBBER » Mon Mar 19, 2012 7:28 am
Hello everyone, my name is Rusty and I am 14 years old. I am currently in the process of rebuilding a 62 beetle. Once the beetle is finished I have a 63 11 window split that will be my long term project.
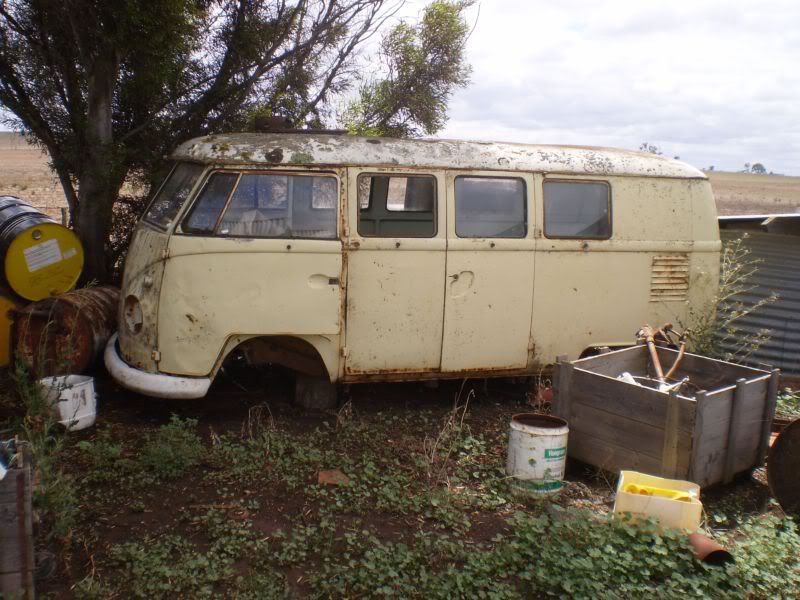
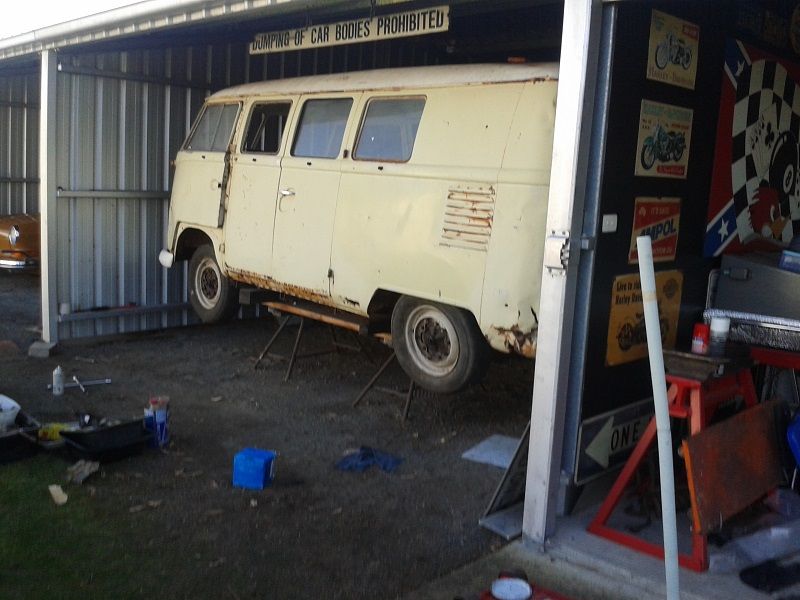
Here is a picture as found…
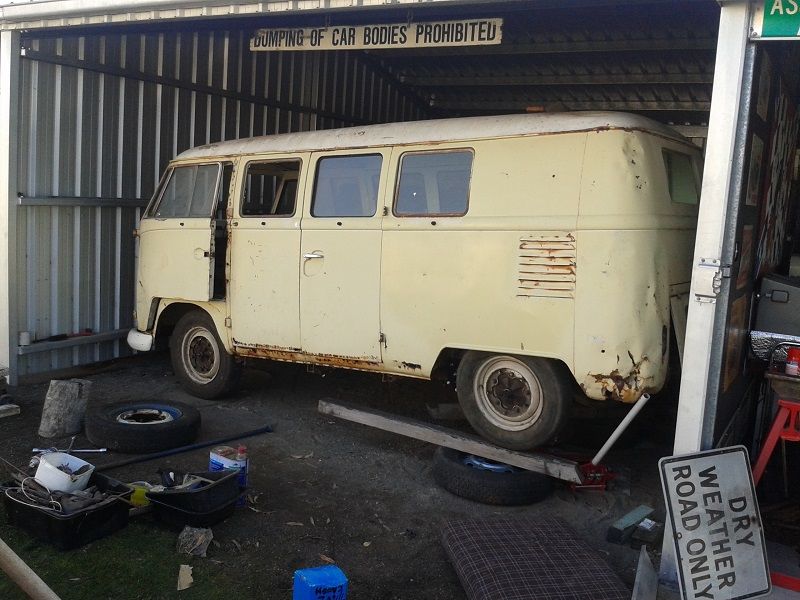
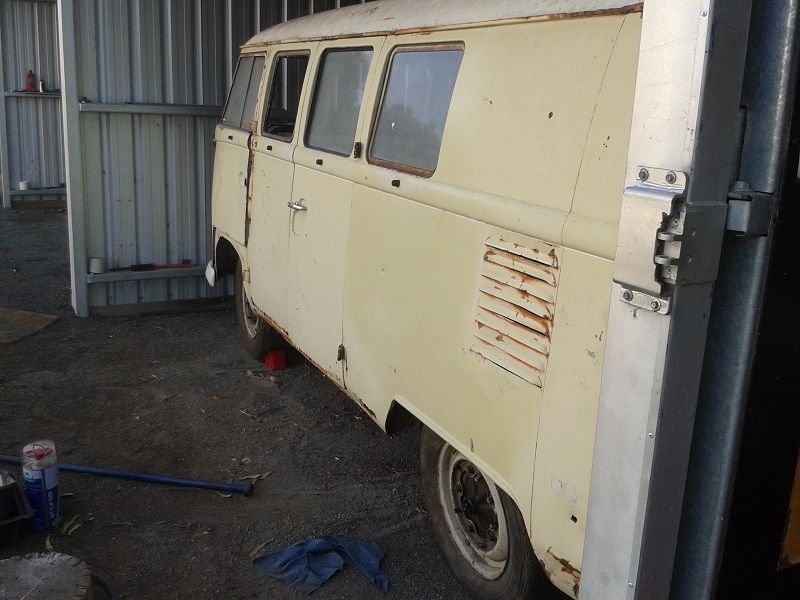
Here is a couple of pictures when I got it home…
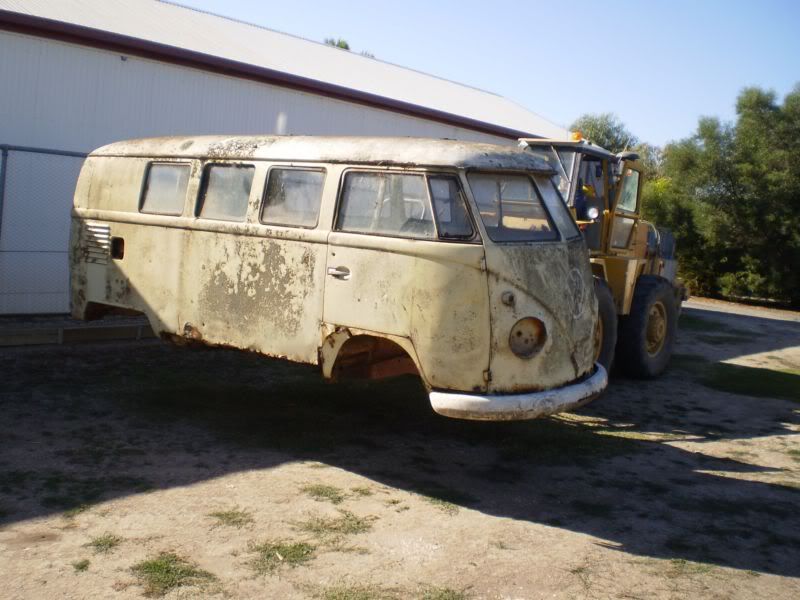
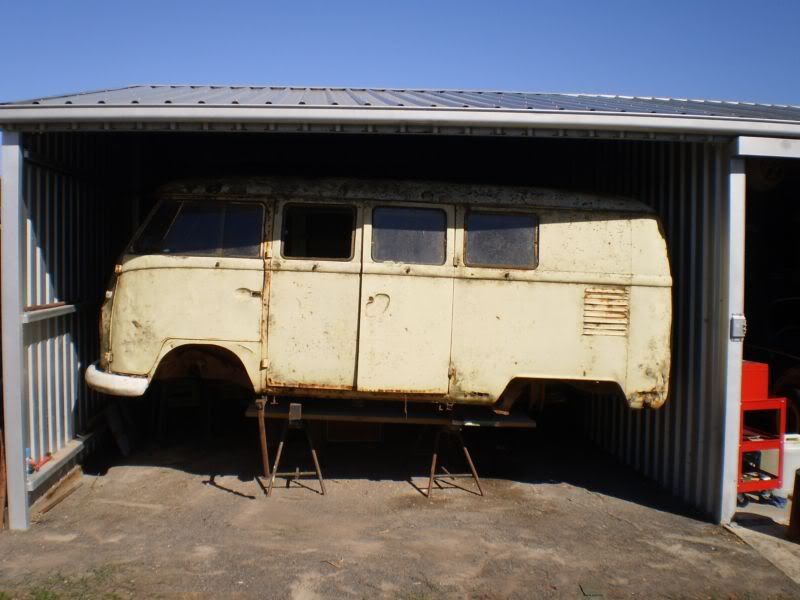
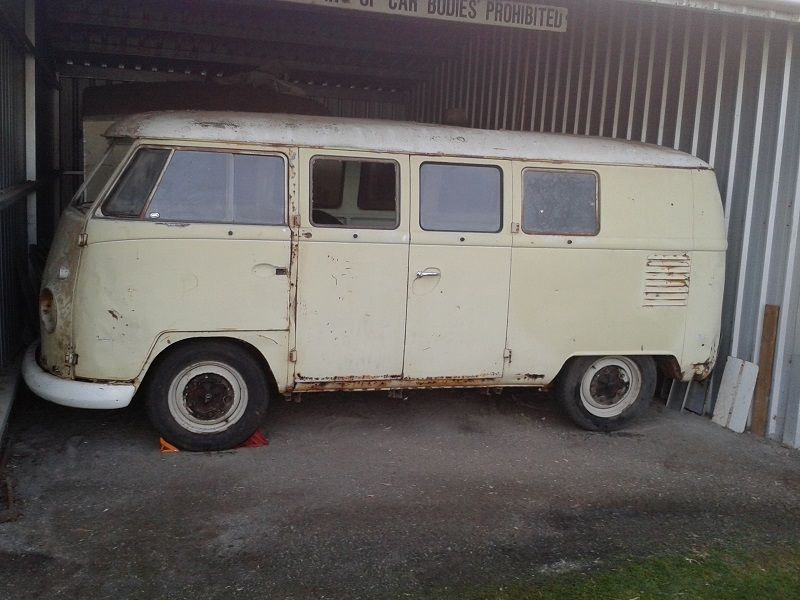
And one after a wash to clean it up..
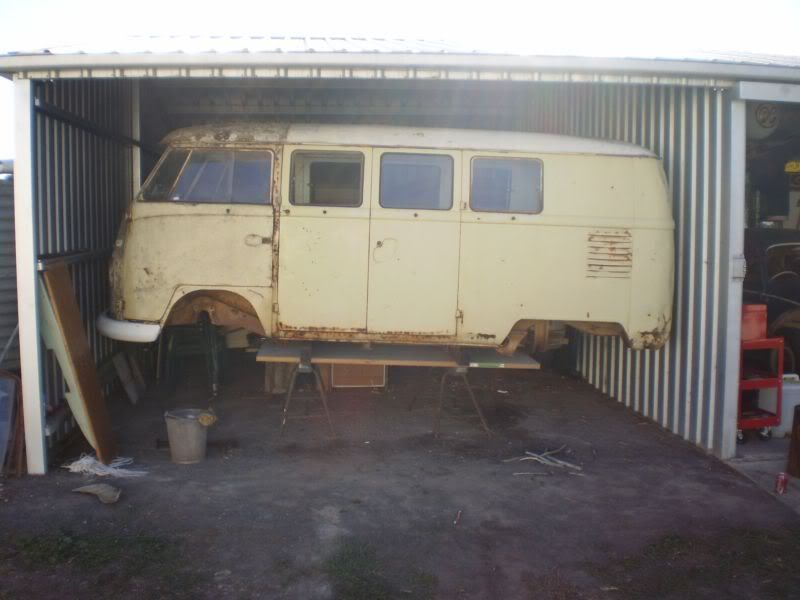
I also have a '76 aussie kombi camper that I was going to do before I got my beetle and split kombi.
Cheers Rusty.
Here is a picture as found…

Here is a couple of pictures when I got it home…


And one after a wash to clean it up..

I also have a '76 aussie kombi camper that I was going to do before I got my beetle and split kombi.
Cheers Rusty.
MID WEST DUBBER
Registered user
Posts: 15
Joined: Thu Mar 15, 2012 9:02 am
Re: '63 11 window project (Aussie)
by AirWRX » Mon Mar 19, 2012 10:52 am
Nice looking project, keep up with the updates!
AirWRX
Registered user
Posts: 75
Joined: Mon Jan 03, 2011 10:04 pm
Re: '63 11 window project (Aussie)
by MID WEST DUBBER » Wed Mar 28, 2012 6:53 am
Thanks
 I will post photos as I get things done!
Rusty.
Rusty.
MID WEST DUBBER
Registered user
Posts: 15
Joined: Thu Mar 15, 2012 9:02 am
Re: '63 11 window project (Aussie)
by MID WEST DUBBER » Sun Jul 12, 2015 6:41 am
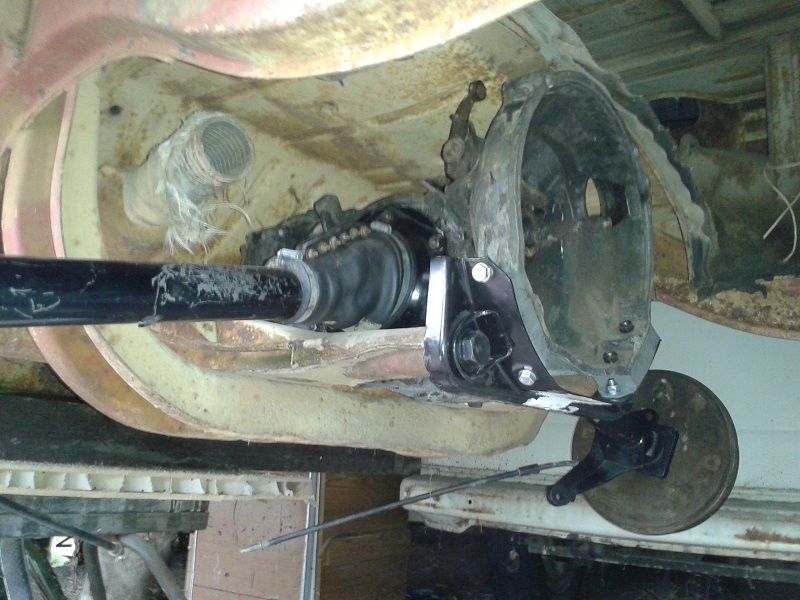
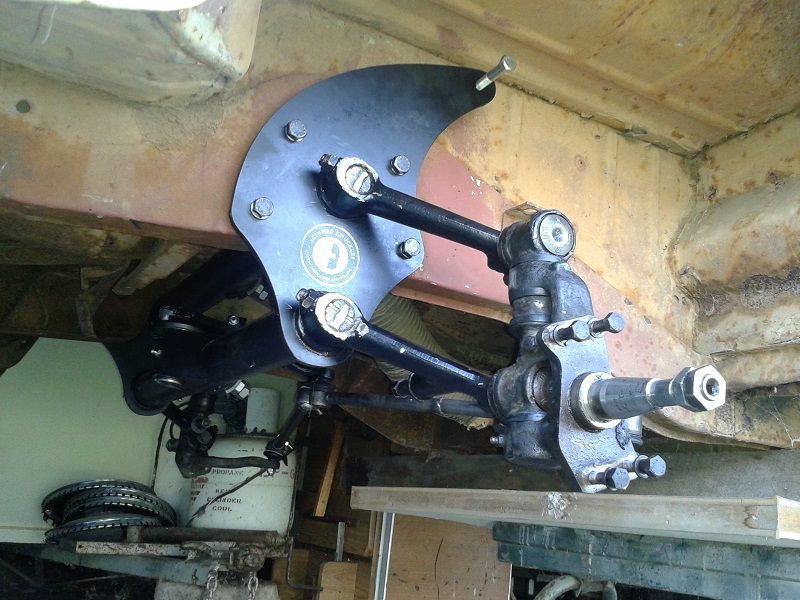
So my bus had sat sideways in the shed for over 2 years while I saved money and collected parts for the front and rear ends. I have put a 4.5" skinned knuckles narrowed beam under and did a straight axle conversion on a type 3 rear end.
With the help of my dad we put the rear end under and the beam under.This was the first time this bus has had a front and rear end under it in 25+ years.
the rear...
The front...
up in the air...!
we slowly brought it down lowering it onto wheels in various stages...
on the ground
With the help of my dad we put the rear end under and the beam under.This was the first time this bus has had a front and rear end under it in 25+ years.
the rear...

The front...

up in the air...!

we slowly brought it down lowering it onto wheels in various stages...

on the ground


MID WEST DUBBER
Registered user
Posts: 15
Joined: Thu Mar 15, 2012 9:02 am
Re: '63 11 window project (Aussie)
by MID WEST DUBBER » Sun Jul 12, 2015 6:41 am
Here is a short video!
https://youtu.be/2UiHmQtZUbg
https://youtu.be/2UiHmQtZUbg
MID WEST DUBBER
Registered user
Posts: 15
Joined: Thu Mar 15, 2012 9:02 am
Re: '63 11 window project (Aussie)
by MID WEST DUBBER » Sun Jul 12, 2015 6:42 am
MID WEST DUBBER
Registered user
Posts: 15
Joined: Thu Mar 15, 2012 9:02 am
Re: '63 11 window project (Aussie)
by MID WEST DUBBER » Sun Jul 12, 2015 6:43 am
At the start of the year I decided I wanted to make something useful at school in year 12 metal work this year. After some thinking I decided I wanted to build a rotisserie for my bus.
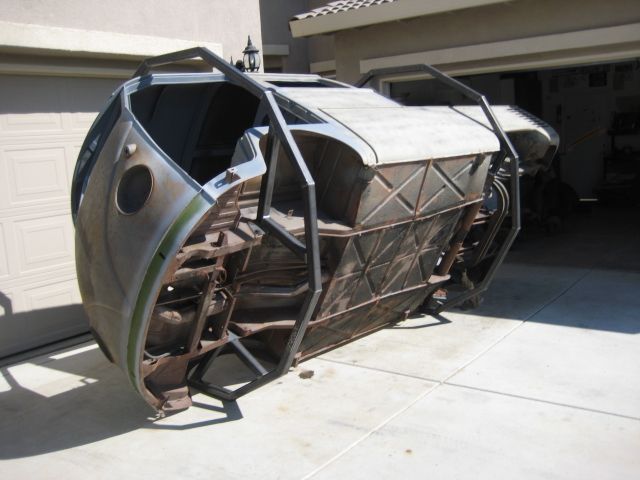
After searching the web at different designs I settled for the two 12 sided hoop design as it would best suit/fit the location I plan to work on the bus in future.
This is the basic idea of what I am aiming for...
So with some research and a fair bit of thinking and measuring, I had an idea of how I was going to build the two hoops.
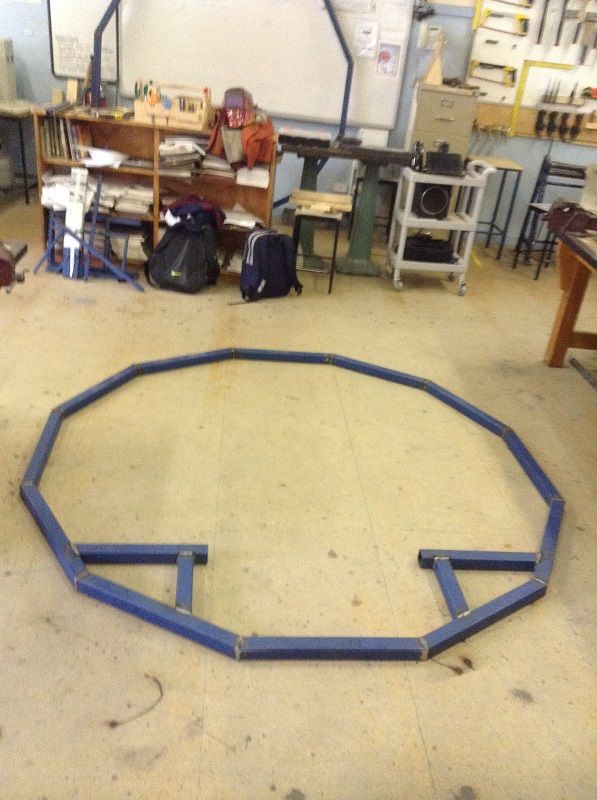
I started off by cutting 24 (12 for each hoop) 580mm lengths of 50mm X 50mm X 3.0mm RHS with 15 degree angles on each end. (the 15 degree angles will join to make a 30 degree, 12 x 30 degrees= 360 degrees)
Ground a 45 degree on the end so the welds would penetrate better.
I then cut 4 lengths of 20x20 RHS which would be tacked into place to hold the top, bottom and side pieces square.
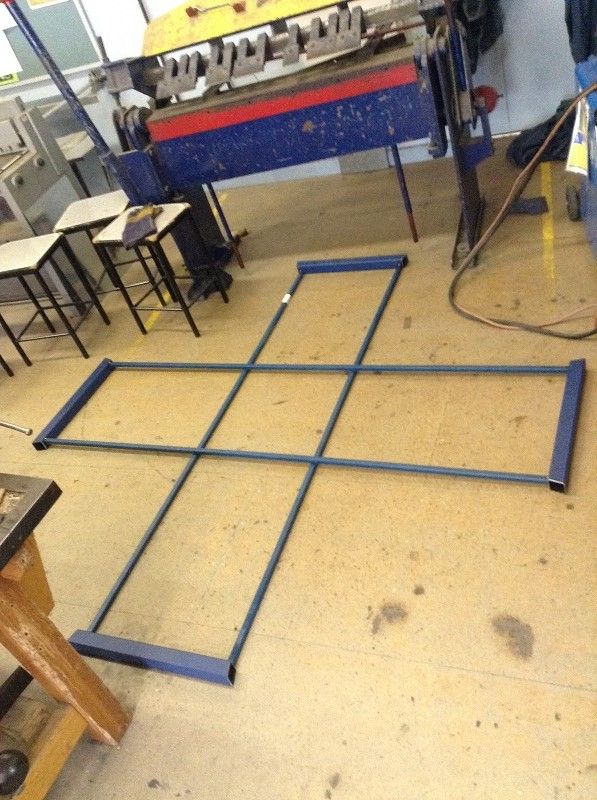
With it all square and tacked I placed the other pieces in place, and when I was happy I tacked each join.
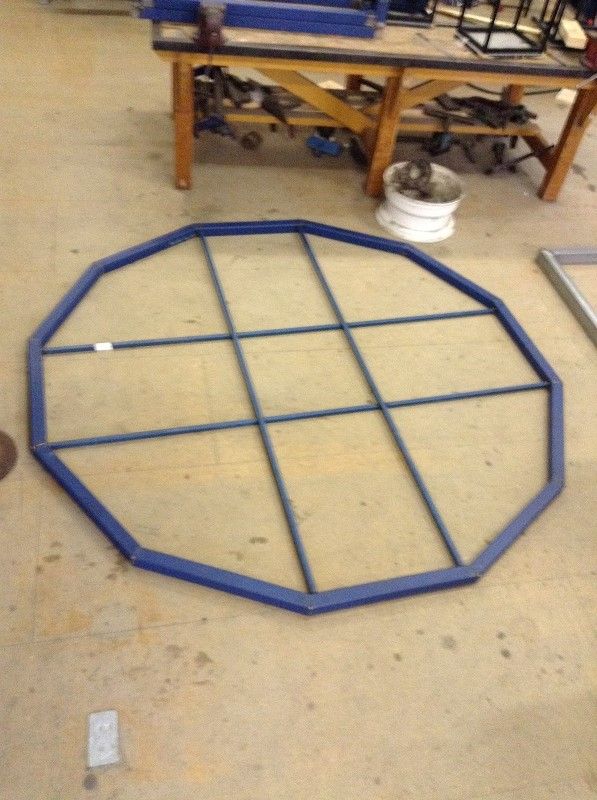
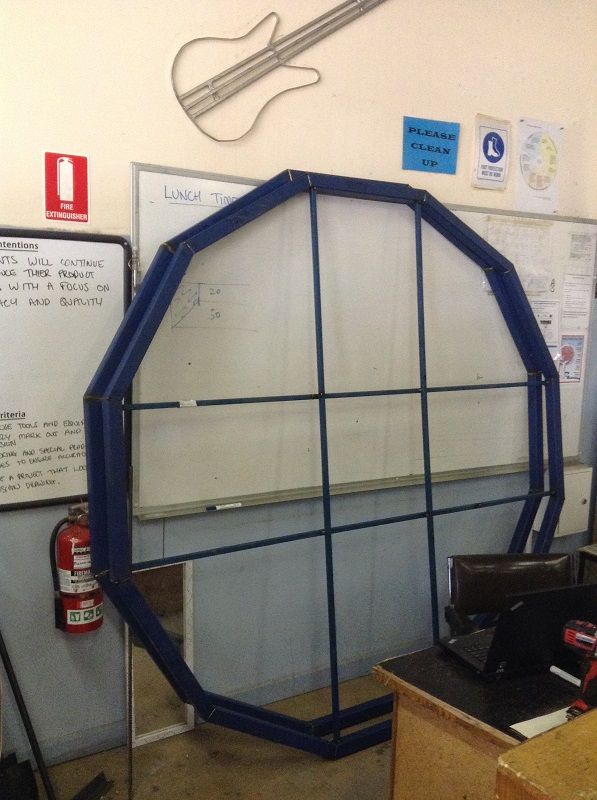
The steel for the second hoop was laid over the top of this one and when they were exactly the same I tacked all four corners of each join and then fully welded the joins.
After searching the web at different designs I settled for the two 12 sided hoop design as it would best suit/fit the location I plan to work on the bus in future.
This is the basic idea of what I am aiming for...

So with some research and a fair bit of thinking and measuring, I had an idea of how I was going to build the two hoops.
I started off by cutting 24 (12 for each hoop) 580mm lengths of 50mm X 50mm X 3.0mm RHS with 15 degree angles on each end. (the 15 degree angles will join to make a 30 degree, 12 x 30 degrees= 360 degrees)
Ground a 45 degree on the end so the welds would penetrate better.
I then cut 4 lengths of 20x20 RHS which would be tacked into place to hold the top, bottom and side pieces square.

With it all square and tacked I placed the other pieces in place, and when I was happy I tacked each join.

The steel for the second hoop was laid over the top of this one and when they were exactly the same I tacked all four corners of each join and then fully welded the joins.

MID WEST DUBBER
Registered user
Posts: 15
Joined: Thu Mar 15, 2012 9:02 am
Re: '63 11 window project (Aussie)
by MID WEST DUBBER » Sun Jul 12, 2015 6:44 am
MID WEST DUBBER
Registered user
Posts: 15
Joined: Thu Mar 15, 2012 9:02 am
Re: '63 11 window project (Aussie)
by MID WEST DUBBER » Sun Jul 12, 2015 6:45 am
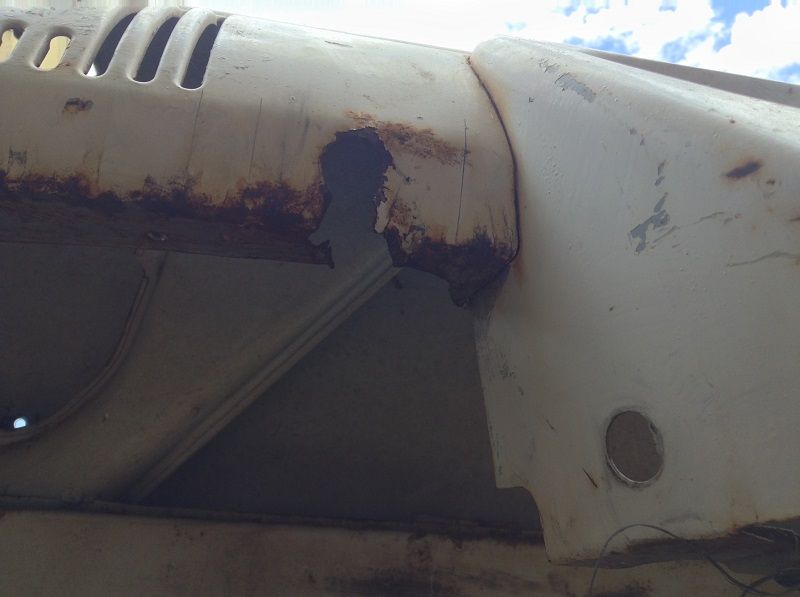
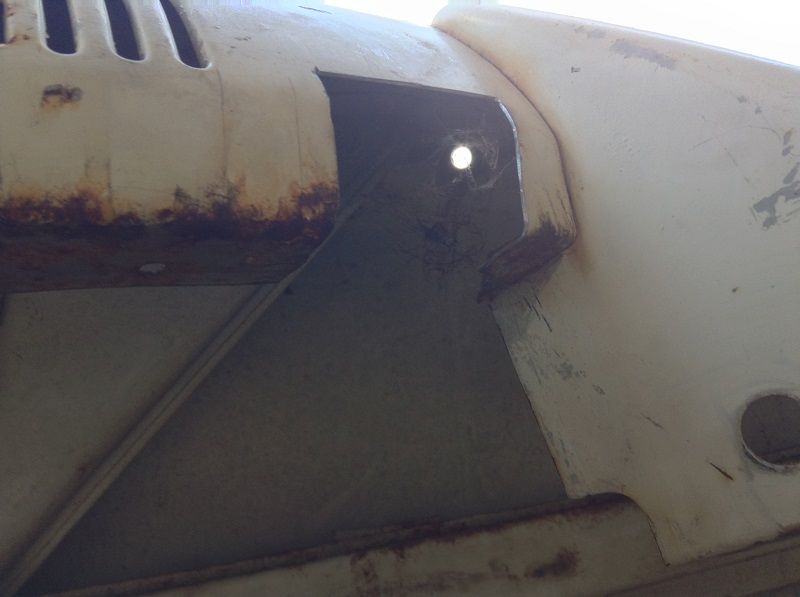
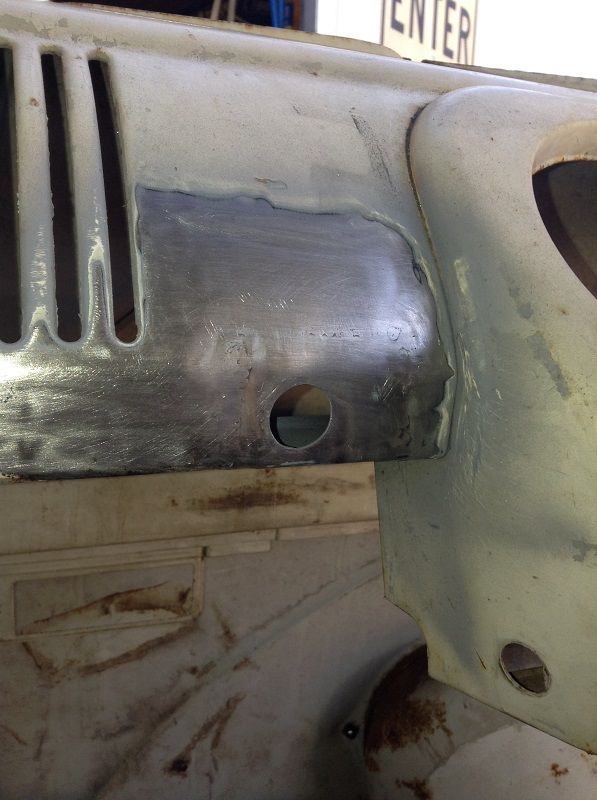
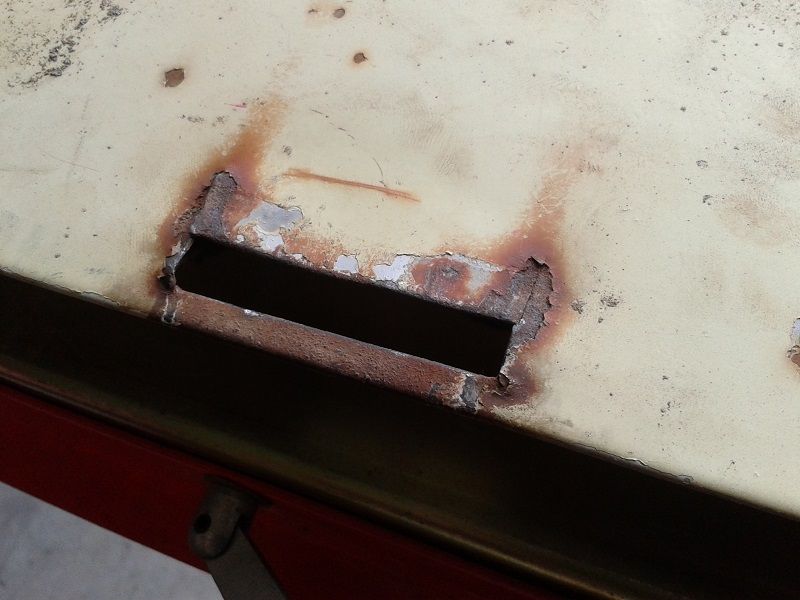
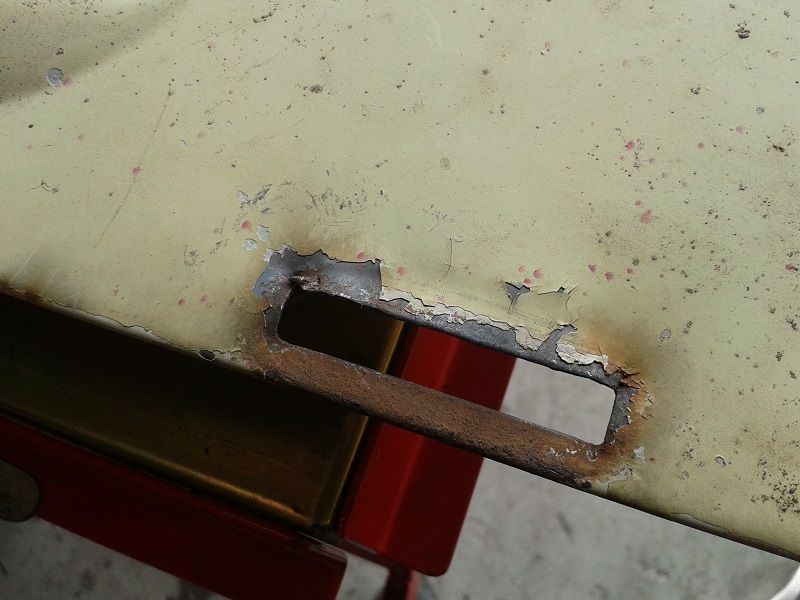
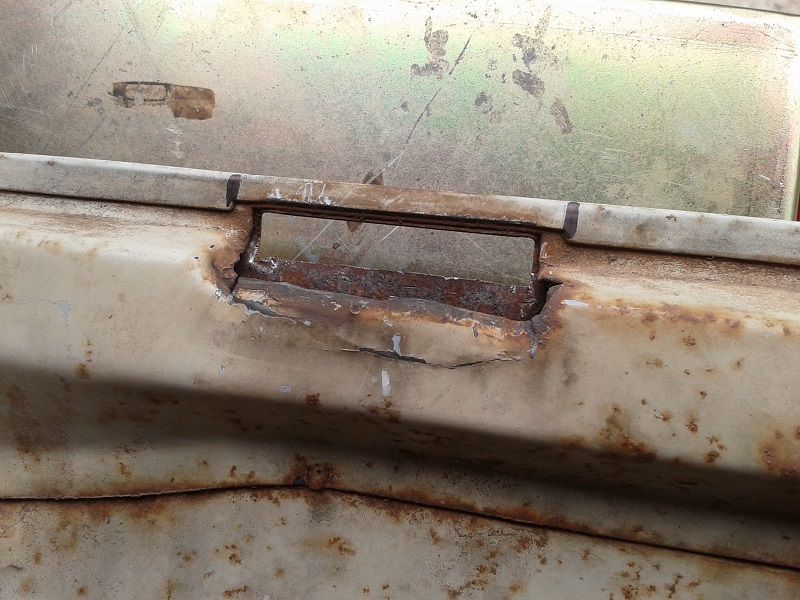
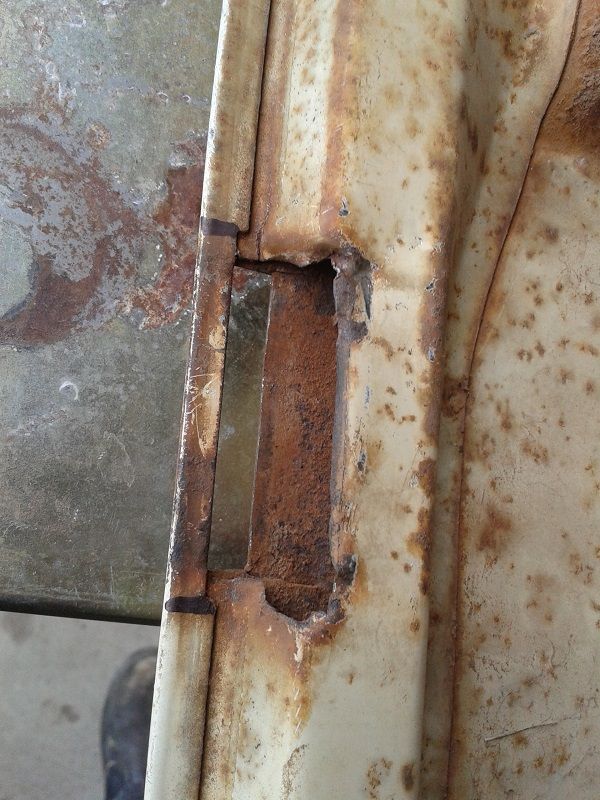
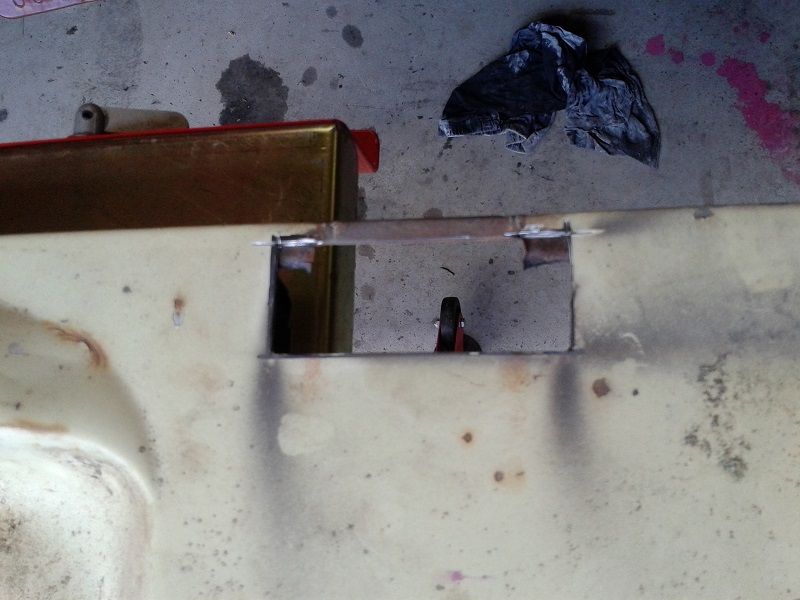
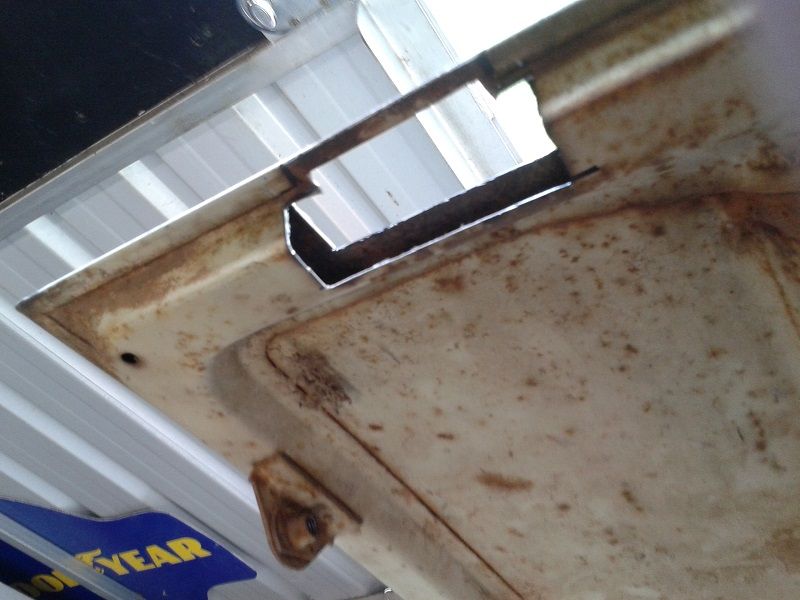
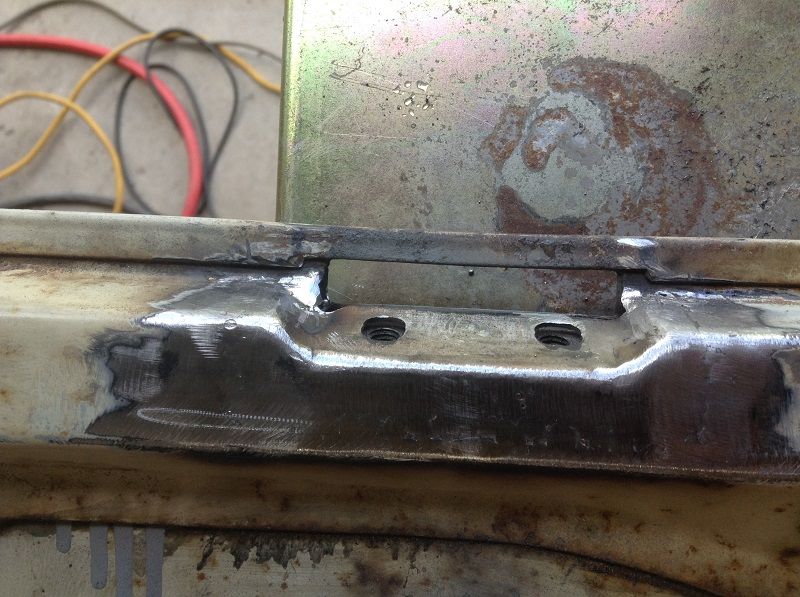
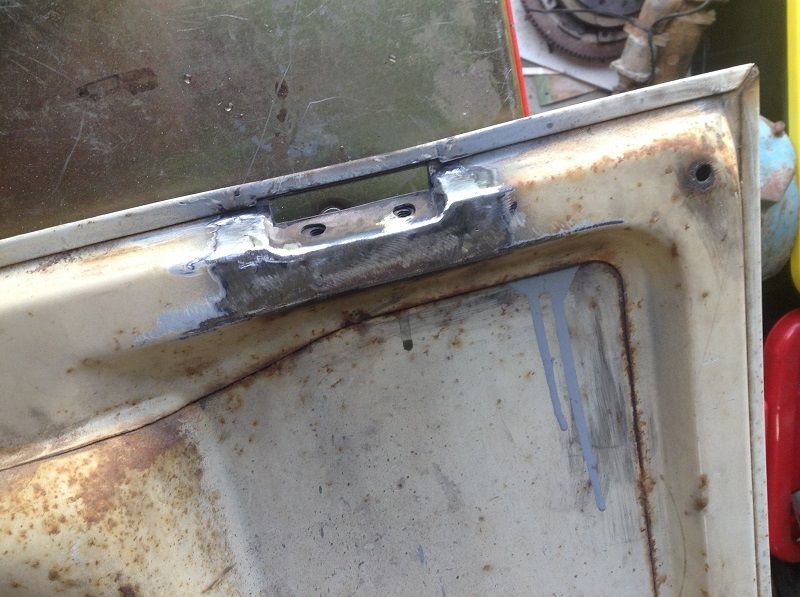
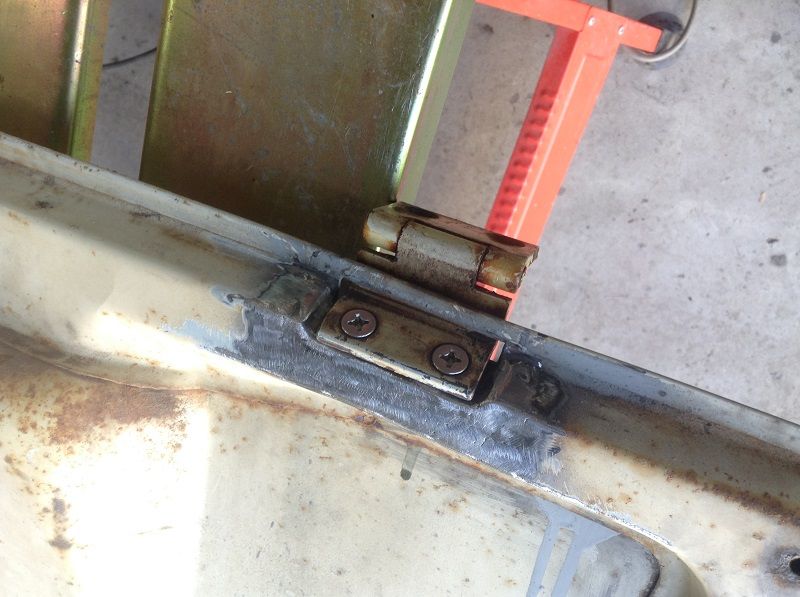
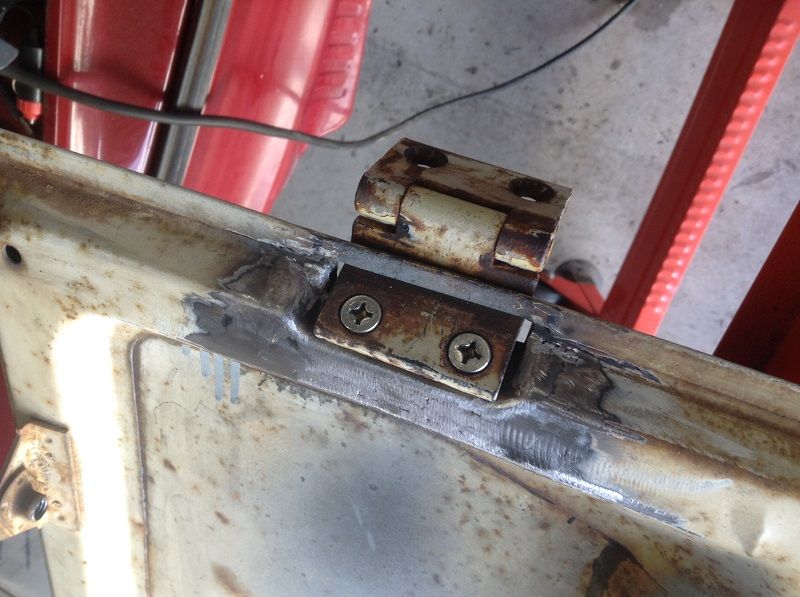
Started by cutting out, repairing and welding the hinge guide/ outside sections
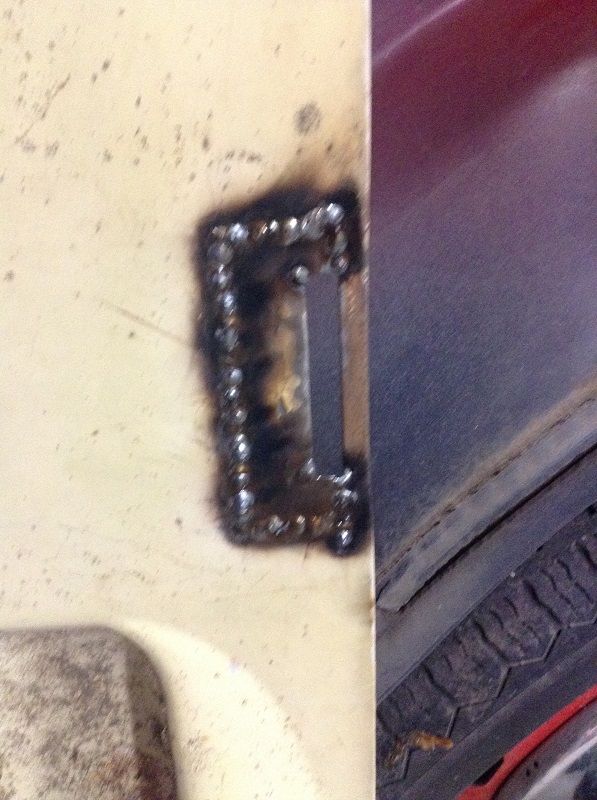
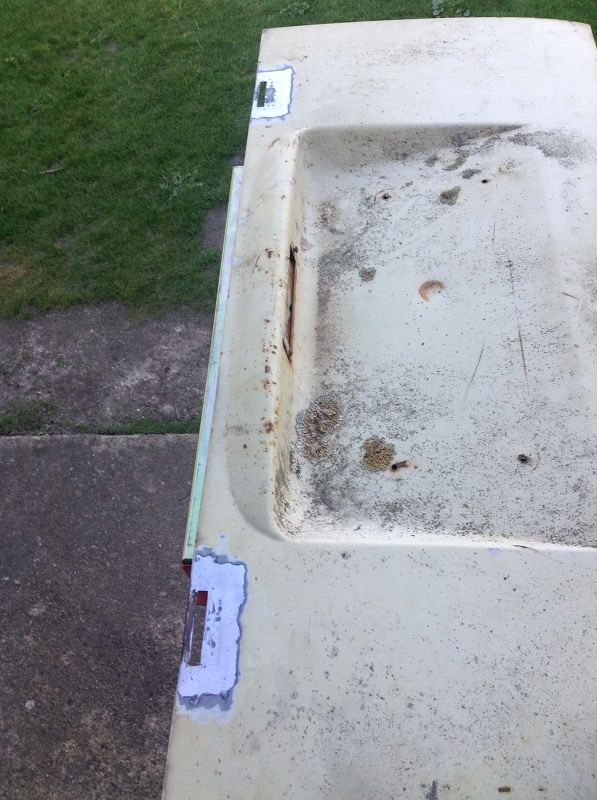
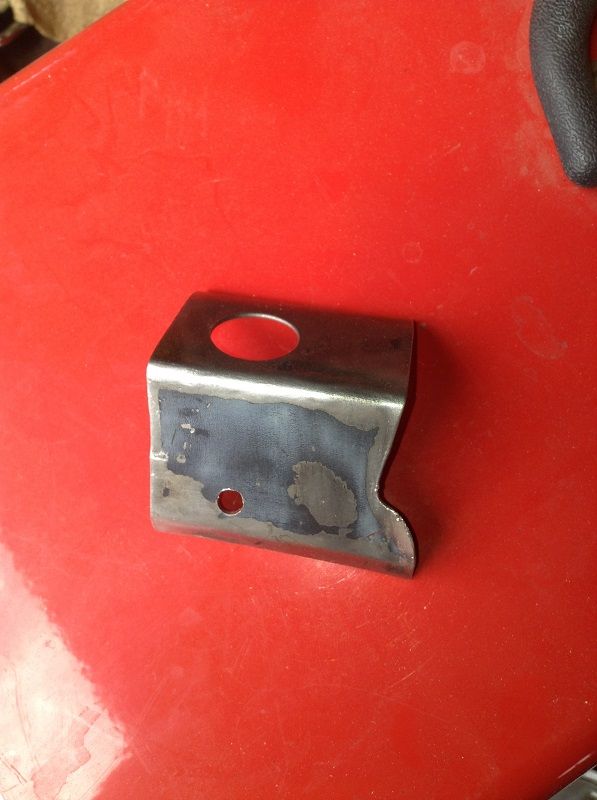
Then I started to fabricate the sections for the inside. From factory the tapping plates are spot welded to the hatch. For adjustment purposes I decided to create a cavity for a tapping plate. The OG tapping plates were buggered so I made a couple of new ones...
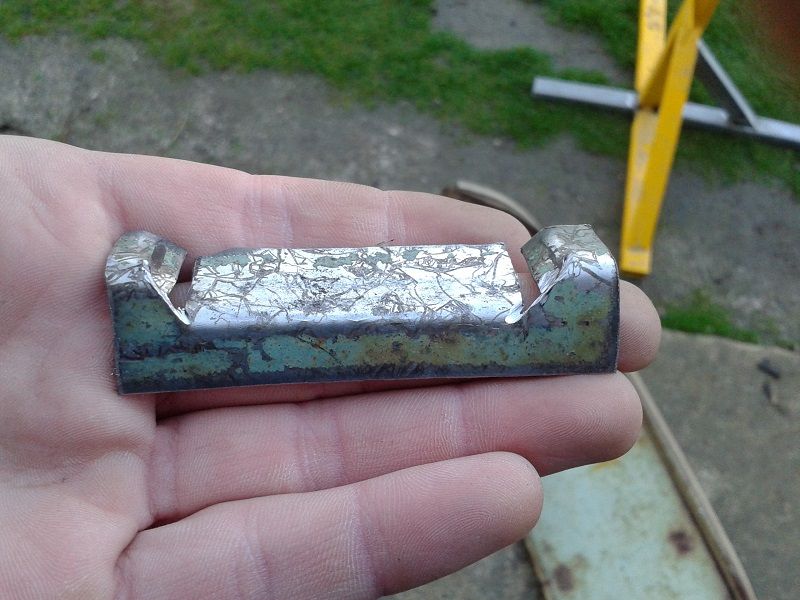
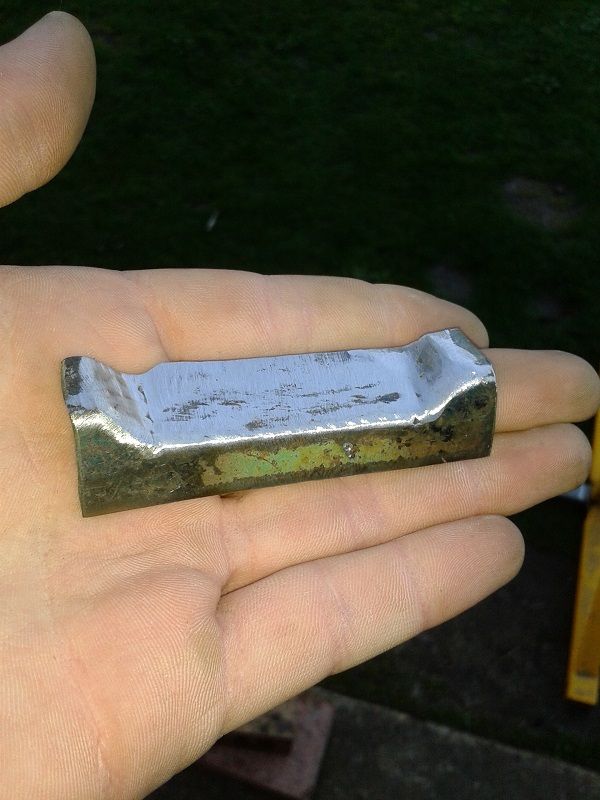
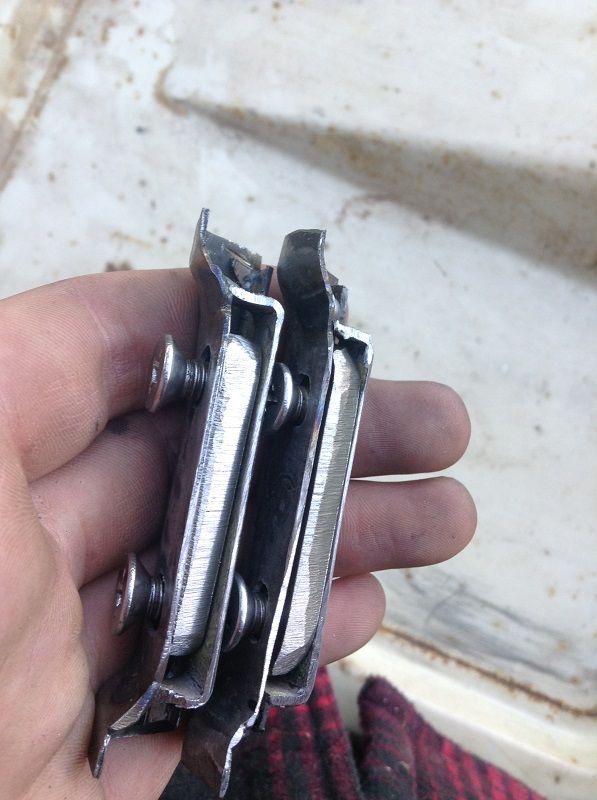
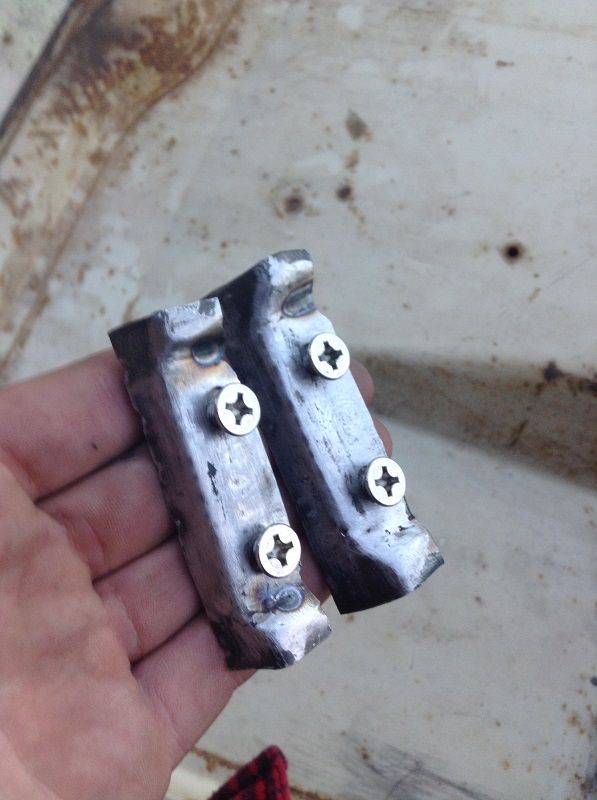


Then I started to fabricate the sections for the inside. From factory the tapping plates are spot welded to the hatch. For adjustment purposes I decided to create a cavity for a tapping plate. The OG tapping plates were buggered so I made a couple of new ones...


MID WEST DUBBER
Registered user
Posts: 15
Joined: Thu Mar 15, 2012 9:02 am
Re: '63 11 window project (Aussie)
by MID WEST DUBBER » Sun Jul 12, 2015 6:50 am
MID WEST DUBBER
Registered user
Posts: 15
Joined: Thu Mar 15, 2012 9:02 am
Re: '63 11 window project (Aussie)
by rusty1962 » Sun Jul 12, 2015 7:48 am
Some good work going on there Russell

I've got a bus called Rusty and an Aussie wife.
Steve
I've got a bus called Rusty and an Aussie wife.
Steve
rusty1962

SSVC Member
Posts: 2590
Joined: Wed Sep 11, 2013 10:35 pm
Re: '63 11 window project (Aussie)
by vwJim » Sun Jul 12, 2015 9:07 am
Nice work. Have you any more photos of the bus?
vwJim
Founder BWA Member
Posts: 17989
Joined: Thu Apr 24, 2003 6:05 pm
Re: '63 11 window project (Aussie)
by MID WEST DUBBER » Thu Feb 25, 2016 11:38 pm
With the hoop frames made I then started work on the front and rear mounting locations and got the supports welded into place...
Front...
Rear...
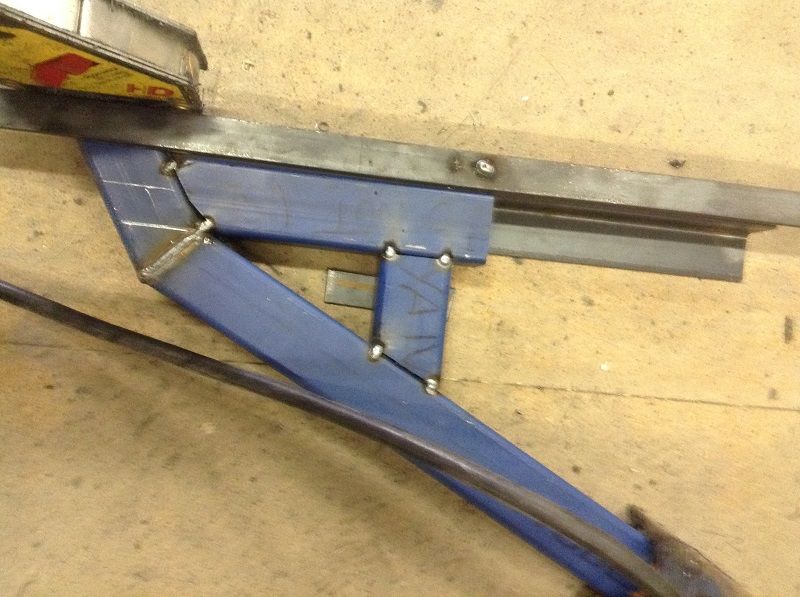
I tack welded equal lengths of RHS between the mounting plates to keep them square and straight when welding them to the rotisserie frame. The rear plates are offset and not central to the hoop as I wanted to have more clearance around the rear wheel arch...
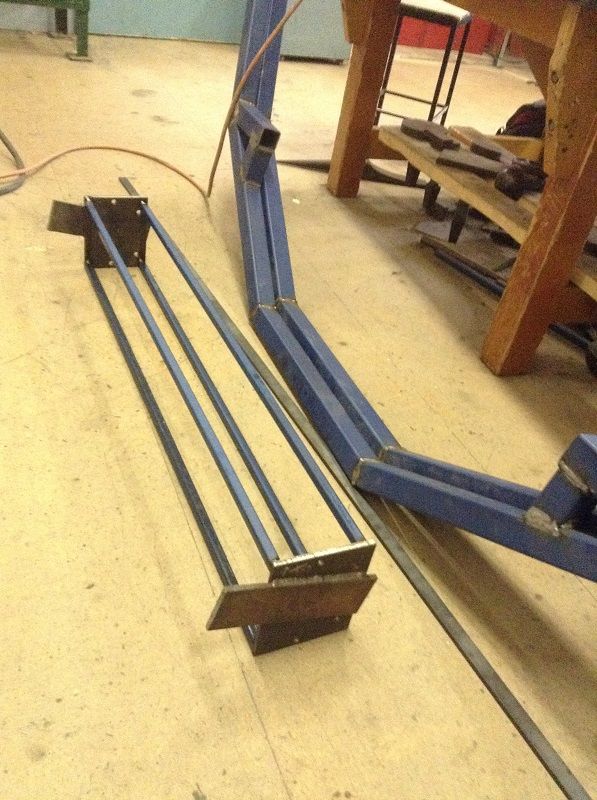
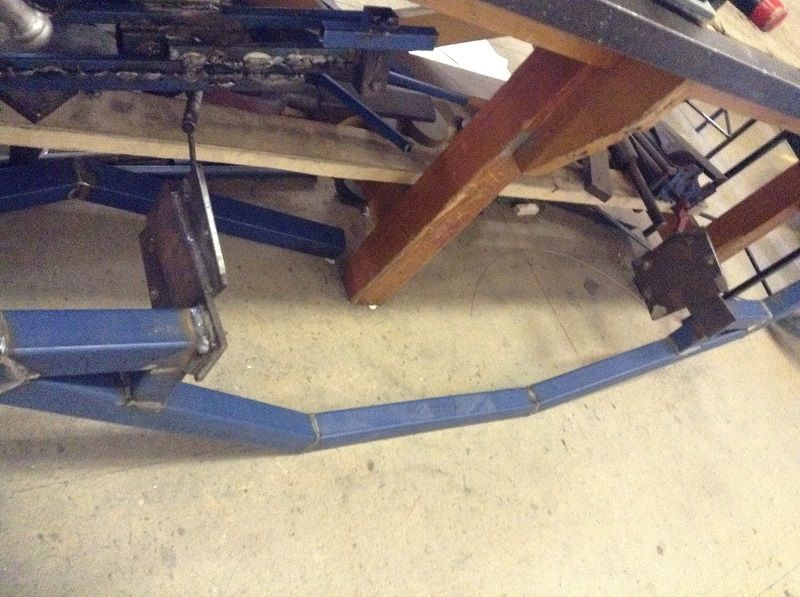
Front...

Rear...

I tack welded equal lengths of RHS between the mounting plates to keep them square and straight when welding them to the rotisserie frame. The rear plates are offset and not central to the hoop as I wanted to have more clearance around the rear wheel arch...


MID WEST DUBBER
Registered user
Posts: 15
Joined: Thu Mar 15, 2012 9:02 am
Re: '63 11 window project (Aussie)
by MID WEST DUBBER » Thu Feb 25, 2016 11:39 pm
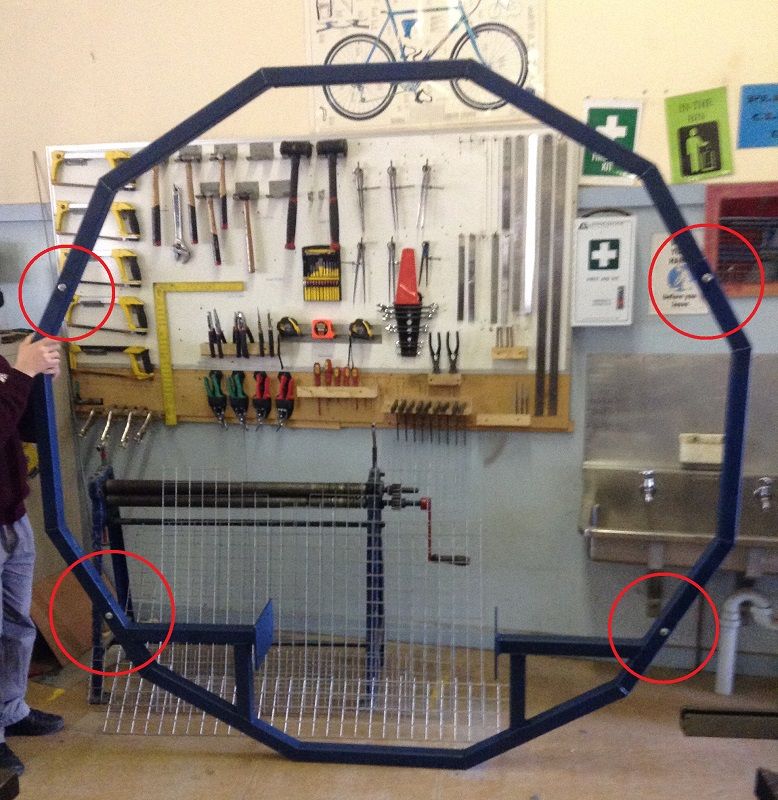
To make for easy installment and transport I chose to join the hoops with a sleeve style method with plug welds on one side and a bolt through the other side of the join...
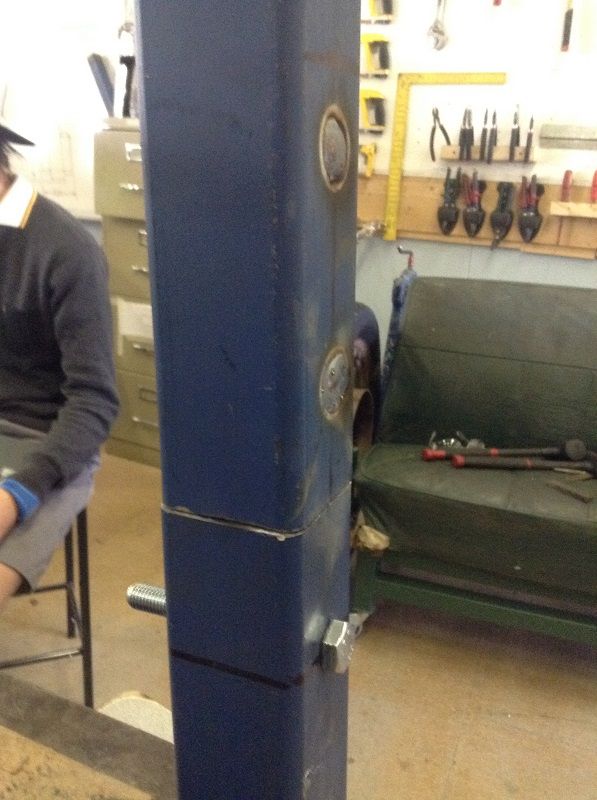
All of the welds/joins/mounting plates etc were cleaned back and painted with a colour matched blue to the existing RHS...
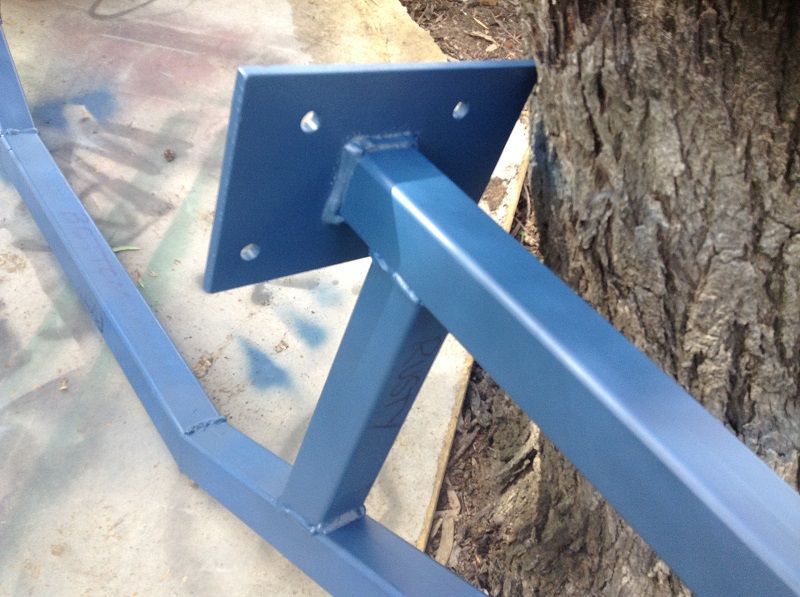
I separated the rear hoop into a top and bottom half with the sleeve joins to make the installation easy...
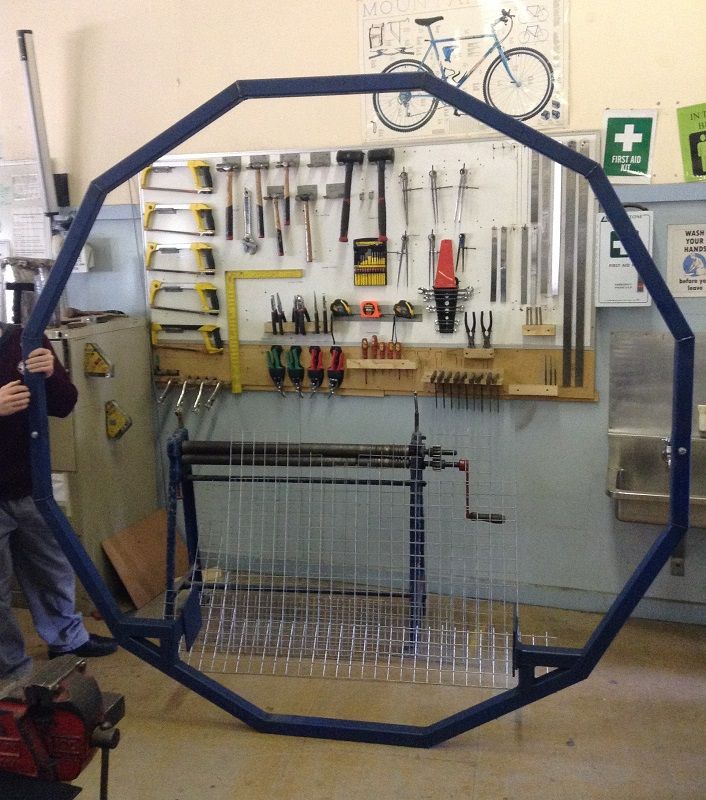
The front hoop was joined in 4 locations which will make it possible to disassemble part of the front hoop while attached to the car, to remove the front doors for dogleg repairs etc...
The main part of the Rotisserie is completed however later on down the track I will add RHS supports which join the two hoops together and also supports to rest underneath the chassis in the centre. Very happy with the outcome of my year 12 school project from last year.

All of the welds/joins/mounting plates etc were cleaned back and painted with a colour matched blue to the existing RHS...

I separated the rear hoop into a top and bottom half with the sleeve joins to make the installation easy...

The front hoop was joined in 4 locations which will make it possible to disassemble part of the front hoop while attached to the car, to remove the front doors for dogleg repairs etc...

The main part of the Rotisserie is completed however later on down the track I will add RHS supports which join the two hoops together and also supports to rest underneath the chassis in the centre. Very happy with the outcome of my year 12 school project from last year.
MID WEST DUBBER
Registered user
Posts: 15
Joined: Thu Mar 15, 2012 9:02 am
Re: '63 11 window project (Aussie)
by rusty1962 » Fri Feb 26, 2016 6:56 am
Nice metalwork

rusty1962

SSVC Member
Posts: 2590
Joined: Wed Sep 11, 2013 10:35 pm

