You are viewing the Split Screen Van Club forum archive.
The forum archive is read-only.Unfortunately in 2021 the Split Screen Van Club forum suffered a ransomware attack and lots of the forum data was lost.
What threads that have been recovered are now searchable on this site. Some threads may be incomplete and some images are still being recovered.
Forum archive search
Re: 52 Samba
by bigmick1 » Mon Feb 07, 2011 5:16 pm
watching and waiting i remembered when it first went into scotts old unit i thought its fooked but seeing what your doing..yer it should go back on the road sooner or later mate
bigmick1
Registered user
Posts: 425
Joined: Thu Jun 19, 2003 8:14 pm
Re: 52 Samba
by Bergepanzer » Mon Feb 07, 2011 7:14 pm
W-O-W !!!
Started to read your pic session with wrinkles on my forehead but the further I read the more a smile came on my face!
The idea with the box sections is a really good way to go; I also thought about a variation of that for a cost-effective original chassis rebuild (just to use 45x45x2 mm square tube as a replacement for the hat and I-sections). And you can be sure that your construction is far more stiff and rigid than the original VW solution as closed profiles are always stronger than open ones.
You won´t have any problems with structural weaknesses of early sambas as you will have to replace your roof rims, reinforcements and gutters as well due to the severe rust damages. I can recommend those parts made of 2 mm sheet steel for additional strenght around the roof frame.
Keep it going!
Cheers,
Jurgen
Bergepanzer
Registered user
Posts: 106
Joined: Sat Jun 06, 2009 5:01 am
Re: 52 Samba
by Fonz » Mon Feb 07, 2011 8:14 pm
I love the attitude you're taking with this project.

You'll certainly deserve it when you finally climb inside and take it for that first spin - which I'm certain you will, as it seems you're doing this no matter what or how long it takes!
I was currently thinking, for mine, I should leave rare thing like a barndoor to someone who knows what they're doing, rather than try and tackle the metalwork myself. But hell, you'll certainly know your bus inside and out when you're done!
Will we get a chance to see it again, and it's progress, at the next BD campout?
Fonz
Registered user
Posts: 33
Joined: Wed Jul 26, 2006 4:25 pm
Re: 52 Samba
by 67ben » Mon Feb 07, 2011 9:09 pm
I like what your up to with the chassis why not build it how you want
as correct as possible parts wise and then full on chassis and running gear
67ben
SSVC Member
Posts: 1490
Joined: Thu Sep 08, 2005 7:58 pm
Re: 52 Samba
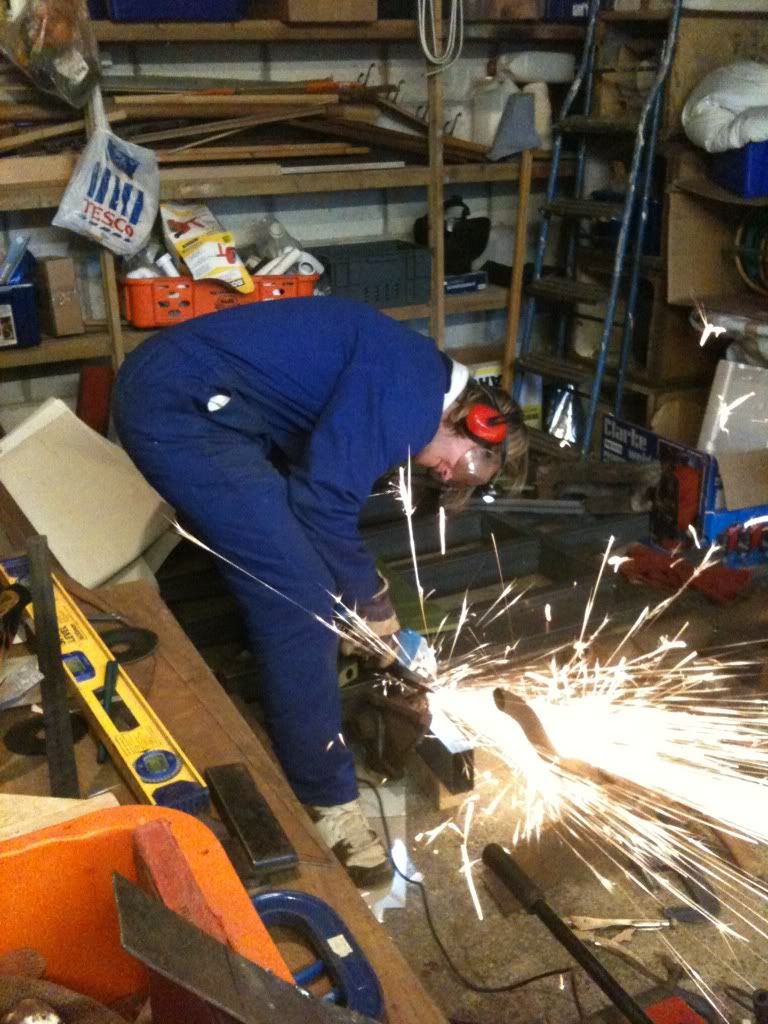
by lowdown dirty rat » Mon Feb 07, 2011 9:25 pm
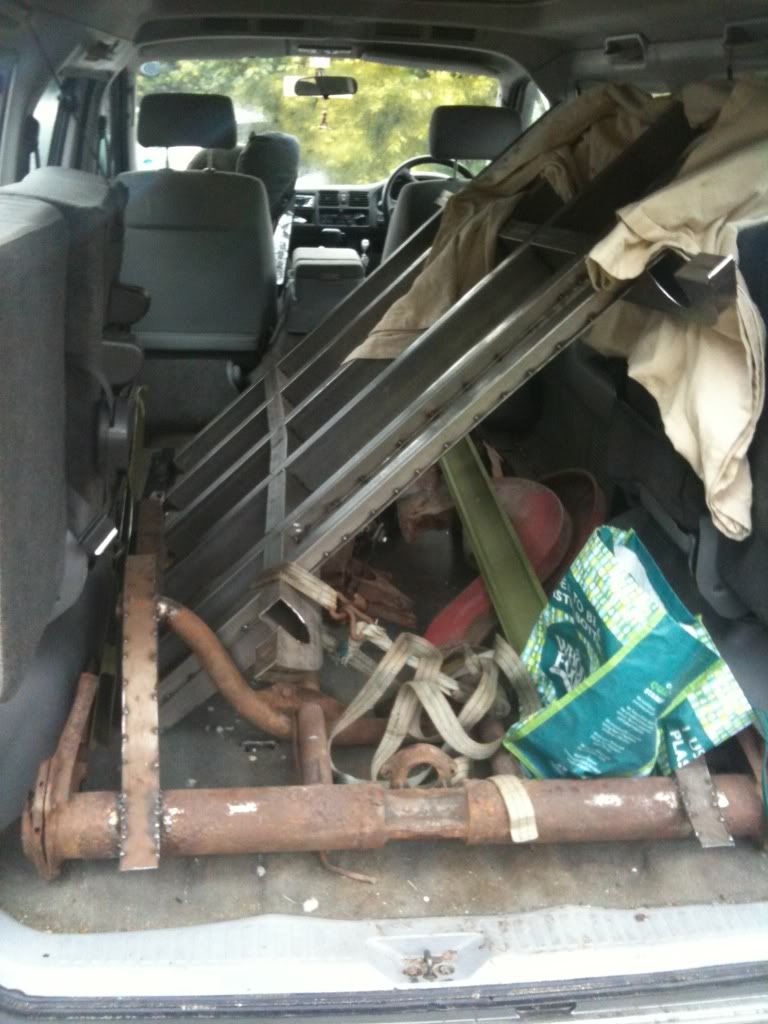
Right, my rear end as promised

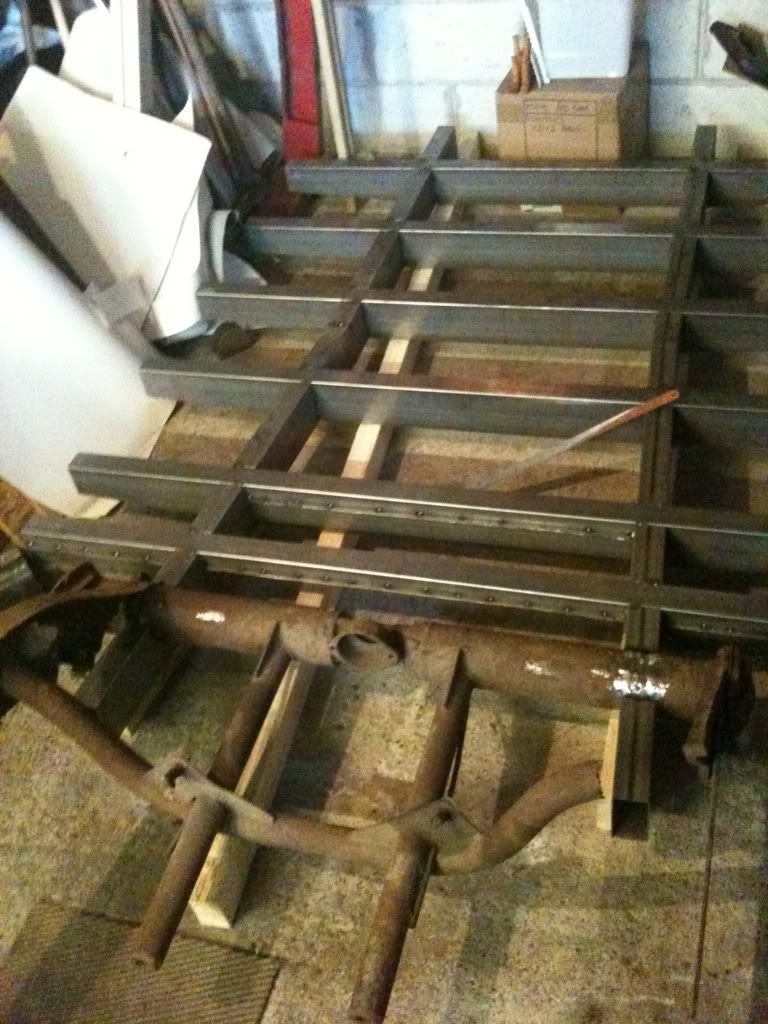
First thing I thought about was the clearance for the swing arms. Would love to avoid a cutout in the rear rails if possible. Lots of talk about how they effect safety but the main reason, they just don't look factory.
Fitted up some beetle swing arms to some bolt on clamps and checked if I would be able to fit a wheel without a notch.
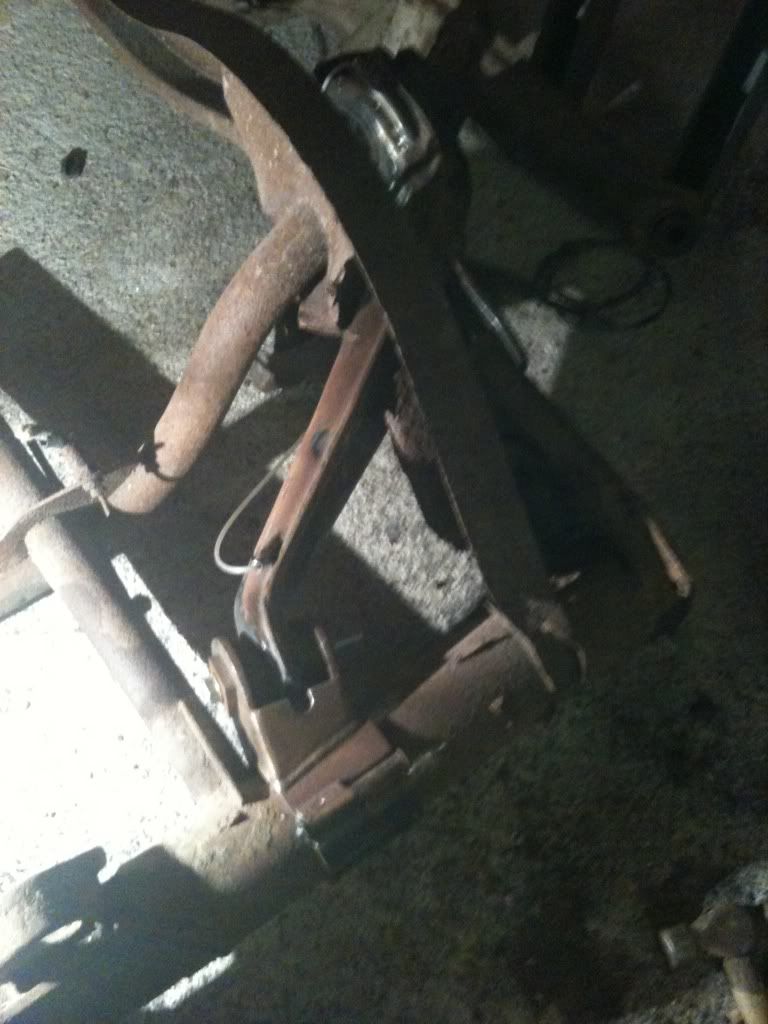
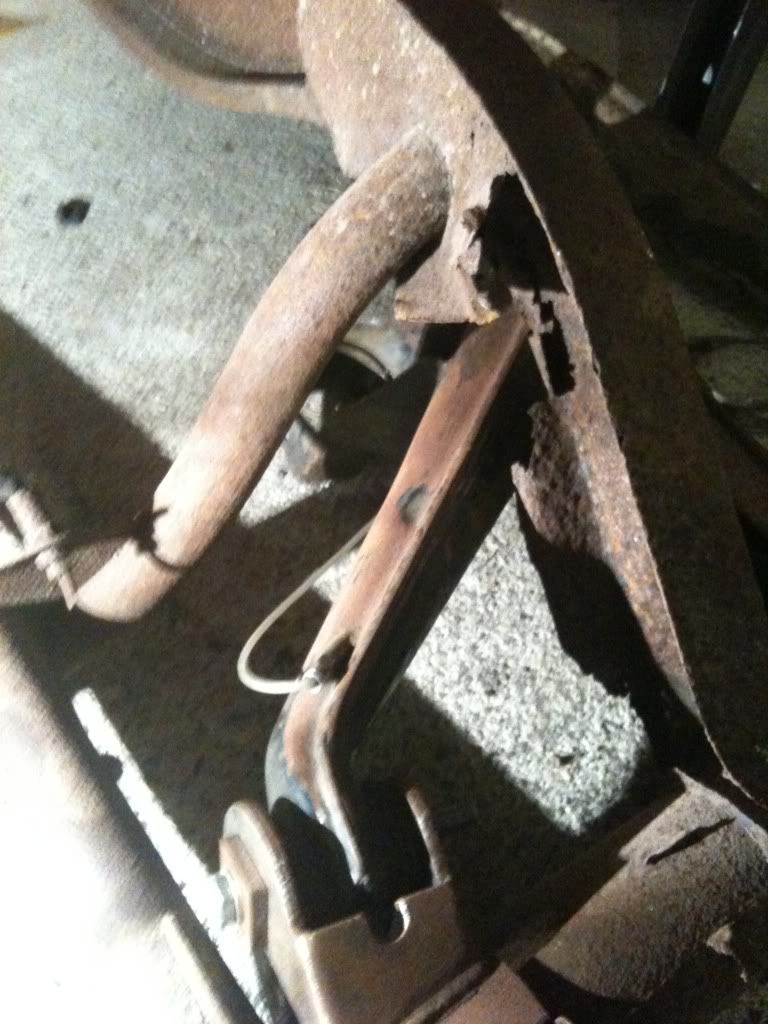
There is a bit of rust damage in the pics but the rail was pretty good and complete enough to clearly see that I wouldn't need a notch
Don't forget the rail is already 45mm higher then standard due to the chassis raise.
On a side note. There is NO reason on a barndoor to not consider IRS when thinking straight axle. With the bolt on clamps a complete beetle setup will bolt in with no mods needed at all !
Having said all that. I'll be opting for some late bay swing arms. They will need to be shortened for the barndoor. If you shorten bay swing arms it brings the mount backwards so you have to use the latter bay ones with the less sharp curve (and their cheaper). The reason for the bay arms is that Beetle arms are more subject to camber issues on big drops. Also they are narrower than beetle arms so will give a tiny bit more raise before they hit the rear rail. And I have a special plan for mounting the hub carrier.
It should also be noted that barndoors, especially the early ones are built to be slammed. The tostion bar ends are turned up to give more drop. The shape of the gearbox cradle means that there is no trimming needed for the swing arms. And the thin flat (on pre 53) bottom of the cradle gives excellent ground clearance.
As stock the torsion bar ends do sit 20mm lower then the frame rails. But after much calculation a 20mm torsion bar raise was to much. So a 10mm raise is all it gets. The very bottom of the torsion bar ends (yes I do want to keep them) will see a little filling down.
Now I only had one rear rail. The other had dissolved so I had to fab one up rather than modify the originals. So custom rails were the order of the day yet again
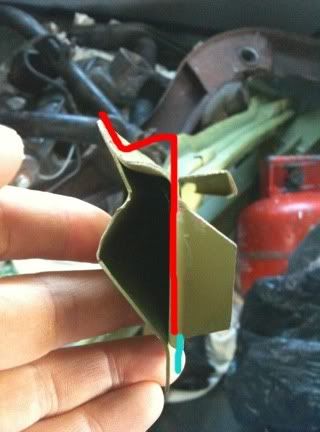
These took ALOT of thought. The problem was as original but 45mm higher they would be raising the floor thingy that sits between the rear wheel arches and subsequently needing the firewall cut and the engine surrounds altered. This I wanted to avoid. Im after everything (except the obvious front wheel wells) to be stock looking from inside. So the options were to lower the curve, but then the swing arms wouldn't clear (they only just did), or skim the top off. In other words thin the rail. Too much would be sketchy, so after a million drawings and a hole day staring at sketches. This is what I came up with
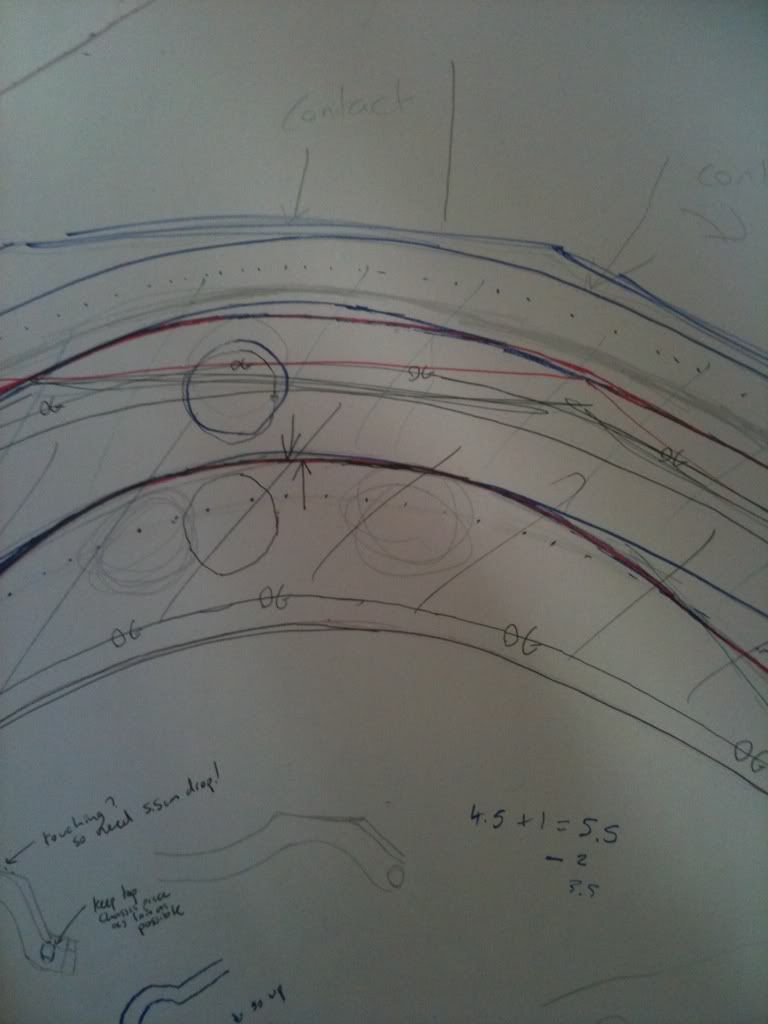
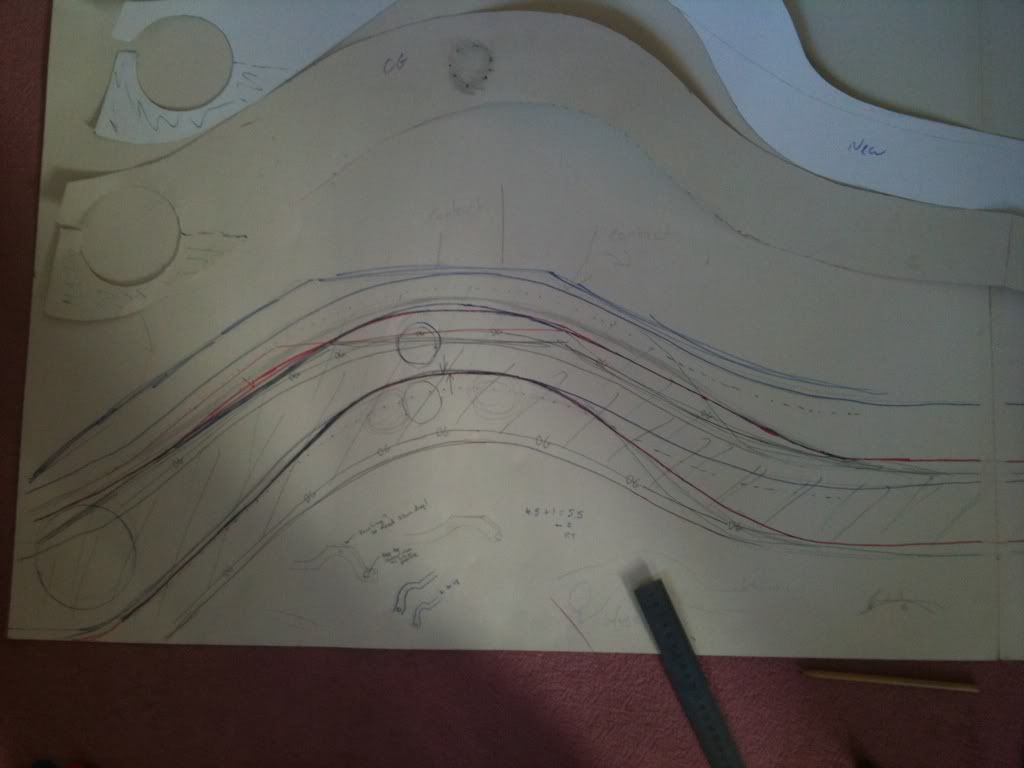
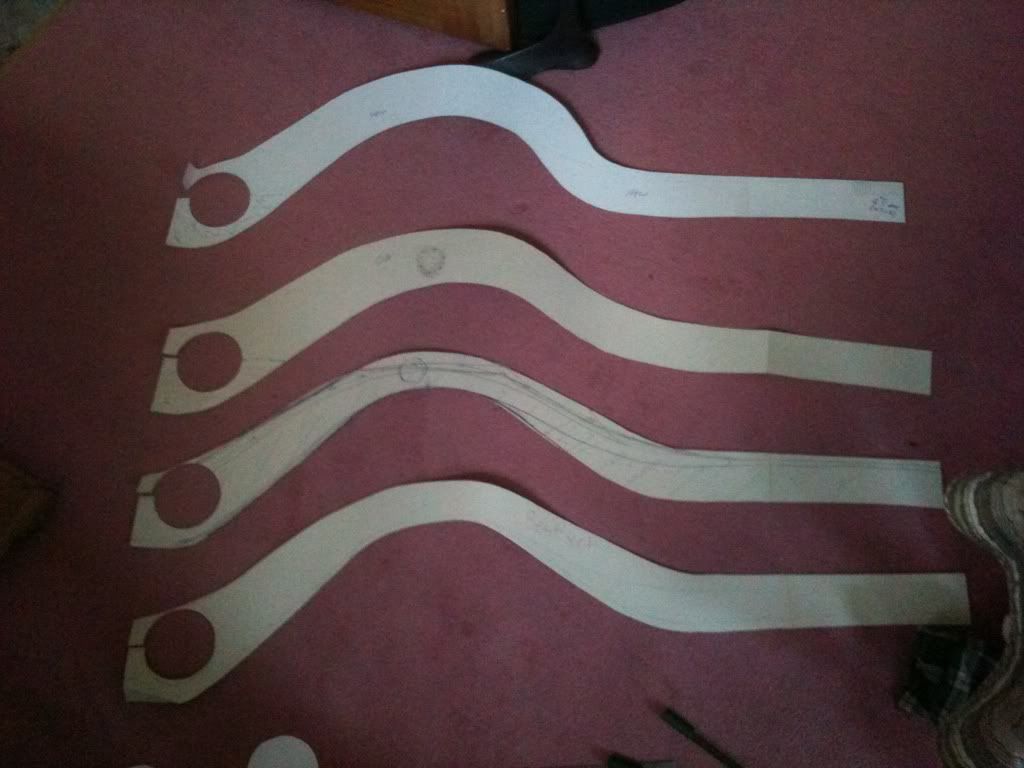
The thin one makes it. Exactly the same lower arch curve as an original rail. The top edge sits closer to the torstion bar ( right on it infact) the top curve edge is ever so lightly higher the an original standard height rail would be
Notice also how the end flat section at the rear has been stepped back down to stock height just like the front frame rail was. So that the rear valance, engine lid and tinware are all factory looking when you open the back up. There will be an unnoticeable slightly steeper slope in the rear engine surround that's all
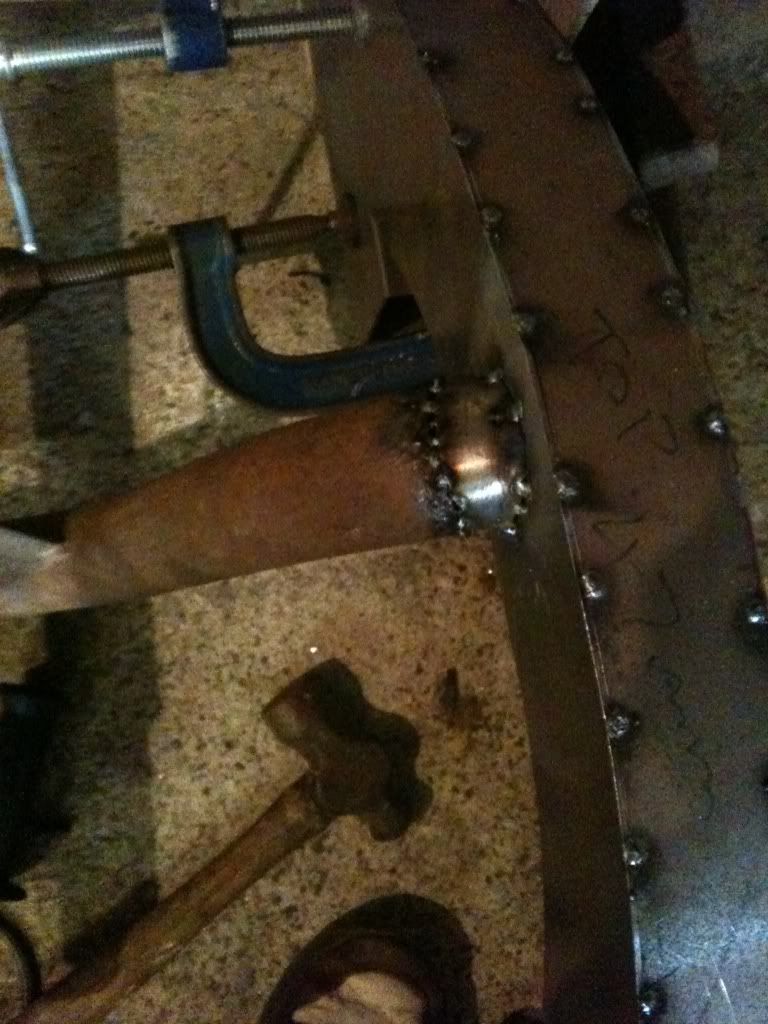
Turn the card into metal
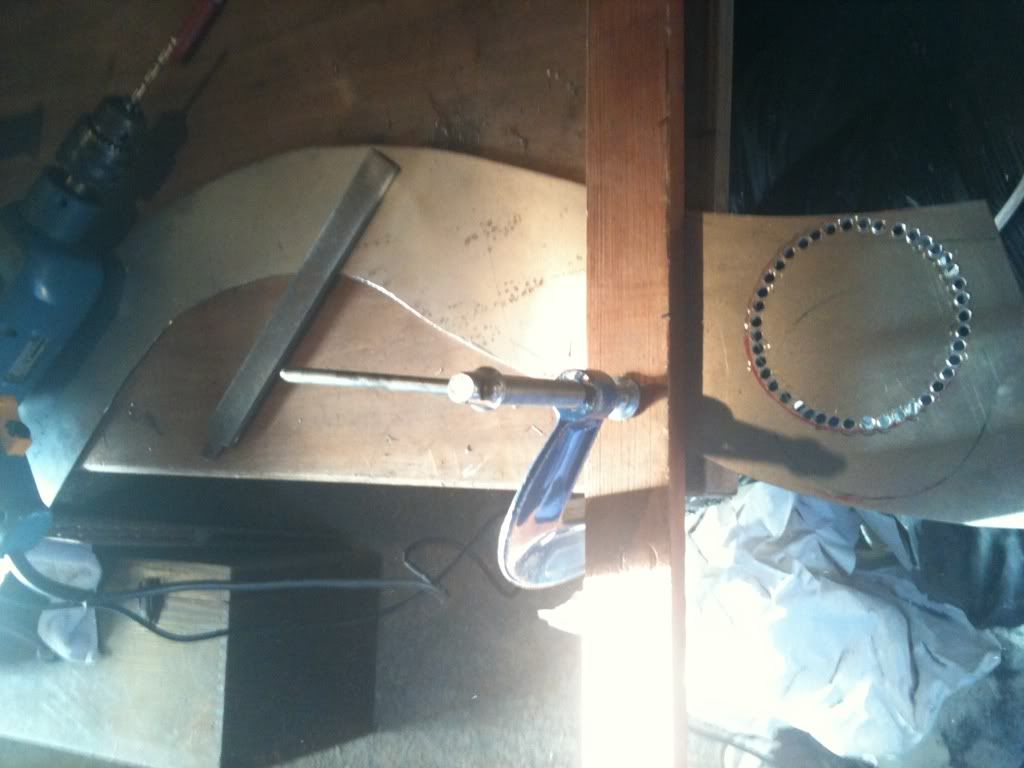
I cut the outside skin out of 3mm steel and the inside skin i ran the full length of the rail for more strength. The inside skin is also 15mm wider to act as the pinch weld/fold that's under the original rails. It doesnt effect the swing arm clearance due to the angle they come up at. The rails were then box sectioned and also had square crossbraces welded inside. So although slightly narrower on the top curve (all the rest is factory diameters) its far more strong. I could twist the original a little if I rearly tried. No chance with my box sectioned rails.

First thing I thought about was the clearance for the swing arms. Would love to avoid a cutout in the rear rails if possible. Lots of talk about how they effect safety but the main reason, they just don't look factory.
Fitted up some beetle swing arms to some bolt on clamps and checked if I would be able to fit a wheel without a notch.
There is a bit of rust damage in the pics but the rail was pretty good and complete enough to clearly see that I wouldn't need a notch
Don't forget the rail is already 45mm higher then standard due to the chassis raise.
On a side note. There is NO reason on a barndoor to not consider IRS when thinking straight axle. With the bolt on clamps a complete beetle setup will bolt in with no mods needed at all !
Having said all that. I'll be opting for some late bay swing arms. They will need to be shortened for the barndoor. If you shorten bay swing arms it brings the mount backwards so you have to use the latter bay ones with the less sharp curve (and their cheaper
It should also be noted that barndoors, especially the early ones are built to be slammed. The tostion bar ends are turned up to give more drop. The shape of the gearbox cradle means that there is no trimming needed for the swing arms. And the thin flat (on pre 53) bottom of the cradle gives excellent ground clearance.
As stock the torsion bar ends do sit 20mm lower then the frame rails. But after much calculation a 20mm torsion bar raise was to much. So a 10mm raise is all it gets. The very bottom of the torsion bar ends (yes I do want to keep them) will see a little filling down.
Now I only had one rear rail. The other had dissolved
These took ALOT of thought. The problem was as original but 45mm higher they would be raising the floor thingy that sits between the rear wheel arches and subsequently needing the firewall cut and the engine surrounds altered. This I wanted to avoid. Im after everything (except the obvious front wheel wells) to be stock looking from inside. So the options were to lower the curve, but then the swing arms wouldn't clear (they only just did), or skim the top off. In other words thin the rail. Too much would be sketchy, so after a million drawings and a hole day staring at sketches. This is what I came up with
The thin one makes it. Exactly the same lower arch curve as an original rail. The top edge sits closer to the torstion bar ( right on it infact) the top curve edge is ever so lightly higher the an original standard height rail would be
Notice also how the end flat section at the rear has been stepped back down to stock height just like the front frame rail was. So that the rear valance, engine lid and tinware are all factory looking when you open the back up. There will be an unnoticeable slightly steeper slope in the rear engine surround that's all
Turn the card into metal
I cut the outside skin out of 3mm steel and the inside skin i ran the full length of the rail for more strength. The inside skin is also 15mm wider to act as the pinch weld/fold that's under the original rails. It doesnt effect the swing arm clearance due to the angle they come up at. The rails were then box sectioned and also had square crossbraces welded inside. So although slightly narrower on the top curve (all the rest is factory diameters) its far more strong. I could twist the original a little if I rearly tried. No chance with my box sectioned rails.
lowdown dirty rat

Registered user
Posts: 787
Joined: Sat Feb 23, 2008 6:14 am
Re: 52 Samba
by lowdown dirty rat » Mon Feb 07, 2011 10:30 pm
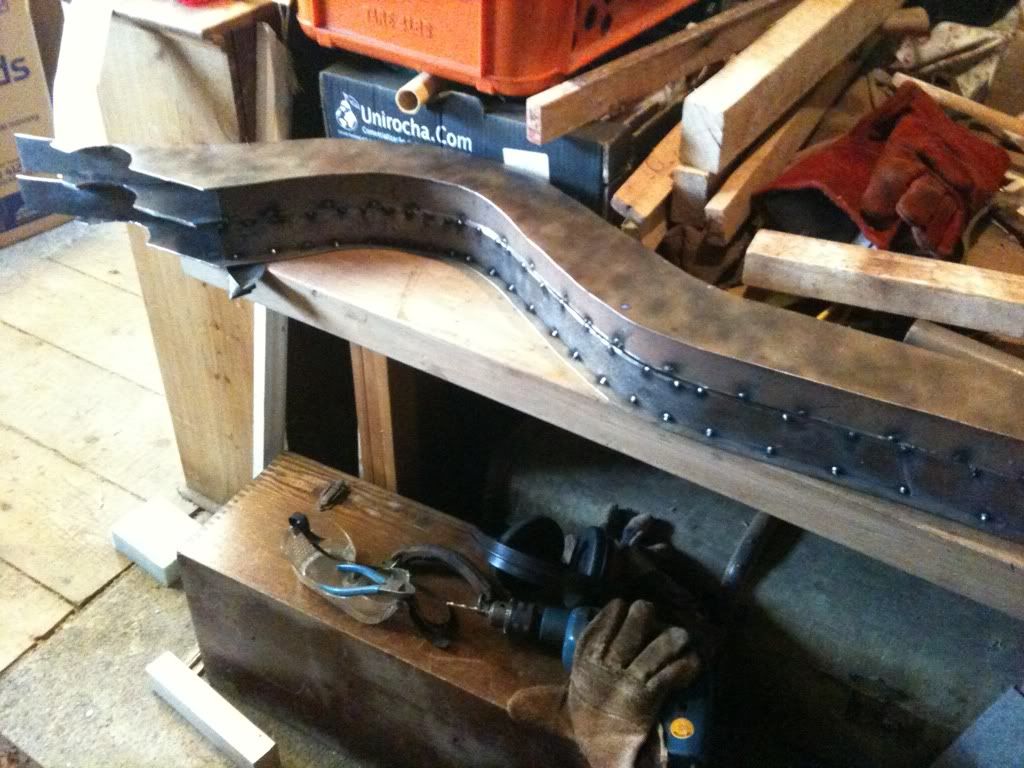
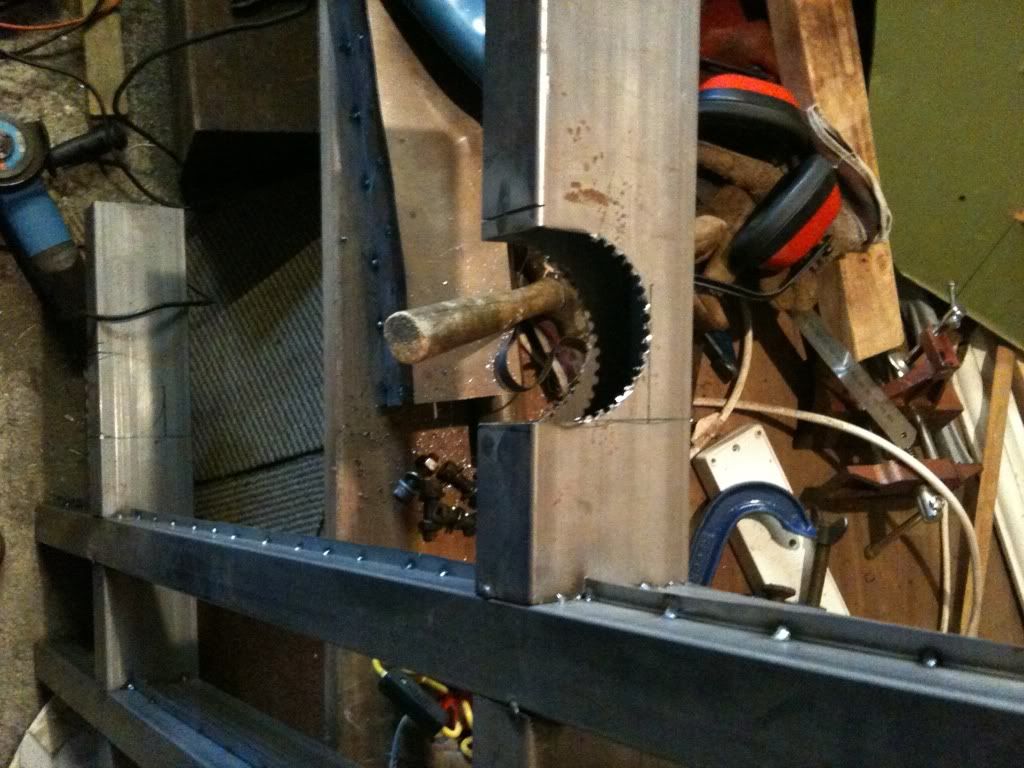
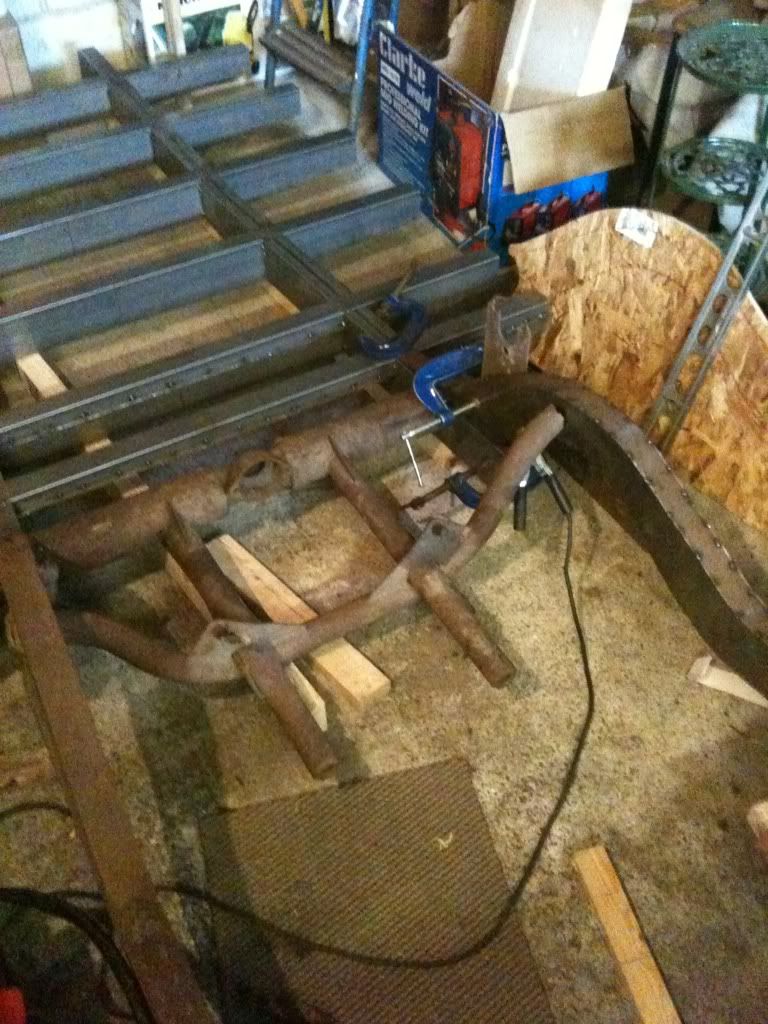
Next up, fitting the rear rails. The 10mm torsion bar raise means that the gearbox cradle touches the ground exactly as the centre rails do
One thing to look out for. Although marks diagram is priceless and I'll be eternally indebted. There is one slight error.

To be fair it does say approx. But I took it as gospel, everything else was.
The radius of the torsion tube is not 5cm. The torsion tube is 9cm. So 4.5cm R.
I found out after cutting the holes in my rear frame arms. 1cm doesn't sound alot but it left quite a gap. I was able to sort it on the rear rail as it was only the top bit of hole I was using. Luckily I discovered it when I had only done one side of the 4 needed on the centre chassis rails. Thankyou poundshop calipers (also double checked with a G clamp
 )
)
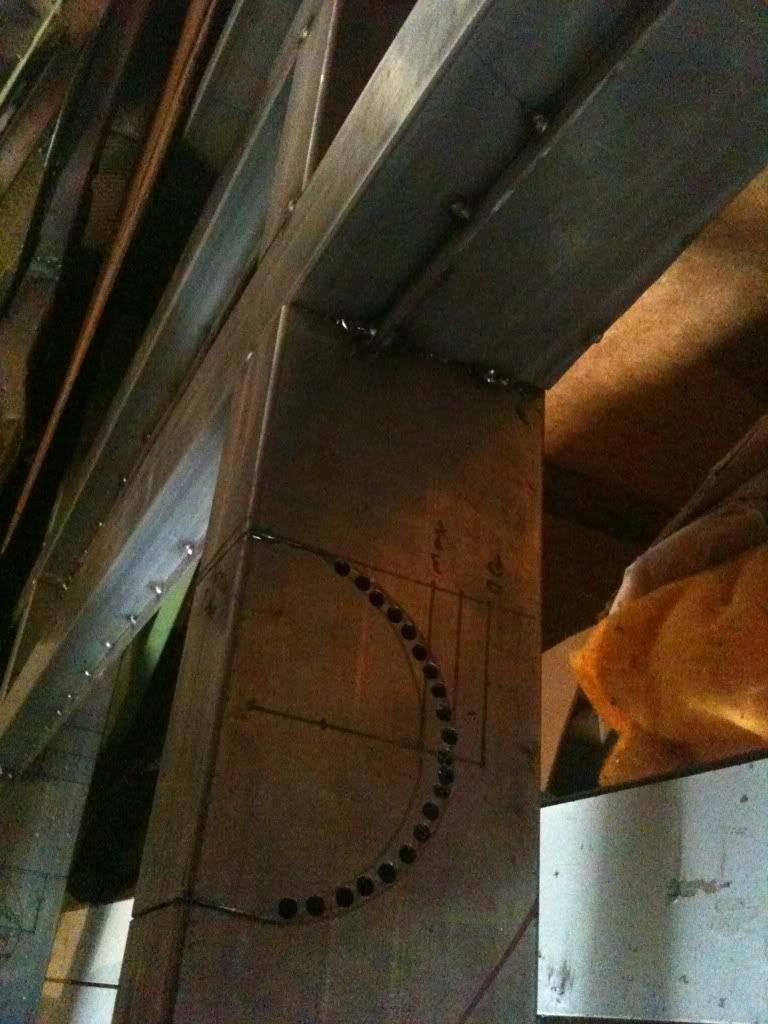
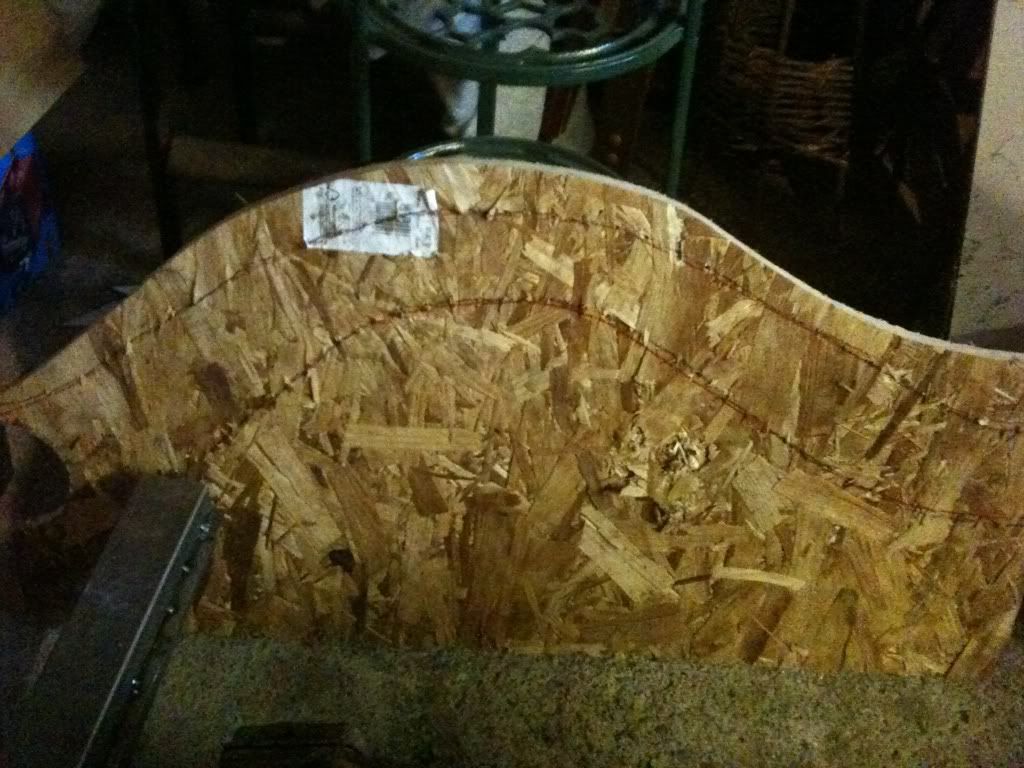
Made up a wooden template to help get the rails in straight.
The top cut line is the top of a factory rail. The middle line is the top of my rails and the bottom line is the bottom of my rails.
Ground down the old welds
Droped it in
Got the rail welded in and welded to the cradle. The bad side needed a repair piece.
One new and one old !
Then cut out the old rail and put the other side in.
Now imagine it with a floor. How factory does that look?
Last thing. Measure the gap between the rear rails. Now I didn't have this measurement so I had just said sod it and carried on. But every measurement from the pie cut weld back would eventually effect this measurement. Well I got one off a 63 panel (cheers Scott) and it was 1005mm. Roughly a meter, wonder if they planned that
Measured mine. Big moment for a rookie

SAME!!! Give or take a few mill
Few more tweaks here and there then it's off to join it's shell with Wiskers. I don't have the facilities to mount a shell. I did look at a winch system but the rafters arnt really strong enough. All it needs now are the front cross brace and inner valance welded on. The bottoms of the pillars fixing up on the shell and then welding onto the inner sills. The side supports and a pair of sills and it should resemble a van again. All be it without a front and still in need of some serious work
But atleast It should roll around with a box and beam bolted in.
As for mods. The chassis should now mount into the shell and that be repaired without ANY more custom mods required. Leaving the wheel wells and a box raise out of course
One thing to look out for. Although marks diagram is priceless and I'll be eternally indebted. There is one slight error.
To be fair it does say approx. But I took it as gospel, everything else was.
The radius of the torsion tube is not 5cm. The torsion tube is 9cm. So 4.5cm R.
I found out after cutting the holes in my rear frame arms. 1cm doesn't sound alot but it left quite a gap. I was able to sort it on the rear rail as it was only the top bit of hole I was using. Luckily I discovered it when I had only done one side of the 4 needed on the centre chassis rails. Thankyou poundshop calipers
Made up a wooden template to help get the rails in straight.
The top cut line is the top of a factory rail. The middle line is the top of my rails and the bottom line is the bottom of my rails.
Ground down the old welds
Droped it in
Got the rail welded in and welded to the cradle. The bad side needed a repair piece.
One new and one old !
Then cut out the old rail and put the other side in.
Now imagine it with a floor. How factory does that look?
Last thing. Measure the gap between the rear rails. Now I didn't have this measurement so I had just said sod it and carried on. But every measurement from the pie cut weld back would eventually effect this measurement. Well I got one off a 63 panel (cheers Scott) and it was 1005mm. Roughly a meter, wonder if they planned that
Measured mine. Big moment for a rookie
SAME!!! Give or take a few mill
Few more tweaks here and there then it's off to join it's shell with Wiskers. I don't have the facilities to mount a shell. I did look at a winch system but the rafters arnt really strong enough. All it needs now are the front cross brace and inner valance welded on. The bottoms of the pillars fixing up on the shell and then welding onto the inner sills. The side supports and a pair of sills and it should resemble a van again. All be it without a front and still in need of some serious work
But atleast It should roll around with a box and beam bolted in.
As for mods. The chassis should now mount into the shell and that be repaired without ANY more custom mods required. Leaving the wheel wells and a box raise out of course
lowdown dirty rat
Registered user
Posts: 787
Joined: Sat Feb 23, 2008 6:14 am
Re: 52 Samba
by bigmick1 » Tue Feb 08, 2011 6:09 am
fook what is it with you lads from cornwall your not afraid of tackleing anything..what with scott and his trailertent (sledge) and you with this im watching and waiting for next set of pics
think i better move down there and it may get me going on mi samba
think i better move down there and it may get me going on mi samba
bigmick1
Registered user
Posts: 425
Joined: Thu Jun 19, 2003 8:14 pm
Re: 52 Samba
by 23A » Tue Feb 08, 2011 6:51 am
23A
SSVC Member
Posts: 11488
Joined: Thu Apr 17, 2003 9:28 am
Re: 52 Samba
by acmecustom » Tue Feb 08, 2011 12:29 pm
Good to see you at the weekend Rob fella, it had been ages. Great to see your getting stuck right in matey. As I said on Saturday, dont be shy, if you need anything, or just somewhere to tinker for a few hours as you can just let me know yeah? I'm normally there. Oh, and did you pop into see Mark on the way home and check out his barndoor collection? I did yesterday but he was out ...
acmecustom
SSVC Member
Posts: 2919
Joined: Mon Apr 16, 2007 7:50 am
Re: 52 Samba
by bigbulli » Tue Feb 08, 2011 4:00 pm
Fantastic
bigbulli
SSVC Member
Posts: 2822
Joined: Thu Apr 17, 2003 8:24 am
Re: 52 Samba
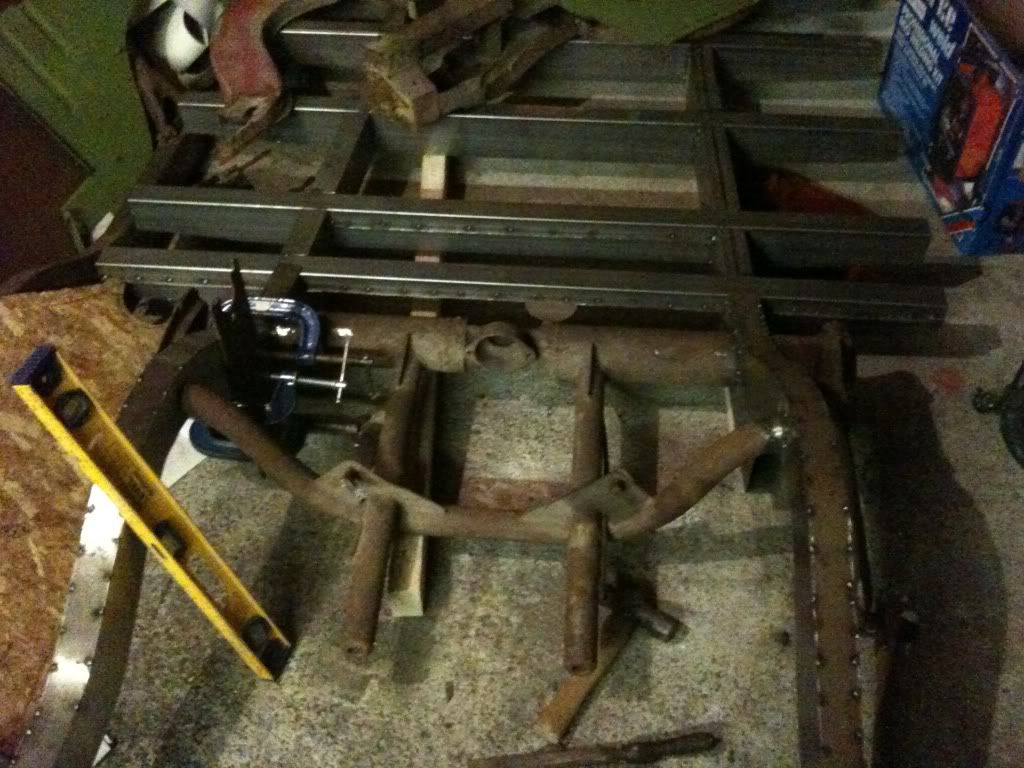
by lowdown dirty rat » Wed Feb 09, 2011 11:21 pm
Thanks for the support guys.
Been triple checking every measurement today.
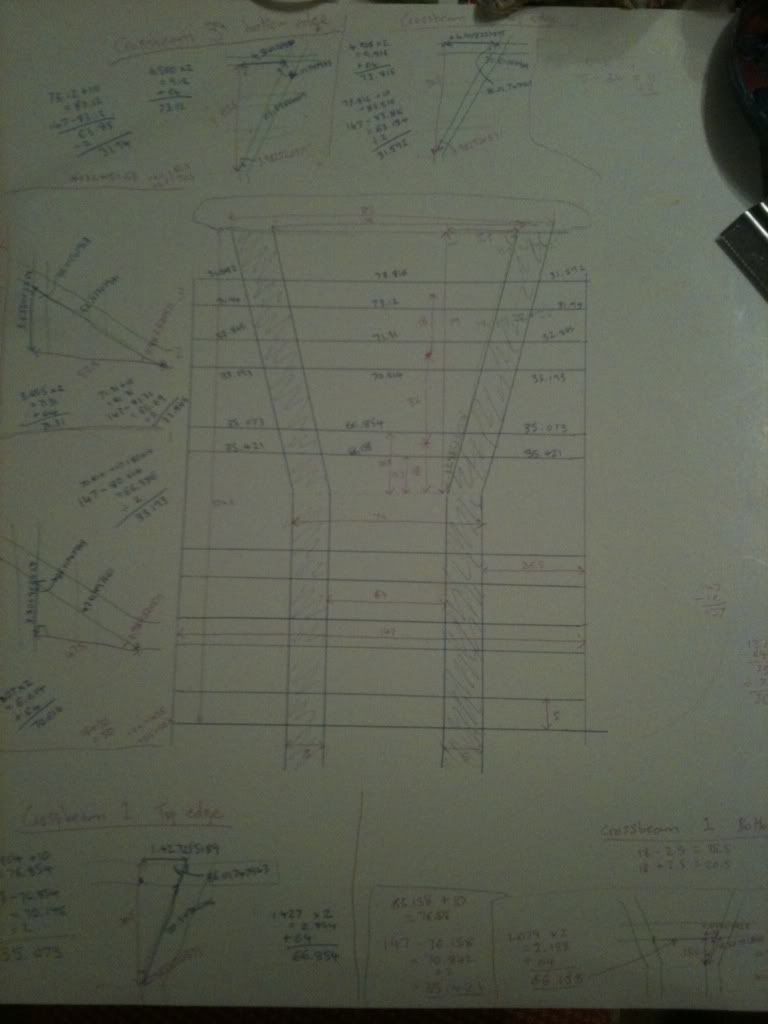
Did some serious trigonometry last night to work out the lengths of the angled crossbeams and outriggers. Definantly should have done that before but couldn't see how. Or better still having a barndoor to measure
Here what I produced. Sorry for the crap phone pic.
Also found this a great help for checking the rear end.
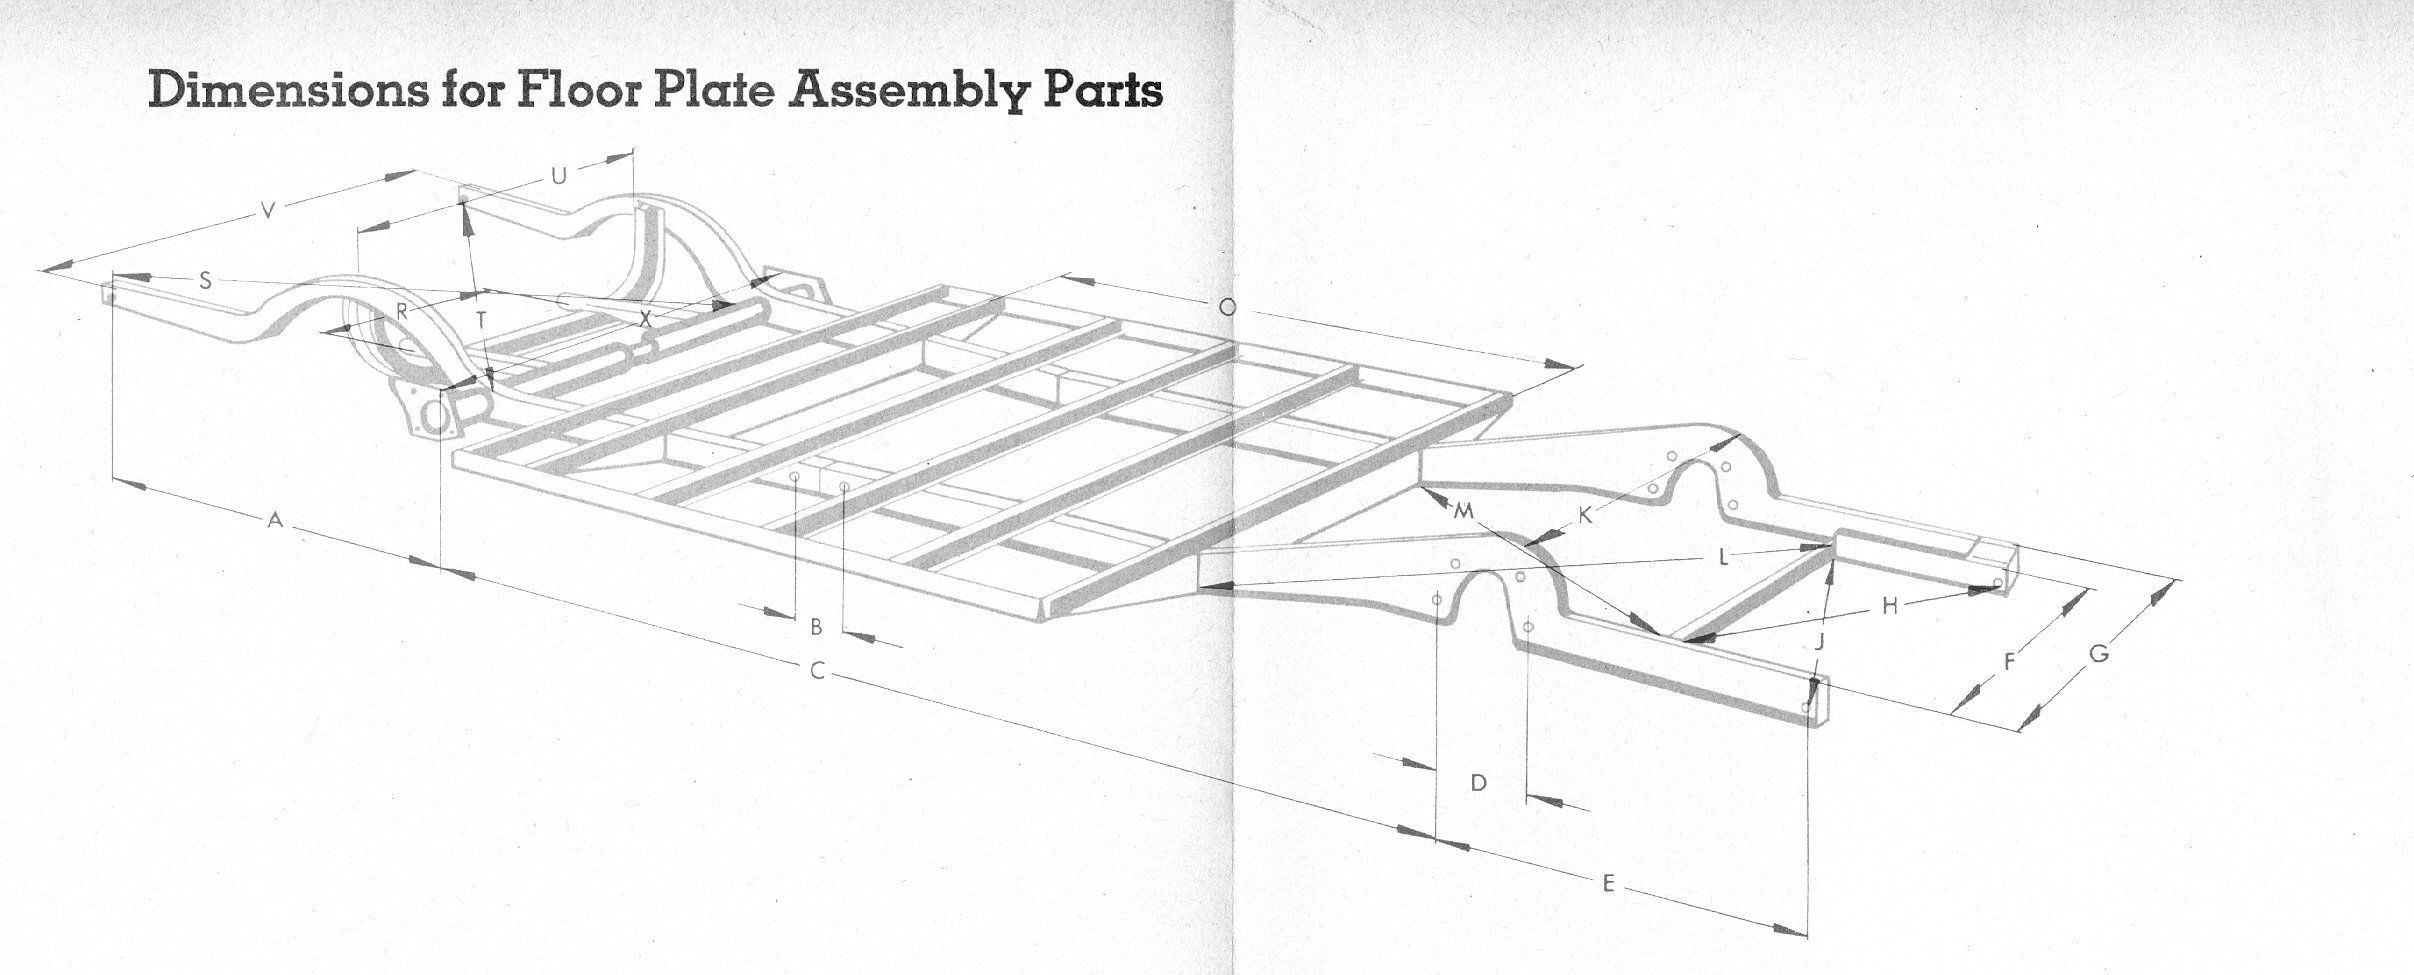
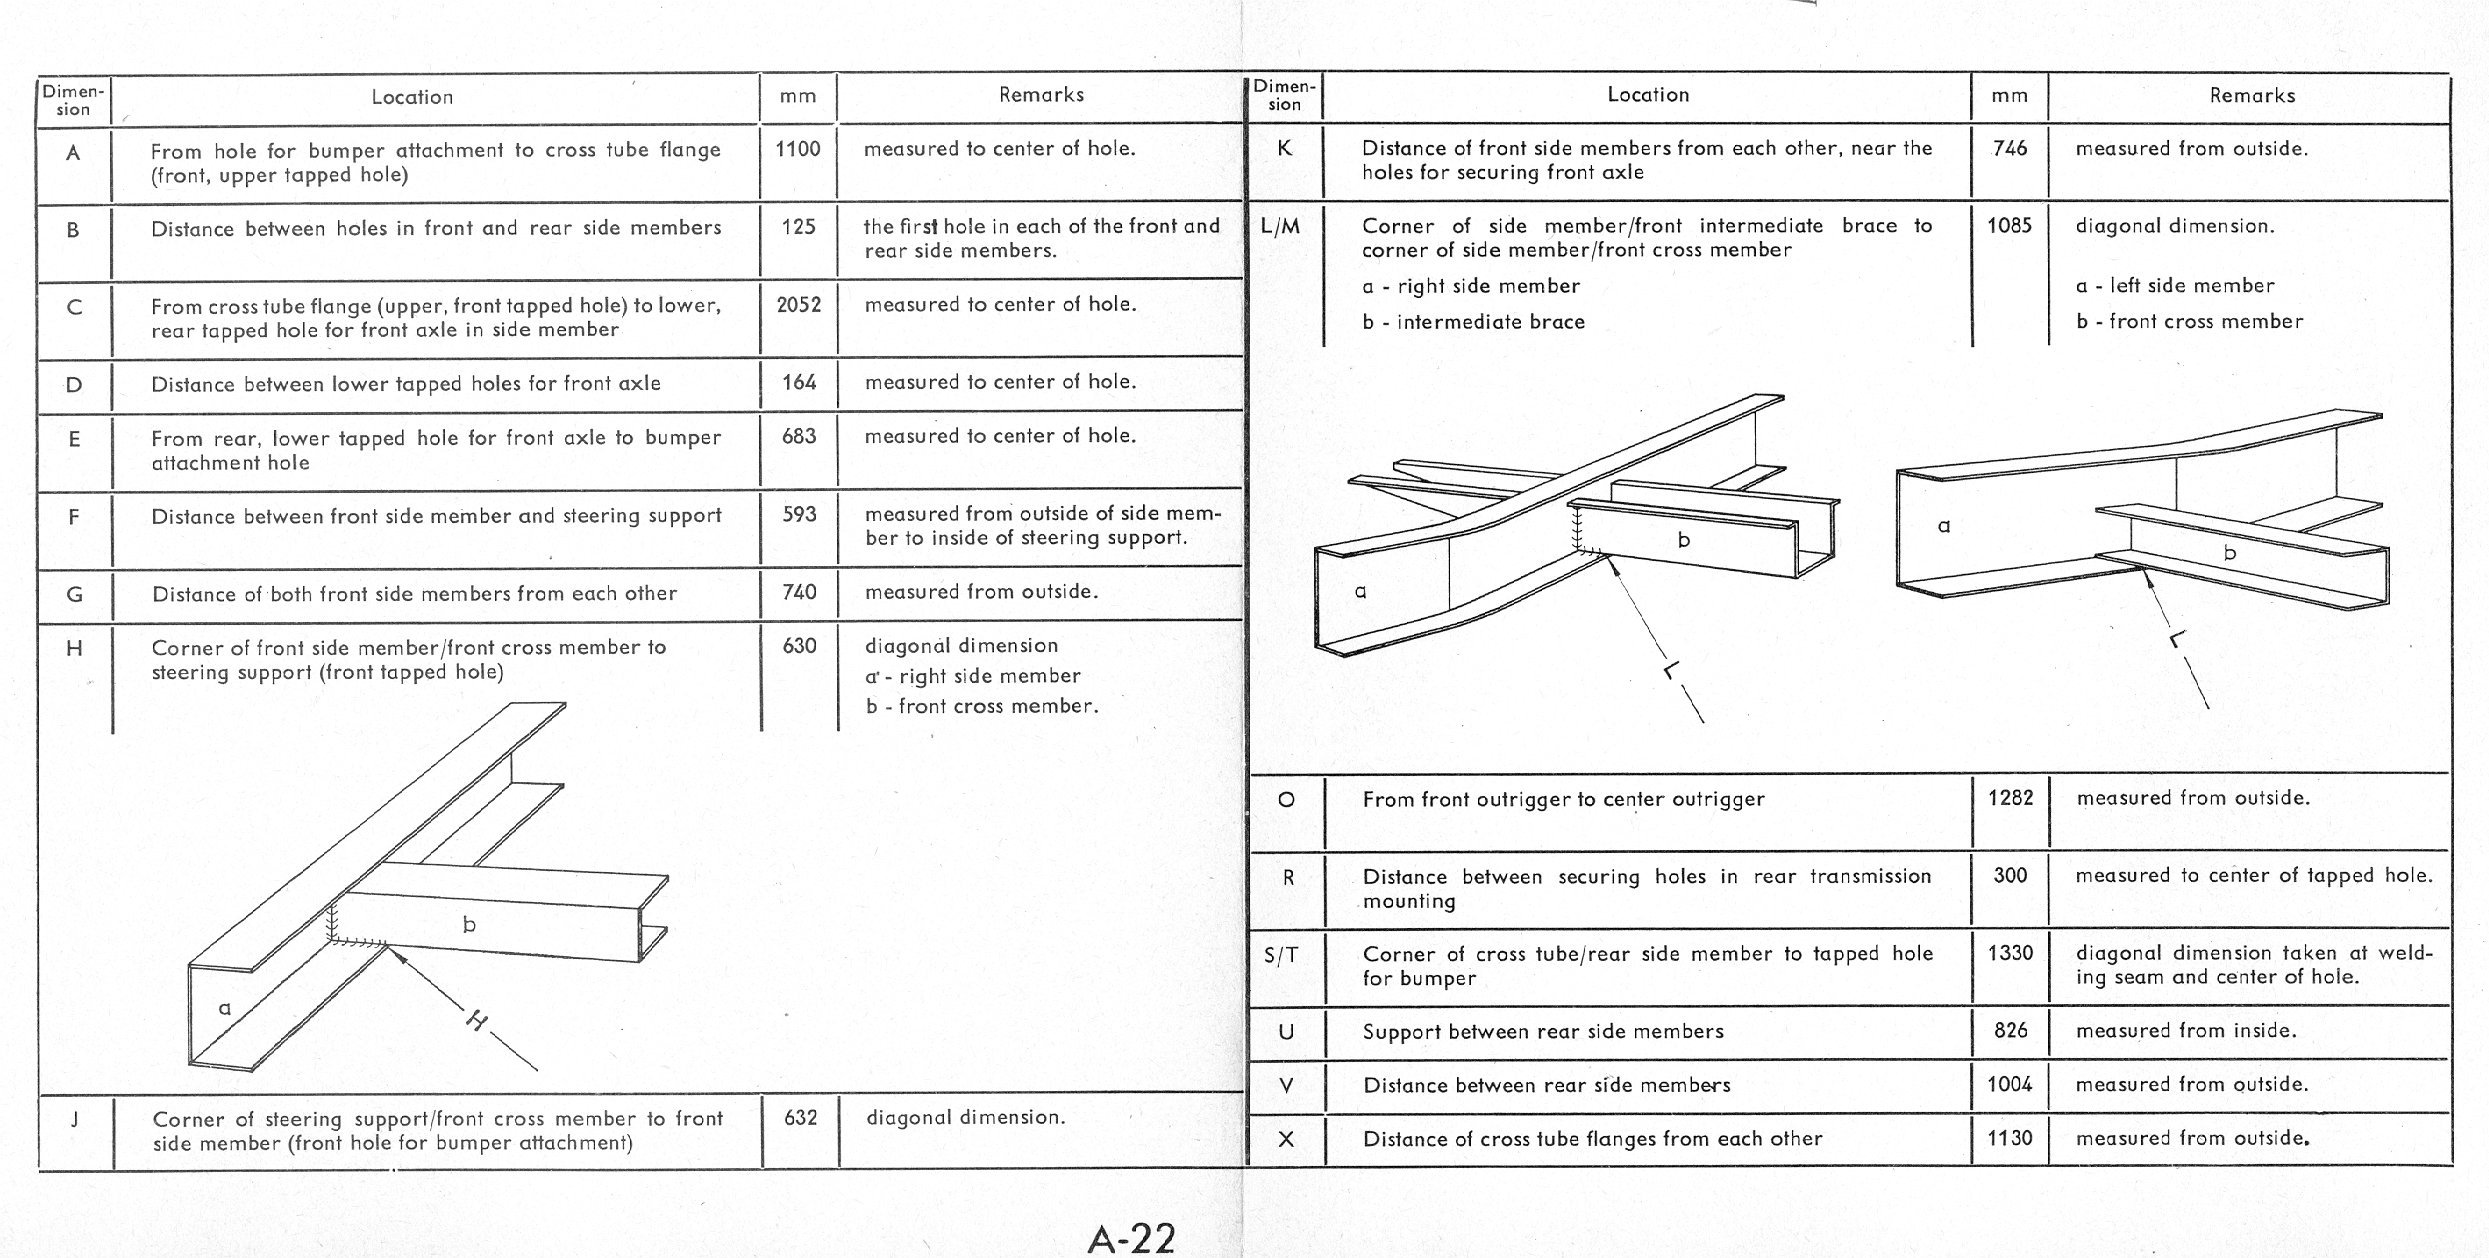
I know it's a late model but i recon that except for the X value. The back measurements would be much the same. And now I hope so, because they did match mine pretty dam well. I stoked that they did. Showed I did a pretty good job for all the measurements to add up
One thing that would help though. What's the measurement from the end of the rear rail to the bumper mount hole they refer too? Cheers
Scott- dropped in on Mark. Nice guy, a very useful contact. Cheers mate. Came by today to try for that bumper hole measurement but you weren't there. I'll be back
Been triple checking every measurement today.
Did some serious trigonometry last night to work out the lengths of the angled crossbeams and outriggers. Definantly should have done that before but couldn't see how. Or better still having a barndoor to measure
Here what I produced. Sorry for the crap phone pic.
Also found this a great help for checking the rear end.
I know it's a late model but i recon that except for the X value. The back measurements would be much the same. And now I hope so, because they did match mine pretty dam well. I stoked that they did. Showed I did a pretty good job for all the measurements to add up
One thing that would help though. What's the measurement from the end of the rear rail to the bumper mount hole they refer too? Cheers
Scott- dropped in on Mark. Nice guy, a very useful contact. Cheers mate. Came by today to try for that bumper hole measurement but you weren't there. I'll be back
lowdown dirty rat
Registered user
Posts: 787
Joined: Sat Feb 23, 2008 6:14 am
Re: 52 Samba
by lowdown dirty rat » Sun Feb 13, 2011 12:50 pm
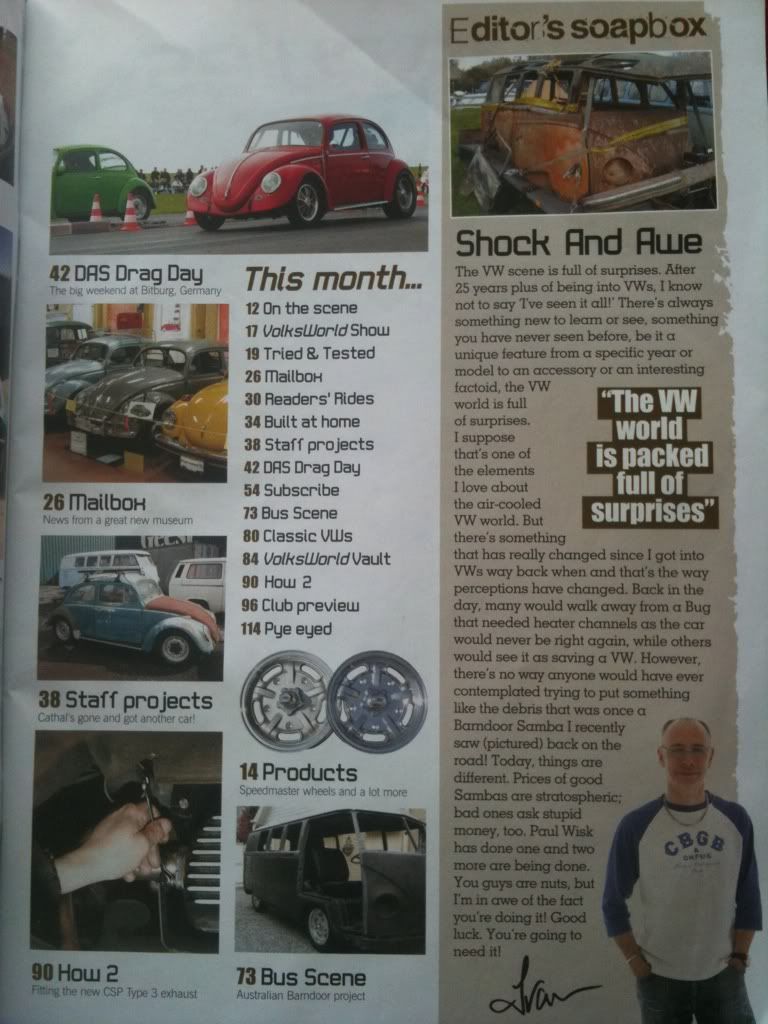
Been meaning to post this up for a while.
From volksworld January 2011.
From volksworld January 2011.
lowdown dirty rat
Registered user
Posts: 787
Joined: Sat Feb 23, 2008 6:14 am
Re: 52 Samba
by lowdown dirty rat » Mon Feb 14, 2011 10:23 pm
The next stage of the build is being part financed by the sale of my trekker on eBay

http://cgi.ebay.co.uk/ws/eBayISAPI.dll?ViewItem&item=320653182826
So help save a barndoor - bid on my trekker !!!
Ends tomorrow (Tuesday)
http://cgi.ebay.co.uk/ws/eBayISAPI.dll?ViewItem&item=320653182826
So help save a barndoor - bid on my trekker !!!
Ends tomorrow (Tuesday)
lowdown dirty rat
Registered user
Posts: 787
Joined: Sat Feb 23, 2008 6:14 am
Re: 52 Samba
by lowdown dirty rat » Sun Feb 27, 2011 7:27 pm
Trekker sold, so it was off to wisks for stage two. Unification.
A barndoor in a bongo.
So while Paul is finishing off a few other things before starting on mine, I thought in would crack on with some anal stuff.
Turning my late barndoor A-pillars into earlies.
Any help would be greatly appreciated. See thesamba thread http://www.thesamba.com/vw/forum/viewtopic.php?t=428324
lowdown dirty rat
Registered user
Posts: 787
Joined: Sat Feb 23, 2008 6:14 am
Re: 52 Samba
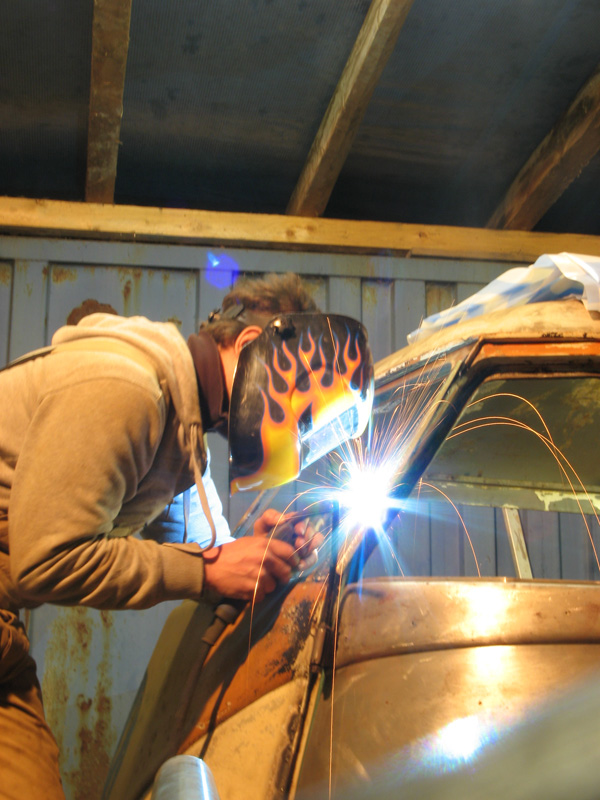
by johnny danger » Sun Feb 27, 2011 9:47 pm
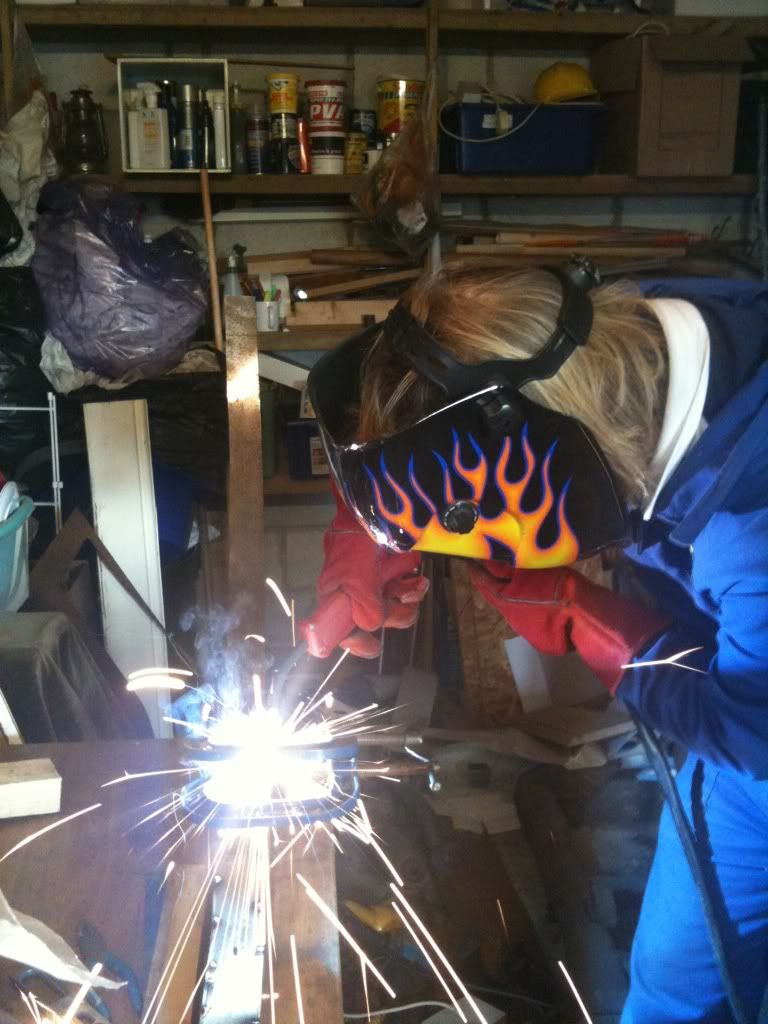
hello rob, well done on the welding, looking forward to see this one on the streets again!
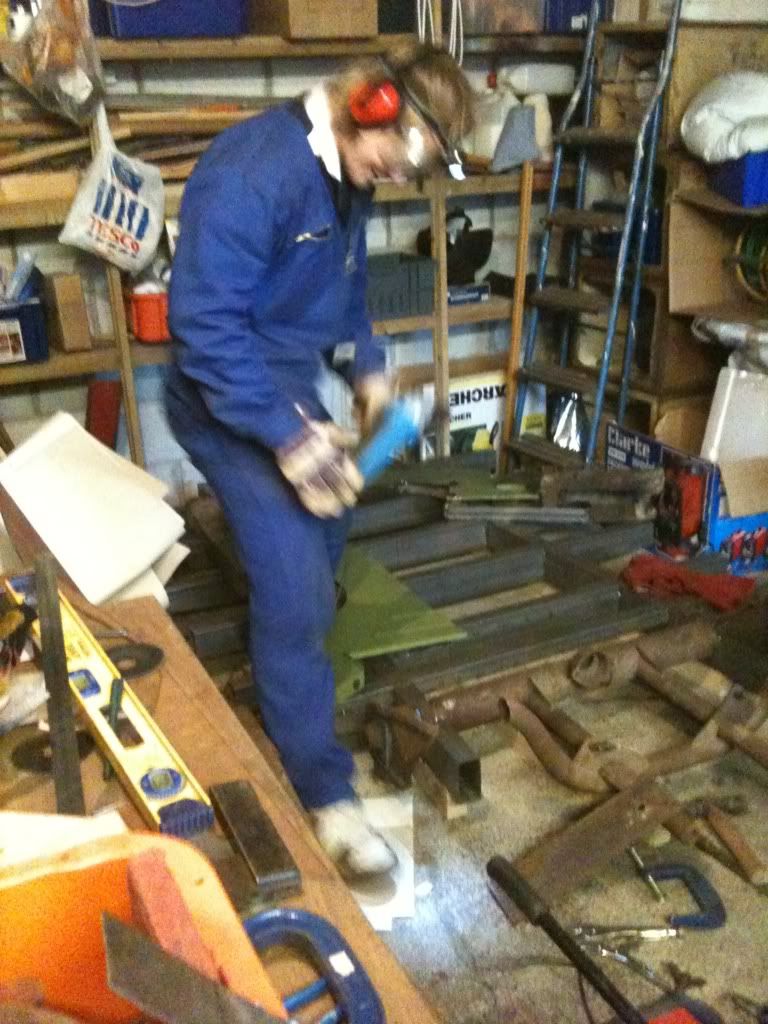
haha.. just was looking to this:
this one looks familiar to me! we used this one also on the pd welding, but we invested some money to get a better one now.. but the old one worked fine!
haha.. just was looking to this:
this one looks familiar to me! we used this one also on the pd welding, but we invested some money to get a better one now.. but the old one worked fine!
johnny danger

Registered user
Posts: 57
Joined: Thu Mar 08, 2007 3:50 pm