You are viewing the Split Screen Van Club forum archive.
The forum archive is read-only.Unfortunately in 2021 the Split Screen Van Club forum suffered a ransomware attack and lots of the forum data was lost.
What threads that have been recovered are now searchable on this site. Some threads may be incomplete and some images are still being recovered.
Forum archive search
'64 LHD Panel to Devon + '63 Eriba Puck + Westy Trailer
Re: '64 LHD Panel to Devon + '63 Eriba Puck + Westy Trailer
by clymoj » Wed Apr 02, 2014 11:22 pm
Great to see this back on track. And good work on those door tops, I'm not looking forward to that job.
clymoj
Registered user
Posts: 938
Joined: Tue Mar 27, 2012 12:10 pm
Re: '64 LHD Panel to Devon + '63 Eriba Puck + Westy Trailer
by type21f » Thu Apr 03, 2014 5:44 pm
Looking really good!
type21f
SSVC Member
Posts: 7449
Joined: Tue May 29, 2007 12:55 pm
Re: '64 LHD Panel to Devon + '63 Eriba Puck + Westy Trailer
by markp » Fri Apr 04, 2014 11:57 am
hats off guys


well done


your true Ambassadors for the club
really pleased for you ripper and it was great to meet you at Vo Wo
Keep us updated of dates when people are coming around as if I'm free I'l be there too
Mark
well done
your true Ambassadors for the club
really pleased for you ripper and it was great to meet you at Vo Wo
Keep us updated of dates when people are coming around as if I'm free I'l be there too
Mark
markp
SSVC Member
Posts: 4467
Joined: Wed Jul 20, 2011 9:56 pm
Re: '64 LHD Panel to Devon + '63 Eriba Puck + Westy Trailer
by Paul66spliy » Thu Apr 10, 2014 1:31 pm
Hi Guys
Would just like to say, I've just seen all of this and, what a Great bunch of Guys you are!!
Would just like to say, I've just seen all of this and, what a Great bunch of Guys you are!!
Paul66spliy
Registered user
Posts: 453
Joined: Sat Jan 21, 2012 7:56 am
Re: '64 LHD Panel to Devon + '63 Eriba Puck + Westy Trailer
by Rippers » Sun Apr 13, 2014 9:03 pm
Feeling a lot more positive on the van and had three days on it. Every job seems to take 10 times longer then I envisage but thats life I guess

If I have done anything wrong please point it out to me!
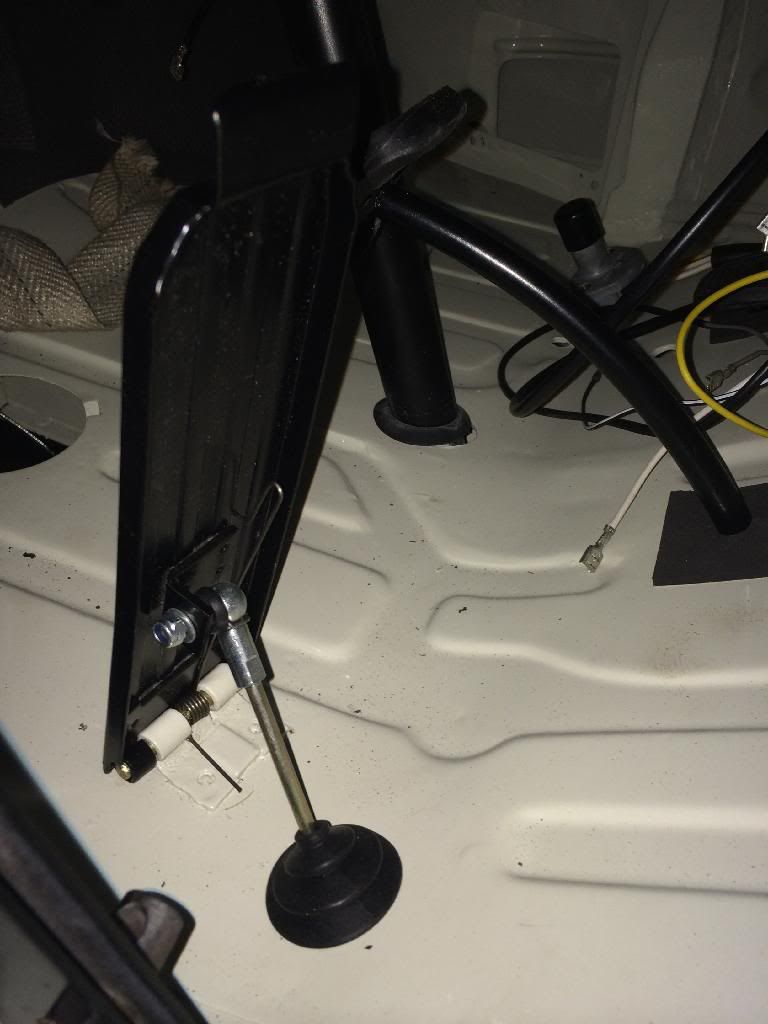
Fitted the throttle pedal
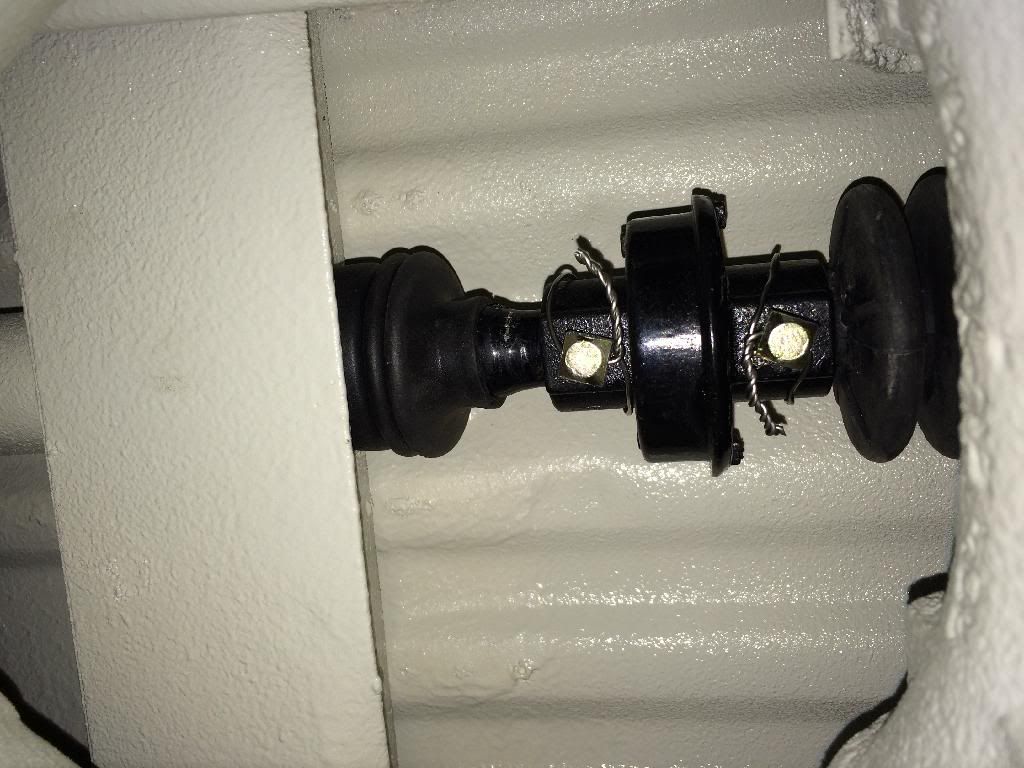
Rear coupling
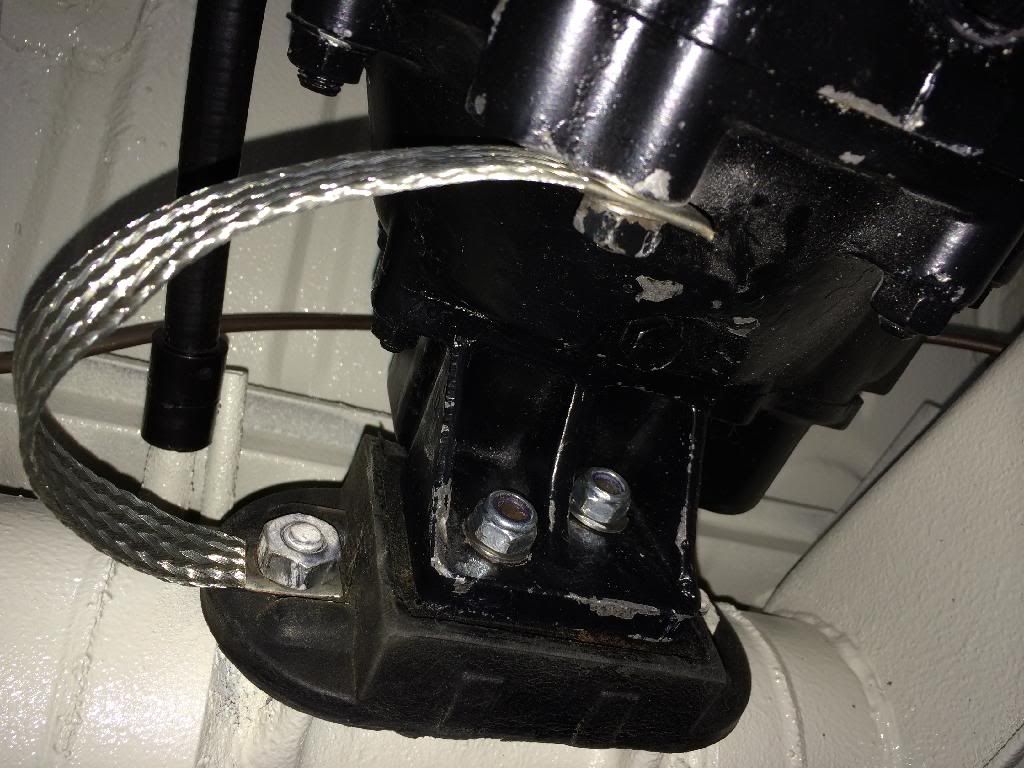
Gearbox Earth
Spring plate lock tabs and torqued up bolts, brake line's and flex's
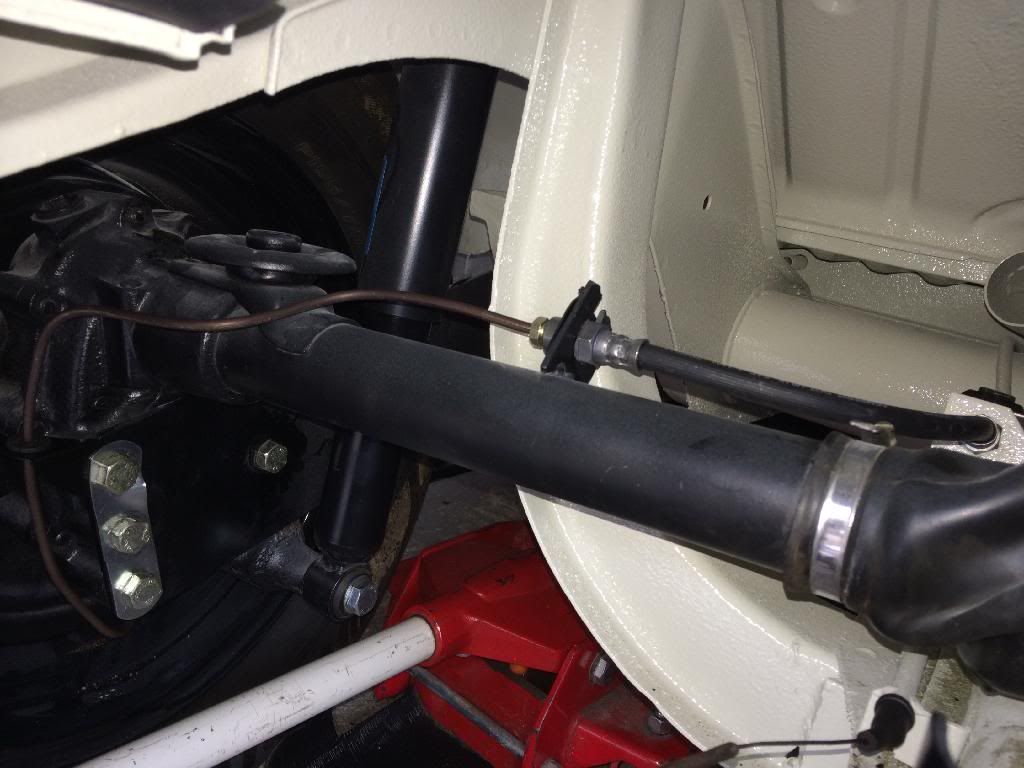
The awkward little pipe between the flexi and t-piece took four attempts
 the brake line over the gear box was also fun. Bowden tube on.
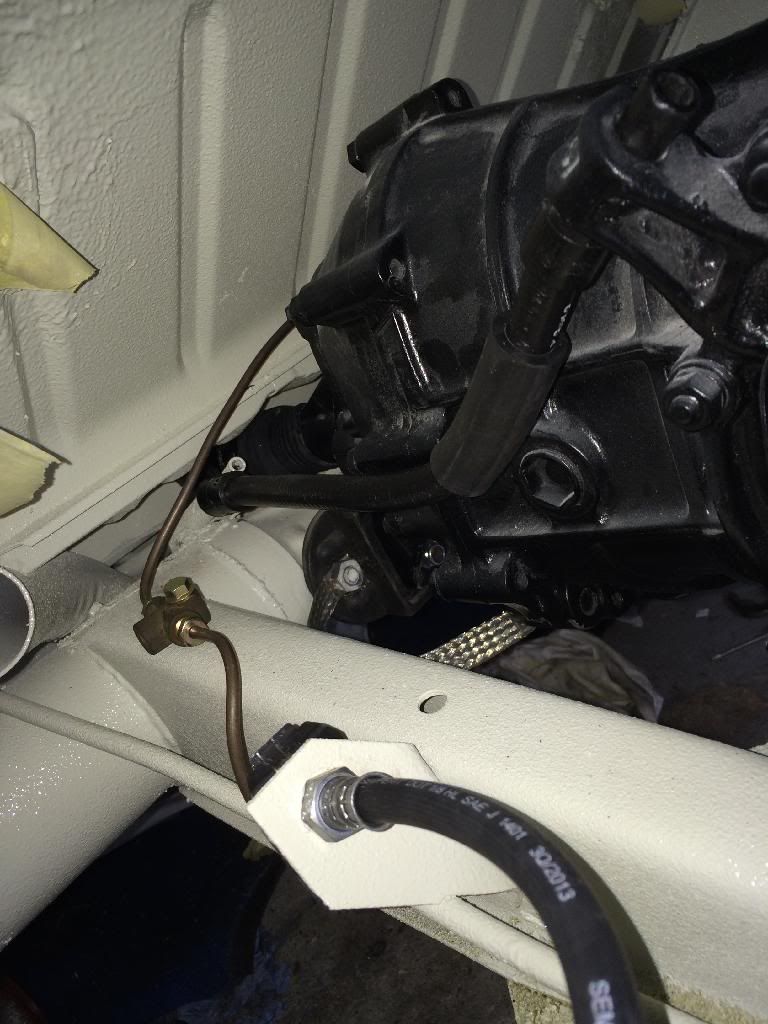
Front coupling
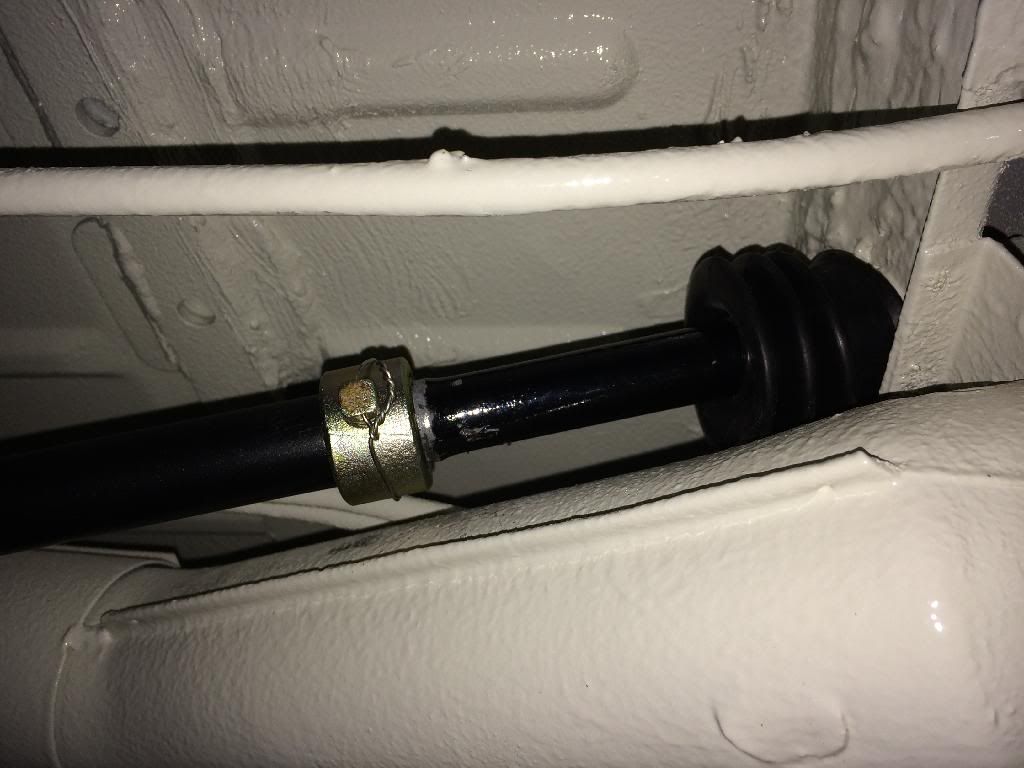
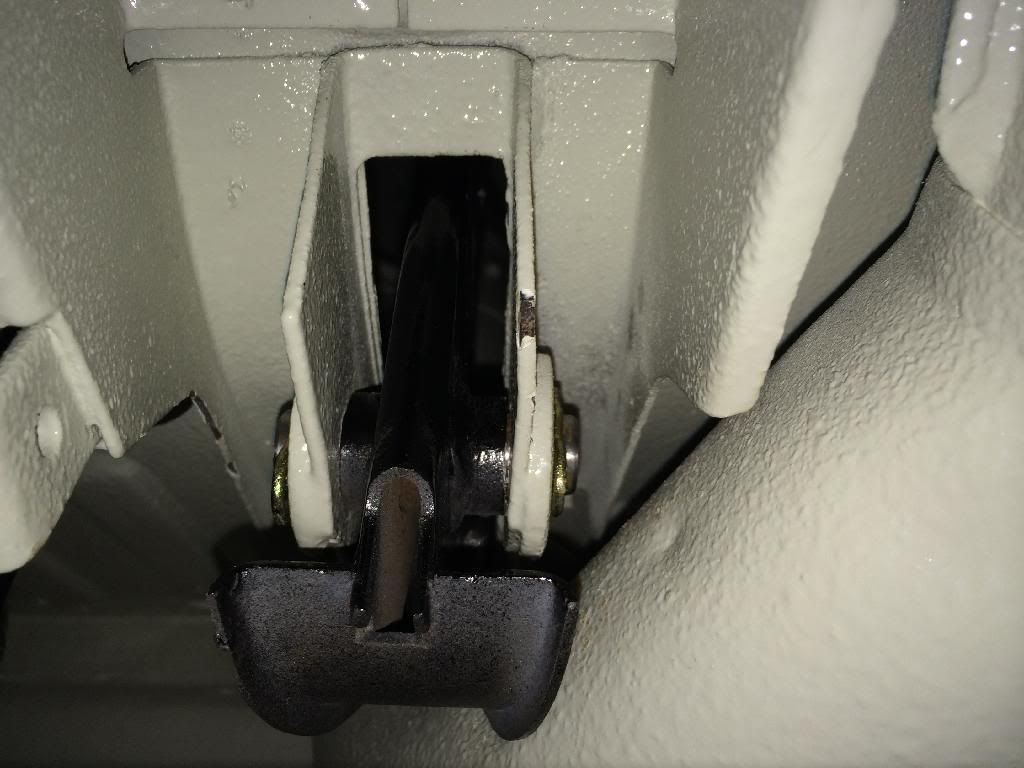
Handbrake pin.. this took nearly two hours to get it to line up and in, had to bend the body work a bit and take a tiny bit off the roll on one side, touch the paint work up after the pic
Gearstick in place
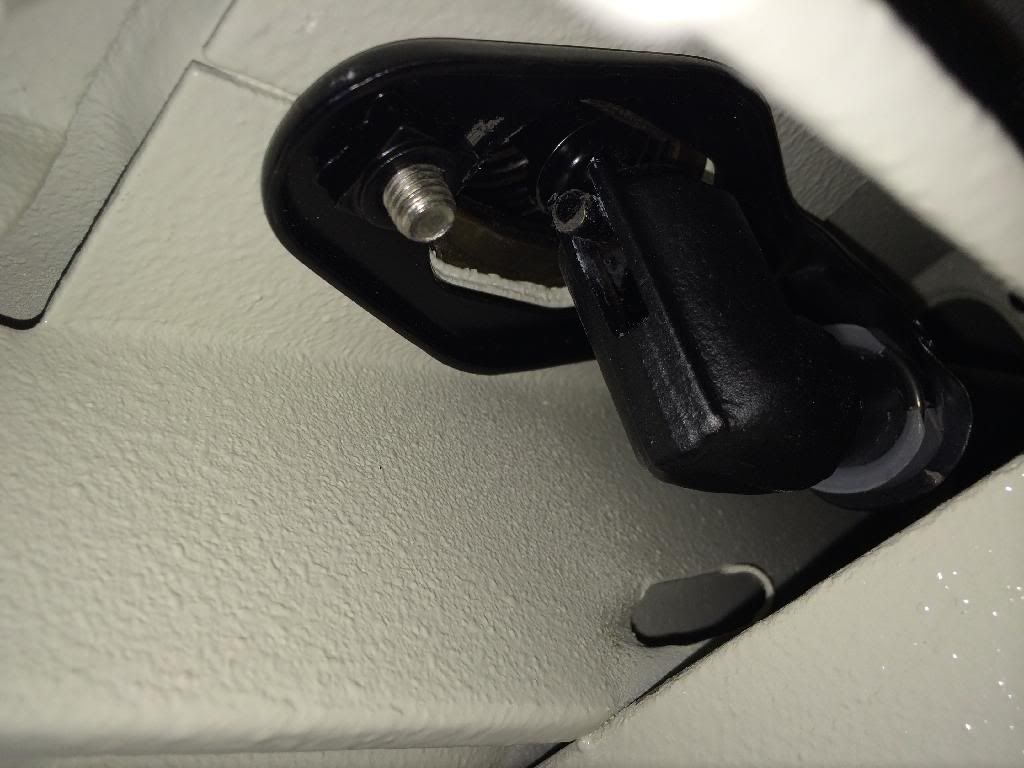
Brake pedal bits
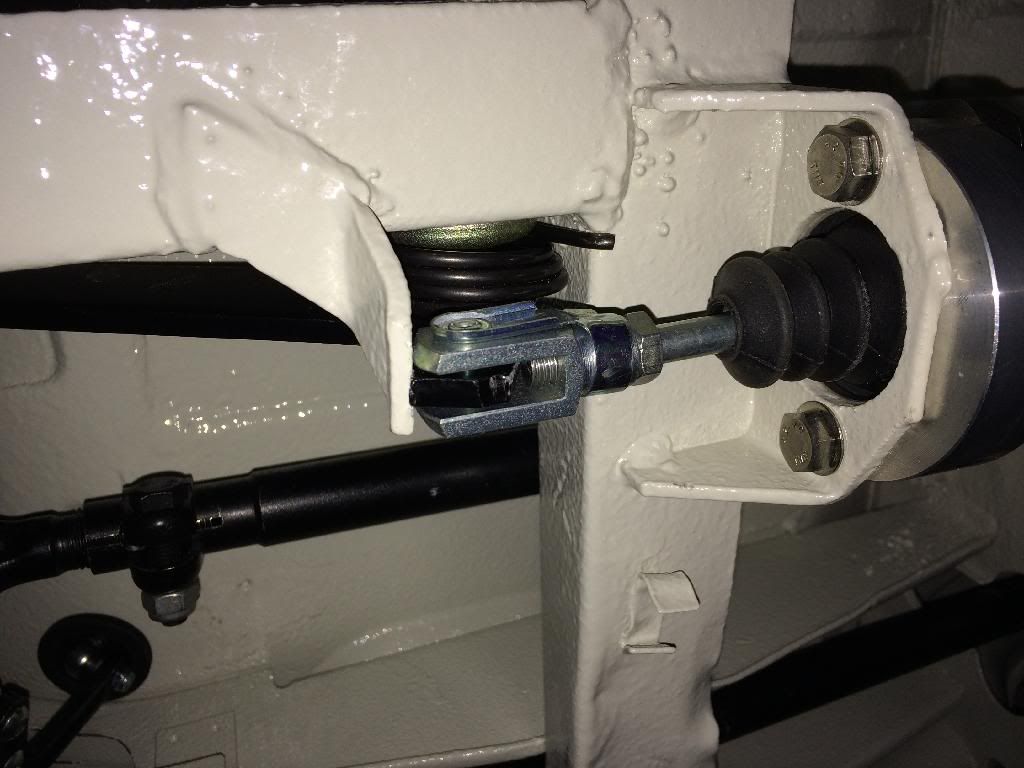
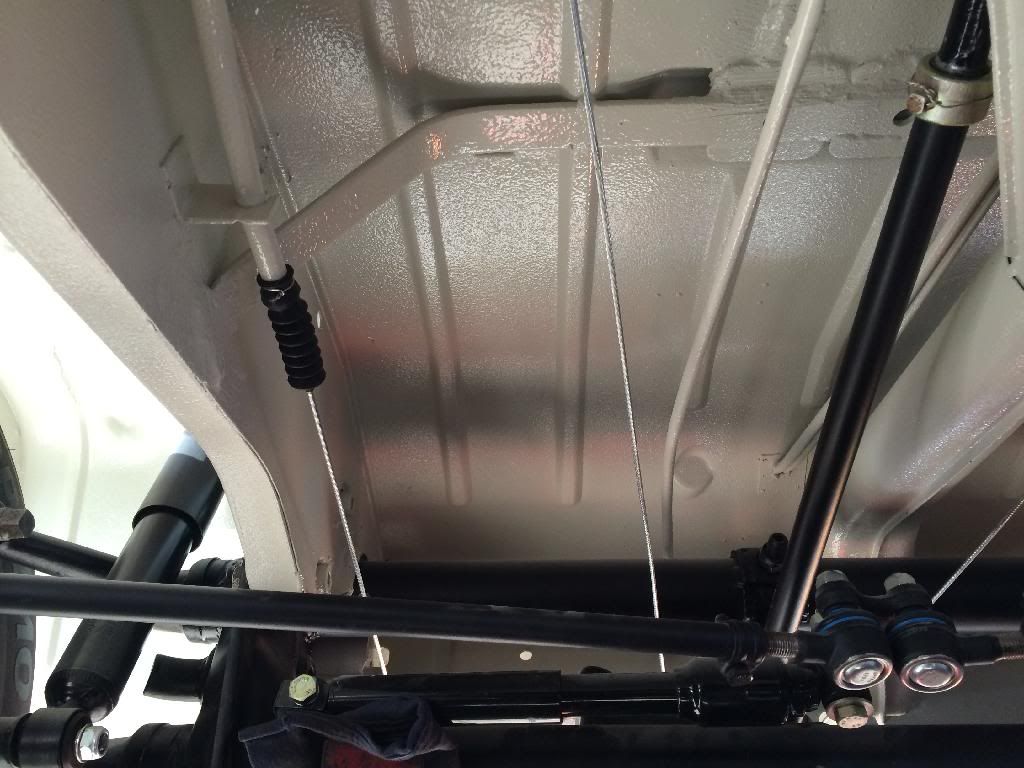
clutch and hand brake cables run,
No photo's but clutch pedal fitted, bit more fettling with the cab doors, battery cable fitted, clutch bearing changed, starter cable fitted now I have the correct grommet, put some contact adhesive on the tailgate seal so it sits nice now, had a good tidy up!
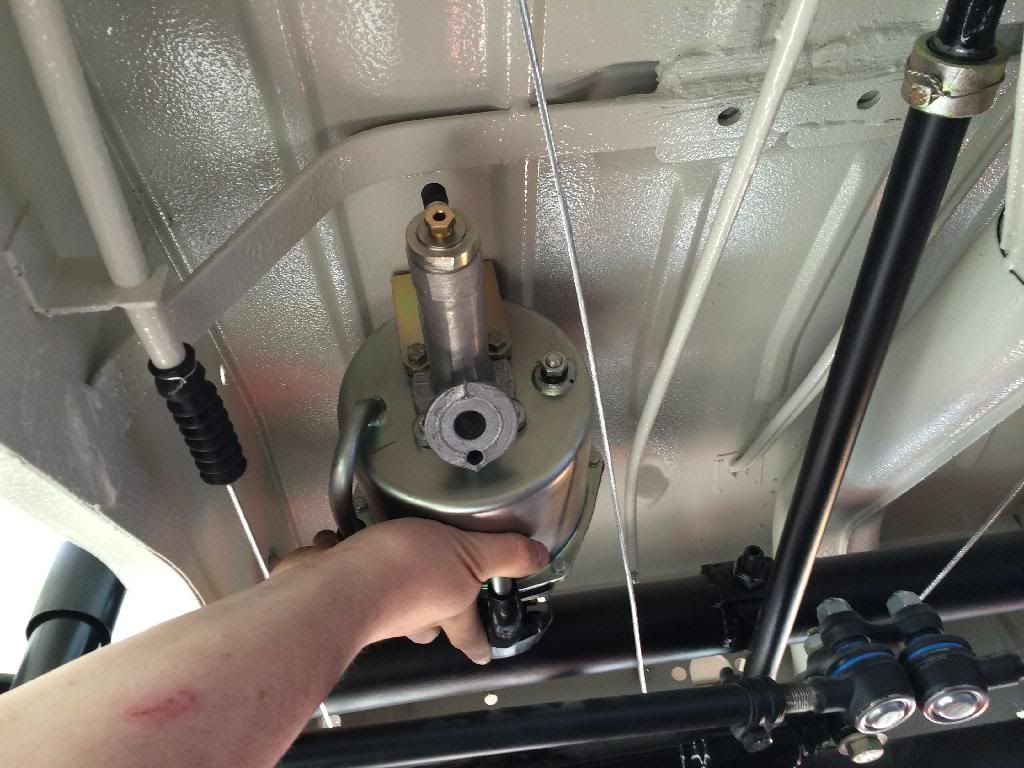
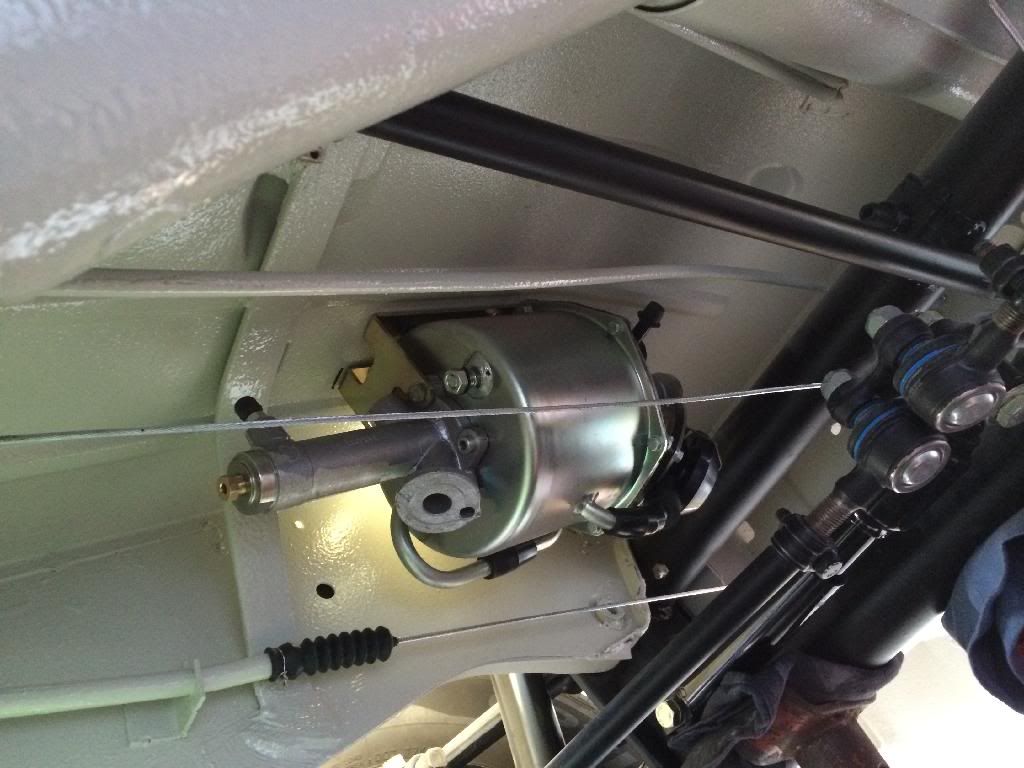
Next was the front brake lines which I hadn't done yet as I hadn't fitted the dual servo unit. Found what looked to be a decent place to put it.. check out the marks on my arms.. this vans been tearing me apart
Drilled and Riv Nutted the bracket (fro vwjim)
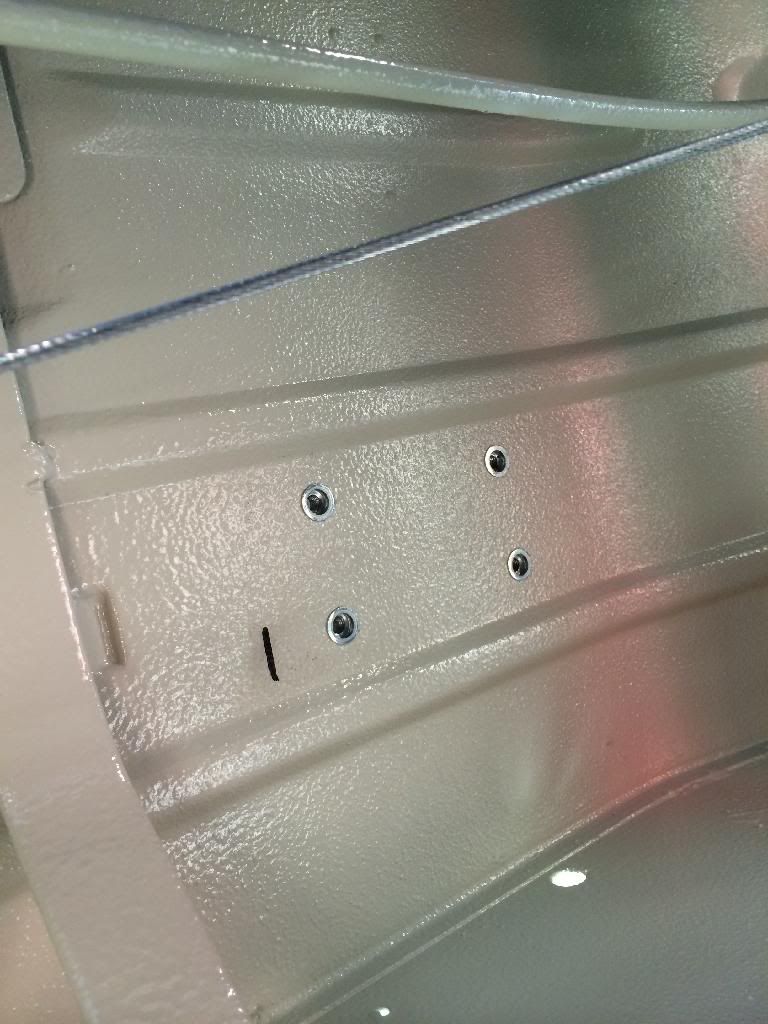
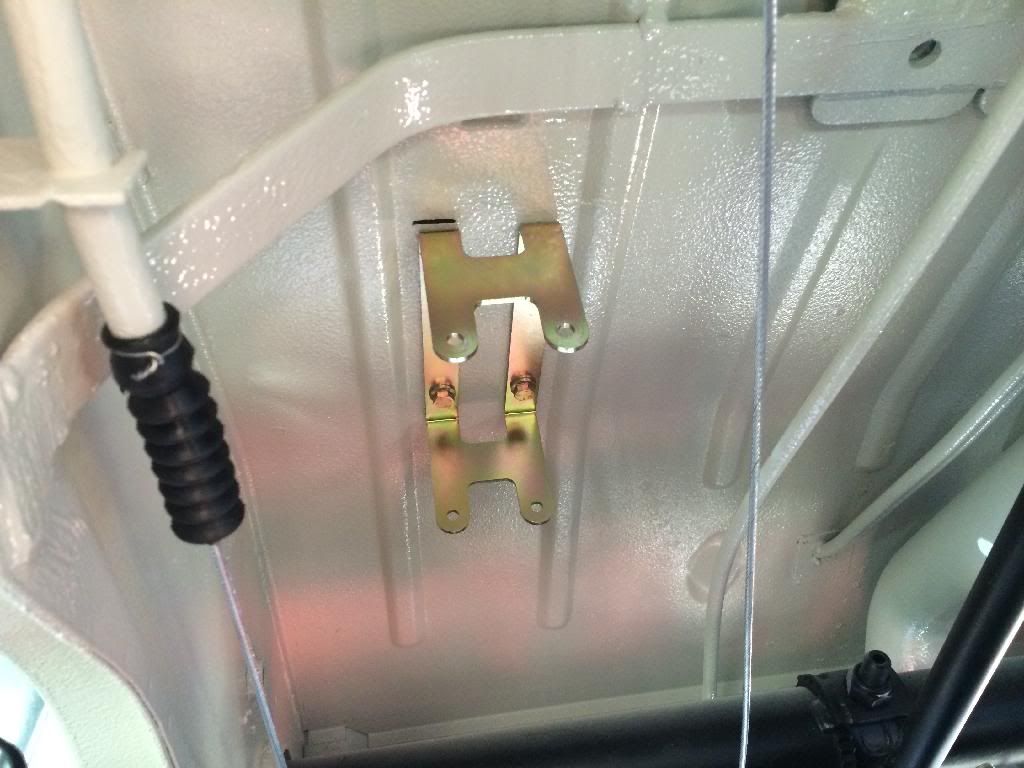
on the inside in the tool chest area (is this what its called?) in front of the spare wheel
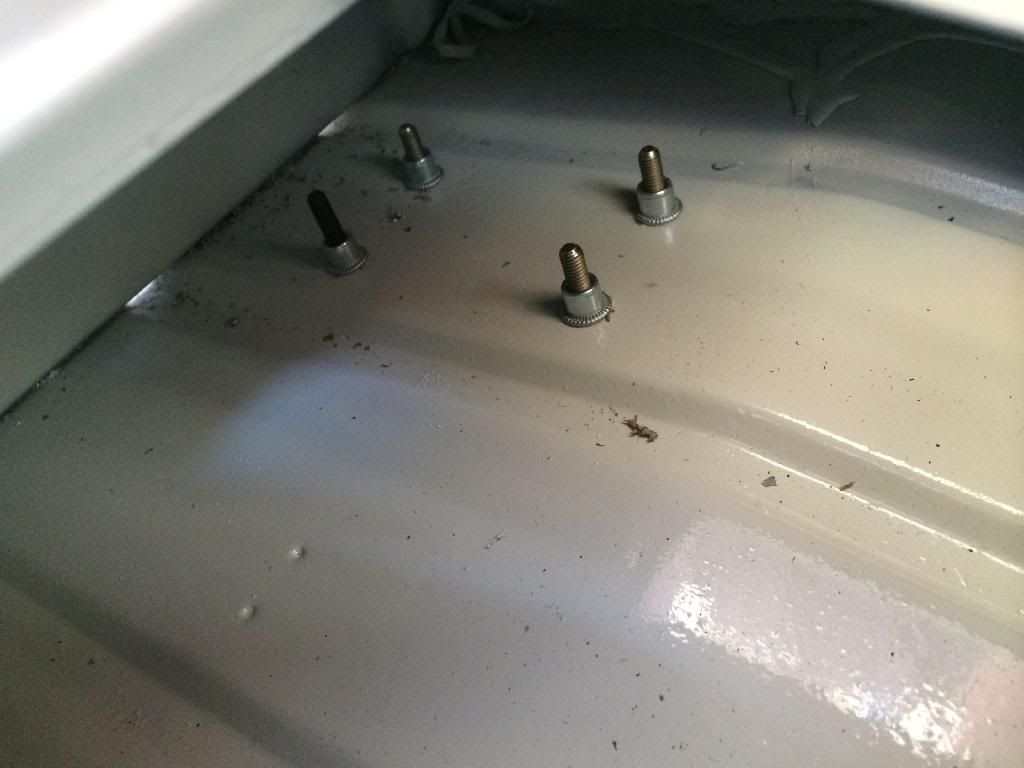
Fitted it up
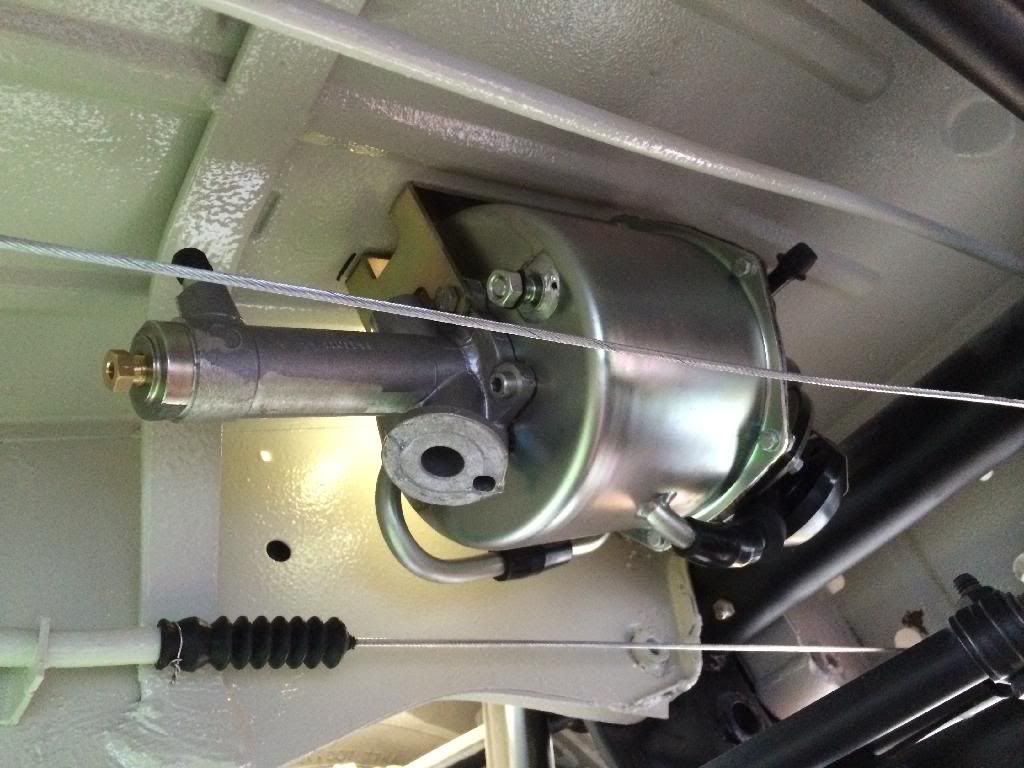
bit more distance on this shot.. very happy with the location, nightmare getting the bolts in and I expect getting the brake lines in will be just as much fun
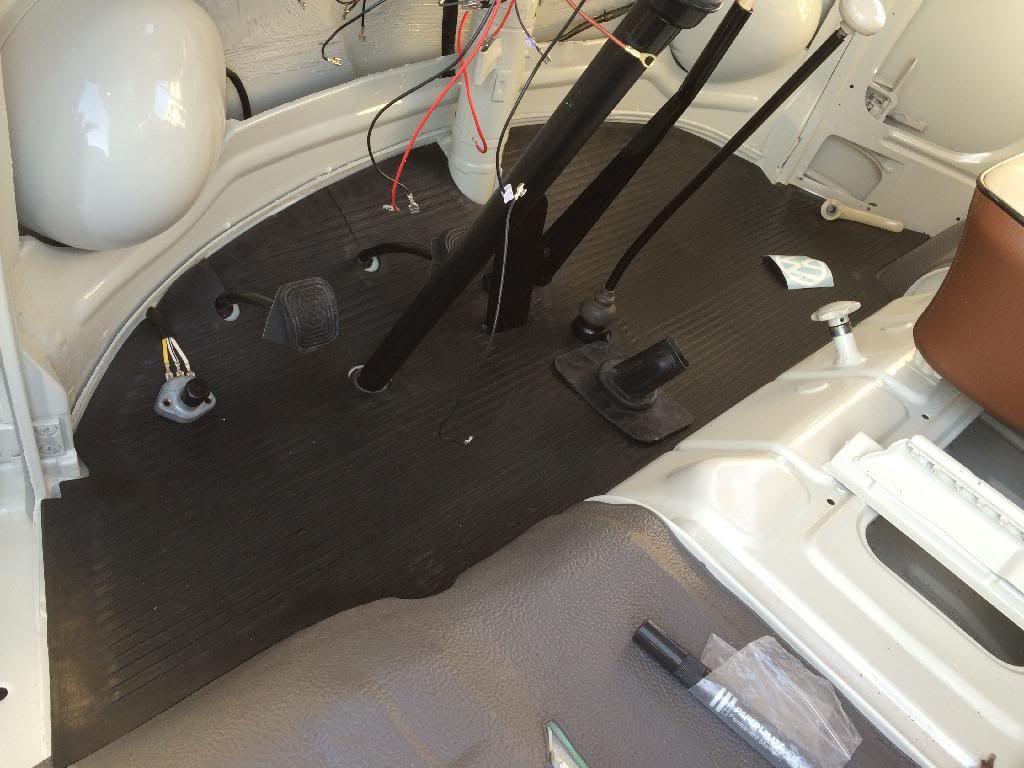
Finally fitted the Wolfsburg West mat, had been looking forward to this and it was such nice quality and pretty much a spot on copy of the original was dear but worth it I think! Can also see the original heater knob which I cleaned up and fitted
Also want to make a quick mention of how good AH Scofield have been, supplying parts on time and really good advise on the phone extra
Might get the odd bit done in the evenings and got Wednesday off during week so hoping to have the brake pipes finished then it won't be long till the engine goes in wahoo!
List of remaining jobs
List of remaining jobs of the top of my head
clutch cable - need adjusting
accelerator cable
accelerator pedal and buttys linkage
handbrake cable - run just connecting and adjusting
hand brake lever pin - done!
Shift rod couplings - done!
Mount Dual Servo - done!
Sort master cylinder rod (think it needs shortening) - getting there need to check the adjustment
Brake line made up fitted and clipped - rears done - fronts and middle remaining
Brake Flexi's - rears done - fronts remaining
Run Vac pipe for Servo
change RGB outer seals
Rear brake drums fit new Cylinders, shoes, handbrake cable
Front double check king links and grease them and the beam
Front brake disc kit
Wheels balanced
Steering arms double checked
Alignment adjusted
Speedo cable
Washer jets and tank
Gearbox:-
Check gearbox oil
Change clutch bearing - done!
adjust clutch cable
fit starter motor and 12v bush
Engine:-
Fire wall seals - done!
Fit engine top up oil
Run fuel line
connect and adjust accelerator cable
will worry about the oil cooler and remote filter later
Wiring:-
fit battery and earth cable - Earth done
fit and wire up lights all round
starter cable - done!
wire up fuse box, relay, dash switches
indicator stalk, dip switch and ignition barrel
Speedo & fuel gauge
Fit Wiper motor/arms
Horn
Steering wheel bracket/parcel shelf after wiring
aerial
Body:-
Cab door alignment - one side done
1x side window
side window adjustment
Glue seals in
Touch ups
MOT and register time..
.. then its interior, flooring, headlining, leisure battery blah blah blah
If I have done anything wrong please point it out to me!
Fitted the throttle pedal

Rear coupling

Gearbox Earth

Spring plate lock tabs and torqued up bolts, brake line's and flex's

The awkward little pipe between the flexi and t-piece took four attempts

Front coupling

Handbrake pin.. this took nearly two hours to get it to line up and in, had to bend the body work a bit and take a tiny bit off the roll on one side, touch the paint work up after the pic

Gearstick in place

Brake pedal bits

clutch and hand brake cables run,

No photo's but clutch pedal fitted, bit more fettling with the cab doors, battery cable fitted, clutch bearing changed, starter cable fitted now I have the correct grommet, put some contact adhesive on the tailgate seal so it sits nice now, had a good tidy up!
Next was the front brake lines which I hadn't done yet as I hadn't fitted the dual servo unit. Found what looked to be a decent place to put it.. check out the marks on my arms.. this vans been tearing me apart

Drilled and Riv Nutted the bracket (fro vwjim)


on the inside in the tool chest area (is this what its called?) in front of the spare wheel

Fitted it up

bit more distance on this shot.. very happy with the location, nightmare getting the bolts in and I expect getting the brake lines in will be just as much fun

Finally fitted the Wolfsburg West mat, had been looking forward to this and it was such nice quality and pretty much a spot on copy of the original was dear but worth it I think! Can also see the original heater knob which I cleaned up and fitted

Also want to make a quick mention of how good AH Scofield have been, supplying parts on time and really good advise on the phone extra
Might get the odd bit done in the evenings and got Wednesday off during week so hoping to have the brake pipes finished then it won't be long till the engine goes in wahoo!
List of remaining jobs
List of remaining jobs of the top of my head
clutch cable - need adjusting
accelerator cable
accelerator pedal and buttys linkage
handbrake cable - run just connecting and adjusting
hand brake lever pin - done!
Shift rod couplings - done!
Mount Dual Servo - done!
Sort master cylinder rod (think it needs shortening) - getting there need to check the adjustment
Brake line made up fitted and clipped - rears done - fronts and middle remaining
Brake Flexi's - rears done - fronts remaining
Run Vac pipe for Servo
change RGB outer seals
Rear brake drums fit new Cylinders, shoes, handbrake cable
Front double check king links and grease them and the beam
Front brake disc kit
Wheels balanced
Steering arms double checked
Alignment adjusted
Speedo cable
Washer jets and tank
Gearbox:-
Check gearbox oil
Change clutch bearing - done!
adjust clutch cable
fit starter motor and 12v bush
Engine:-
Fire wall seals - done!
Fit engine top up oil
Run fuel line
connect and adjust accelerator cable
will worry about the oil cooler and remote filter later
Wiring:-
fit battery and earth cable - Earth done
fit and wire up lights all round
starter cable - done!
wire up fuse box, relay, dash switches
indicator stalk, dip switch and ignition barrel
Speedo & fuel gauge
Fit Wiper motor/arms
Horn
Steering wheel bracket/parcel shelf after wiring
aerial
Body:-
Cab door alignment - one side done
1x side window
side window adjustment
Glue seals in
Touch ups
MOT and register time..
.. then its interior, flooring, headlining, leisure battery blah blah blah
Rippers
SSVC Member
Posts: 1085
Joined: Thu Jul 21, 2011 4:36 pm
Re: '64 LHD Panel to Devon + '63 Eriba Puck + Westy Trailer
by 8 8US » Sun Apr 13, 2014 9:18 pm
Flying now Rippers, you'll make Viccy Farm yet!
8 8US
SSVC Member
Posts: 1476
Joined: Tue Jul 17, 2012 8:31 pm
Re: '64 LHD Panel to Devon + '63 Eriba Puck + Westy Trailer
by type21f » Sun Apr 13, 2014 9:34 pm
All looking really good
Especially the cab mat---wish they did a RHD mat, I would buy three!
I...see you have followed Z14 supplement for seat belt mounts...in the spare wheel well!
Trying to be helpfull and not being picky but you might try shorter bolts for the dual servo cradle...so they do not sit too high and snag things in your tool box area..Usually only need a couple of thread showing through the nut.
I have even fitted a vwjim cover over my toolbox...painted to match.. I am really pleased with this..
type21f

SSVC Member
Posts: 7449
Joined: Tue May 29, 2007 12:55 pm
Re: '64 LHD Panel to Devon + '63 Eriba Puck + Westy Trailer
by Rippers » Sun Apr 13, 2014 9:43 pm
Yep Z14 supplement nicked the idea from your thread

The bolts where the only ones I had to hand was going change them as my OCD won't allow having one odd bolt lol the riv nuts will probably snag anyway.
I do plan to get one of vwjims covers actually, they look great

The bolts where the only ones I had to hand was going change them as my OCD won't allow having one odd bolt lol the riv nuts will probably snag anyway.
I do plan to get one of vwjims covers actually, they look great
Rippers

SSVC Member
Posts: 1085
Joined: Thu Jul 21, 2011 4:36 pm
Re: '64 LHD Panel to Devon + '63 Eriba Puck + Westy Trailer
by clymoj » Sun Apr 13, 2014 10:04 pm
type21f wrote:Especially the cab mat---wish they did a RHD mat, I would buy three!
Bottom of the page Graham? Or was it WW specifically you were after?
http://www.karmannkonnection.com/acatal ... 67_21.html
Good work by the way Rippers, good to see you re-enthused and a nice little milestone getting everything attached to the pedals.
clymoj

Registered user
Posts: 938
Joined: Tue Mar 27, 2012 12:10 pm
Re: '64 LHD Panel to Devon + '63 Eriba Puck + Westy Trailer
by type21f » Sun Apr 13, 2014 10:21 pm
type21f

SSVC Member
Posts: 7449
Joined: Tue May 29, 2007 12:55 pm
Re: '64 LHD Panel to Devon + '63 Eriba Puck + Westy Trailer
by wizard 1066 » Sun Apr 13, 2014 10:31 pm
Been following the build and enjoy the updates, as we are in the process of repairing our camper looking at your posts should keep us going for a while, looking forward to seeing it a Stanford hall one day along with ours.
wizard 1066
Registered user
Posts: 237
Joined: Fri Jan 03, 2014 7:47 pm
Re: '64 LHD Panel to Devon + '63 Eriba Puck + Westy Trailer
by Rippers » Sun Apr 13, 2014 11:18 pm
Thanks guys.. need to do some swatting on a few bits.. first the clutch cable adjustment, then the master cylinder rod adjustment and handbrake cable adjustment.
Also has anyone ever done a thread or guide to the workings of the '64 Cab door mech's, one one side it seems lock and open from the inside, the other side will only just about lock on the inside and won't let you open the door from the inside. Taken them both out and given them some lube and slowly getting the jist of how they work. I noticed one side had a spring missing (oddly the side that works better?!) does anyone have a good close up picture of how these mechs should be?
Thanks!
Rippers

SSVC Member
Posts: 1085
Joined: Thu Jul 21, 2011 4:36 pm
Re: '64 LHD Panel to Devon + '63 Eriba Puck + Westy Trailer
by Rippers » Wed Apr 16, 2014 8:49 pm
Another day where It feels like I achieved nothing!
Long brake pipe run
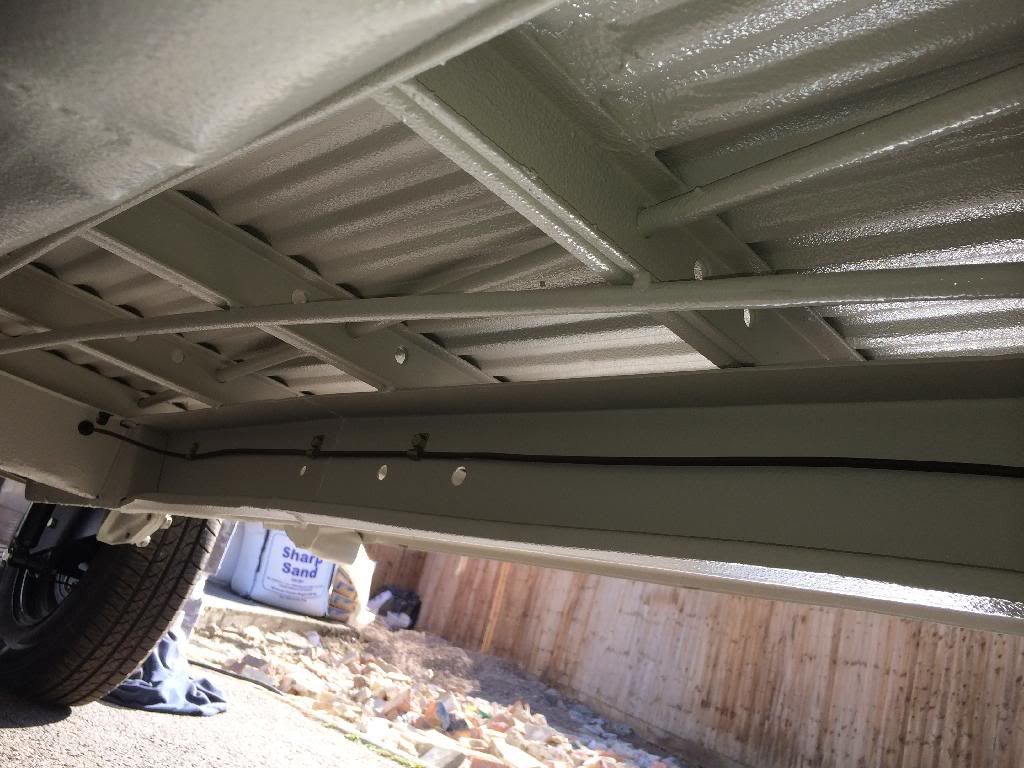
Connected to remote servo
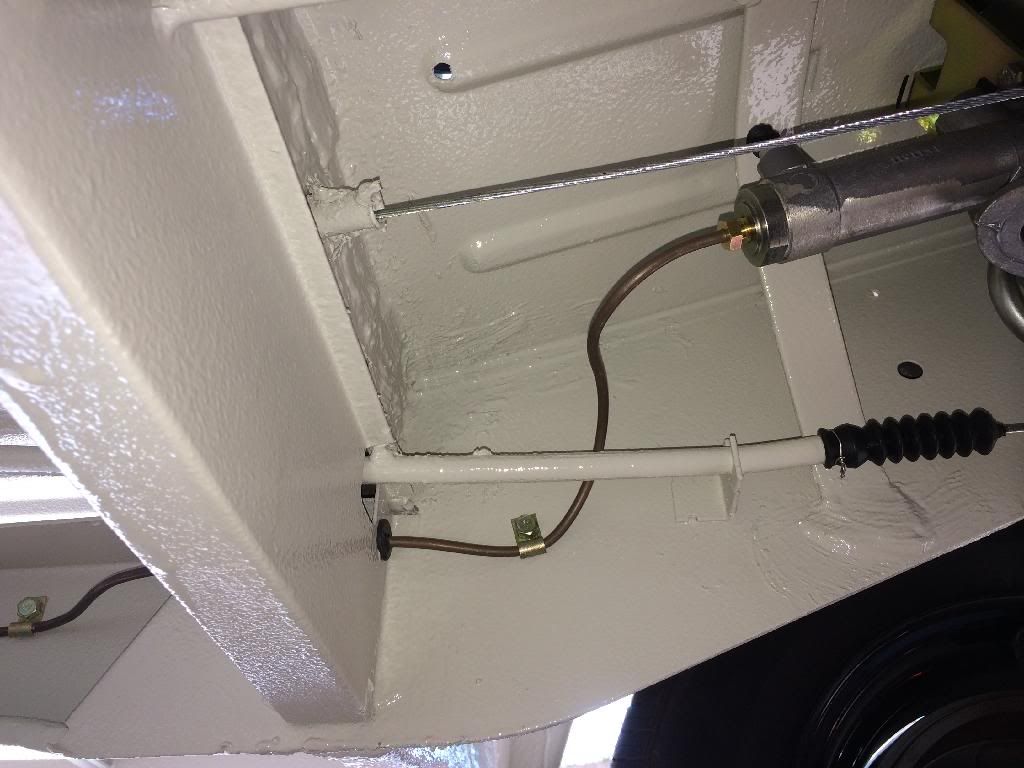
The servo looks like it has a earth point does this need connecting ?
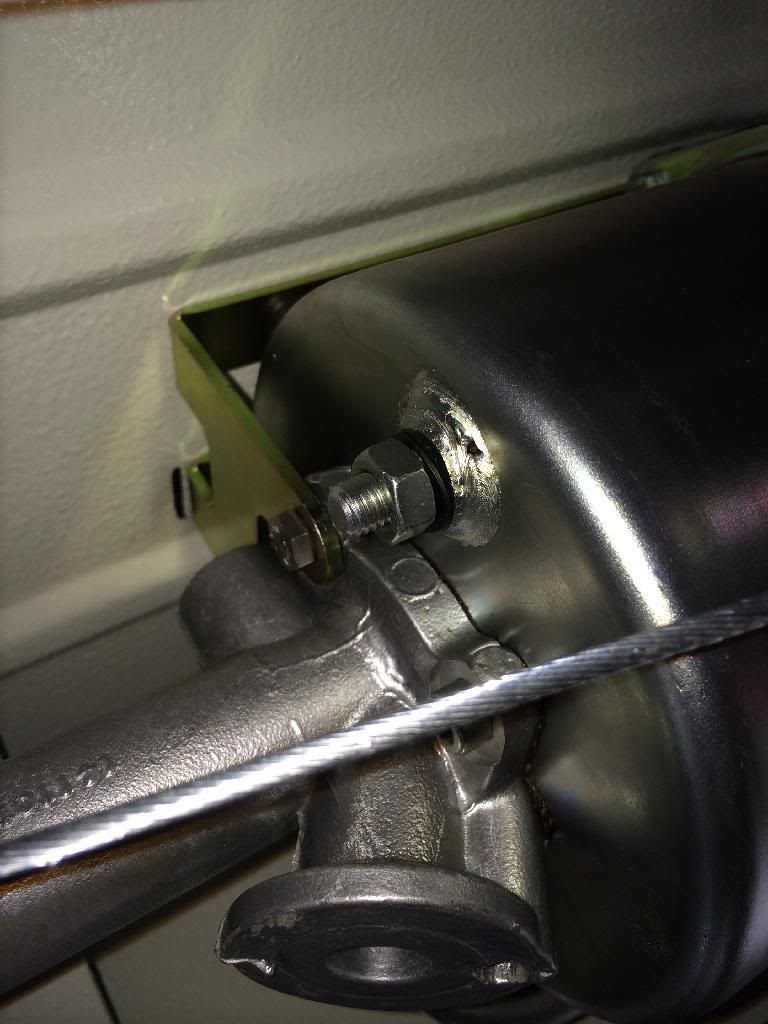
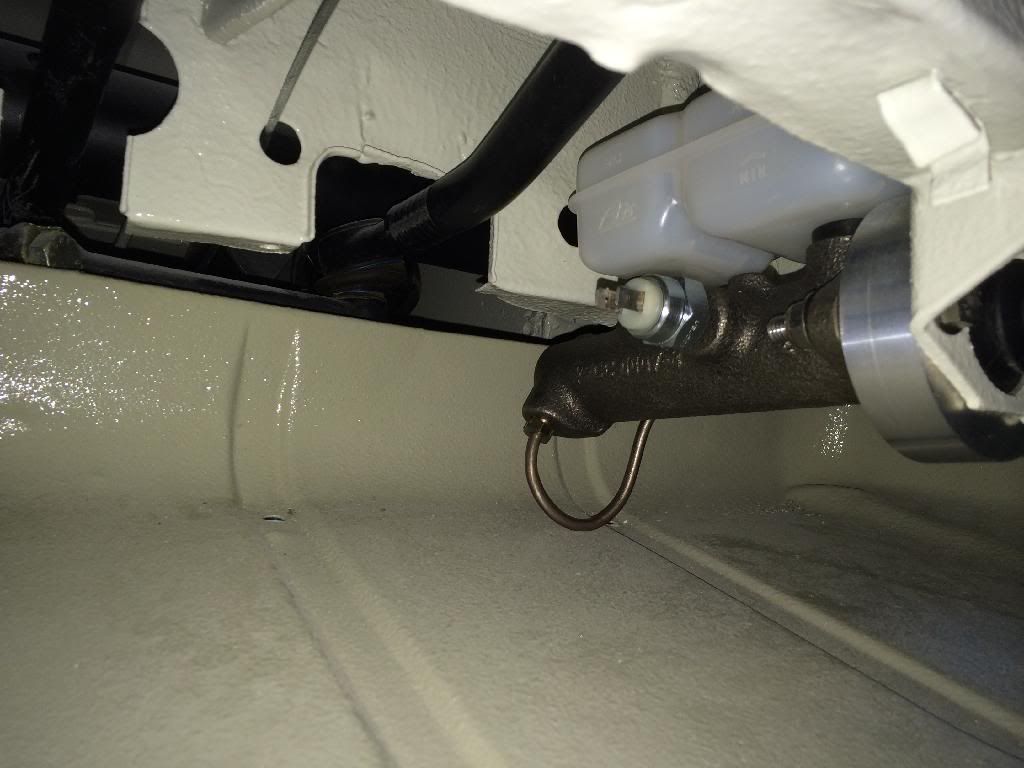
Not too happy with the way this pipe sits low, the splash pan won't fit with the pipe like this and I think it is dangerous, I can't get the angle any tighter with the bender I have, so going to have to buy another tool! anyone know why you have to use this output of the master cylinder and not the one on the other side?
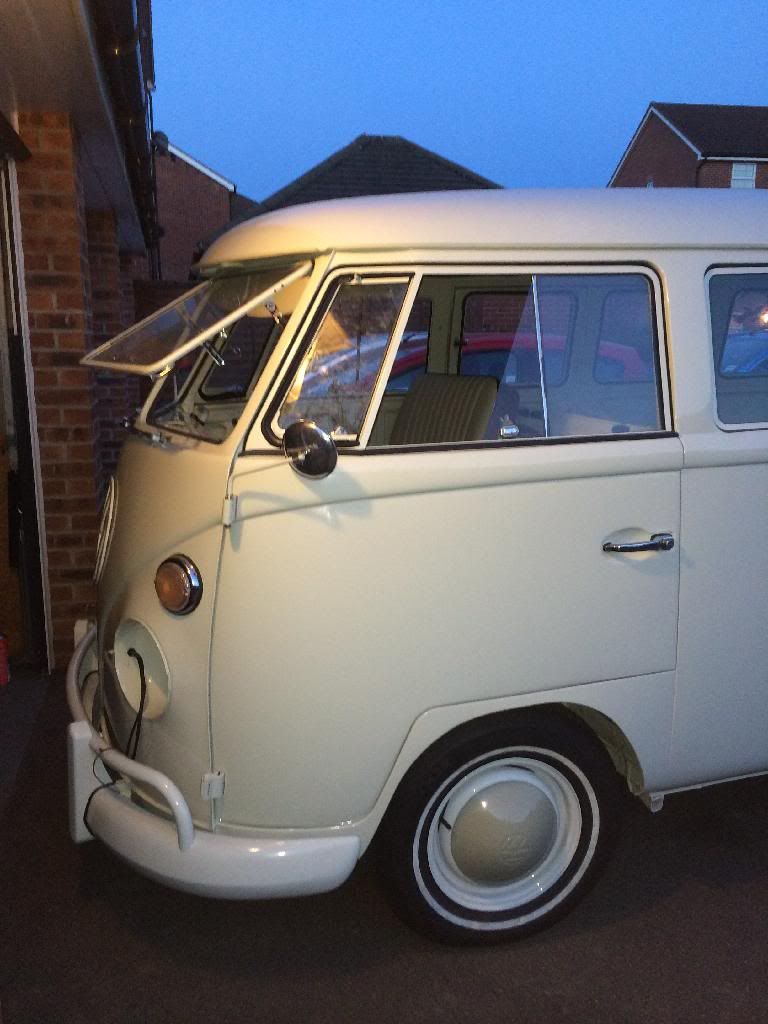
Had a play with the wipers, needs new seals Its slowly getting there
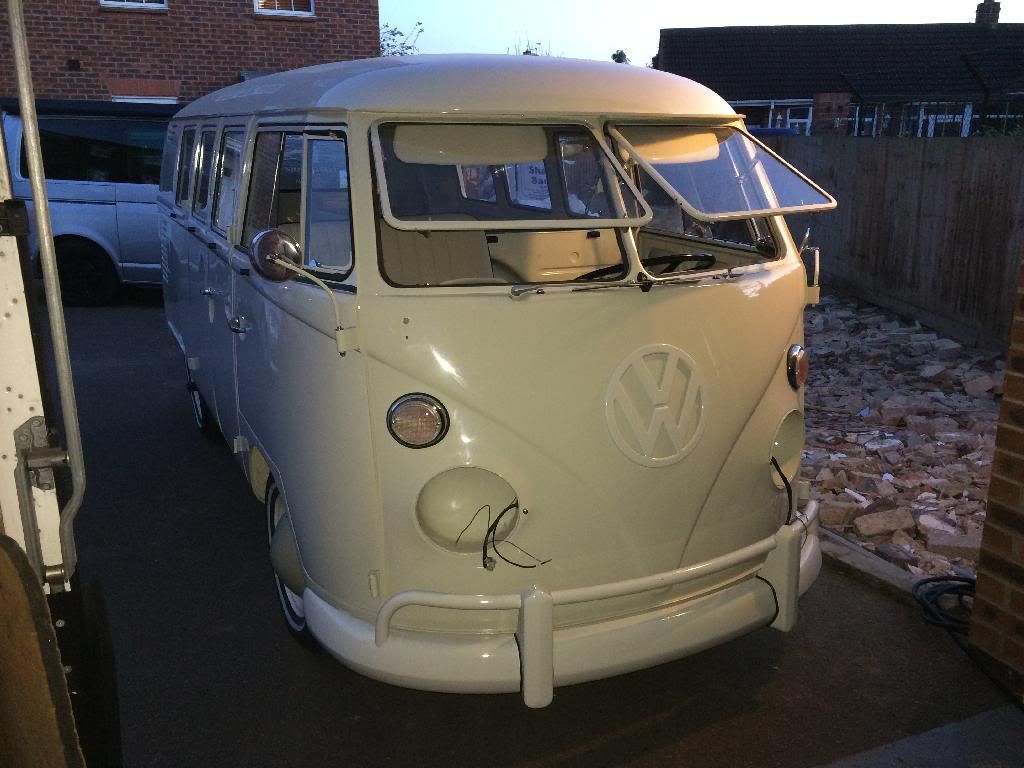
Its slowly getting there
List of remaining jobs edit
clutch cable - need adjusting
accelerator cable
accelerator pedal and buttys linkage
handbrake cable - run just connecting and adjusting
hand brake lever pin - done!
Shift rod couplings - done!
Mount Dual Servo - done!
Sort master cylinder rod - done!
Brake line made up fitted and clipped - rears done - middle pipes done - fronts remaining
Brake Flexi's - rears done - fronts remaining
Run Vac pipe for Servo
change RGB outer seals
Rear brake drums fit new Cylinders, shoes, handbrake cable
Front double check king links and grease them and the beam
Front brake disc kit
Wheels balanced
Steering arms double checked
Alignment adjusted
Speedo cable
Washer jets and tank Need parcel shelf to complete
Gearbox:-
Check gearbox oil
Change clutch bearing - done!
adjust clutch cable
fit starter motor and 12v bush
Engine:-
Fire wall seals - done!
Fit engine top up oil
Run fuel line
connect and adjust accelerator cable
will worry about the oil cooler and remote filter later
Wiring:-
fit battery and earth cable - Earth done
fit and wire up lights all round
starter cable - done!
wire up fuse box, relay, dash switches
indicator stalk, dip switch and ignition barrel
Speedo & fuel gauge
Fit Wiper motor/arms - half done
Horn
Steering wheel bracket/parcel shelf after wiring
aerial
Body:-
Cab door alignment - one side done
1x side window
side window adjustment
Glue seals in
Touch ups
MOT and register time..
.. then its interior, flooring, headlining, leisure battery blah blah blah
Long brake pipe run

Connected to remote servo

The servo looks like it has a earth point does this need connecting ?

Not too happy with the way this pipe sits low, the splash pan won't fit with the pipe like this and I think it is dangerous, I can't get the angle any tighter with the bender I have, so going to have to buy another tool! anyone know why you have to use this output of the master cylinder and not the one on the other side?

Had a play with the wipers, needs new seals

Its slowly getting there

List of remaining jobs edit
clutch cable - need adjusting
accelerator cable
accelerator pedal and buttys linkage
handbrake cable - run just connecting and adjusting
hand brake lever pin - done!
Shift rod couplings - done!
Mount Dual Servo - done!
Sort master cylinder rod - done!
Brake line made up fitted and clipped - rears done - middle pipes done - fronts remaining
Brake Flexi's - rears done - fronts remaining
Run Vac pipe for Servo
change RGB outer seals
Rear brake drums fit new Cylinders, shoes, handbrake cable
Front double check king links and grease them and the beam
Front brake disc kit
Wheels balanced
Steering arms double checked
Alignment adjusted
Speedo cable
Washer jets and tank Need parcel shelf to complete
Gearbox:-
Check gearbox oil
Change clutch bearing - done!
adjust clutch cable
fit starter motor and 12v bush
Engine:-
Fire wall seals - done!
Fit engine top up oil
Run fuel line
connect and adjust accelerator cable
will worry about the oil cooler and remote filter later
Wiring:-
fit battery and earth cable - Earth done
fit and wire up lights all round
starter cable - done!
wire up fuse box, relay, dash switches
indicator stalk, dip switch and ignition barrel
Speedo & fuel gauge
Fit Wiper motor/arms - half done
Horn
Steering wheel bracket/parcel shelf after wiring
aerial
Body:-
Cab door alignment - one side done
1x side window
side window adjustment
Glue seals in
Touch ups
MOT and register time..
.. then its interior, flooring, headlining, leisure battery blah blah blah
Rippers

SSVC Member
Posts: 1085
Joined: Thu Jul 21, 2011 4:36 pm
Re: '64 LHD Panel to Devon + '63 Eriba Puck + Westy Trailer
by BusBug&KG » Fri Apr 18, 2014 6:54 pm
Any help coming this weekend fella???
Tony C
Tony C
BusBug&KG

SSVC Member
Posts: 3331
Joined: Sun Oct 07, 2007 9:33 pm
Re: '64 LHD Panel to Devon + '63 Eriba Puck + Westy Trailer
by jayvanman » Sat Apr 19, 2014 5:17 pm
HOPE THIS HELPS
jayvanman wrote:ok here we go with the locks
pictures pretty much do the talking


I didn't know what the hell these were but all was revealed later


The rear hatch lock, a little different but overall the same


the retaining ring is a little more tricky to get out that the cab door handles but I noticed a small slot that i could get a small screw driver in, it helps.


inside I found an almost complete ring of those little bit I that i didn't what they were. I think they are grafite, like the "led" in a pencil. I assume they kind of lubricate the turning of the key.


for £20 I got the 4 locks tabs moved about and a new key cut. the chap said it was a BMW key.

I had kept all the different door handles separate.

OK
important you know this.
the lock can be inserted back into the barrel two ways, only one will work.
the lock has one part that sticks out from under the chrome ring. the other 3 its are tucked under the chrome. this sticky out part has to be able to rotate in the barrel.
take a look at the difference.1st photo of the grooves in the barrel goes straight all the way to the top. the ones below have a kind of "ledge" at top, this is where the sticky out bit moves when its rotated.


and thats it, piece of cake
on my drivers door I tried to get the little grafite pieces back on, i used a very small amount of grease for them to stick to.
drivers door doesn't close that well anyway and the locks are stiff, I'm not sure if it was a success or not


jayvanman
Registered user
Posts: 2608
Joined: Tue Aug 19, 2008 10:21 am
