You are viewing the Split Screen Van Club forum archive.
The forum archive is read-only.Unfortunately in 2021 the Split Screen Van Club forum suffered a ransomware attack and lots of the forum data was lost.
What threads that have been recovered are now searchable on this site. Some threads may be incomplete and some images are still being recovered.
Forum archive search
Forum Archive > Rides and Projects
my 1776cc build
Re: my 1776cc build
by caveman » Sat Apr 11, 2015 6:53 pm
so I had nearly a full day on it today,
I started by stripping and cleaning everything, - I did it by using engine cleaner and a jet washer, - no access to an ultrasonic cleaner unfortunately so it will have to do.
I added the new correct bearings and checked out the alignment for the oil ways - it wasn't great , so I added a small area of chamfer to aid the oil getting to the bearings correctly . if you see the pencil marks that's where the oil passageway comes out so the chamfer was neede to allow the oil to get to the passageway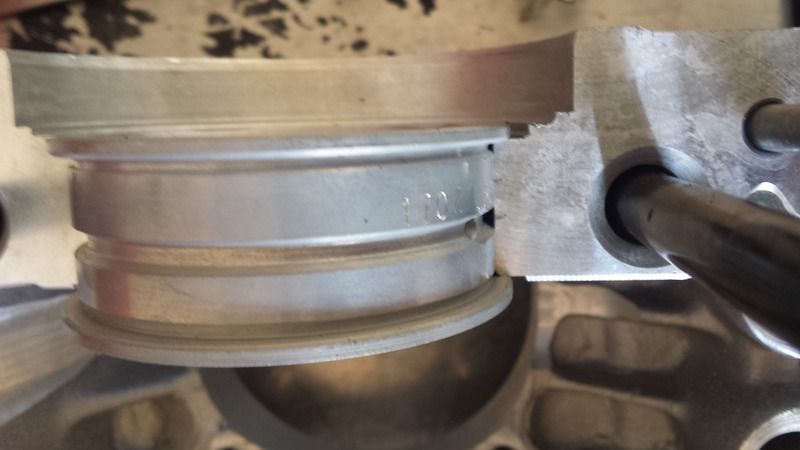
so this is what ive done - I hope its ok?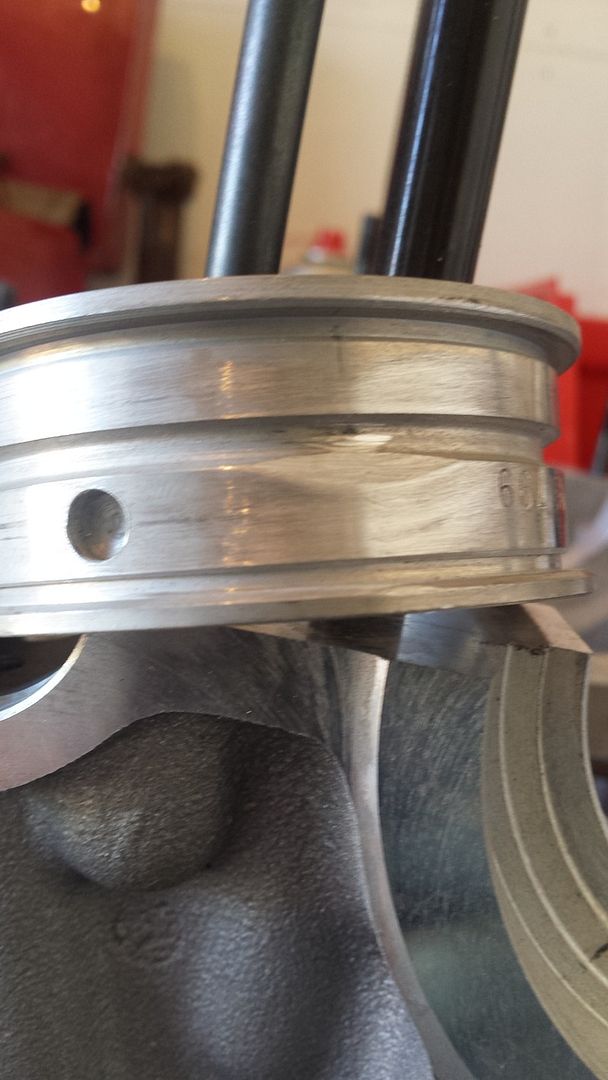
it was necessary on two bearings, the one by the flywheel and the one 2nd in from the front..
then I went through the case and de-burred everything.
I decided that next up was to build up the crankshaft timing gear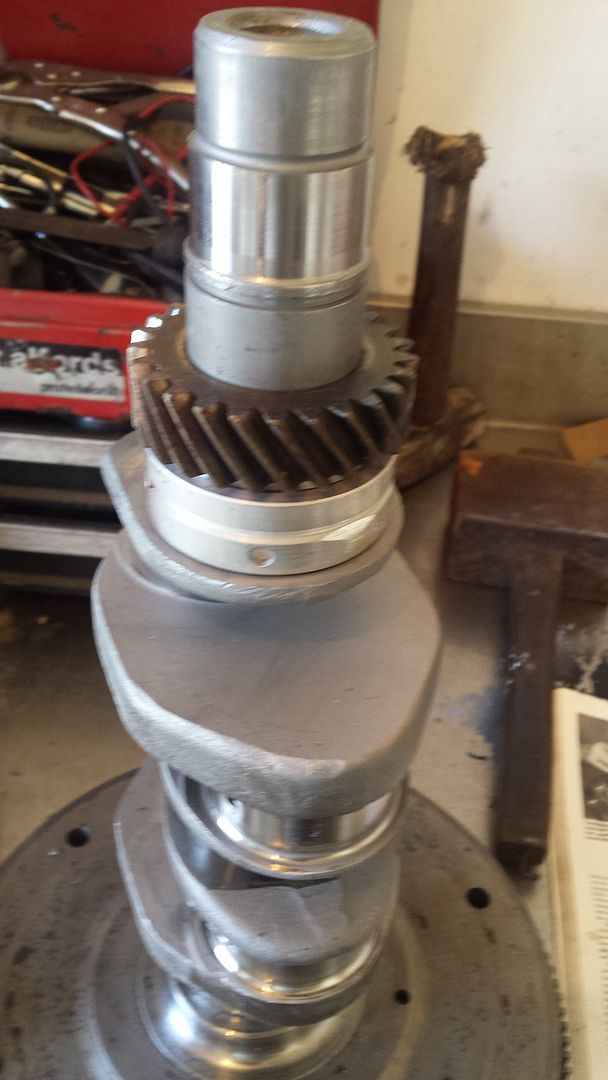
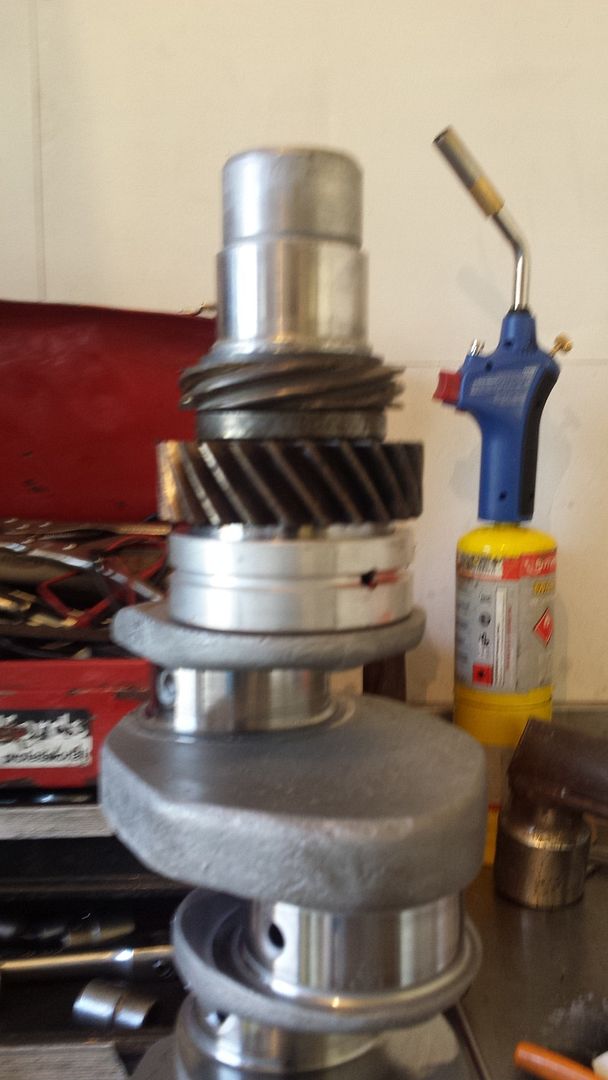
then I added the camshaft bearings ( double thrust) and offered the crankshaft and camshaft. all was well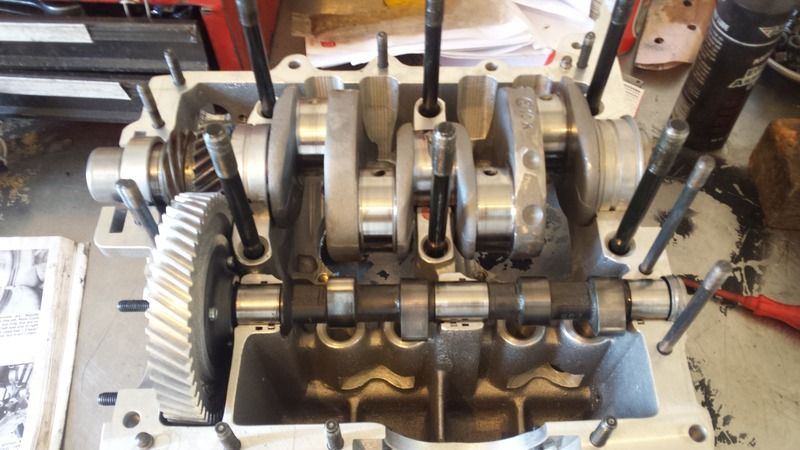
then I added the oil pump ( a 30 mm ) to check that the camshaft bolts cleared the oil pump - well it didn't so I ground these down and refitted them to the camshaft with thread lock to make sure that they don't come loose.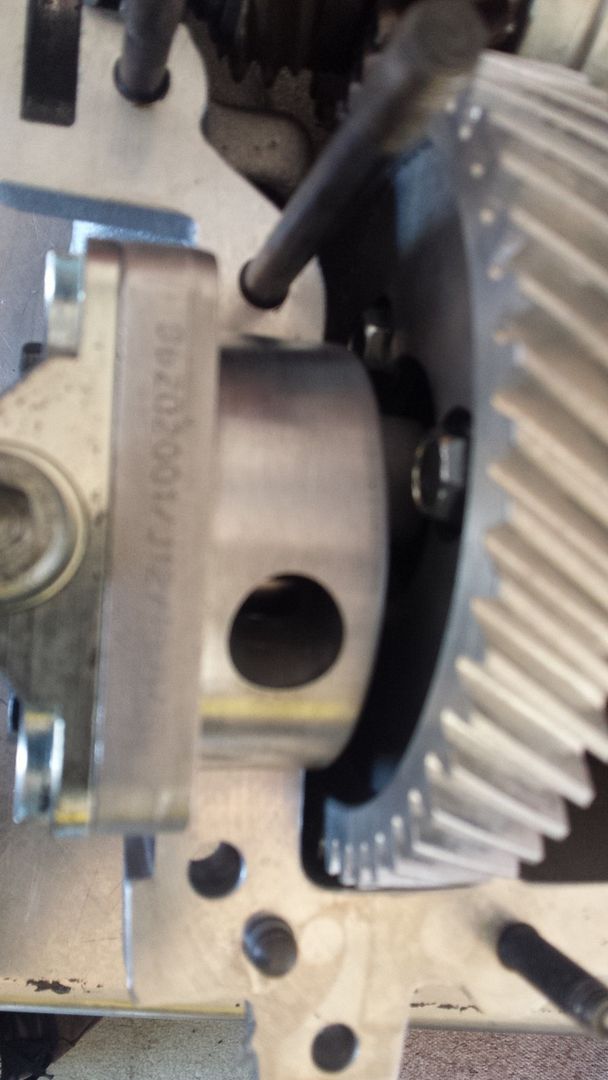
that's about where I got to today, ill have another go tomorrow
I started by stripping and cleaning everything, - I did it by using engine cleaner and a jet washer, - no access to an ultrasonic cleaner unfortunately so it will have to do.
I added the new correct bearings and checked out the alignment for the oil ways - it wasn't great , so I added a small area of chamfer to aid the oil getting to the bearings correctly . if you see the pencil marks that's where the oil passageway comes out so the chamfer was neede to allow the oil to get to the passageway

so this is what ive done - I hope its ok?

it was necessary on two bearings, the one by the flywheel and the one 2nd in from the front..
then I went through the case and de-burred everything.
I decided that next up was to build up the crankshaft timing gear


then I added the camshaft bearings ( double thrust) and offered the crankshaft and camshaft. all was well

then I added the oil pump ( a 30 mm ) to check that the camshaft bolts cleared the oil pump - well it didn't so I ground these down and refitted them to the camshaft with thread lock to make sure that they don't come loose.

that's about where I got to today, ill have another go tomorrow
caveman
SSVC Member
Posts: 1127
Joined: Sun Aug 15, 2004 3:33 pm
Re: my 1776cc build
by The Flying Scotvan » Sun Apr 26, 2015 9:03 pm
Following this with interest. I'm going to build pretty much the same engine next winter....
Good luck
Good luck
The Flying Scotvan

Registered user
Posts: 348
Joined: Thu Apr 17, 2003 9:04 pm
Re: my 1776cc build
by readyboy61 » Mon May 04, 2015 10:05 am
Just a heads up when it comes to fitting the front pulley tin its going to need some trimming and also the fan shroud needs a trim due to the raised roof on the case, other than that the only other thing that annoys me is how the top right engine mounting hole hasn't been spotted flat
readyboy61
SSVC Member
Posts: 2640
Joined: Sat Jan 26, 2008 8:36 pm
Re: my 1776cc build
by caveman » Tue Oct 20, 2015 6:10 am
I am going to restart this tomorrow, after being halted for a while due to my recent crash in my splitty caused by a stupid girl who didn't look at a junction. but I eventually feel like starting it all again as I will not be beaten ! lol
caveman
SSVC Member
Posts: 1127
Joined: Sun Aug 15, 2004 3:33 pm
Re: my 1776cc build
by caveman » Tue Oct 20, 2015 6:12 am
thanks readboy ill check that ll out I had heard that the tinwear needed some adjusting to make right, its a pity al of mine is powder coated already , I may look to buy and fit a new ( genuine set ) so that I can have it powdercoated ready for the new installation
caveman
SSVC Member
Posts: 1127
Joined: Sun Aug 15, 2004 3:33 pm
Re: my 1776cc build
by e m p i » Tue Oct 20, 2015 3:34 pm
Well done Matt, stay with it dude

Cheers, Lee.
Cheers, Lee.
e m p i
Registered user
Posts: 5152
Joined: Fri Jan 28, 2005 3:51 pm
Re: my 1776cc build
by caveman » Tue Oct 20, 2015 5:22 pm
cheers dude I need the encouragement but I will forge on thru it lol
caveman
SSVC Member
Posts: 1127
Joined: Sun Aug 15, 2004 3:33 pm
Re: my 1776cc build
by caveman » Thu Oct 22, 2015 12:33 pm
so last night I spent some time on it, only to take it all apart after torquing it and it seizing.
I found them issue then rear bearing pin sits quite deep into their case and this meant that when I checked them case and bearings before it it looked like they were seated correctly.
but this did allow us to see that there main bearing oil hole again didn't line up with them oil galley so that's tonight's job to modify there bearing to allow full oil flow. and re build their case after a good reason clean.
dispute all this I actually enjoyed building their engine and can't wait for fire up day as I know I will have built it with blood sweat and lots of tears/shouting lol
caveman
SSVC Member
Posts: 1127
Joined: Sun Aug 15, 2004 3:33 pm
Re: my 1776cc build
by caveman » Fri Oct 23, 2015 6:05 am
so last night I had a go and didn't get much don due to a head ache brought on by my recent car crash , I found that the rear bearing had some edge damage so I flatted it off on a glass block to ensure that it seats correctly. also the middle bearing oil hole didn't line up with the oil gallery so it was reshaped on the back to allow the free passage of oil to the oil pathway in the bearing.
I have cleaned some parts but after this point I had to call it a day due to the head ache
more next week when I finally build it to a longblock stage !
I have cleaned some parts but after this point I had to call it a day due to the head ache
more next week when I finally build it to a longblock stage !
caveman
SSVC Member
Posts: 1127
Joined: Sun Aug 15, 2004 3:33 pm
Re: my 1776cc build
by caveman » Fri Oct 23, 2015 6:07 am
I also made sure that the oil pump cover was flat using the engineers glass block and wet and dry paper in a figure of 8 pattern to ensure total flatness
caveman
SSVC Member
Posts: 1127
Joined: Sun Aug 15, 2004 3:33 pm
Re: my 1776cc build
by caveman » Thu Nov 12, 2015 7:10 pm
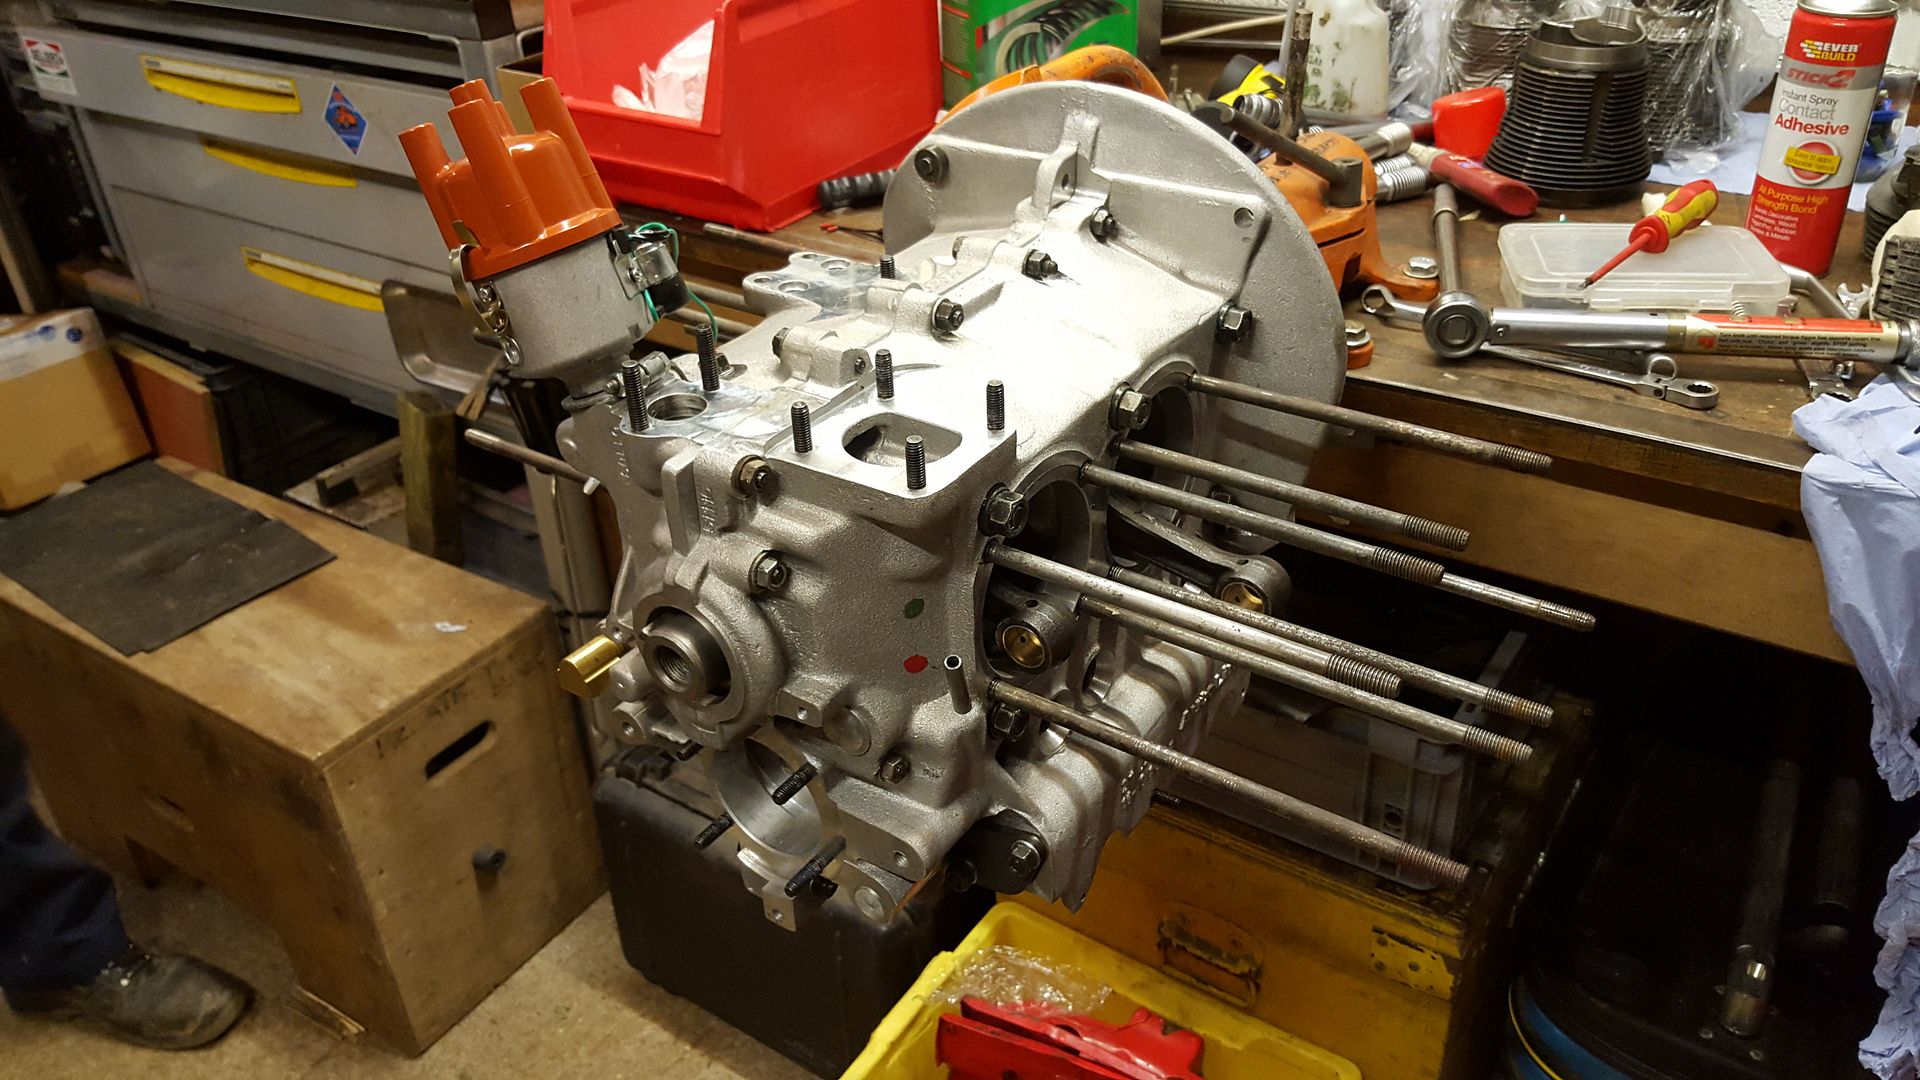
so I have spent some time on it again, I managed to get the small block built up with all the bearings coated in assembly lube torqued the case nuts and the studs inserted with Loctite to help prevent leaks,
i the came up against what i shall call "my luck" i bought a set of pushrods tube from a supplier ( I'm not too sure who) and didn't check them and when i came to use them i have a magpie in the nest lol - ade has a set he will give me that have been painted black to aid heat transfer . hey ho lol next time its longblock time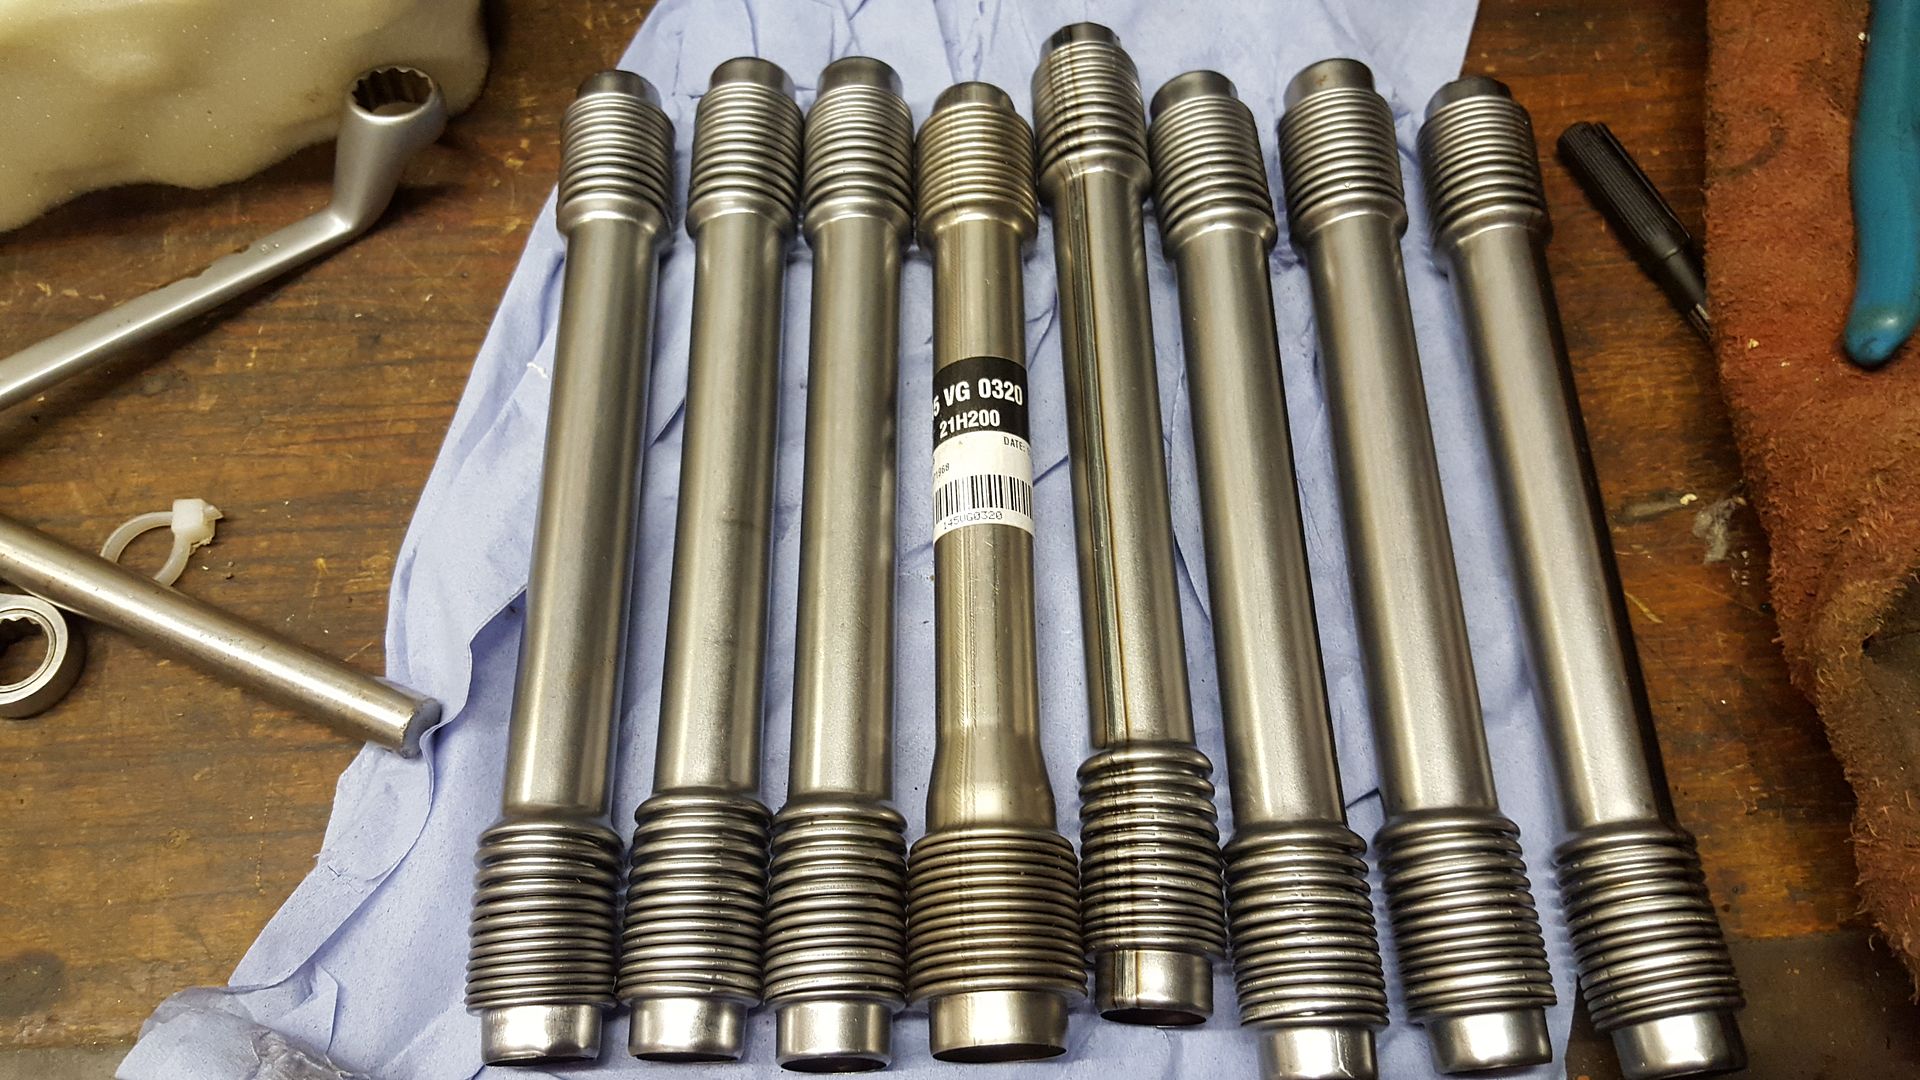
[IMG]
http://i28.photobucket.com/albums/c231/ ... 211342.jpg [/IMG]

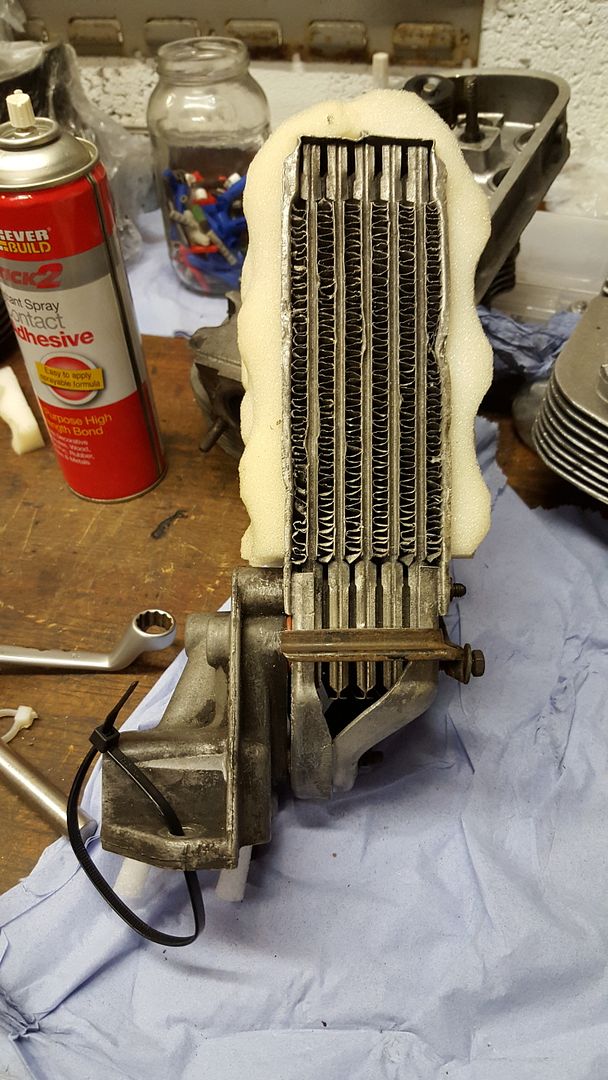
i also covered the oil cooler in a soft foam to ensure the correct damming of the air in the fanhousing and added the all important "hoover bit"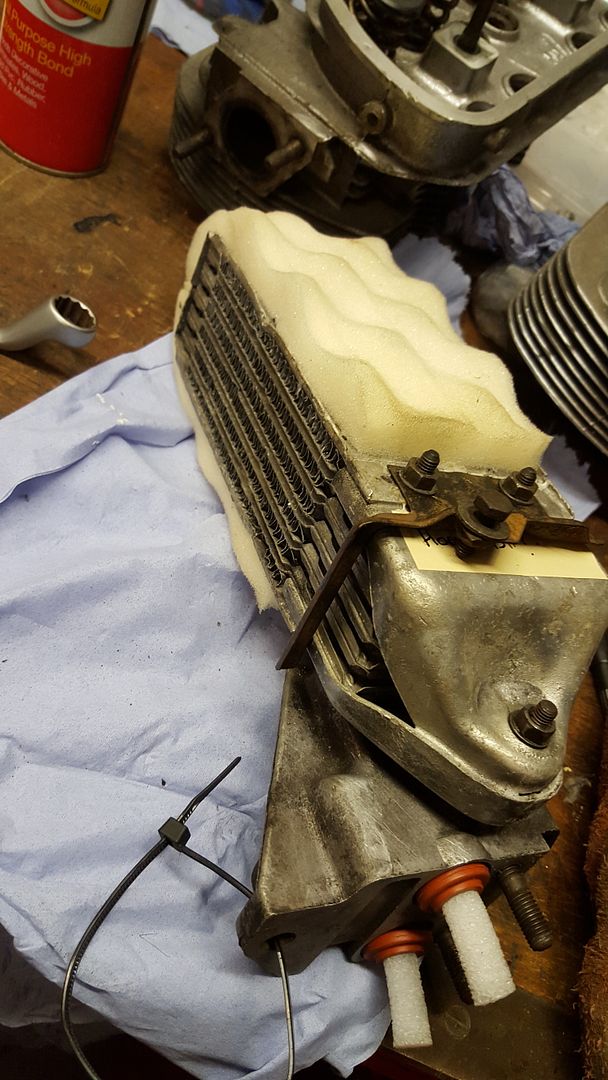

i the came up against what i shall call "my luck" i bought a set of pushrods tube from a supplier ( I'm not too sure who) and didn't check them and when i came to use them i have a magpie in the nest lol - ade has a set he will give me that have been painted black to aid heat transfer . hey ho lol next time its longblock time

[IMG]
http://i28.photobucket.com/albums/c231/ ... 211342.jpg [/IMG]

i also covered the oil cooler in a soft foam to ensure the correct damming of the air in the fanhousing and added the all important "hoover bit"


caveman
SSVC Member
Posts: 1127
Joined: Sun Aug 15, 2004 3:33 pm
Re: my 1776cc build
by caveman » Thu Nov 12, 2015 7:11 pm
oh for the beady eyed - that's a genuine Vw workshop engine building stand! i think this one is from the 70's as he doesn't like to use the other older one
caveman
SSVC Member
Posts: 1127
Joined: Sun Aug 15, 2004 3:33 pm
Re: my 1776cc build
by rusty1962 » Thu Nov 12, 2015 11:21 pm
This is all good stuff.
I know nothing really about how these engines fit together and work so it's good that you've taken good close ups and are explaining everything.
Keep on going
Steve
I know nothing really about how these engines fit together and work so it's good that you've taken good close ups and are explaining everything.
Keep on going
Steve
rusty1962

SSVC Member
Posts: 2593
Joined: Wed Sep 11, 2013 10:35 pm
Re: my 1776cc build
by caveman » Fri Nov 13, 2015 8:51 pm
no worries I'm no oracle but I'm trying after two engine builders couldn't lol
caveman
SSVC Member
Posts: 1127
Joined: Sun Aug 15, 2004 3:33 pm
Re: my 1776cc build
by Bren Ralls » Sat Nov 14, 2015 7:49 am
Well done matt there is nothing more satisfying than doing it your self, turning the key and it making the right noises. It becomes a rapid learning curve when it comes to deck heights, cc's and compression ratios as that was a mine field.
On mine I used my original heads & barrels which were good but after developing a crack between the valves 10k miles down the line now find out the deck height was is to big although compression ratio calculated right . who ever originally made that part achieved value by taking loads out of head. I know now but on a first time build getting that info just didn't know and now requires pulling barrels of to get them machined or buying new barrels to get everything back to a STD size if there is such a thing..
On mine I used my original heads & barrels which were good but after developing a crack between the valves 10k miles down the line now find out the deck height was is to big although compression ratio calculated right . who ever originally made that part achieved value by taking loads out of head. I know now but on a first time build getting that info just didn't know and now requires pulling barrels of to get them machined or buying new barrels to get everything back to a STD size if there is such a thing..
Bren Ralls

SSVC Member
Posts: 1143
Joined: Mon Sep 12, 2011 6:16 am
