You are viewing the Split Screen Van Club forum archive.
The forum archive is read-only.Unfortunately in 2021 the Split Screen Van Club forum suffered a ransomware attack and lots of the forum data was lost.
What threads that have been recovered are now searchable on this site. Some threads may be incomplete and some images are still being recovered.
Forum archive search
Forum Archive > Rides and Projects
Swedish 66 Crew Cab
Re: Swedish 66 Crew Cab
by mabbo » Tue Apr 30, 2019 9:23 pm
Thanks
 Another small update...
Got the jacking points seamed up:


And spot welded to the sill, as factory:

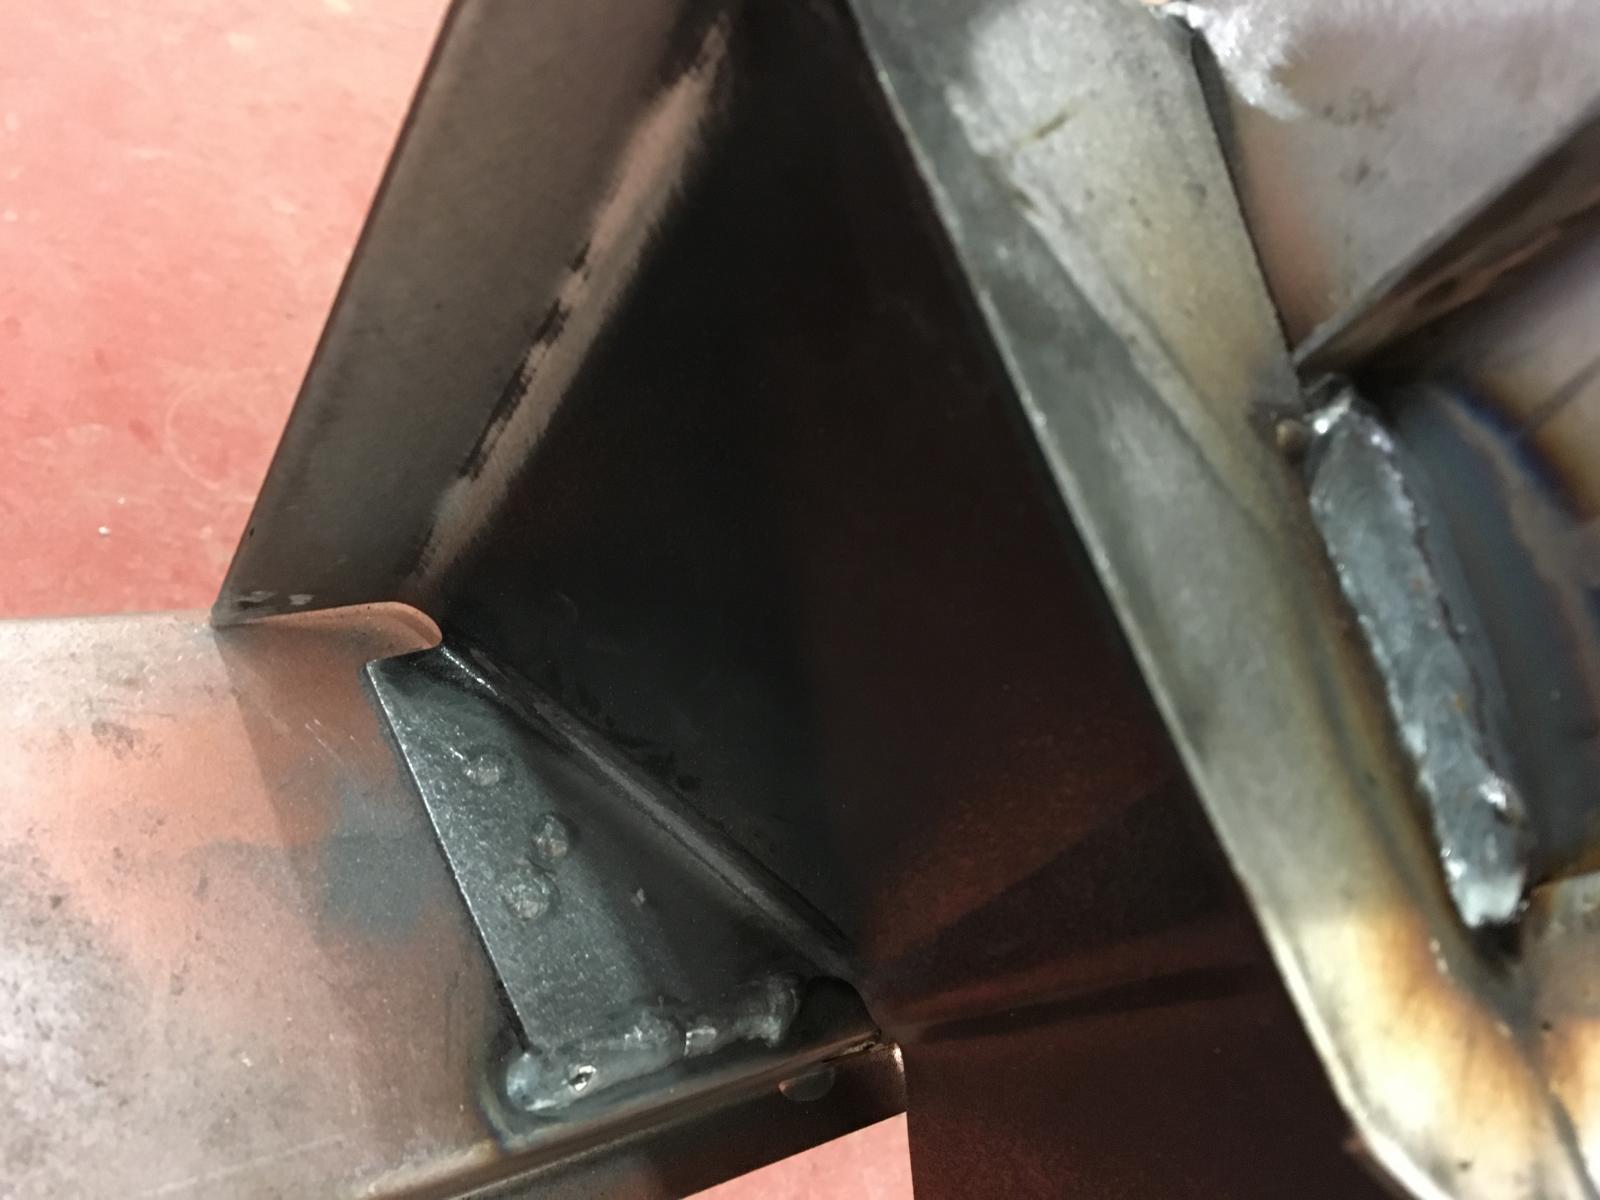
Marked up the factory tack welds on the underside of the front floor under the bench seat, and replicated:
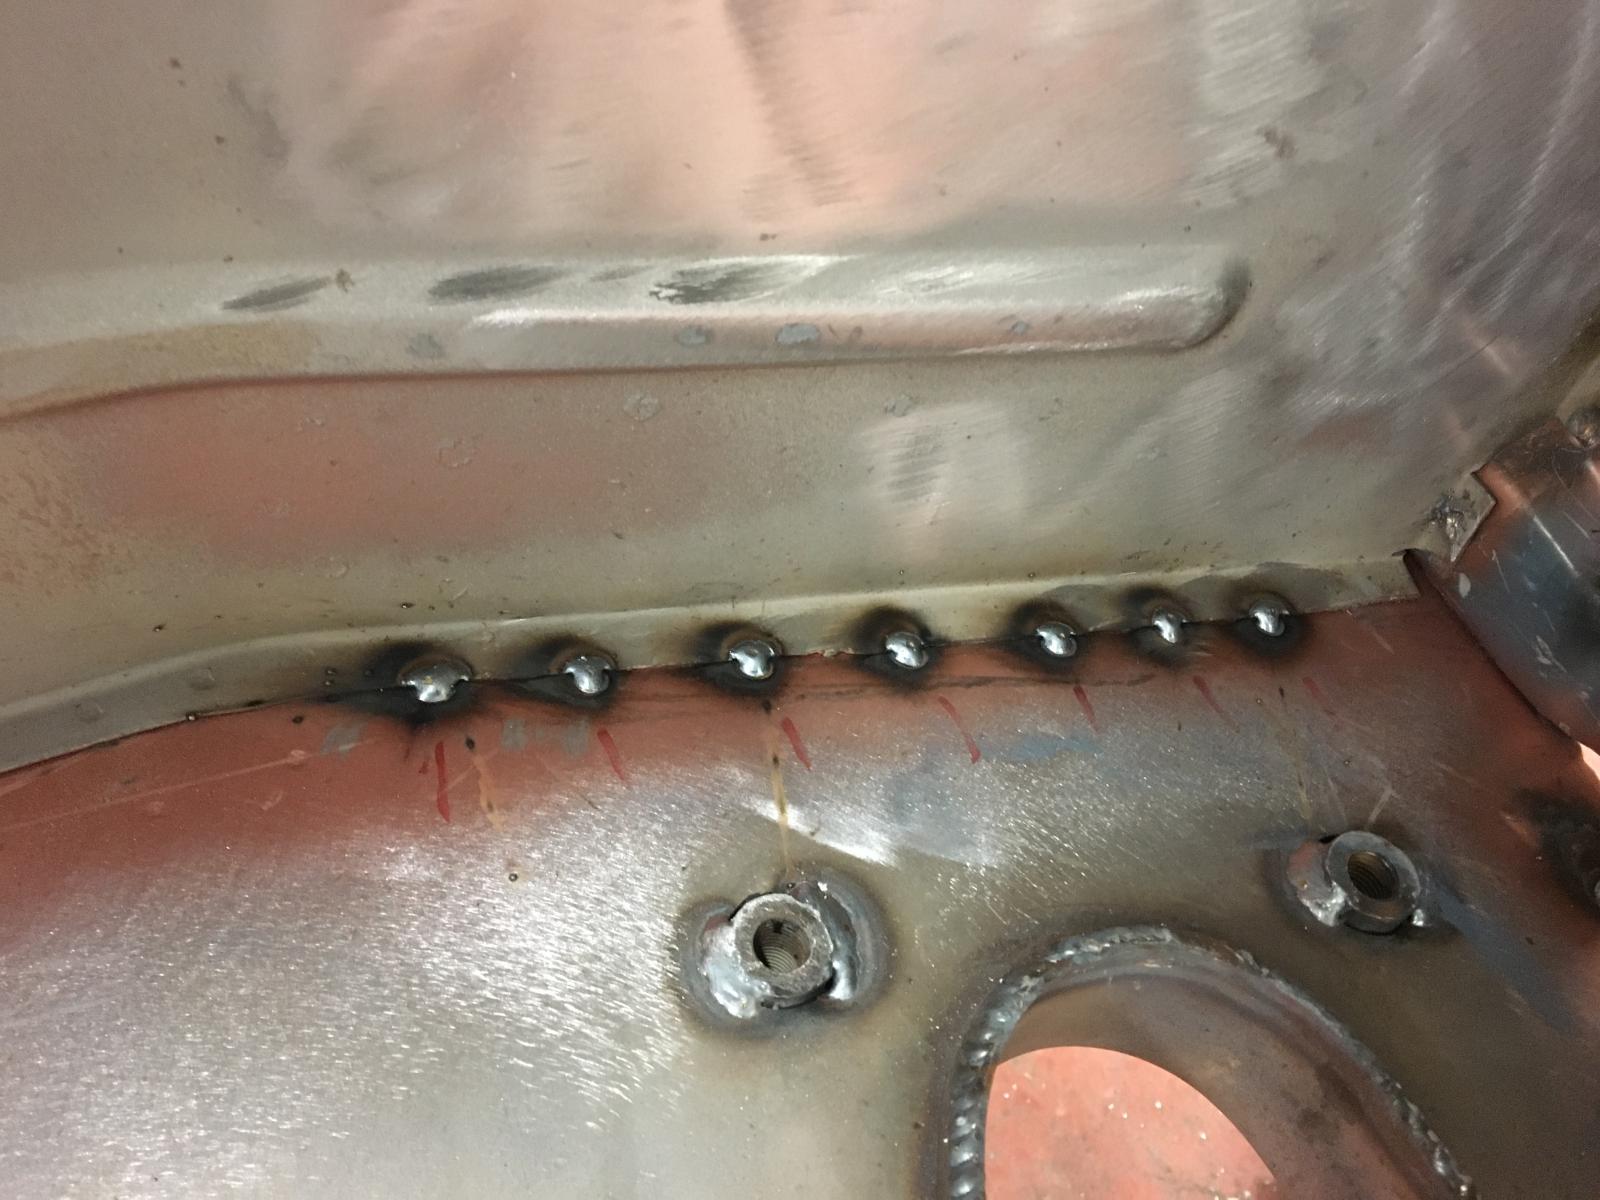
Heater tubes in and welding around the front finished:

Clutch pedal guide cleaned up and welded as factory:
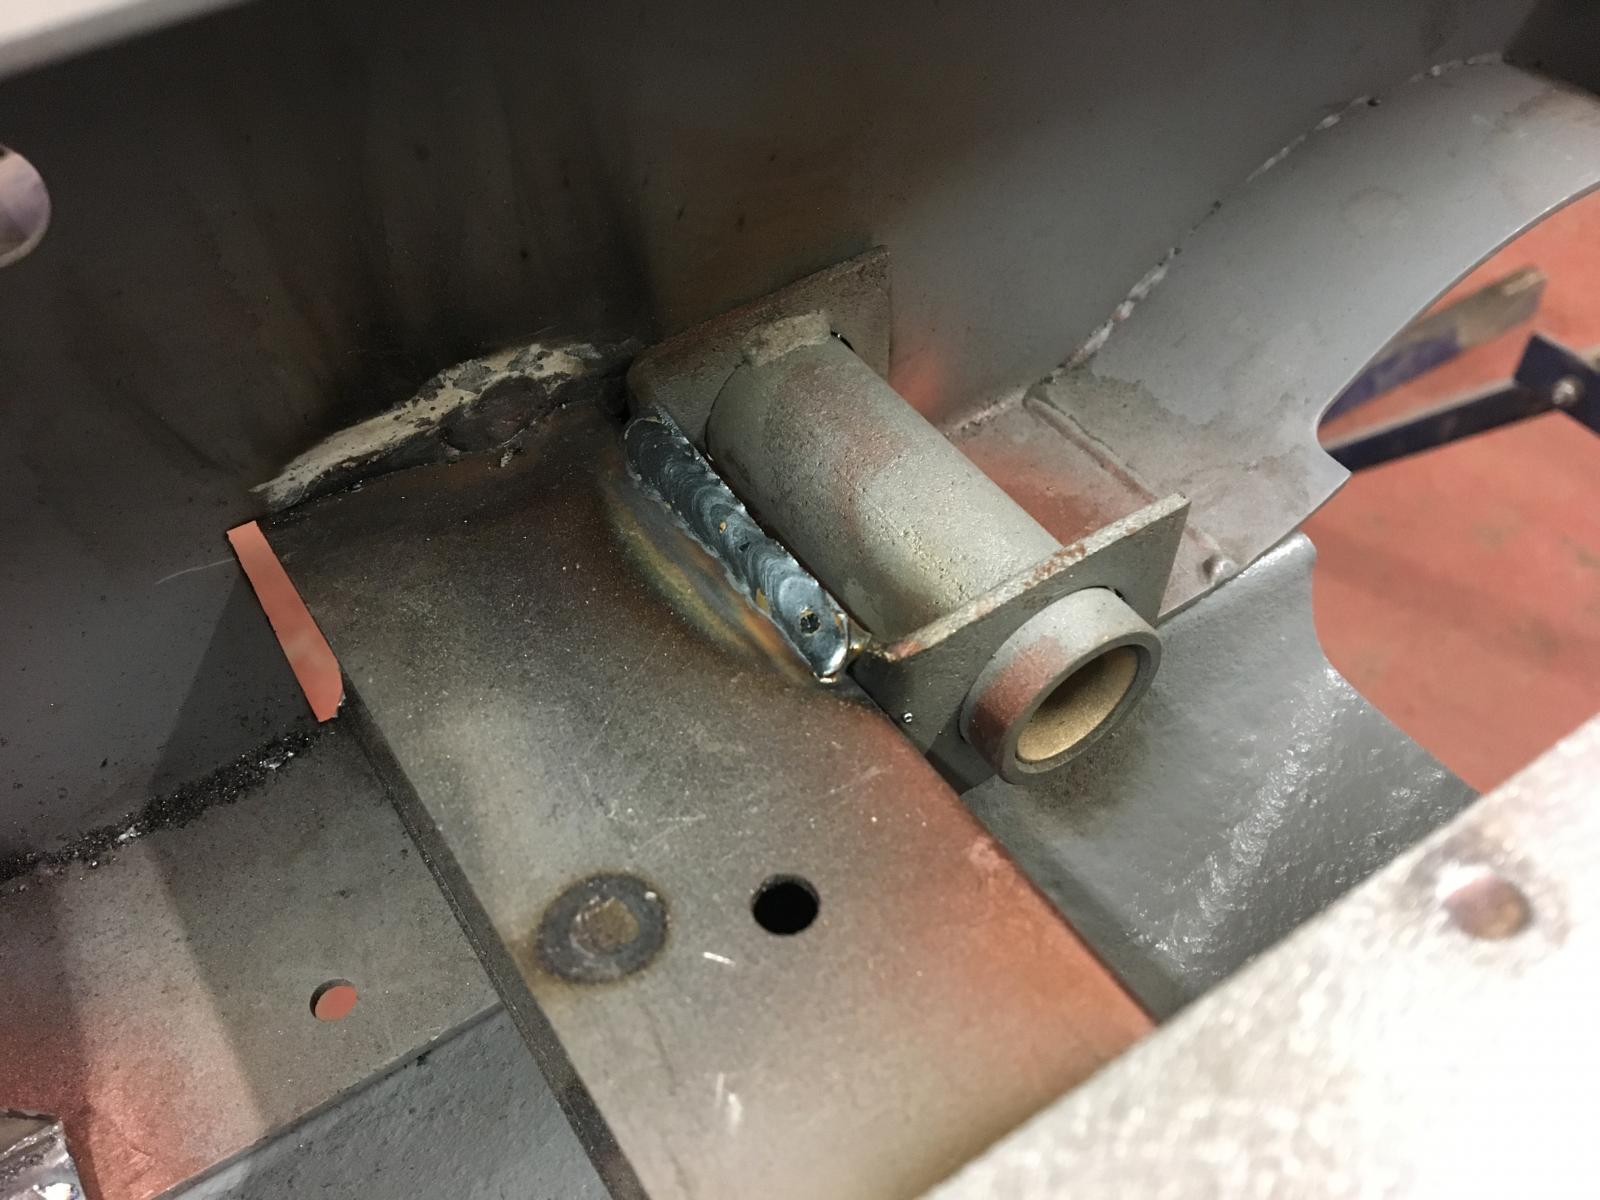
New chassis rails didn't have any wiring tabs, so they were made and spot welded:
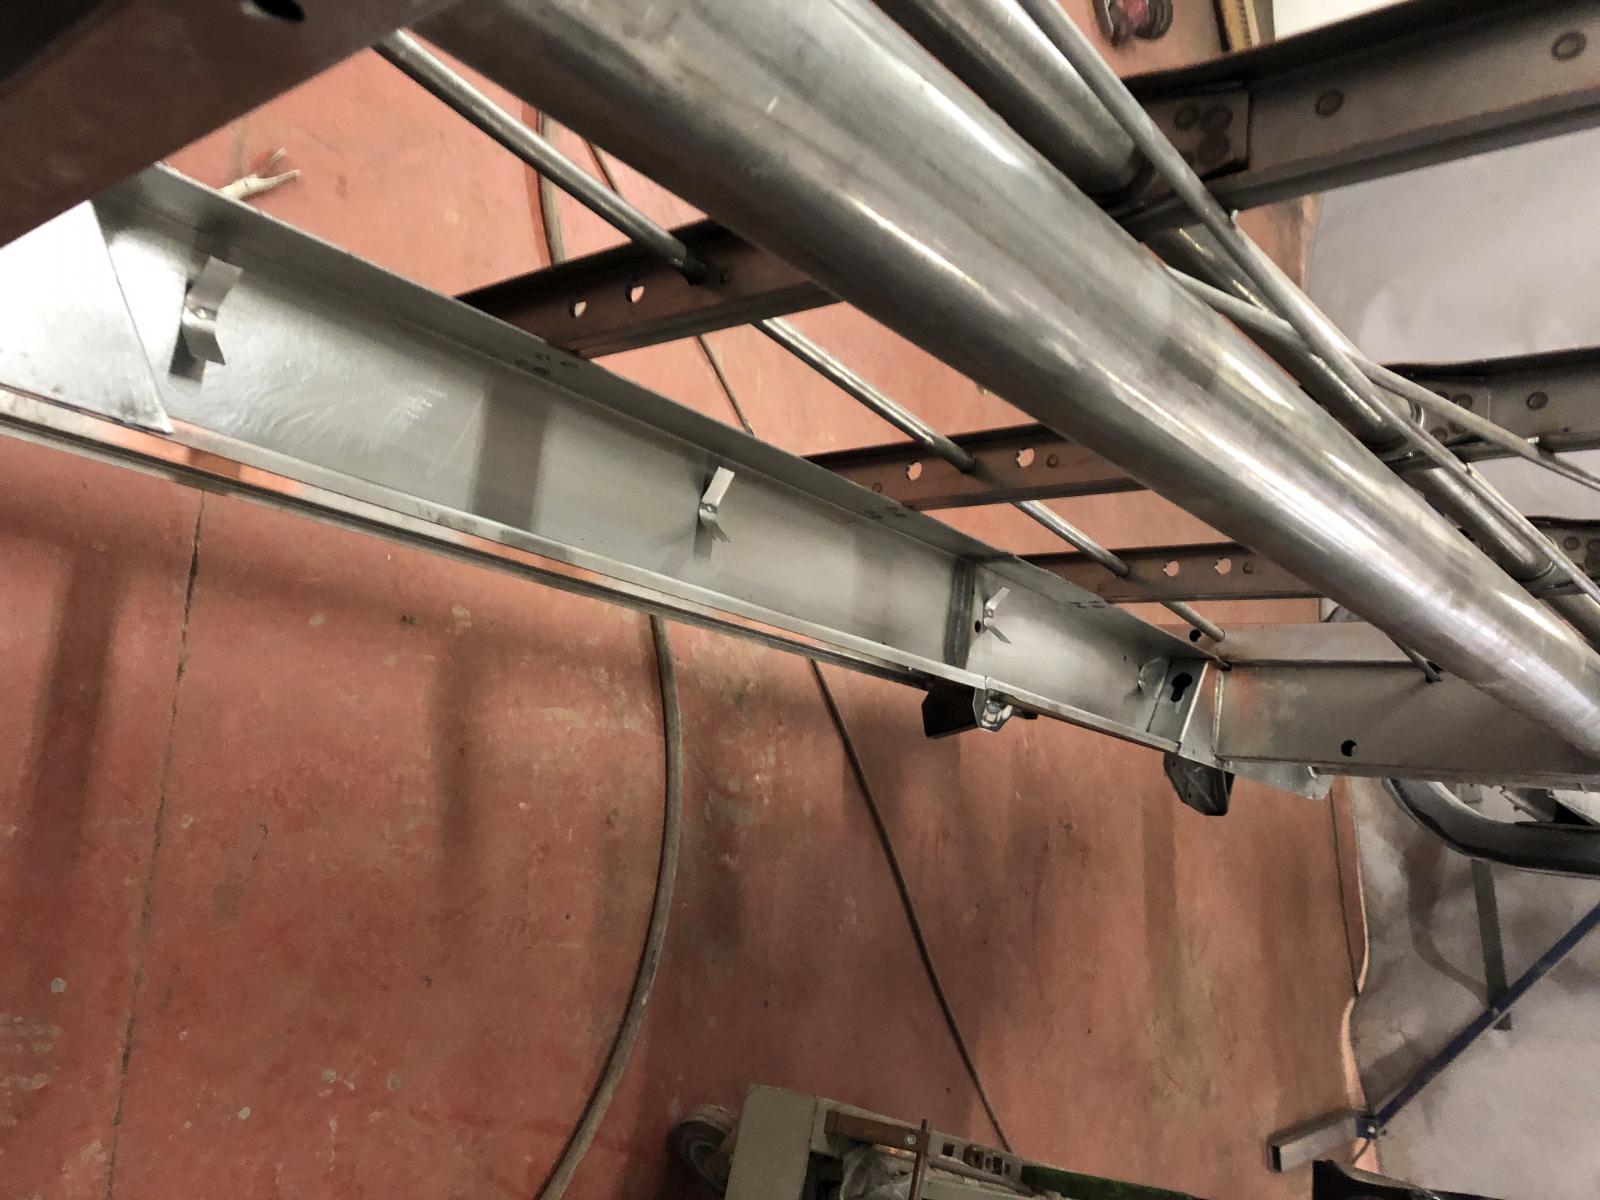
Clutch tube bracket made and welded:

Spent what seemed like forever tidying all the welds up, and prepping the chassis ready for epoxy primer:

Got the jacking points seamed up:


And spot welded to the sill, as factory:


Marked up the factory tack welds on the underside of the front floor under the bench seat, and replicated:

Heater tubes in and welding around the front finished:

Clutch pedal guide cleaned up and welded as factory:

New chassis rails didn't have any wiring tabs, so they were made and spot welded:

Clutch tube bracket made and welded:

Spent what seemed like forever tidying all the welds up, and prepping the chassis ready for epoxy primer:

mabbo
SSVC Member
Posts: 80
Joined: Wed Jun 01, 2011 7:09 pm
Re: Swedish 66 Crew Cab
by mabbo » Fri Aug 09, 2019 9:19 pm
Got a bit more done...
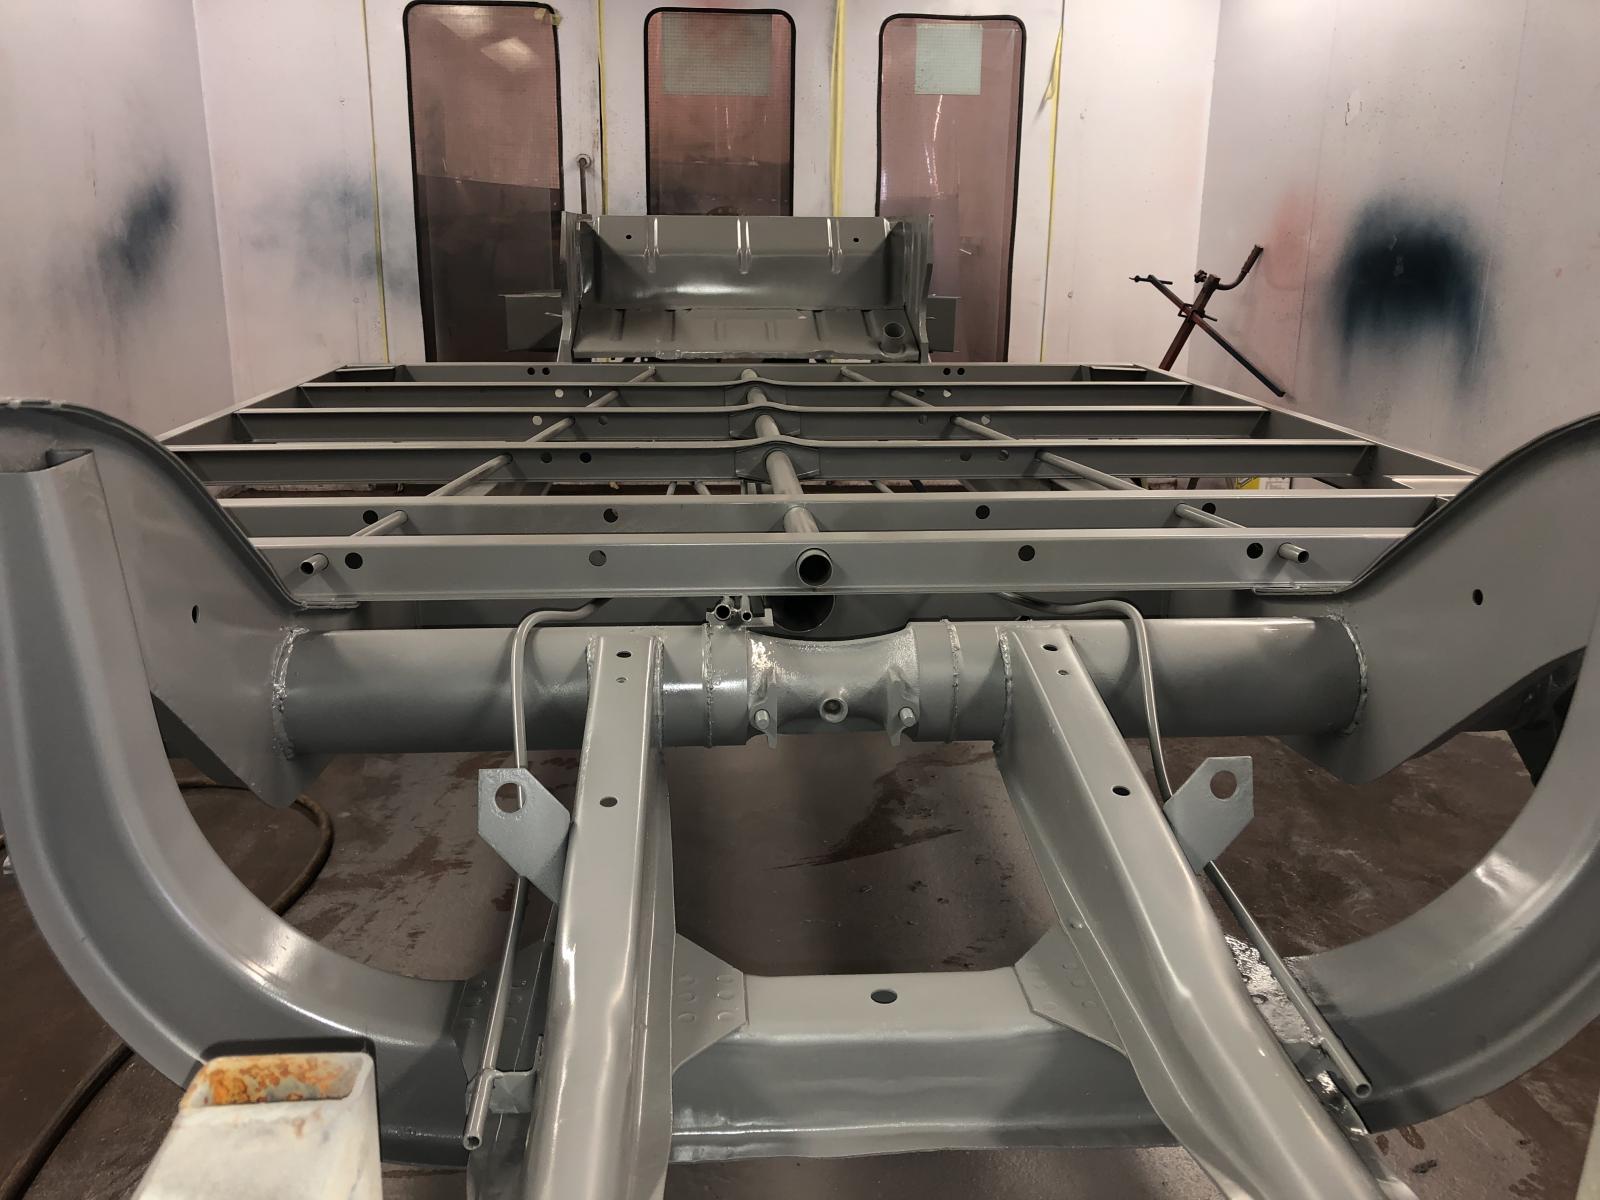
The chassis has been epoxied:
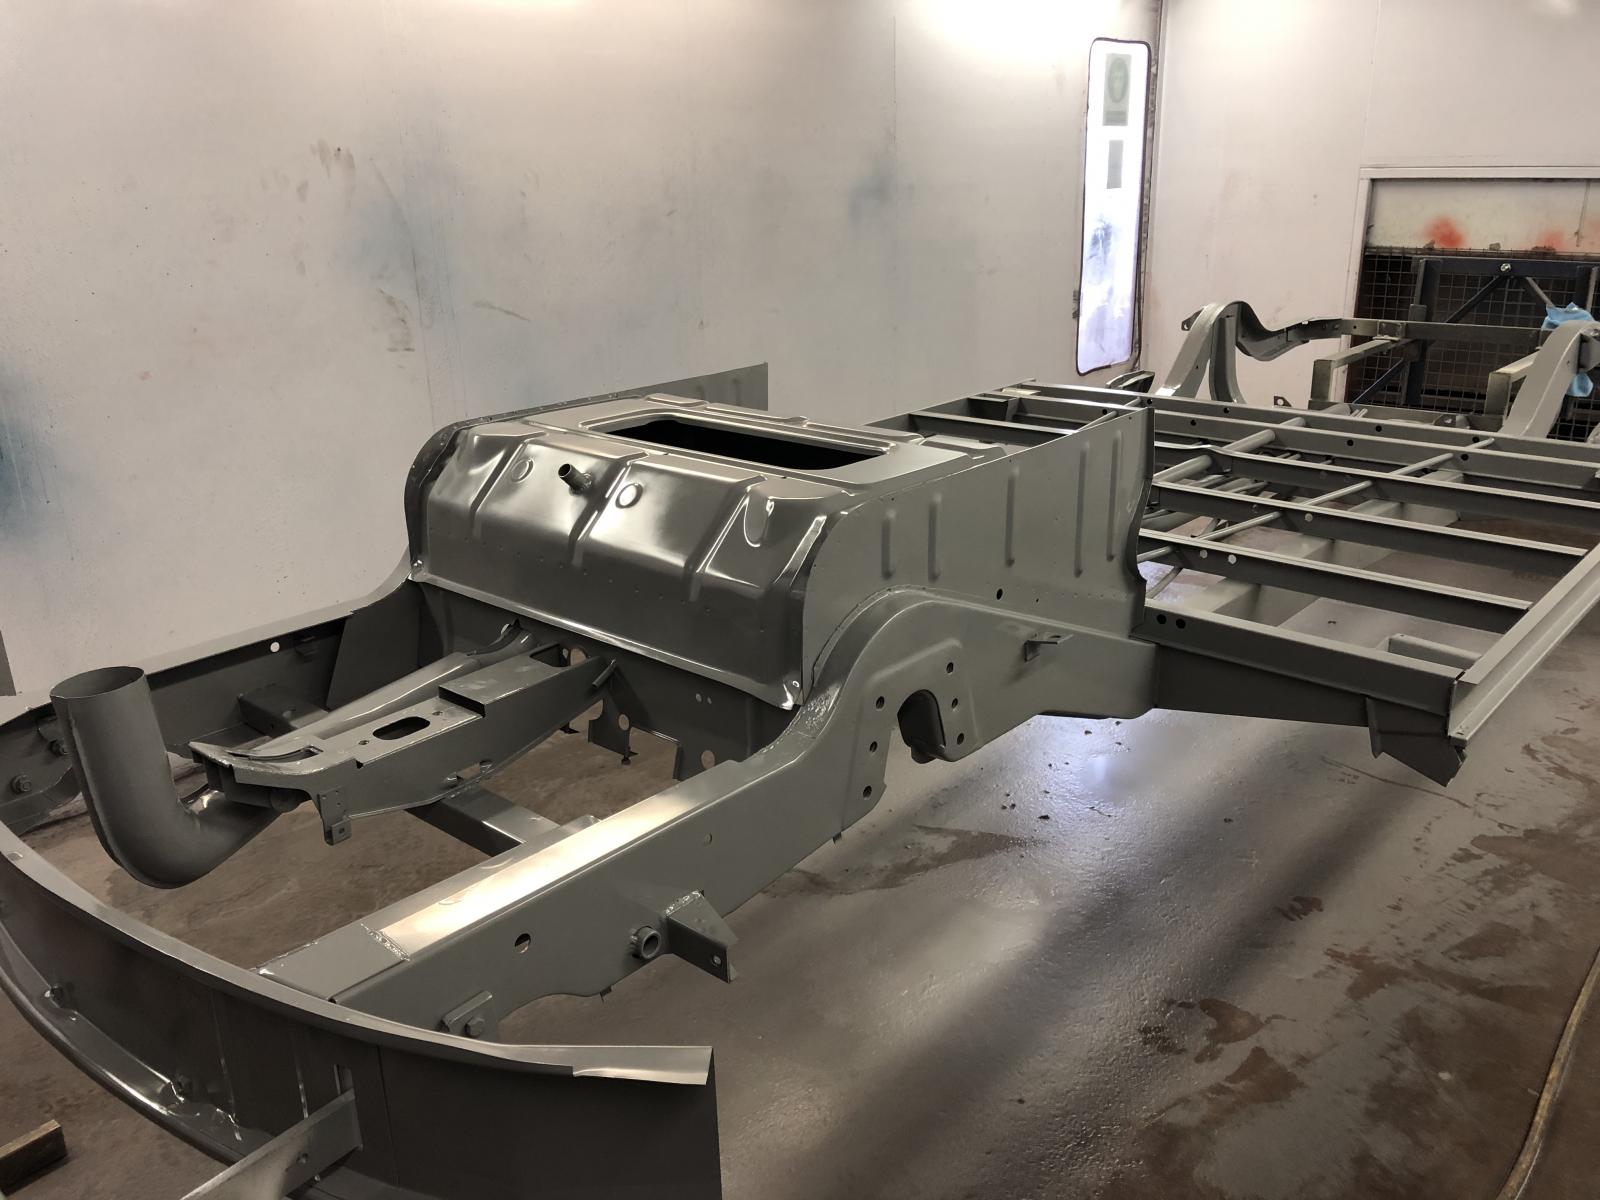
Spent today cutting the body from the chassis and seperating the front and back half. It dont look as bad in the pictures as it is... Its a pear.


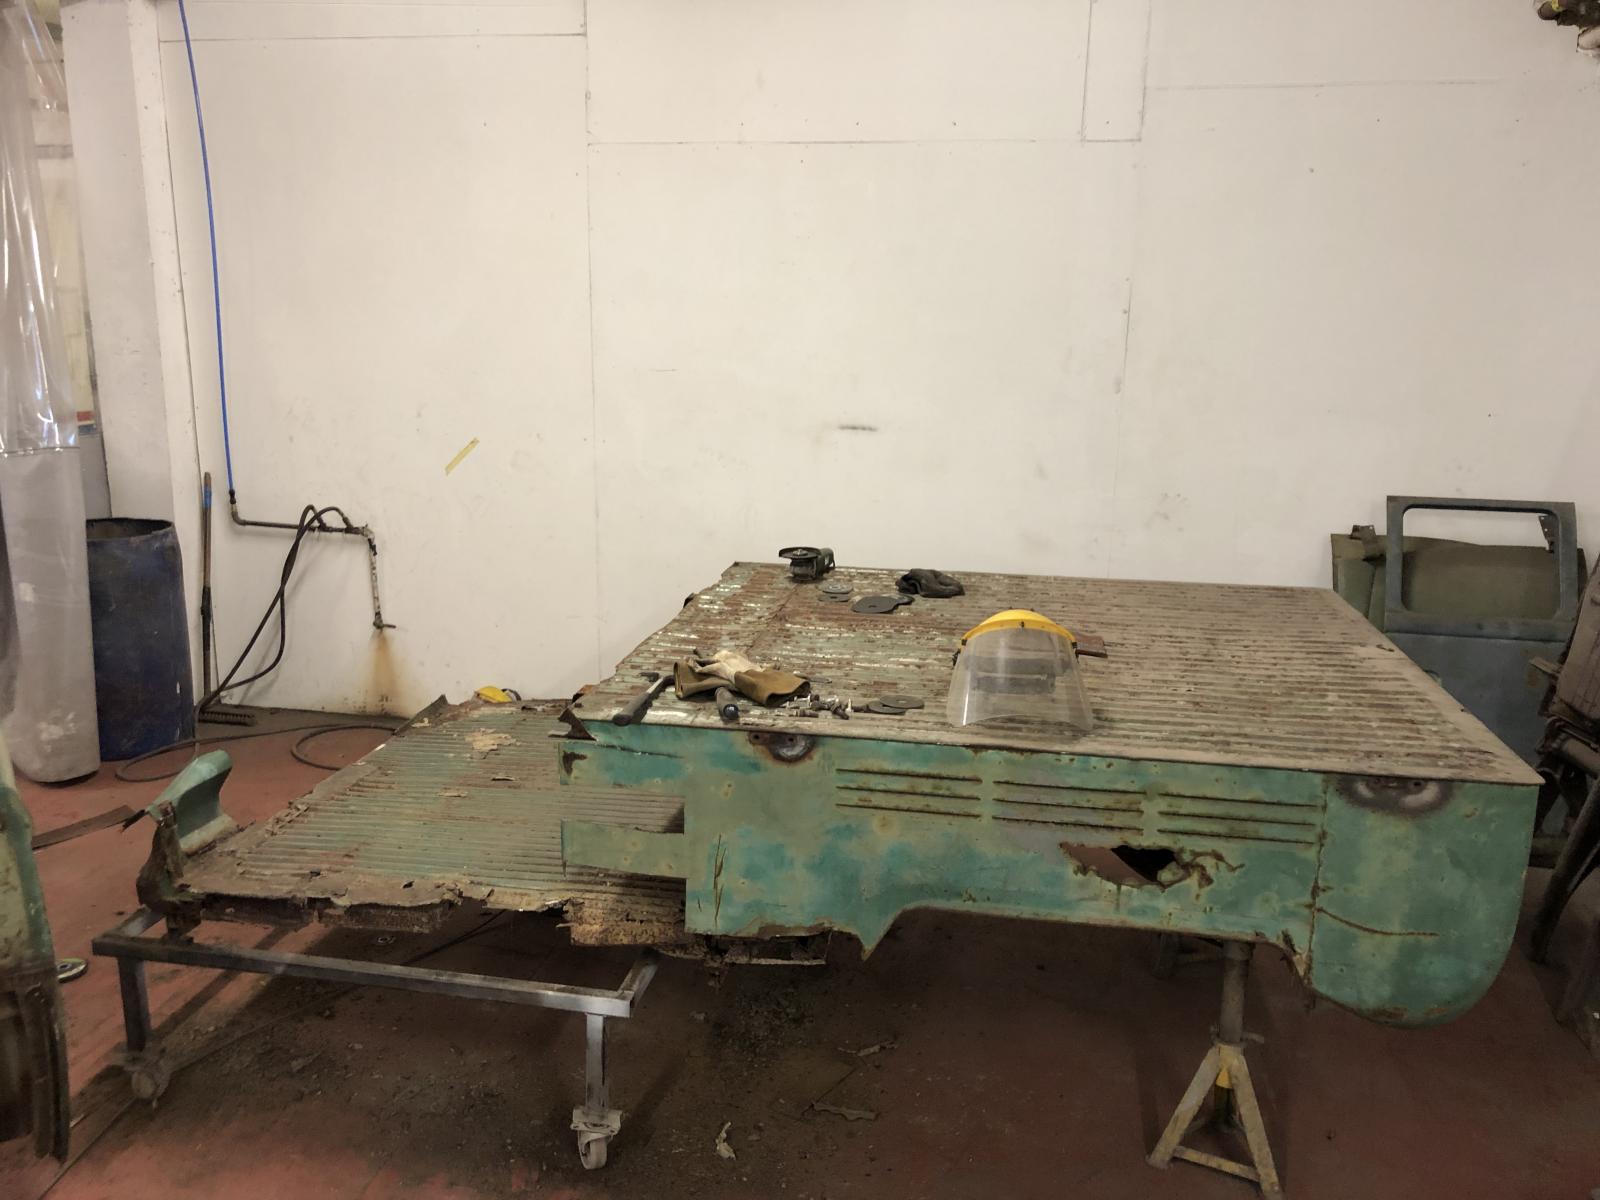

Planning on getting the front half repaired first... the back half dont look too bad
The chassis has been epoxied:


Spent today cutting the body from the chassis and seperating the front and back half. It dont look as bad in the pictures as it is... Its a pear.


Planning on getting the front half repaired first... the back half dont look too bad
mabbo
SSVC Member
Posts: 80
Joined: Wed Jun 01, 2011 7:09 pm
Re: Swedish 66 Crew Cab
by mabbo » Tue Aug 13, 2019 7:47 pm
We wanted to get the body sitting over the restored chassis so we could make a start to the repairs on the body. We removed the remains of the original inner valance so the body would sit at the correct height on the new inner valance on the restored chassis. Also removed the remains of the front bulkhead that had previously been hacked out, and the patched up lower B posts so we could see how the new bulkhead from BBT fit.


Body sits nice on the chassis and everything seems to line up as expected, but the new bulkhead isnt as good as we had hoped. Id never fitted one before and every other panel from BBT has been good, but the shape at the top of the panel where it meets the B post isnt right and will need some work. I know the bulkhead is the wrong one but my customer isnt bothered. I would be if it was my bus, but its not, so this one is going to be fitted - overall its not bad at all.
Anyway, we had a good look at the rear section of the van, and luckily the area where the fuel tank sits and the surrounding metal that we need to re use dont look too bad. The inner framework under the bed looks pretty good too. Will know more when its stripped down... but its pretty grim under there:

mabbo
SSVC Member
Posts: 80
Joined: Wed Jun 01, 2011 7:09 pm
Re: Swedish 66 Crew Cab
by mabbo » Thu Aug 15, 2019 9:22 pm
So, we had the rear half of the bus ready to strip down to go to be blasted:

We stripped everything that wasnt reusable and were left with this:

I decided to have a look at the heater pipes under the dash which had been hacked. My customer supplied a replacement but it didnt have the captive nut mounting for the wiper motor:
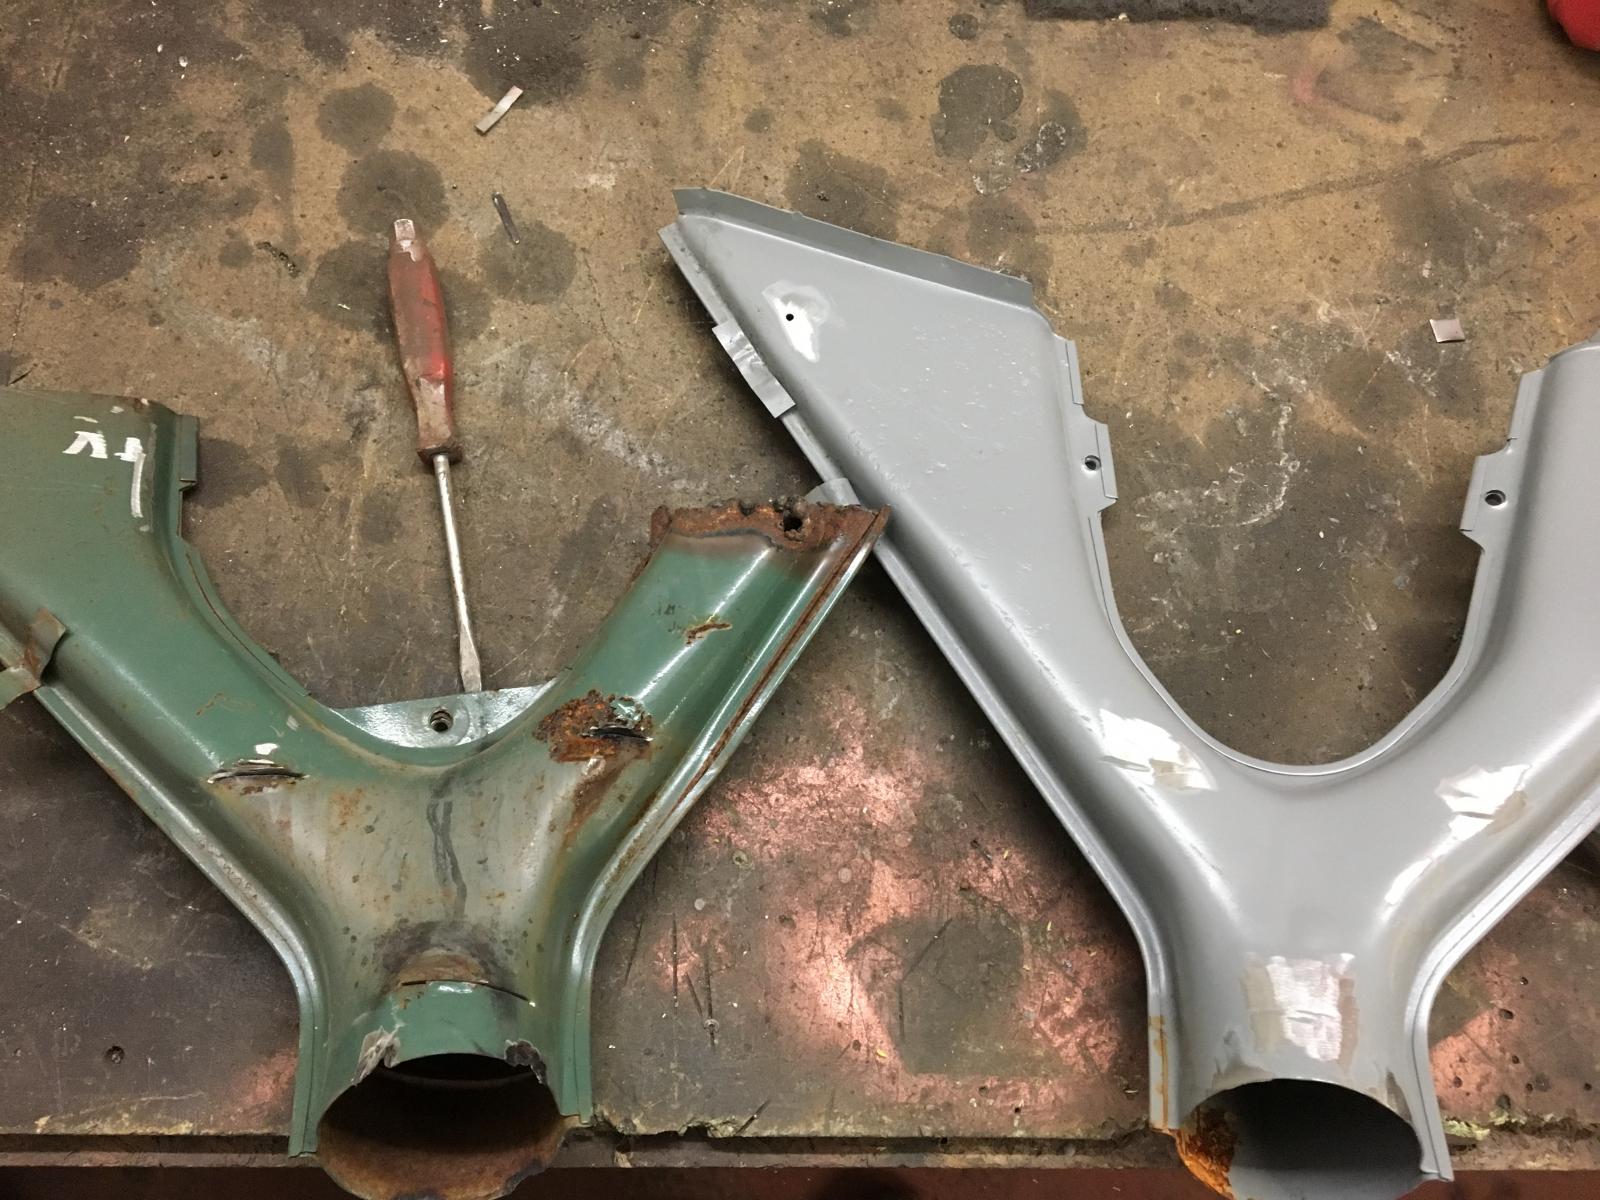
Modified close enough to factory for this piece:

The dashboard had been hacked too:
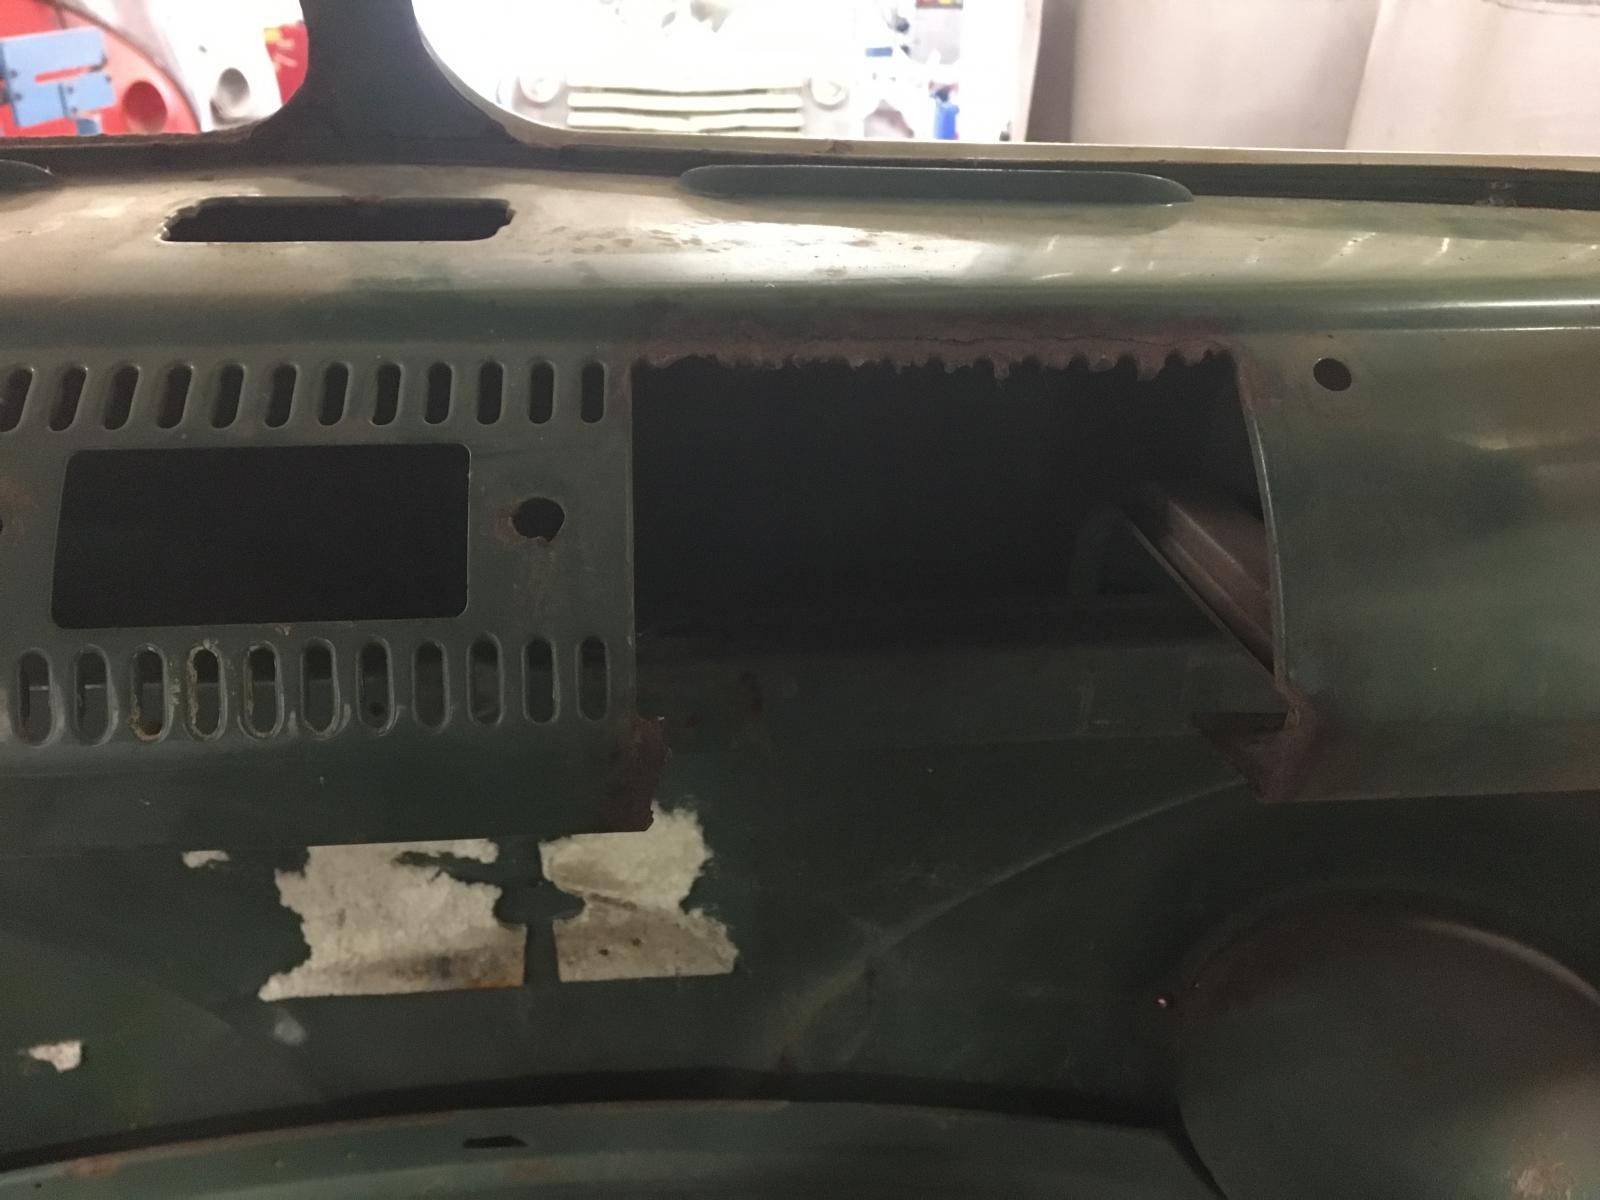
Supplied donor section was slightly too short so extended it before welding in place:


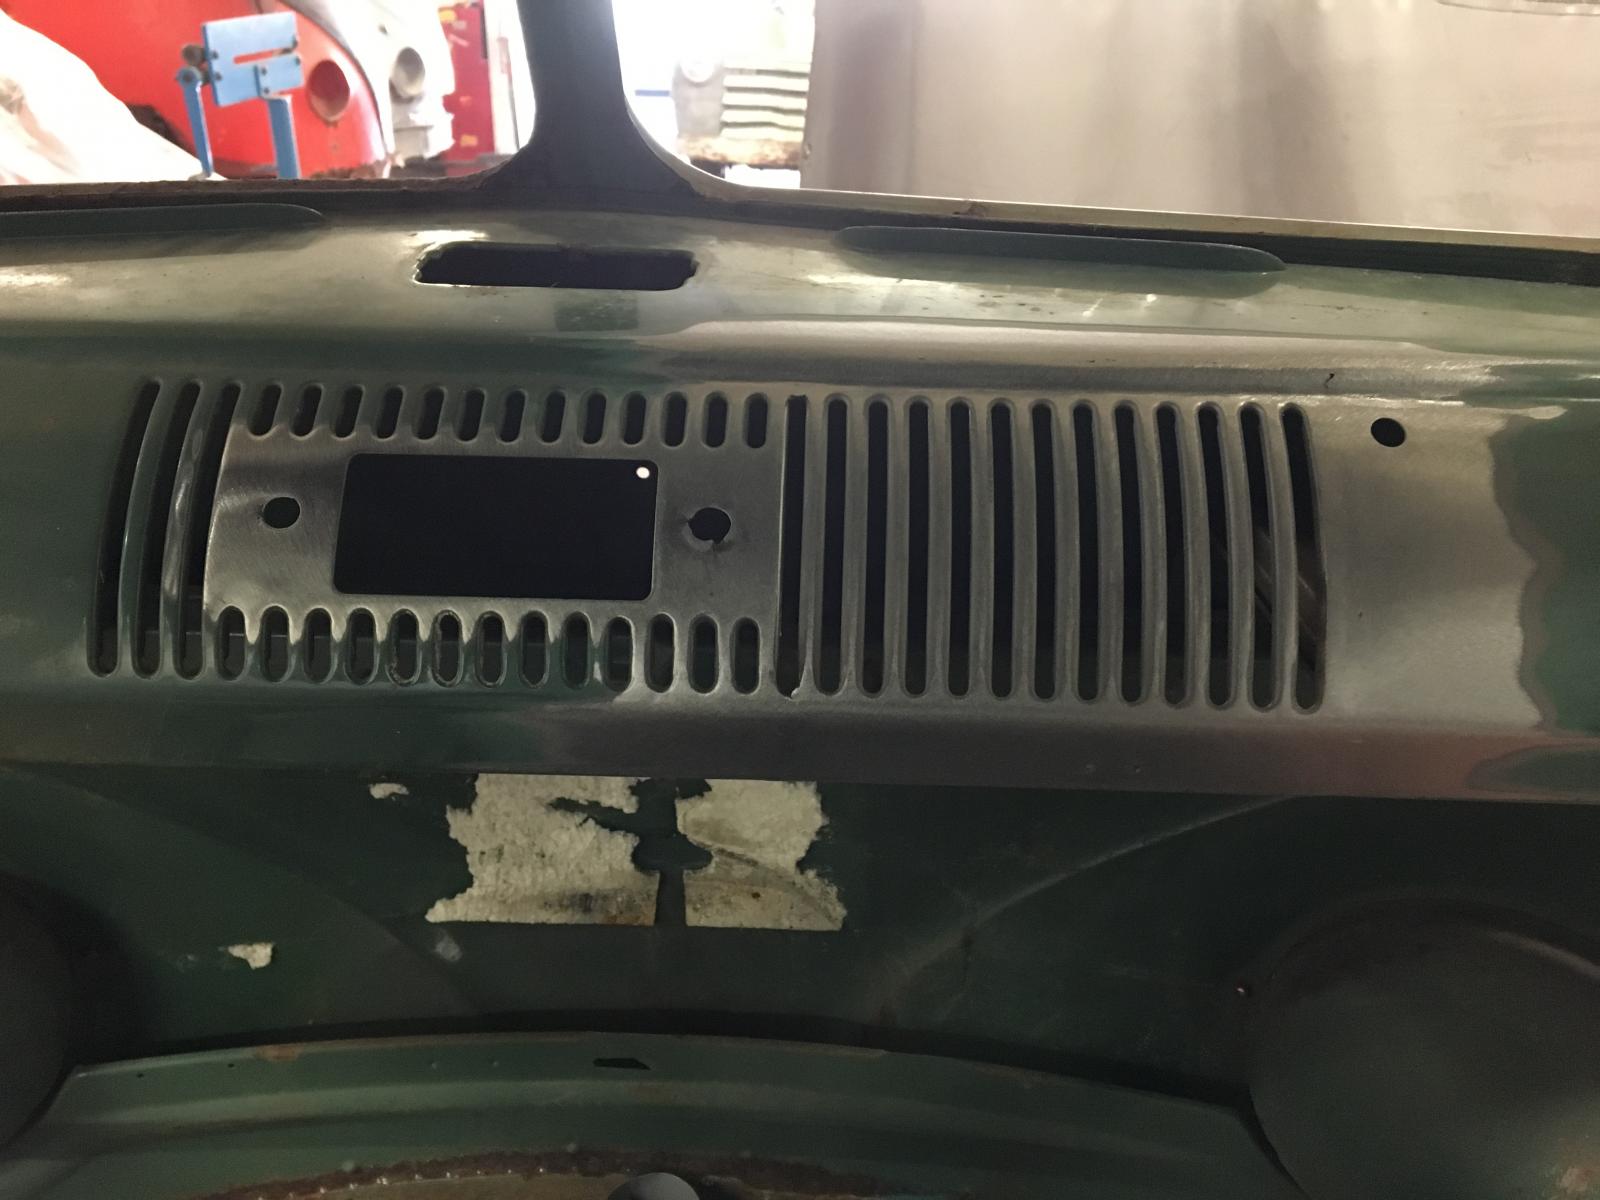
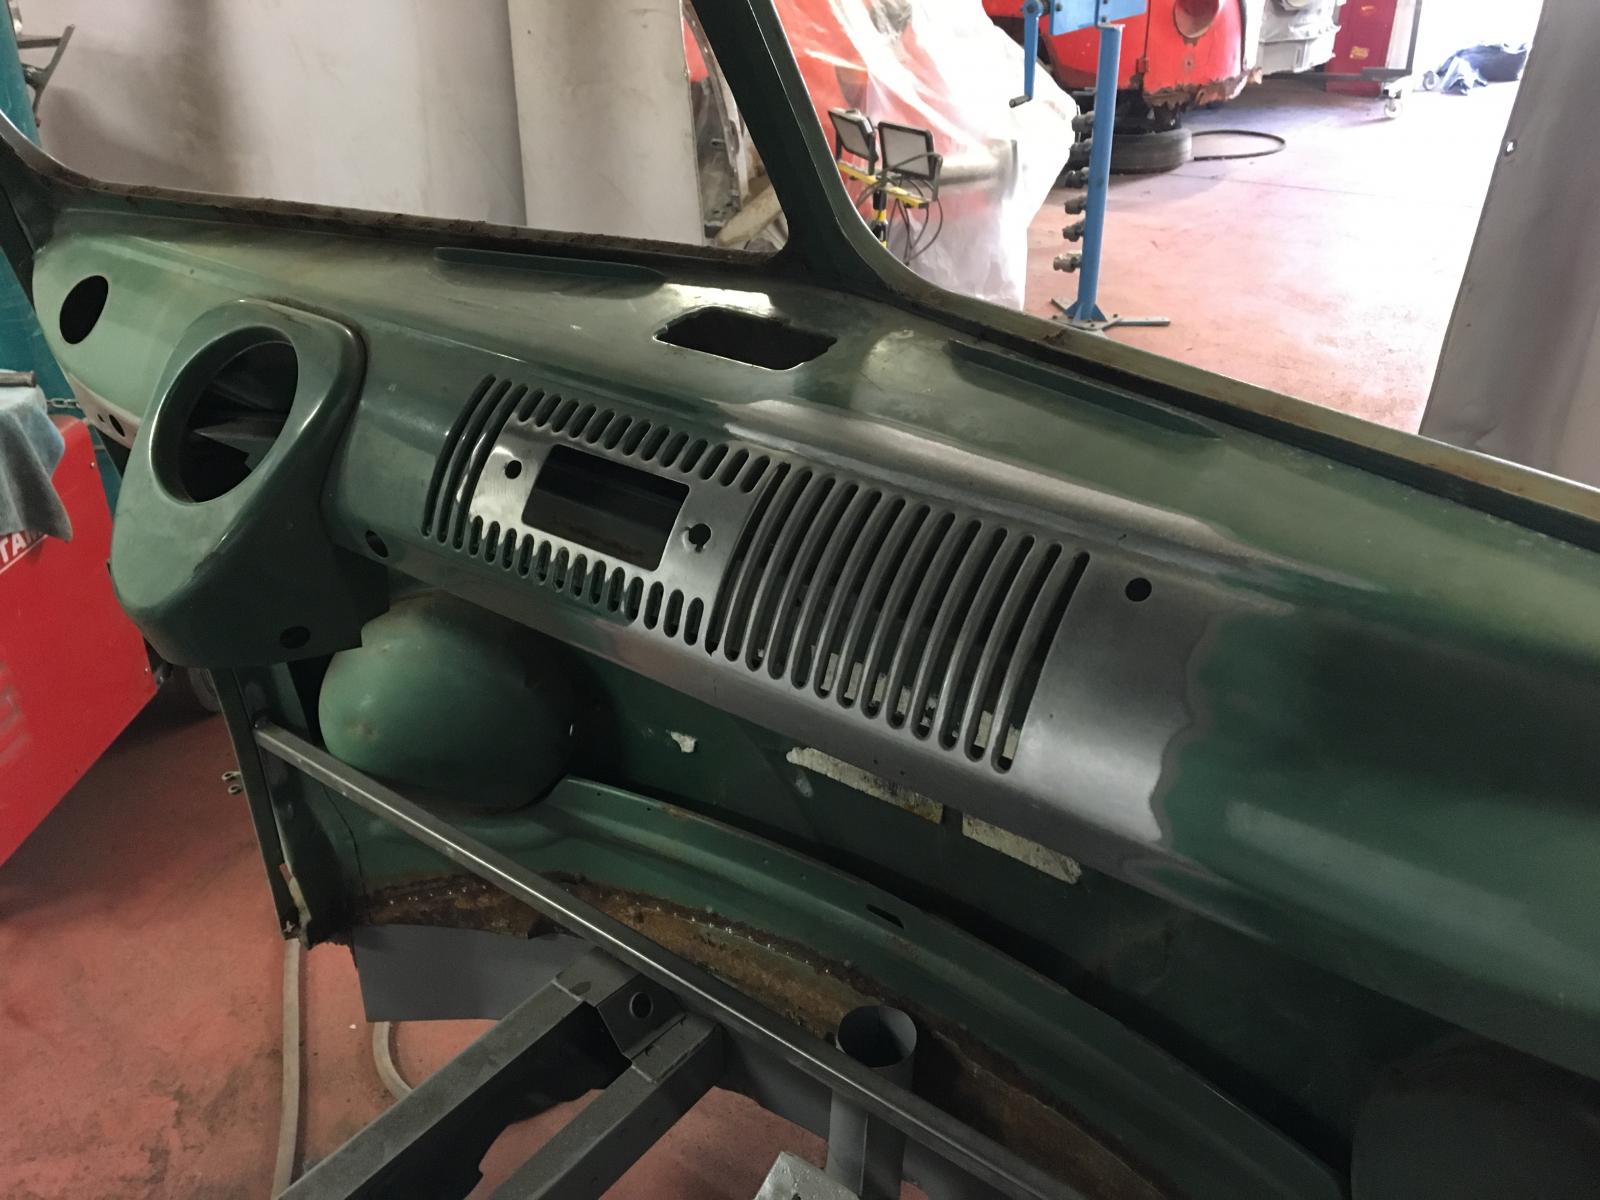
Here it is welded in place. I cant find my file to finish the welds at the top and bottom of the vent:
Although the rear bulkhead panel was pretty solid, it was battered. We had a new KF panel to fit so took it apart and the posts were worse than expected. Pretty glad we are replacing it now as we were considering repairing the original:
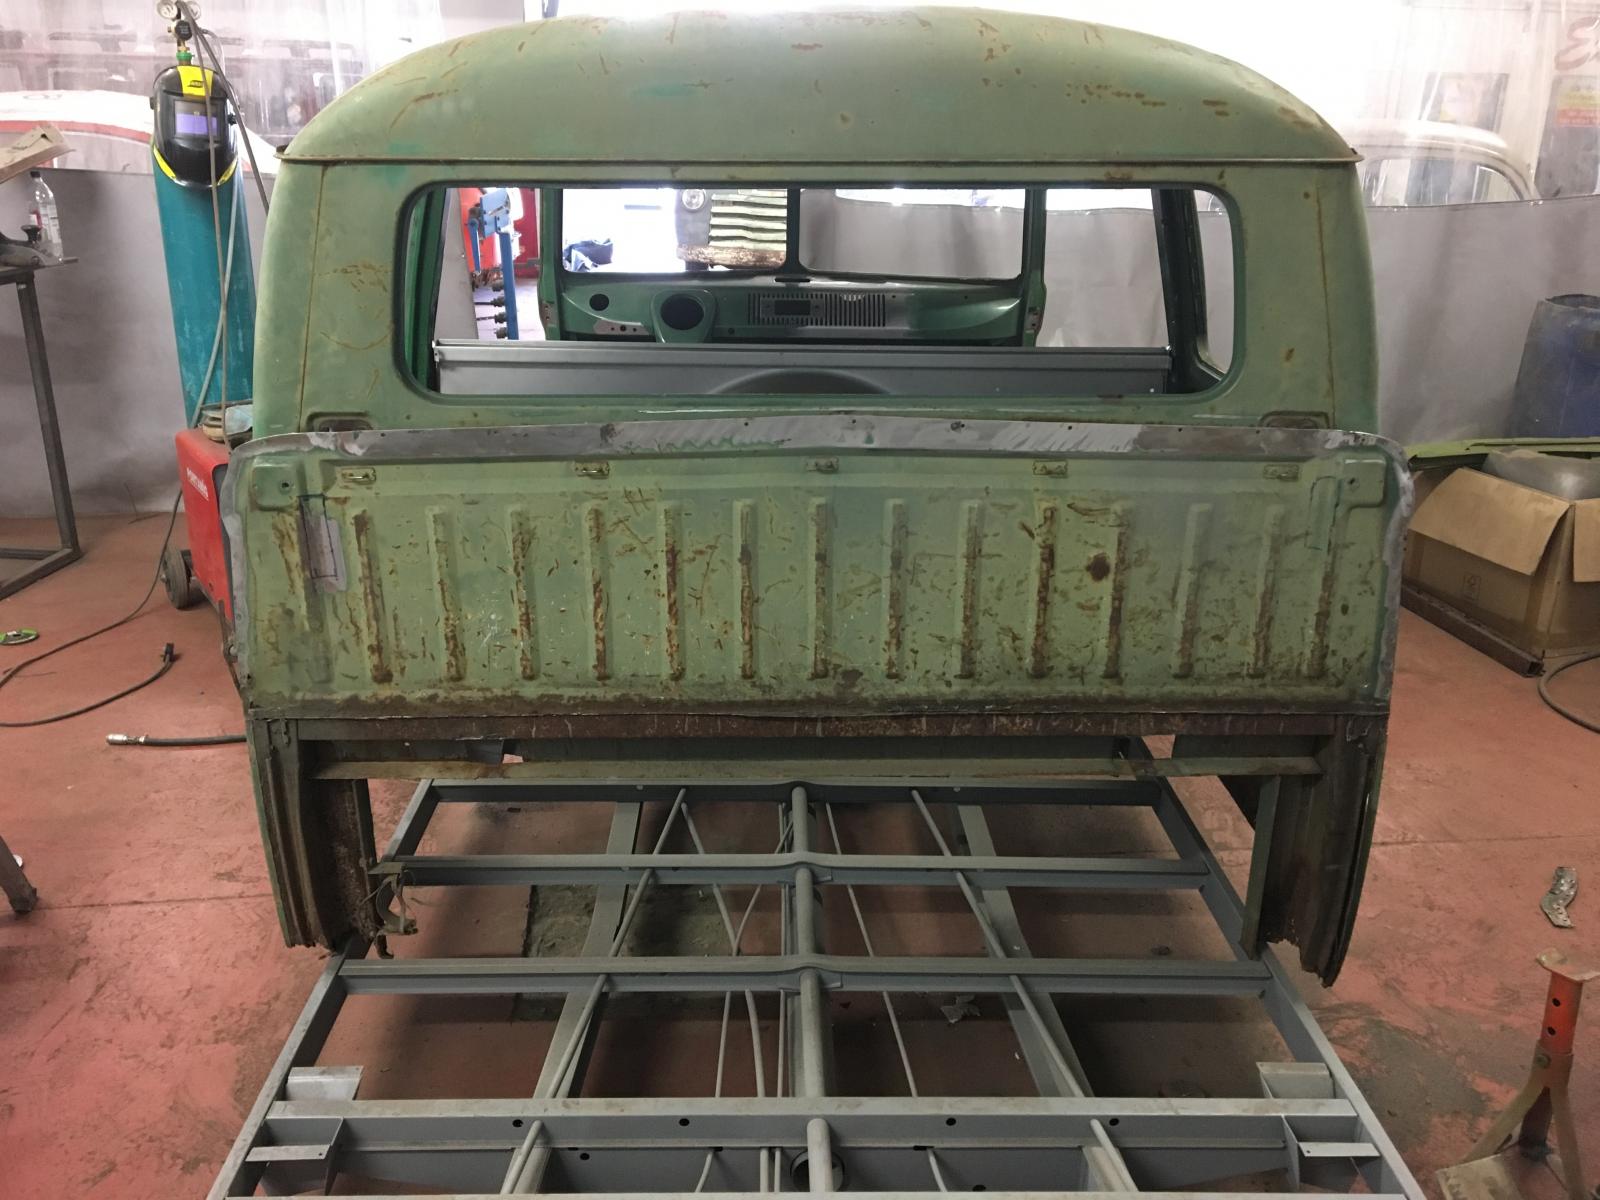
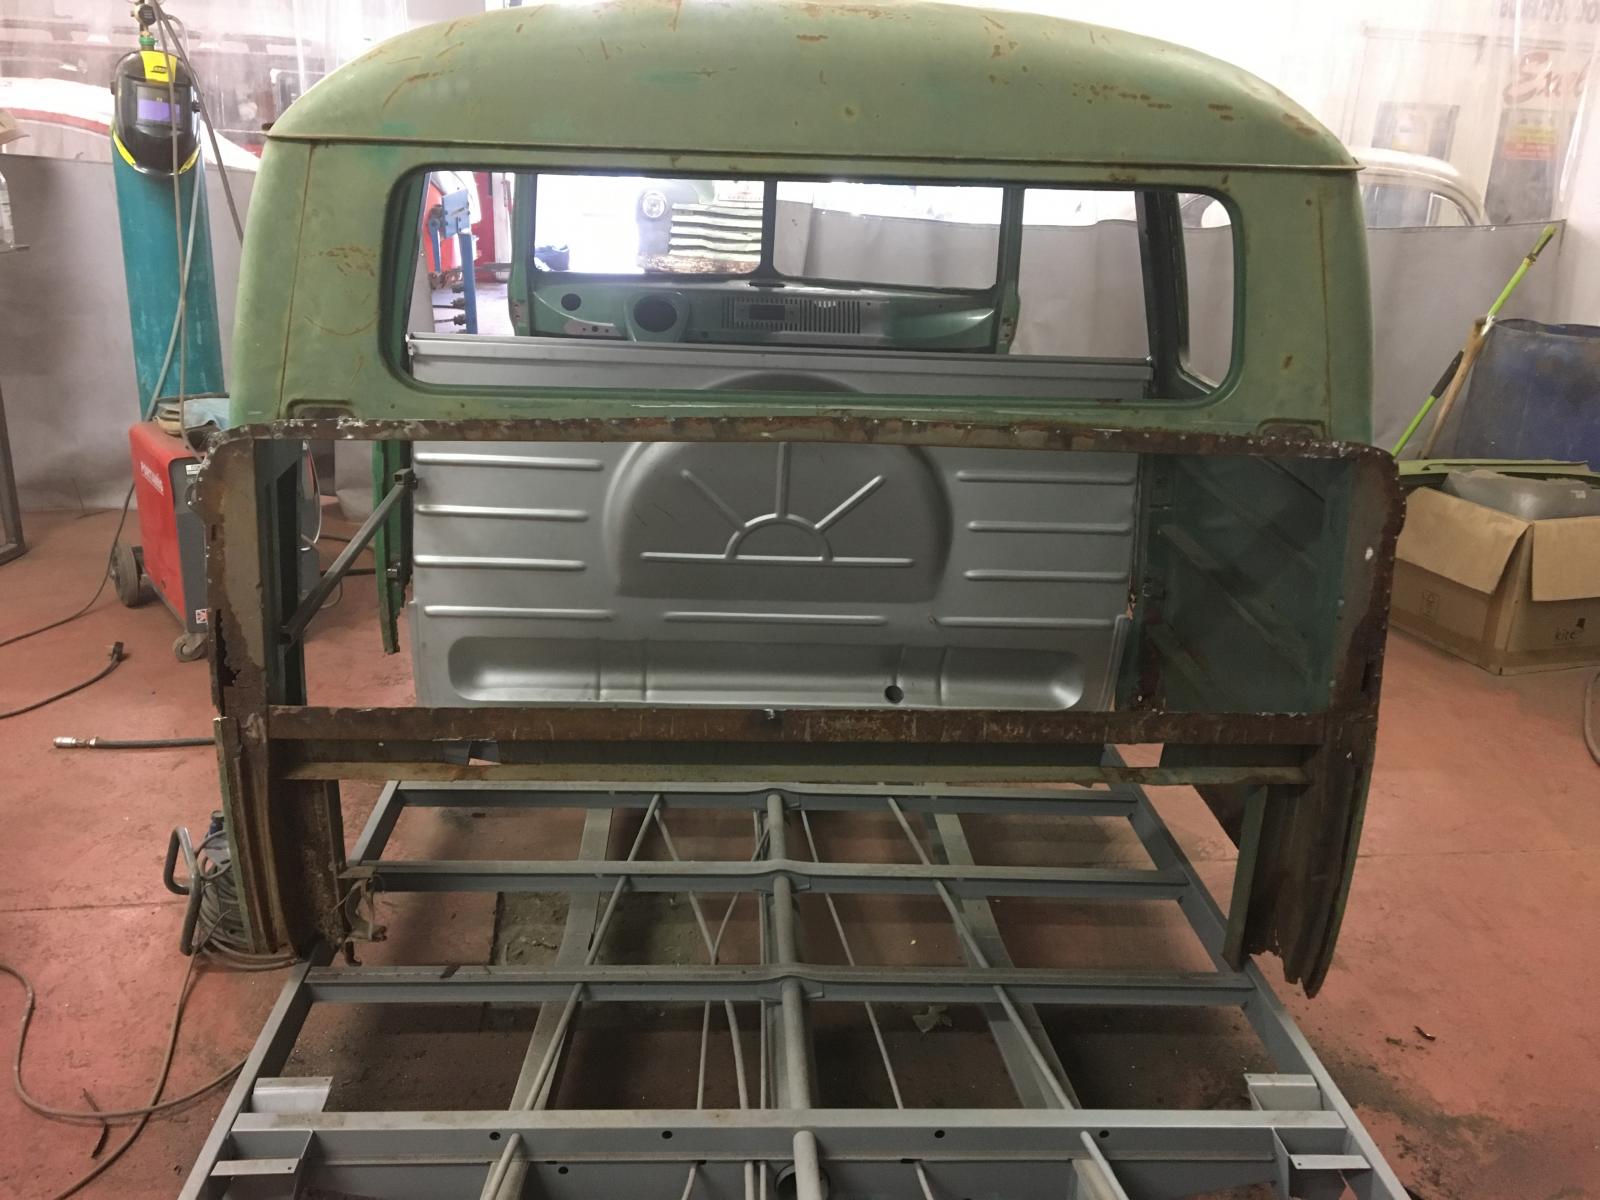
And placed the new panel to test the fit. Seems to fit really nice, just need to get the seat mounts spot welded onto the panel before its ready to be fitted:
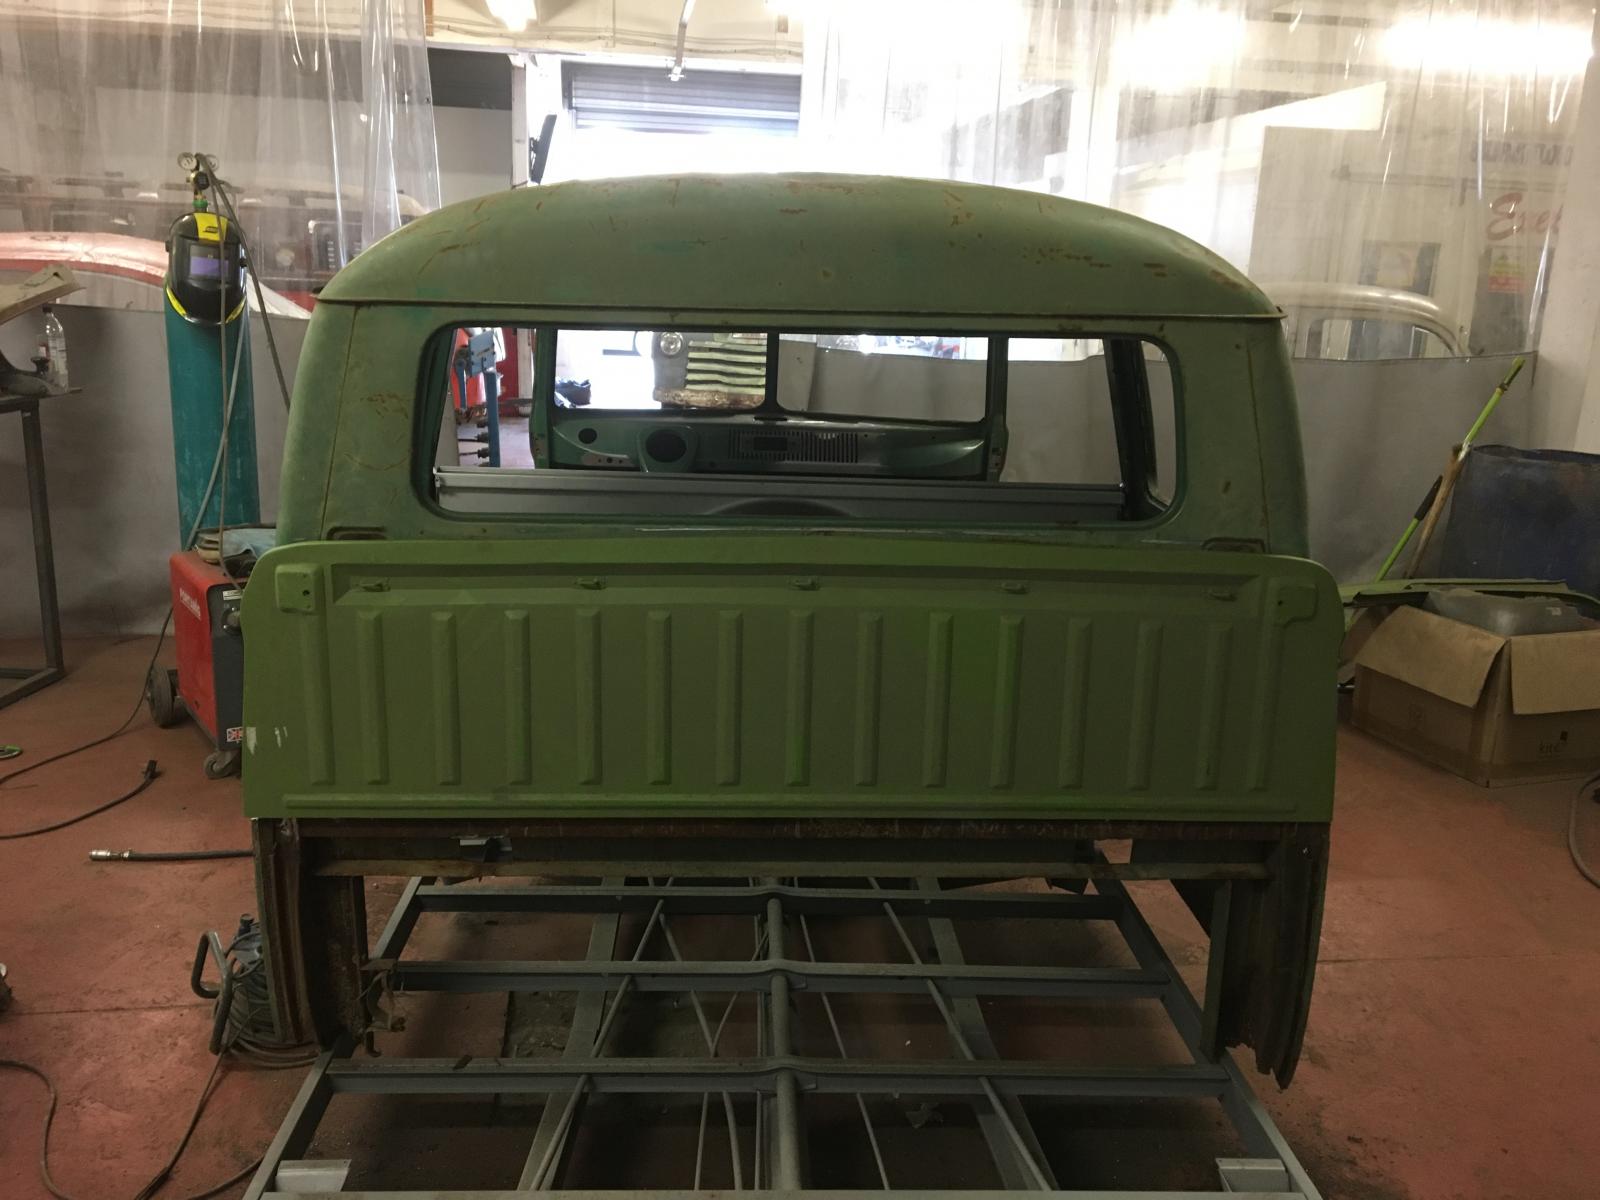
Hoping to get everything blasted next week.

We stripped everything that wasnt reusable and were left with this:

I decided to have a look at the heater pipes under the dash which had been hacked. My customer supplied a replacement but it didnt have the captive nut mounting for the wiper motor:

Modified close enough to factory for this piece:

The dashboard had been hacked too:

Supplied donor section was slightly too short so extended it before welding in place:


Here it is welded in place. I cant find my file to finish the welds at the top and bottom of the vent:


Although the rear bulkhead panel was pretty solid, it was battered. We had a new KF panel to fit so took it apart and the posts were worse than expected. Pretty glad we are replacing it now as we were considering repairing the original:


And placed the new panel to test the fit. Seems to fit really nice, just need to get the seat mounts spot welded onto the panel before its ready to be fitted:

Hoping to get everything blasted next week.
mabbo
SSVC Member
Posts: 80
Joined: Wed Jun 01, 2011 7:09 pm
Re: Swedish 66 Crew Cab
by westwopa » Fri Aug 16, 2019 10:20 am
Tremendous amount of work and dedication.
Here’s mine after blasting
Here’s mine after blasting

westwopa
Registered user
Posts: 591
Joined: Fri Feb 19, 2010 5:06 pm
Re: Swedish 66 Crew Cab
by mabbo » Fri Aug 23, 2019 9:13 am
Looking good mate
A bit of an update but nothing too exciting. There were a couple of holes on the dash that had been drilled below the fuel gauge, apparently one was for a switch for a sump heater for the cold climates, and another was a warning light to show when a trailer was attached. Pretty cool, but here they are welded up:

The rear seat mounts were welded in. I tried to replicated the factory (excessive amount of) spotwelds:

The seat runner panel thats spot welded to the cab tool chest area was hacked up in the past. It was removed, repaired and pinned into position. Got to tidy a couple of things up on it before its welded in place:


As the side panels were getting replaced they were removed before blasting. This let the blaster get to the insides of the posts as they were pretty bad:

We were hoping to save the front panel, but it wouldnt have been cost effective for the customer, and we were concerned about the condition of the A posts, so we cut it off. The A posts were loads better than expected

We took the cab section and a box full of bits to be blasted, got it back to the workshop and put it back over the chassis:
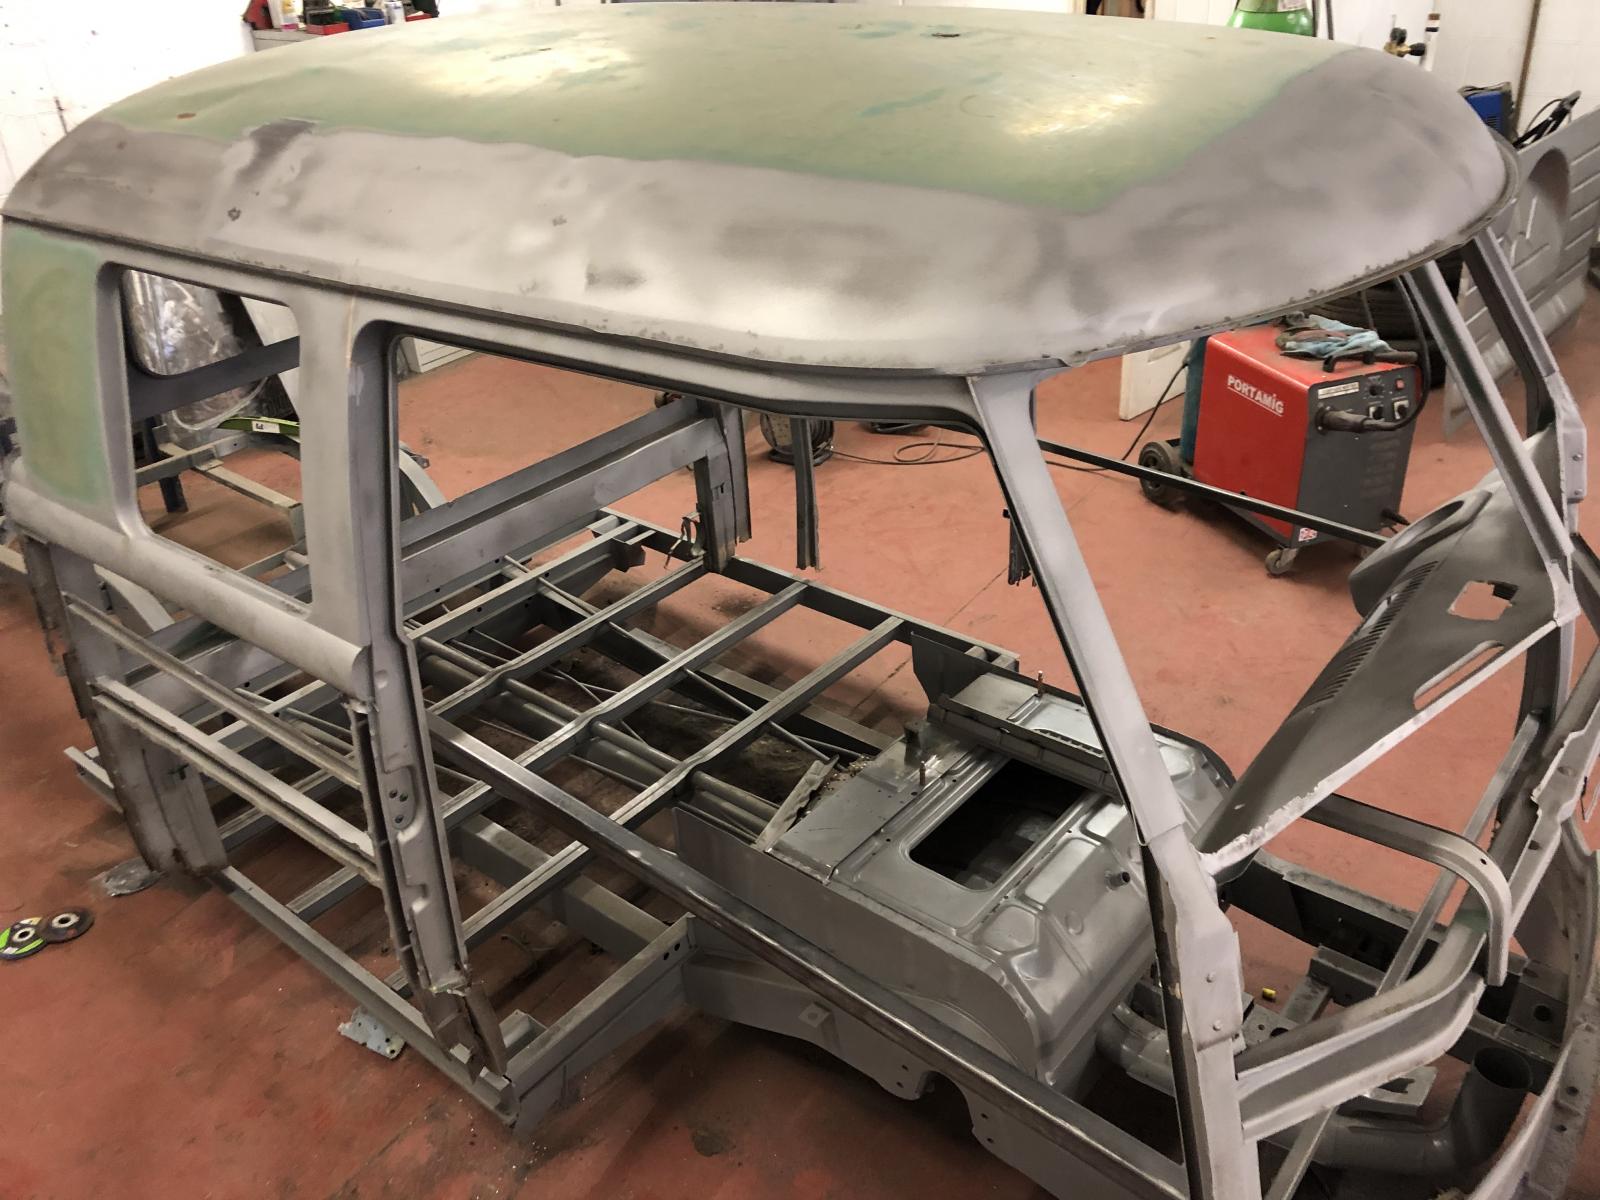
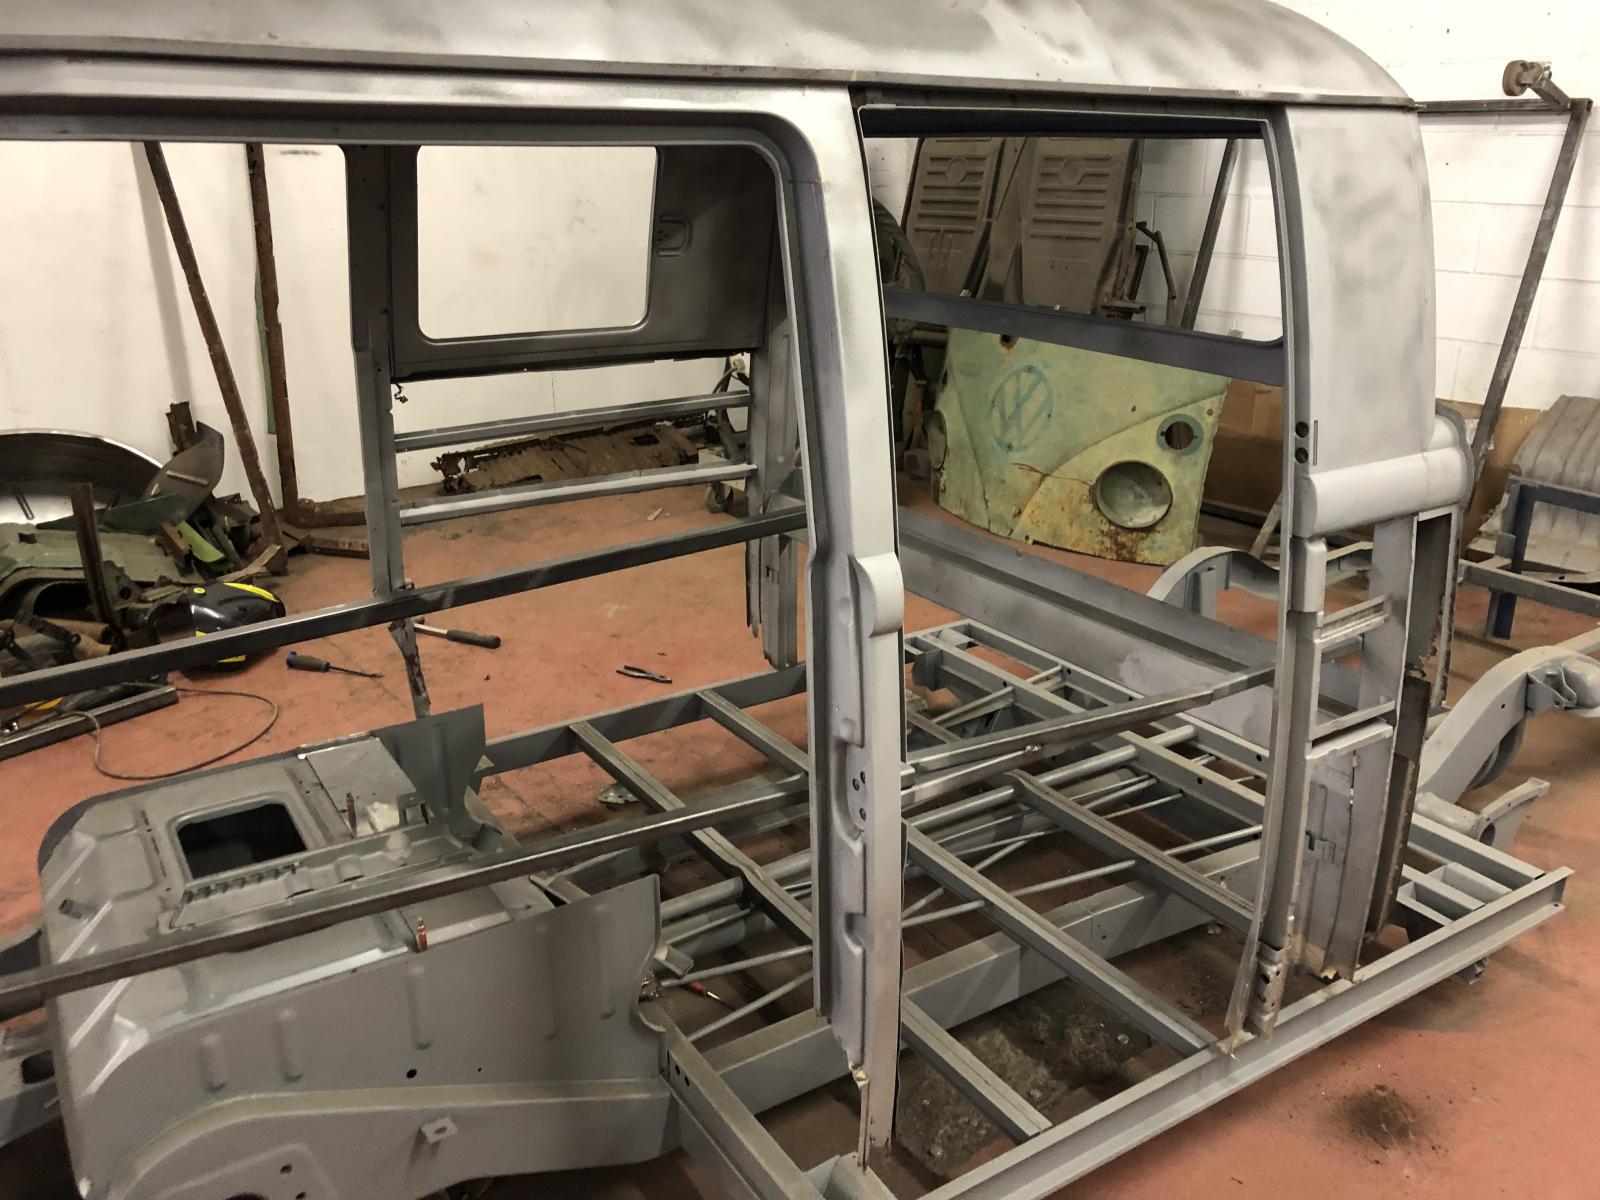

The RHS window frame had a few pin holes in, so these were cut out and a little repair piece welded in:
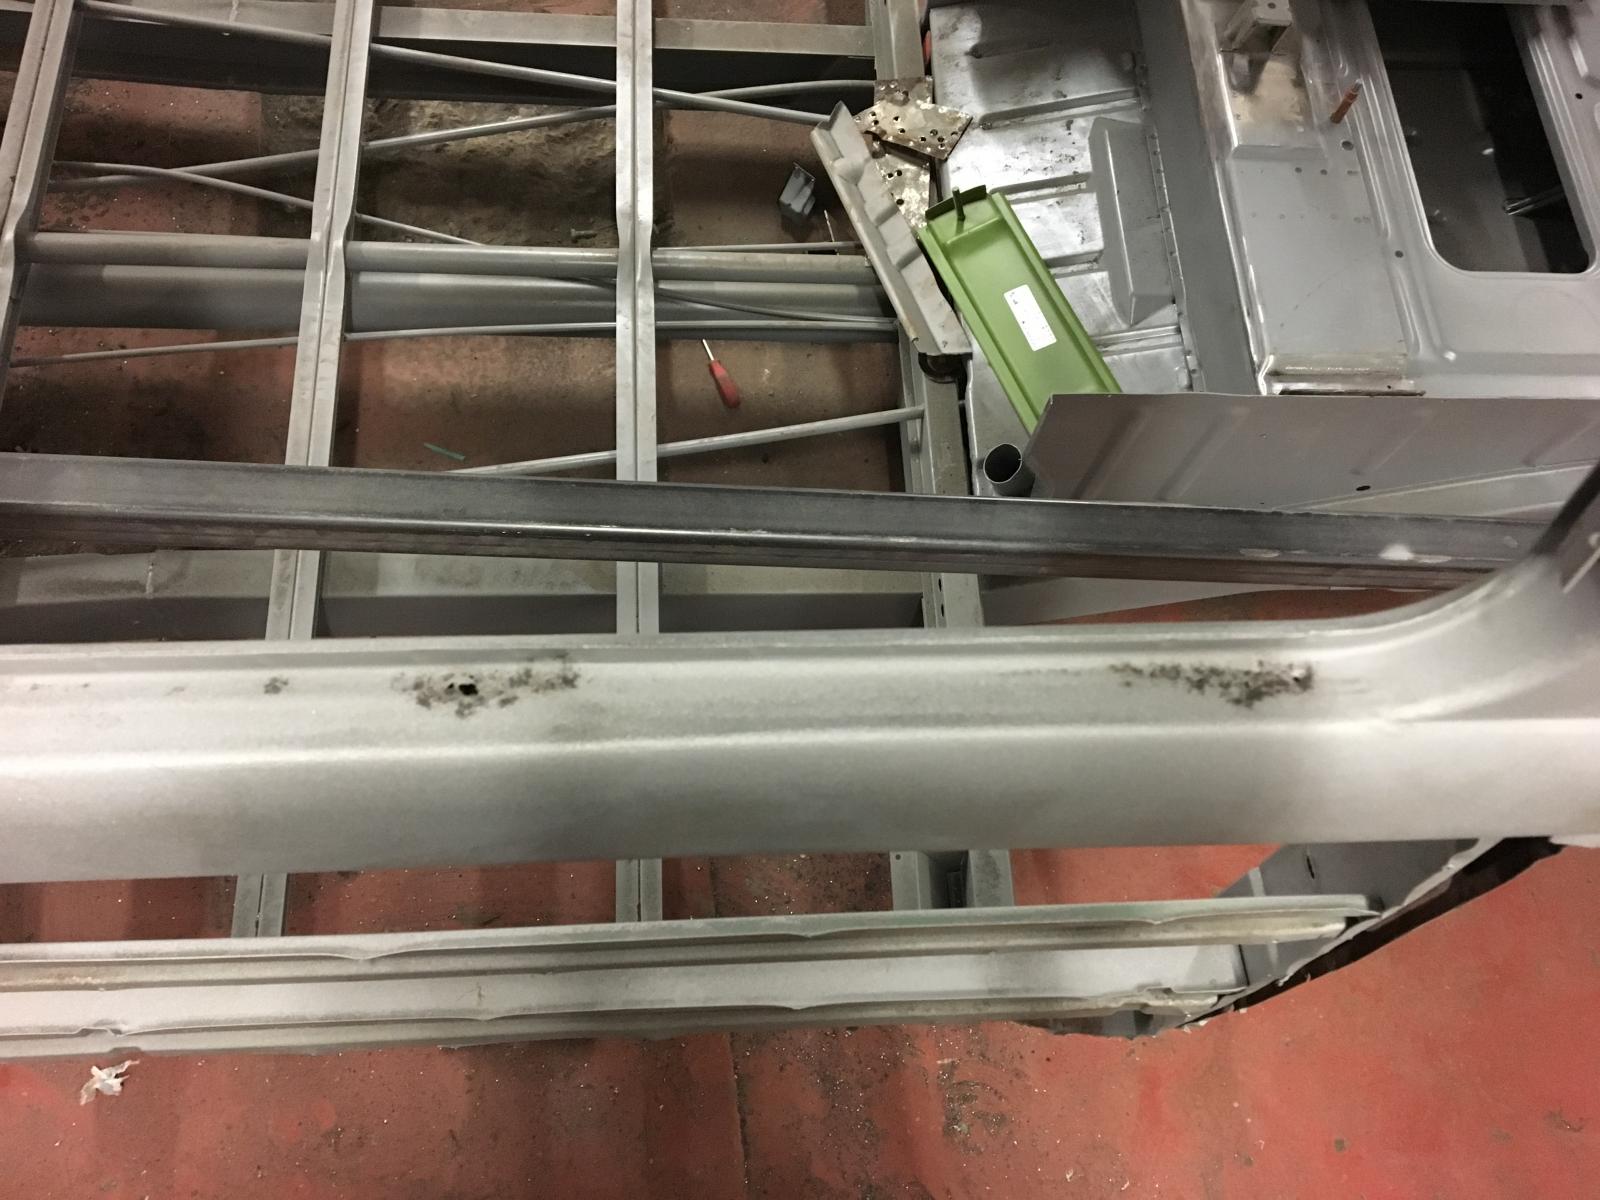

The front inner window frames were also rotten in places, so I cut the rot out and welded in some new steel:

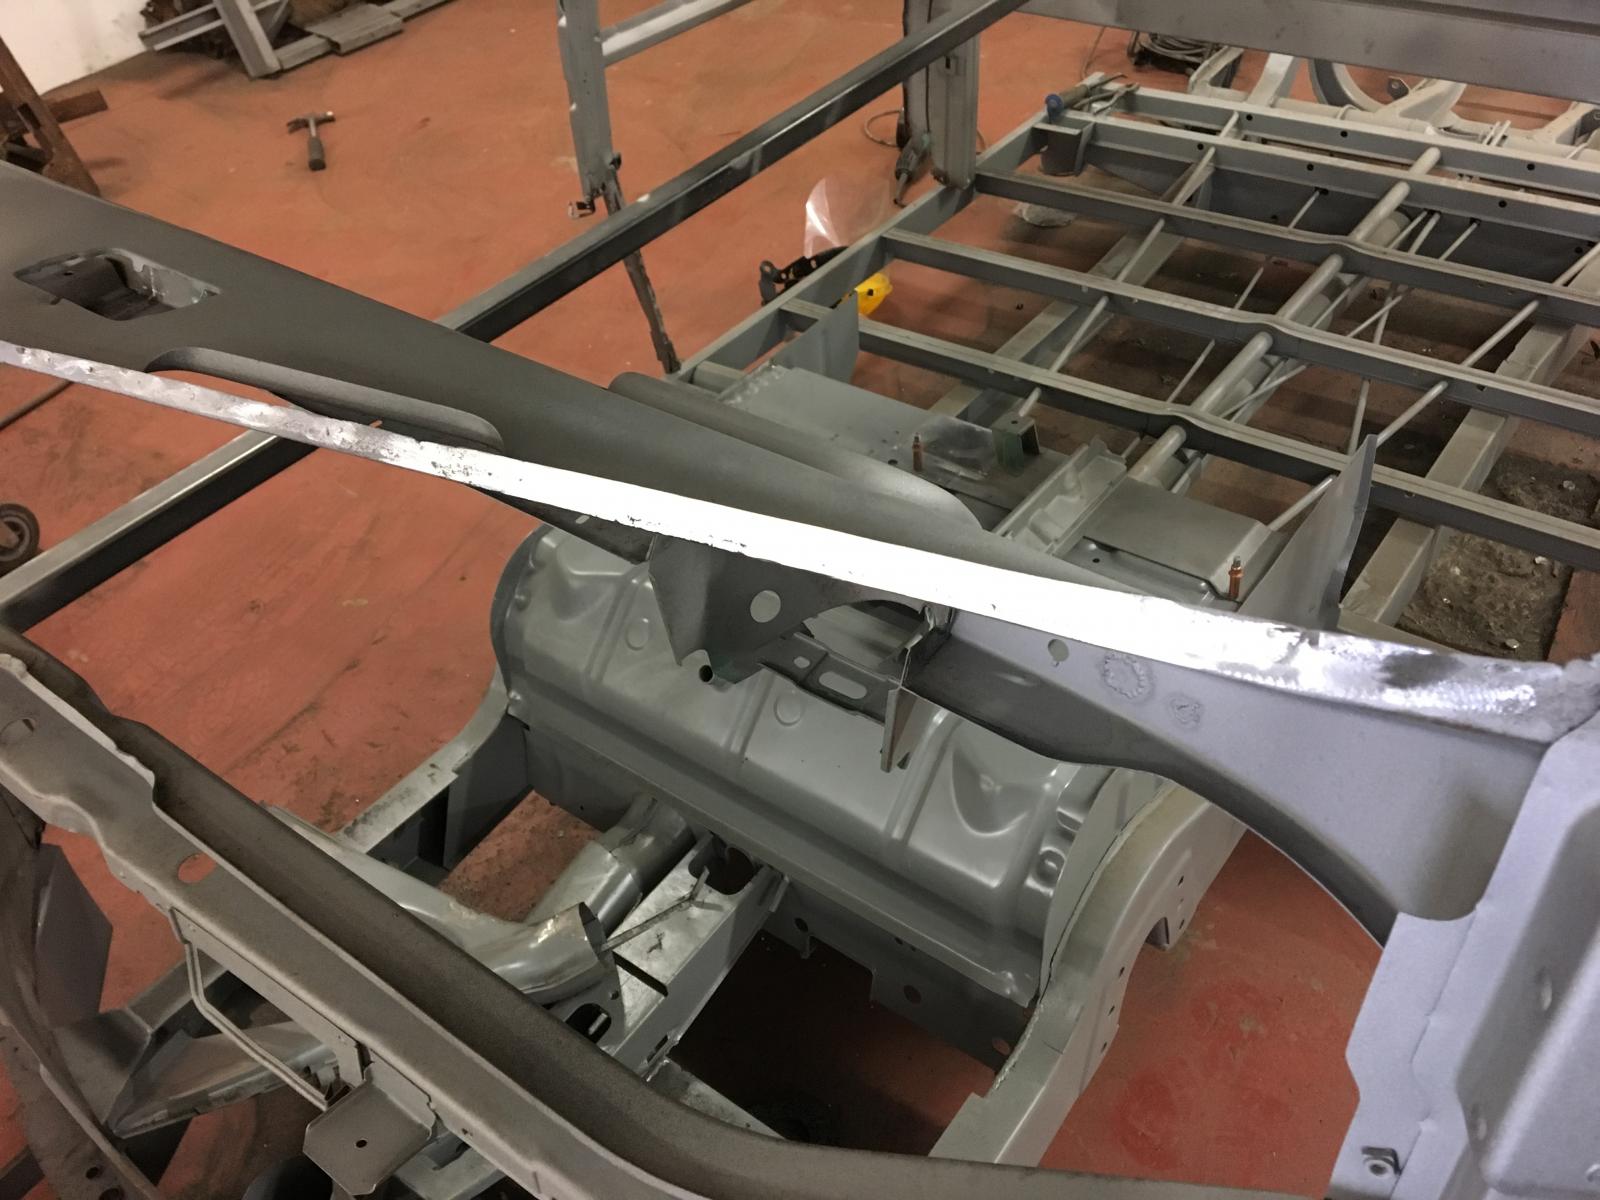
Did the same both sides, then lined the heater Y section up and pinned it into place ready for welding once Im happy everything lines up properly:

The panel behind the fuel tank had a section hacked out at some point, you can just make it out on the RHS of this pic:

Now that panel had been removed we made a repair panel to put it back to factory:


Thats about it so far.
Cheers, Neil
mabbo
SSVC Member
Posts: 80
Joined: Wed Jun 01, 2011 7:09 pm
Re: Swedish 66 Crew Cab
by type21f » Fri Aug 23, 2019 9:34 am
Lots of excellent work going on. The chassis was impressive but the further work looks to be on another level! Great work Neil!
G
G
type21f
SSVC Member
Posts: 15456
Joined: Tue May 29, 2007 12:55 pm
Re: Swedish 66 Crew Cab
by mabbo » Fri Aug 23, 2019 11:25 am
mabbo
SSVC Member
Posts: 80
Joined: Wed Jun 01, 2011 7:09 pm
Re: Swedish 66 Crew Cab
by mabbo » Thu Sep 12, 2019 4:16 pm
More recent work on the Crew cab...
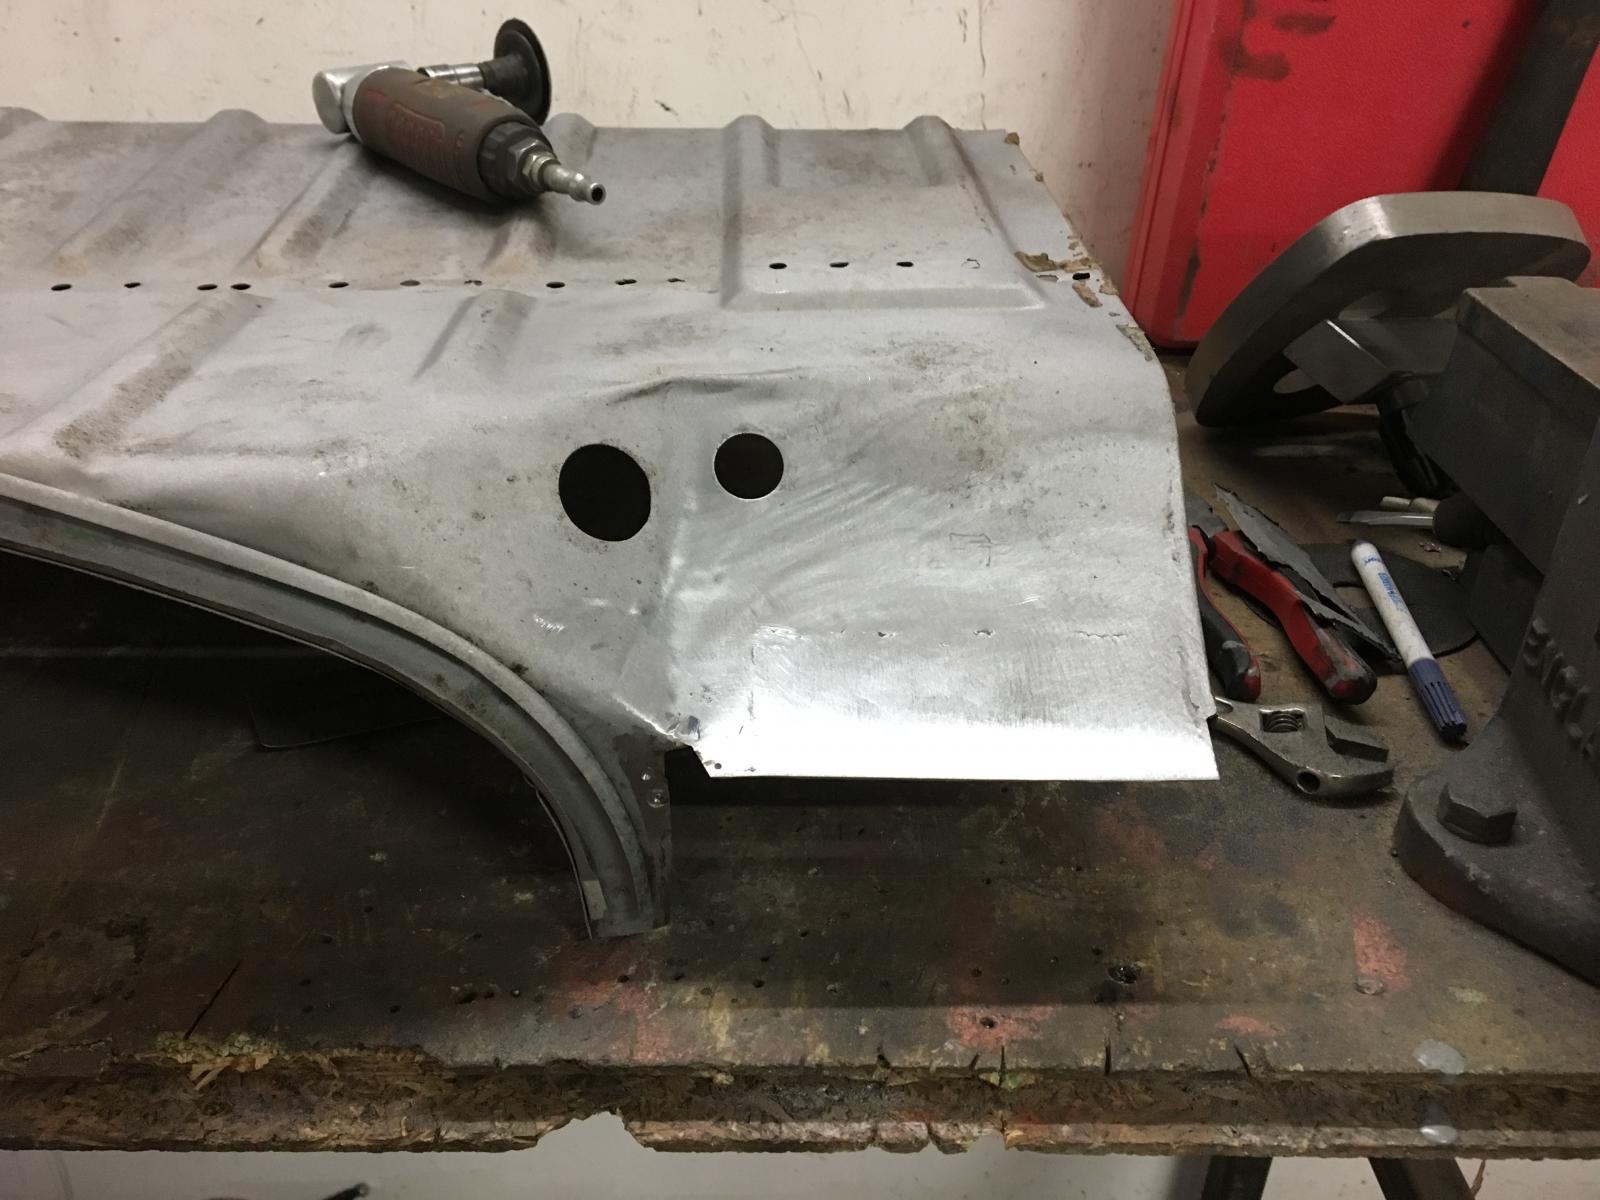
I repaired the panel above the gearbox that was rotten where both engine side trays meet it. Did the same repair both sides:

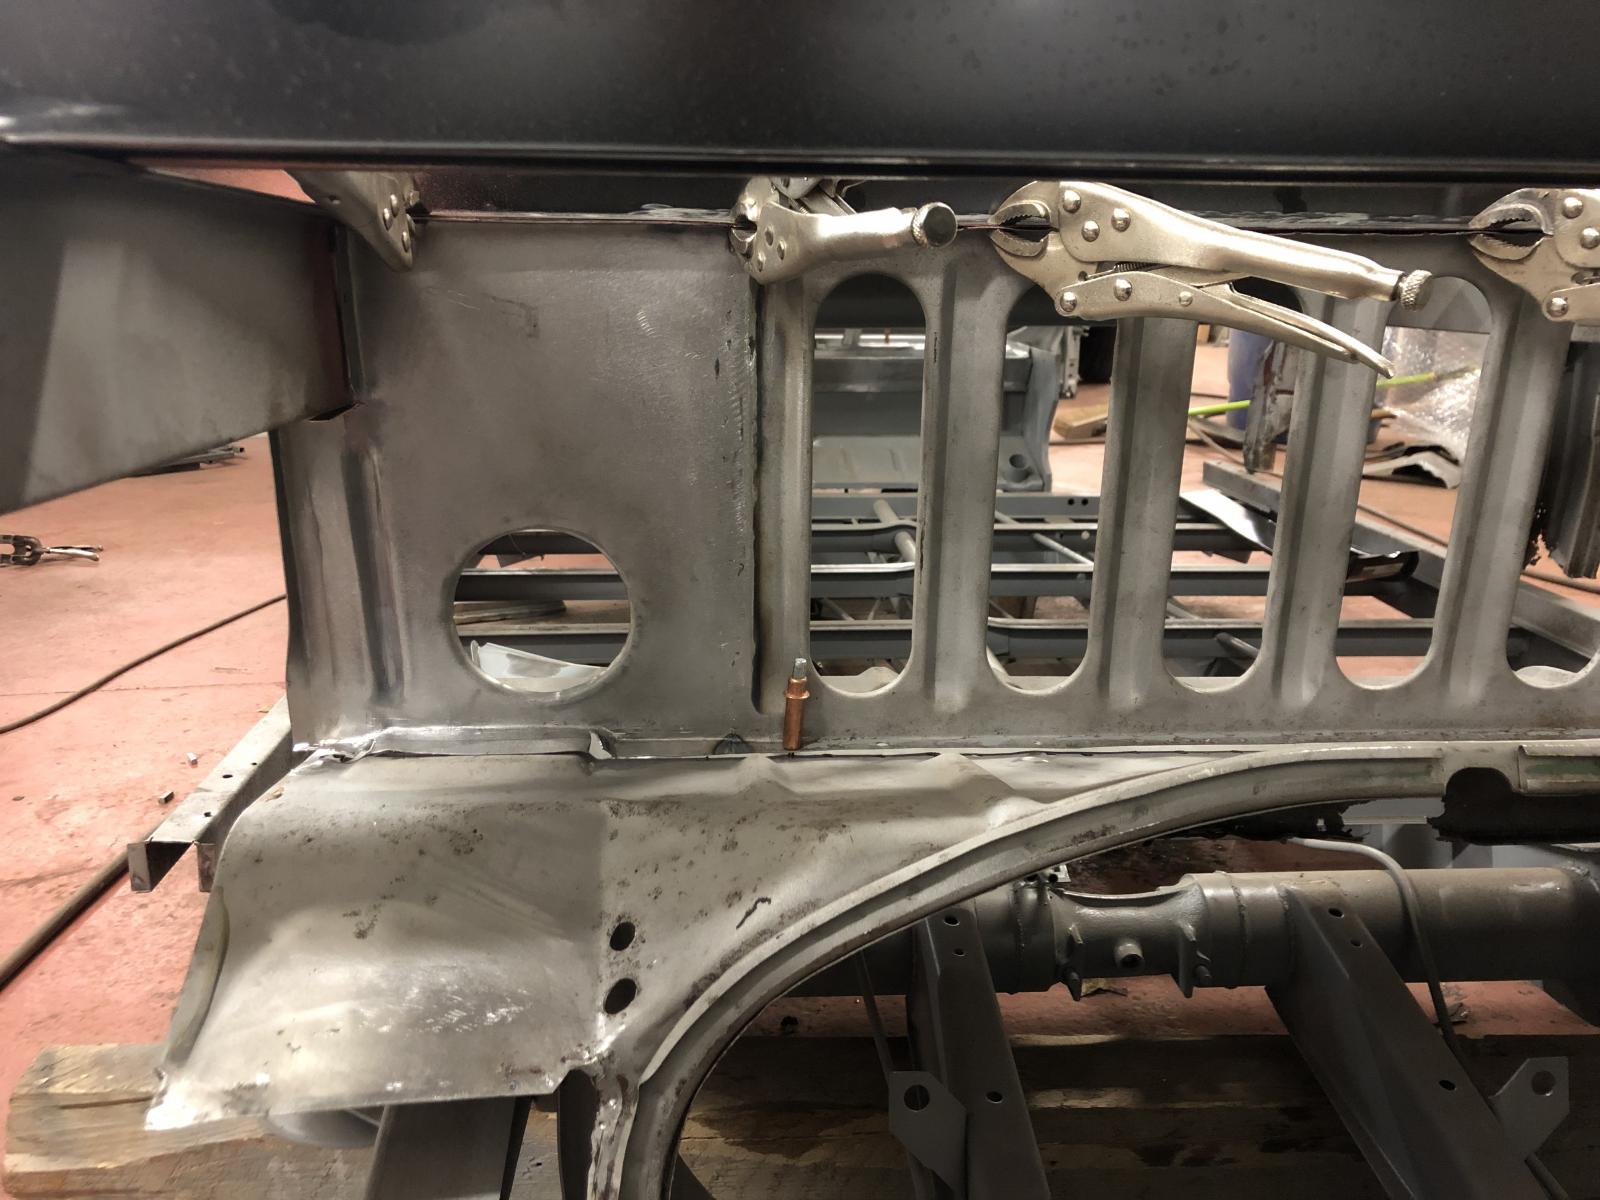
Then, the repair panel we made was welded in and clamped in place while we trial fitted the other new panels:
The new top hats and side supports were clamped in place to check everything was good before any welding:
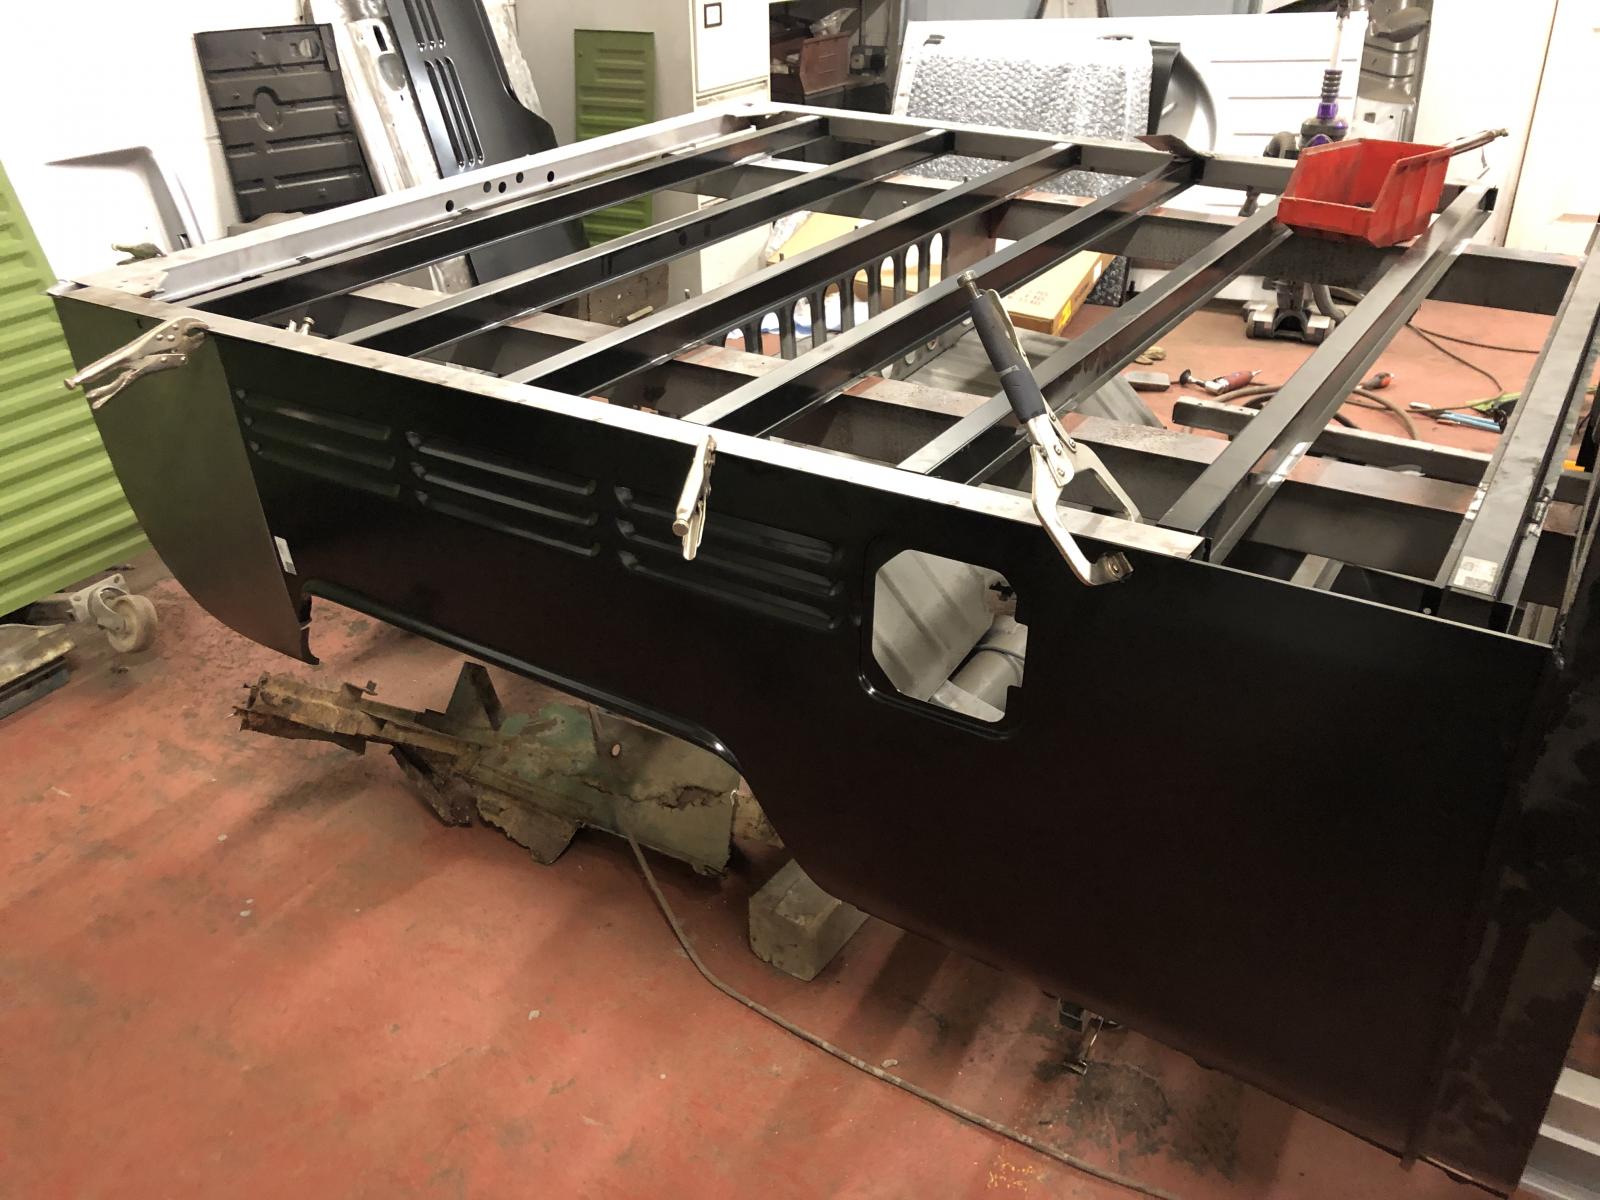
The side panels and rear corners fitted quite nice. The rear engine lid hinge panel needed a bit of work, and the sides supports still need lengthening at this point, but now we were happy with the top hats etc they were welded in place. The engine lid hinge panel was twisted, with the corners and engine lid fitted the gaps were awful. After some work they are a little better but still need more work:

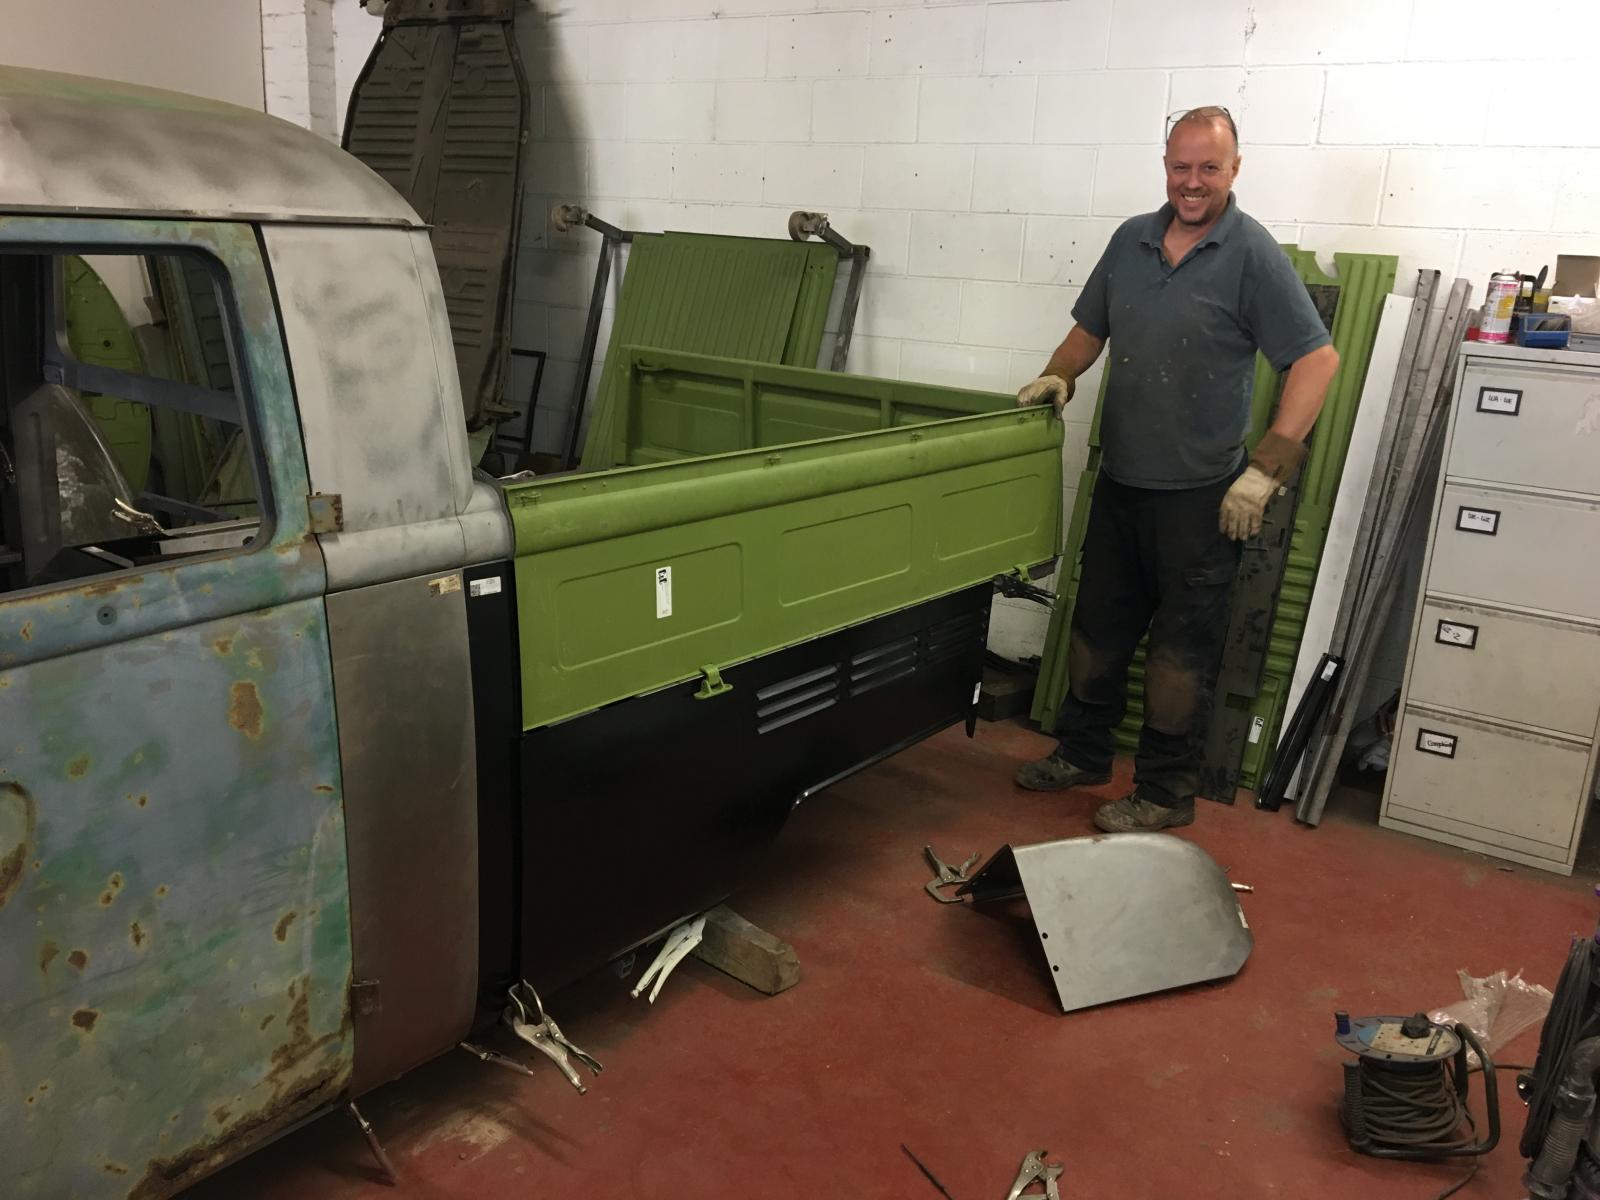
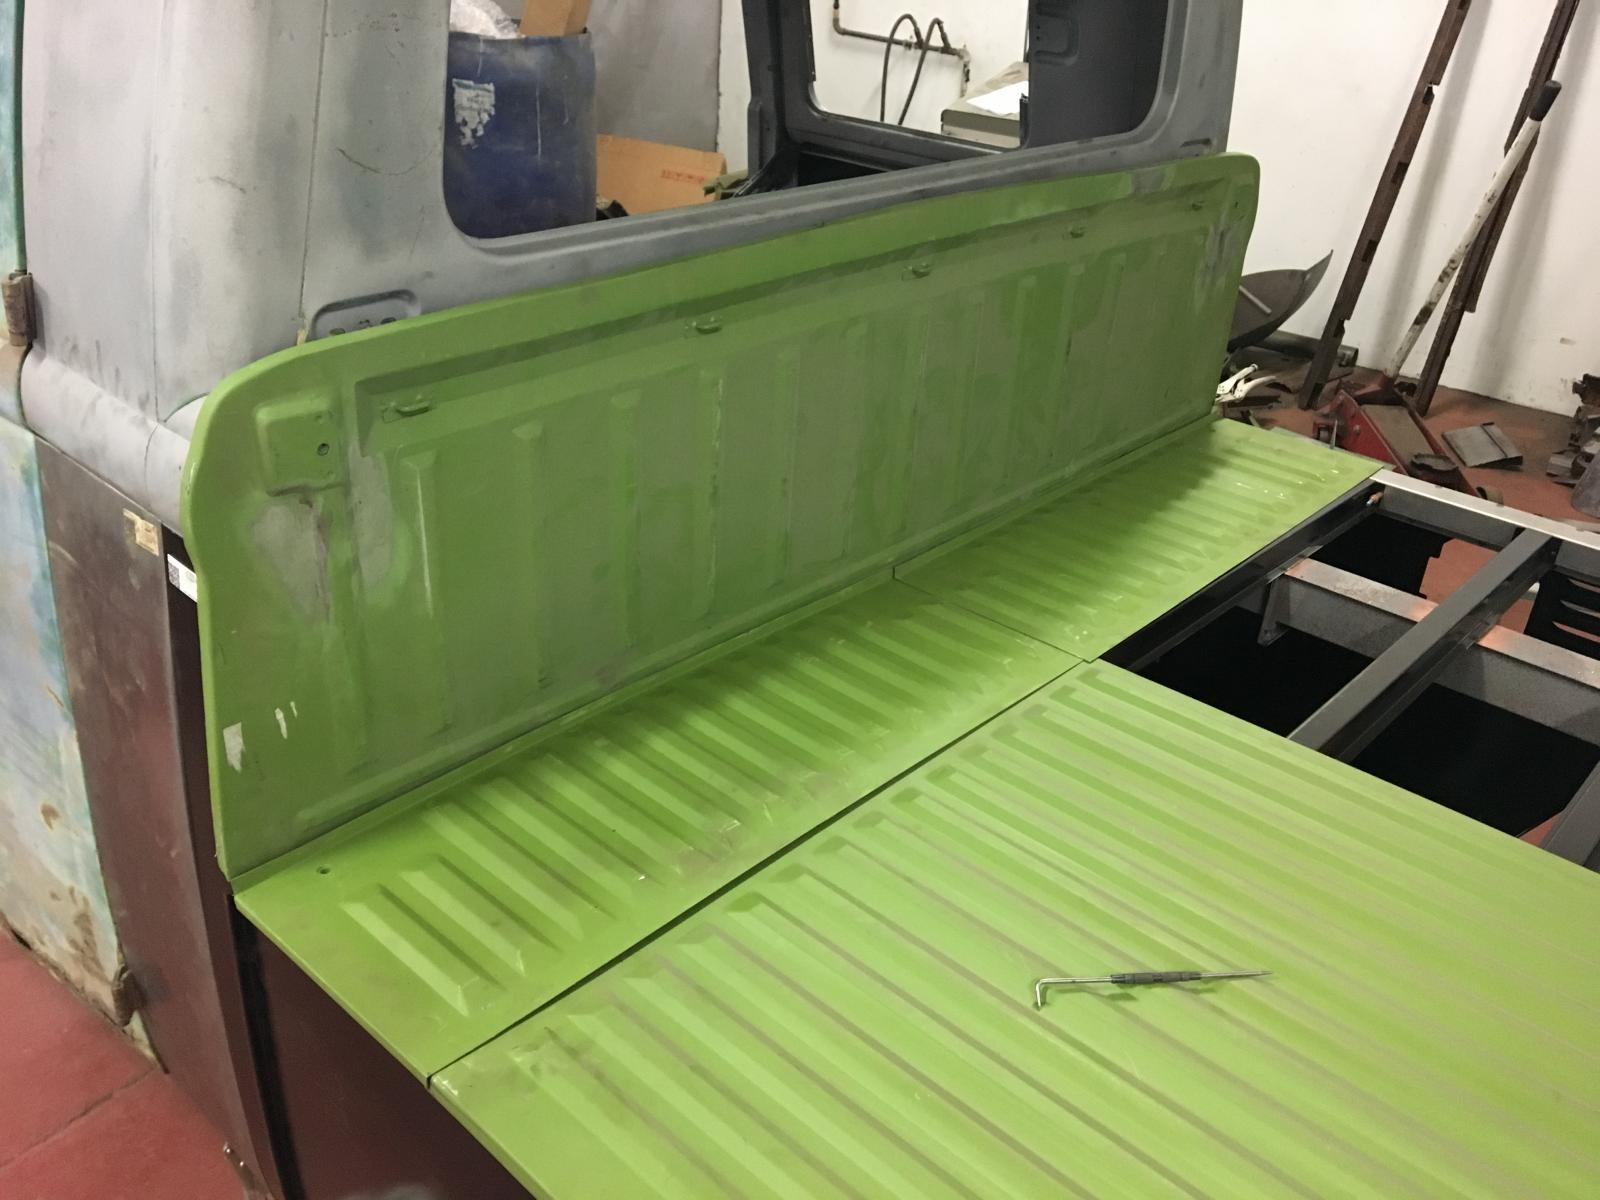
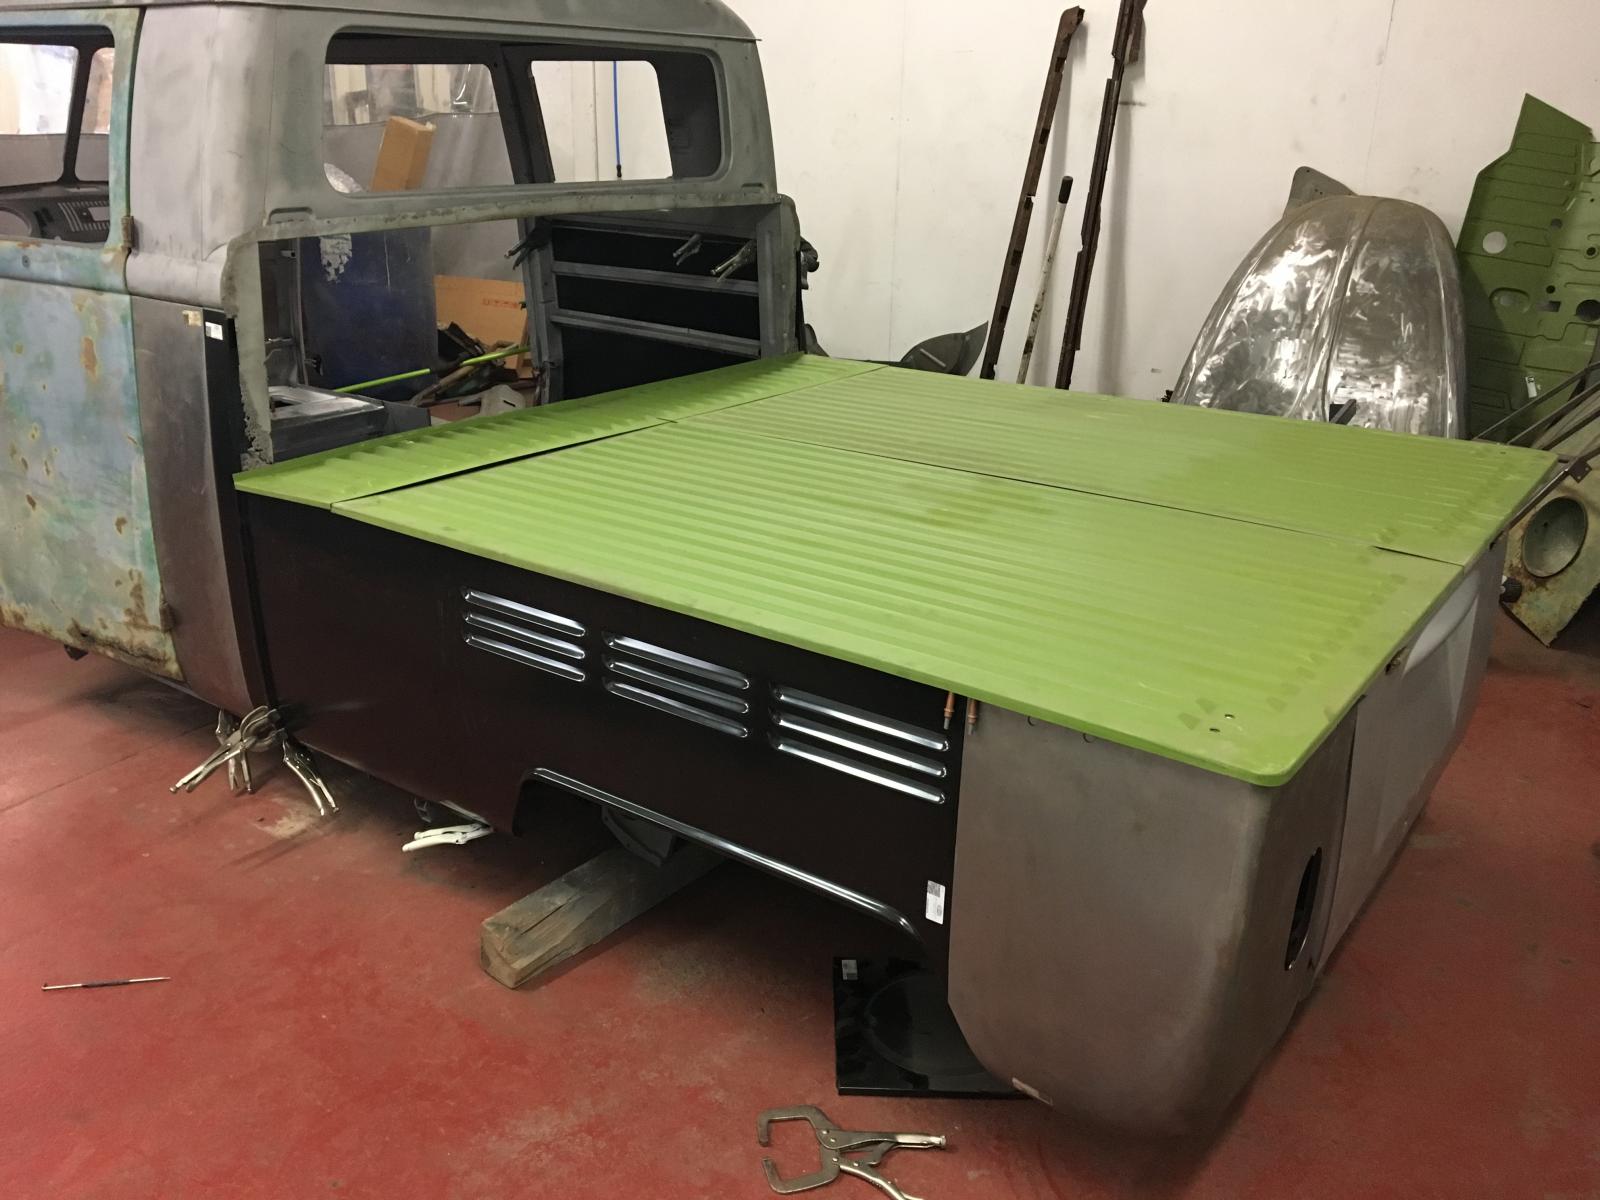
We trial fitted the gates at this point to see where the captive nuts needed fitting into the side panels of the bed framework, and to check the mounting area on the BBT engine lid hinge panel and rear corners. None of them lined up But they will be OK with a bit of work... Looks a bit like a finished bus:
I spot welded both side panels to the smaller side panel at the back of the cab that meets the bulkhead:
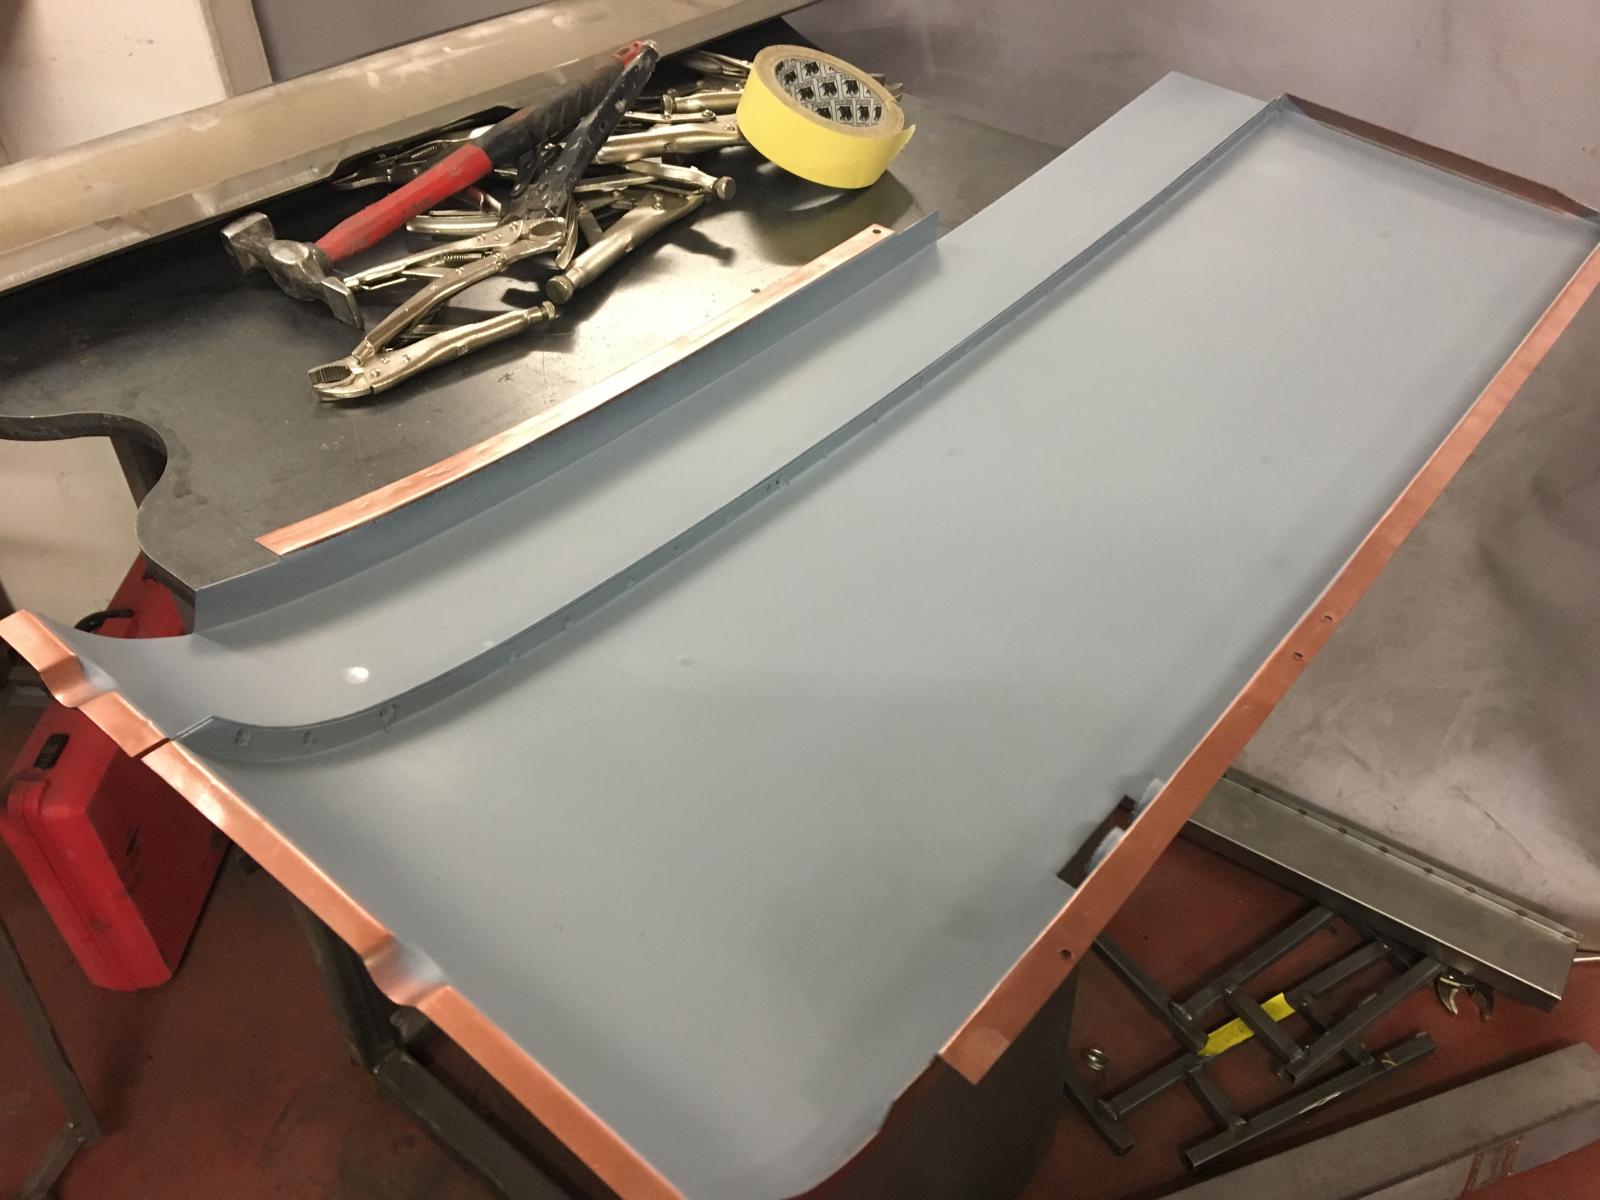
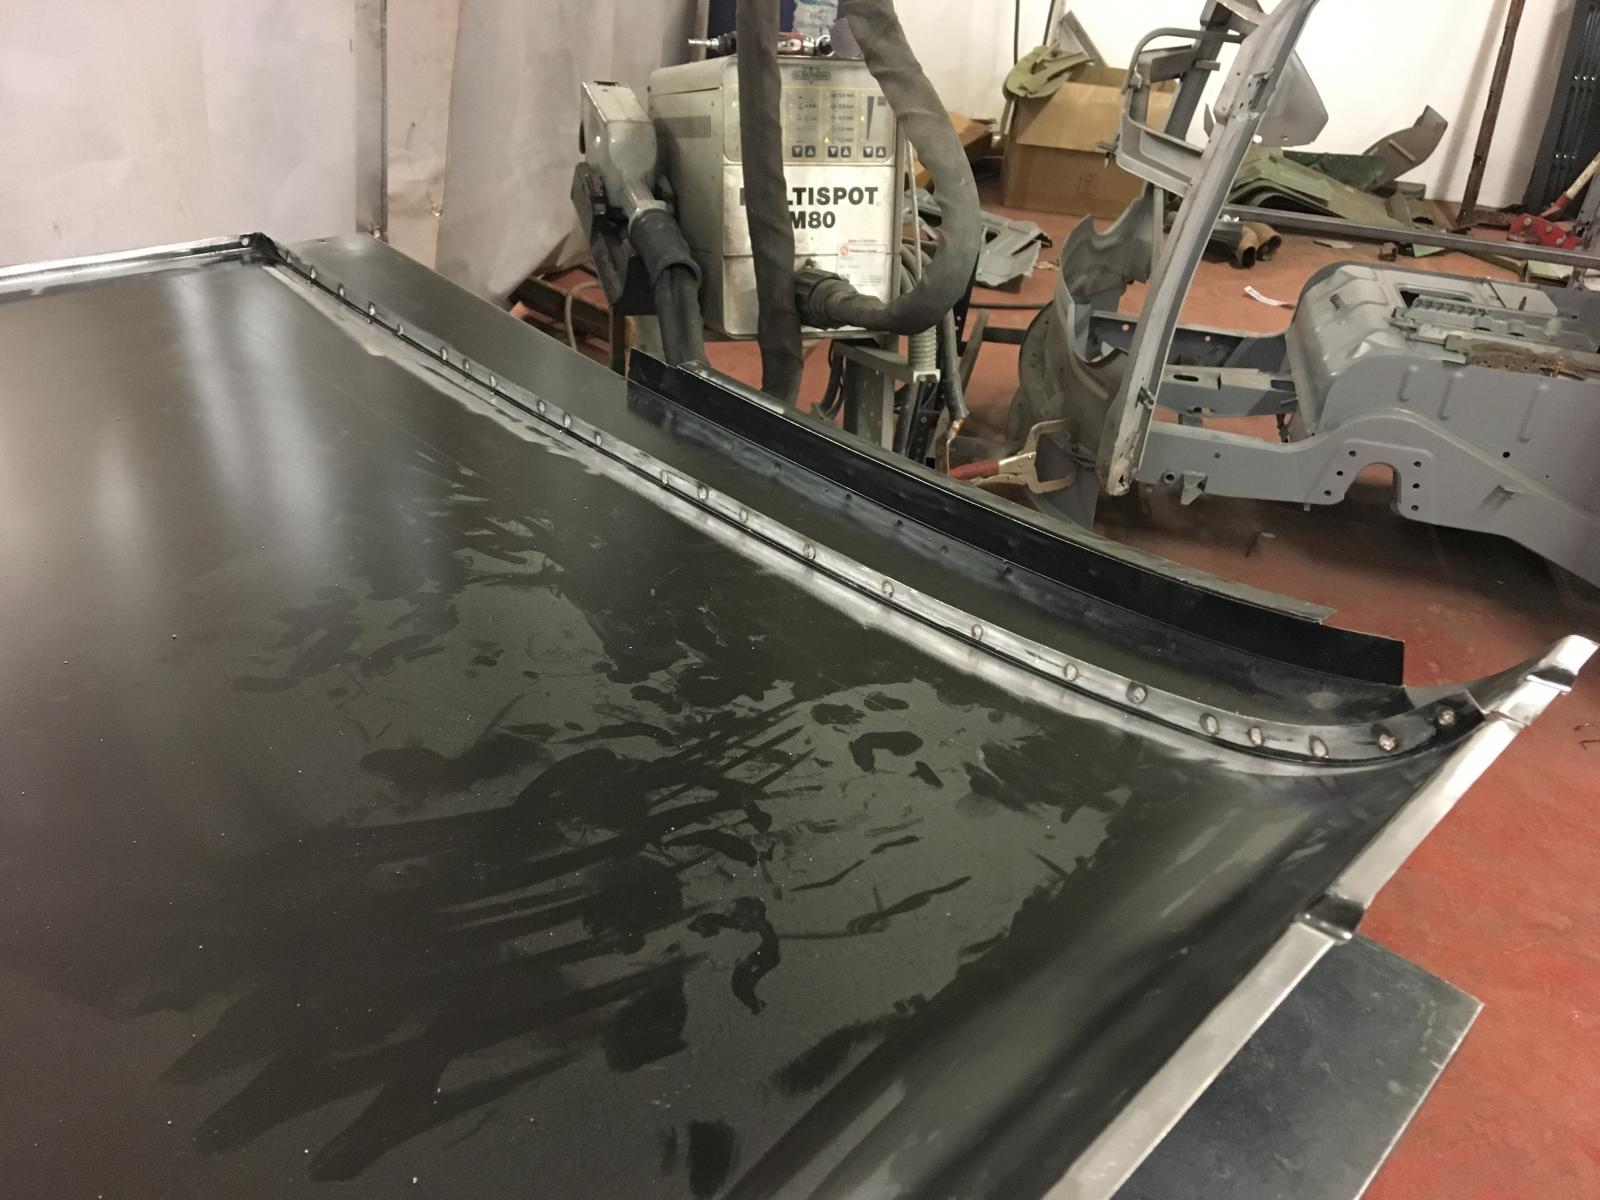
The lower hinge section of the post was repaired with a Klassic Fab panel. I cant find pictures of this but once this was repaired the side panels were trimmed down, fitted and pinned in place once fitting nice, ready for welding:

The rear bulkhead and bed were trial fitted now the new side panels were in place, and sides and quarters mocked up on the repaired framework:
The original cargo door was twisted / damaged. We have an good original paint door that we used to check the gaps... Pretty pleased with this:

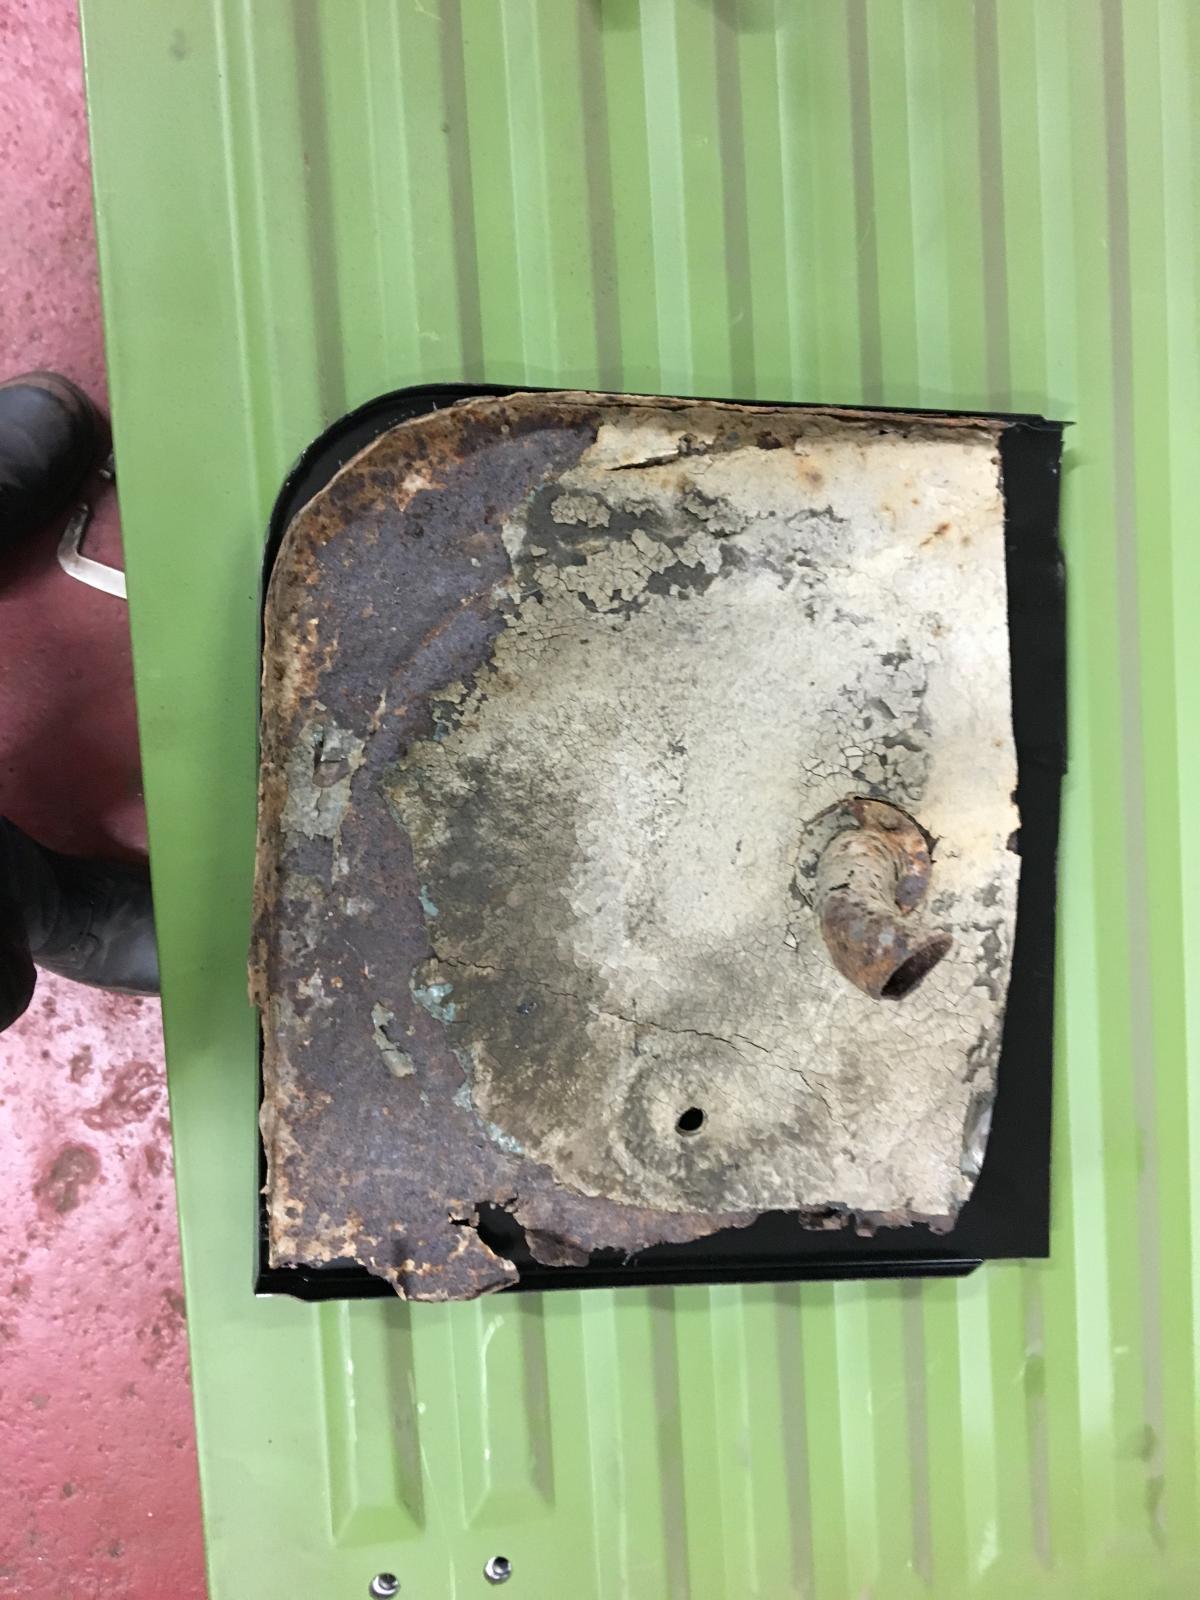
There was so much work in all the above. Working with a mixture of panels from Klassic Fab, Autocraft, and the new BBT panels in weld through primer... All pretty good but all need work. The rear corners are not great. The holes for the gate hinges are in the wrong place, and the shape isnt perfect, but they are good enough overall. Just to show how much modification these panels need - here is the original battery tray, with the new Autocraft panel on top of it. Completely different shape where it meets the corner... And, neither of those panels fit the new corner. No big deal, we will just reshape the new panel when its fitted to fit the new corner:
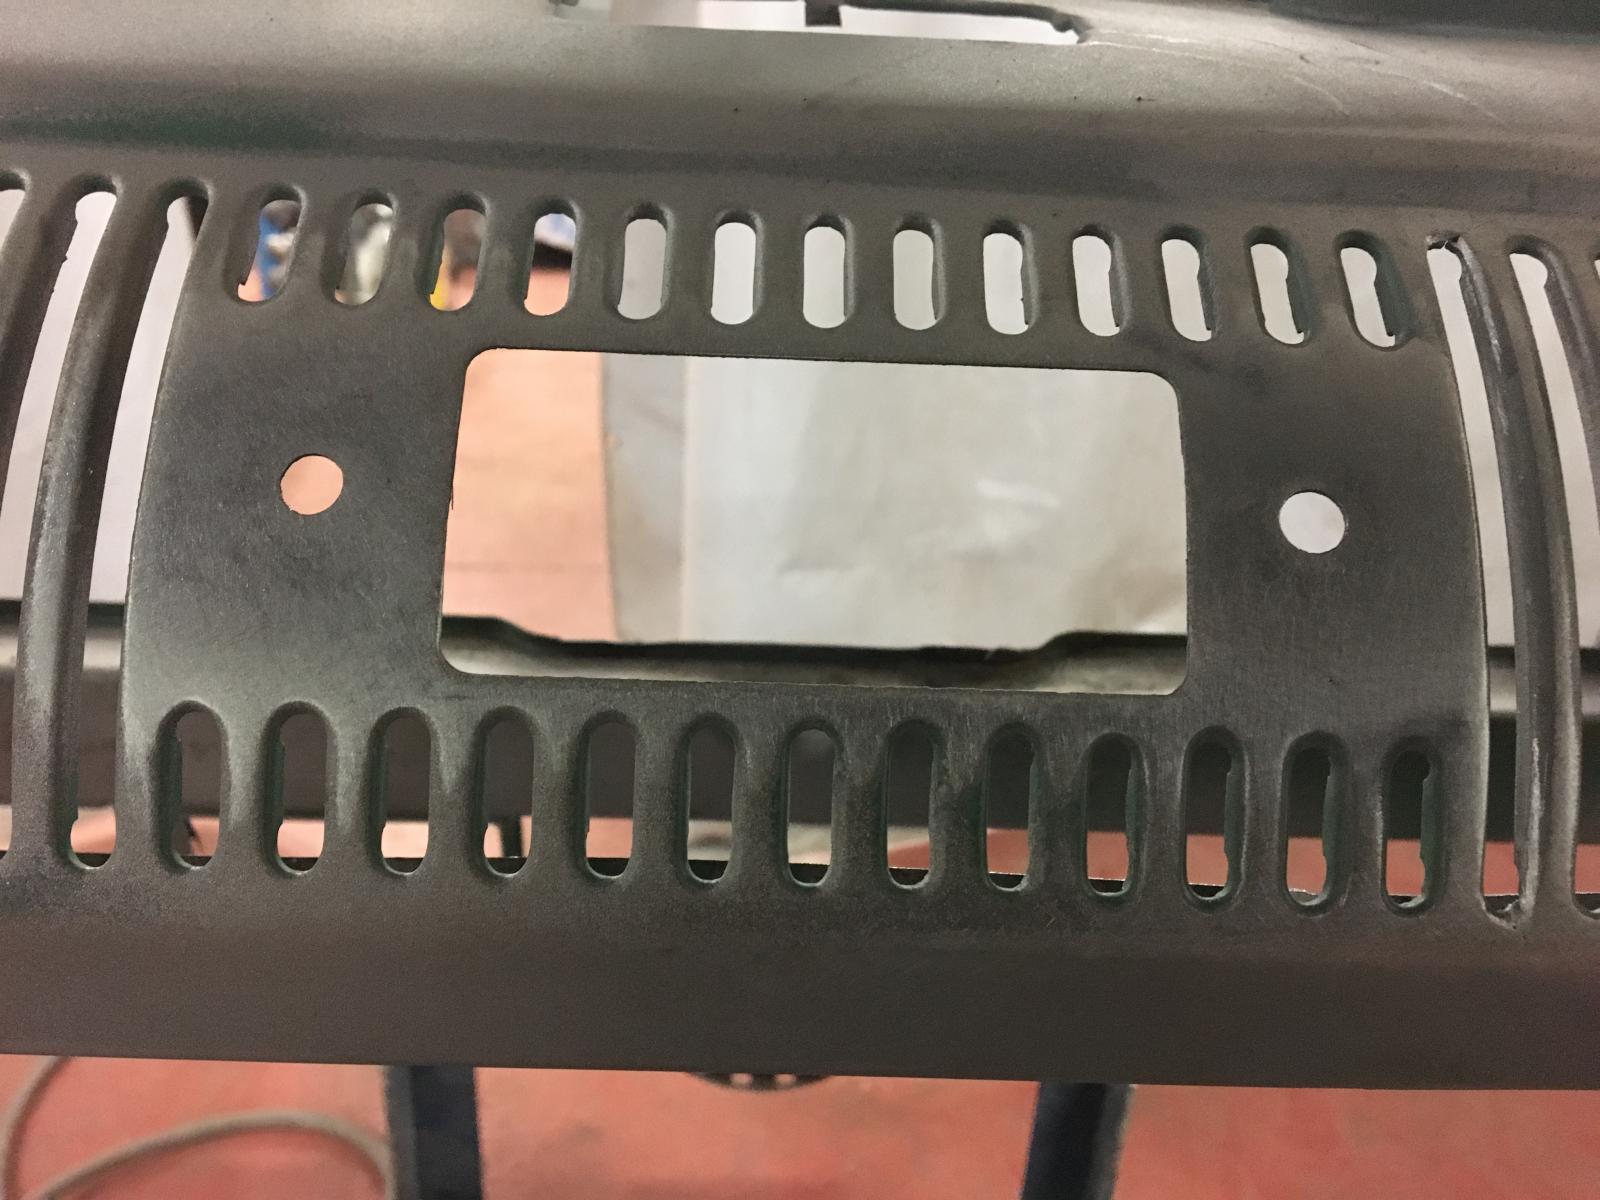
A little repair I forgot to mention - The radio holes were slightly damaged, so they were repaired and are now have the correct size hole. Before:

After:

And the other side:
RHS inner B post panel tacked in place, and side panel pinned in place:

New bulkhead trial fit with new B post:
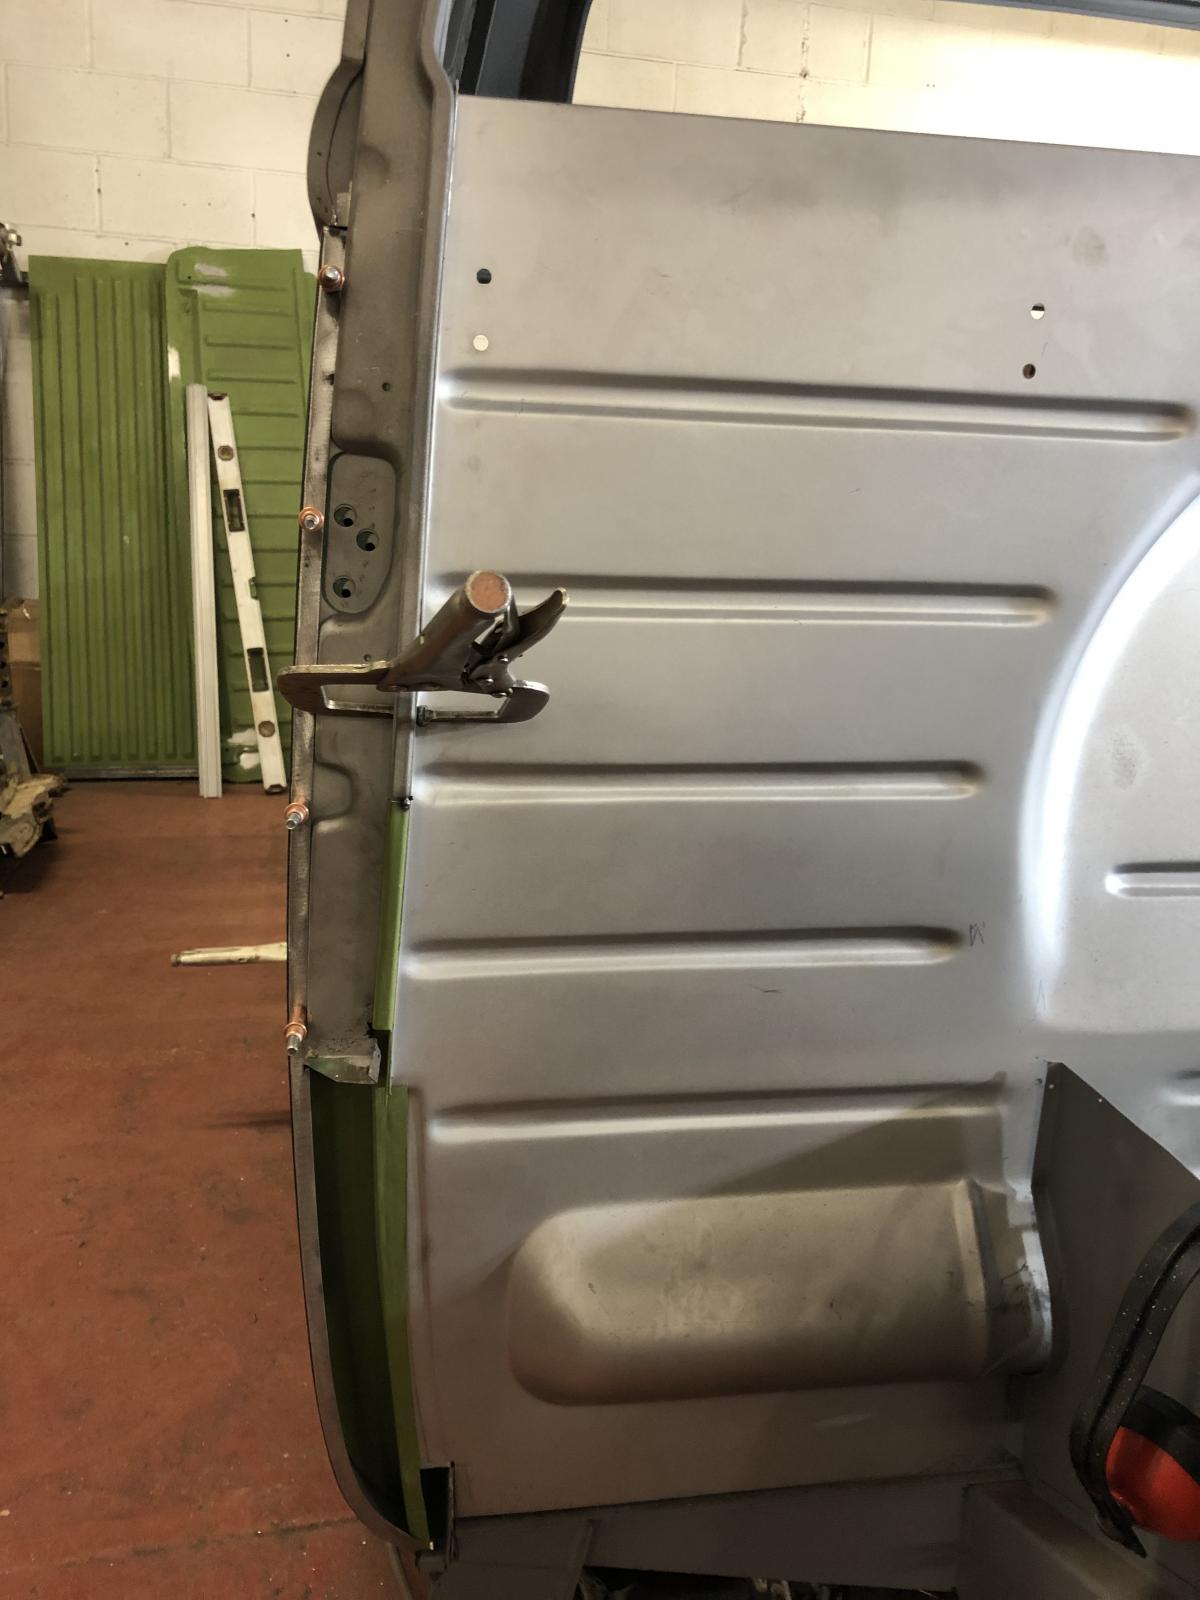
Side panels and corners lined up and pinned in place:


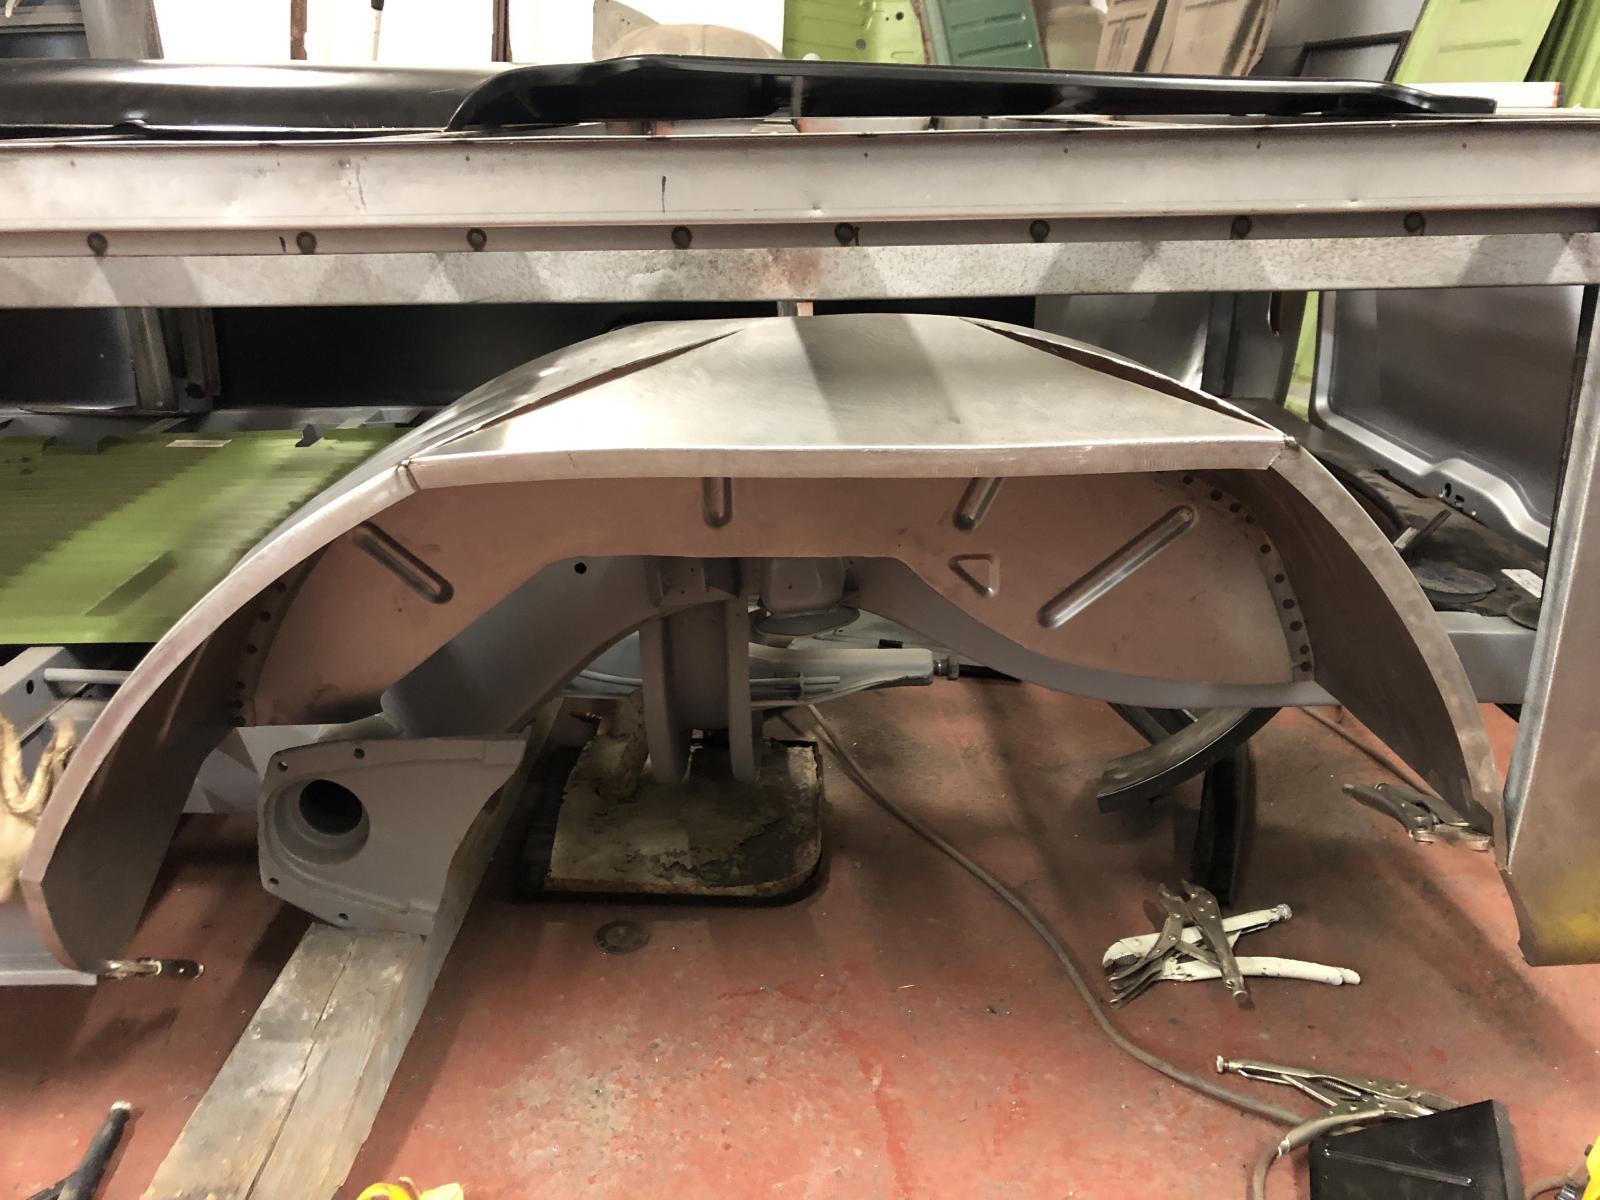
As far as I know no one makes rear tubs for a truck so we modified a pair of tubs from Autocraft to clear the vents as the originals. We mocked them up with the side panel, marked where they needed to be re shaped, cut them then got them in the stretcher and worked the edge until they were fairly straight:

The shape along the lower curve at the end of the sill wasnt the same profile as the rear side panel:
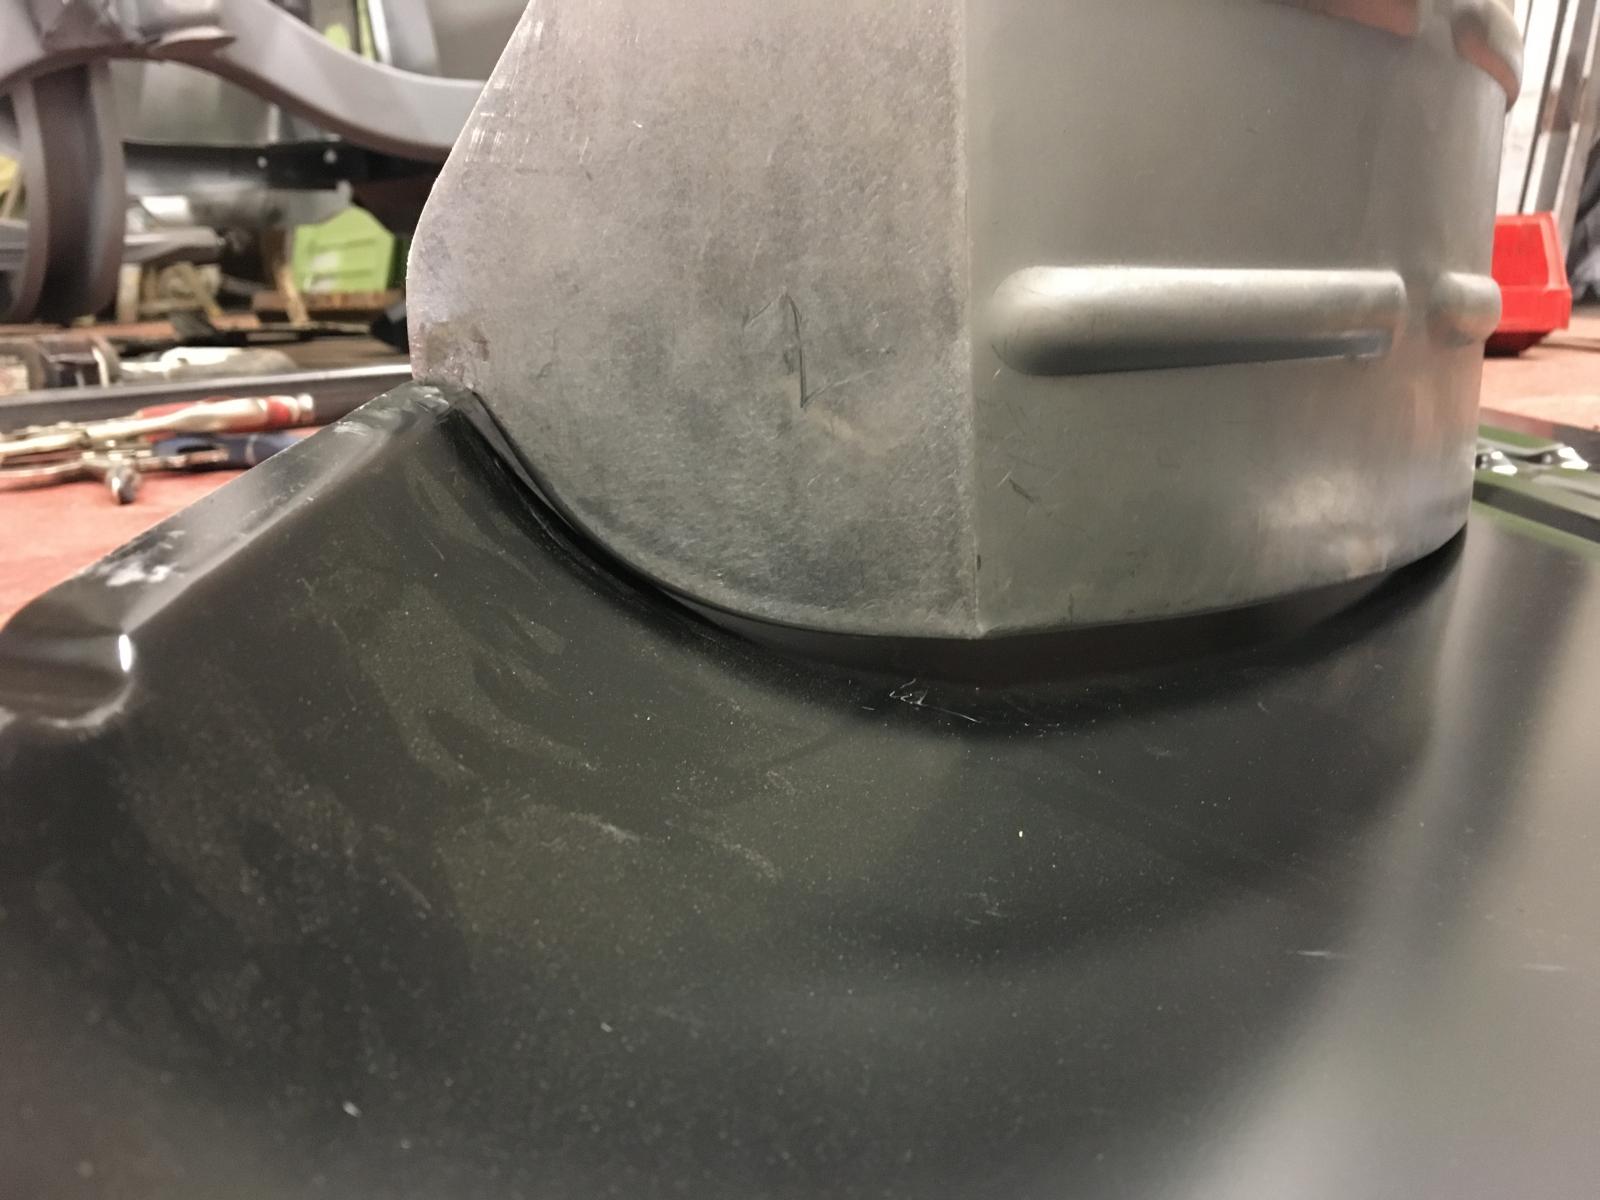
If we would have left the tubs like this, the side panel would have been a mess after welding them together so we reshaped them. The rear closing panel had a nice curve that matched the side panel, so that was used as a template:

You can see the difference with the template over the tub:

After a bit of reshaping just using a hammer and dolly:
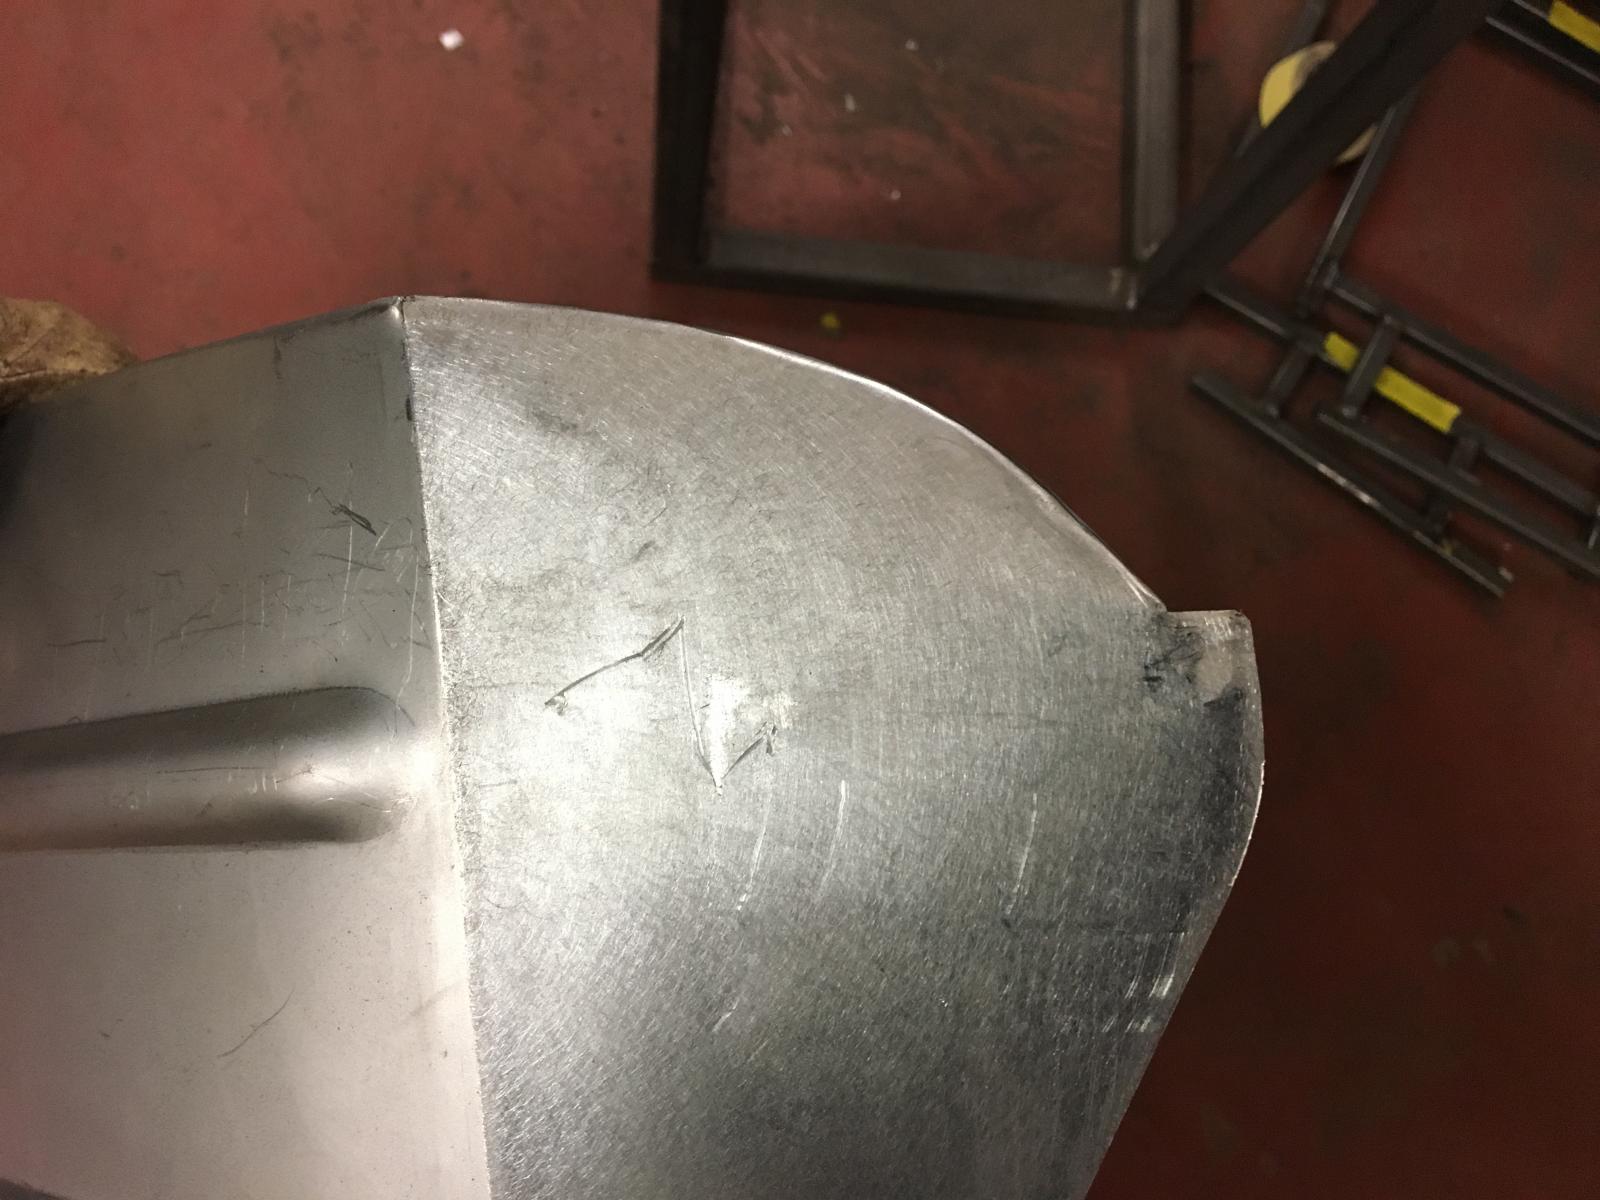
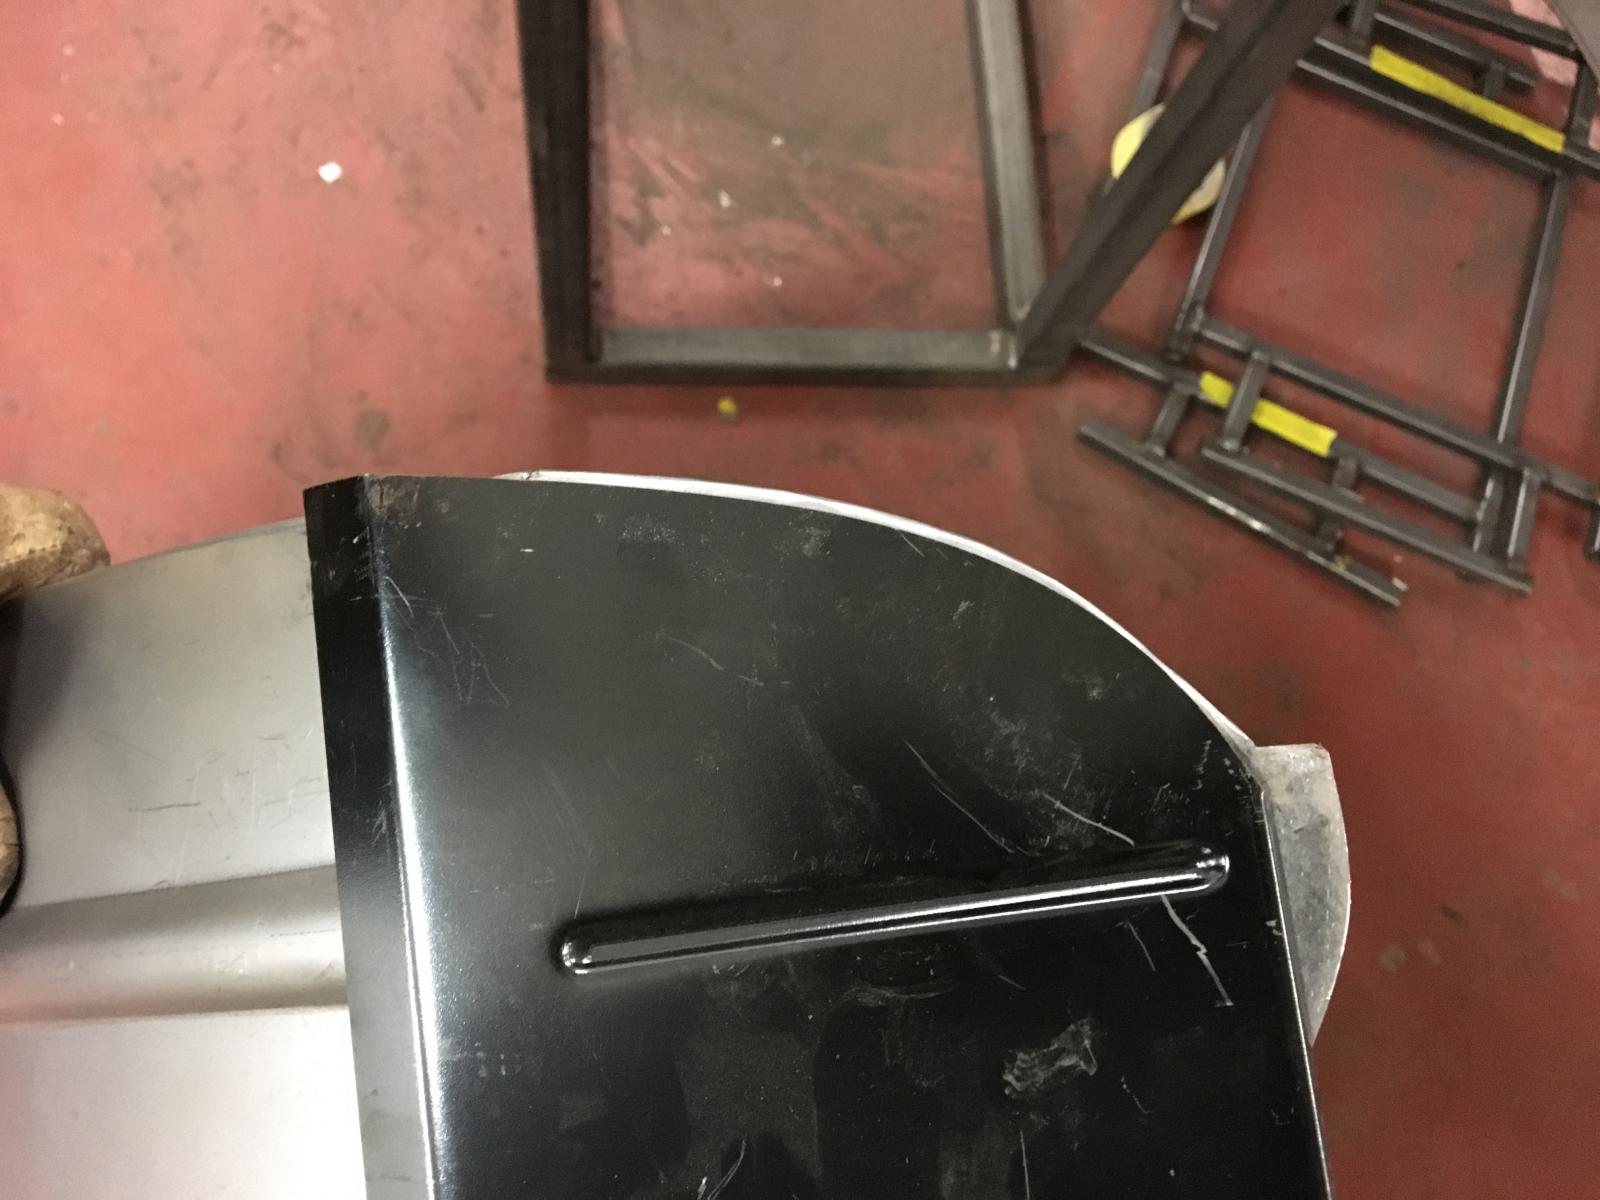
Much better fit with the side panel:

The side panel and tub were fitted and pinned together, then removed to finish welding the tubs:


We welded the top cuts in the tubs and spot welded the new side supports:
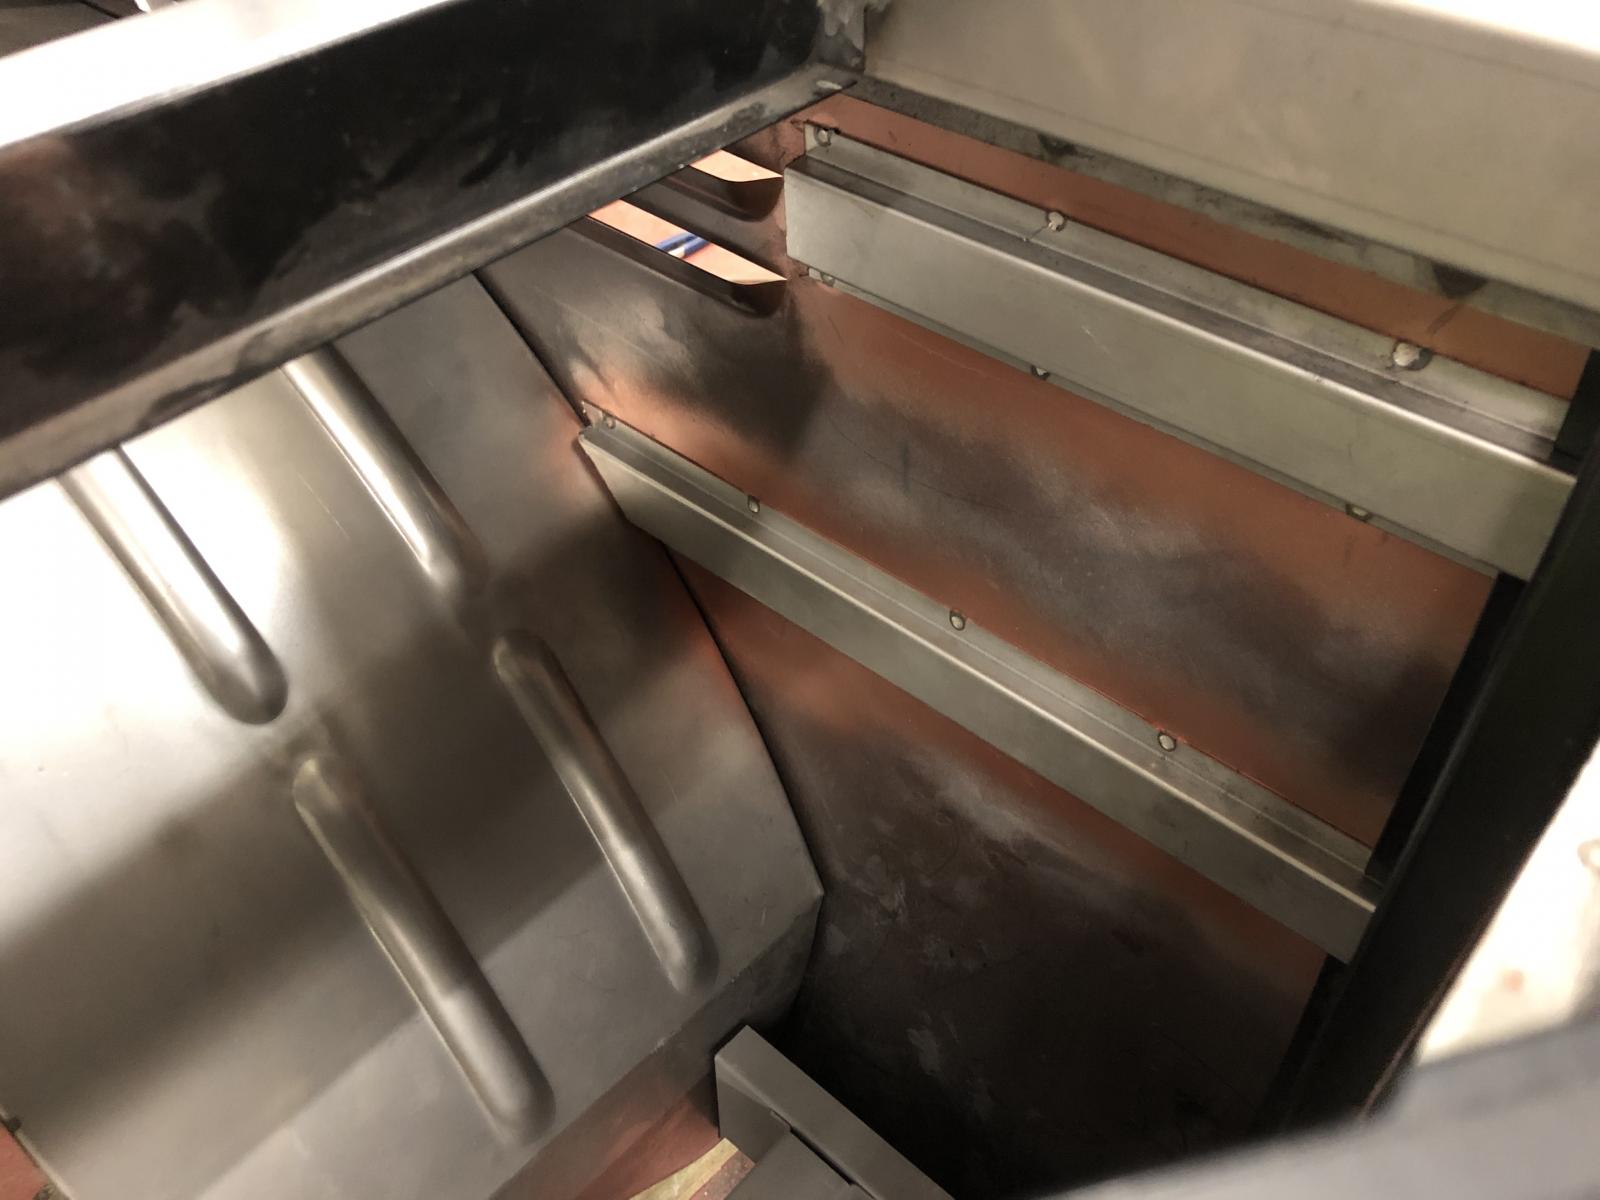


We spent ages getting the door gaps nice and making sure the body was in the right position over the chassis forwards/backwards and left/right. Once happy we pinned everything into place:
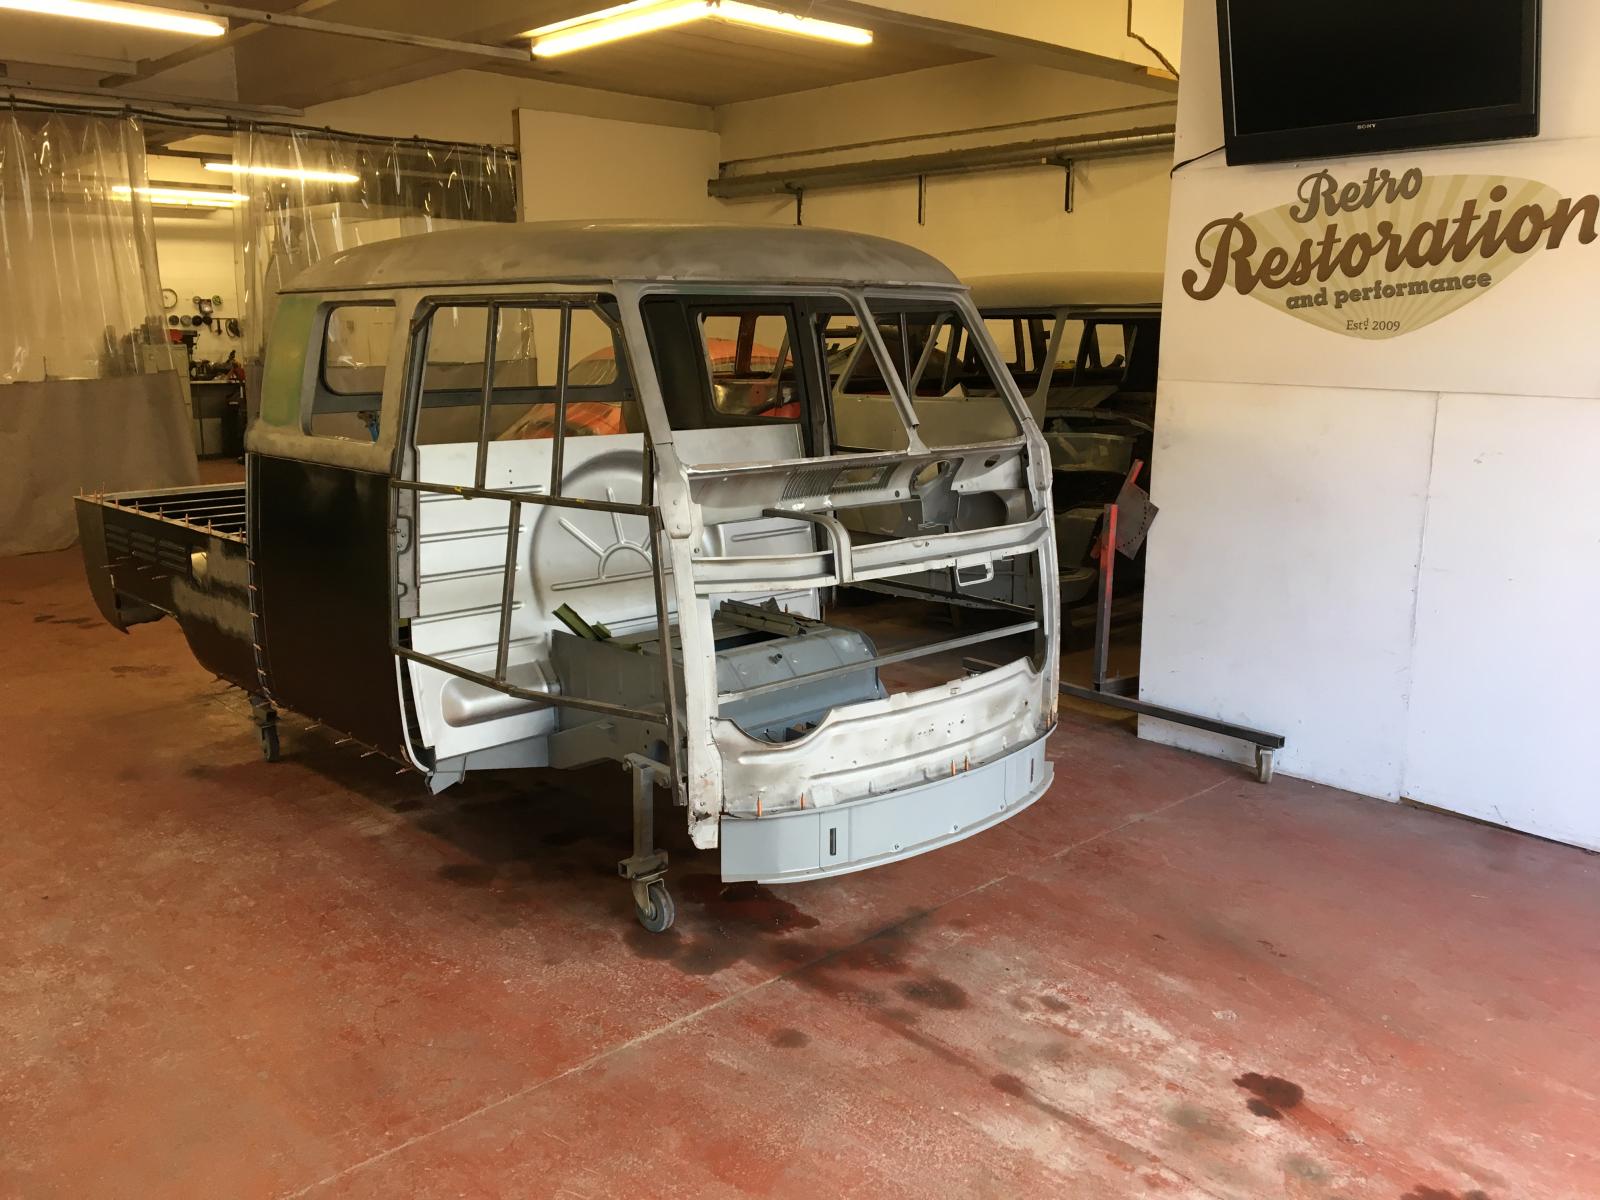

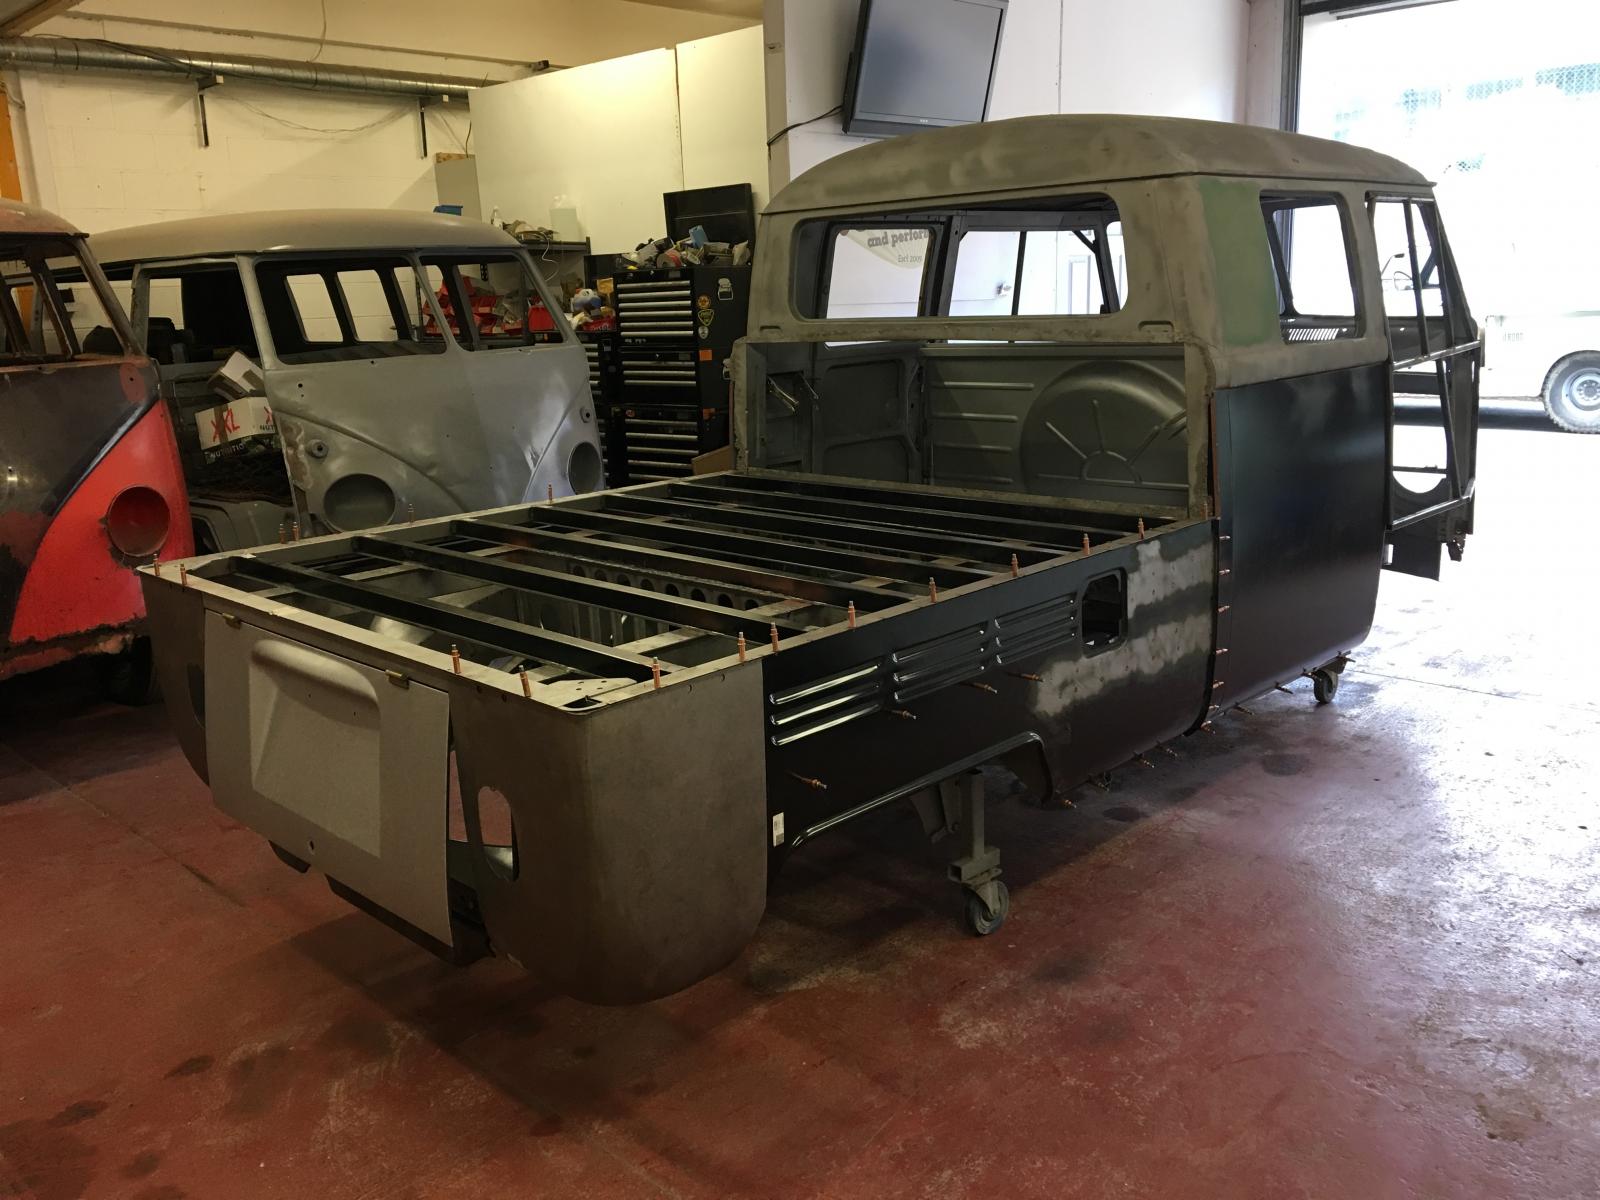
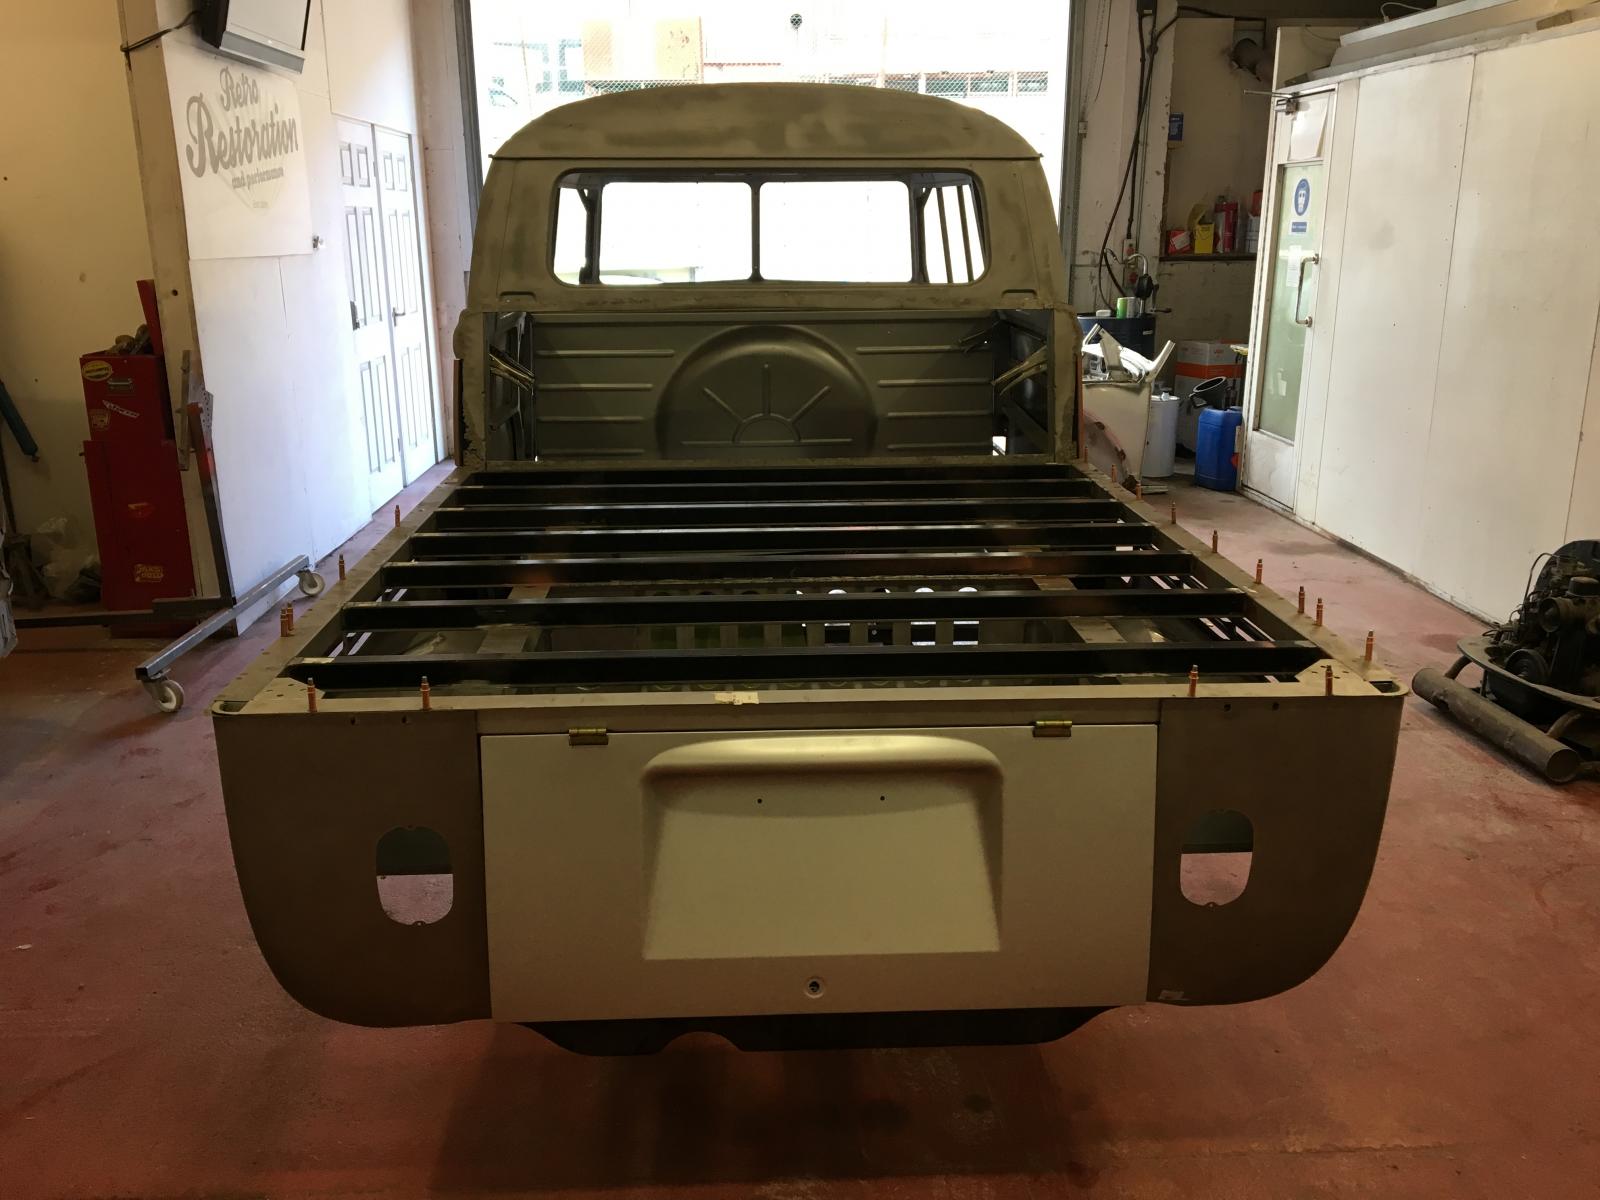
Thats where we are at the moment.
Cheers
I repaired the panel above the gearbox that was rotten where both engine side trays meet it. Did the same repair both sides:


Then, the repair panel we made was welded in and clamped in place while we trial fitted the other new panels:

The new top hats and side supports were clamped in place to check everything was good before any welding:

The side panels and rear corners fitted quite nice. The rear engine lid hinge panel needed a bit of work, and the sides supports still need lengthening at this point, but now we were happy with the top hats etc they were welded in place. The engine lid hinge panel was twisted, with the corners and engine lid fitted the gaps were awful. After some work they are a little better but still need more work:

We trial fitted the gates at this point to see where the captive nuts needed fitting into the side panels of the bed framework, and to check the mounting area on the BBT engine lid hinge panel and rear corners. None of them lined up

I spot welded both side panels to the smaller side panel at the back of the cab that meets the bulkhead:


The lower hinge section of the post was repaired with a Klassic Fab panel. I cant find pictures of this but once this was repaired the side panels were trimmed down, fitted and pinned in place once fitting nice, ready for welding:

The rear bulkhead and bed were trial fitted now the new side panels were in place, and sides and quarters mocked up on the repaired framework:


The original cargo door was twisted / damaged. We have an good original paint door that we used to check the gaps... Pretty pleased with this:

There was so much work in all the above. Working with a mixture of panels from Klassic Fab, Autocraft, and the new BBT panels in weld through primer... All pretty good but all need work. The rear corners are not great. The holes for the gate hinges are in the wrong place, and the shape isnt perfect, but they are good enough overall. Just to show how much modification these panels need - here is the original battery tray, with the new Autocraft panel on top of it. Completely different shape where it meets the corner... And, neither of those panels fit the new corner. No big deal, we will just reshape the new panel when its fitted to fit the new corner:

A little repair I forgot to mention - The radio holes were slightly damaged, so they were repaired and are now have the correct size hole. Before:

After:

And the other side:

RHS inner B post panel tacked in place, and side panel pinned in place:

New bulkhead trial fit with new B post:

Side panels and corners lined up and pinned in place:


As far as I know no one makes rear tubs for a truck so we modified a pair of tubs from Autocraft to clear the vents as the originals. We mocked them up with the side panel, marked where they needed to be re shaped, cut them then got them in the stretcher and worked the edge until they were fairly straight:


The shape along the lower curve at the end of the sill wasnt the same profile as the rear side panel:

If we would have left the tubs like this, the side panel would have been a mess after welding them together so we reshaped them. The rear closing panel had a nice curve that matched the side panel, so that was used as a template:

You can see the difference with the template over the tub:

After a bit of reshaping just using a hammer and dolly:


Much better fit with the side panel:

The side panel and tub were fitted and pinned together, then removed to finish welding the tubs:


We welded the top cuts in the tubs and spot welded the new side supports:


We spent ages getting the door gaps nice and making sure the body was in the right position over the chassis forwards/backwards and left/right. Once happy we pinned everything into place:


Thats where we are at the moment.
Cheers
mabbo
SSVC Member
Posts: 80
Joined: Wed Jun 01, 2011 7:09 pm
Re: Swedish 66 Crew Cab
by Griff55 » Thu Sep 12, 2019 4:43 pm
Wow! Amazing work fair play.
Do you know what length of cable guides and shift rod tube you had sticking out when welded? Mine were cut when I got it and not sure how much to leave on new ones I’m fitting?
Do you know what length of cable guides and shift rod tube you had sticking out when welded? Mine were cut when I got it and not sure how much to leave on new ones I’m fitting?
Griff55
Registered user
Posts: 71
Joined: Fri Aug 30, 2013 10:41 pm
Re: Swedish 66 Crew Cab
by type21f » Thu Sep 12, 2019 7:43 pm
Excellent thread explaining step by step!
G
G
type21f
SSVC Member
Posts: 15456
Joined: Tue May 29, 2007 12:55 pm
Re: Swedish 66 Crew Cab
by mabbo » Wed Oct 16, 2019 3:59 pm
These might not be in order, but here goes.
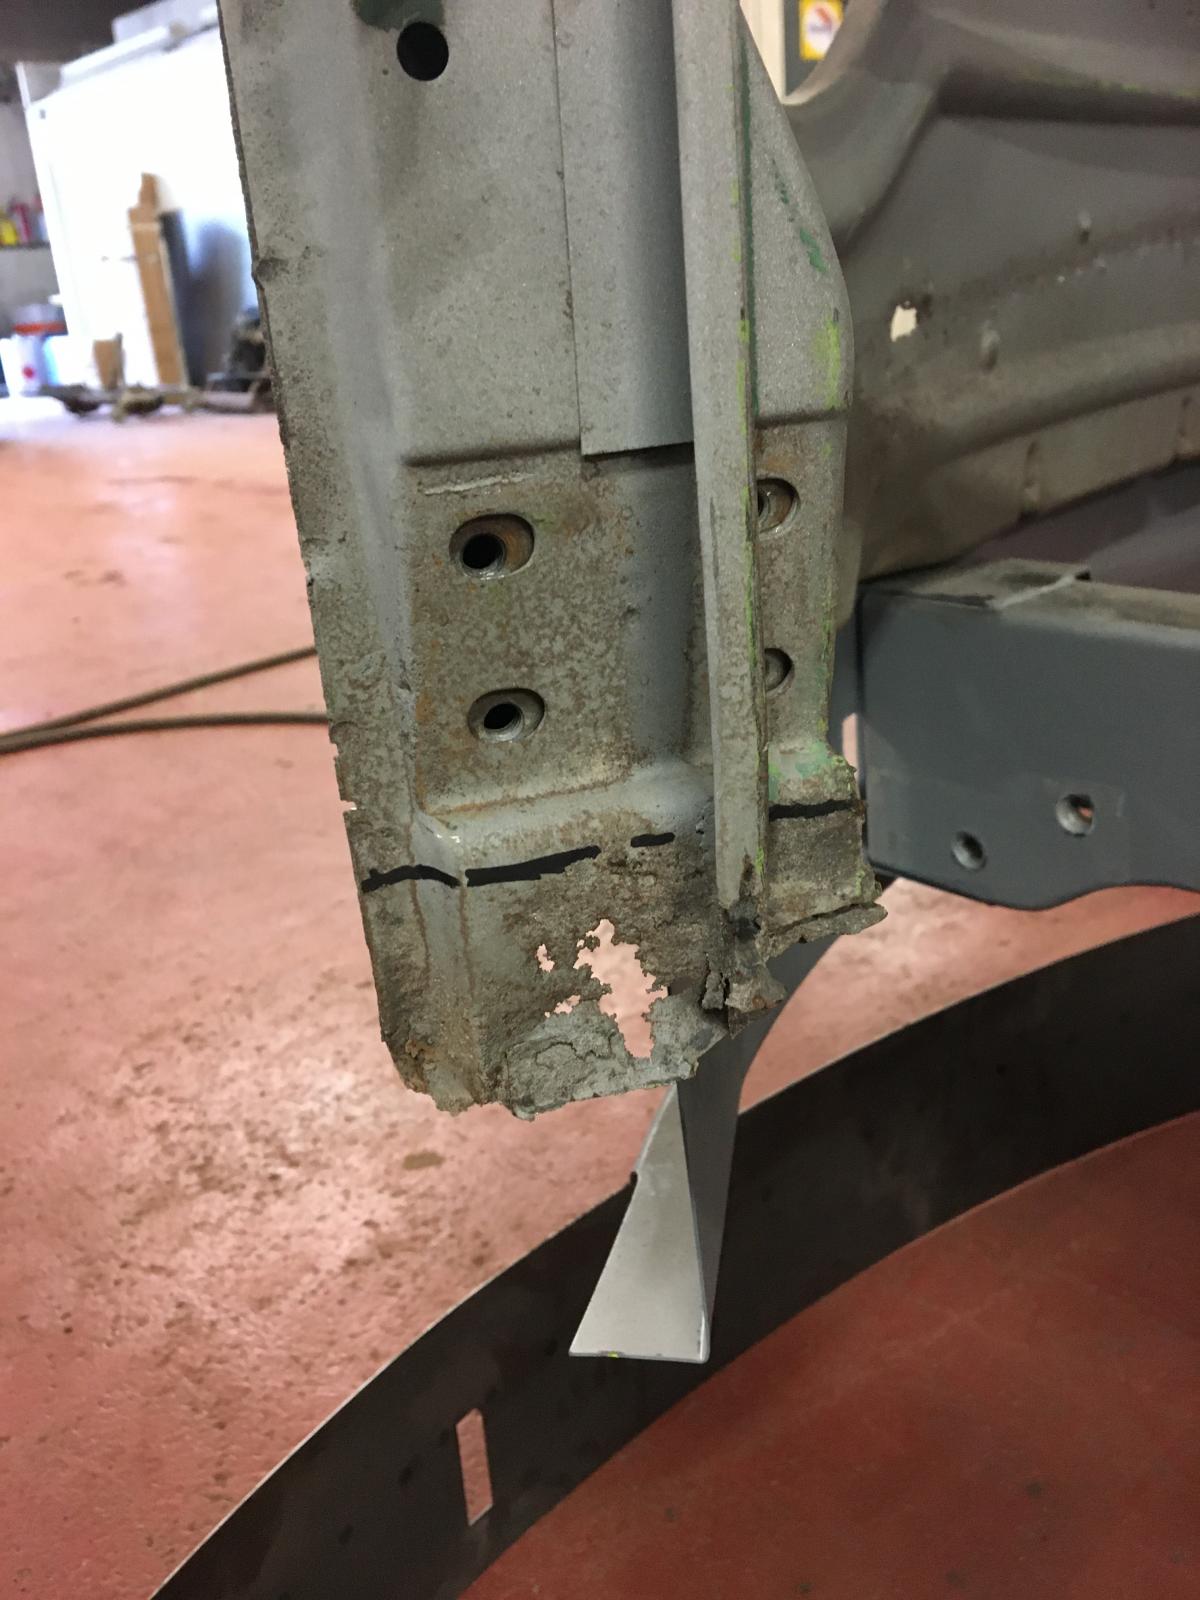
A post repairs on both sides:
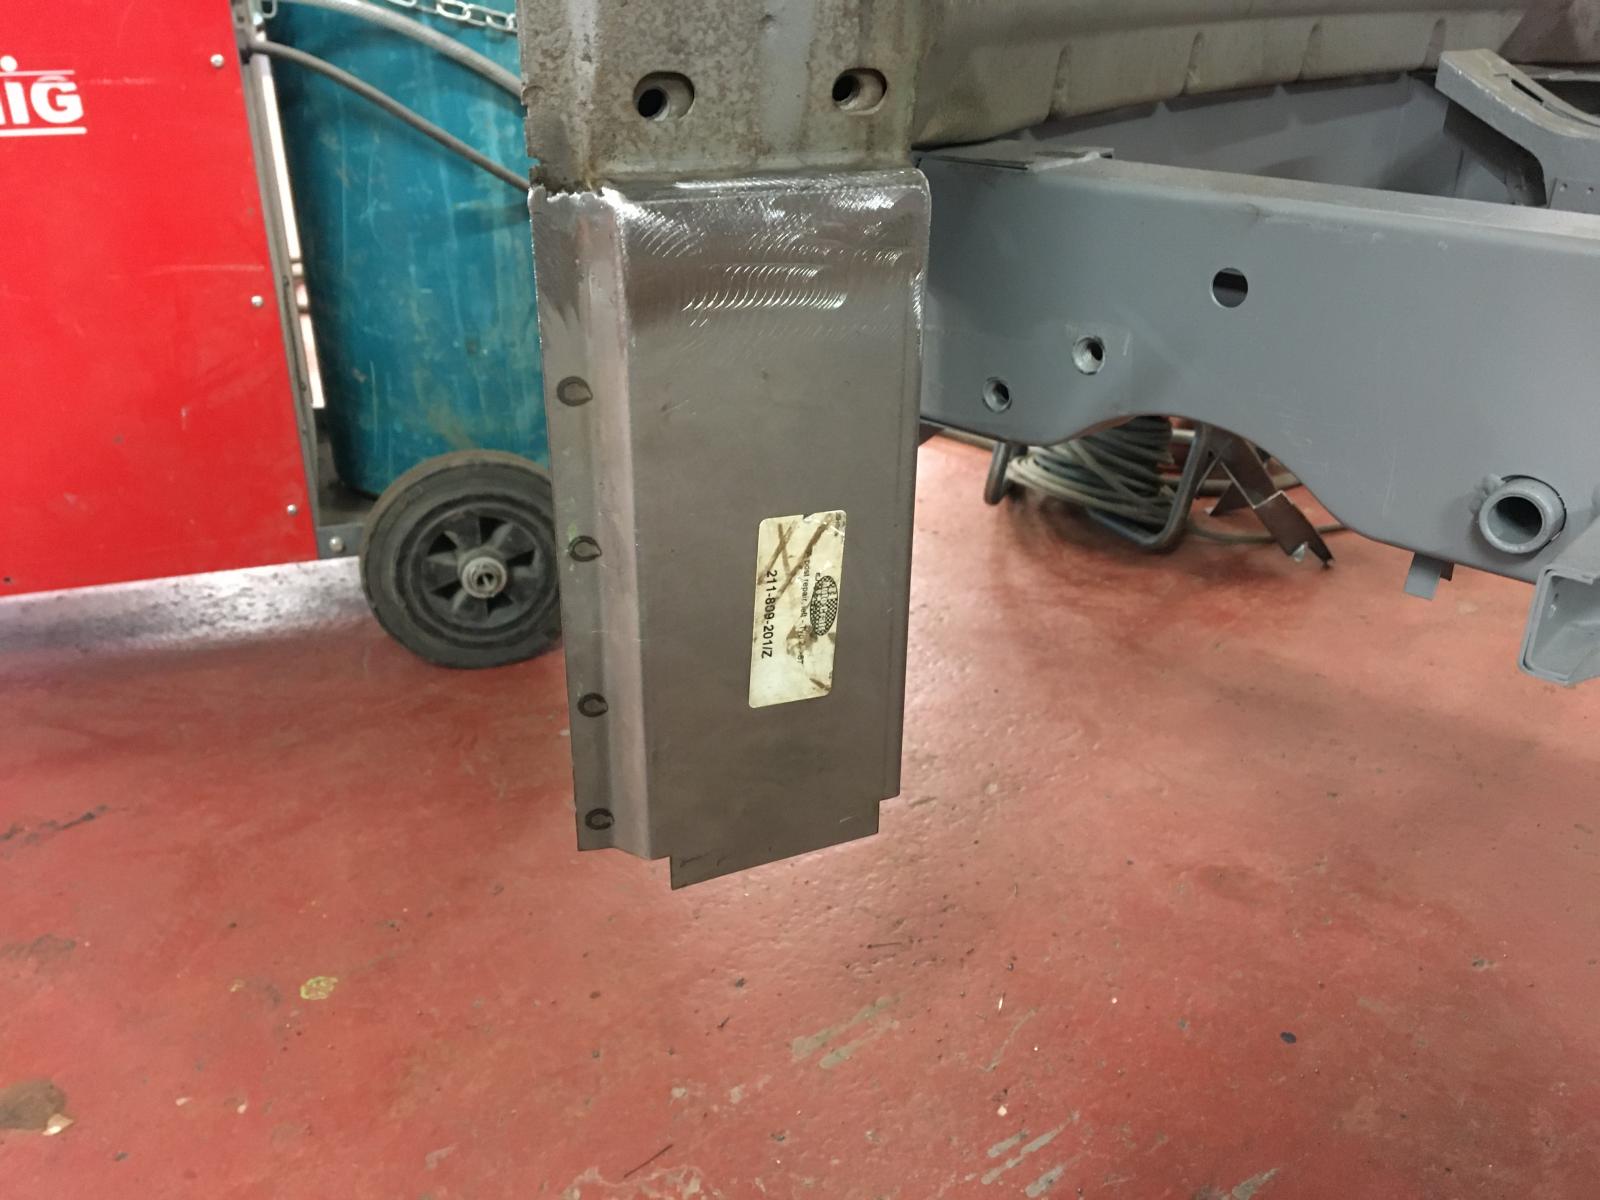
LHS B post repairs:
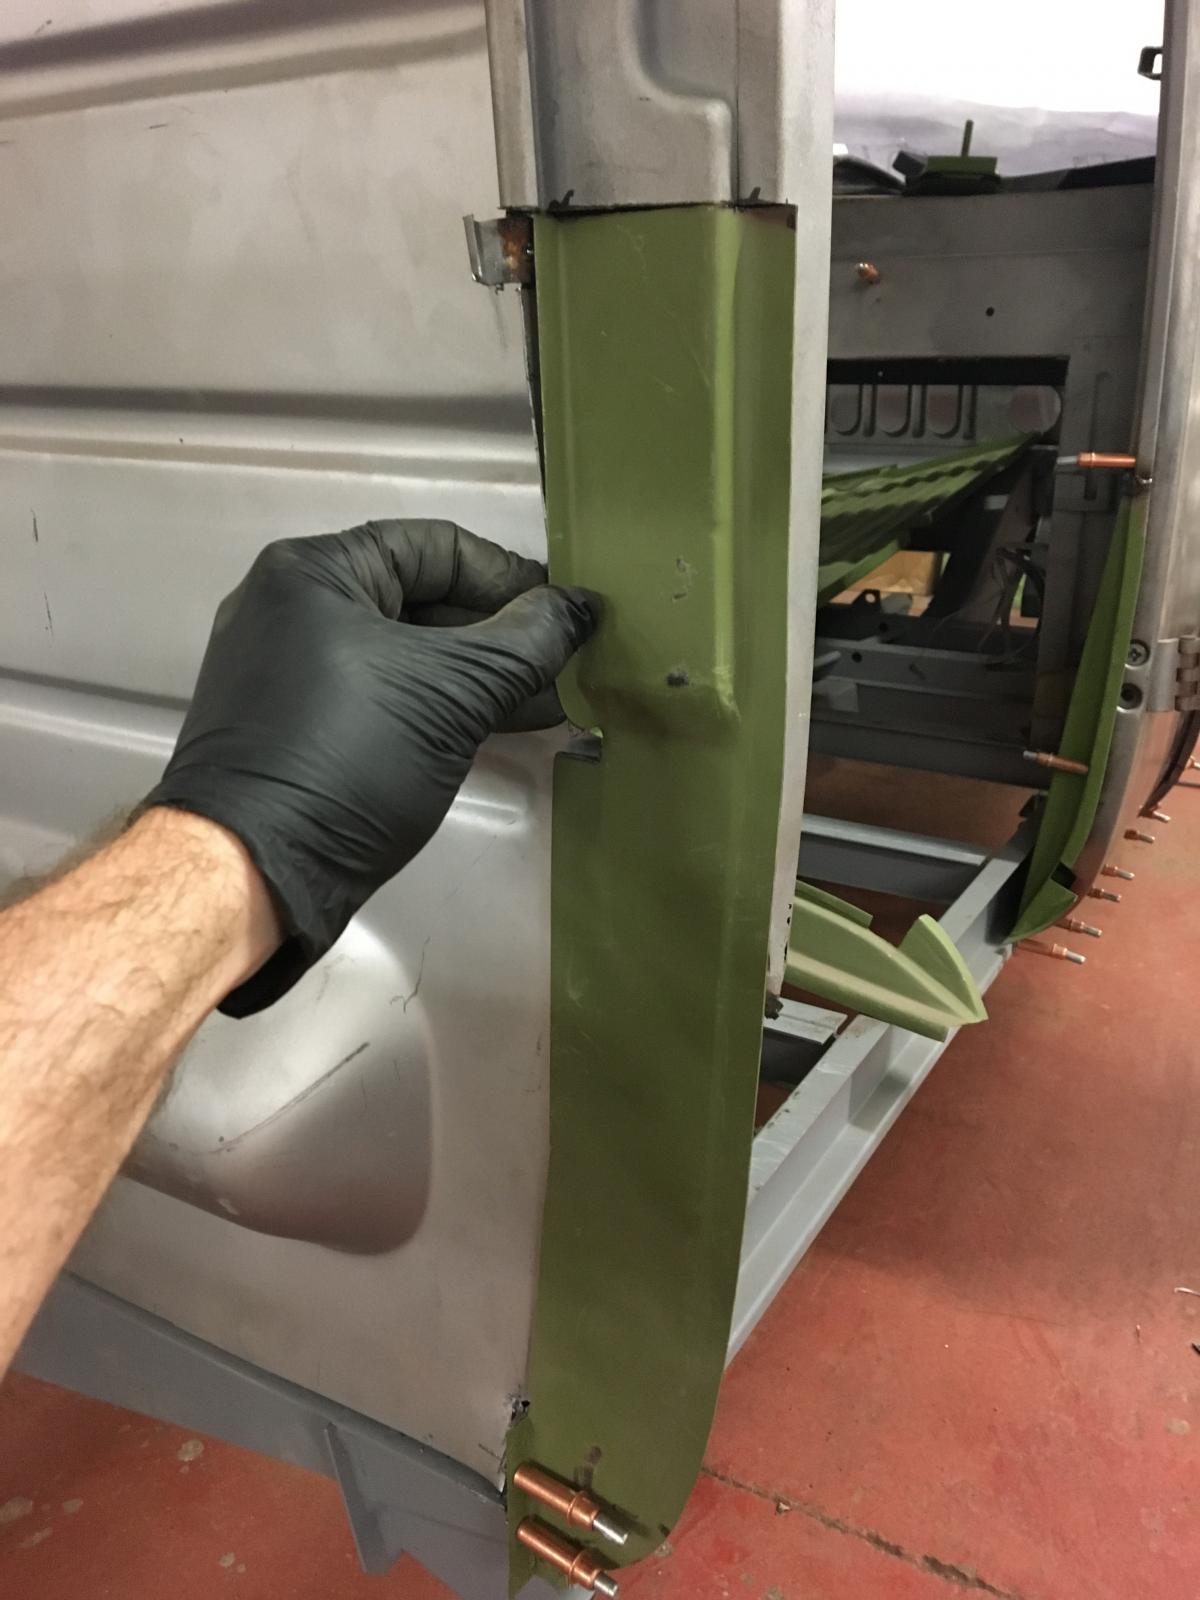
We are using the 3 piece Klassic Fab panel which is pretty nice, but needs a bit of work. Its for a regular bus so needed modifying for things like the hinge slot etc but overall its pretty nice.
You can see the top of the panel isnt as wide as the original:
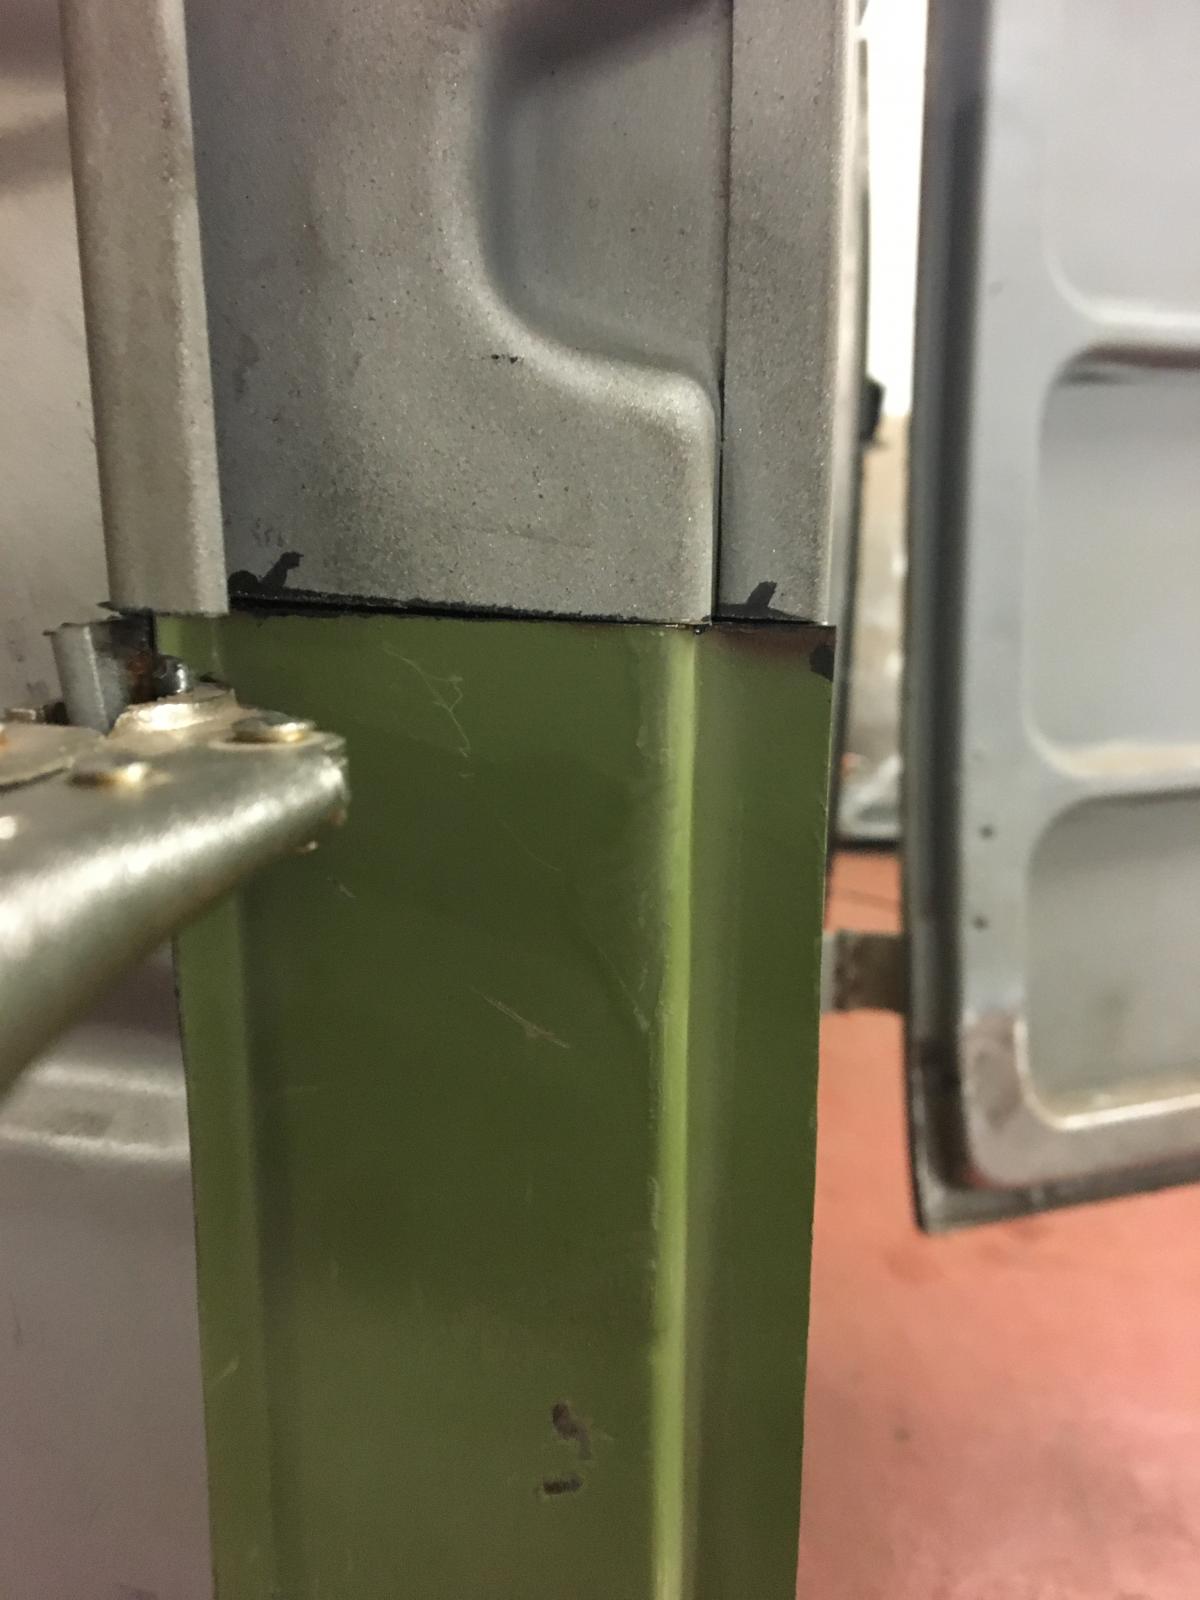
Reshaped it:


Inner post trimmed down and clamped in place:
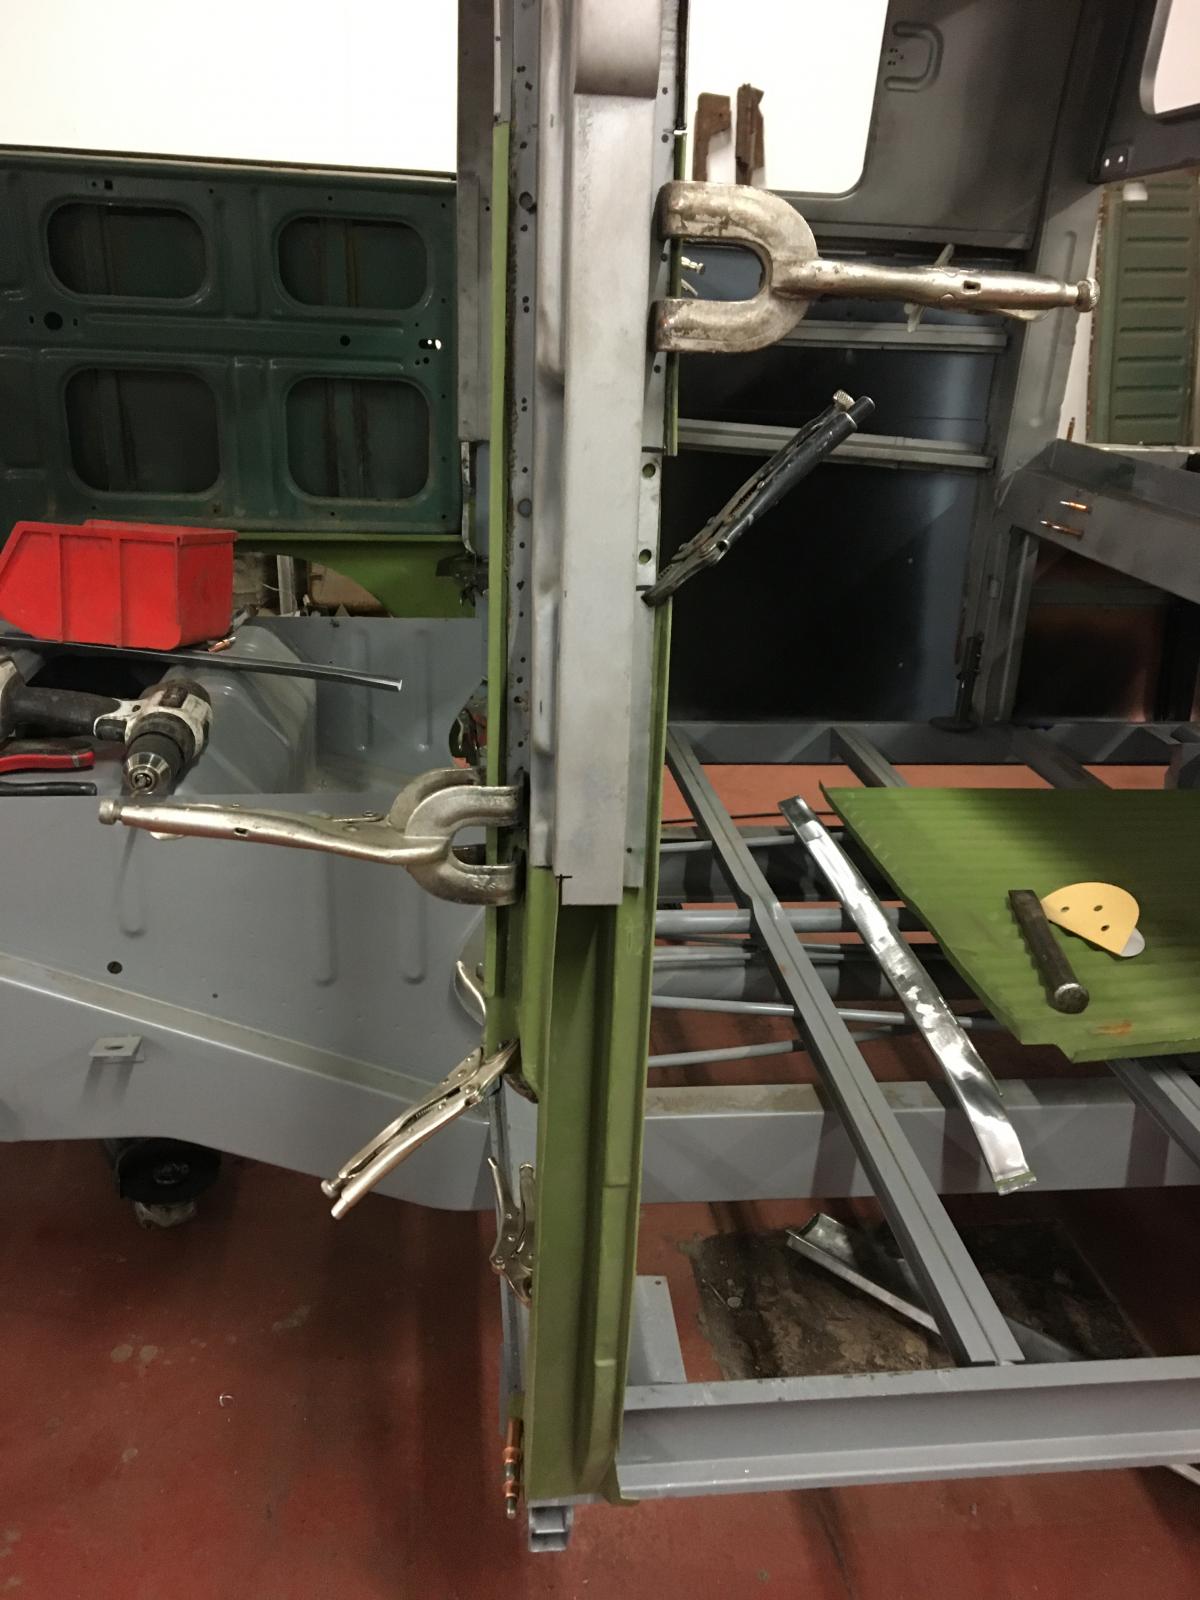
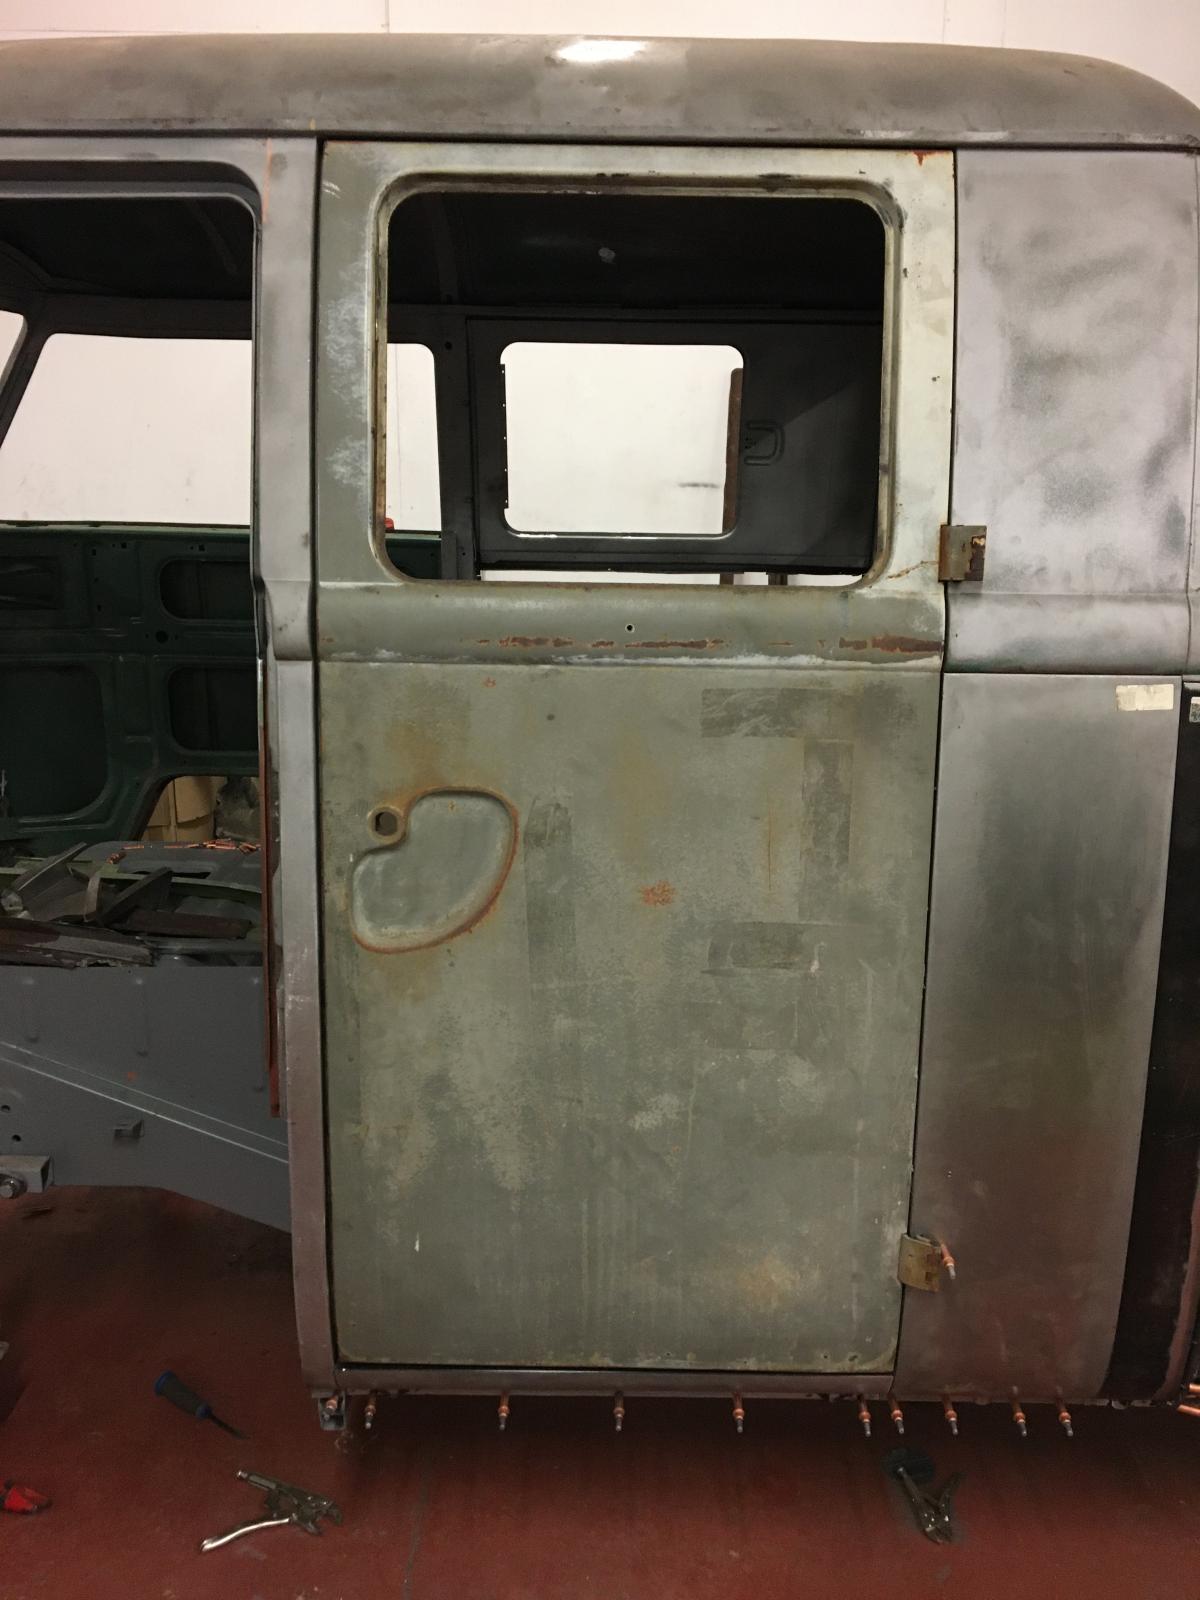
Outer B post trimmed, lined up and mocked up. Had the sill, door and dogleg all mocked up to check the height etc but didnt get a pic:

All 3 B post panels welded in place:

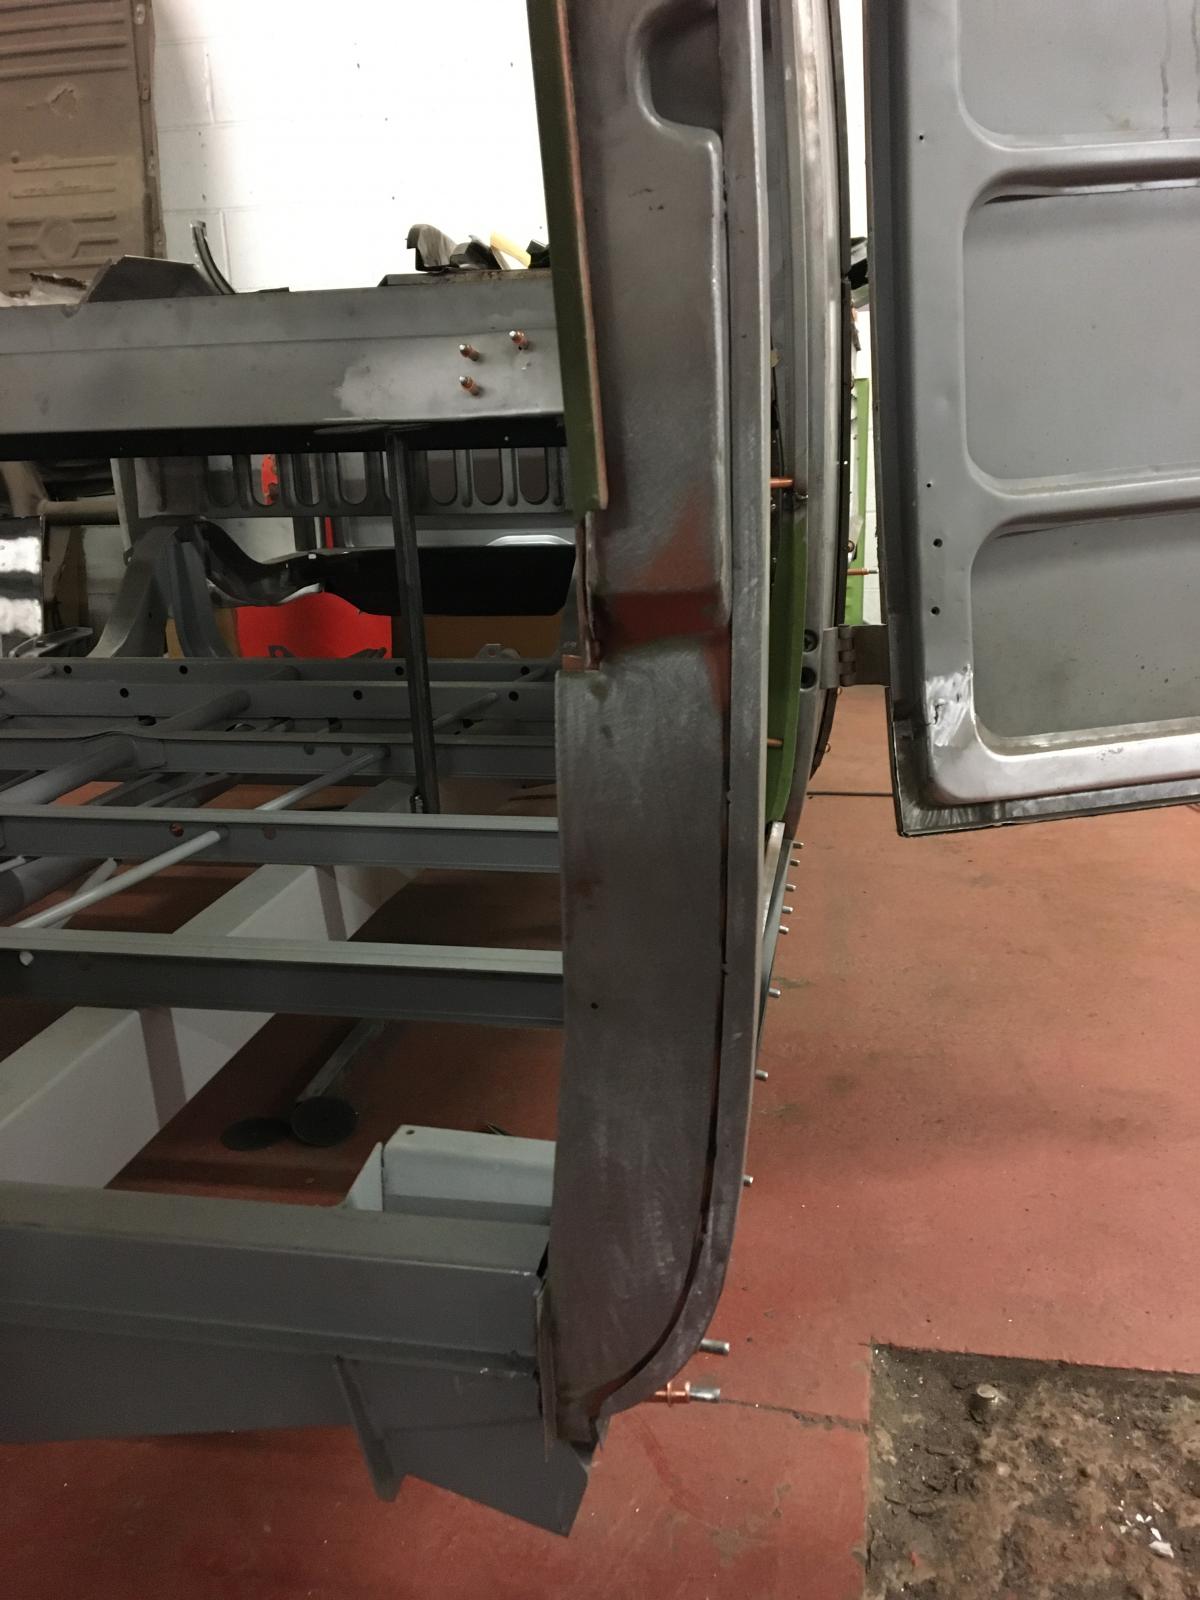

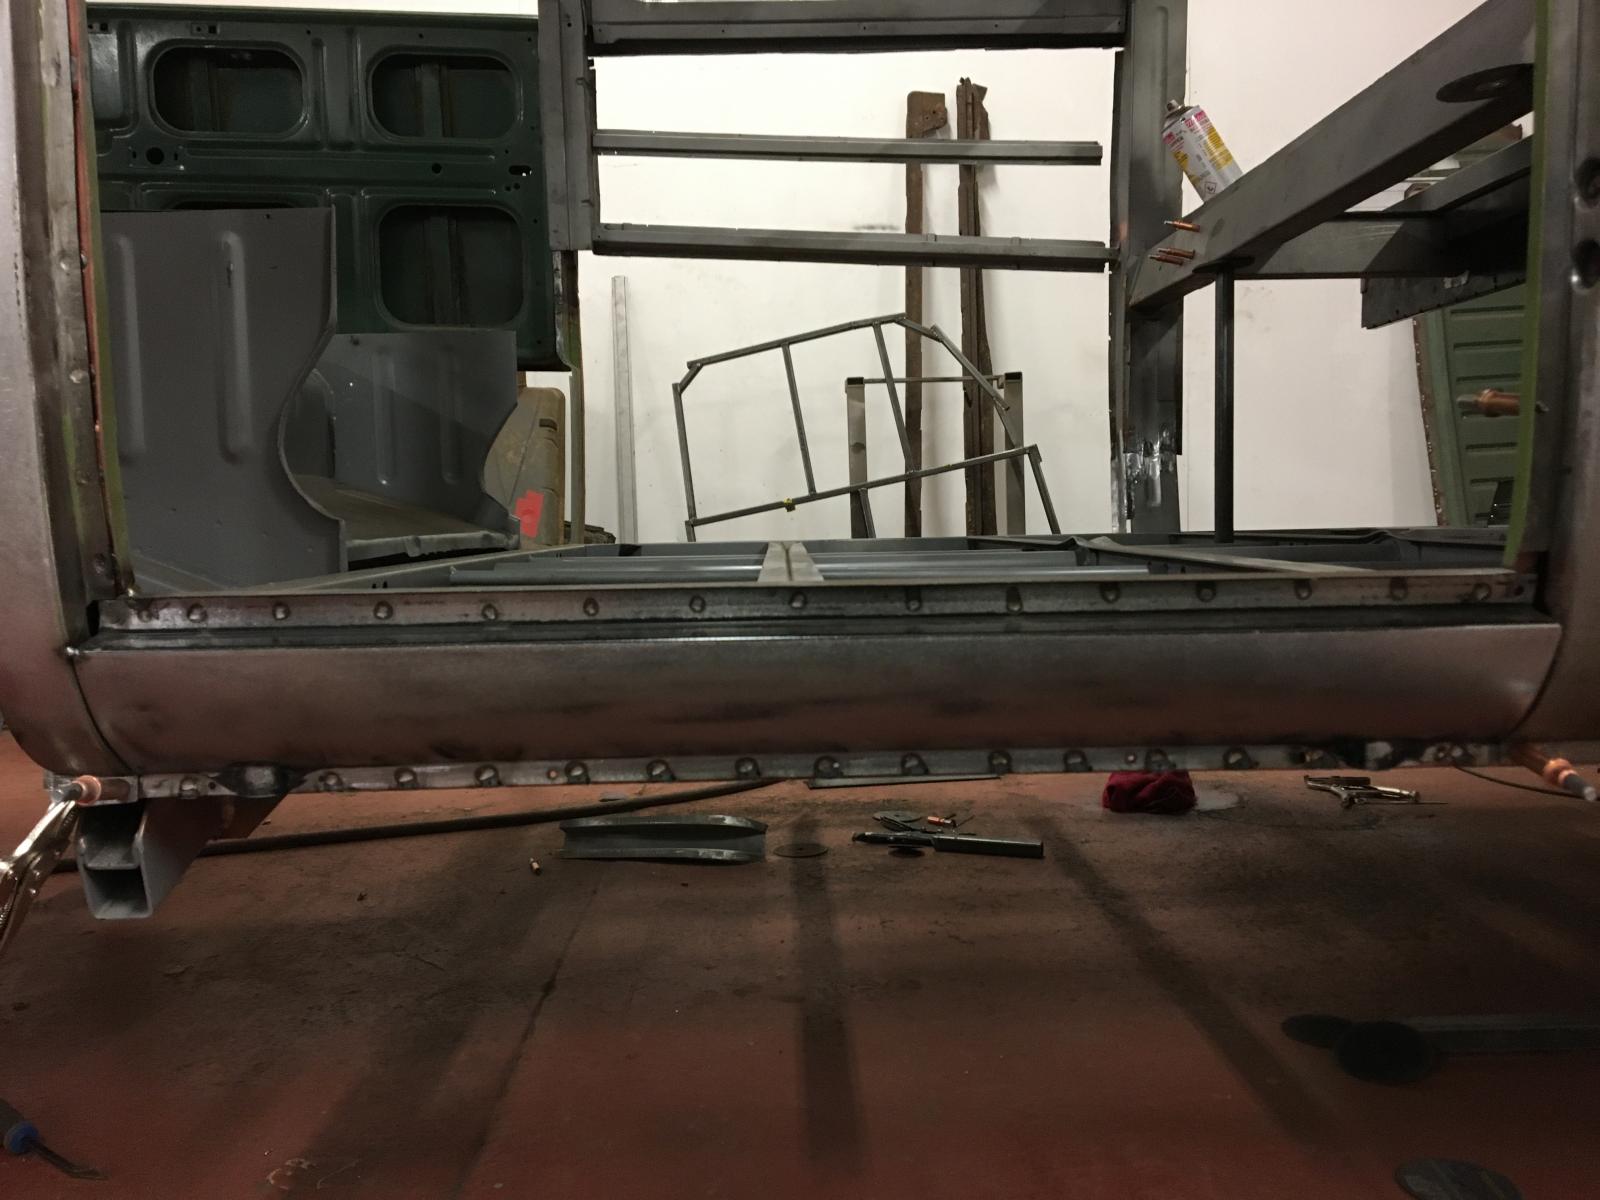
Sill lines up nice, and nice enough gaps:
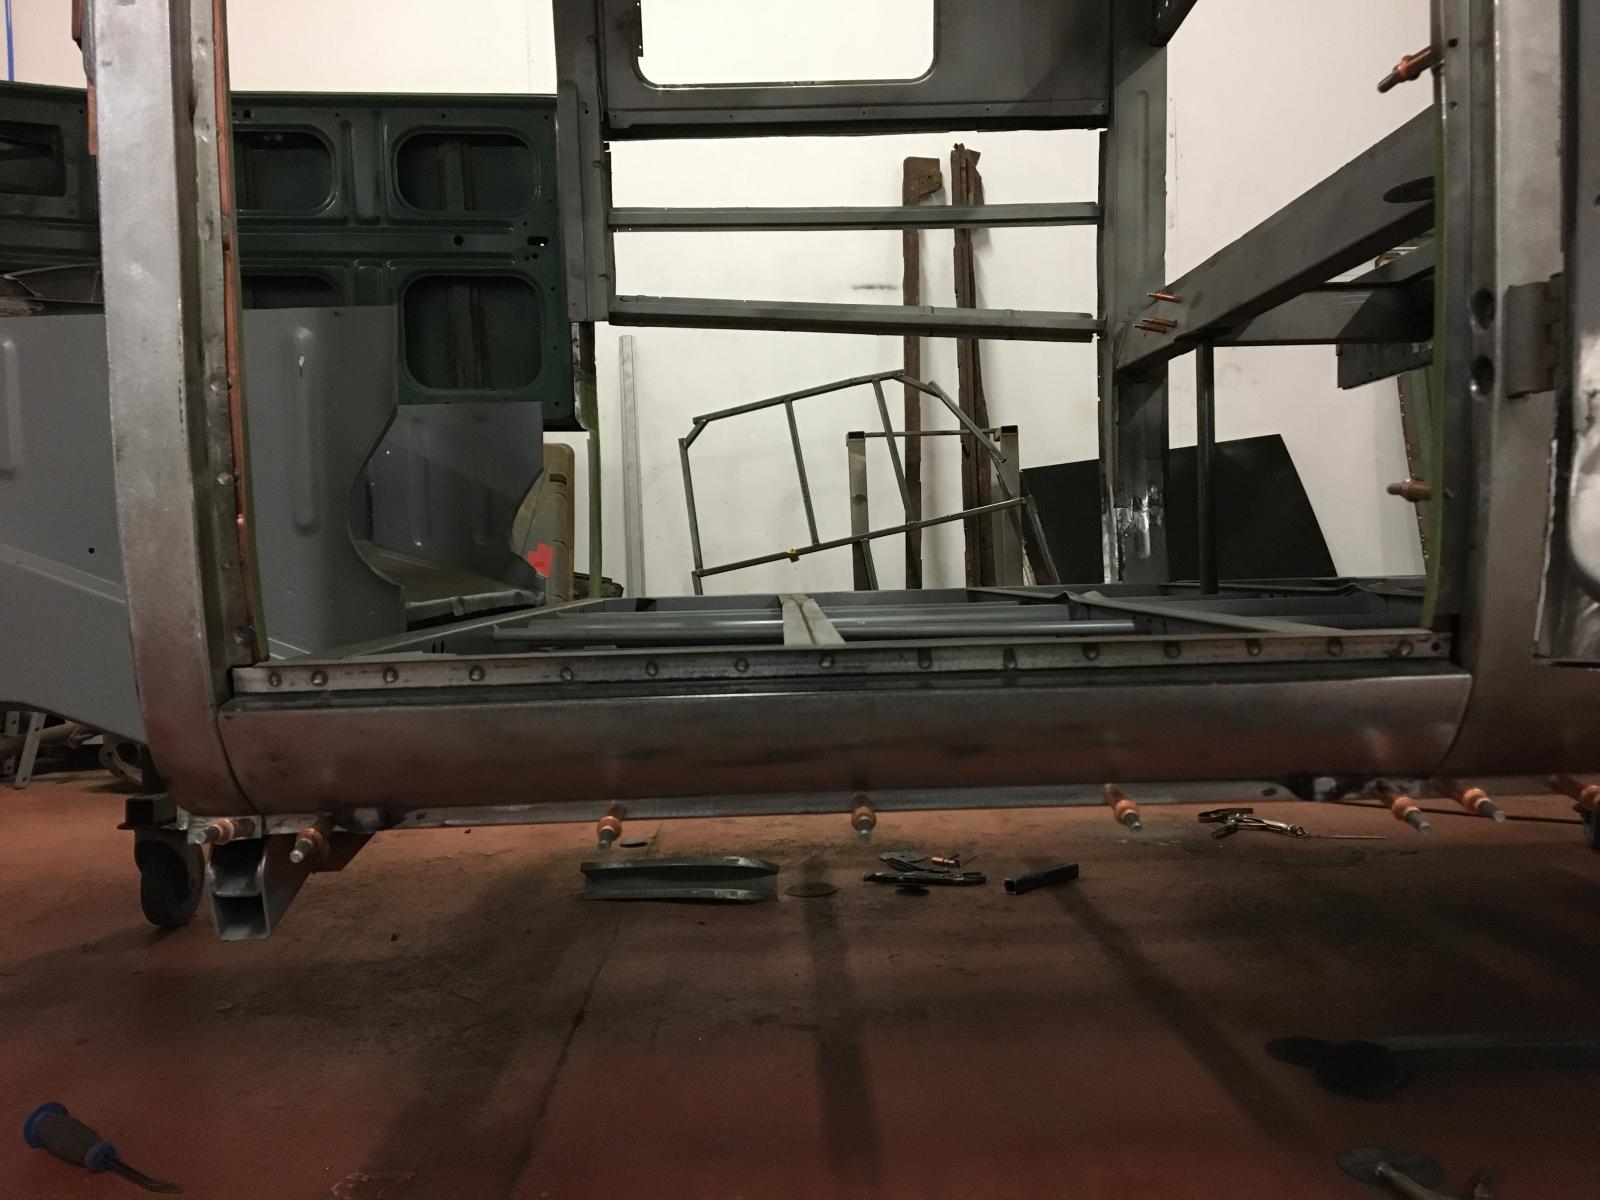
And welded in place:
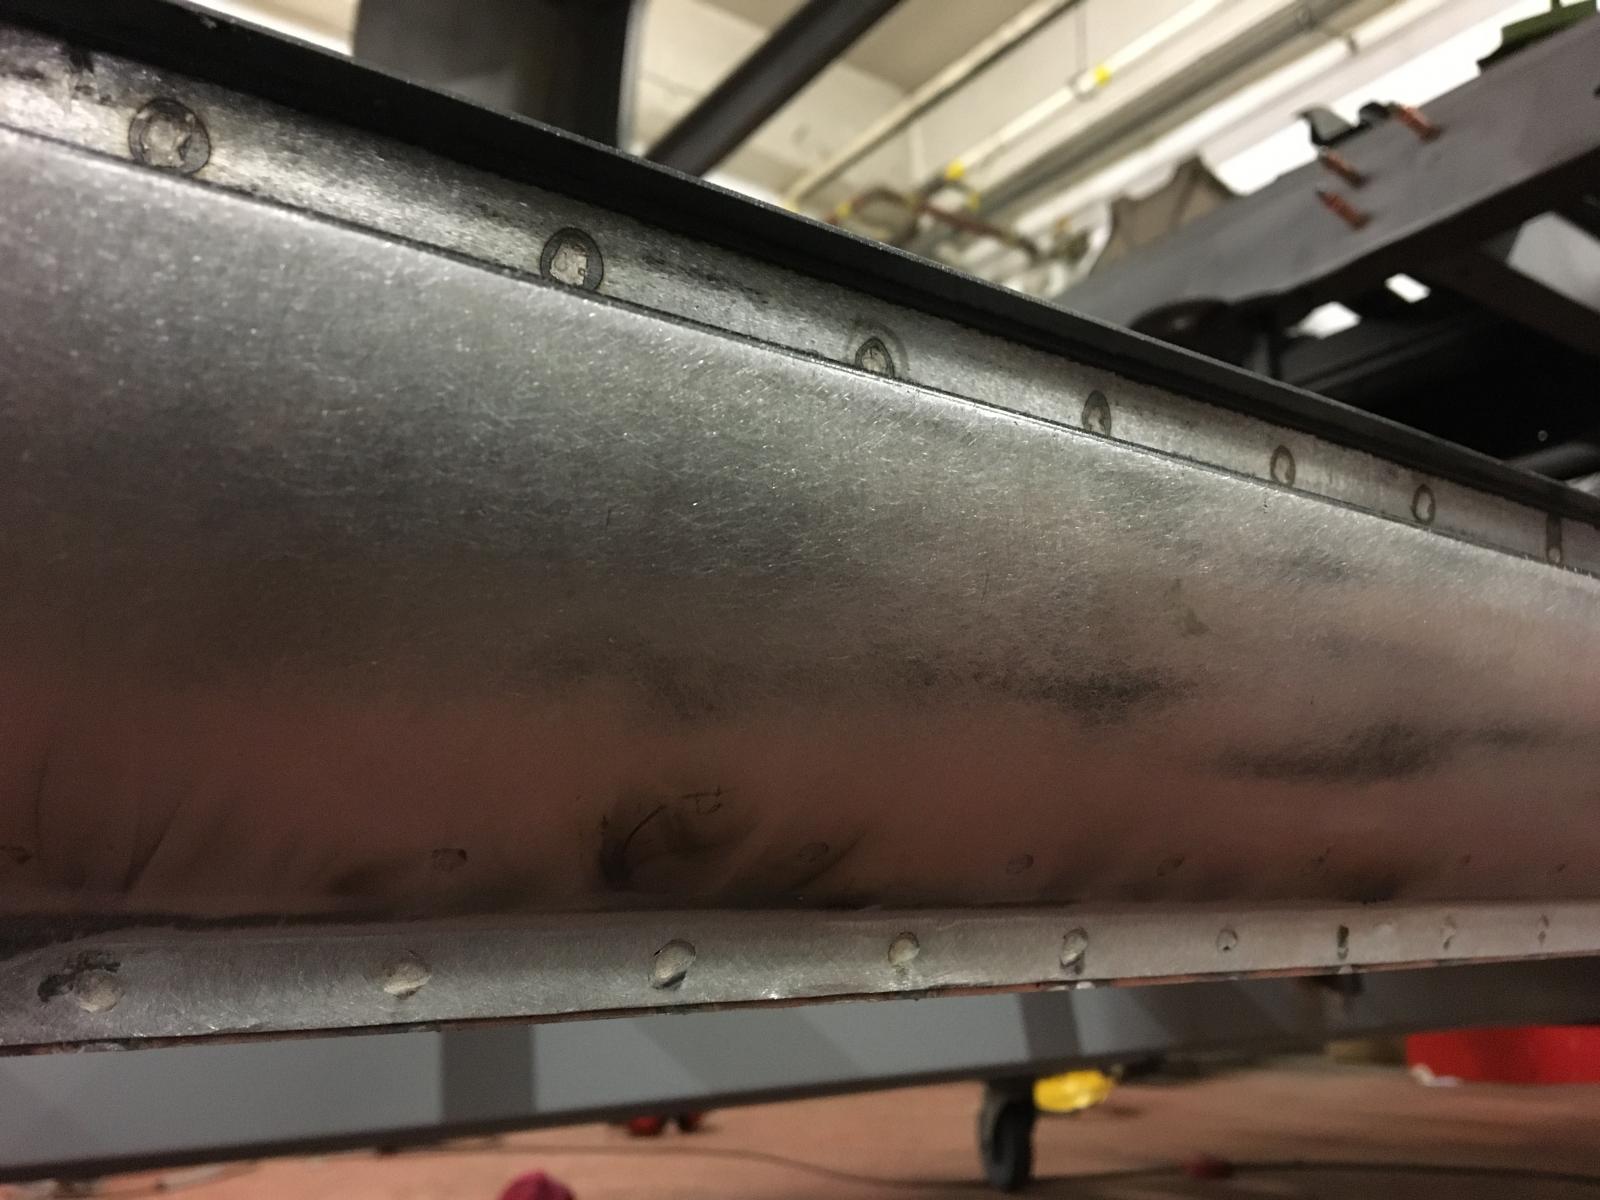
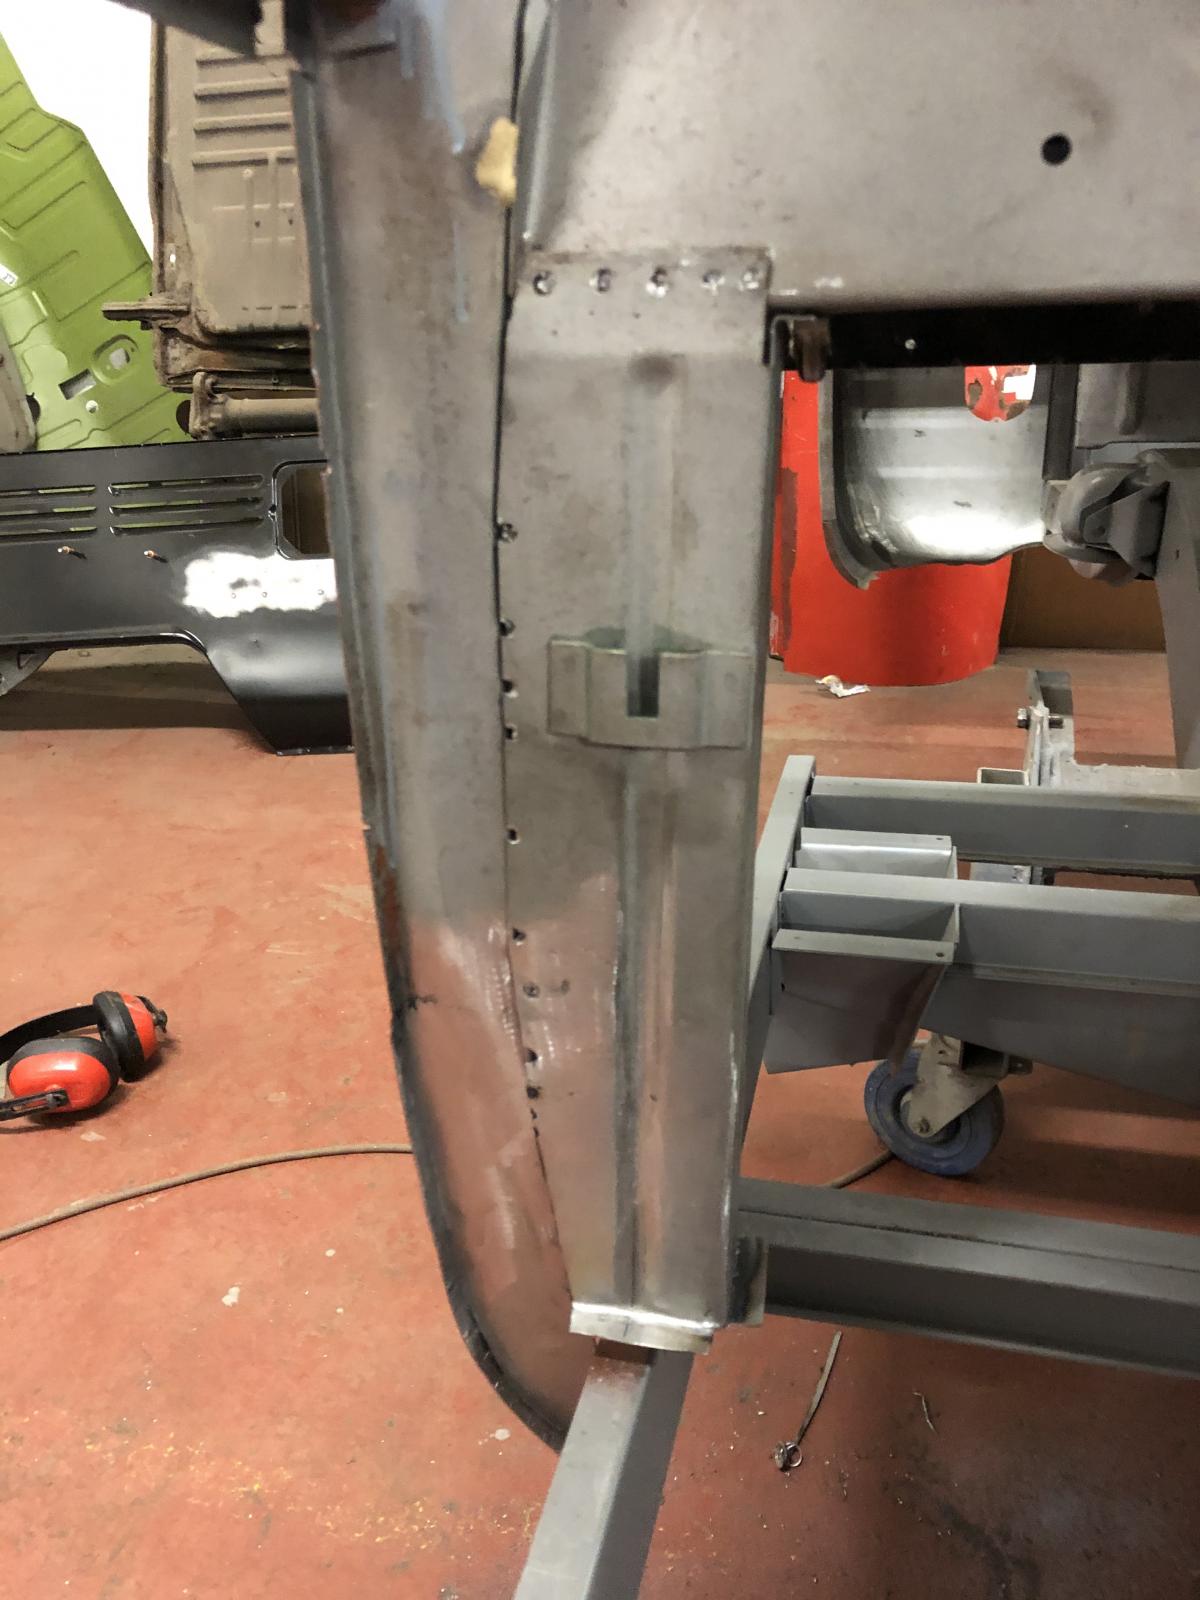
The rear cab inner posts were rotten at the bottom. We drilled the spotwelds and removed the panel to get access to the post and made a repair section:


Cheers
A post repairs on both sides:


LHS B post repairs:

We are using the 3 piece Klassic Fab panel which is pretty nice, but needs a bit of work. Its for a regular bus so needed modifying for things like the hinge slot etc but overall its pretty nice.
You can see the top of the panel isnt as wide as the original:

Reshaped it:


Inner post trimmed down and clamped in place:

Outer B post trimmed, lined up and mocked up. Had the sill, door and dogleg all mocked up to check the height etc but didnt get a pic:

All 3 B post panels welded in place:


Sill lines up nice, and nice enough gaps:


And welded in place:


The rear cab inner posts were rotten at the bottom. We drilled the spotwelds and removed the panel to get access to the post and made a repair section:


Cheers
mabbo
SSVC Member
Posts: 80
Joined: Wed Jun 01, 2011 7:09 pm
Re: Swedish 66 Crew Cab
by Droger45 » Tue Oct 29, 2019 12:36 am
That's a great transformation for this Crew Cab! Excellent work
Droger45
Registered user
Posts: 9
Joined: Tue Jul 11, 2017 9:33 am
Re: Swedish 66 Crew Cab
by john&hannah » Tue Oct 29, 2019 10:11 am
fantastic fabrication and great photos. really helpful for for others with similar projects
john&hannah
Registered user
Posts: 398
Joined: Tue Apr 14, 2009 2:59 pm
Re: Swedish 66 Crew Cab
by mabbo » Tue Mar 31, 2020 9:47 pm
Right... Haven't updated this in a while and I cant really remember exactly the order the pictures should be in, but here goes.
Got the RHS inner B post repaired, and the bulkhead welded to both B posts and front top hat:


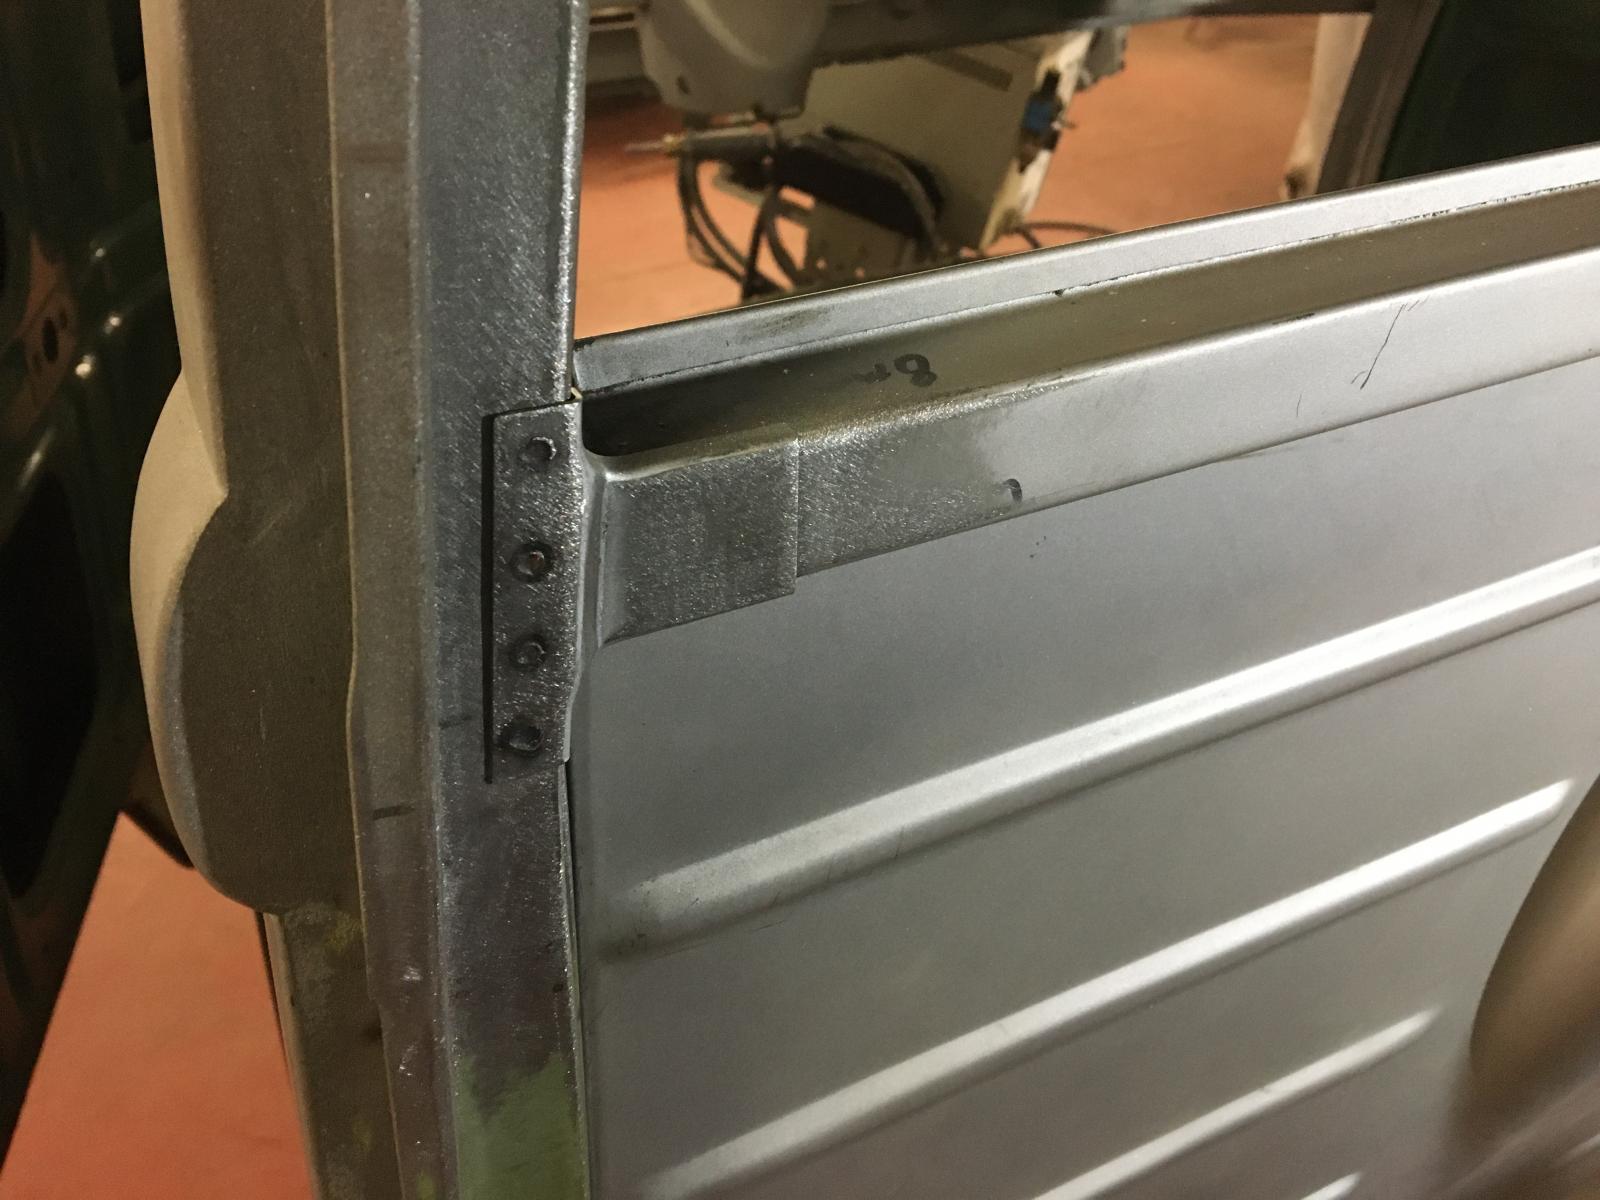
Door gaps checked/set and dog legs and tubs pinned in place:
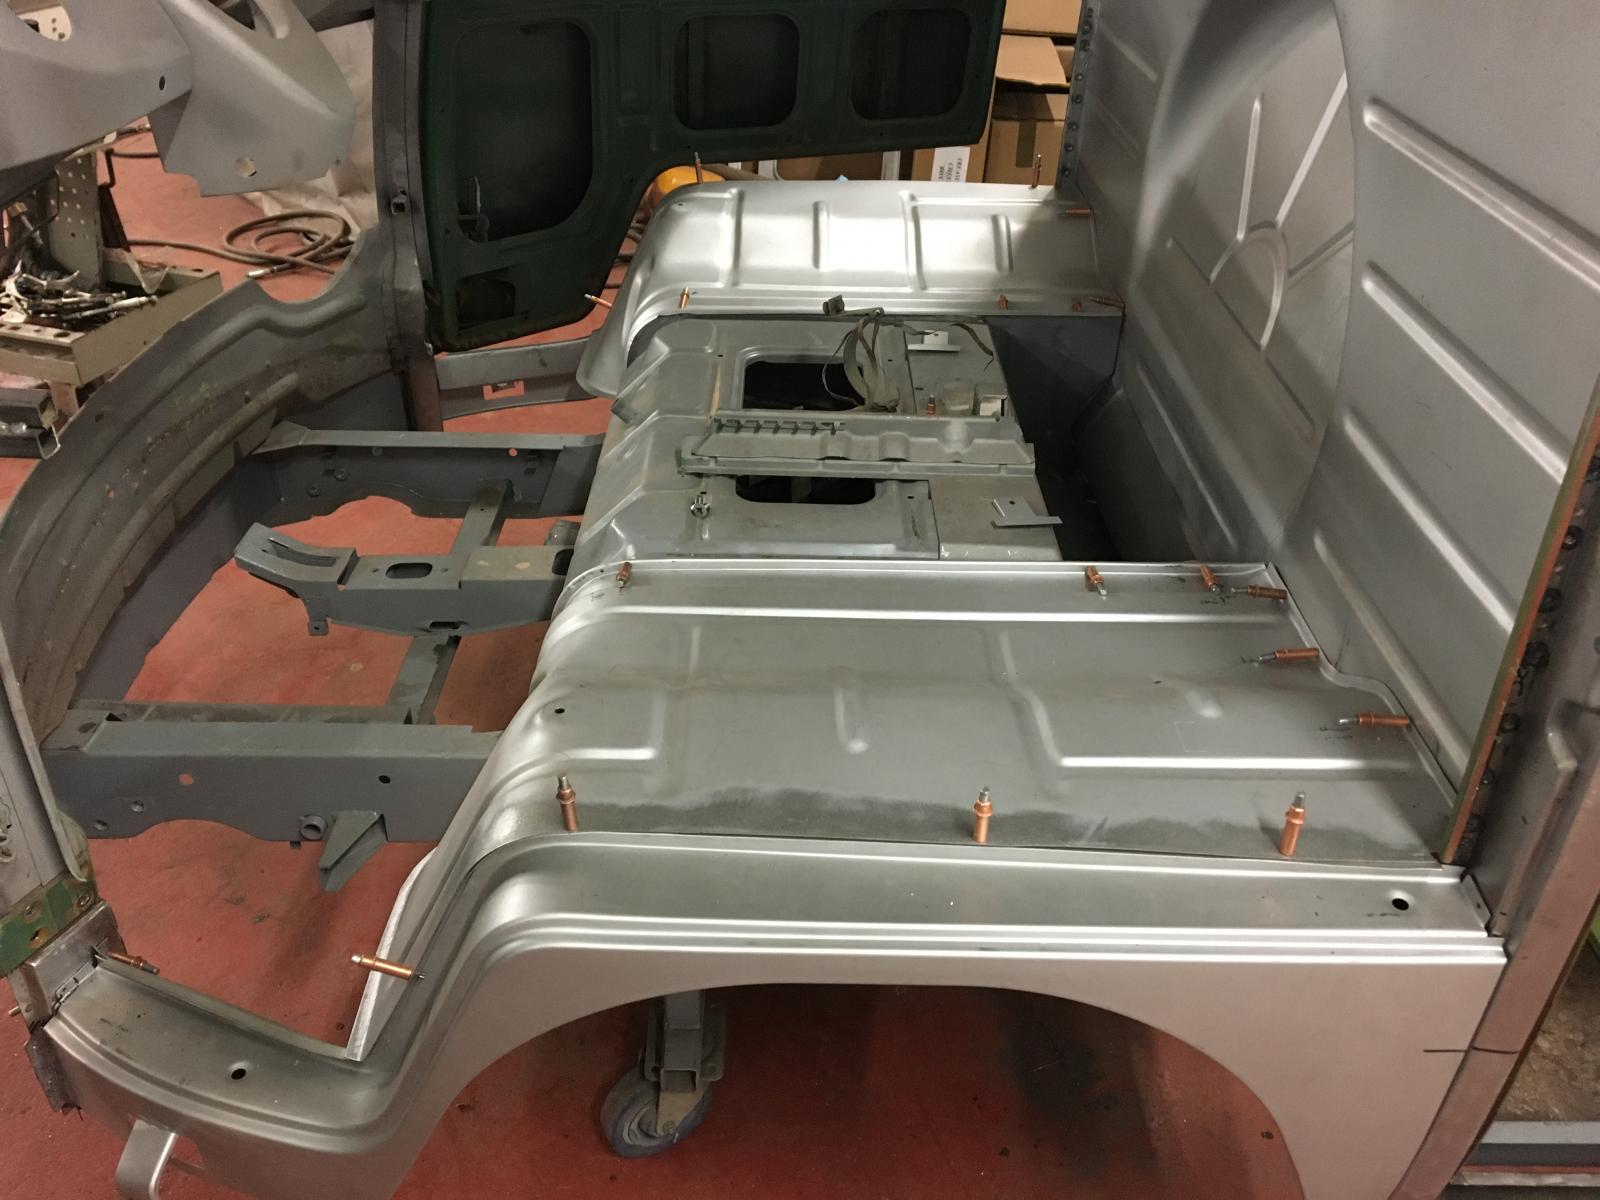

Got the side panel welded down the B post and sill so the dog legs and tubs can be fitted:
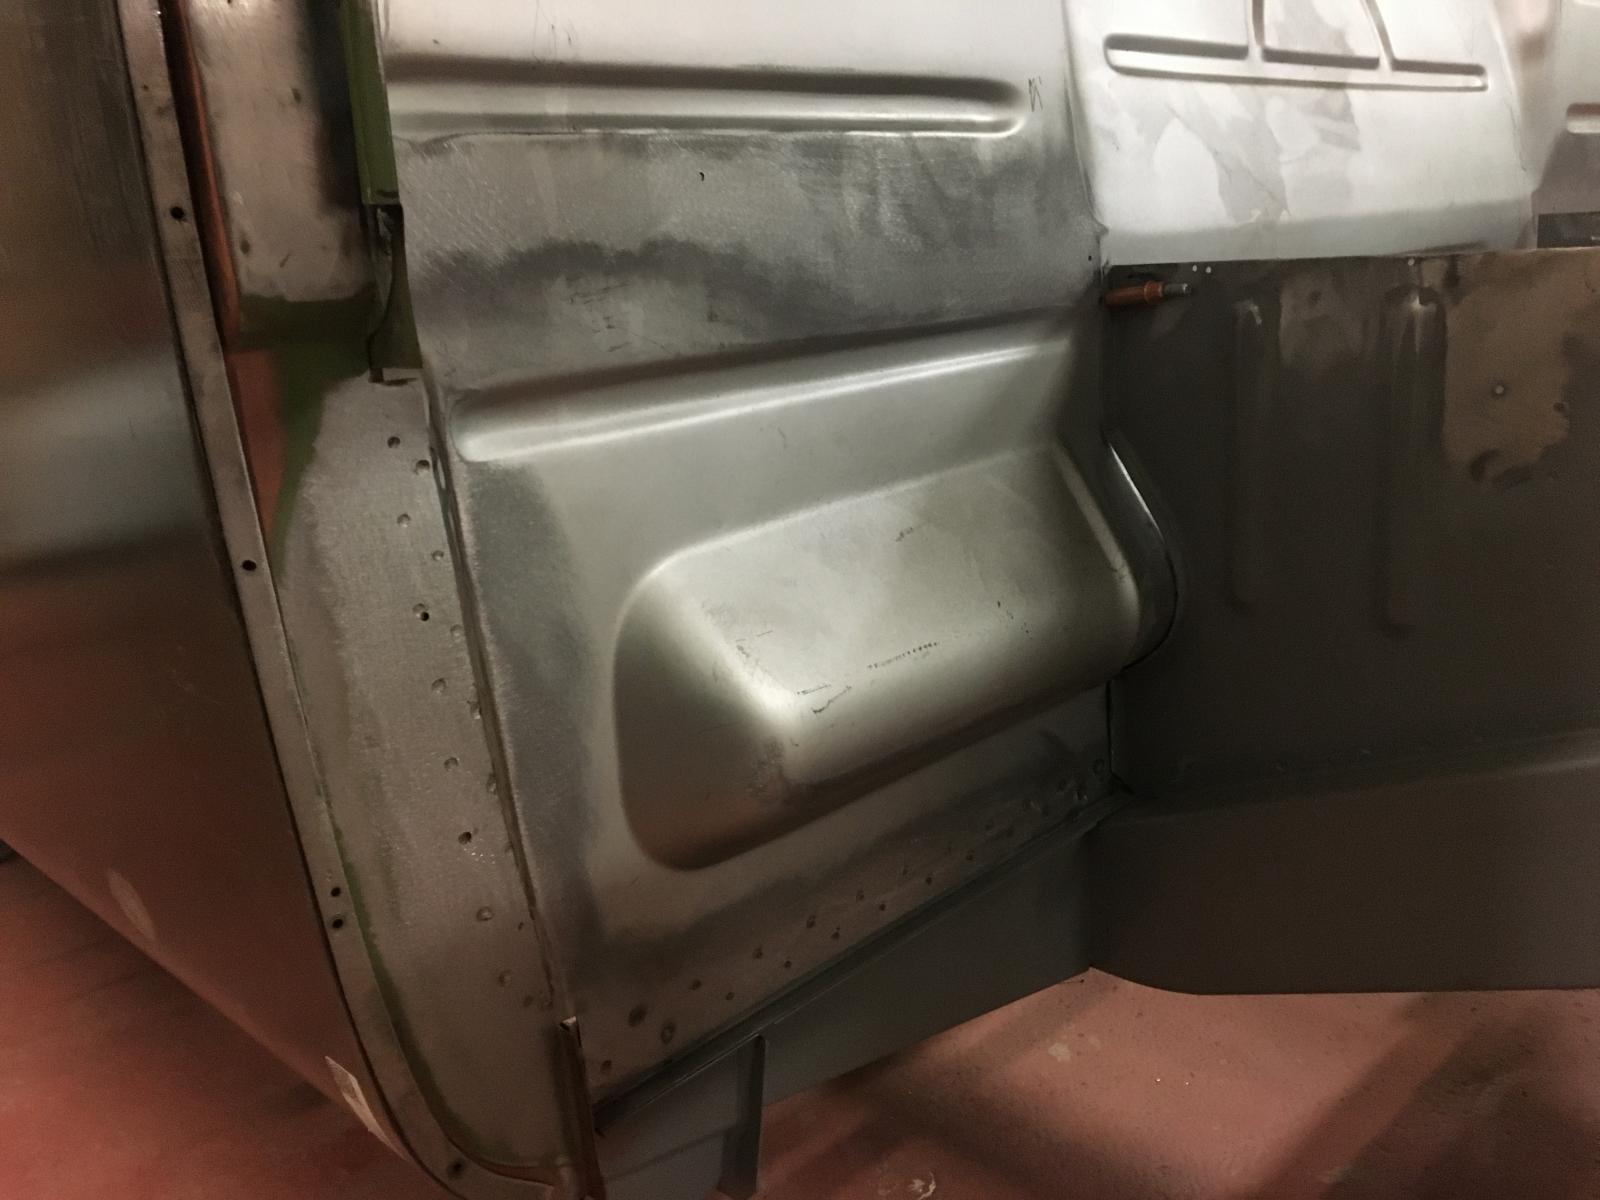
Getting ready to weld:
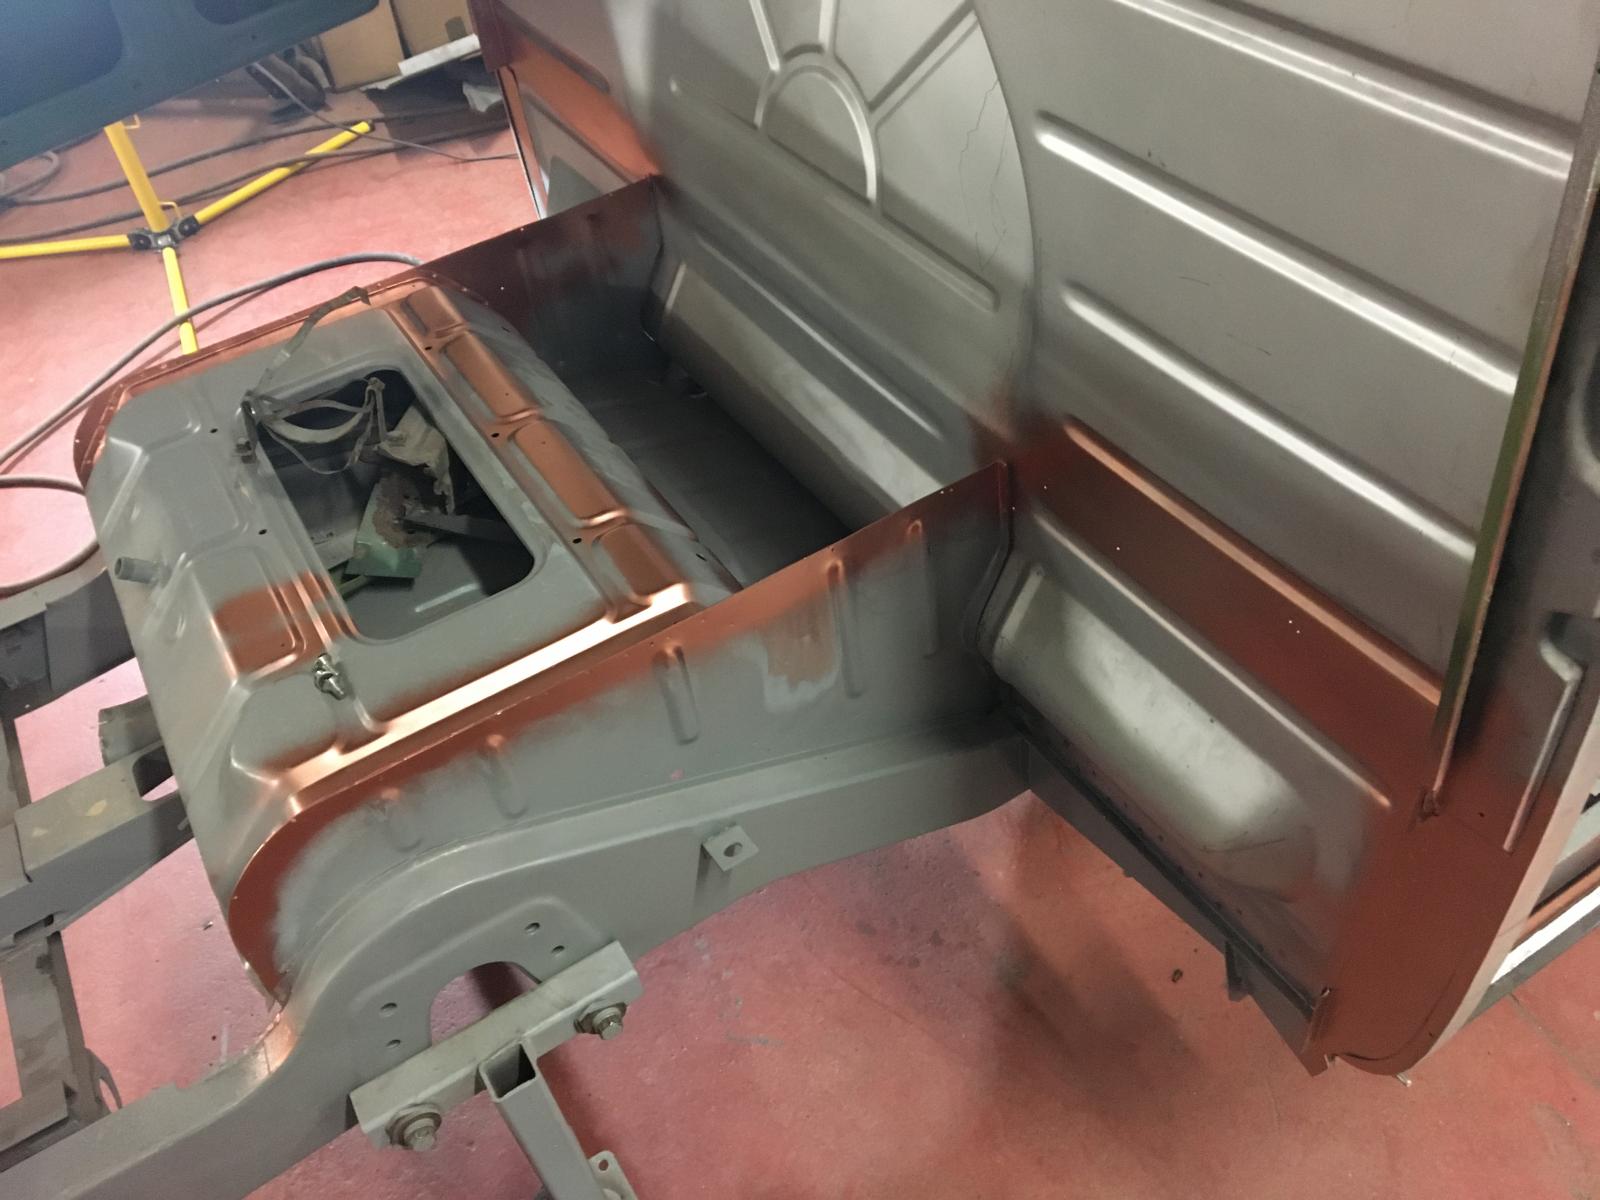
Seat runner panel plug welded to tool chest:
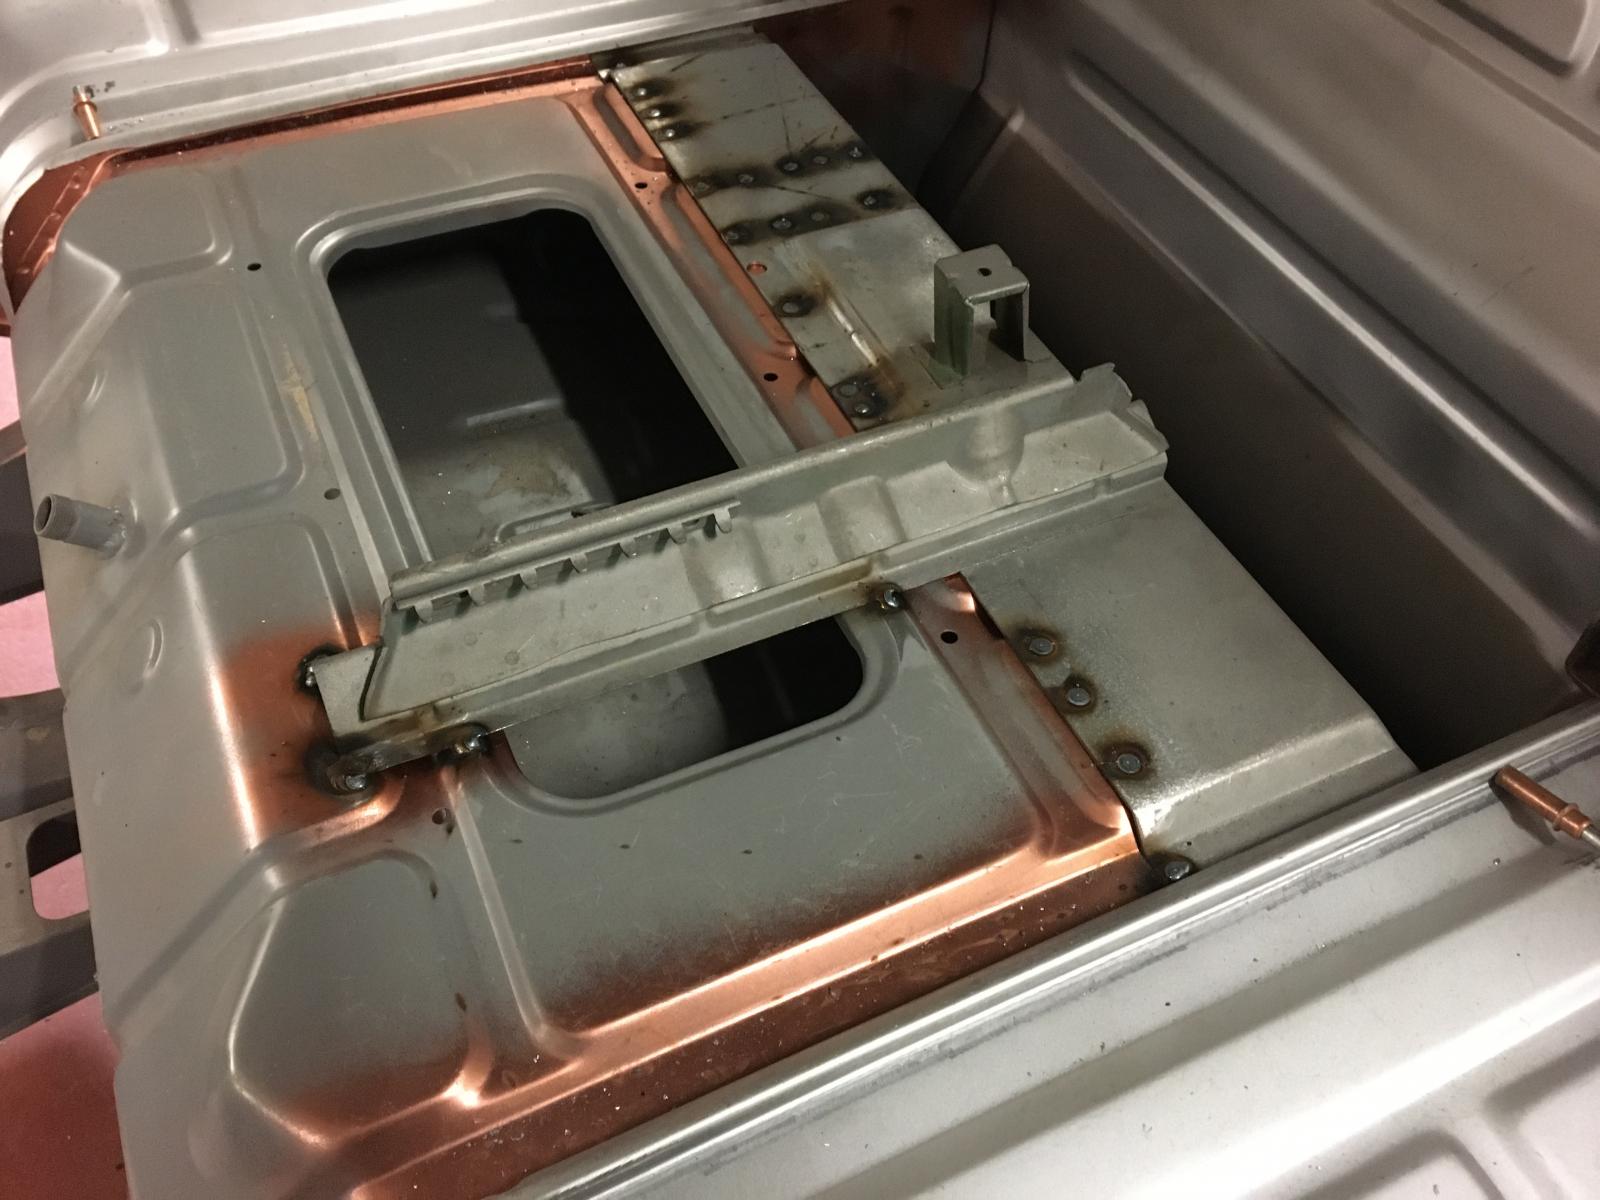
Tubs welded:
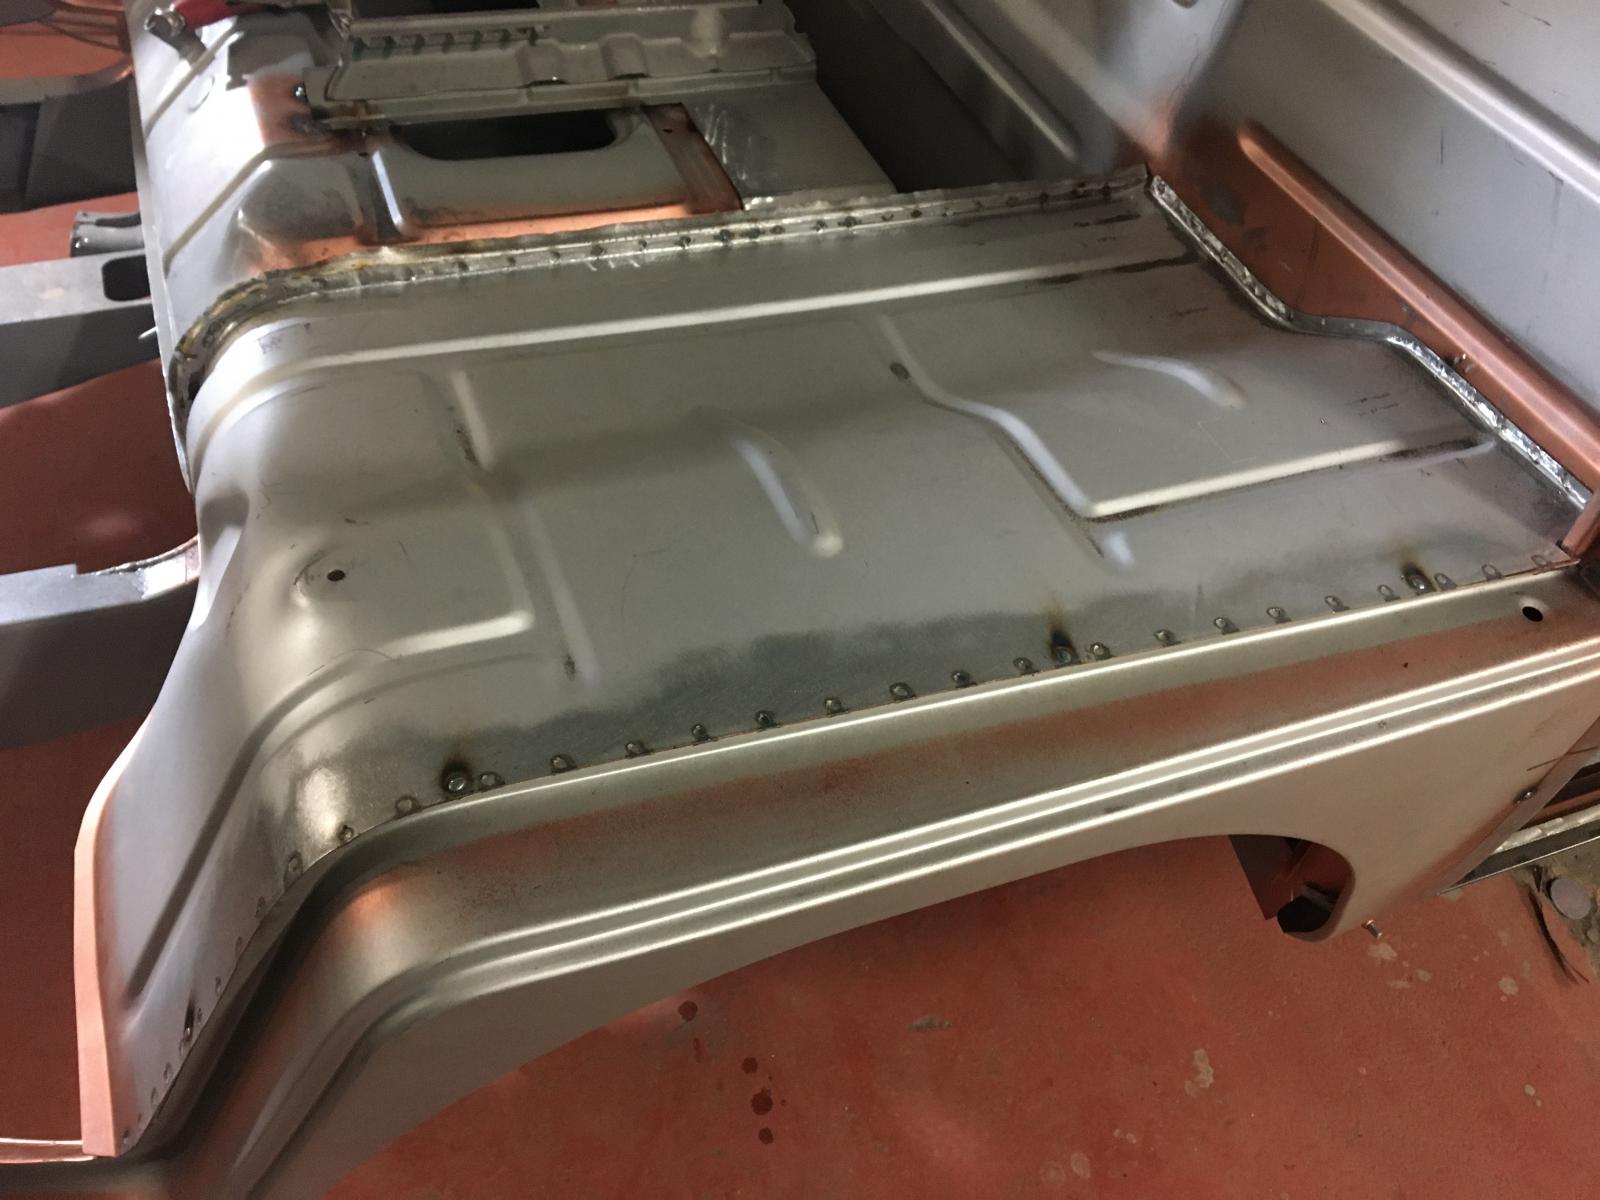
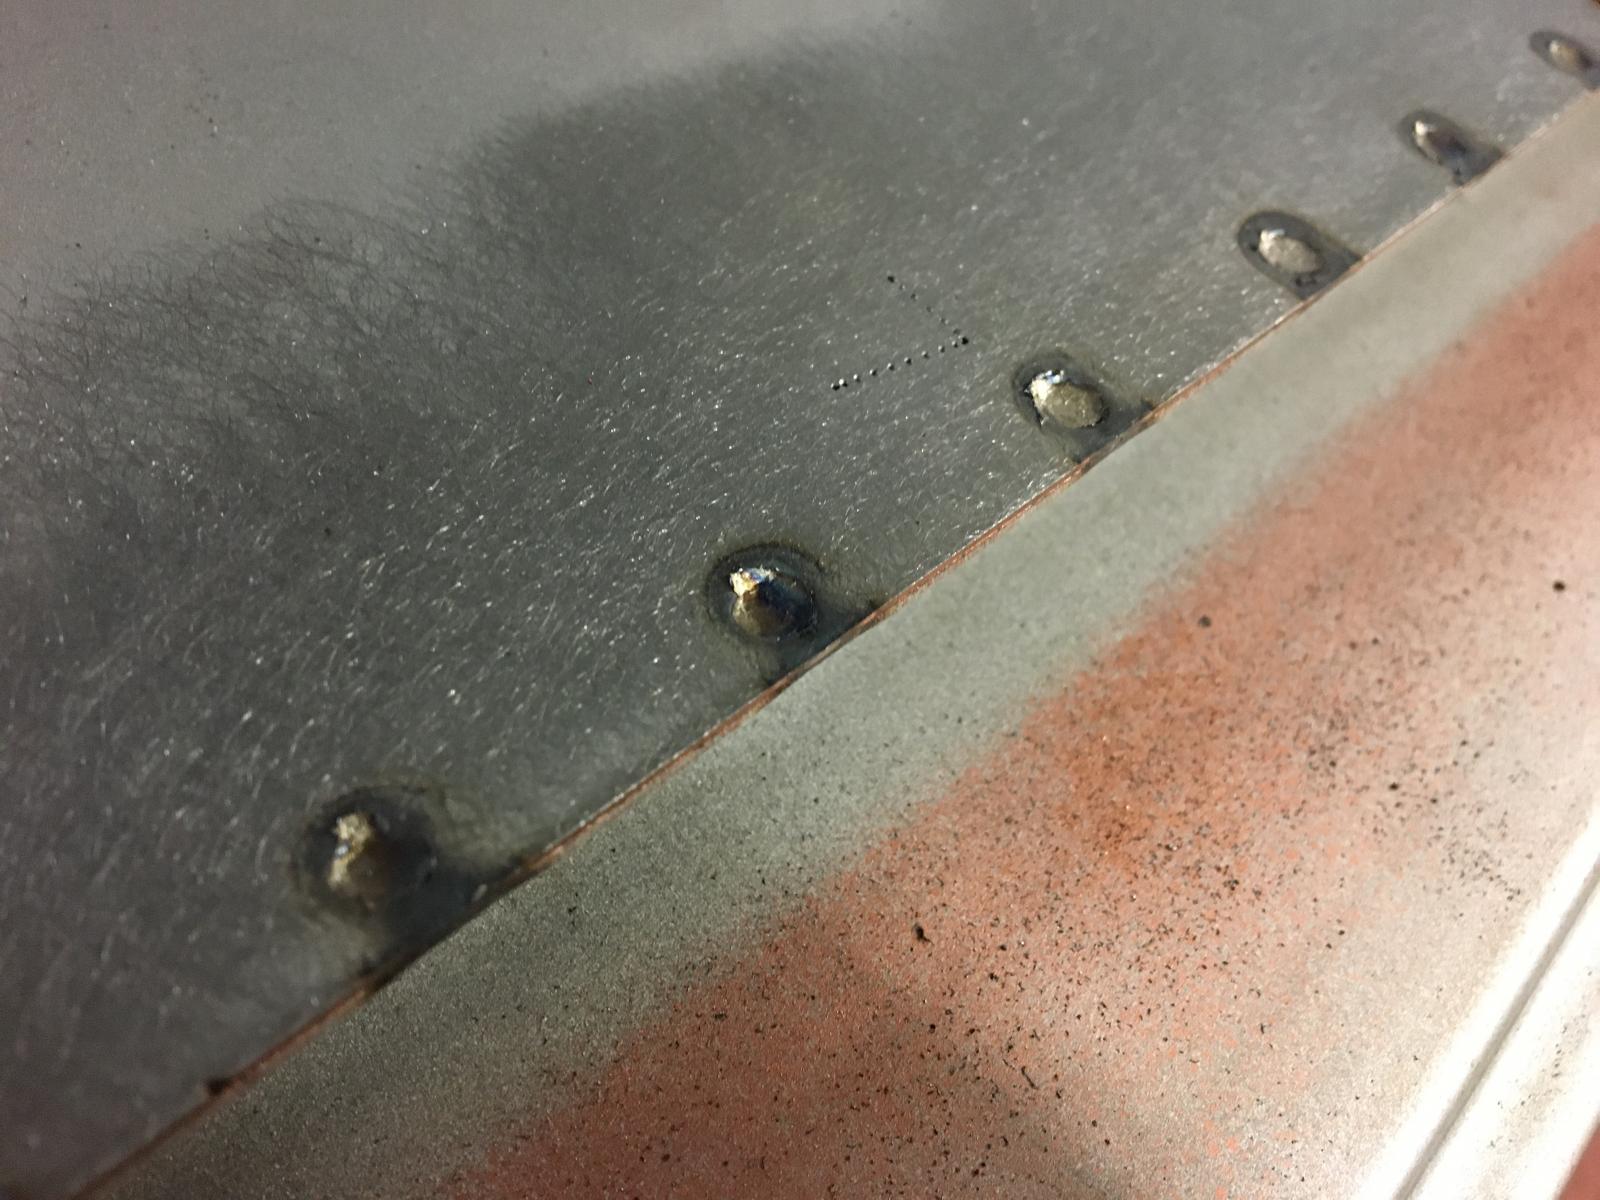

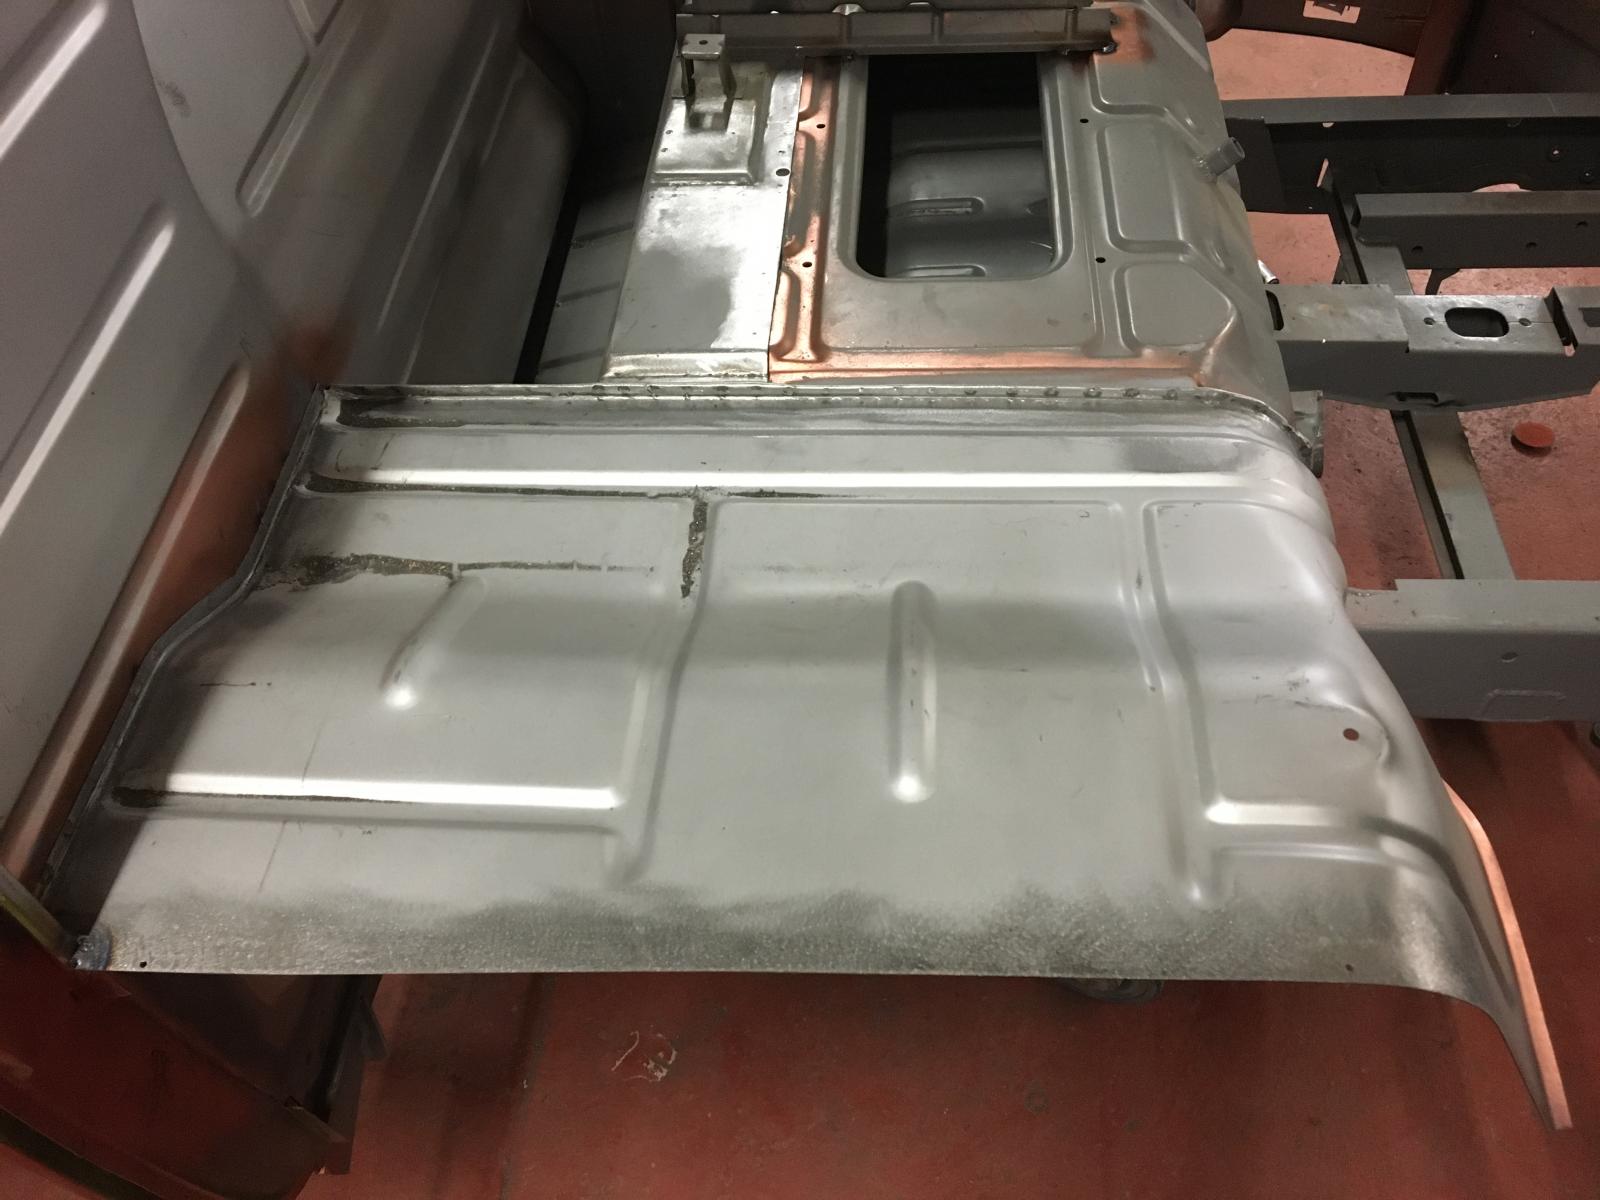
Front arches welded:

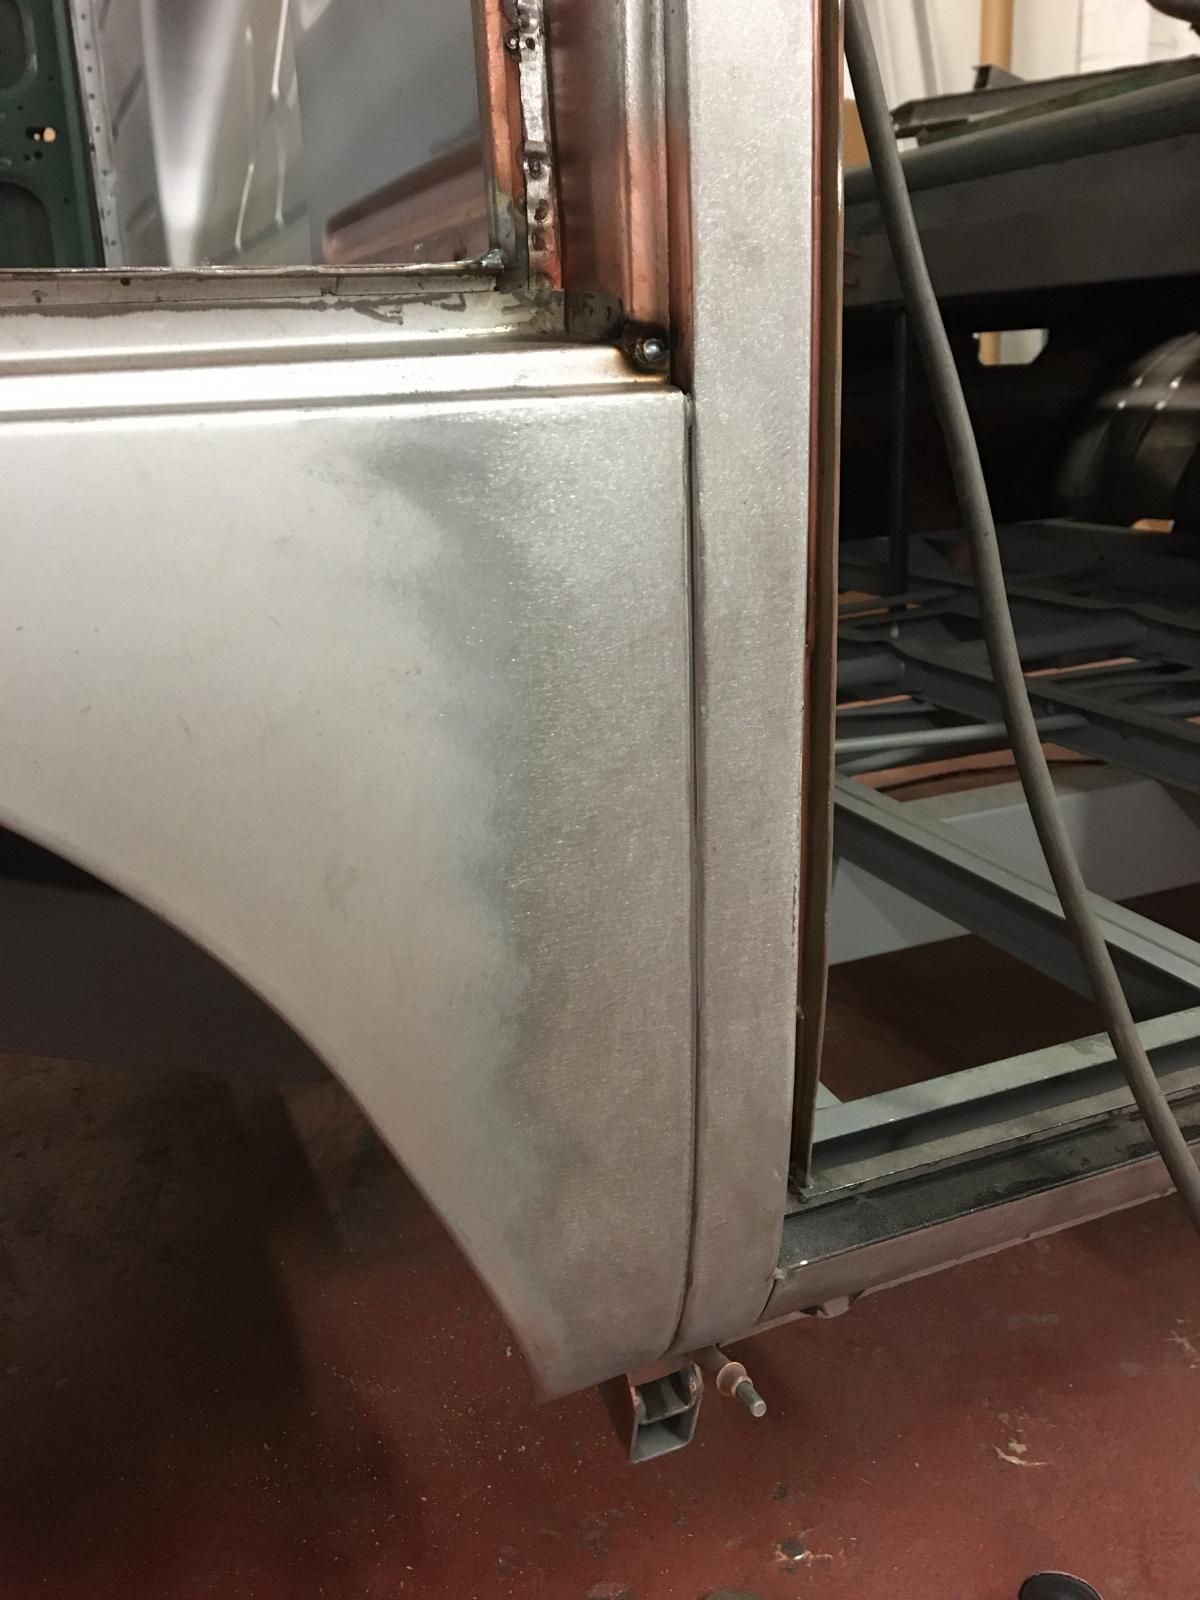
Front kick panel repaired:
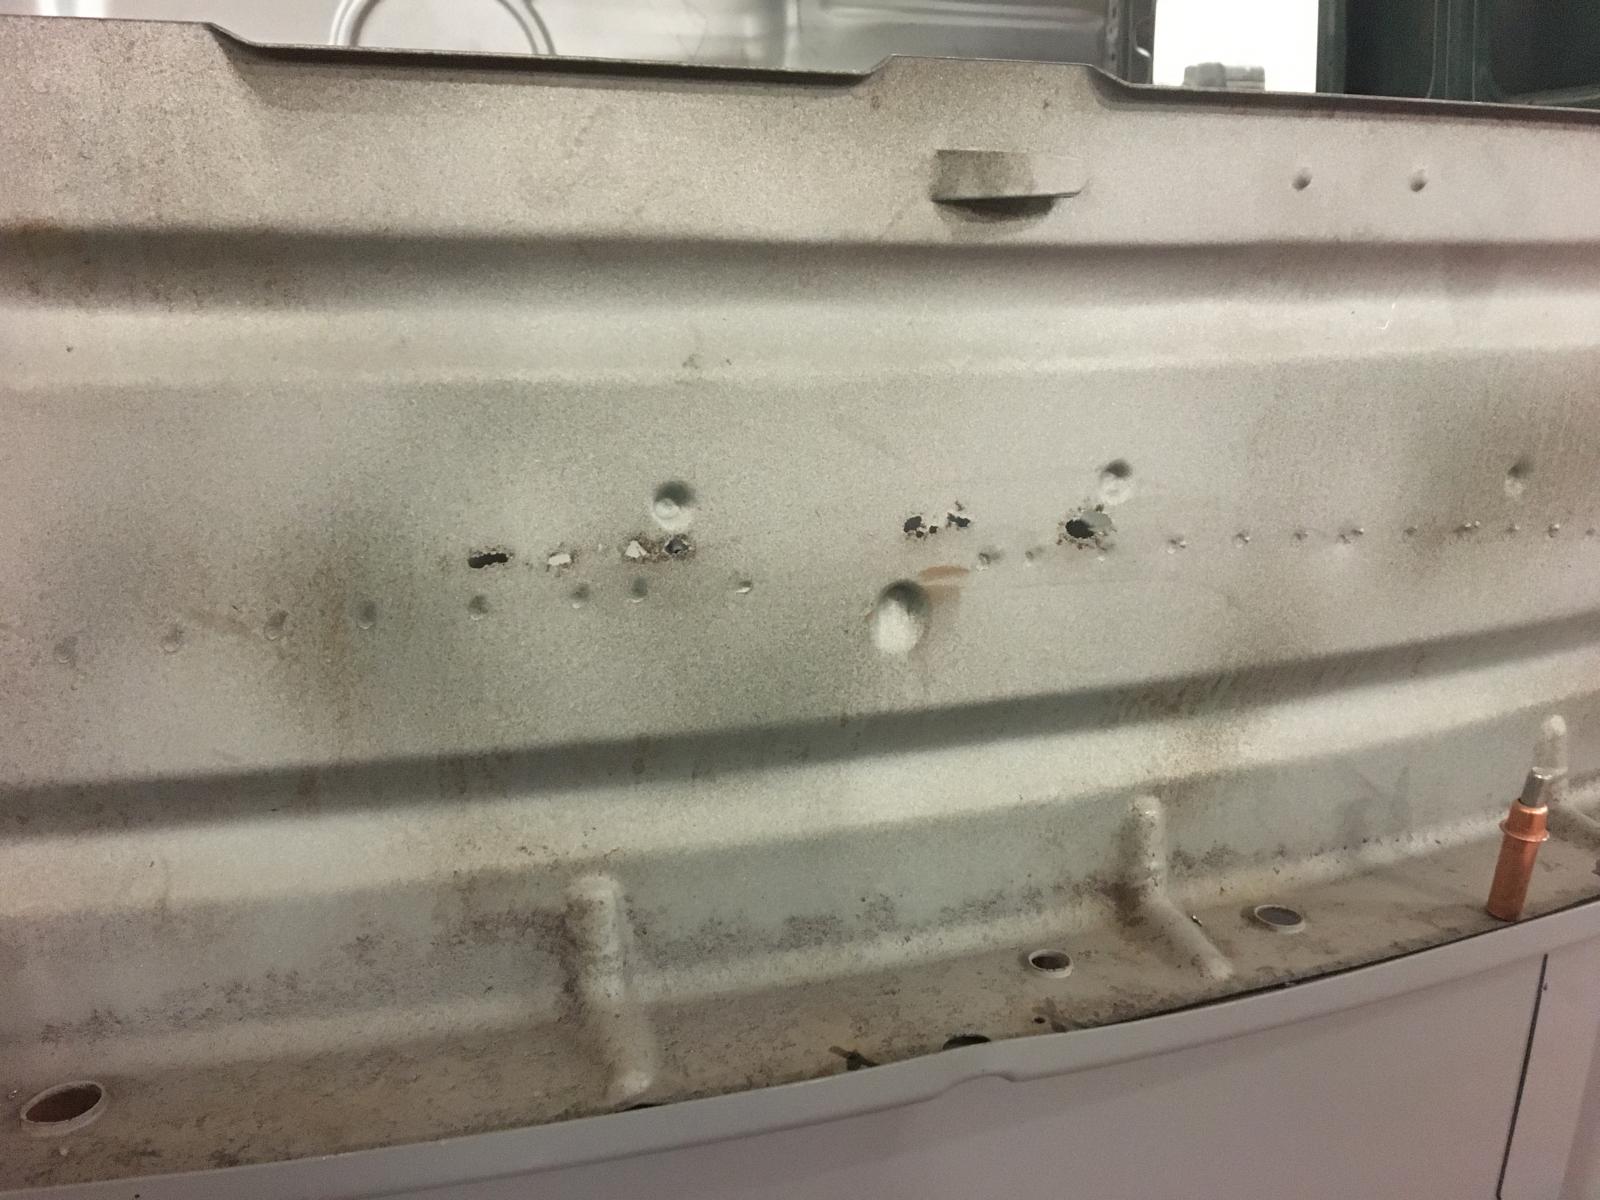
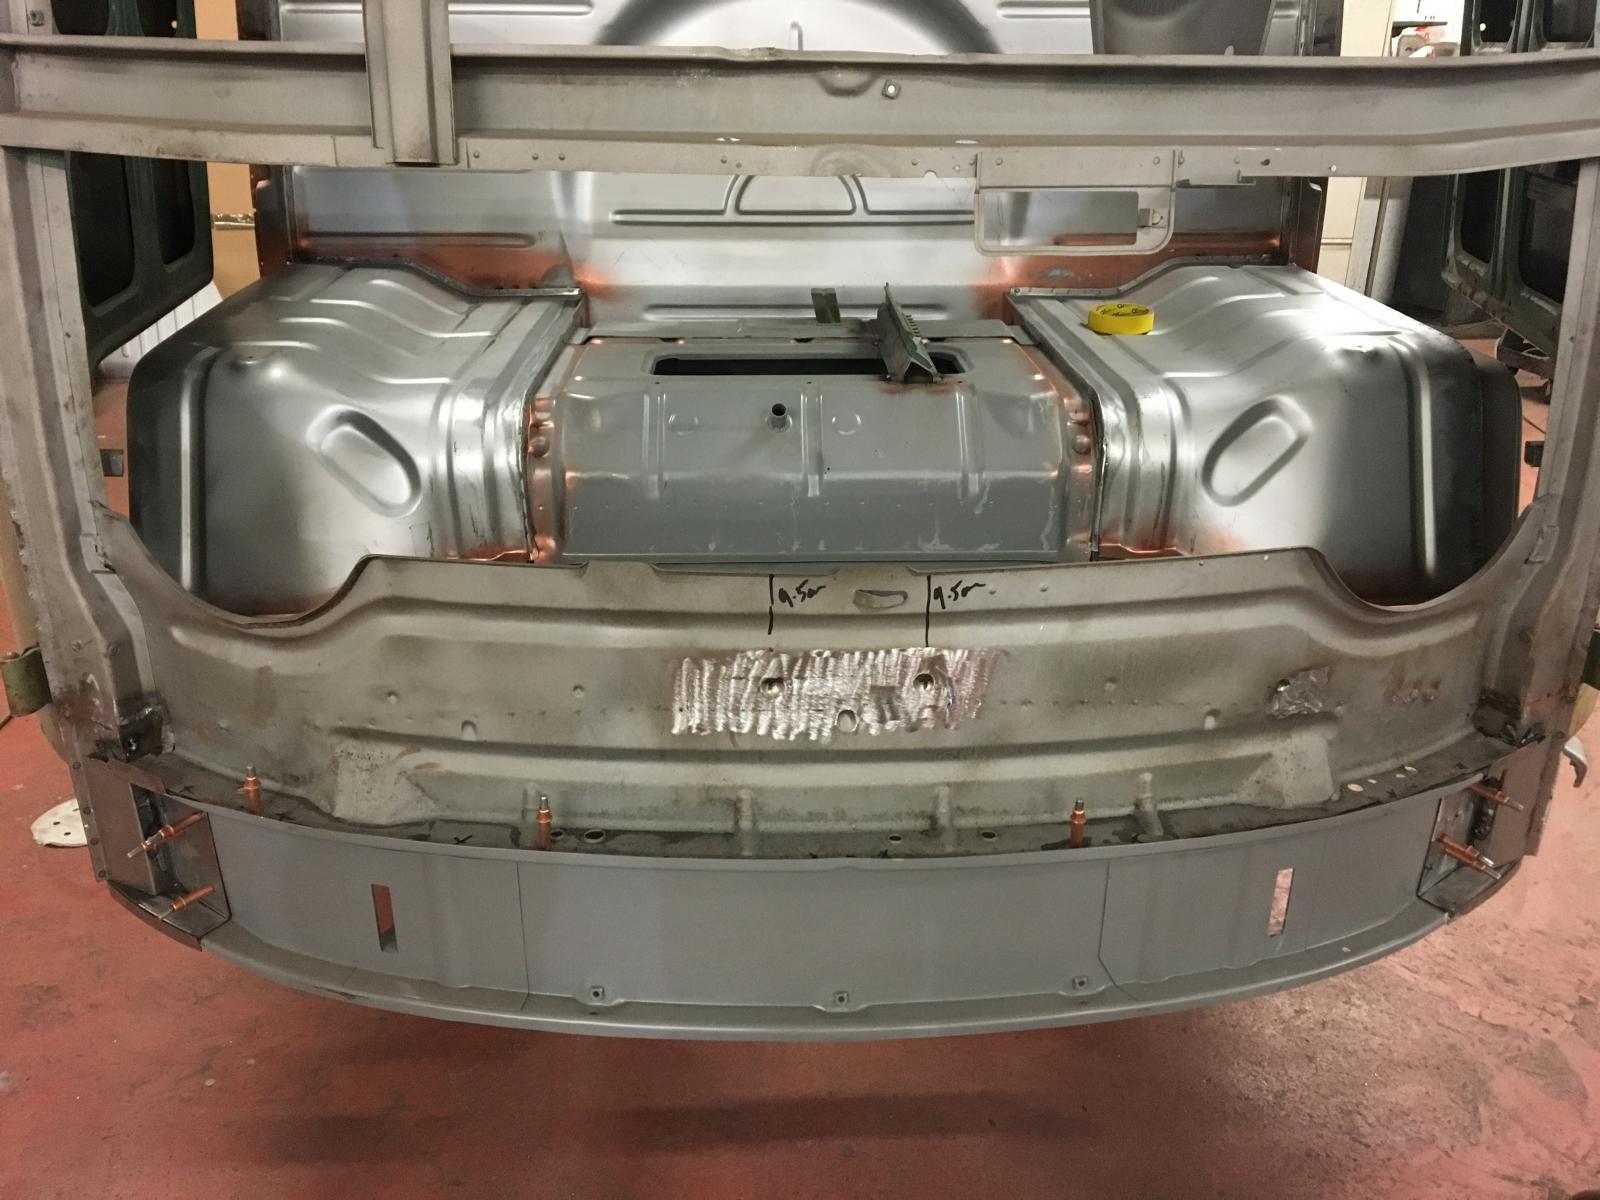
Trimmed down the window frame repair panel and scribed the position to cut:

Spot welded the heater Y piece back into the dash ready for the front panel to be fitted:
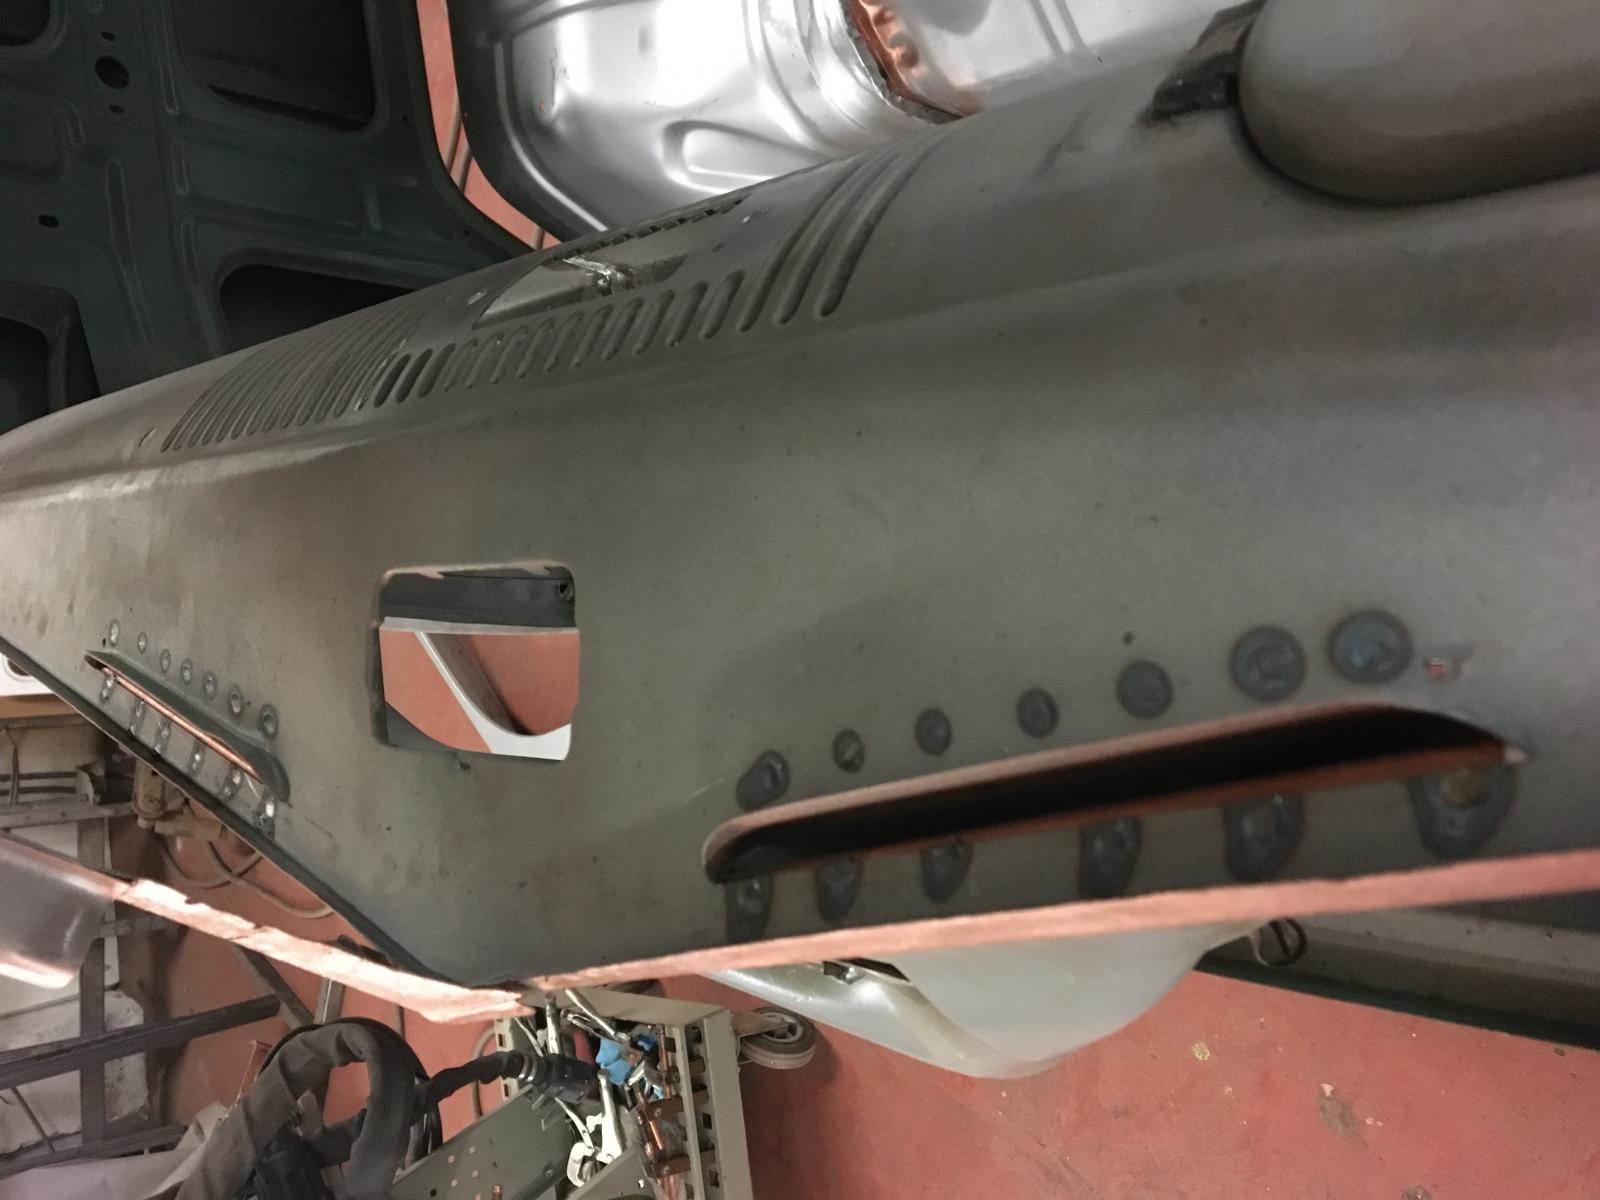
Front panel pinned in place:
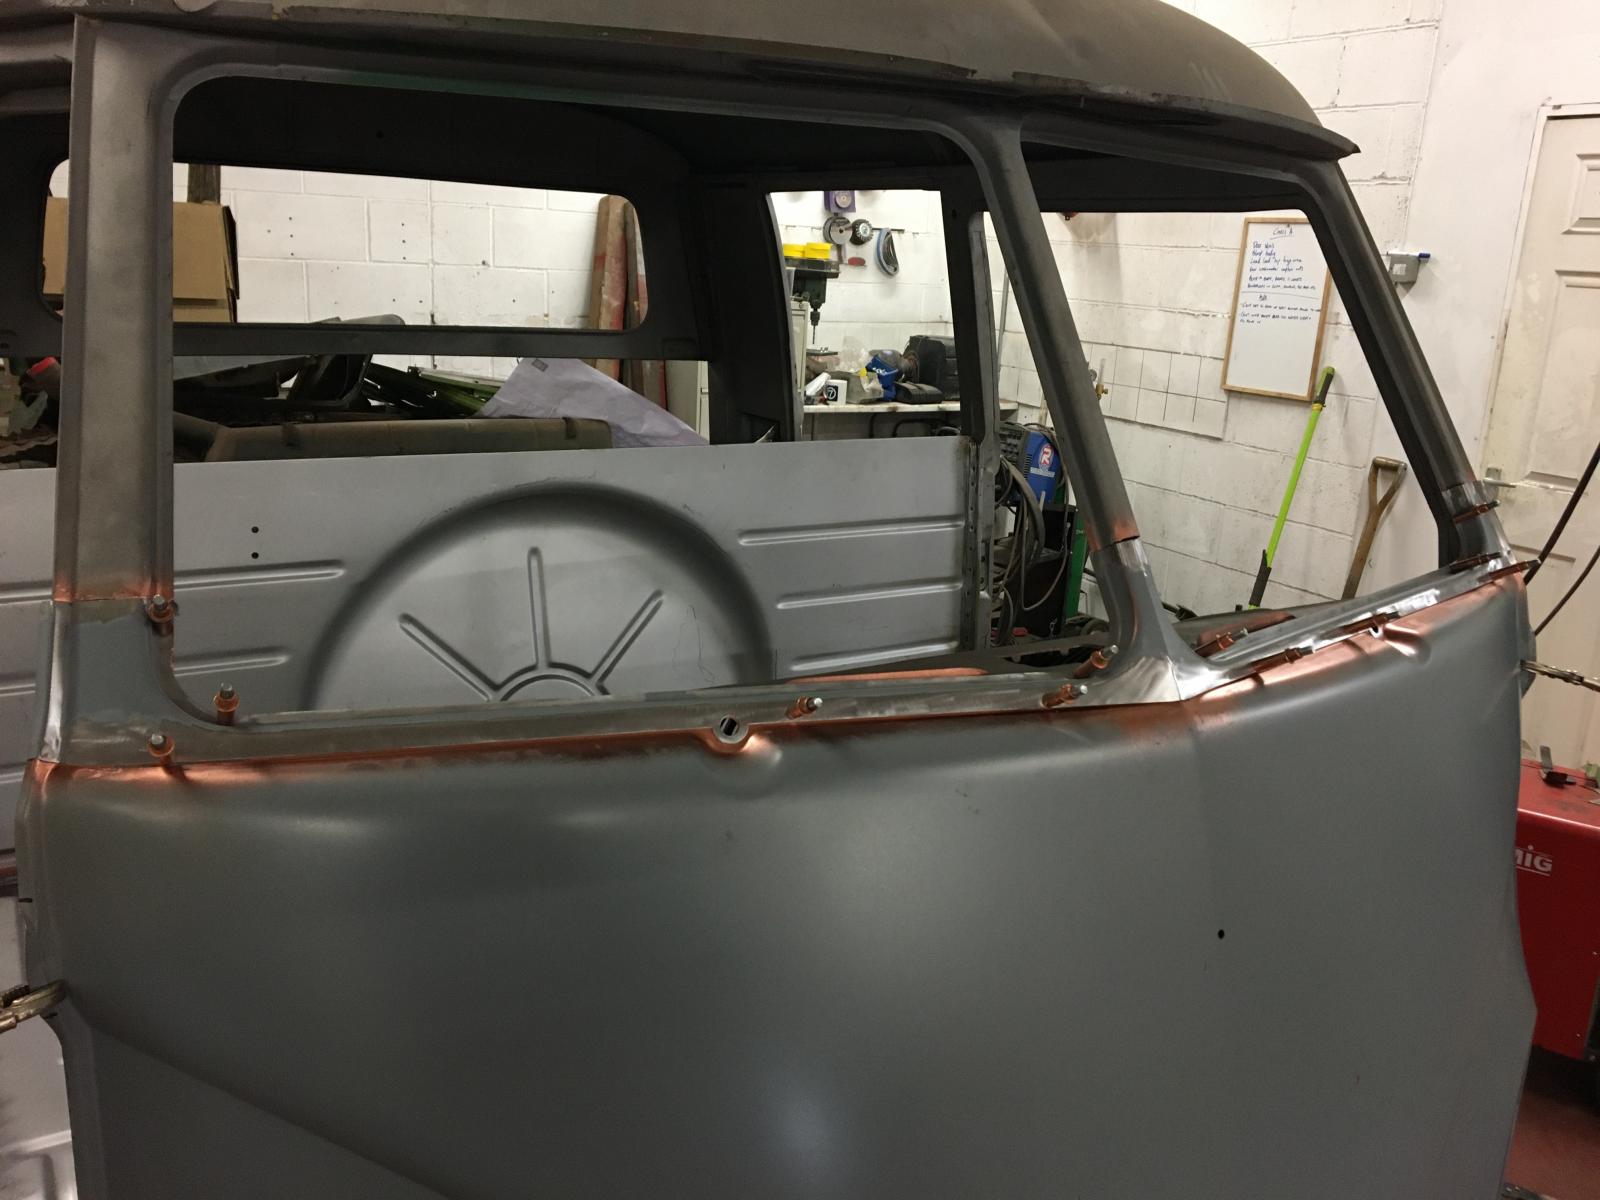
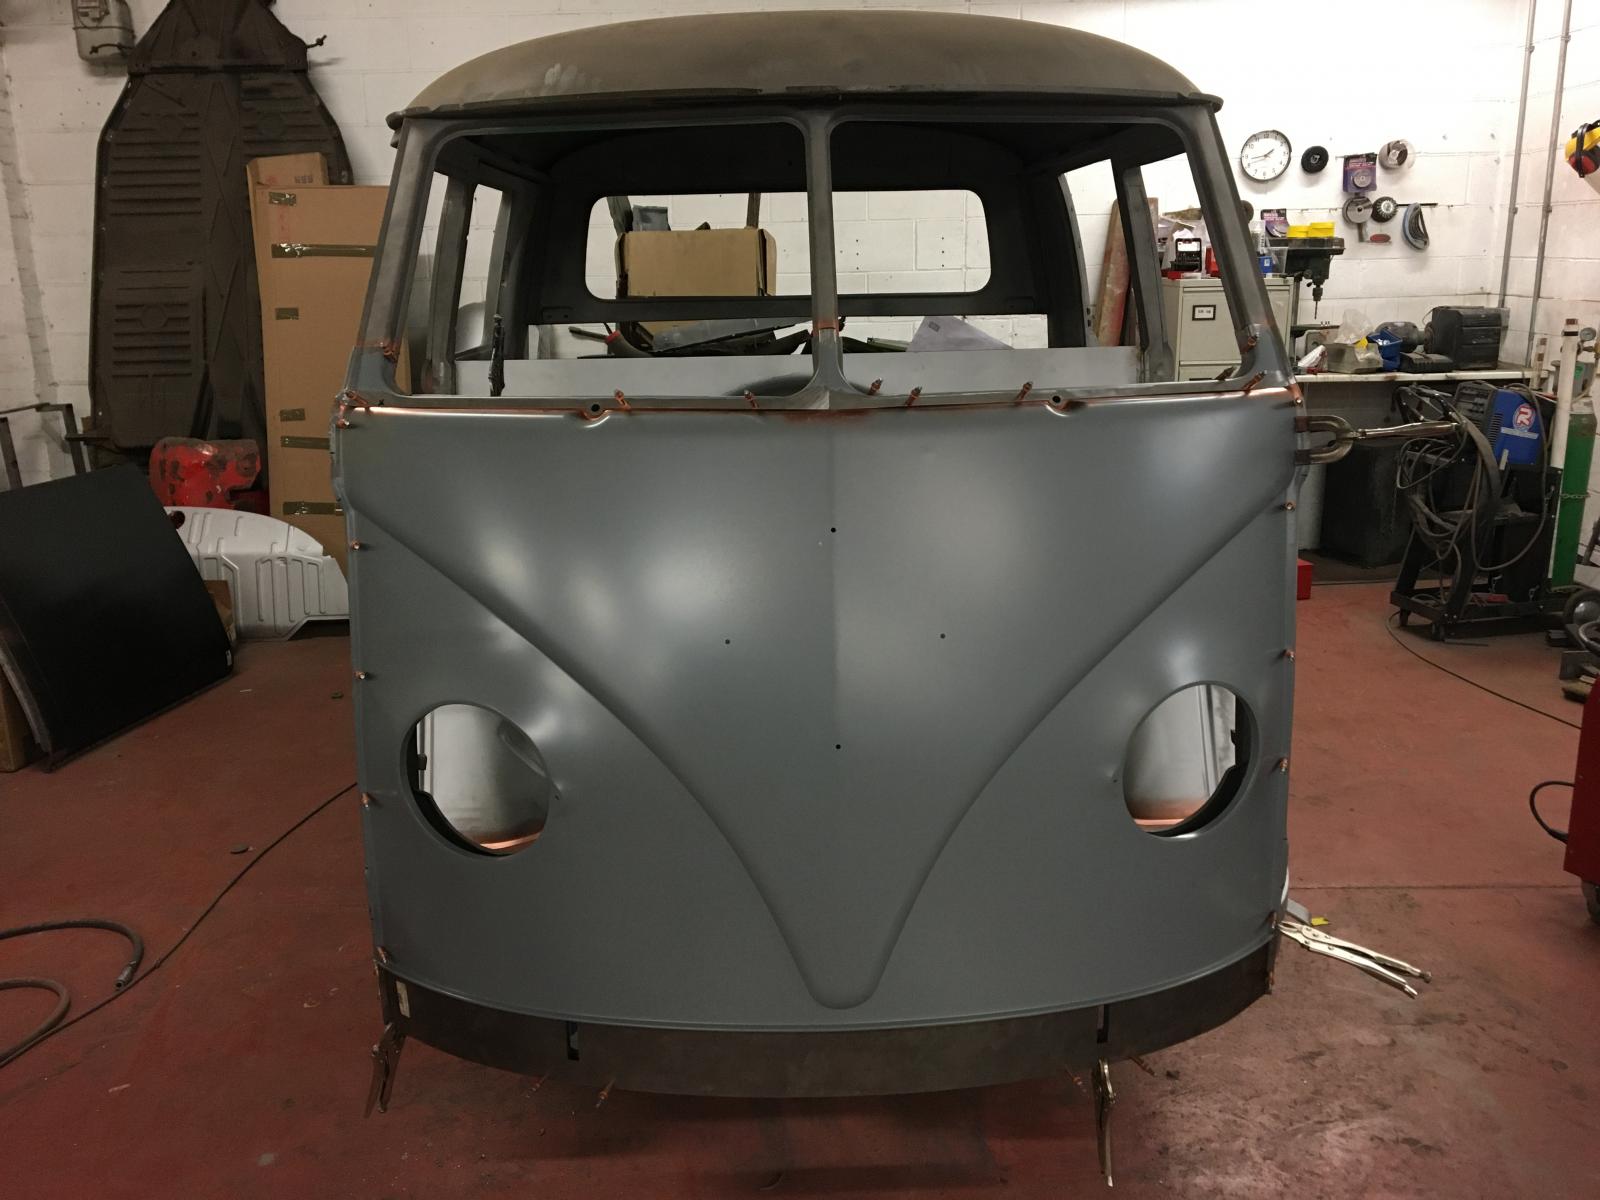
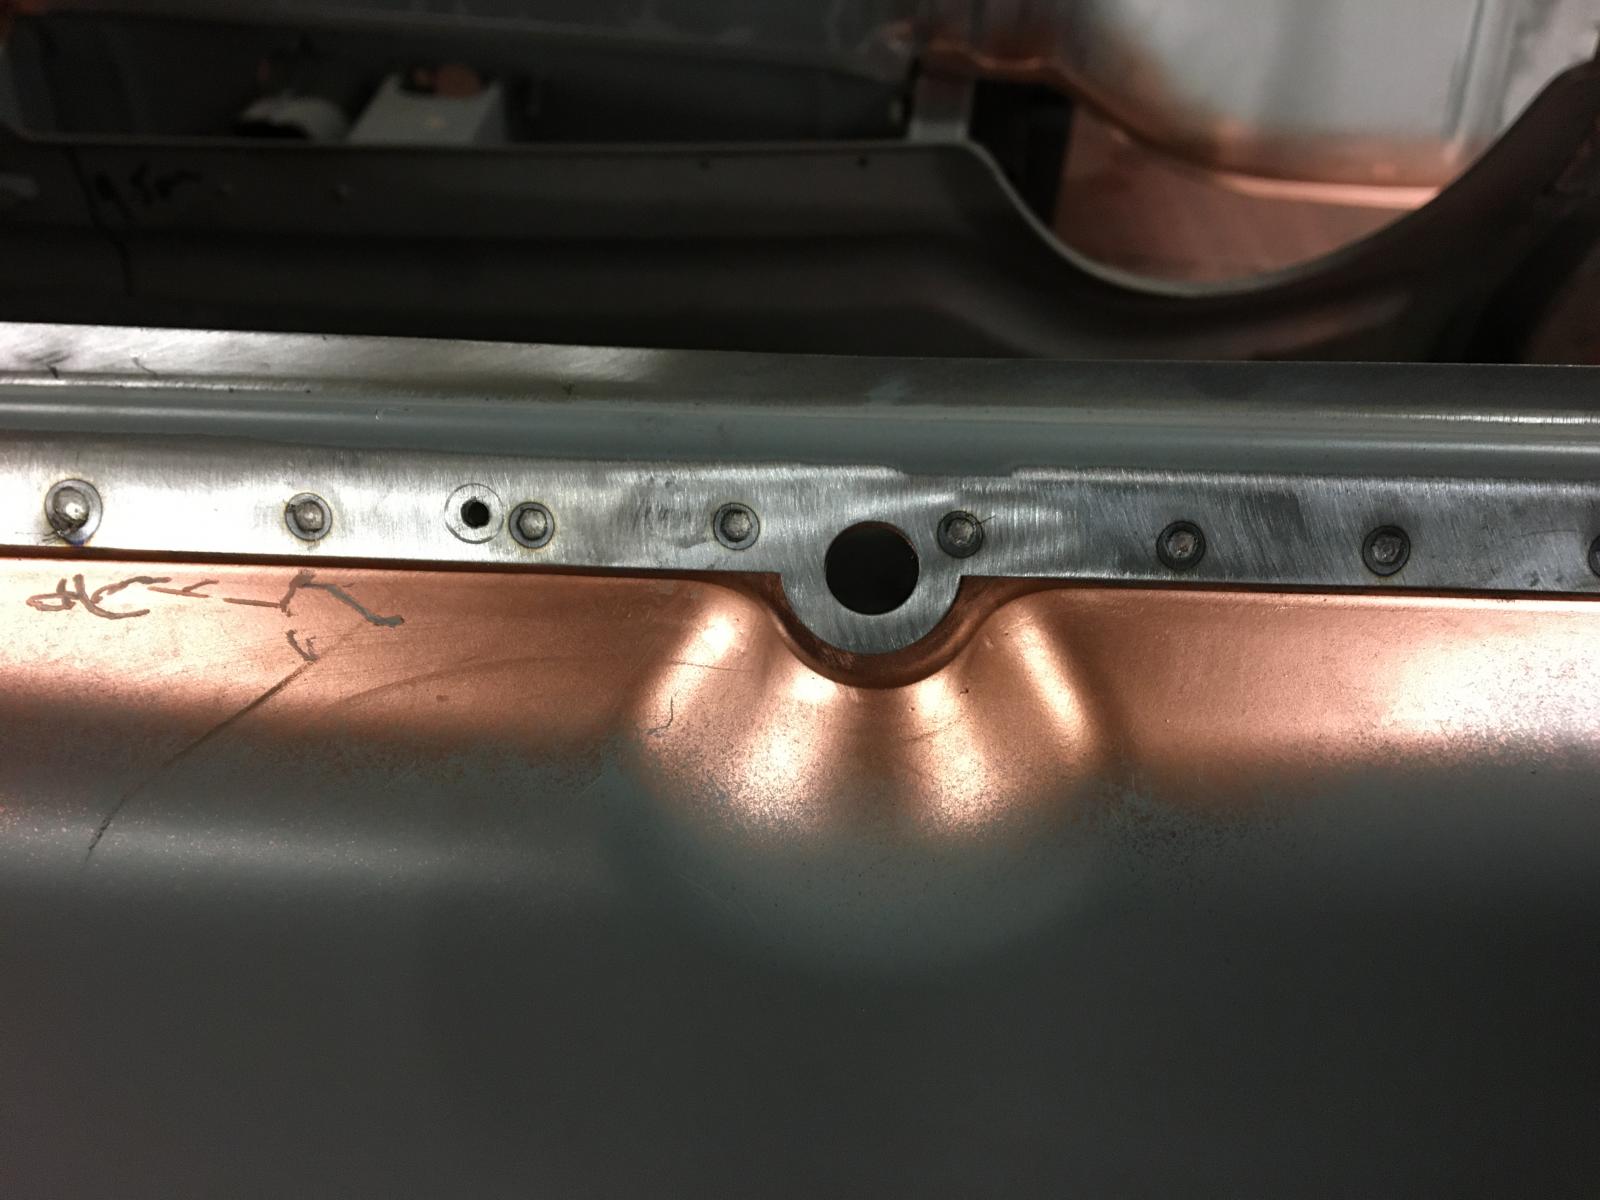
Removed the front panel and windscreen repair panel and spot welded them together:


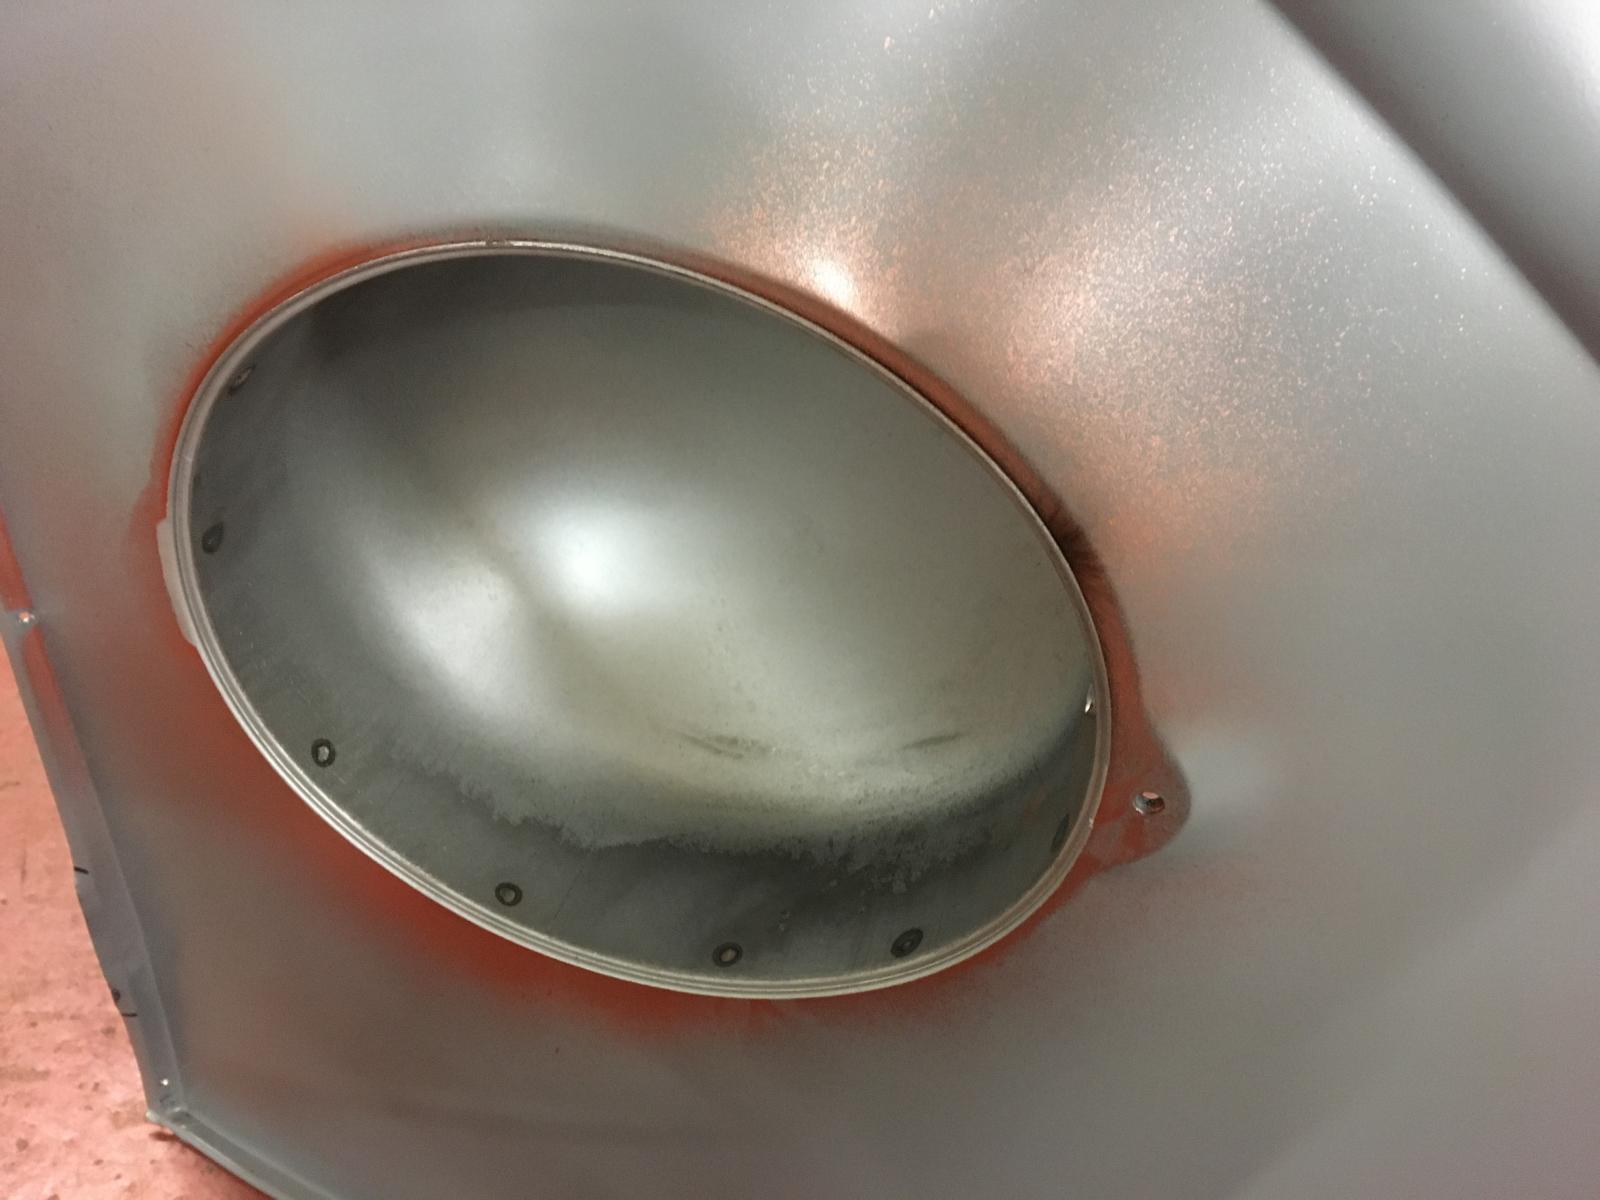
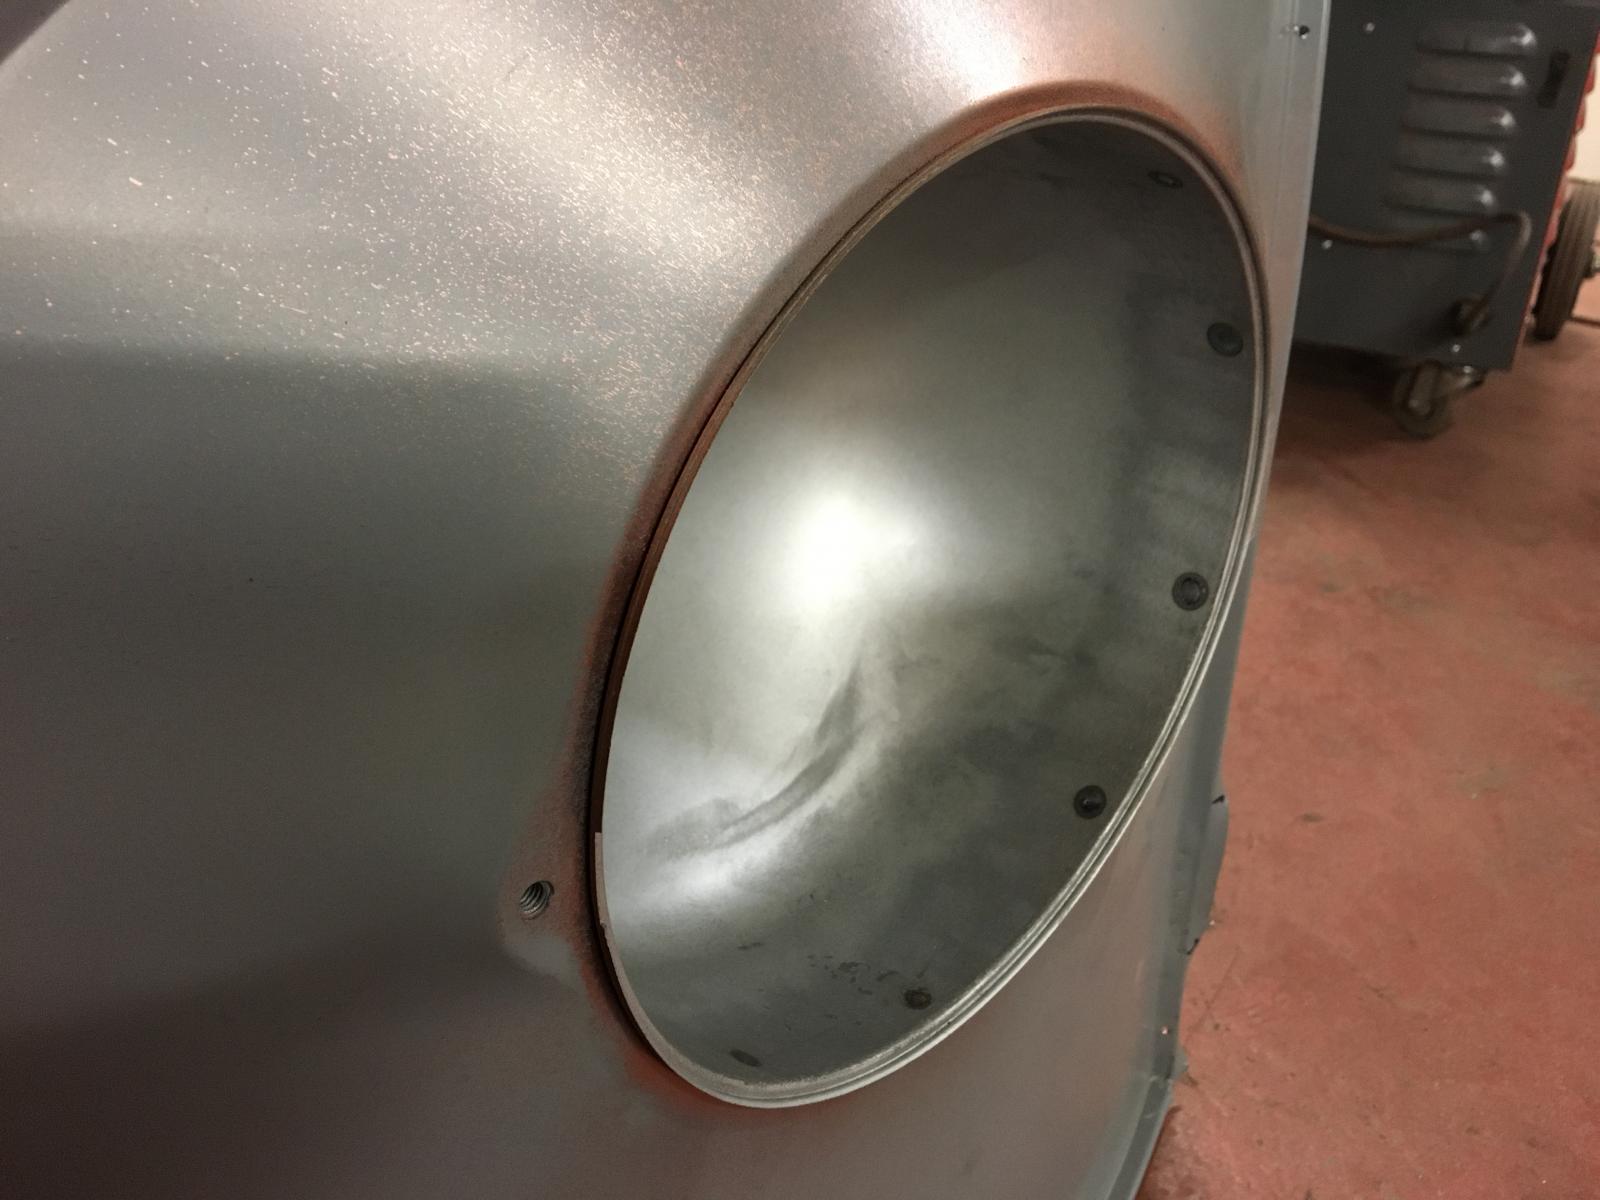
Spot welded the new headlight bowls to the front panel:
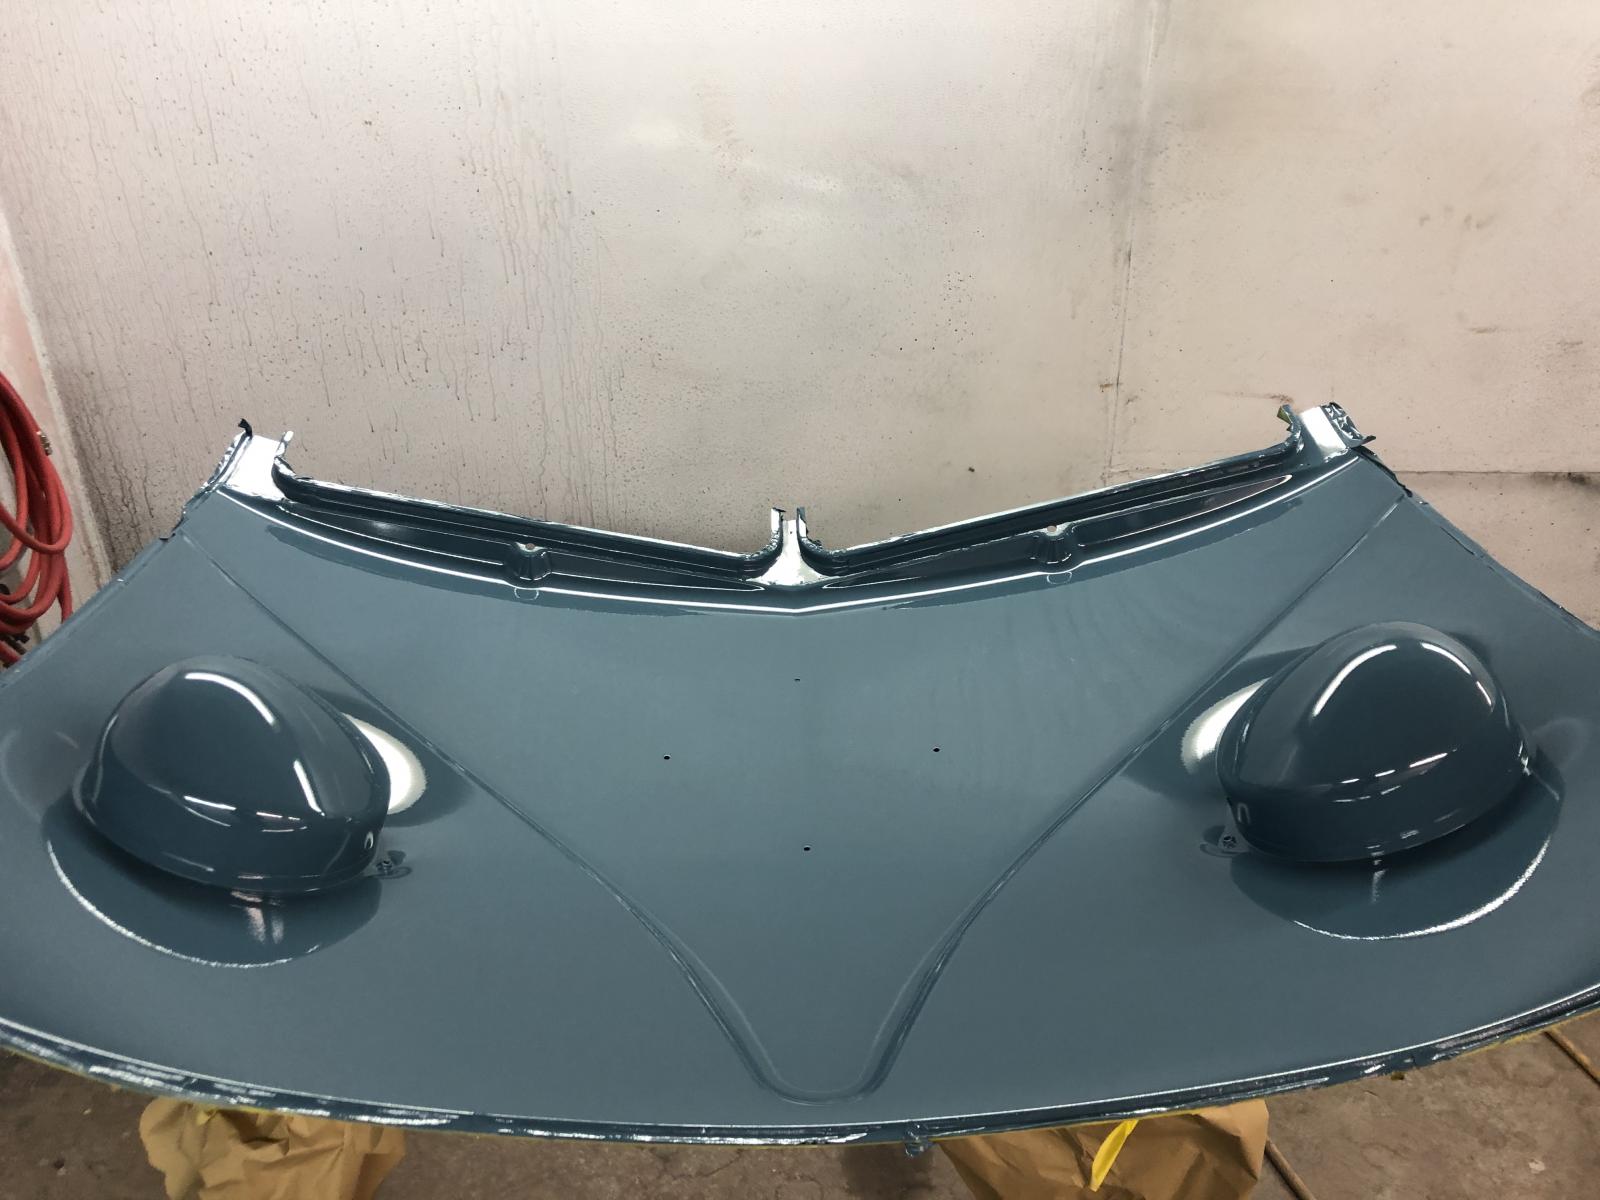
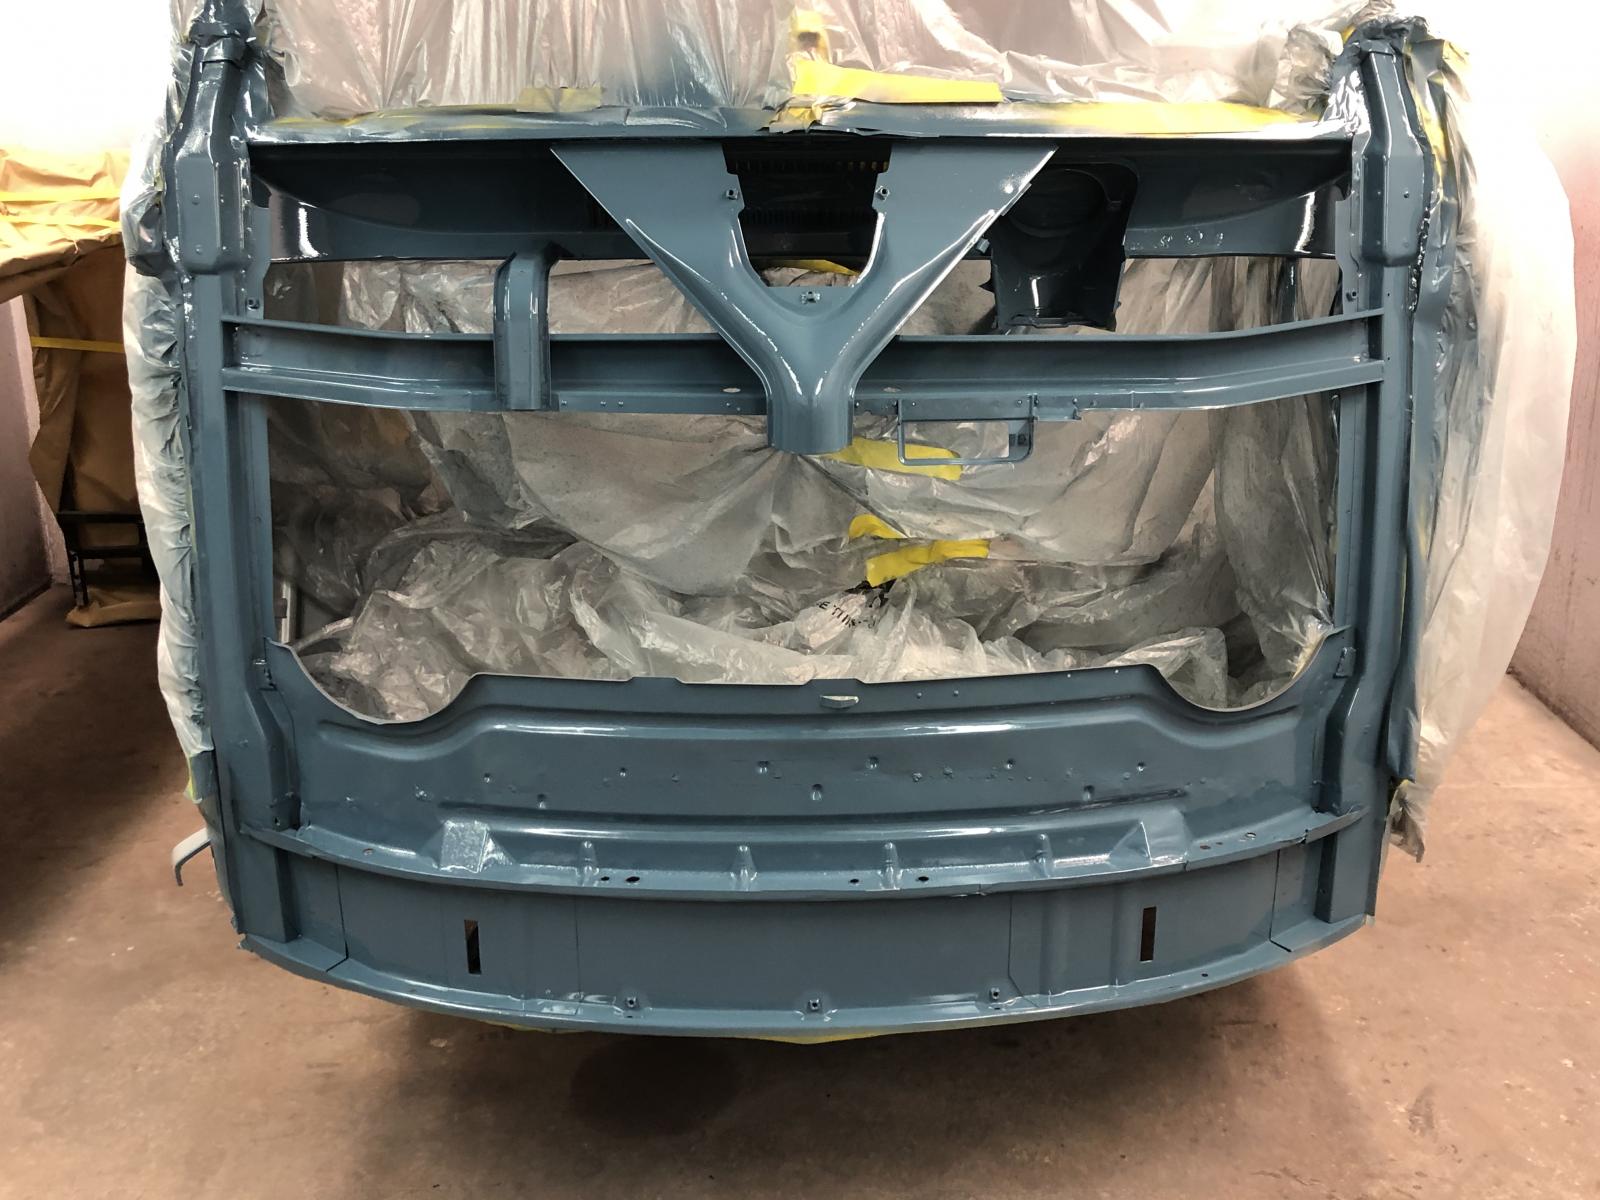
With the welding to the front panel complete, we painted the inside of the front panel, outer valance and inner framework body colour:
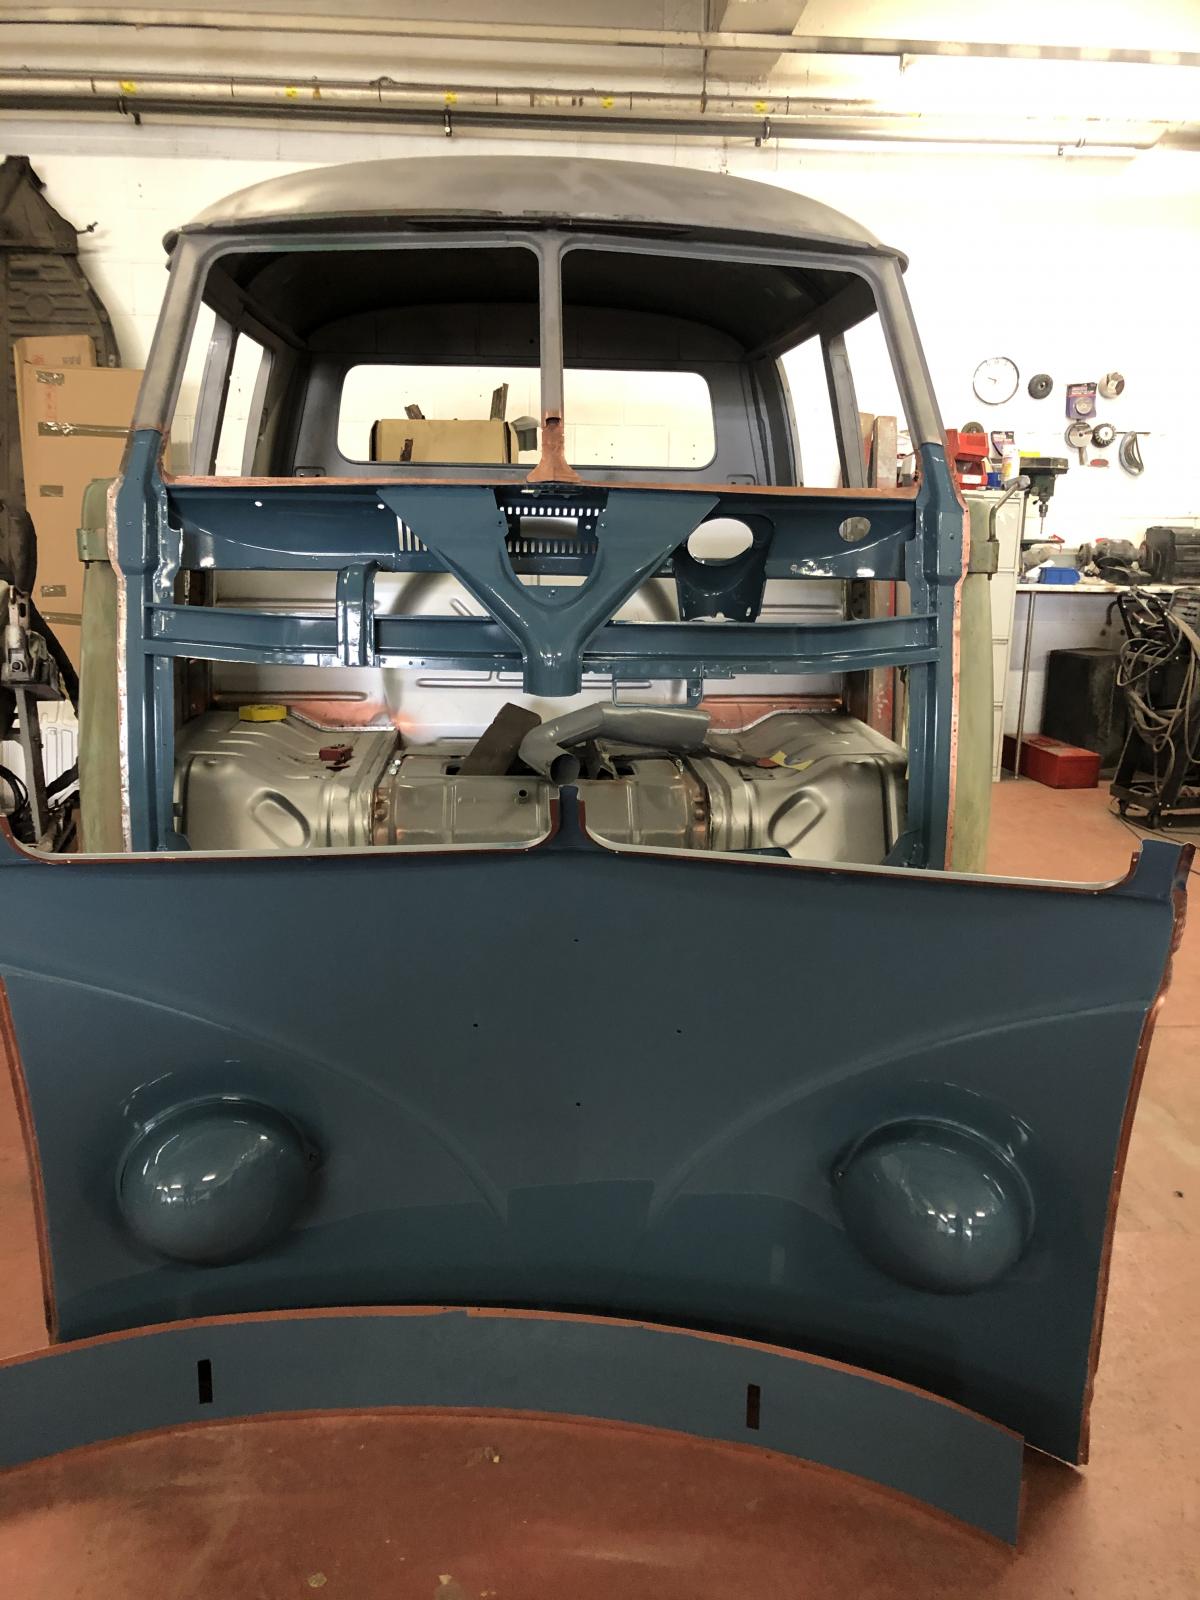
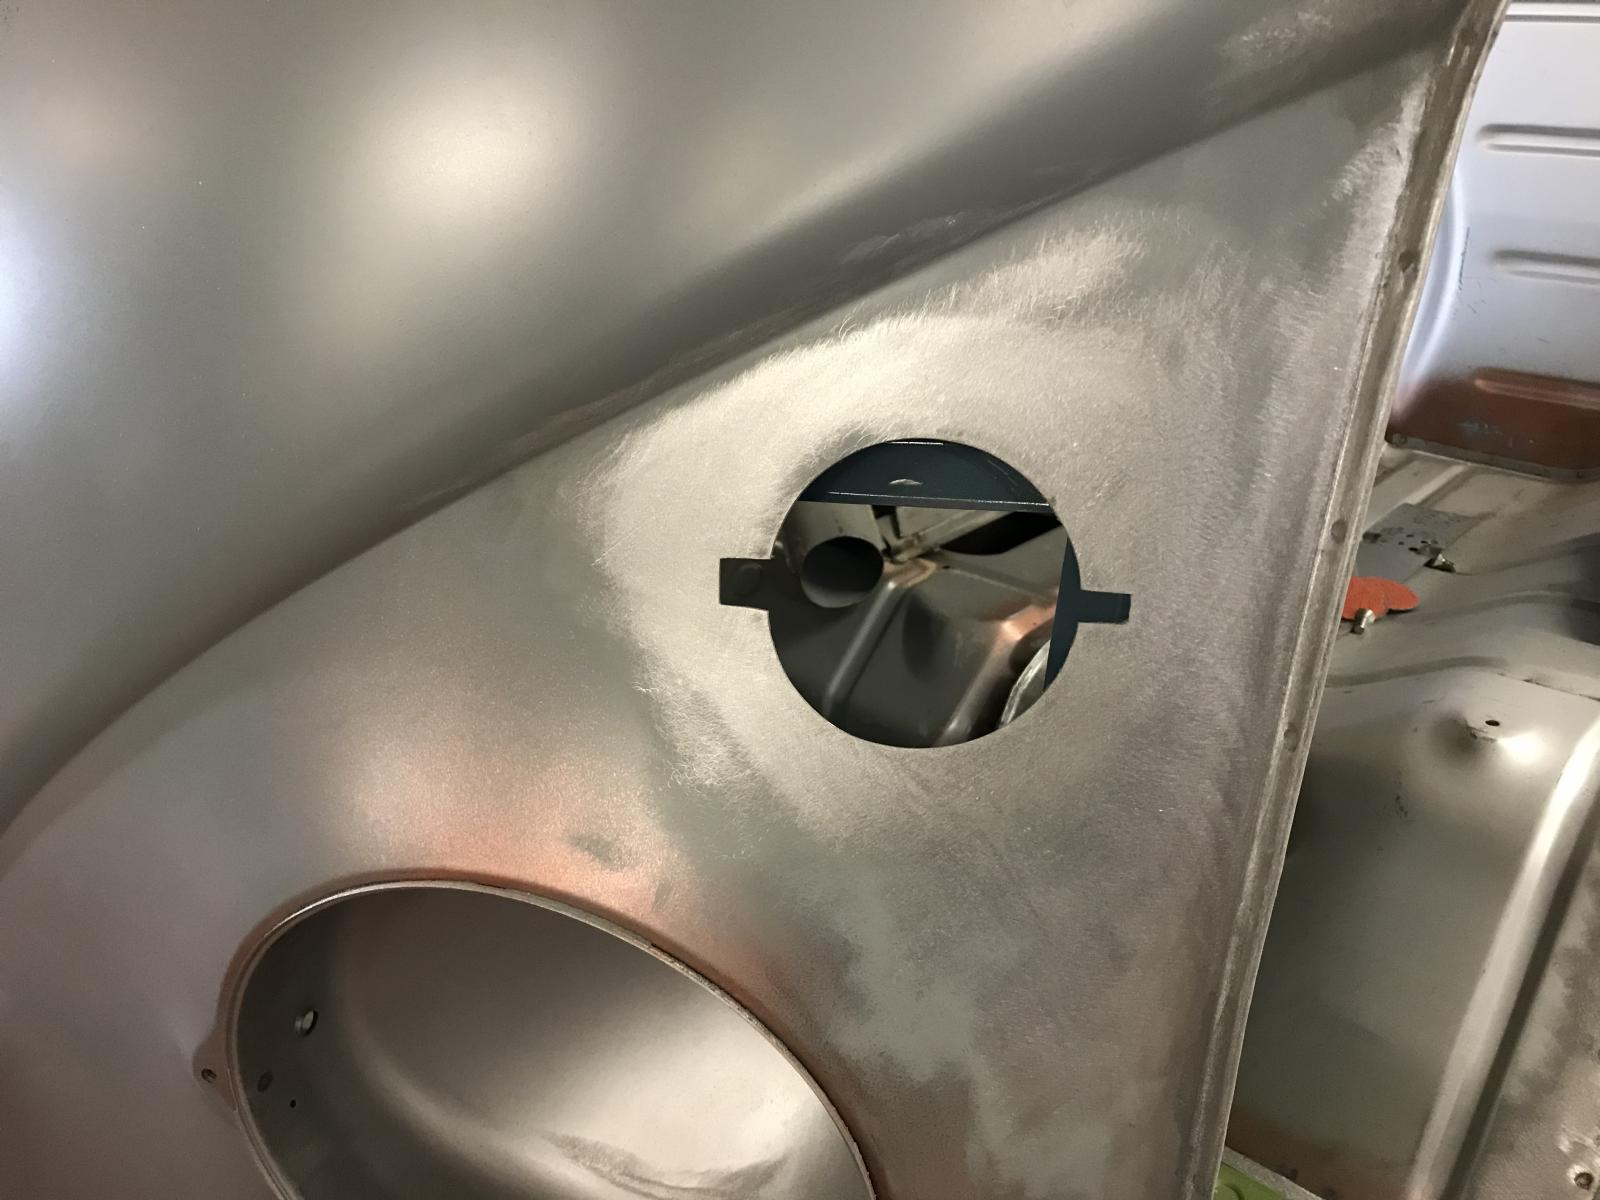
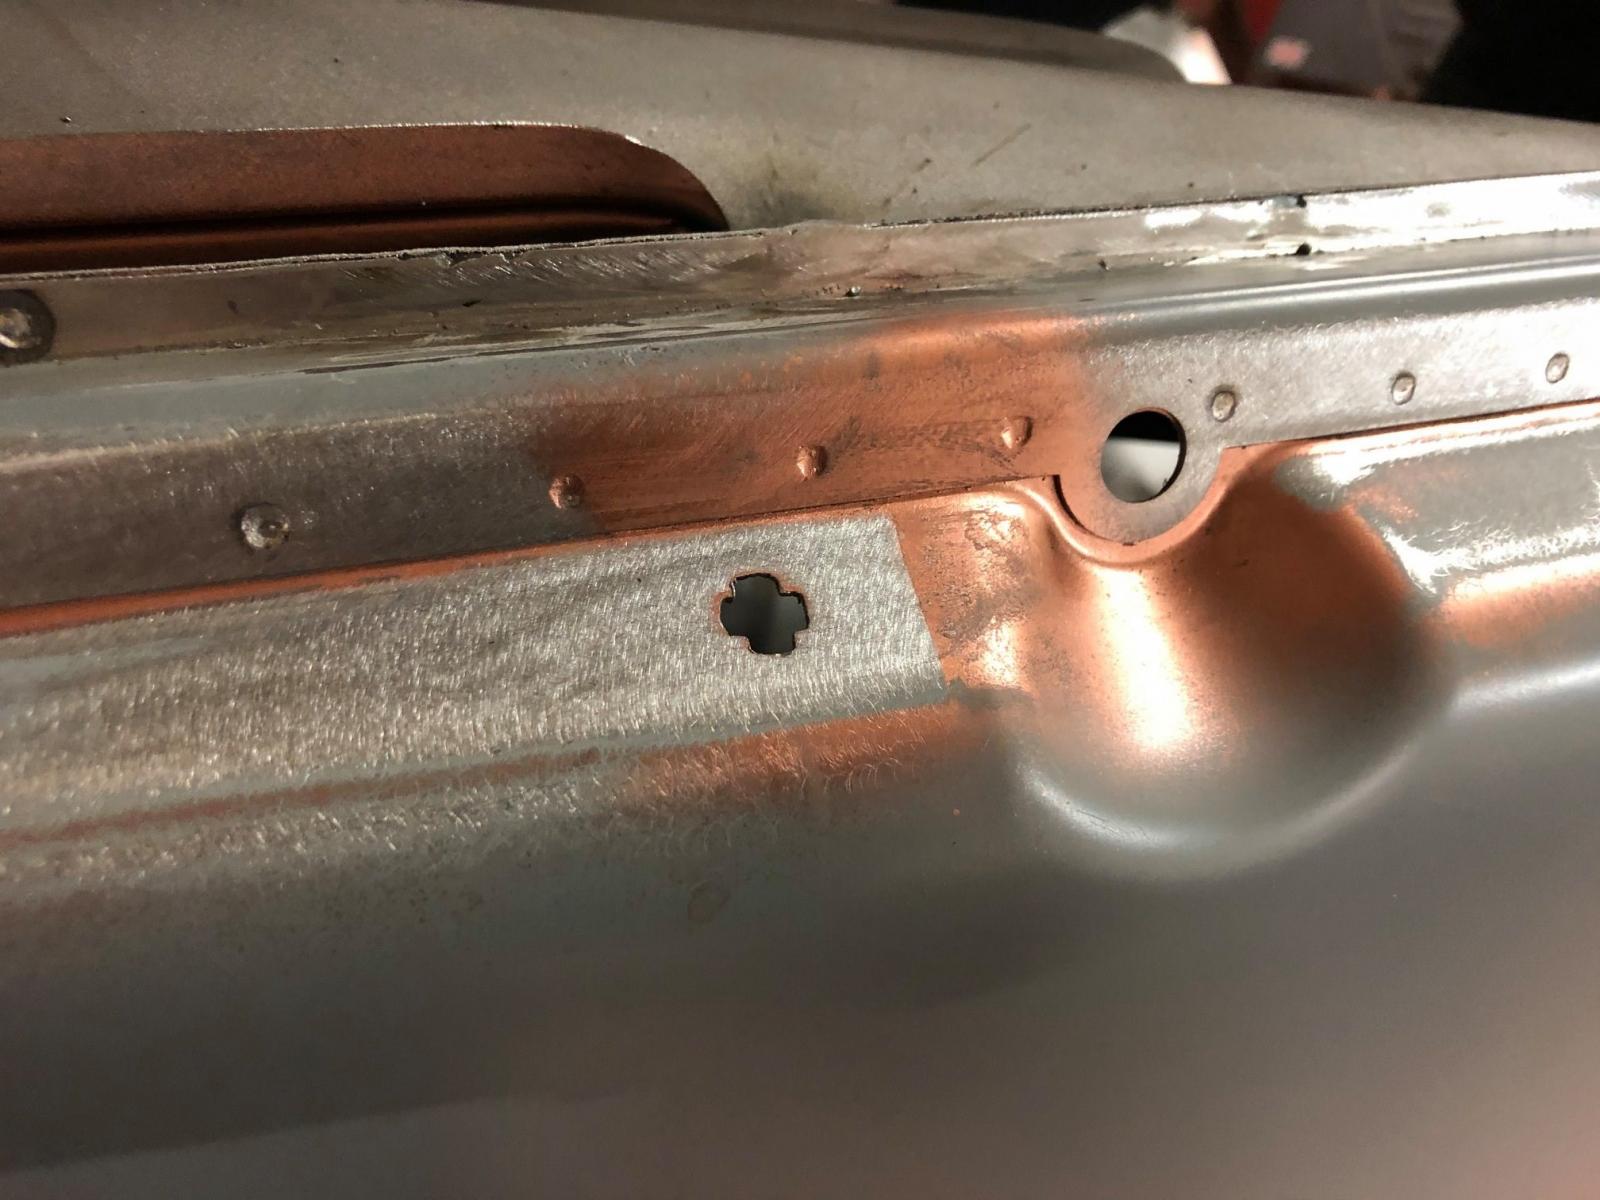
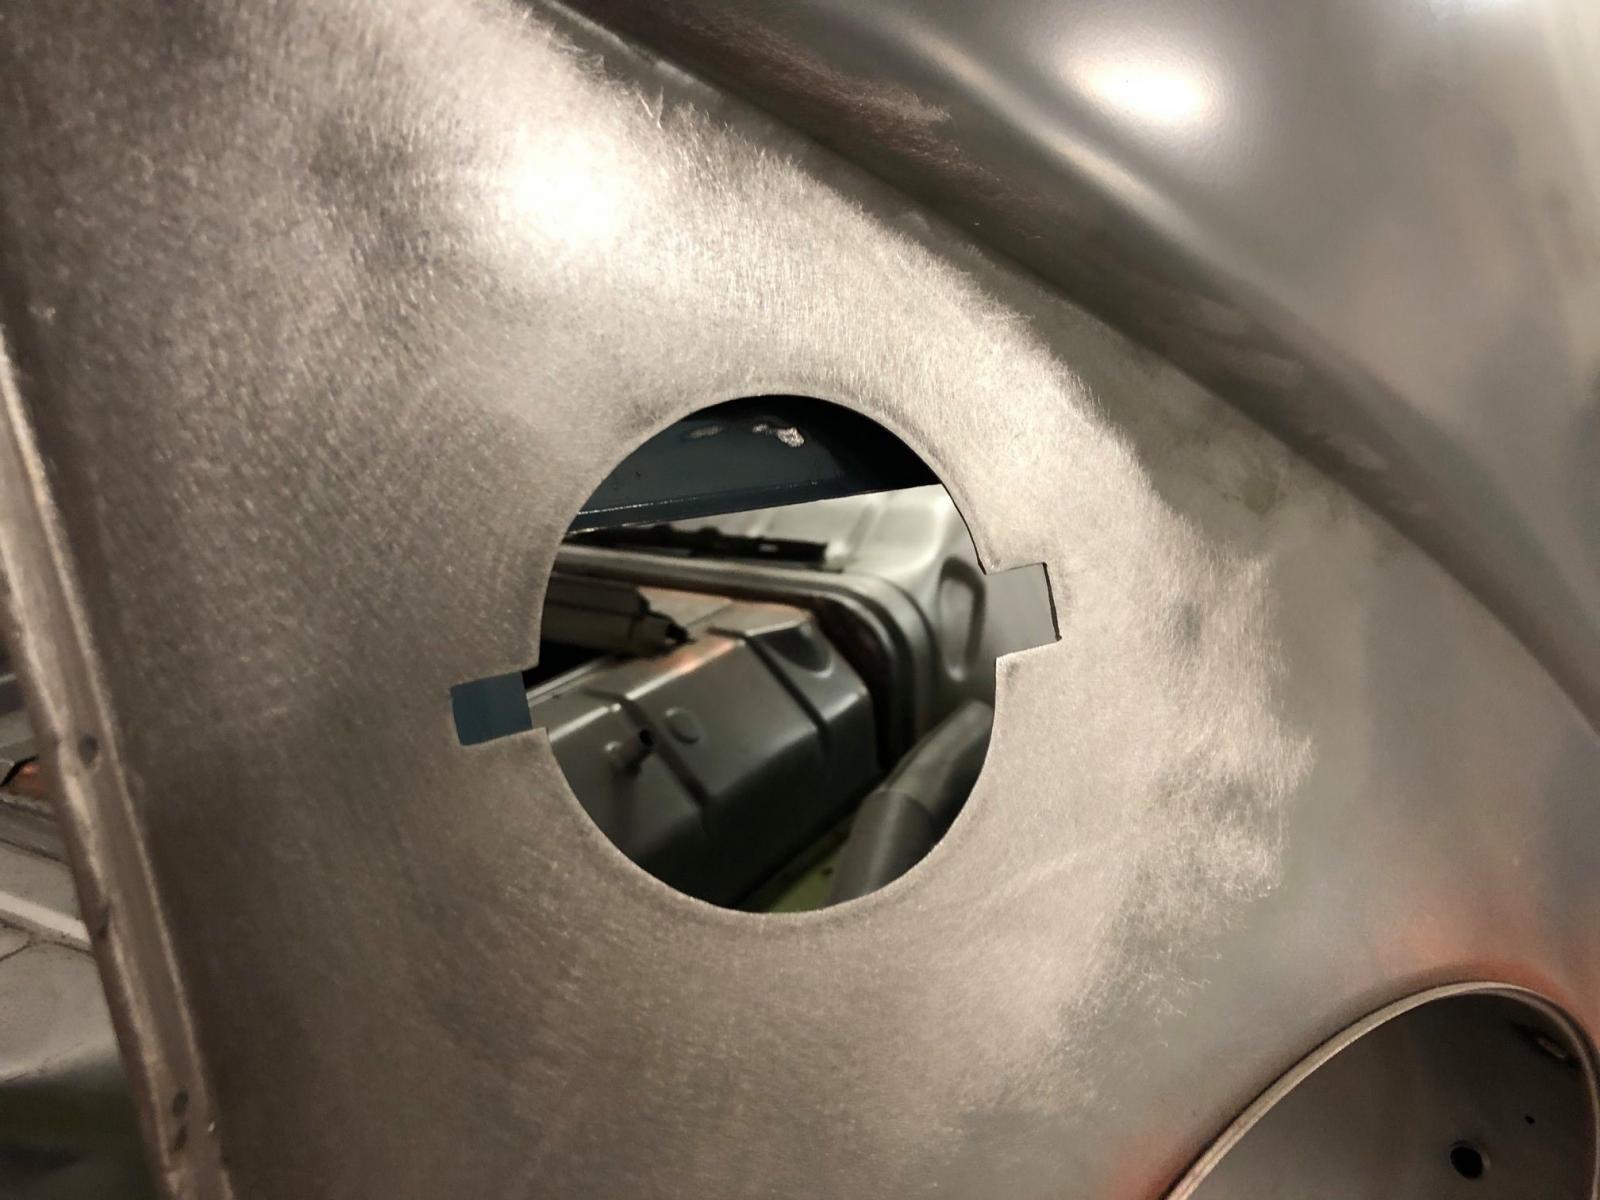
Spot welded down the A posts, valance and window frame, and cut the indicator holes and washer holes as close to factory as possible:
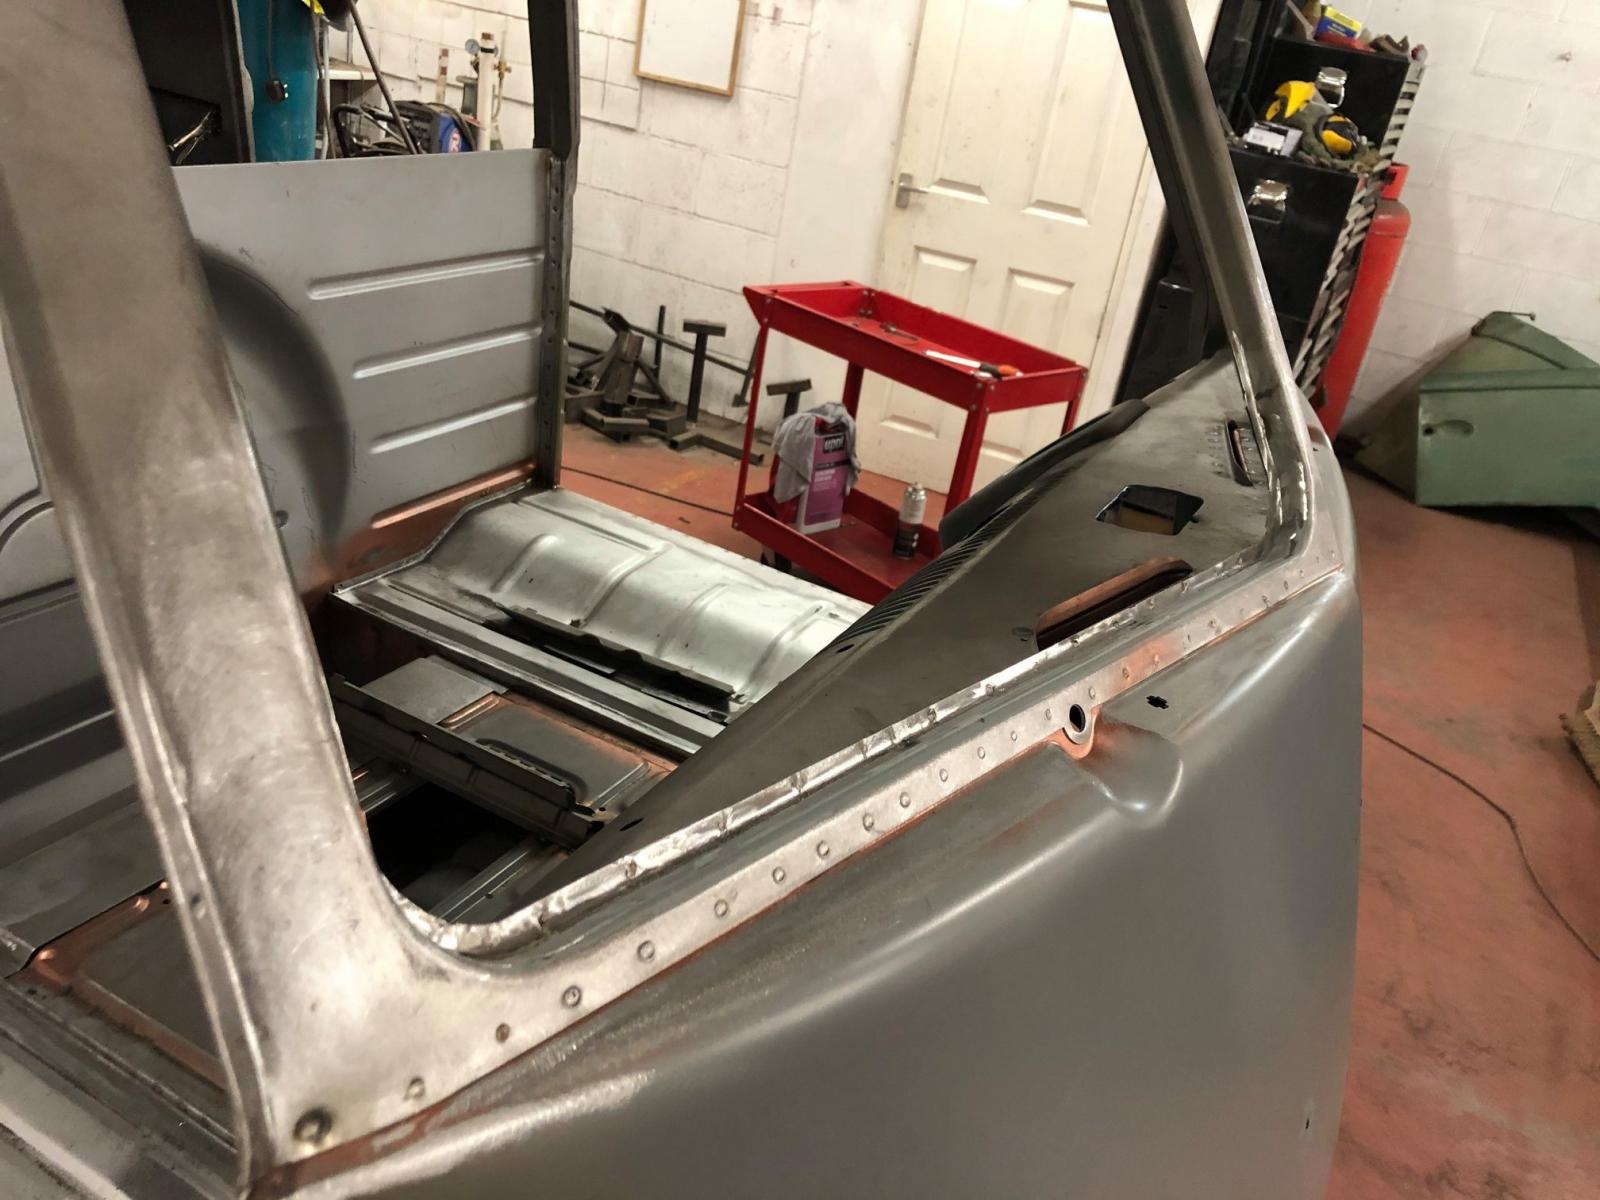
The cab floor was welded in before the front panel as fitted:
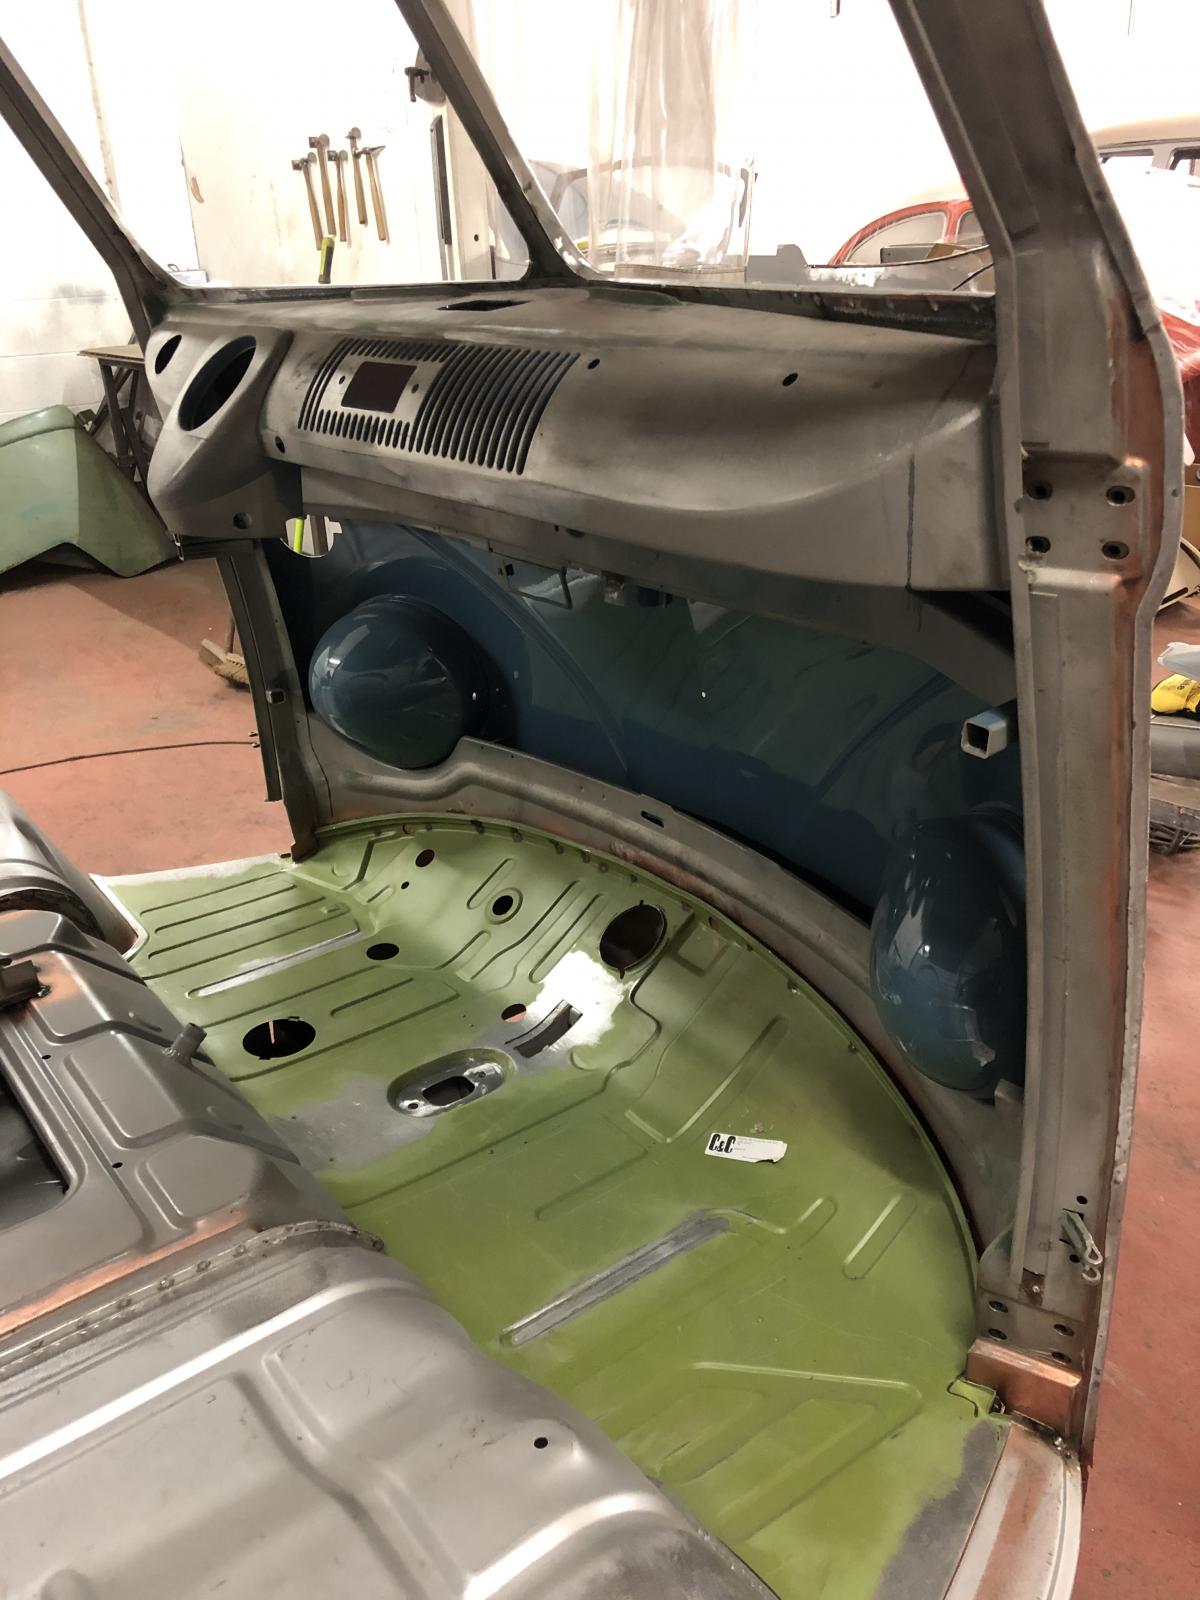
Thats it for a while...
Got the RHS inner B post repaired, and the bulkhead welded to both B posts and front top hat:


Door gaps checked/set and dog legs and tubs pinned in place:


Got the side panel welded down the B post and sill so the dog legs and tubs can be fitted:

Getting ready to weld:

Seat runner panel plug welded to tool chest:

Tubs welded:


Front arches welded:


Front kick panel repaired:


Trimmed down the window frame repair panel and scribed the position to cut:

Spot welded the heater Y piece back into the dash ready for the front panel to be fitted:

Front panel pinned in place:


Removed the front panel and windscreen repair panel and spot welded them together:


Spot welded the new headlight bowls to the front panel:


With the welding to the front panel complete, we painted the inside of the front panel, outer valance and inner framework body colour:


Spot welded down the A posts, valance and window frame, and cut the indicator holes and washer holes as close to factory as possible:


The cab floor was welded in before the front panel as fitted:

Thats it for a while...
mabbo
SSVC Member
Posts: 80
Joined: Wed Jun 01, 2011 7:09 pm
