You are viewing the Split Screen Van Club forum archive.
The forum archive is read-only.Unfortunately in 2021 the Split Screen Van Club forum suffered a ransomware attack and lots of the forum data was lost.
What threads that have been recovered are now searchable on this site. Some threads may be incomplete and some images are still being recovered.
Forum archive search
Re: '65 Westy Sub Hatch Project
by Wastedspark » Sat Sep 07, 2013 8:32 pm
Looking forward to updates, with pictures.
Would you recommend Clifton campers to import a van?
Would you recommend Clifton campers to import a van?
Wastedspark
Registered user
Posts: 154
Joined: Mon Sep 02, 2013 8:59 pm
Re: '65 Westy Sub Hatch Project
by DrumBreaker » Sun Sep 08, 2013 8:56 pm
Wow, thanks for the replies. Feel under pressure to perform now!
Just back from Busfest and managed to pick the brains of some really knowledgeable Bus owners (especially the couple with a mouse grey/white 62 S033 mosaic-what a cool bus you have man). Feeling optimistic for the future of my little red van - I'm giving myself until Busfest next year to get it sorted. I say sorted, that might mean limping an empty, barely MOT'd painted van through the gates like a staggering bewildered wino, but right now I'd snap yer hand off for that outcome....
Wasted Spark - I would say definitely talk to them, they are very approachable people. I bought the van as an import option, so it came straight from the States to me making the risk all mine (had videos and pics to help me assess the condition). I was pretty green going into it and had imagined I could have waltzed it through a quick MOT whilst restoring it on the road - I would say that was more my lack of knowledge and experience than anything else... Given the chance to do it again, I would spend more time looking at more vans for sure, just to understand what's out there. Rush in to nothing!!
Ah one, Ah two, Ah one, two, three, four...
Just back from Busfest and managed to pick the brains of some really knowledgeable Bus owners (especially the couple with a mouse grey/white 62 S033 mosaic-what a cool bus you have man). Feeling optimistic for the future of my little red van - I'm giving myself until Busfest next year to get it sorted. I say sorted, that might mean limping an empty, barely MOT'd painted van through the gates like a staggering bewildered wino, but right now I'd snap yer hand off for that outcome....
Wasted Spark - I would say definitely talk to them, they are very approachable people. I bought the van as an import option, so it came straight from the States to me making the risk all mine
Ah one, Ah two, Ah one, two, three, four...
DrumBreaker
SSVC Member
Posts: 277
Joined: Fri Jun 28, 2013 9:46 am
Re: '65 Westy Sub Hatch Project
by DrumBreaker » Wed Sep 11, 2013 9:48 pm
Evening, just a few to be going on with...
How many fuel filters do you think is enough fuel filters in an engine bay??
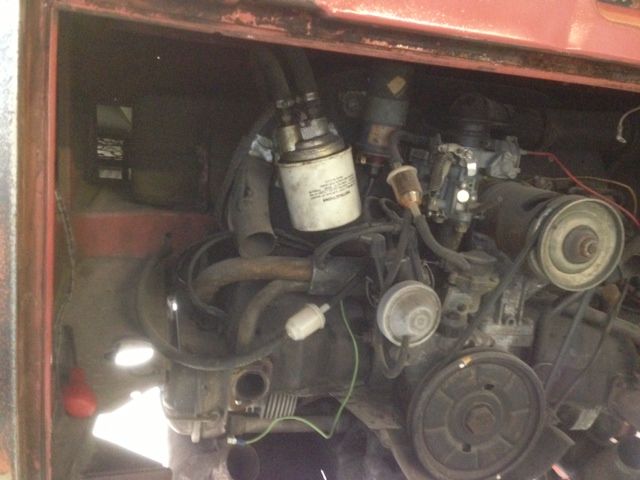
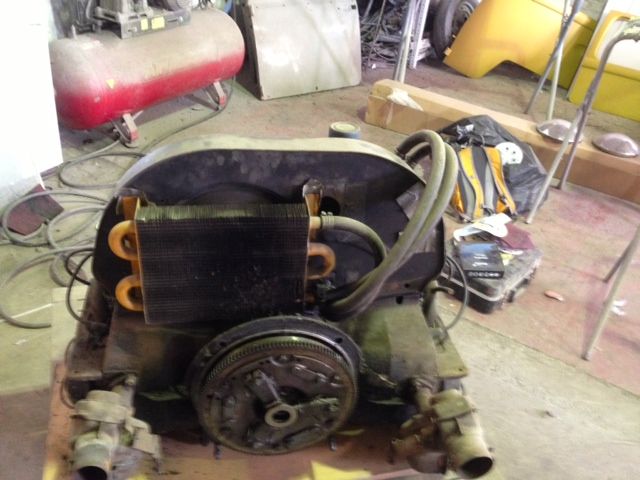
Also, this single port 1600 has this filter/cooler arrangement in place of the standard fan mounted cooler. What do ewe reckon - keep like this / reinstate original cooler / reposition this cooler and filter out of the engine bay in conjunction with original cooler / throw the whole lot into the canal and have a go at my first engine rebuild to go along with my first van rebuild?
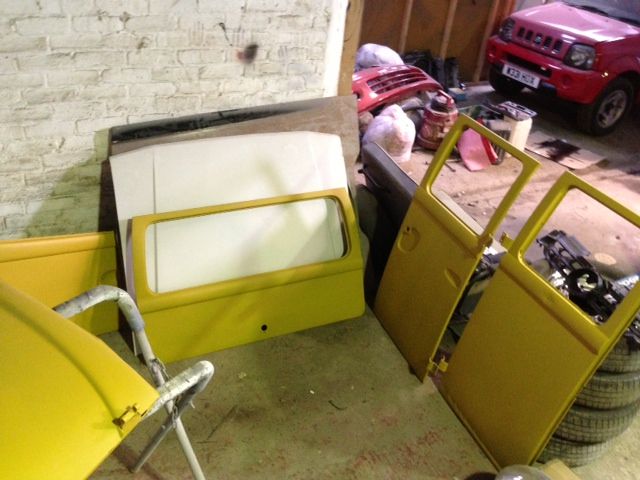
Been a productive week so far (that'll all change when I have to go back to work next week...), got the doors and hatch etch primed after sodablasting (still repairs to make to them, just wanted to protect them from surface rust).

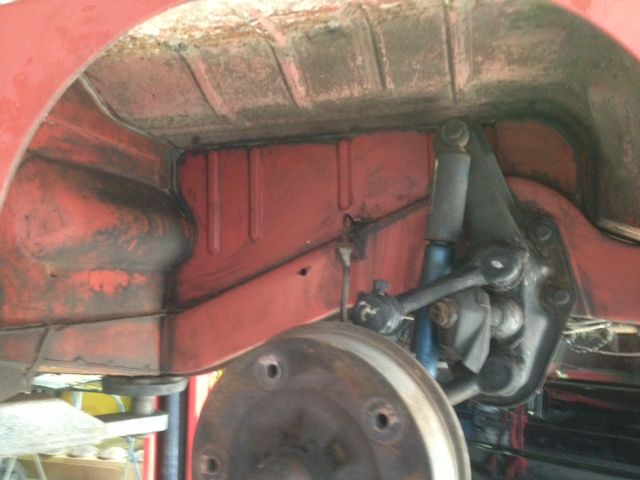
Also had a bit of a dig at the arches, looks like it's hardly been driven under here!
Had loads back from the blasters tonight, and been grinding and sanding the last couple of days, so hopefully should have pics of body progress if I don't lose any more skin - puts grinder guard back on and reaches sheepishly for the first aid kit....ahem..
Cheers
The nine fingered one (almost)
How many fuel filters do you think is enough fuel filters in an engine bay??

Also, this single port 1600 has this filter/cooler arrangement in place of the standard fan mounted cooler. What do ewe reckon - keep like this / reinstate original cooler / reposition this cooler and filter out of the engine bay in conjunction with original cooler / throw the whole lot into the canal and have a go at my first engine rebuild to go along with my first van rebuild?

Been a productive week so far (that'll all change when I have to go back to work next week...), got the doors and hatch etch primed after sodablasting (still repairs to make to them, just wanted to protect them from surface rust).


Also had a bit of a dig at the arches, looks like it's hardly been driven under here!

Had loads back from the blasters tonight, and been grinding and sanding the last couple of days, so hopefully should have pics of body progress if I don't lose any more skin - puts grinder guard back on and reaches sheepishly for the first aid kit....ahem..
Cheers
The nine fingered one (almost)
DrumBreaker
SSVC Member
Posts: 277
Joined: Fri Jun 28, 2013 9:46 am
Re: '65 Westy Sub Hatch Project
by Griff55 » Wed Sep 11, 2013 10:39 pm
Looking good mate!! I too have just got my first splitty project. Also a 1965 import ( alot rougher than yours
 )
)
I'm from down by Tenby and would seriously be interested in your views on the soda blasting. I've got my heart set on getting it dipped, but looking at you panels I might go soda??? Choices, choices!!
Good work bud, keep it up!
I'm from down by Tenby and would seriously be interested in your views on the soda blasting. I've got my heart set on getting it dipped, but looking at you panels I might go soda??? Choices, choices!!
Good work bud, keep it up!
Griff55
Registered user
Posts: 71
Joined: Fri Aug 30, 2013 10:41 pm
Re: '65 Westy Sub Hatch Project
by DrumBreaker » Thu Sep 12, 2013 7:54 am
Thanks Griff
I couldn't recommend the Soda boys highly enough! They will also use glass beads for heavier stuff if need be, and they offer a mobile service too. The company's name is Evablast, and Gareth's number is 07572 466489. I did look into dipping, but in the end I thought the van didn't warrant that level of strip (that, and the fact I couldn't afford it ). I hope I don't regret that choice....

Good luck with your project!
Cheers
Law
I couldn't recommend the Soda boys highly enough! They will also use glass beads for heavier stuff if need be, and they offer a mobile service too. The company's name is Evablast, and Gareth's number is 07572 466489. I did look into dipping, but in the end I thought the van didn't warrant that level of strip (that, and the fact I couldn't afford it
Good luck with your project!
Cheers
Law
DrumBreaker
SSVC Member
Posts: 277
Joined: Fri Jun 28, 2013 9:46 am
Re: '65 Westy Sub Hatch Project
by DrumBreaker » Sat Sep 21, 2013 10:04 pm
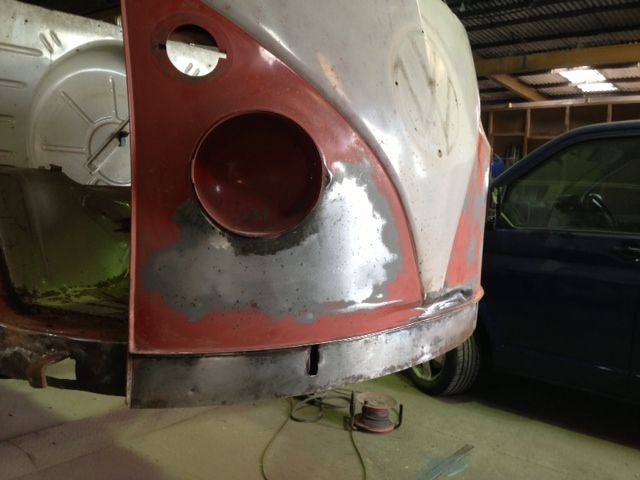
A few more pics to represent my SLOW progress since my last post - that'll be me back off holidays then...
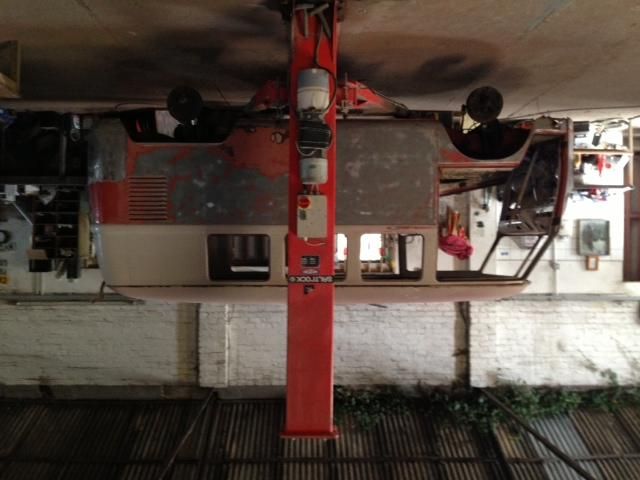
Started to get back to metal, valance in decent nick...
Short rocker is pretty straight, cargo floor less so
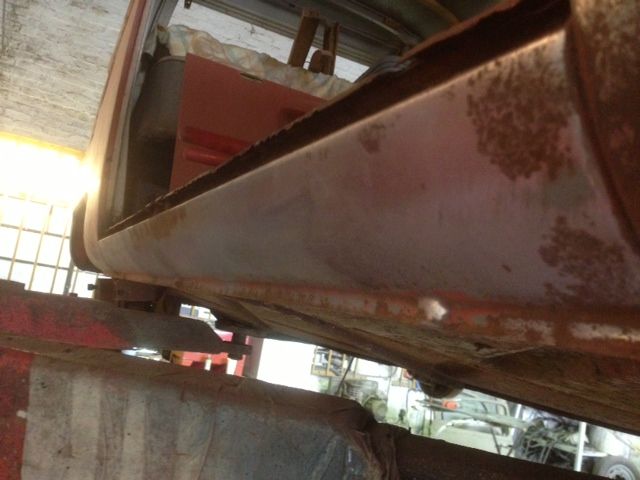
All that came up with the long rocker, but do you think belly pans could be hiding more?

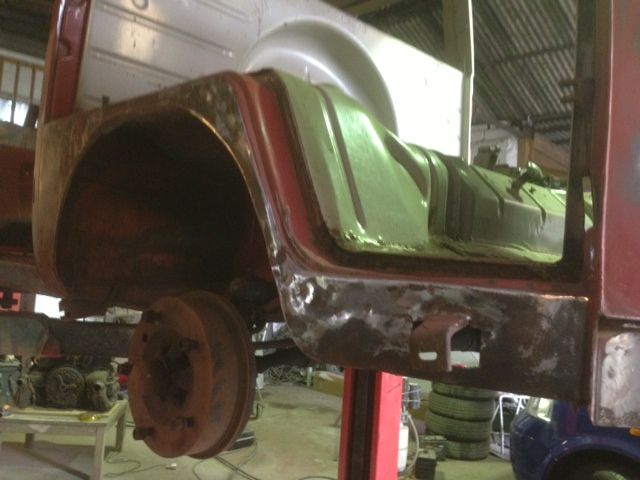
My right hand dogleg is pretty beaten up - this corner sustained some crash damage at some point. The beam is about 10mm back on this side and there is deformation in the chassis rail. B@lls Still, it's only metal, right?
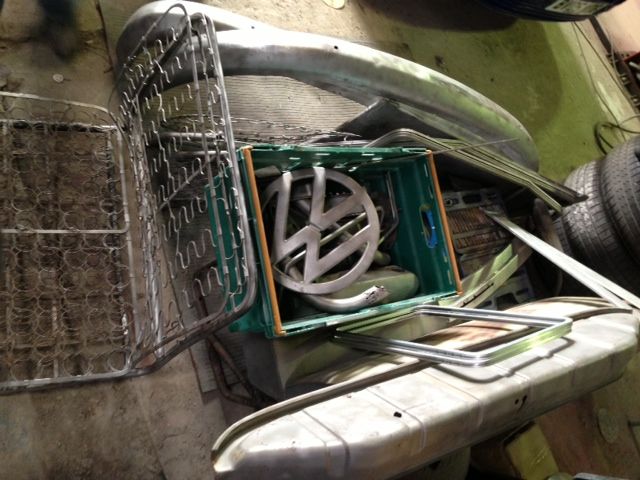
The Soda boys have come up trumps again, more shiny metal arrived in the week...
All in all, lots done, but now proper stuff needs attending to, like getting both sides of the the chassis pointing roughly in the same direction (it's not as bad as I'm making out, I just loves the drama...). More importantly, do I trim the tree that's growing into the lockup???
Cheers
Ears
Started to get back to metal, valance in decent nick...

Short rocker is pretty straight, cargo floor less so

All that came up with the long rocker, but do you think belly pans could be hiding more?

My right hand dogleg is pretty beaten up - this corner sustained some crash damage at some point. The beam is about 10mm back on this side and there is deformation in the chassis rail. B@lls

The Soda boys have come up trumps again, more shiny metal arrived in the week...

All in all, lots done, but now proper stuff needs attending to, like getting both sides of the the chassis pointing roughly in the same direction (it's not as bad as I'm making out, I just loves the drama...). More importantly, do I trim the tree that's growing into the lockup???

Cheers
Ears
DrumBreaker
SSVC Member
Posts: 277
Joined: Fri Jun 28, 2013 9:46 am
Re: '65 Westy Sub Hatch Project
by Kid Rock » Sat Sep 21, 2013 11:32 pm
I'd wait till the branches are getting in the way, then go outside and lop the whole tree! I wish my garage had this much space. Could get loads of s#@t in it, and still do your van B-)
Looking good fella. I'll be keeping me peepers on this.
Andie
Looking good fella. I'll be keeping me peepers on this.
Andie
Kid Rock
SSVC Member
Posts: 234
Joined: Sat Sep 10, 2005 11:46 am
Re: '65 Westy Sub Hatch Project
by DrumBreaker » Thu Sep 26, 2013 6:16 pm
I wish it was my garage, just renting space in it from a mate until the van is painted, MOTed and watertight. So that'll be for ever then really....

It's got a booth, ramp, tools, nudie calendars, the lot. So I have no excuses not to get my act together
It's got a booth, ramp, tools, nudie calendars, the lot. So I have no excuses not to get my act together
DrumBreaker
SSVC Member
Posts: 277
Joined: Fri Jun 28, 2013 9:46 am
Re: '65 Westy Sub Hatch Project
by vanbloke » Wed Oct 02, 2013 7:17 pm
youve got a great space to work in dude
 looks like your well on the way
 ....
....

vanbloke
Registered user
Posts: 224
Joined: Sun Nov 07, 2004 7:08 pm
Re: '65 Westy Sub Hatch Project
by jayvanman » Mon Oct 07, 2013 10:08 am
How's the camper coming along ?
Any updates ?
Seeing as you've got a sub hatch I thought I'd invite you to have a look at my thread. It's still a little way of finished but you'll see where I'm going with it.
viewtopic.php?f=2&t=98166
Jason
Any updates ?
Seeing as you've got a sub hatch I thought I'd invite you to have a look at my thread. It's still a little way of finished but you'll see where I'm going with it.
viewtopic.php?f=2&t=98166
Jason
jayvanman
Registered user
Posts: 3260
Joined: Tue Aug 19, 2008 10:21 am
Re: '65 Westy Sub Hatch Project
by DrumBreaker » Tue Oct 08, 2013 6:09 pm
Hey Jason, I've been looking at your Riviera thread today as it happens! I've been dragging my feet a little - my bus is 10 miles away in my mate's workshop and I've been working some silly hours lately...
 I'm going to bring my engine home this week, so at least I can drunkenly work into the wee hours whilst everyone sleeps.
I have managed some smaller stuff - drilled out tons of studs and retapped the threads back, rebuilt the painted seat frames (got some mesh grey covers coming) made up the overhead air flaps with new seals and paint and just about to rebuild cab windows (the Riviera thread was pretty inspiring on this), + pop-outs and newly painted hella US headlights. I'm waiting for another mate to do some welding on my doors so I can get them close to finished and put to one side....
I really need to learn to weld
All this fiddling is happening because I need to take the shell to be sandblasted and have the chassis around the beam mount pulled straight and probably strengthened - it hit something hard once, but should fix fine. I hope. Ahem....
Love that SO23 interior you're doing - are you working from an original set of furniture or plans? Looking really good - what ply are you using for the bulkhead/headliner? I have started to stress about getting something original or building something close to it - mine probably would have been SO33 although as someone said it might have been a tourist option based on a standard (don't know what was in one of those!) A never ending list of things to learn.
Good luck with your projects man, I'll keep checking in to inspire me to get off my @rse!!
Cheers
Law
DrumBreaker
SSVC Member
Posts: 277
Joined: Fri Jun 28, 2013 9:46 am
Re: '65 Westy Sub Hatch Project
by jayvanman » Tue Oct 08, 2013 11:13 pm
DrumBreaker wrote:Hey Jason, I've been looking at your Riviera thread today as it happens!
(the Riviera thread was pretty inspiring on this),
Law
OMG
it's a sundial
ha ha ha
to be honest if you asked me what the difference is I could only tell you the riviera have long windows down the side and not the usual 3 separate ones.
glad you liked the refelting of cab doors, a few people have commented on it - it's nice to know that I've done something of use for other people.
good to know your pressing on with the other bits of your project. Get some pics up man, it'll keep people interested in your rebuild thread and that in itself is motivation, and we all need a little of that now and then.
I've been quite slack with my updates, but I have done LOADS ! I keep meaning to get some pics up but new job and 6 days a week blah blah excuses excuses.......
however it is about time I put some news up.
the SO23 interior is a very close representation of an original, but with my own little twist on it -no screws or pins on show in the cabinets. I've ordered some latches and hinges etc to finish the bits off so check that link after the weekend for some updates.
Get busy with your bus mate as before know it it will be freezing and you won't won't to be out there and you'll be putting things off and then it's spring and people are going out in there buses and you'll wish you done that list of jobs when you had time - trust me , I know these things
good luck and keep pressing on
J
jayvanman
Registered user
Posts: 3260
Joined: Tue Aug 19, 2008 10:21 am
Re: '65 Westy Sub Hatch Project
by DrumBreaker » Thu Oct 10, 2013 12:35 pm
D'oh! Sundial!!! Of course! Sorry Jason...

I'm covering myself in glory on this thread (bit like your rooster)....
I have been taking pics whilst I go, and will get some up when I have something vaguely useful. Looking forward to seeing the interior you're building getting finished - I have toyed with the idea of making a modified version of a Westy interior to lose the wardrobe - I fancy having access to the window and putting a low height unit in it's place. Will I be beaten up by Germans?...
DrumBreaker
SSVC Member
Posts: 277
Joined: Fri Jun 28, 2013 9:46 am
Re: '65 Westy Sub Hatch Project
by jayvanman » Thu Oct 10, 2013 1:46 pm
Doubt itDrumBreaker wrote:Will I be beaten up by Germans?...
Remember the war
Contraversal
God bless um, we wouldn't have the splits without um.
Have I opened up a can of worms there.
Uh oh.........
jayvanman
Registered user
Posts: 3260
Joined: Tue Aug 19, 2008 10:21 am
Re: '65 Westy Sub Hatch Project
by DrumBreaker » Mon Nov 04, 2013 7:22 pm
I am so rubbish at updates....

Anyhow, whilst I wait for a turn in the sandblasters for my body shell, I thought I'd get on with doing some nice shiny, clean bits in the house over half term...
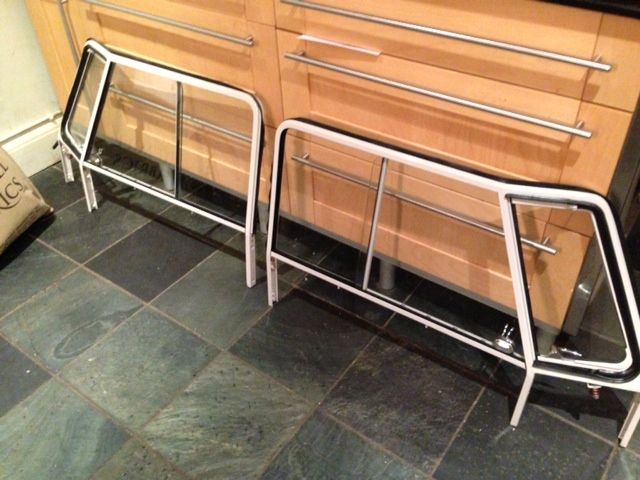
My mate Karl the painter helped things along by getting some beige grey on a few bits, which meant I could delve into my Schofield box of seals...
Cab windows first, the quarterlight seals were fun to trim. How the hell do you get a neat finish in behind the wind deflector????

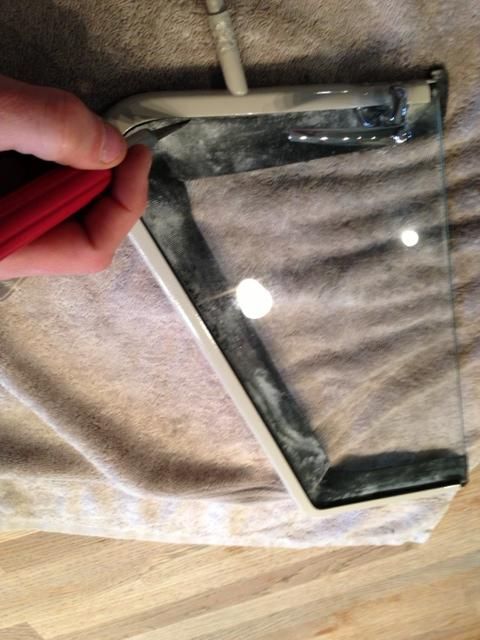
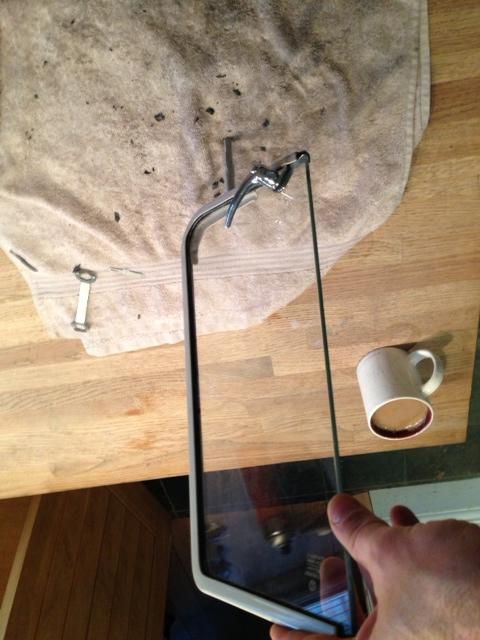
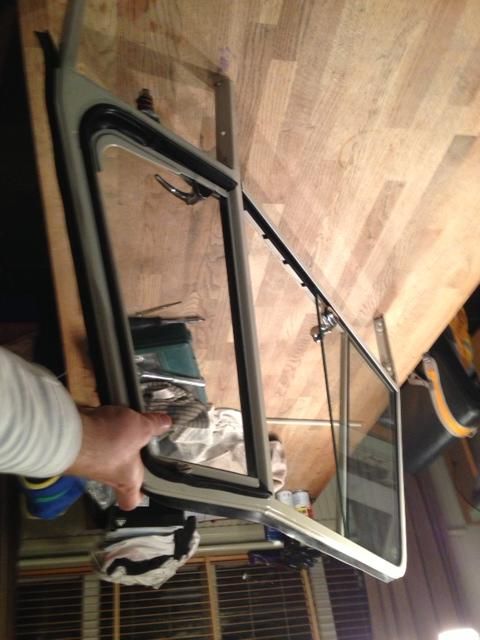
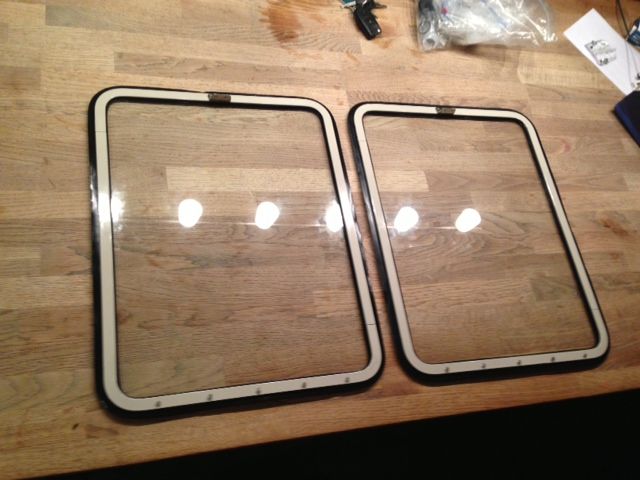
Then pop outs... I have a fine texture on all my windows, like they have been lightly sandblasted on one side! I had a go at them with some of that Cerium Oxide paste and a polishing pad and was amazed how well they came out. Was convinced that stuff was a scam...
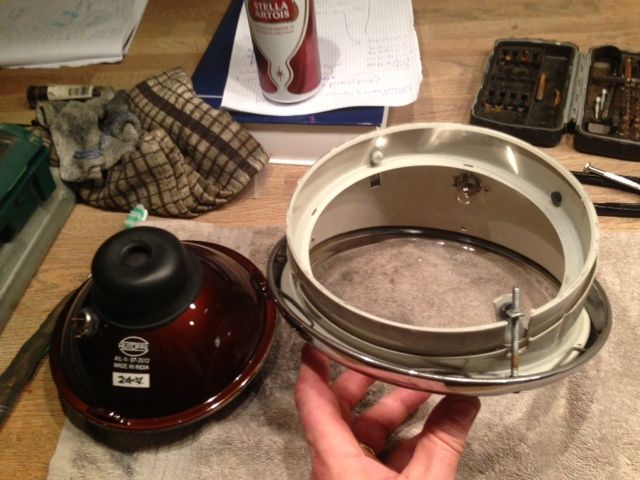
We thought while the beige was in the gun, we should give the headlights a once over (I know, it's not OG, but thought it would be pretty close... )
)
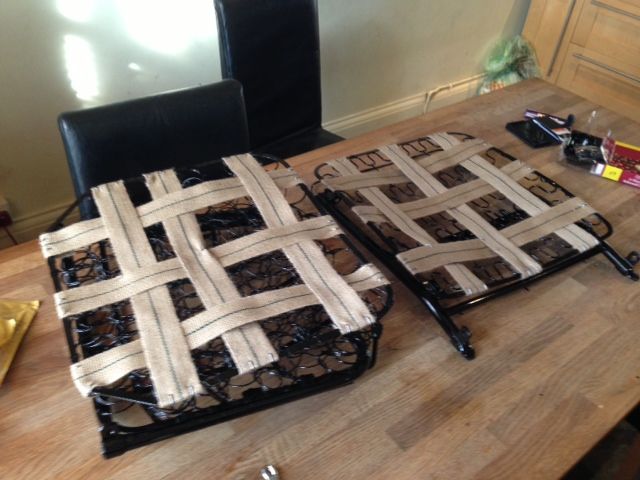
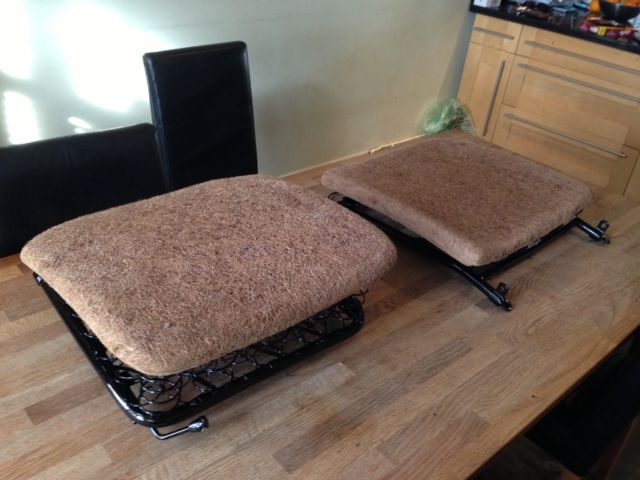
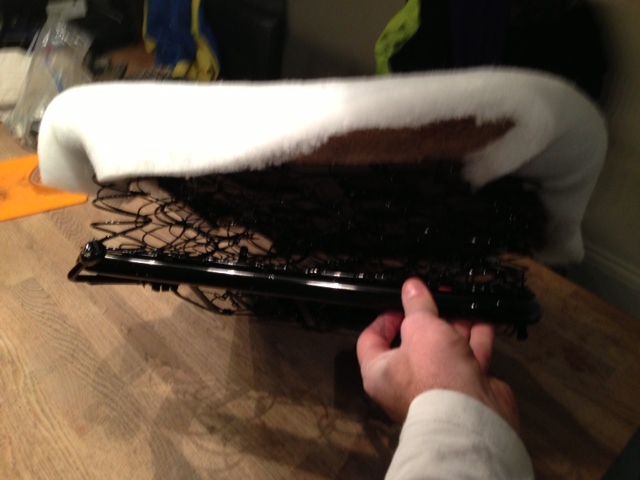
Next up was to fit the mesh grey seat covers I have had waiting. They went on pretty well for a ham-fisted Welshman (I wont mention the small tear where I should have heated them up a bit more with the hairdryer...)
Used Webbing to protect the seat pads...
Just to prove I exist and do some of the work!!
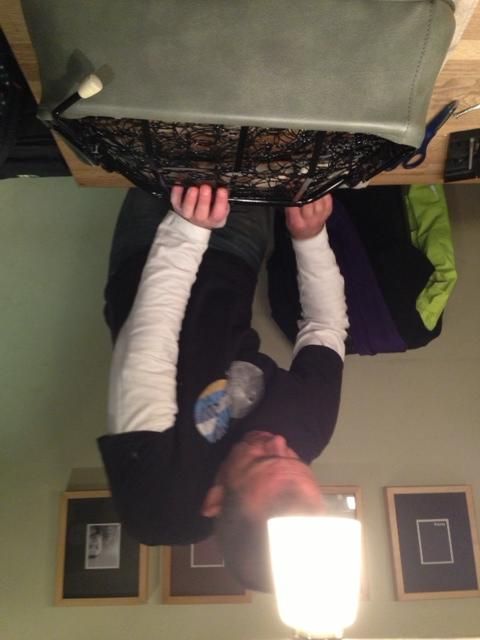
Of course this little dude did all the hard stuff...
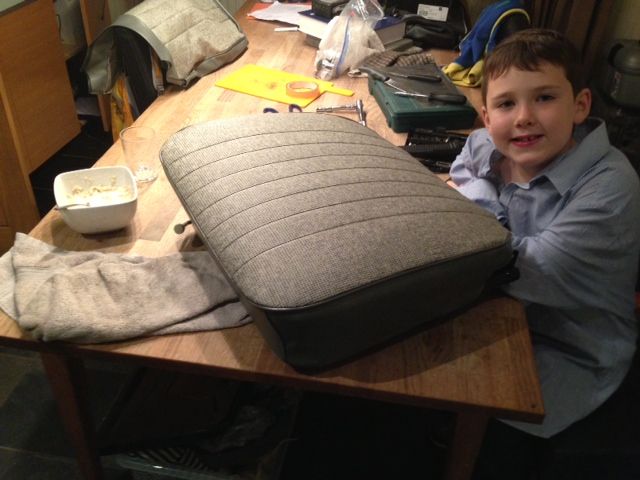
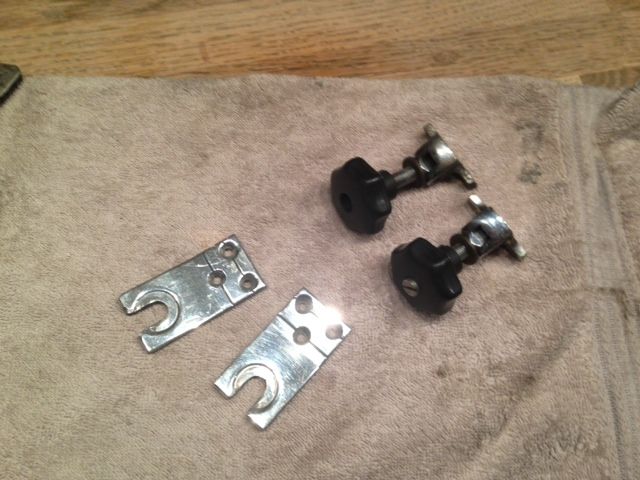
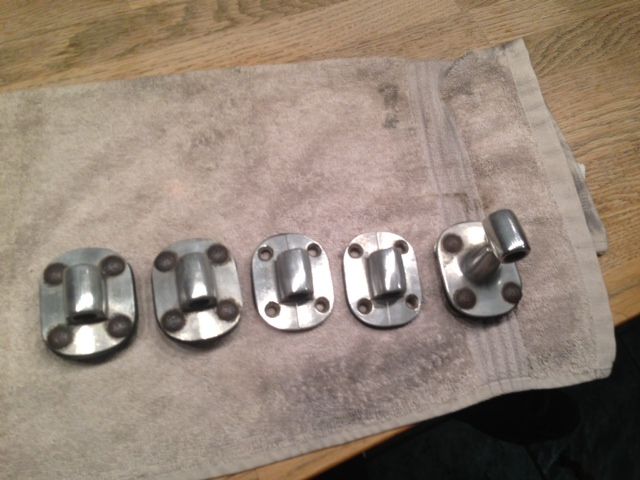
With several boxes of parts to go through, had some quality time with my Autosol and a collection of tea towels and other kitchen implements. Kitchen became Bus-Lab over half term. Ssshhhhh...
Sub hatch and Westy roof bracketry...
So although I've not been bone idle, I really want to make head roads into the bigger jobs - Doors whilst the body is away, then decide how far to take the mechanicals. I'm pulling out the beam to sort the slop in the steering, and the gearbox for new mounts, but whilst it isn't jumping out of gear anywhere I'm just going to do a transmission oil change, output shaft seal and renew the clutch bearing release arm - the notches on the forks are almost through to the other side.
Looking forward to the frozen months....
Anyhow, whilst I wait for a turn in the sandblasters for my body shell, I thought I'd get on with doing some nice shiny, clean bits in the house over half term...
My mate Karl the painter helped things along by getting some beige grey on a few bits, which meant I could delve into my Schofield box of seals...
Cab windows first, the quarterlight seals were fun to trim. How the hell do you get a neat finish in behind the wind deflector????


Then pop outs... I have a fine texture on all my windows, like they have been lightly sandblasted on one side! I had a go at them with some of that Cerium Oxide paste and a polishing pad and was amazed how well they came out. Was convinced that stuff was a scam...

We thought while the beige was in the gun, we should give the headlights a once over (I know, it's not OG, but thought it would be pretty close...

Next up was to fit the mesh grey seat covers I have had waiting. They went on pretty well for a ham-fisted Welshman (I wont mention the small tear where I should have heated them up a bit more with the hairdryer...)
Used Webbing to protect the seat pads...


Just to prove I exist and do some of the work!!

Of course this little dude did all the hard stuff...

With several boxes of parts to go through, had some quality time with my Autosol and a collection of tea towels and other kitchen implements. Kitchen became Bus-Lab over half term. Ssshhhhh...
Sub hatch and Westy roof bracketry...


So although I've not been bone idle, I really want to make head roads into the bigger jobs - Doors whilst the body is away, then decide how far to take the mechanicals. I'm pulling out the beam to sort the slop in the steering, and the gearbox for new mounts, but whilst it isn't jumping out of gear anywhere I'm just going to do a transmission oil change, output shaft seal and renew the clutch bearing release arm - the notches on the forks are almost through to the other side.
Looking forward to the frozen months....
DrumBreaker
SSVC Member
Posts: 277
Joined: Fri Jun 28, 2013 9:46 am
