You are viewing the Split Screen Van Club forum archive.
The forum archive is read-only.Unfortunately in 2021 the Split Screen Van Club forum suffered a ransomware attack and lots of the forum data was lost.
What threads that have been recovered are now searchable on this site. Some threads may be incomplete and some images are still being recovered.
Forum archive search
Re: My 64 camper Blog
by paul_f » Thu Sep 24, 2009 4:32 pm
orange wrote:Hi paul thanks for the advice on the hubs and A arms, this forum is really helpfull, once the body work is all done Ill be draging the breaks and suspension out again and trying to set them up. Just brought "how to modify volkswagen bus serspension ,breaks and chassis" from VW books for some help If it dosent work Ive got a ball joint lowered beam and T3 IRS gear box Ill fit, progress will be posted on the blog. cheers
Don't put ball joints on! I did that when I got my bus and it was an awful ride!
Dropped king and link pin spindles give a much better ride
paul_f
SSVC Committee Member
Posts: 6009
Joined: Thu Apr 17, 2003 9:58 am
Re: My 64 camper Blog
by mo » Thu Sep 24, 2009 6:22 pm
When you say King & Link pin gives a better ride - how do you mean ? Could you be a bit more specific as I was thinking of doing the same - going ball joint route ??

mo
Registered user
Posts: 149
Joined: Thu Mar 17, 2005 1:30 pm
Re: My 64 camper Blog
by paul_f » Thu Sep 24, 2009 7:25 pm
Well for starters a stock ball joint beam is too wide (the wheels poke out further) and too high.
So then you lower it. Perhaps if you are running stock height, and can cope with the front wheels sticking out further then they are fine.
As soon as you lower with them you get a choppy bouncy ride
So then you lower it. Perhaps if you are running stock height, and can cope with the front wheels sticking out further then they are fine.
As soon as you lower with them you get a choppy bouncy ride
paul_f
SSVC Committee Member
Posts: 6009
Joined: Thu Apr 17, 2003 9:58 am
Re: My 64 camper Blog
by orange » Mon Mar 22, 2010 3:49 am
Although I havent been in the garage much over the winter I have managed to get a few jobs done
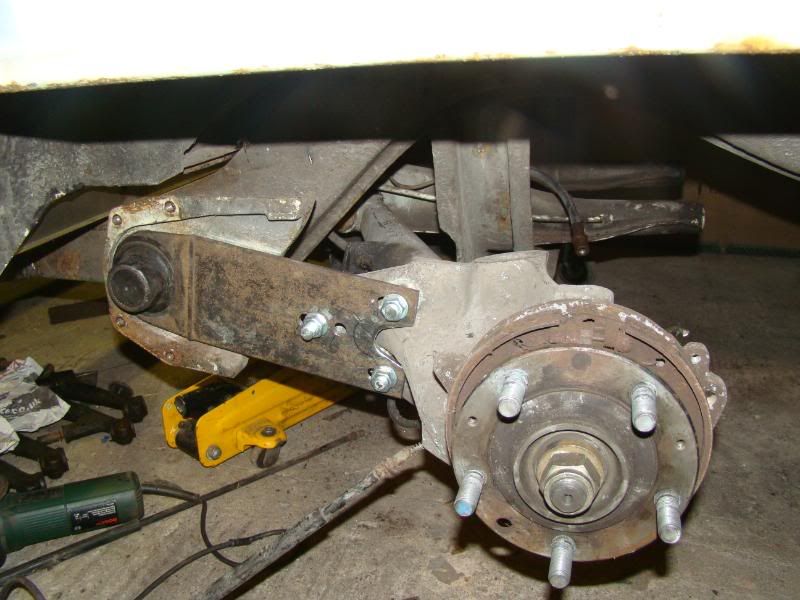
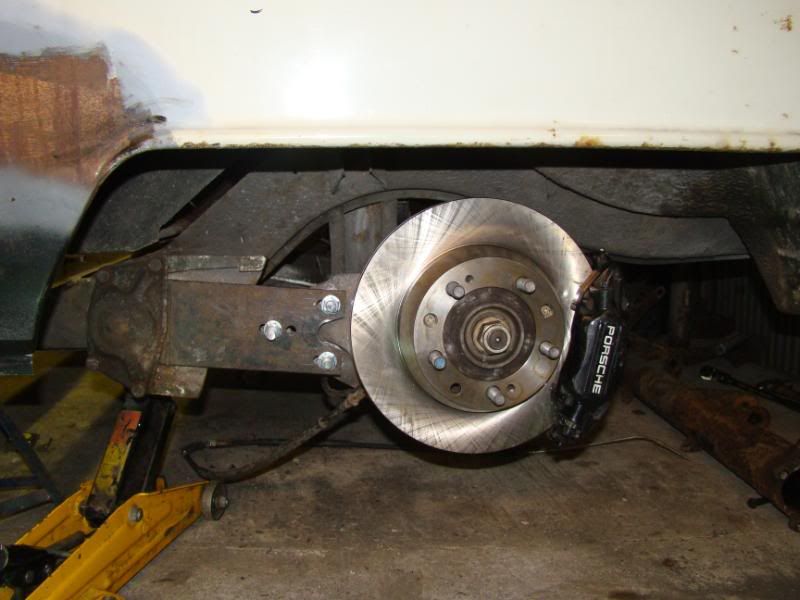
Ive been messing around with the rear end a bit more
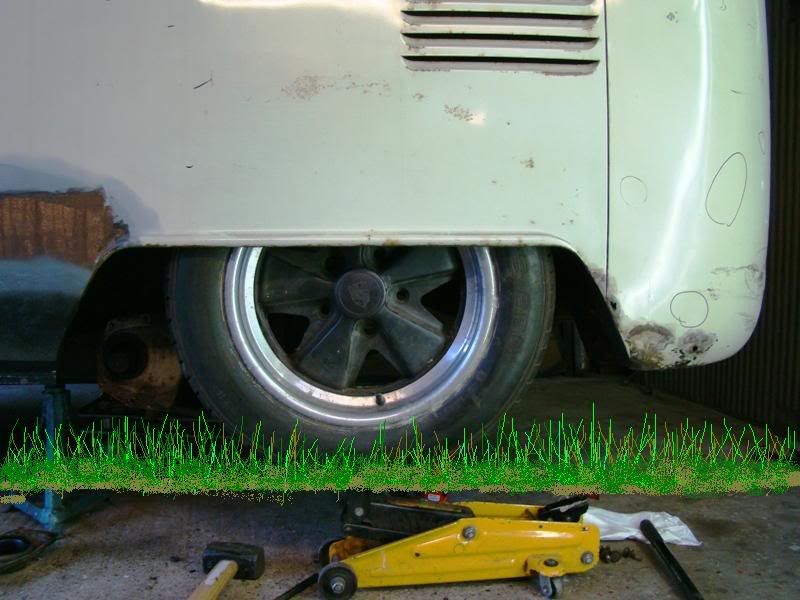
And messing around with windows paint program,
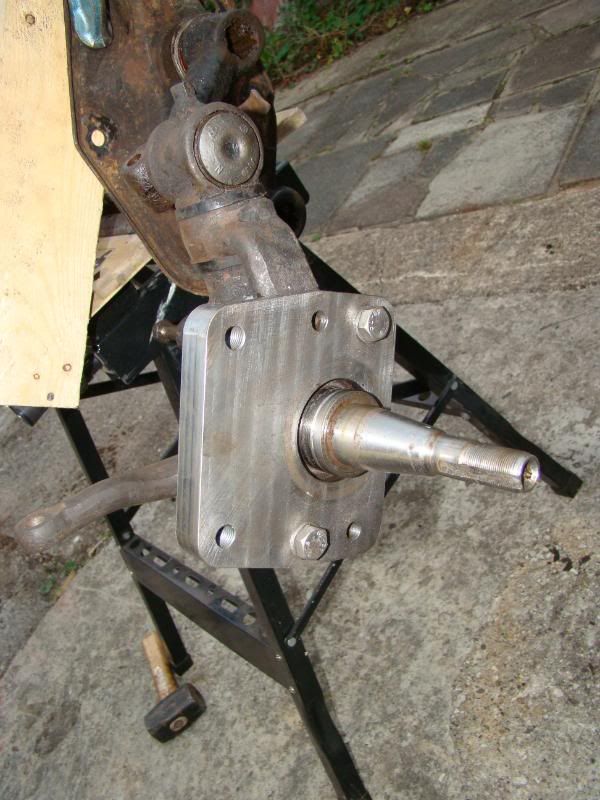
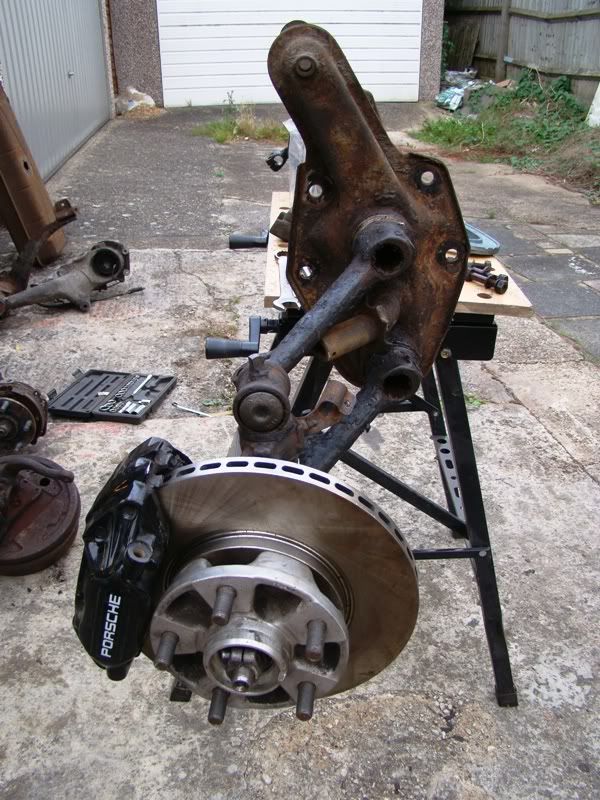
Also played about with the front end
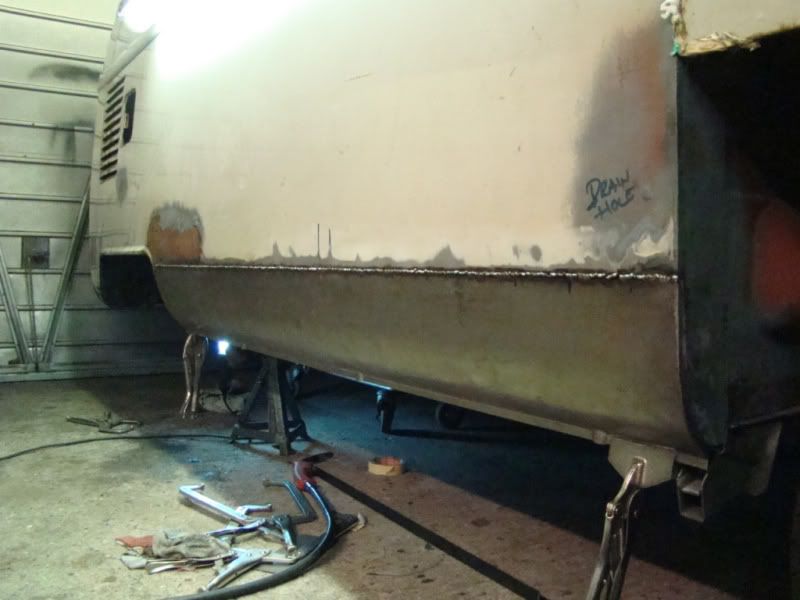
managed to get the outer sill on with out warping it to much
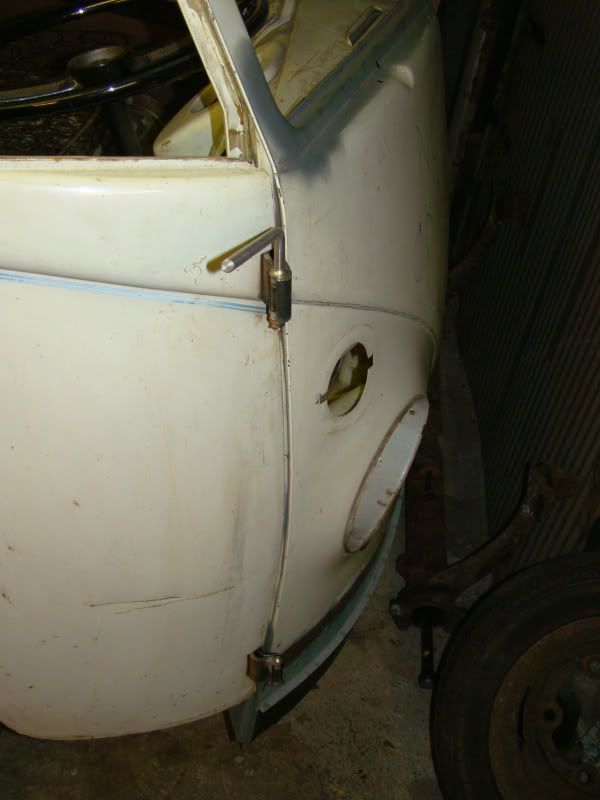
welded the cracked cab door hindge rivits and fitted the new hindge pins
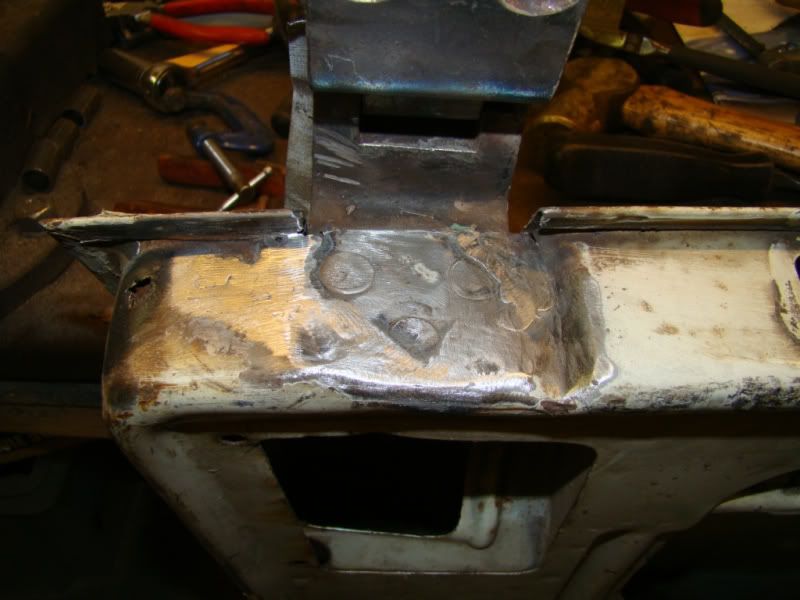
Managed to patch up the accelerator hindge
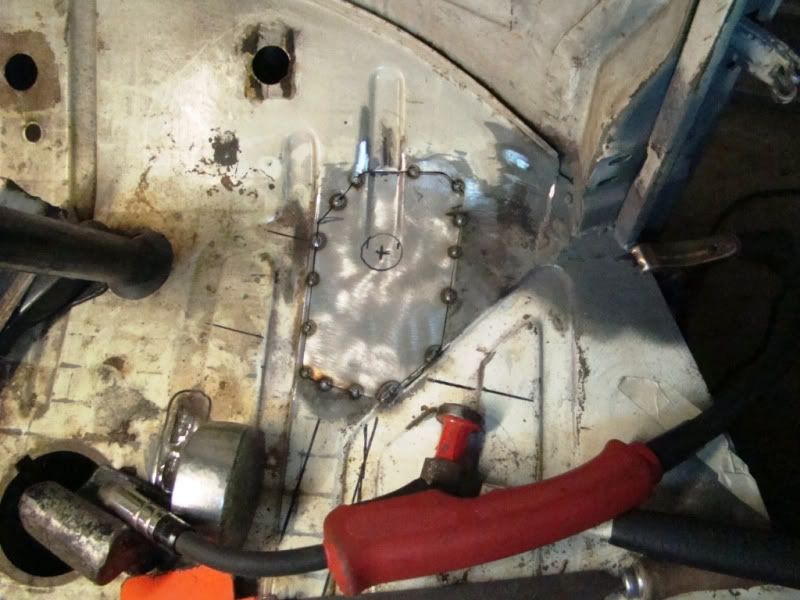
And play with my new toy
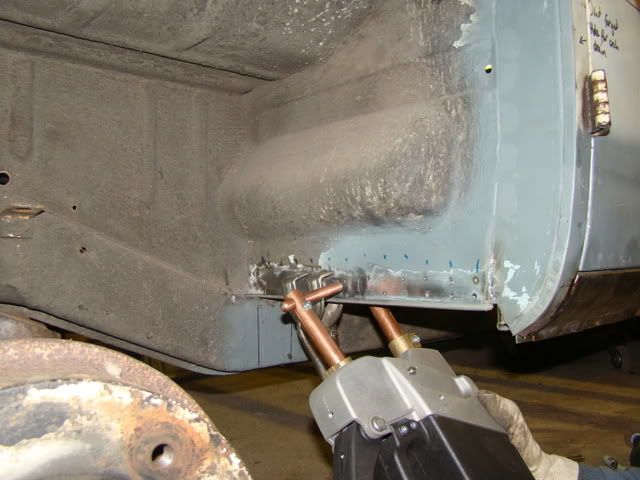
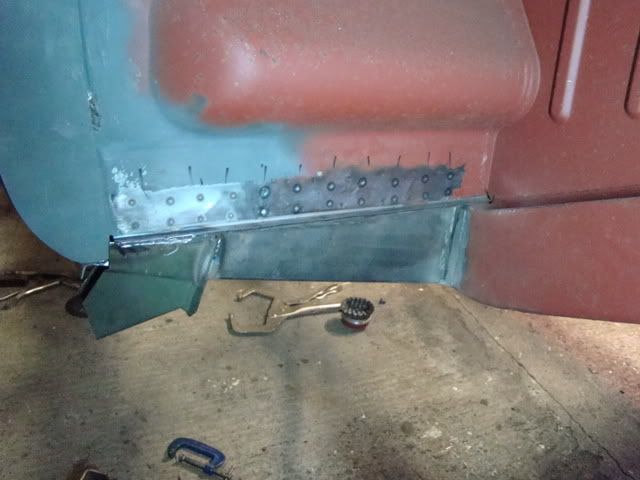
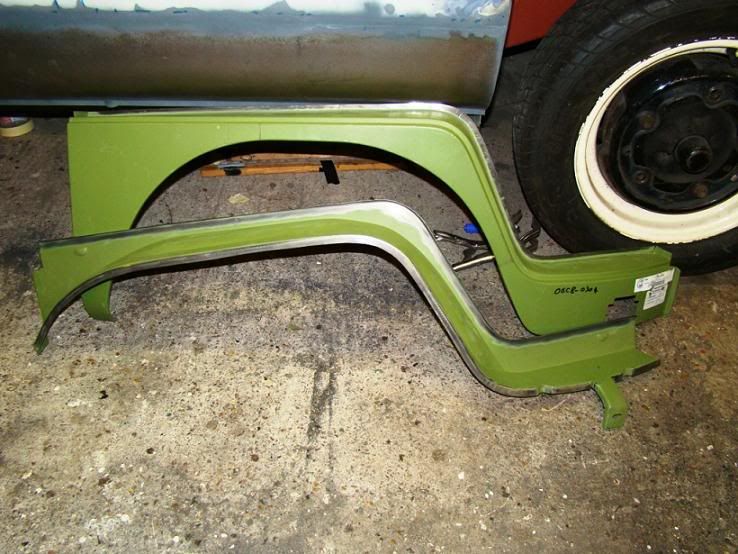
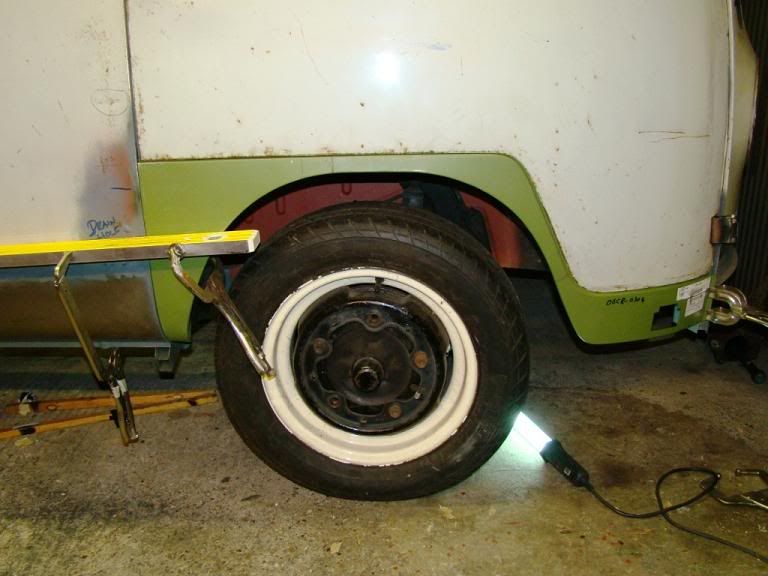
And finally spent the day trying to do the job ive been least looking forward to doing.I spent a day trying to fit this arch but still could not get it to fit straight.
I was hoping to have the bus in paint prep buy spring, for a summer paint job but we all know these things take time.
Theres more detail on my blog of what Ive been up to.
Ive been messing around with the rear end a bit more


And messing around with windows paint program,

Also played about with the front end


managed to get the outer sill on with out warping it to much

welded the cracked cab door hindge rivits and fitted the new hindge pins


Managed to patch up the accelerator hindge

And play with my new toy


And finally spent the day trying to do the job ive been least looking forward to doing.I spent a day trying to fit this arch but still could not get it to fit straight.


I was hoping to have the bus in paint prep buy spring, for a summer paint job but we all know these things take time.
Theres more detail on my blog of what Ive been up to.
orange
Registered user
Posts: 312
Joined: Tue Jul 04, 2006 6:16 pm
Re: My 64 camper Blog
by orange » Tue Jul 27, 2010 1:05 am
Thought Id post my 6 monthly update,
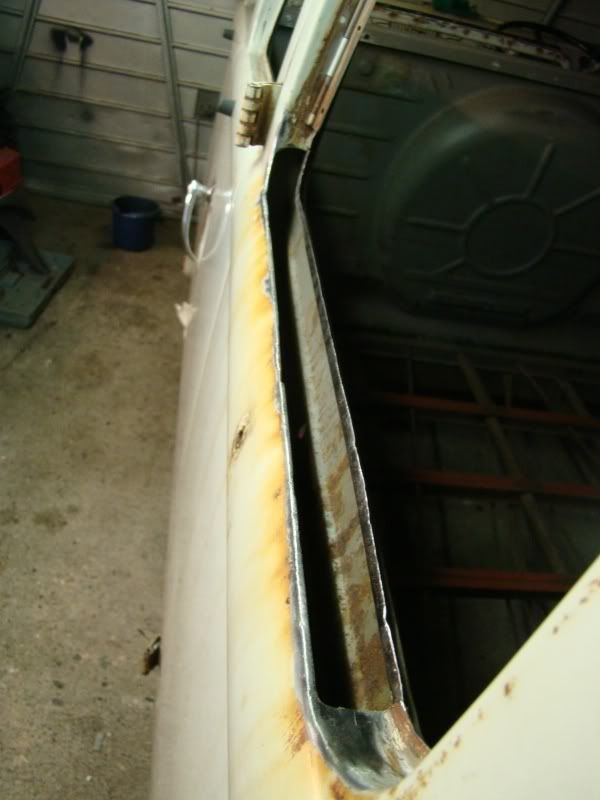
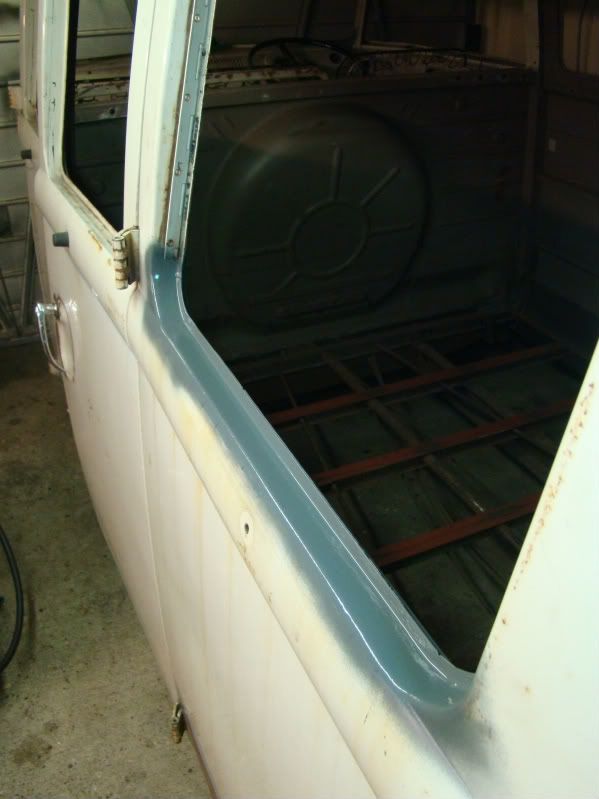
A window sill repair
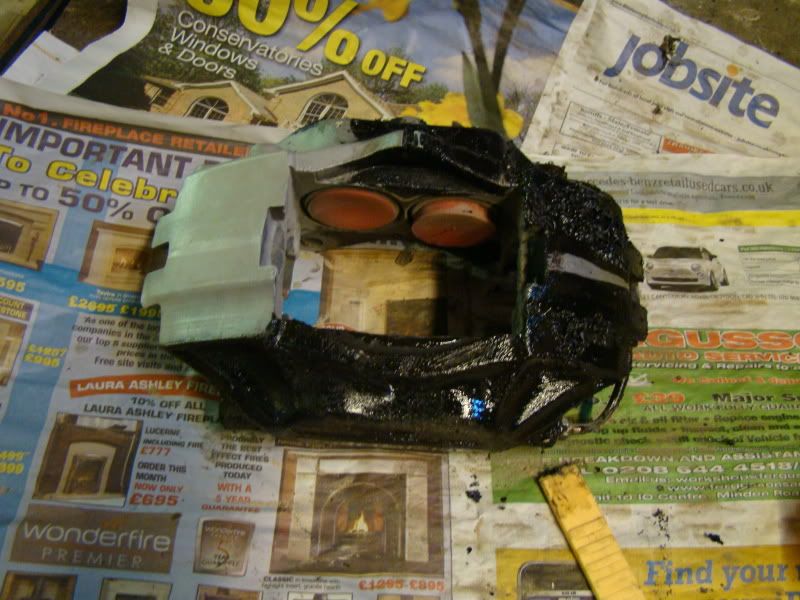
striping and blasting calipers
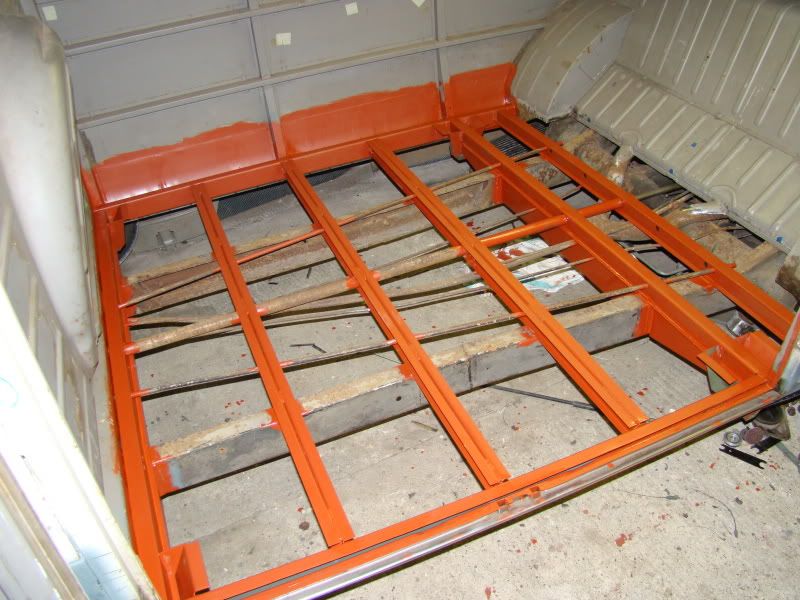
finishing the chassis ready for the floor
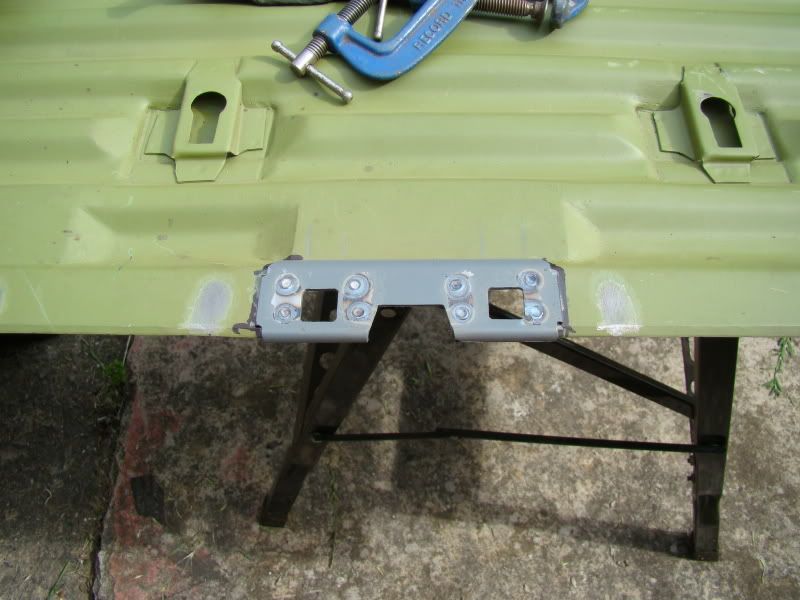
Making and fitting a new strike plate
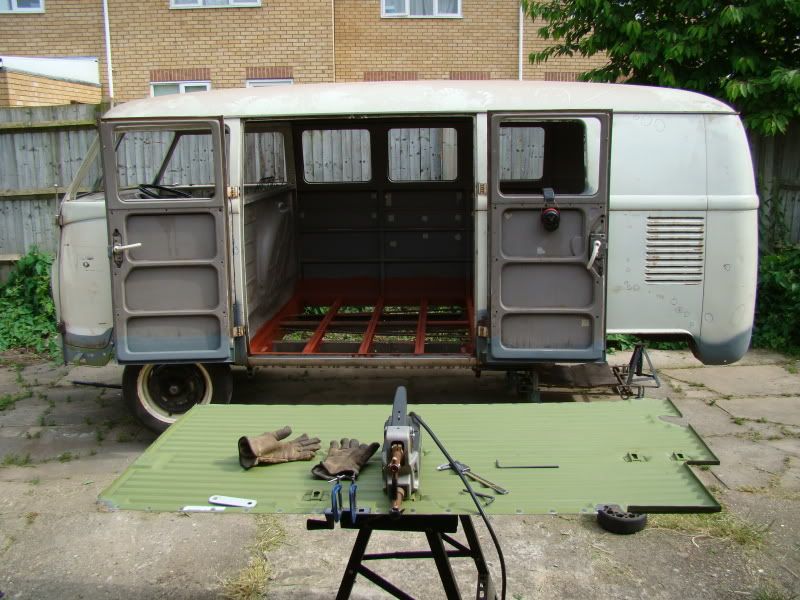
Draging the van out to weld the floor in
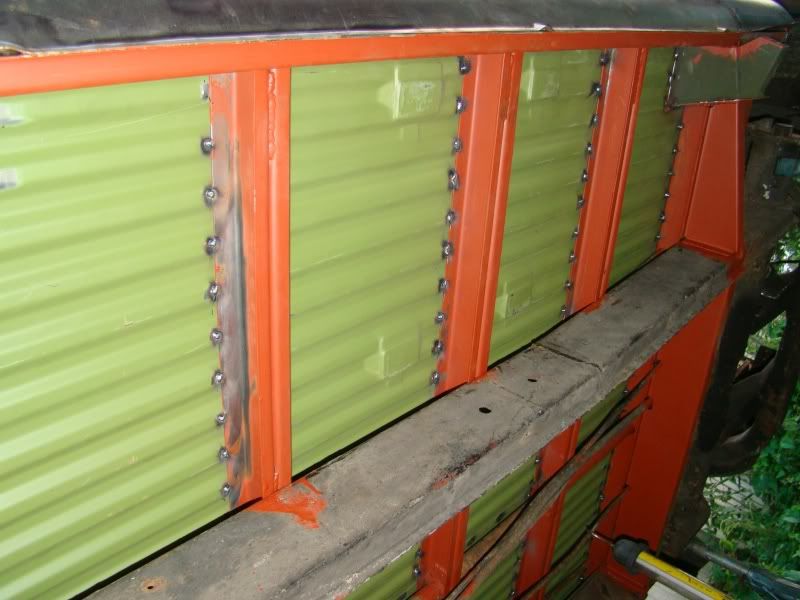
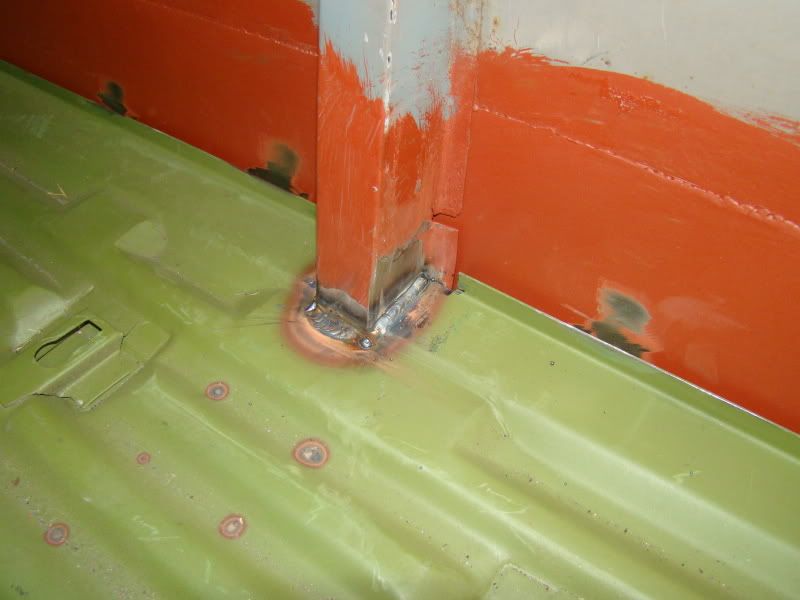
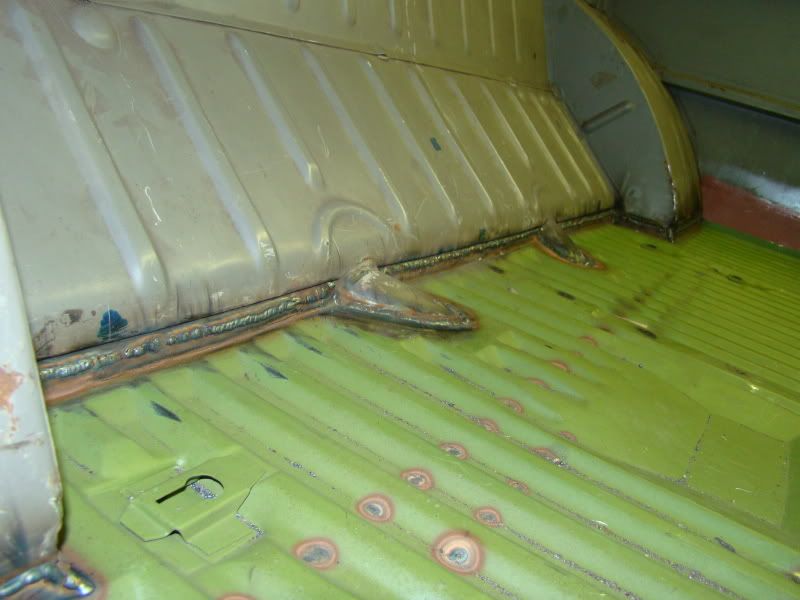
Welding the floor in
Painting it ready for show and shine.
getting spacers machined
cutting off 924 IRS hindge brackets
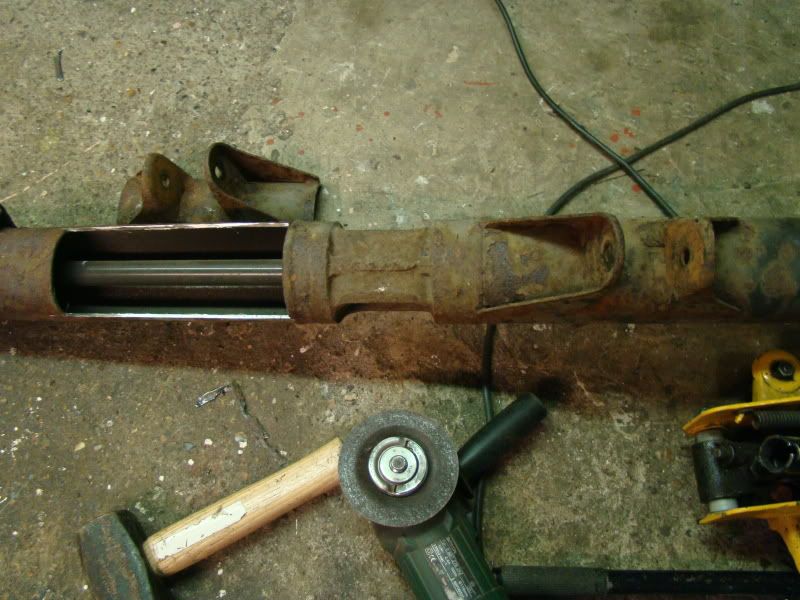
blasting brackets and seeing if they fit
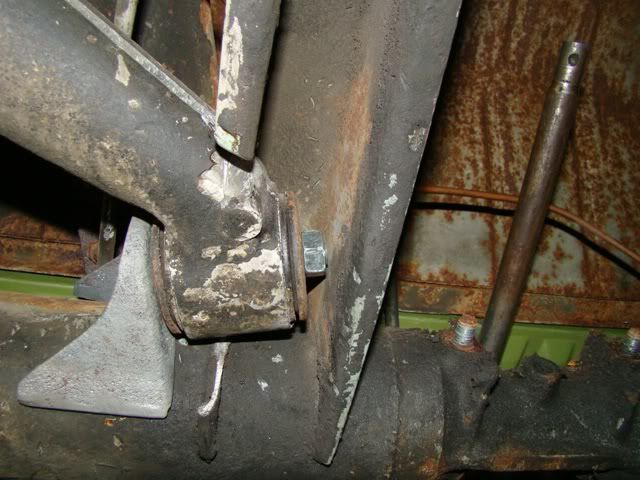
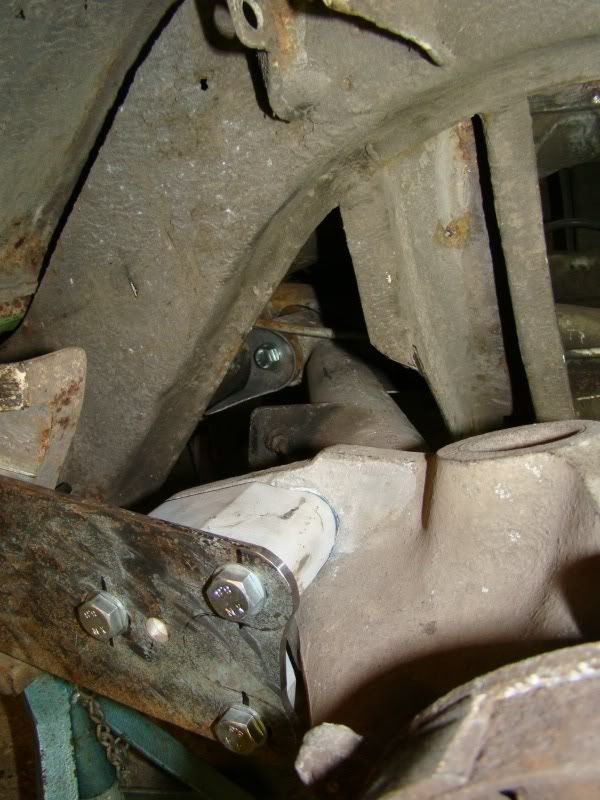
fitting the IRS ready for welding
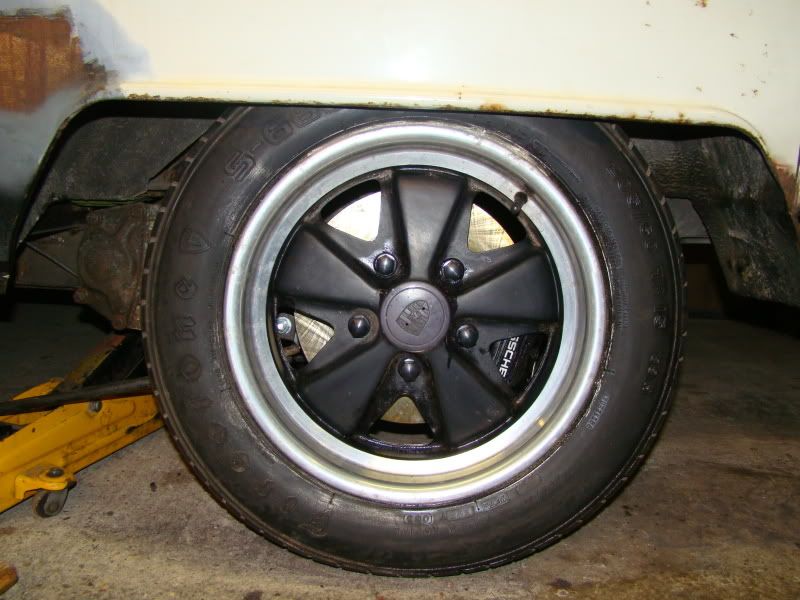
Just making sure the wheels still look ok
cutting out the left arch
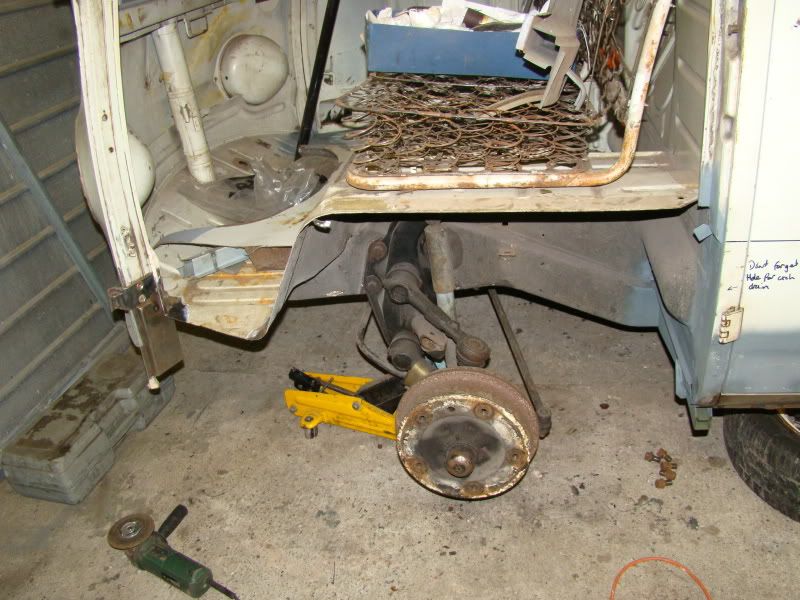
using the welding probes of death
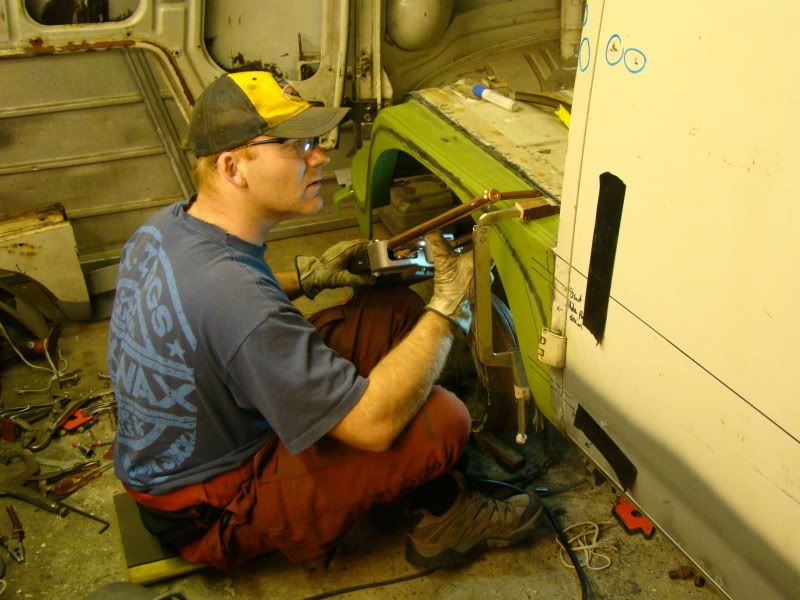
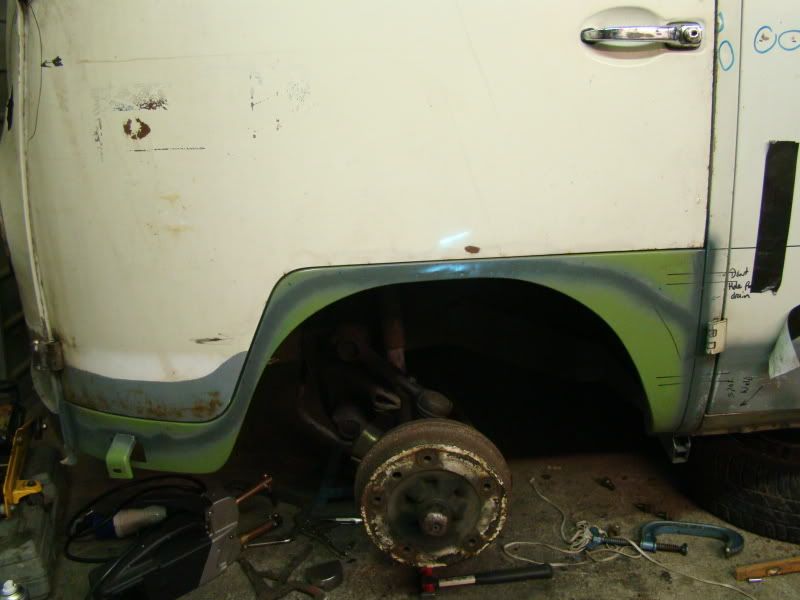
Taking 3 days to fit the new arch
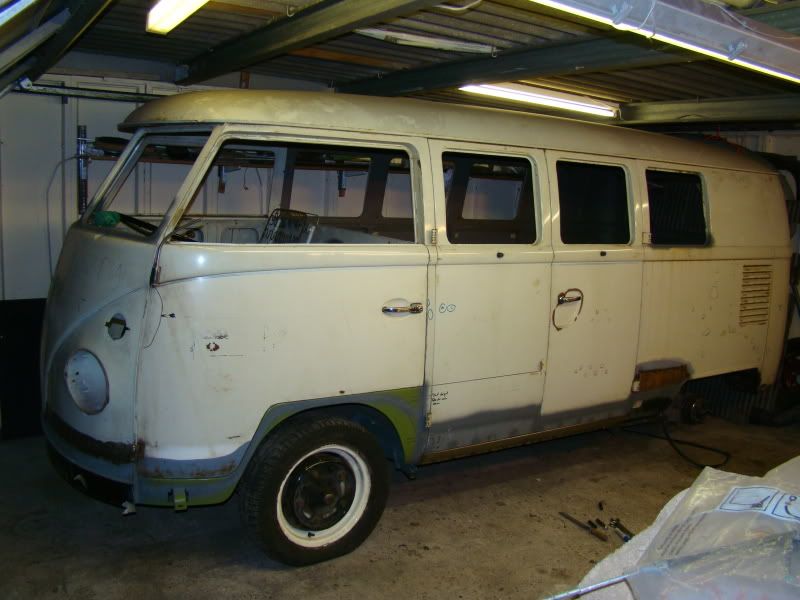
Getting excited about seeing the van in nearly one peice again
Remember more info on my blog check it out.

A window sill repair

striping and blasting calipers

finishing the chassis ready for the floor

Making and fitting a new strike plate

Draging the van out to weld the floor in

Welding the floor in


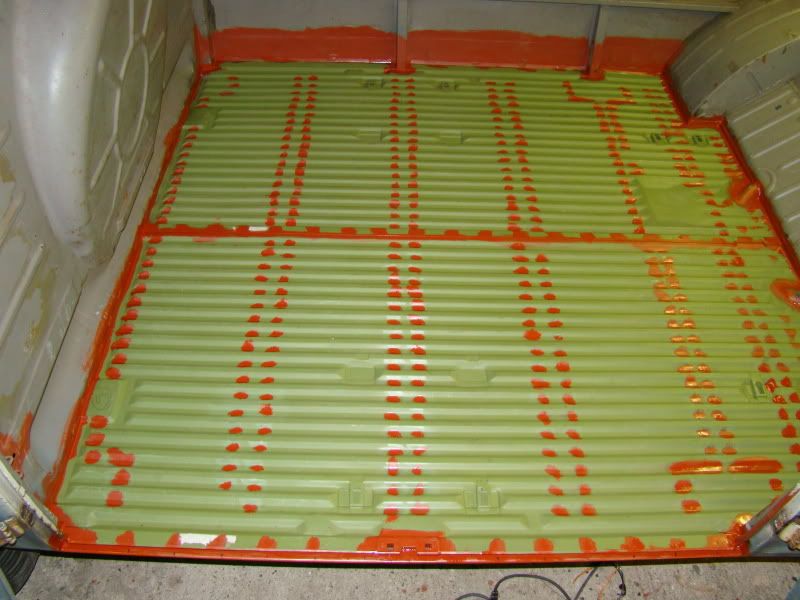
Painting it ready for show and shine.

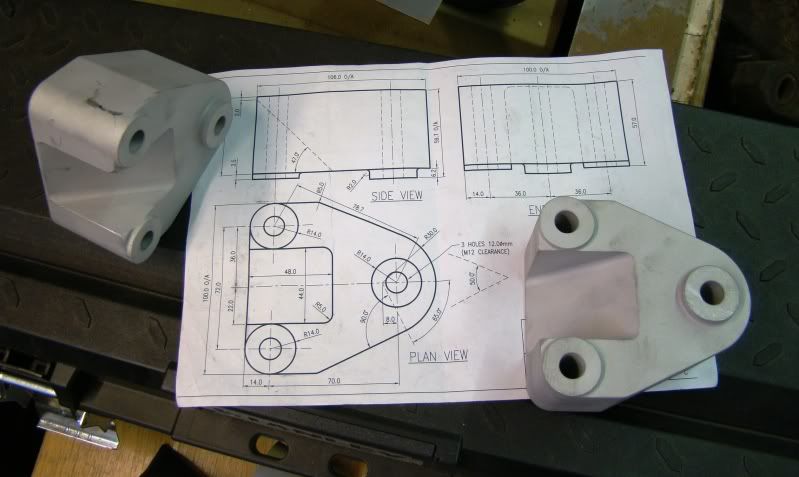
getting spacers machined

cutting off 924 IRS hindge brackets

blasting brackets and seeing if they fit

fitting the IRS ready for welding

Just making sure the wheels still look ok

cutting out the left arch

using the welding probes of death

Taking 3 days to fit the new arch

Getting excited about seeing the van in nearly one peice again

Remember more info on my blog check it out.
orange
Registered user
Posts: 312
Joined: Tue Jul 04, 2006 6:16 pm
Re: My 64 camper Blog
by malcolm57 » Tue Jul 27, 2010 7:16 am
nice work mate keep the pics coming

malcolm57

Registered user
Posts: 325
Joined: Sat Aug 09, 2008 4:02 pm
Re: My 64 camper Blog
by mo » Tue Jul 27, 2010 11:06 am
Lovin that and also check the blog on a regular. WIll be nice when it becomes a complete shell - you'll feel like you've reached a milestone - not long to go
 !!!
!!!
 !!!
!!!mo
Registered user
Posts: 149
Joined: Thu Mar 17, 2005 1:30 pm
Re: My 64 camper Blog
by orange » Thu Dec 30, 2010 9:11 pm
Its been a slow winter but heres a bit of an update of my 64
Been messing about with a couple of cans of paint, just to see what colors i like.


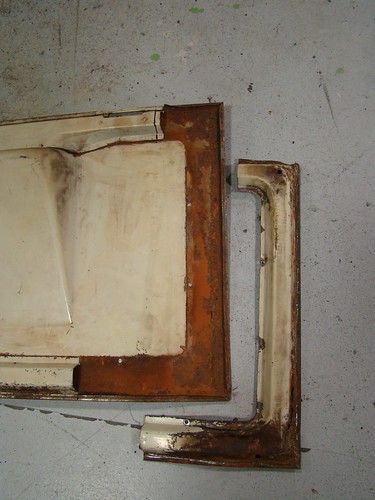
Trying to sort out my dented deck lid, any one got a spare they dont need
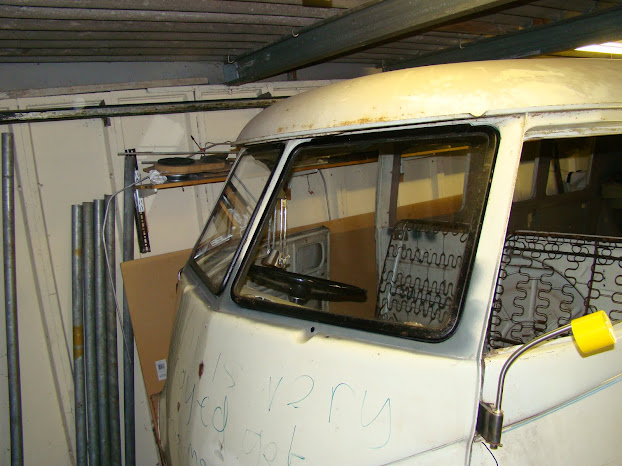
fitted my Safaris first with screws then using riv nuts

More info on my blog as usual. Have a good new year.
Been messing about with a couple of cans of paint, just to see what colors i like.
Trying to sort out my dented deck lid, any one got a spare they dont need

fitted my Safaris first with screws then using riv nuts
More info on my blog as usual. Have a good new year.
orange
Registered user
Posts: 312
Joined: Tue Jul 04, 2006 6:16 pm
Re: My 64 camper Blog
by orange » Fri Apr 15, 2011 1:00 pm
Had a new member of the family join in with the van build


Been going to north west london collage on evening classes to learn a bit of panel beating
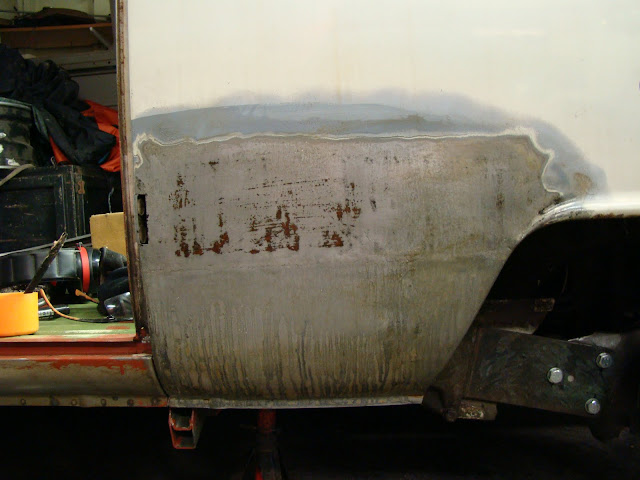
this is the first attempt on the cab door.


Pulled off and old repair that I wasent happy with but had more trouble get the new one back on as i cut it short or to low.
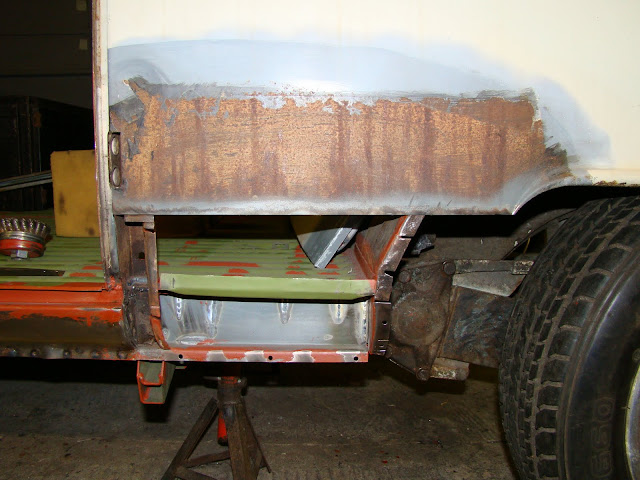
Had to cut throuhg tack welds as panel started to warp together just from the tacks.
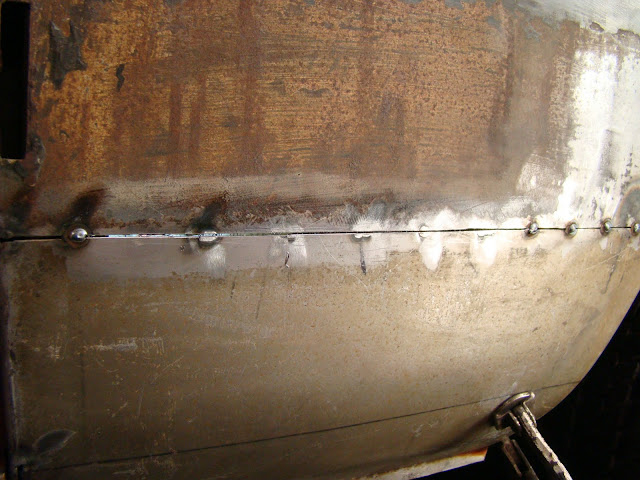
Had to rework the lip where it didnt line up.


Also tried out some "rust blast" not quite a brush on remover but with a bit of work get 99% of the rust.

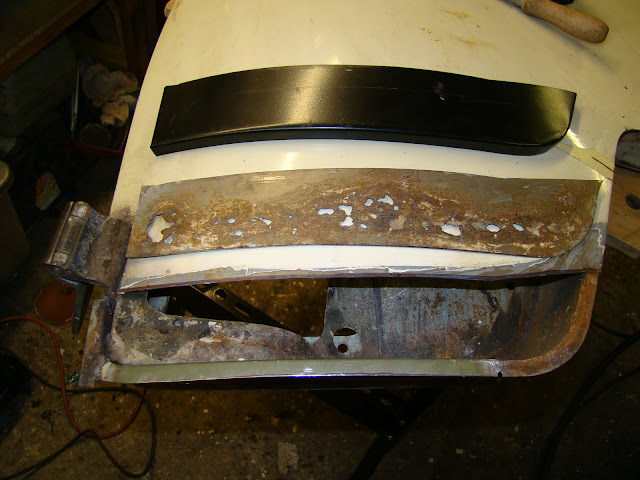
Finally delt with the cab door rust.




And got the van out for its yearly dose of sun


A good night shot after a long day in the garage

More info on the blog as usual
Been going to north west london collage on evening classes to learn a bit of panel beating
this is the first attempt on the cab door.


Pulled off and old repair that I wasent happy with but had more trouble get the new one back on as i cut it short or to low.
Had to cut throuhg tack welds as panel started to warp together just from the tacks.
Had to rework the lip where it didnt line up.
Also tried out some "rust blast" not quite a brush on remover but with a bit of work get 99% of the rust.
Finally delt with the cab door rust.


And got the van out for its yearly dose of sun
A good night shot after a long day in the garage
More info on the blog as usual
orange
Registered user
Posts: 312
Joined: Tue Jul 04, 2006 6:16 pm
Re: My 64 camper Blog
by orange » Sun May 15, 2011 3:49 am
Ive added my first video to my blog and updated a few more bits, Id post the vid here but Its a bit bouring and I cant figure out how to stick it to the post.
the jobs on the van are getting a bit bitty as it gets closer to preping for paint, unfortunatly for the van the paint fund got spent on an engagement ring, I did tell my girlfriend that the ring on her finger was planned for the van, she said she would help with and engine.......
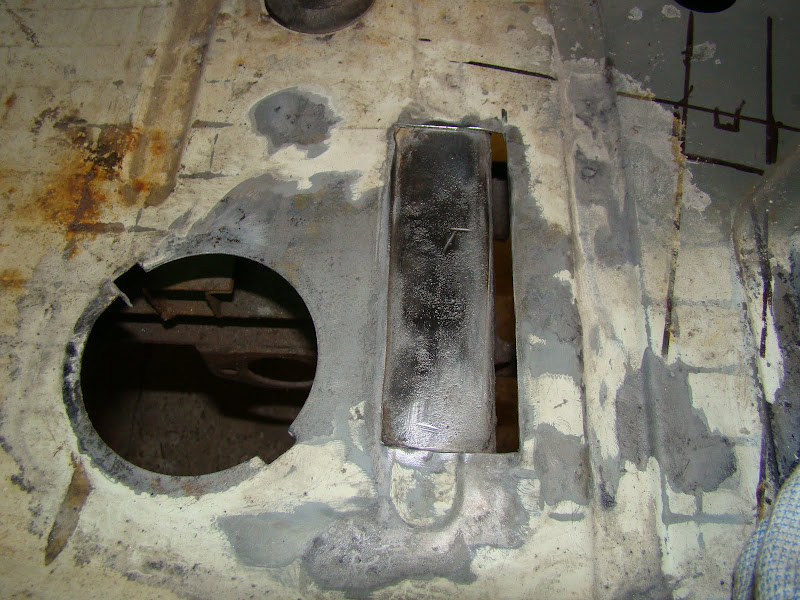
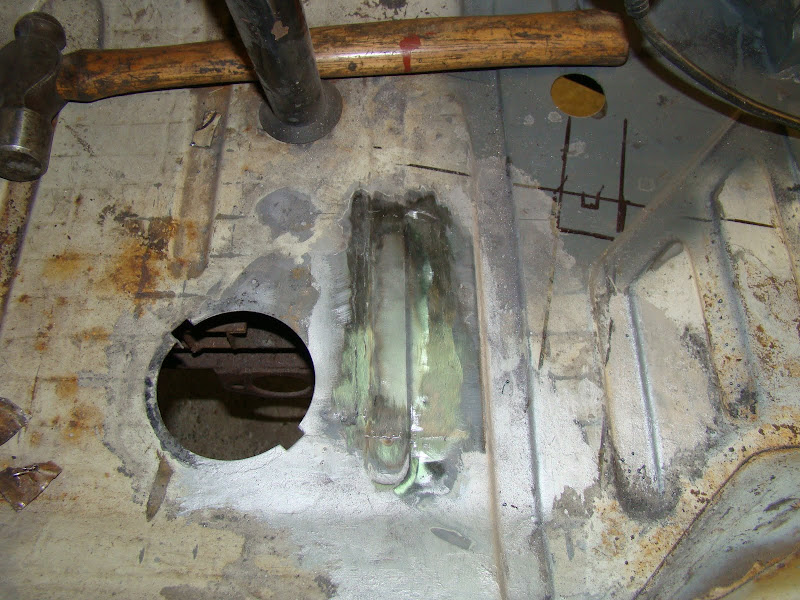
Joggled a patch for the cab floor
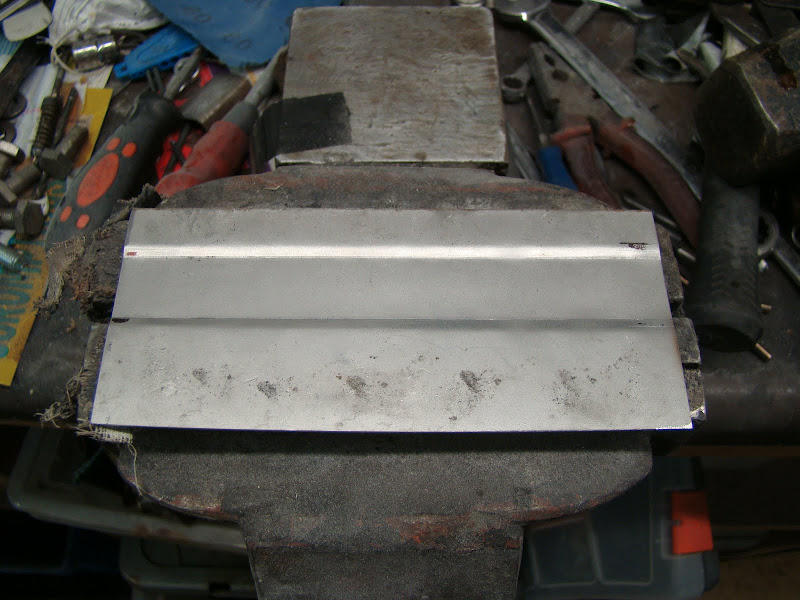
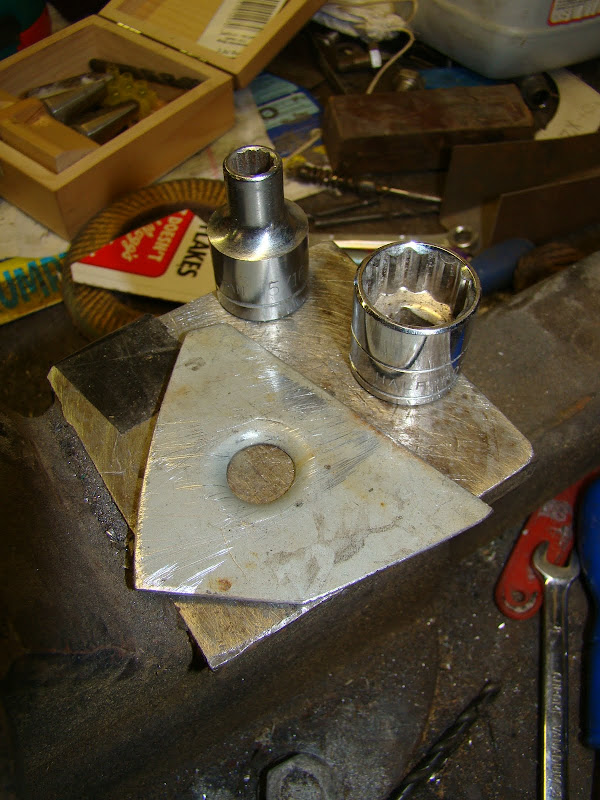
Made a capping plate for the A piller bottoms

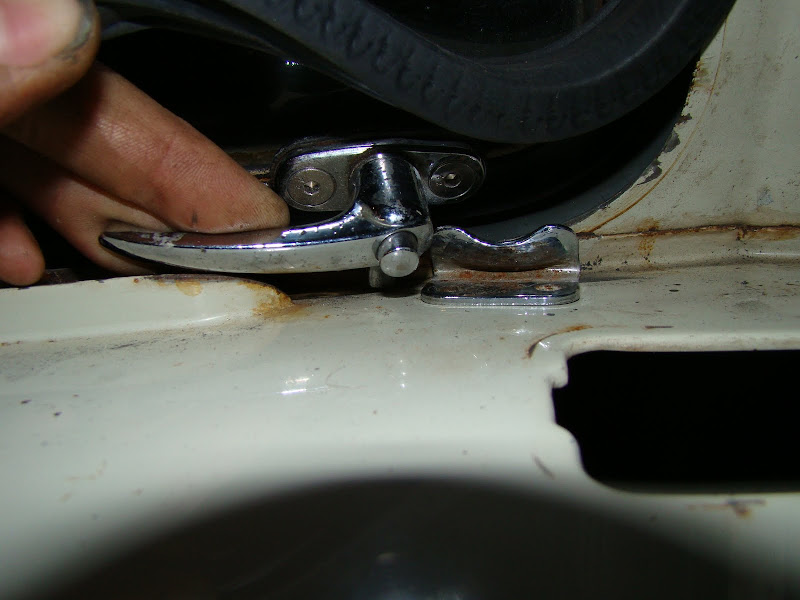
Fitted my safari brackets
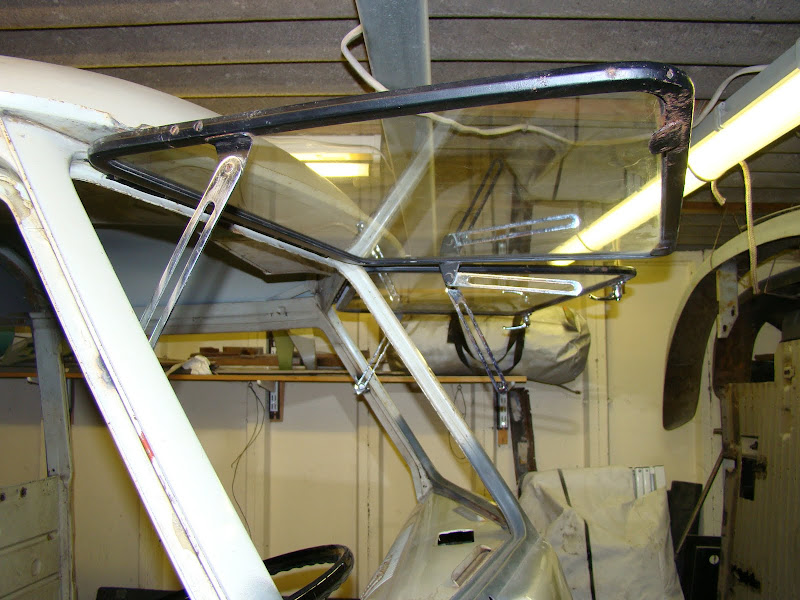
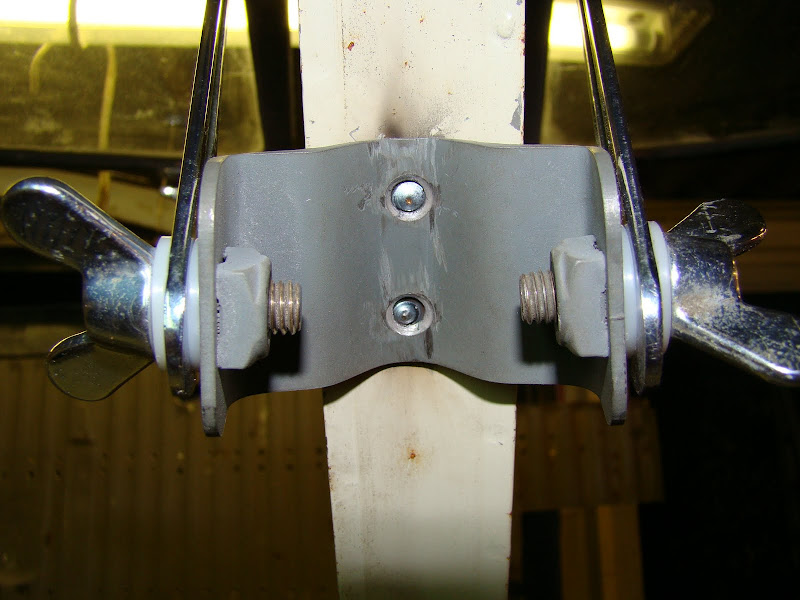
but have the problem that my frames sit low and the latches foul on the plates, any help with this would be greate.
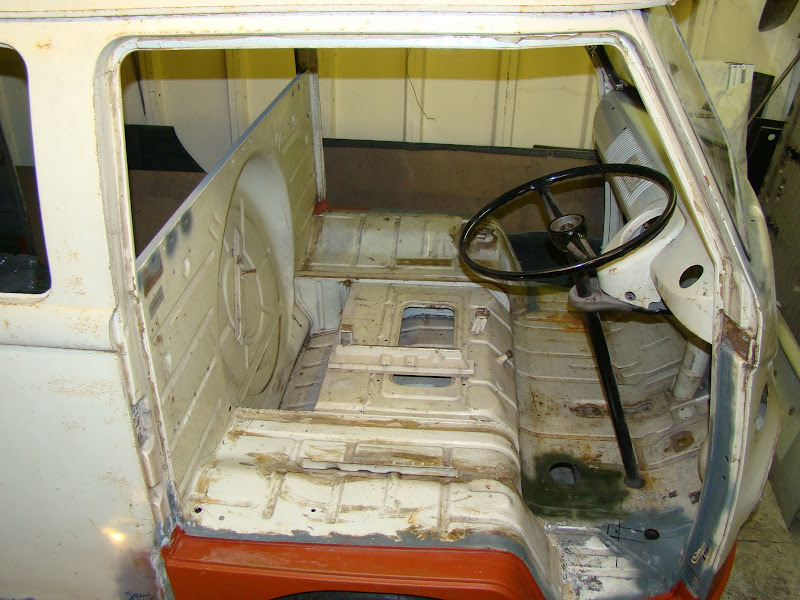
Cleaned out The cab
Ground out a troublsome hinge bolt

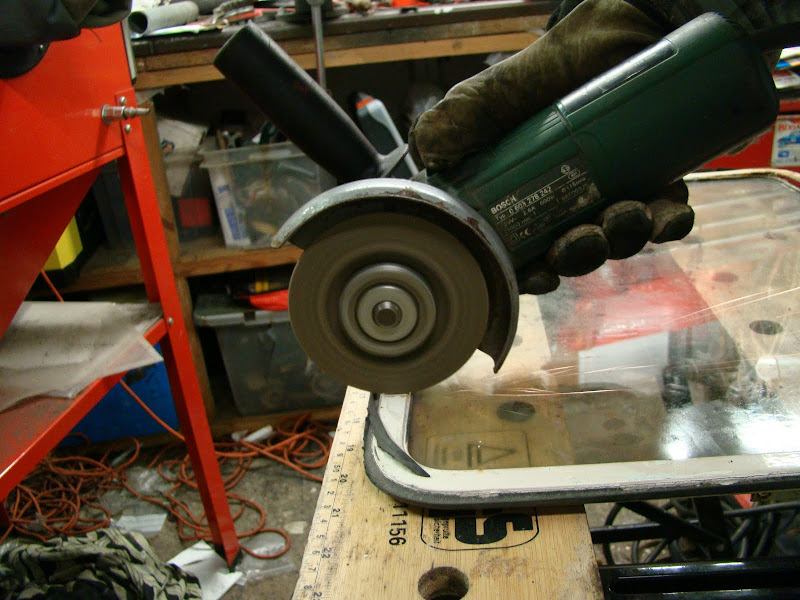
Chopped up my pop out window frames
Managed to get the cargo door hindge pins out

Squezed the new ones in

the jobs on the van are getting a bit bitty as it gets closer to preping for paint, unfortunatly for the van the paint fund got spent on an engagement ring, I did tell my girlfriend that the ring on her finger was planned for the van, she said she would help with and engine.......
Joggled a patch for the cab floor
Made a capping plate for the A piller bottoms

Fitted my safari brackets
but have the problem that my frames sit low and the latches foul on the plates, any help with this would be greate.
Cleaned out The cab
Ground out a troublsome hinge bolt

Chopped up my pop out window frames
Managed to get the cargo door hindge pins out
Squezed the new ones in
orange
Registered user
Posts: 312
Joined: Tue Jul 04, 2006 6:16 pm
Re: My 64 camper Blog
by orange » Tue Sep 06, 2011 7:05 pm
Made a cheep rool over rig from 50mm schafold pole, made it steep so it would fit in the garage


But havent rolled it over yet looking for as many spondge as I can find in case it does not work
Recived a 4" narrowed beam and dropped spindles from Type 2 decectives
and my dog helped me unwrap it


cleaned up the front trailling arms

discovered the rot under the front beam

got to use my uncles old lathe

made some front shock mount spacers

cut away the rear horn supports to fit a shock mount
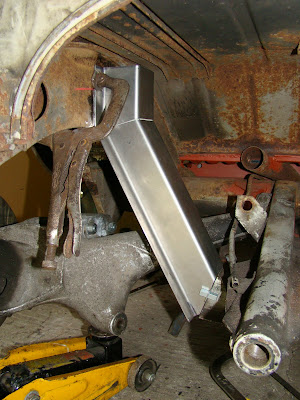

realised the shock did not fit when compressed back to the drawing board
spent my paint fund again on a 2L type 4 engine opps.


But havent rolled it over yet looking for as many spondge as I can find in case it does not work
Recived a 4" narrowed beam and dropped spindles from Type 2 decectives
and my dog helped me unwrap it
cleaned up the front trailling arms
discovered the rot under the front beam

got to use my uncles old lathe

made some front shock mount spacers

cut away the rear horn supports to fit a shock mount
realised the shock did not fit when compressed back to the drawing board
spent my paint fund again on a 2L type 4 engine opps.

orange
Registered user
Posts: 312
Joined: Tue Jul 04, 2006 6:16 pm
Re: My 64 camper Blog
by orange » Sun Mar 04, 2012 12:49 am
Been a while so I better post a little up date of my slow progress
sorted out the issue with the shock mount by making a piece to cover the shock

fitted a couple of bearings to the top shock mount

bent the lip to clear the A arm


Finally after I think 2 years Ive fitted one half of the IRS axels.

Ill tidy up the corners and welds then see about attempting the other side.
more details how I did it here
http://www.paulssplit.blogspot.com/search/label/944%20IRS%20conversion
I became the proud owner of A Lathe

A piller Drill and milling machine


This has ment I spent more time turning my garage into a work shop that working on my van, I ve built a new bench painted the floor on the coldest day of the year so it didnt dry for to days, and had my first attempt with expendand foam on the gaps around the roof as part 1 of my plan to start insulating the garage, I mean workshop.


I plated up a patch in my front chassis rail


I spent an epic amount of time sorting my battery tray


The splash guard or what ever the flappie bit is called


i later realised that i fitted this the wrong side of the battery tray lip.
And the double curved forward part of the rear corner


I then welded the new panel in place to find that the adjusting Id done to fit the curve of the corner had shrunk the lip so it no longer touched at any point.


So ill probably be ripping this panel out and starting again
As ever you can see my progress on my blog in the link below.
http://www.paulssplit.blogspot.com/
sorted out the issue with the shock mount by making a piece to cover the shock

fitted a couple of bearings to the top shock mount

bent the lip to clear the A arm


Finally after I think 2 years Ive fitted one half of the IRS axels.

Ill tidy up the corners and welds then see about attempting the other side.
more details how I did it here
http://www.paulssplit.blogspot.com/search/label/944%20IRS%20conversion
I became the proud owner of A Lathe

A piller Drill and milling machine


This has ment I spent more time turning my garage into a work shop that working on my van, I ve built a new bench painted the floor on the coldest day of the year so it didnt dry for to days, and had my first attempt with expendand foam on the gaps around the roof as part 1 of my plan to start insulating the garage, I mean workshop.


I plated up a patch in my front chassis rail


I spent an epic amount of time sorting my battery tray


The splash guard or what ever the flappie bit is called


i later realised that i fitted this the wrong side of the battery tray lip.
And the double curved forward part of the rear corner


I then welded the new panel in place to find that the adjusting Id done to fit the curve of the corner had shrunk the lip so it no longer touched at any point.


So ill probably be ripping this panel out and starting again
As ever you can see my progress on my blog in the link below.
http://www.paulssplit.blogspot.com/
orange
Registered user
Posts: 312
Joined: Tue Jul 04, 2006 6:16 pm
Re: My 64 camper Blog
by John TC » Sun Mar 04, 2012 8:56 am
Great skills on display here, keep the pics coming.

John TC
SSVC Member
Posts: 1031
Joined: Tue Jun 29, 2010 9:29 pm
Re: My 64 camper Blog
by orange » Sat Nov 03, 2012 2:17 am
my blog update
with one side of the porsche IRS shock mount compleate the other side was fitted.

Heres the parts needed of the mob


IRS complete, just need to figure out what drive shaft length I need and where to get it?

now work on the front end.
the T2D 4" narrow beam

Leaf springs cut to length

new grub screw holes drilled in place

fitment checked

the trailing arms now needed shorting

drilled out the pin in the trailling arm


the arm was heated so the pin could be pulled out with the spacer I made

cut to length

new hole drilled and taped

the new lower shoch mounts were made. these were 1/2" dia rather that 12mm because the scocks from T2D were 1/2" holes

new roll pins installed

lower pins fitted

trailling arms ready for cleaning and paint

Cut a hole in the B piller to slide the seat belt mount in place

held in place with magnet and wires


new pedal hindge fitted, but neally fitted it the wrong way around

needed access to both sides of the front panel so decided to remove the head lamp bowl. first using a blade and pry bar around the edge

ground away the spot welds

carfully pulled the bowl out with a slide hammer

done

covered the front of the van in black paint then sanded it back to see the result of the dent repair that was hidden under all that filler


This could keep me busy till christmas.
with one side of the porsche IRS shock mount compleate the other side was fitted.

Heres the parts needed of the mob

IRS complete, just need to figure out what drive shaft length I need and where to get it?

now work on the front end.
the T2D 4" narrow beam

Leaf springs cut to length

new grub screw holes drilled in place

fitment checked

the trailing arms now needed shorting

drilled out the pin in the trailling arm


the arm was heated so the pin could be pulled out with the spacer I made

cut to length

new hole drilled and taped

the new lower shoch mounts were made. these were 1/2" dia rather that 12mm because the scocks from T2D were 1/2" holes

new roll pins installed

lower pins fitted

trailling arms ready for cleaning and paint

Cut a hole in the B piller to slide the seat belt mount in place

held in place with magnet and wires


new pedal hindge fitted, but neally fitted it the wrong way around

needed access to both sides of the front panel so decided to remove the head lamp bowl. first using a blade and pry bar around the edge

ground away the spot welds

carfully pulled the bowl out with a slide hammer

done

covered the front of the van in black paint then sanded it back to see the result of the dent repair that was hidden under all that filler


This could keep me busy till christmas.
orange
Registered user
Posts: 312
Joined: Tue Jul 04, 2006 6:16 pm
Re: My 64 camper Blog
by orange » Mon Apr 22, 2013 12:57 am
So now I have a computer that works I can finally up date my blog.
here is what I've been up to.
got a tip from a mate to try out oxalic acid

Here's what I does after 24 hours.


made a bush for my pebal

Then attempted my first brazing with a arc welder and carbon rod burner

Made a bunch more parts for the pedal

stuck them together and trial fitted them


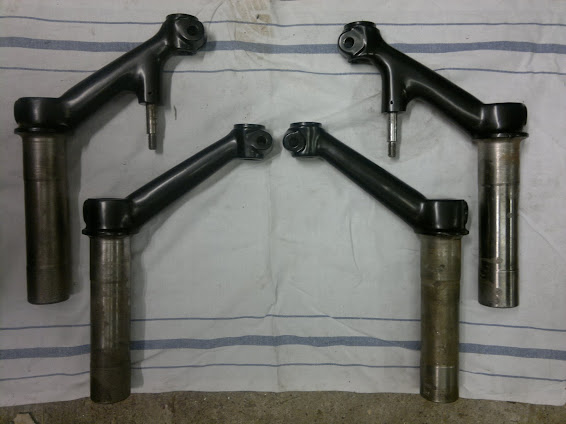
Had my modified trailing arms powder coated
Made a shrinking disc


Then tried it out on the front panel, and nearly chopped my hand off, It worked better once it was balanced.

Had to extend my TO DO LIST to pt2, thought this should be getting shorter.

set fire to my roof and melted the led out of the joint


moved my roof drain so it does not rot out my windows again

Spent a bit more time hanging out the van

and still trying to get the front straight

Realised how rotten my engine lid seal carrier was

measured , measured again and cut it out


made some strips to fix it

then tacked in place

Finally got around to taking the rear hatch off and kind of knew about this. hopping it would go away.

But didn't know about this

Noticed my lowered spindles were getting rusty from sitting in a box for two years,

so decided to take them apart and get them powder coated, good job to as I found swarf in the bearings from where they had been worked. should have bone this myself.

adjusted my wheel arch lip, think this is because my sil is to low.


Checked out how bad the rear hatch hinge rot was.

So decided to take the springs out. not easy to do.


by sliding and pulling they sprang out but not sure how.

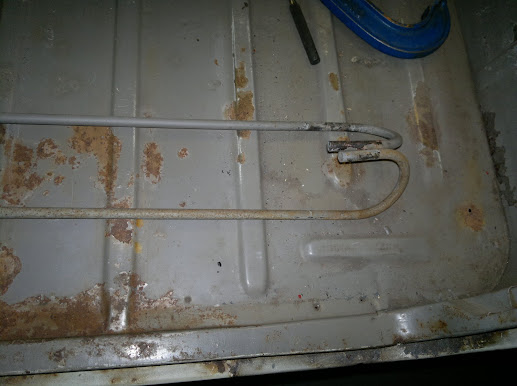
Had a few odd jobs to do drill out bolts, tidy my poor welding.


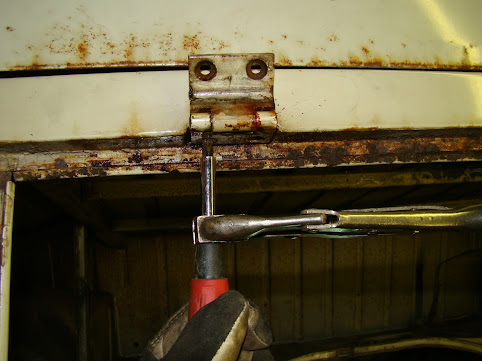
This included welding nuts onto the other side of bolts that had sheared off.
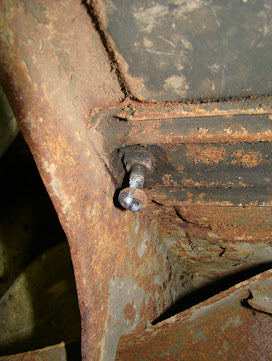
took my heater cable controller knob apart
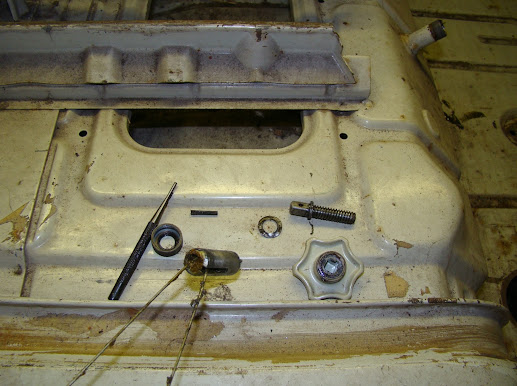
Sorted through all my parts and made a huge shopping, powder coat and chrome list.

The big day arrived I shipped the van up to enviro strip near Tamworth
 [img]https://lh5.googleusercontent.com/-vz2EN-I8-
4Y/UWbfgbg5azI/AAAAAAAADPc/DlZsVTLtu7I/w517-h386-p-o/Image2467.jpg[/img]

Saw two other vans waiting to be dipped.


A week later went to pick it up, This was very exciting, is it ok that I could not sleep the night before.

Rachel said she would help put the IRS and beam on, This took triple the 1 hour I expected.

After 3 hours we got it on the trailer


Home safe avoiding the rain and low bridges


Back in the garage, its amazing how much room you don't have in your garage when you empty our van of all the crap you have stored in it.

one small unexpected hole in the rear side window frame.

the lead joint in the door frame and roof lip joint has melted out from the chemical dip process.

The full extent of the hinge and seal carried damage.


Another part that caught me out the door had rusted from the inside out.


The rear shelf had a bit of flaking that I cleaned out with a rotary wire brush and treated with a rust stopper just in case.

This is the spray I used. once dry it turns the rust black and can be painted over.

Another piece on the lip of the roof, After the wire wheel I used a small brush to let the rust stopper seep into the seam.


I then seam sealed the gutter, I used some thinner on a gloved finger to smooth it out.


seam sealed the cab and rear shelf


Before I seam sealed the engine bay I had to clear up another bit,

To get the sealer in to the hard to reach places I stuck a tube on the end.

After £50 spent at B and Q (could have got it cheaper at screw fix) I made up these movable casters for the roll over rig.

Called on some friends and fitted the roll rig. the van just fitted out the garage.


snuck an air mattress under the van just in case, not that I doubted my design and welding skills.


Had some little helpers to make sure the job was done right

My measurements were just right as the van just fitted under the door.

Found a key

and a couple of dents on the roof, don't think they were there before.

And another bit of rust. think this is because of air trapped at the engine fire wall. so the chemical treatment could not clean it out properly.

wasted over half a day to clean and treat.
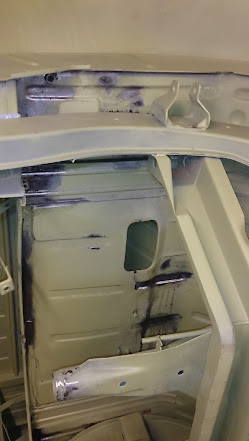
Last bit that needs repair, this must have been full of filler.

Tried out a couple of paint colours as Rachel wants me to paint the under side red


Back to the proper work. I spot welded the lower box sections. I could not do this from underneath the van. and forgot to roll the van before dipping.


which meant I had also forgot to weld the tubes back in place.

I started seam sealing the under side.


I swept and hovered the garage floor, then masked off the outside of the van and made hung up a load of dust sheet.

Mixed up some wash primer, this gets into all the small gaps,
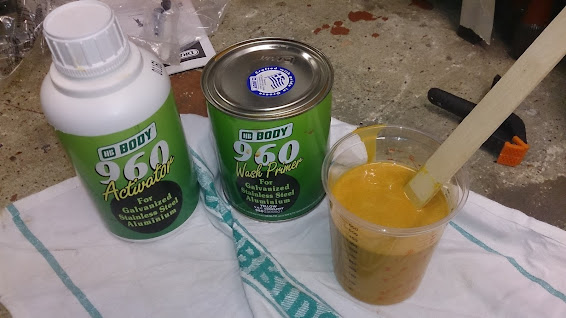
Then did my first spray job


Let the primer dry and broke out the stone chip

This was great fun to spray on

but needs 4-6 bar of air pressure.

I used six litres but could have done with 2 more,


As I've spent the night uploading these photos Ill have to update the blog with all the details later.
here is what I've been up to.
got a tip from a mate to try out oxalic acid
Here's what I does after 24 hours.
made a bush for my pebal

Then attempted my first brazing with a arc welder and carbon rod burner

Made a bunch more parts for the pedal

stuck them together and trial fitted them


Had my modified trailing arms powder coated

Made a shrinking disc


Then tried it out on the front panel, and nearly chopped my hand off, It worked better once it was balanced.

Had to extend my TO DO LIST to pt2, thought this should be getting shorter.

set fire to my roof and melted the led out of the joint


moved my roof drain so it does not rot out my windows again

Spent a bit more time hanging out the van

and still trying to get the front straight

Realised how rotten my engine lid seal carrier was

measured , measured again and cut it out


made some strips to fix it

then tacked in place

Finally got around to taking the rear hatch off and kind of knew about this. hopping it would go away.

But didn't know about this

Noticed my lowered spindles were getting rusty from sitting in a box for two years,

so decided to take them apart and get them powder coated, good job to as I found swarf in the bearings from where they had been worked. should have bone this myself.

adjusted my wheel arch lip, think this is because my sil is to low.


Checked out how bad the rear hatch hinge rot was.

So decided to take the springs out. not easy to do.


by sliding and pulling they sprang out but not sure how.


Had a few odd jobs to do drill out bolts, tidy my poor welding.


This included welding nuts onto the other side of bolts that had sheared off.
took my heater cable controller knob apart
Sorted through all my parts and made a huge shopping, powder coat and chrome list.
The big day arrived I shipped the van up to enviro strip near Tamworth
 [img]https://lh5.googleusercontent.com/-vz2EN-I8-
4Y/UWbfgbg5azI/AAAAAAAADPc/DlZsVTLtu7I/w517-h386-p-o/Image2467.jpg[/img]

Saw two other vans waiting to be dipped.


A week later went to pick it up, This was very exciting, is it ok that I could not sleep the night before.

Rachel said she would help put the IRS and beam on, This took triple the 1 hour I expected.

After 3 hours we got it on the trailer


Home safe avoiding the rain and low bridges


Back in the garage, its amazing how much room you don't have in your garage when you empty our van of all the crap you have stored in it.

one small unexpected hole in the rear side window frame.

the lead joint in the door frame and roof lip joint has melted out from the chemical dip process.

The full extent of the hinge and seal carried damage.


Another part that caught me out the door had rusted from the inside out.


The rear shelf had a bit of flaking that I cleaned out with a rotary wire brush and treated with a rust stopper just in case.

This is the spray I used. once dry it turns the rust black and can be painted over.

Another piece on the lip of the roof, After the wire wheel I used a small brush to let the rust stopper seep into the seam.


I then seam sealed the gutter, I used some thinner on a gloved finger to smooth it out.


seam sealed the cab and rear shelf


Before I seam sealed the engine bay I had to clear up another bit,

To get the sealer in to the hard to reach places I stuck a tube on the end.

After £50 spent at B and Q (could have got it cheaper at screw fix) I made up these movable casters for the roll over rig.

Called on some friends and fitted the roll rig. the van just fitted out the garage.


snuck an air mattress under the van just in case, not that I doubted my design and welding skills.


Had some little helpers to make sure the job was done right

My measurements were just right as the van just fitted under the door.

Found a key

and a couple of dents on the roof, don't think they were there before.

And another bit of rust. think this is because of air trapped at the engine fire wall. so the chemical treatment could not clean it out properly.

wasted over half a day to clean and treat.

Last bit that needs repair, this must have been full of filler.

Tried out a couple of paint colours as Rachel wants me to paint the under side red


Back to the proper work. I spot welded the lower box sections. I could not do this from underneath the van. and forgot to roll the van before dipping.


which meant I had also forgot to weld the tubes back in place.

I started seam sealing the under side.


I swept and hovered the garage floor, then masked off the outside of the van and made hung up a load of dust sheet.

Mixed up some wash primer, this gets into all the small gaps,

Then did my first spray job


Let the primer dry and broke out the stone chip

This was great fun to spray on

but needs 4-6 bar of air pressure.

I used six litres but could have done with 2 more,


As I've spent the night uploading these photos Ill have to update the blog with all the details later.
orange
Registered user
Posts: 312
Joined: Tue Jul 04, 2006 6:16 pm
