You are viewing the Split Screen Van Club forum archive.
The forum archive is read-only.Unfortunately in 2021 the Split Screen Van Club forum suffered a ransomware attack and lots of the forum data was lost.
What threads that have been recovered are now searchable on this site. Some threads may be incomplete and some images are still being recovered.
Forum archive search
Re: My 64 camper Blog
by orange » Sun Nov 24, 2013 1:40 am
Wow so again its been over 6 months since I last posted an update on here.
If your not aware of my blog here in brief is what I've been up to.
layed on some Red on the under side

used a can to get into the tight spots

covered it in clear coat

patched the hole at the rear hatch hinge


Dealt with a fiddly patch in the rear hatch seal carrier


Made a tool to pull my trailing arms out of the front beam because I bashed them in to tight

used some wood angle and threaded bar to pull the arm out.

was kindly lent a massive reamer from a fellow club member to correctly ream my bushes

assembled the front beam back together

Repaired my door bottom


Started to flatten my roof

Day 1

Day 2


Day 3


Discovered the factory Lead loaded joints


Brought a body soldering kit

Loaded up the lead


patched up the rear corner


Wrote a piece for the club magazine

Dragged the van back out side and rolled it right side up


patched up some holes in the side window frames


filled some small gaps in the sill repair Id been meaning to do for ages

Go my bumpers blasted decided I could have done a better job my self


mixed up the oxalic acid to remove the rest of the rust


prepped my bumper


swapped out my mismatched rear bumper

welded up the cut out


Made some new bushes for my rear hatch hinges

... previously on pauls split blog. knacked engine lid


tried to make a repair piece with a block as trying to find a decent engine lid at a decent price is hard

but trial piece came out curved and wonkie

So finally found a doner engine lid with knackered outer skin and hinges but with a good inner frame to repair the inside of mine.


made a rear seat belt mount


see here for more on that subject fitting seat belts in a split screen bus
Got my old school RAF mechanic uncle over to help tidy up the outer body

dragged out my shrinking disk to drop down those high spots in the panel repairs

used a template to get the sill shape straight as its sooooo long.

flattened down the spot weld dimples in the front arches.

covered myself in filler dust

primed the bulkhead


made sure I filtered the paint that went into the spray gun

Sprayed the roof with a gravity gun, this is not easy

Let Rachel have a go at spraying the cargo floor


Had a few problems with my gun leaking

let the dog inspect the work

prepped the doors for primer


sprayed one side once the doors were aligned

then the cab


then the front

dragged the van out and spent the day hanging the doors


one day before the delivery to the paint shop that I put of for a week already I decided the belt line trim holes were more important than the body prep and primer on the other side of the van so I raided my pile of fresh parts to get the belt line trim out.

got a friend to help me fit it


run out of time to finish all the prep work I wanted to so last shot in the garage before off for paint

If your not aware of my blog here in brief is what I've been up to.
layed on some Red on the under side

used a can to get into the tight spots

covered it in clear coat

patched the hole at the rear hatch hinge


Dealt with a fiddly patch in the rear hatch seal carrier


Made a tool to pull my trailing arms out of the front beam because I bashed them in to tight

used some wood angle and threaded bar to pull the arm out.

was kindly lent a massive reamer from a fellow club member to correctly ream my bushes

assembled the front beam back together

Repaired my door bottom


Started to flatten my roof

Day 1

Day 2


Day 3


Discovered the factory Lead loaded joints


Brought a body soldering kit

Loaded up the lead


patched up the rear corner


Wrote a piece for the club magazine

Dragged the van back out side and rolled it right side up


patched up some holes in the side window frames


filled some small gaps in the sill repair Id been meaning to do for ages

Go my bumpers blasted decided I could have done a better job my self


mixed up the oxalic acid to remove the rest of the rust


prepped my bumper


swapped out my mismatched rear bumper

welded up the cut out


Made some new bushes for my rear hatch hinges

... previously on pauls split blog. knacked engine lid
tried to make a repair piece with a block as trying to find a decent engine lid at a decent price is hard

but trial piece came out curved and wonkie

So finally found a doner engine lid with knackered outer skin and hinges but with a good inner frame to repair the inside of mine.


made a rear seat belt mount


see here for more on that subject fitting seat belts in a split screen bus
Got my old school RAF mechanic uncle over to help tidy up the outer body

dragged out my shrinking disk to drop down those high spots in the panel repairs

used a template to get the sill shape straight as its sooooo long.

flattened down the spot weld dimples in the front arches.

covered myself in filler dust

primed the bulkhead


made sure I filtered the paint that went into the spray gun

Sprayed the roof with a gravity gun, this is not easy

Let Rachel have a go at spraying the cargo floor


Had a few problems with my gun leaking

let the dog inspect the work

prepped the doors for primer


sprayed one side once the doors were aligned
then the cab


then the front

dragged the van out and spent the day hanging the doors


one day before the delivery to the paint shop that I put of for a week already I decided the belt line trim holes were more important than the body prep and primer on the other side of the van so I raided my pile of fresh parts to get the belt line trim out.

got a friend to help me fit it


run out of time to finish all the prep work I wanted to so last shot in the garage before off for paint

orange
Registered user
Posts: 312
Joined: Tue Jul 04, 2006 6:16 pm
Re: My 64 camper Blog
by markp » Sun Nov 24, 2013 7:12 am
BOOM
now that's an update


well done and great skills on show
bus is looking good dude
Mark
now that's an update
well done and great skills on show
bus is looking good dude
Mark
markp
SSVC Member
Posts: 4464
Joined: Wed Jul 20, 2011 9:56 pm
Re: My 64 camper Blog
by vanmanjimmer » Sun Nov 24, 2013 8:04 am
Amazing work, this is going to be a great bus!
Looking good.
Looking good.
vanmanjimmer
Registered user
Posts: 347
Joined: Wed May 27, 2009 8:20 am
Re: My 64 camper Blog
by bex88 » Sun Nov 24, 2013 12:11 pm
It maybe six months but with work like that worth the wait. Lead loading love it! I have not put my project on here because progress is not as rapid as many but maybe I should.
bex88
Registered user
Posts: 302
Joined: Mon Jul 23, 2012 3:02 pm
Re: My 64 camper Blog
by orange » Thu Dec 12, 2013 12:04 am
Just a quick up date from the paint shop.
Hired a bloke and a trailer, to much hassel doing it myself last time

Gutted I didn't get all the prep done that I wanted to do and the van was a week late already

Delivered it to Gavin and his Dad at The PaintShop Pros near Aylesbury check out there work on there face book page.

Gavin hires his booth out so I wanted to have a go at spraying the inside myself, but it took 3 days of prep before I could rool it in for paint

rolled the van in the booth

quick set up of the gun

And on with the paint

used a small gun to get into the corners first then laid on the main coat

Baked for twenty min and pulled the tape off


Not to bad for a first go, will update my blog with more details when I get the time.
Hired a bloke and a trailer, to much hassel doing it myself last time

Gutted I didn't get all the prep done that I wanted to do and the van was a week late already

Delivered it to Gavin and his Dad at The PaintShop Pros near Aylesbury check out there work on there face book page.

Gavin hires his booth out so I wanted to have a go at spraying the inside myself, but it took 3 days of prep before I could rool it in for paint

rolled the van in the booth

quick set up of the gun

And on with the paint
used a small gun to get into the corners first then laid on the main coat

Baked for twenty min and pulled the tape off


Not to bad for a first go, will update my blog with more details when I get the time.
orange
Registered user
Posts: 312
Joined: Tue Jul 04, 2006 6:16 pm
Re: My 64 camper Blog
by orange » Fri Jan 10, 2014 11:23 pm
I was just about to do an exciting update on my Blog with the van back from paint and then share all the juicy details on here, only to find all the previously posted pictures have had the links broken due to google changing the address. If I cant sort it out there's a lot of picture posting required. Bit gutted.
So here's a little teaser while I try and sort out my Blog.

So here's a little teaser while I try and sort out my Blog.
orange
Registered user
Posts: 312
Joined: Tue Jul 04, 2006 6:16 pm
Re: My 64 camper Blog
by orange » Sun Jan 12, 2014 12:45 am
so Im over my rant at Google, so I changed my public setting by mistake, blog and thread photos all back to normal.
So anyway the good bit, the results from the paint shop.
Had a bit more prep to do

last coat of primer

inside of doors painted

engine bay done

lower part of cab done
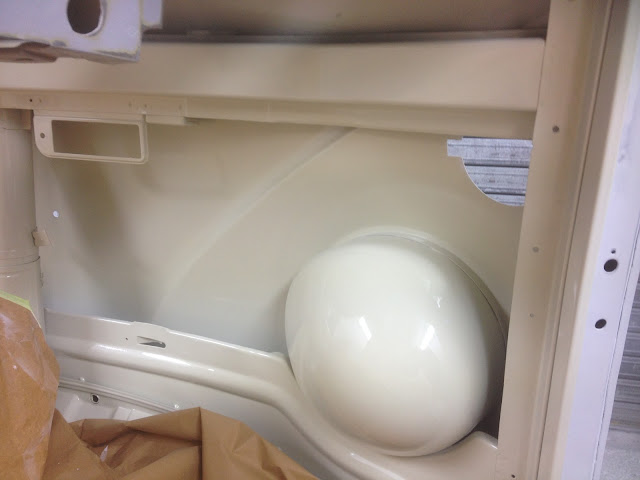
Dash and cab roof done

I like this shot, top ready for colour

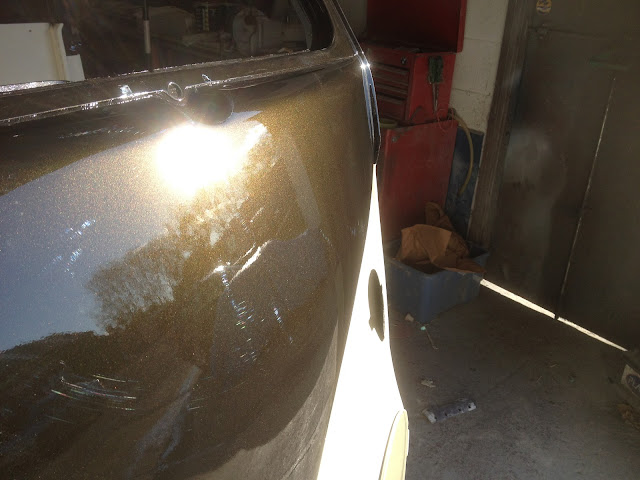
Base coats on

below the roof lacquered

touch of sun lite to show off the paint
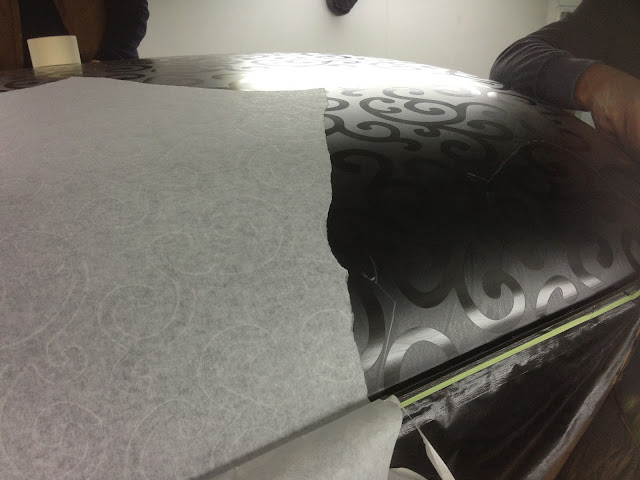
stencil being applied

patten cut to wrap over the corners
Gloss black applied and stencil removed

quick roll out in the sun

touch of air brush
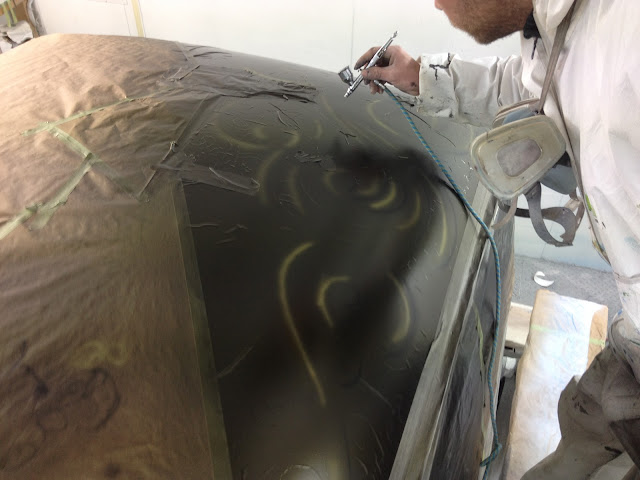
second stencil removed

A couple coats of lacquer then a few more

A cut back

quick polish

job done

Finally got the call to pick up the van

Loaded into a trailer

Back home safe.
I'll let the pics do the talking


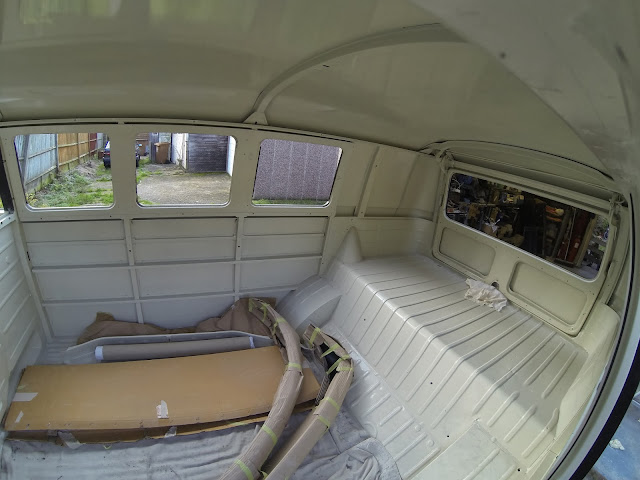


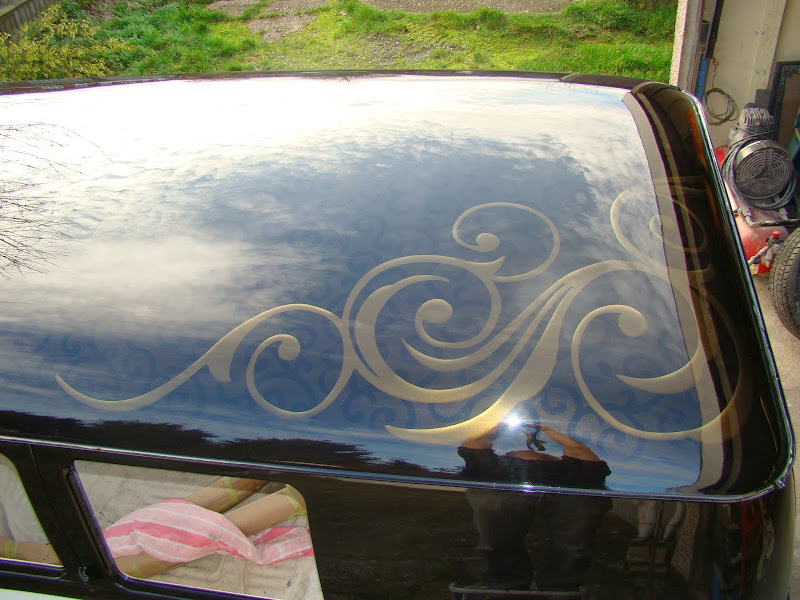

One very proud splity owner
So anyway the good bit, the results from the paint shop.
Had a bit more prep to do

last coat of primer
inside of doors painted
engine bay done
lower part of cab done
Dash and cab roof done
I like this shot, top ready for colour
Base coats on
below the roof lacquered
touch of sun lite to show off the paint
stencil being applied
patten cut to wrap over the corners
Gloss black applied and stencil removed
quick roll out in the sun
touch of air brush
second stencil removed
A couple coats of lacquer then a few more
A cut back
quick polish
job done
Finally got the call to pick up the van

Loaded into a trailer

Back home safe.
I'll let the pics do the talking
One very proud splity owner
orange
Registered user
Posts: 312
Joined: Tue Jul 04, 2006 6:16 pm
Re: My 64 camper Blog
by markp » Sun Jan 12, 2014 6:34 am
well done
it looks fab


I can feel ya excitement from here buddy


Like the roof ....... it's nice to be different from the norm some times
so stop cleaning it and stop looking at it ...... and start putting this bad boy back together again
Loving the colour combo dark over light ...... But there again I would say the wouldn't I

Mark
Mark
it looks fab
I can feel ya excitement from here buddy
Like the roof ....... it's nice to be different from the norm some times
so stop cleaning it and stop looking at it ...... and start putting this bad boy back together again
Loving the colour combo dark over light ...... But there again I would say the wouldn't I
Mark
Mark
markp
SSVC Member
Posts: 4464
Joined: Wed Jul 20, 2011 9:56 pm
Re: My 64 camper Blog
by rusty1962 » Sun Jan 12, 2014 9:24 am
Hi Paul, great update

I was particularly interested in this bit as I'm about to repair my "new" cab door.
Did you unpick the fold from the door skin and then let in the repair piece or just butt up to what remained after cutting out? It also looks as if you may have plug welded to the door skin from the inside?
This is all new to me and it's a steep learning curve!
Thanks for any advice in advance
Steve
I was particularly interested in this bit as I'm about to repair my "new" cab door.
orange wrote:
Repaired my door bottom


Did you unpick the fold from the door skin and then let in the repair piece or just butt up to what remained after cutting out? It also looks as if you may have plug welded to the door skin from the inside?
This is all new to me and it's a steep learning curve!
Thanks for any advice in advance
Steve
rusty1962

SSVC Member
Posts: 1549
Joined: Wed Sep 11, 2013 10:35 pm
Re: My 64 camper Blog
by John TC » Sun Jan 12, 2014 10:00 am
wow
John TC
SSVC Member
Posts: 1031
Joined: Tue Jun 29, 2010 9:29 pm
Re: My 64 camper Blog
by orange » Sun Jan 12, 2014 12:22 pm
rusty1962 wrote:Hi Paul, great update
I was particularly interested in this bit as I'm about to repair my "new" cab door.
Did you unpick the fold from the door skin and then let in the repair piece or just butt up to what remained after cutting out? It also looks as if you may have plug welded to the door skin from the inside?
This is all new to me and it's a steep learning curve!
Thanks for any advice in advance
Steve
Hi Steve check out my blog entry a lot more detail how I repaired my door bottoms here
http://www.paulssplit.blogspot.co.uk/2013/10/cab-door-bottom-repair.html
The edge lip that holds the inner skin was spot welded in a couple of places, I drilled these out from the inside then used a pick to lift the edge of the seam. at the curve it split due to the tight radius.
this allowed me to slot the repair piece in place. the plug welds are from just filling the pin holes left from the rust.
If I was to do it again I would probably try and make my own repair patch to match my door, like in this post
http://paulssplit.blogspot.co.uk/2011/03/cab-door-bottom-repair.html
the patch I got did not match my door curve and took a lot of work to re shape a compound curve rather than make your own.
Hope this helps Steve.
orange
Registered user
Posts: 312
Joined: Tue Jul 04, 2006 6:16 pm
Re: My 64 camper Blog
by orange » Sun Jan 12, 2014 12:28 pm
markp wrote:well done
it looks fab


I can feel ya excitement from here buddy


Like the roof ....... it's nice to be different from the norm some times
so stop cleaning it and stop looking at it ...... and start putting this bad boy back together again
Loving the colour combo dark over light ...... But there again I would say the wouldn't I

Mark
Hi Mr P
Thanks for the comments, Your right I have spent a week looking at it and dusting it down,
I'm just trying to remember how to put it back together. It may take a while as I still need to restore a lot of bit now that the body looks so fresh.
hopefully rolling by Vic farm if the cash doesn't run out.
orange
Registered user
Posts: 312
Joined: Tue Jul 04, 2006 6:16 pm
Re: My 64 camper Blog
by markp » Sun Jan 12, 2014 4:49 pm
Cool
Will be great too see it in the flesh
What's the name of the colours you used. ..... The top looks black .... But in sun it's looks a black with gold metallic ?
Love the roof ... Look idea
Mark
Will be great too see it in the flesh
What's the name of the colours you used. ..... The top looks black .... But in sun it's looks a black with gold metallic ?
Love the roof ... Look idea
Mark
markp
SSVC Member
Posts: 4464
Joined: Wed Jul 20, 2011 9:56 pm
Re: My 64 camper Blog
by rusty1962 » Sun Jan 12, 2014 7:59 pm
orange wrote:rusty1962 wrote:Hi Paul, great update
I was particularly interested in this bit as I'm about to repair my "new" cab door.
Did you unpick the fold from the door skin and then let in the repair piece or just butt up to what remained after cutting out? It also looks as if you may have plug welded to the door skin from the inside?
This is all new to me and it's a steep learning curve!
Thanks for any advice in advance
Steve
Hi Steve check out my blog entry a lot more detail how I repaired my door bottoms here
http://www.paulssplit.blogspot.co.uk/2013/10/cab-door-bottom-repair.html
The edge lip that holds the inner skin was spot welded in a couple of places, I drilled these out from the inside then used a pick to lift the edge of the seam. at the curve it split due to the tight radius.
this allowed me to slot the repair piece in place. the plug welds are from just filling the pin holes left from the rust.
If I was to do it again I would probably try and make my own repair patch to match my door, like in this post
http://paulssplit.blogspot.co.uk/2011/03/cab-door-bottom-repair.html
the patch I got did not match my door curve and took a lot of work to re shape a compound curve rather than make your own.
Hope this helps Steve.
Thanks Paul, very useful.
Cheers
Steve
rusty1962

SSVC Member
Posts: 1549
Joined: Wed Sep 11, 2013 10:35 pm
Re: My 64 camper Blog
by vanmanjimmer » Sun Jan 12, 2014 8:21 pm
Really looking forward to the build up! The paintwork is Awesome!
vanmanjimmer
Registered user
Posts: 347
Joined: Wed May 27, 2009 8:20 am
