You are viewing the Split Screen Van Club forum archive.
The forum archive is read-only.Unfortunately in 2021 the Split Screen Van Club forum suffered a ransomware attack and lots of the forum data was lost.
What threads that have been recovered are now searchable on this site. Some threads may be incomplete and some images are still being recovered.
Forum archive search
Re: My 64 camper Blog
by orange » Mon Jun 23, 2014 11:56 pm
markp wrote:Cool
What's the name of the colours you used. ..... The top looks black .... But in sun it's looks a black with gold metallic ?
Love the roof ... Look idea
Mark
Hi Mark sorry I didn't see your comment earlier, your right about the paint the top of the van is painted in "Black Gold" its a GM colour some times called Saturn Black. the swirl is the same black gold just with more gold added and the base colour is the black gold without the gold.
orange
Registered user
Posts: 312
Joined: Tue Jul 04, 2006 6:16 pm
Re: My 64 camper Blog
by orange » Tue Jun 24, 2014 1:51 am
So here goes the latest update, I was expecting to have the van rolling 6 months on from paint but it does not always work out how you hope, any way here's the lasted in brief, more detailed info on the blog paulssplit.blogspot.com
So checking out the underside of the van I was not happy with the over spray, this would have been fine if I had sprayed it cream


And some of the filler left behind

there was also stone chip that had lifted and needed cleaning up and rust treating


I covered the fresh paint half with my cover as I ran out of materials

Then covered the engine bay
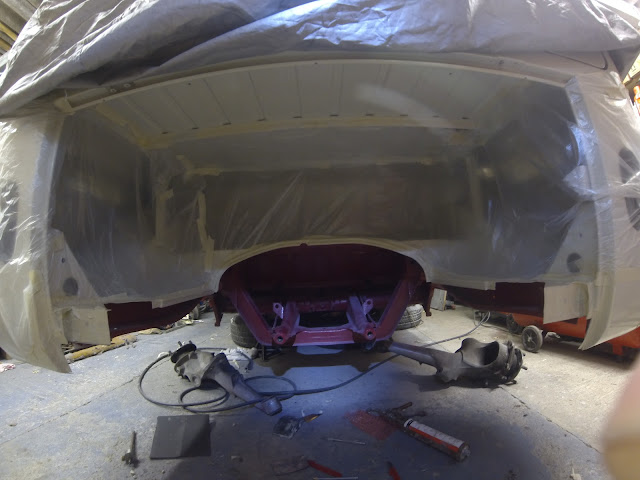
So I primed the suspension mounting points

I brought a detail suction gun that needed modifying to get into the gaps

And sprayed the whole under side again this time on my back


Also treated and brushed the top of the chassis rails that missed out on paint

I then covered it In lacquer, not sure why, still working out if it was a good idea, what's wrong with Black.

my lead lamp makes it look orange


I later found out I had been using two different reds, due to a cock up from the paint suppliers.
NOT PLEASED, I'm not doing it again.

Taking a break from the paint I made a brake master cylinder spacer


Stripped down my steering box

cut out the sealant holding my quarter light glass and pulled them out the frame using some wire in a vice

I then got back onto the paint work, there were lots of small bit of paint that needed some attention
some of it that will never be seen again.
The top cargo latch had over spray

the lip around the rear hatch I repainted in cream

a area that will probably be covered in a seal but I wanted to sort

both B pillars had paint flaking this was because I wax inside the box sections and it had seeped out, this was the same around a lot of the window frames.


I closed the vent for paint but should have left it open, and touched up the inside tube rather than spray the part that was hidden
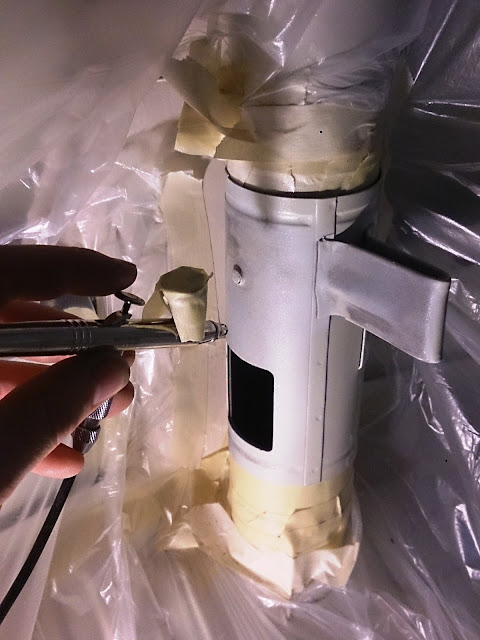
after a slight rub down the engine bay needed another coat
so masked up the van again

Its hard to see but some of the low spots were showing primer

I wanted to get into all the tight corners so got out the detail gun

fresh coat of paint in all the right places

while I was painting added a coat to the battery strap

Id pulled some paint off the lip from masking up when painting the red.
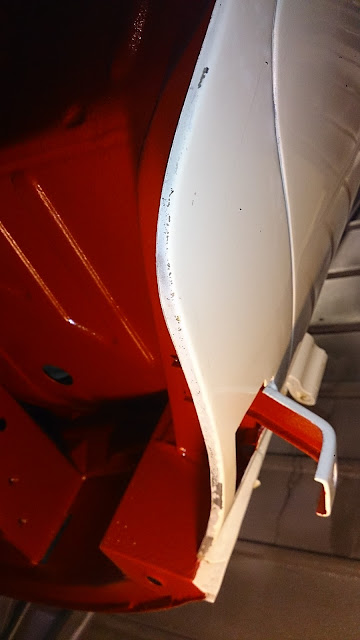


the cab door frame top lip needed attention

the lacquer on the air vent and by the sun visor was very mottled, I tried to cut it back to repolish but there was not enough paint there so broke through to the primer

I then used my air brush to touch up the parts that had cut through

Then put a couple of coats of lacquer back on
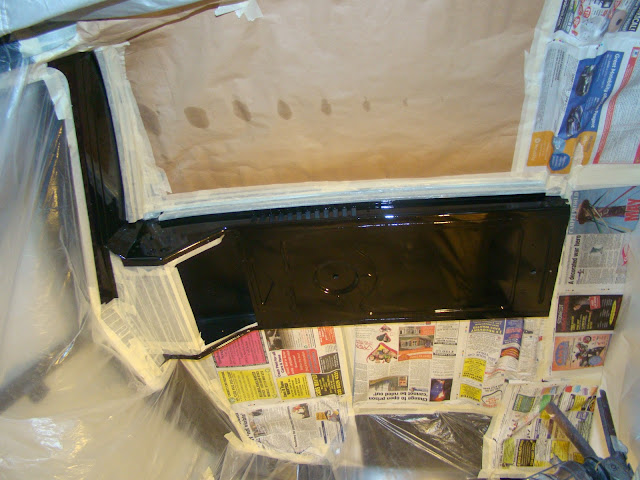

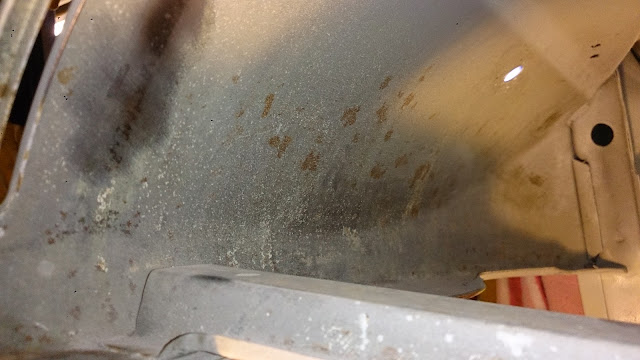
I really thought I was done with the paint until I found these rust spots under the dash

this is from the dippers not getting primer on there and the painters not getting any paint under the dash either
I cleaned what I could

before I spent time on my back with a cheep dremmel cleaning between the grills

I cut strips of foam to blank the grill

rust treated it all

raided the curtains to masked up the cab

A lot of hard work and I managed to get a coat of paint under the dash


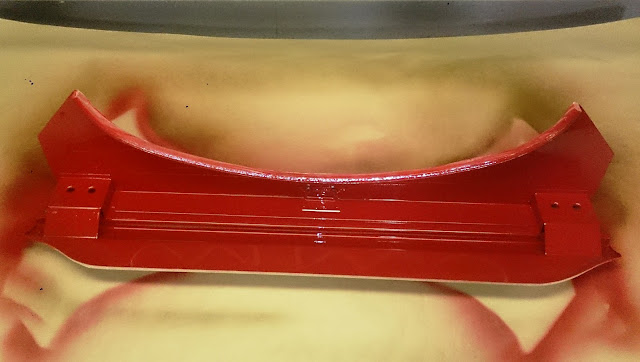
the rear valance needed a touch up to the cream and the red


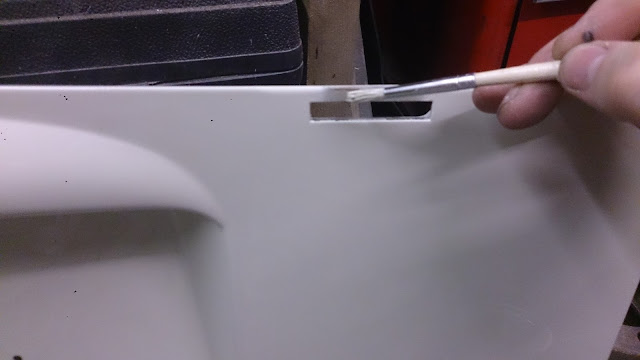
the engine lid also had some touch-ups to do I got fed up with spraying so got out the paint brush

I spent over 3 months sorting all the small bit of paint with a couple of small bits left to do I had to see some progress, so unboxed my fuel tank

I unpacked my new loom, comparing it to the old one

slid it through the chassis from back to front using a coat hanger

Watched my girlfriend struggle getting the loom up to the dash

then sat pondering for a few hours going colour blind

with some help from an avonic genious tried to work out how to fit a 6V fuel gauge to a 12v system


then striped out the wires in my new loom because I was not happy with the way they were laid up.

Now the engine bay was a bit nicer I stuck one some foam seals

laid in the new engine seals and cut them

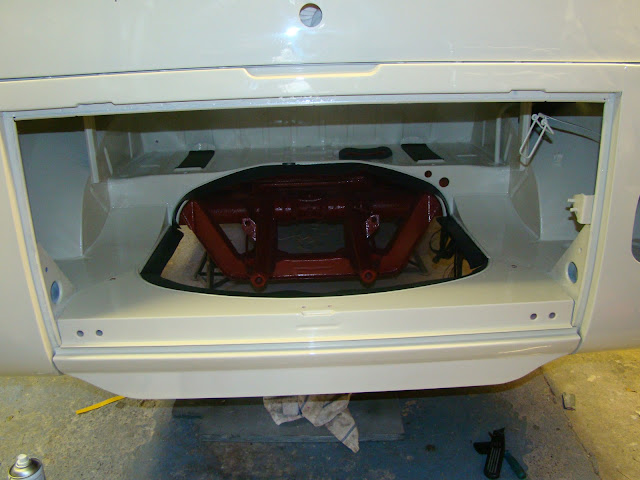
trialled the rear valance
I got some front beam bolts back from chemical blacking

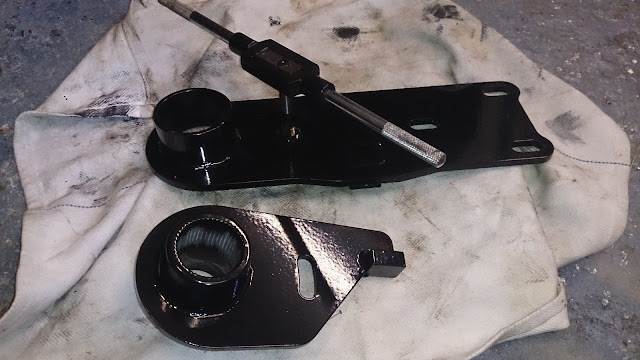
went to fit the front beam to find the to steering bush was in the wrong way round, the grove should be facing the grease nipple

made a tool to pull it out


pulled it back in with the same tool and reamed the bushes.

I sorted all the new parts and went through all the bolts and ordered stainless ones.

also picked up my locks from being plated
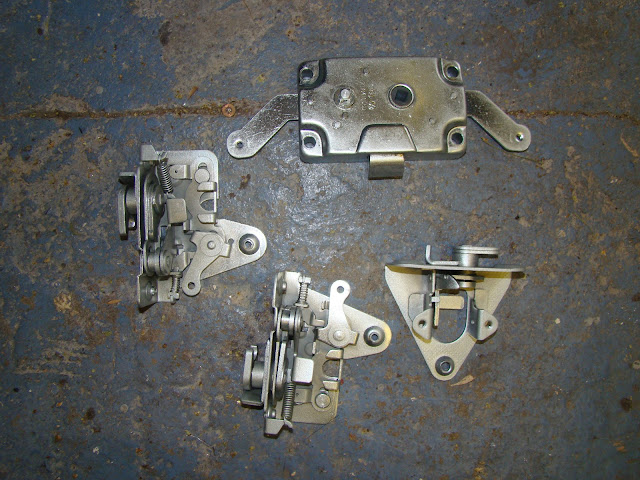
Hope fully by the next up date I should have some better progress of the build, Its frustrating having all the parts ready to fit but messing around getting things right before I can put the parts back on the bus, just hope I don't miss to much of the summer...

So checking out the underside of the van I was not happy with the over spray, this would have been fine if I had sprayed it cream
And some of the filler left behind
there was also stone chip that had lifted and needed cleaning up and rust treating
I covered the fresh paint half with my cover as I ran out of materials
Then covered the engine bay
So I primed the suspension mounting points
I brought a detail suction gun that needed modifying to get into the gaps
And sprayed the whole under side again this time on my back
Also treated and brushed the top of the chassis rails that missed out on paint
I then covered it In lacquer, not sure why, still working out if it was a good idea, what's wrong with Black.
my lead lamp makes it look orange
I later found out I had been using two different reds, due to a cock up from the paint suppliers.
NOT PLEASED, I'm not doing it again.
Taking a break from the paint I made a brake master cylinder spacer
Stripped down my steering box
cut out the sealant holding my quarter light glass and pulled them out the frame using some wire in a vice
I then got back onto the paint work, there were lots of small bit of paint that needed some attention
some of it that will never be seen again.
The top cargo latch had over spray

the lip around the rear hatch I repainted in cream
a area that will probably be covered in a seal but I wanted to sort

both B pillars had paint flaking this was because I wax inside the box sections and it had seeped out, this was the same around a lot of the window frames.


I closed the vent for paint but should have left it open, and touched up the inside tube rather than spray the part that was hidden
after a slight rub down the engine bay needed another coat
so masked up the van again
Its hard to see but some of the low spots were showing primer

I wanted to get into all the tight corners so got out the detail gun
fresh coat of paint in all the right places

while I was painting added a coat to the battery strap
Id pulled some paint off the lip from masking up when painting the red.

the cab door frame top lip needed attention

the lacquer on the air vent and by the sun visor was very mottled, I tried to cut it back to repolish but there was not enough paint there so broke through to the primer
I then used my air brush to touch up the parts that had cut through
Then put a couple of coats of lacquer back on
I really thought I was done with the paint until I found these rust spots under the dash
this is from the dippers not getting primer on there and the painters not getting any paint under the dash either
I cleaned what I could
before I spent time on my back with a cheep dremmel cleaning between the grills
I cut strips of foam to blank the grill
rust treated it all
raided the curtains to masked up the cab
A lot of hard work and I managed to get a coat of paint under the dash
the rear valance needed a touch up to the cream and the red

the engine lid also had some touch-ups to do I got fed up with spraying so got out the paint brush
I spent over 3 months sorting all the small bit of paint with a couple of small bits left to do I had to see some progress, so unboxed my fuel tank
I unpacked my new loom, comparing it to the old one
slid it through the chassis from back to front using a coat hanger
Watched my girlfriend struggle getting the loom up to the dash
then sat pondering for a few hours going colour blind
with some help from an avonic genious tried to work out how to fit a 6V fuel gauge to a 12v system
then striped out the wires in my new loom because I was not happy with the way they were laid up.
Now the engine bay was a bit nicer I stuck one some foam seals
laid in the new engine seals and cut them
trialled the rear valance
I got some front beam bolts back from chemical blacking
went to fit the front beam to find the to steering bush was in the wrong way round, the grove should be facing the grease nipple
made a tool to pull it out
pulled it back in with the same tool and reamed the bushes.
I sorted all the new parts and went through all the bolts and ordered stainless ones.
also picked up my locks from being plated
Hope fully by the next up date I should have some better progress of the build, Its frustrating having all the parts ready to fit but messing around getting things right before I can put the parts back on the bus, just hope I don't miss to much of the summer...
orange
Registered user
Posts: 312
Joined: Tue Jul 04, 2006 6:16 pm
Re: My 64 camper Blog
by rusty1962 » Tue Jun 24, 2014 6:15 am
Good update Paul. You have the patience of a saint!
rusty1962

SSVC Member
Posts: 1577
Joined: Wed Sep 11, 2013 10:35 pm
Re: My 64 camper Blog
by orange » Fri Aug 15, 2014 1:26 am
Things have been a bit slow, work and lack of dosh have slowed things down, don't think She'll be rolling this summer. Any way here's the latest.
Got my gearbox from Bears, It has a IRS 4 spider gear super diff
with 1.26 3rd and 0.89 4th gear

Finally got my parts back from the powder coaters
which means I can start fitting stuff.

was going to start with the gear box but noticed they had painted over some of the corrosion,
so decided to clean it up and also clean up the casting on the case

masked up ready for repaint

Fitted some conversion drive flanges for larger CV joints

dressed the rest of the box ready to fit

cleaned out my gear shift tube and lubbed up my shaft

fitted my coupling and wire locked it up

slid in my cable and mounted my box in place trying not to take off any paint.

cleaned out the spring plates this included all the powder coating off the internal parts

Mocked up the IRS A arm

trailed the full Range of movement of the drive shafts

found out I needed to drill through the gator plates to get it to fit

found my air box controls ready for a clean


striped and blasted ready for paint
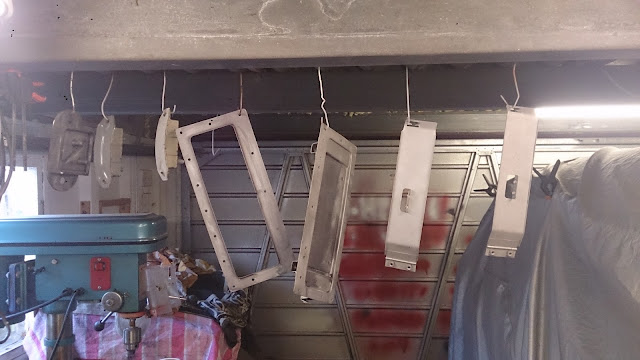
painted ready for assembly


fitted the front beam while it was not assembled
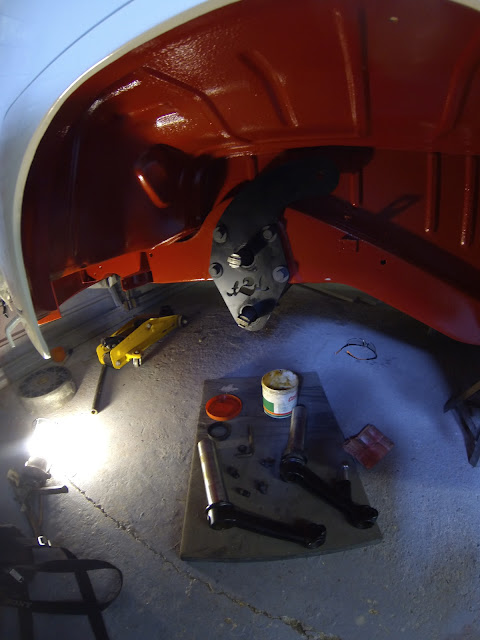

although I had previously reamed the bushes I could not get this arm in as far as it should have gone

so I cleaned it out with a abrasive flapper wheel

fitted the trailing arms, the reamer was just to remove the paint
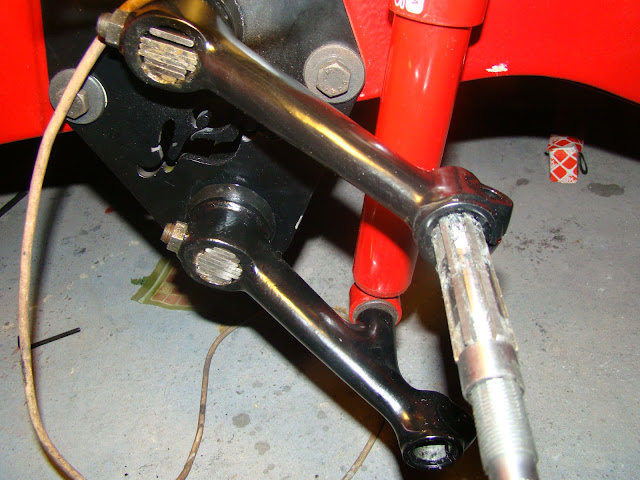
made a cup to squese the old king pin bushes out with the vice

Laid out the seals and cover plates for fitting the pins then after after a days of working it out found out you cant fit these if you flip the spindles

made a black nylon bush to replace the previous one Id made

the black replaces the white one that I made in stead of a thrust bearing
that would have replaced the steel bush
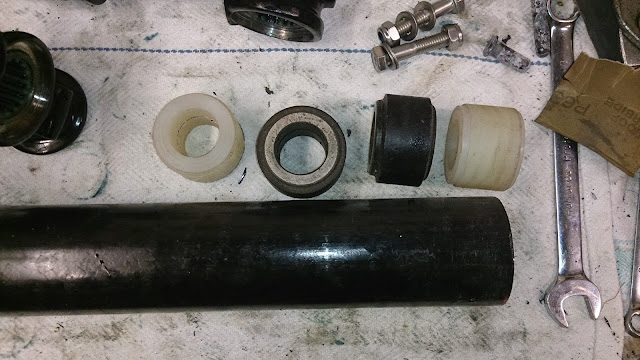

Started mocking up the front spindles realising I was missing some parts

after cleaning out all the paint I started fitting the pedals parts


And rebuilt my master cylinder after it got painted

there was a few parts I forgot to give to the powder coaters, that I found after an afternoon search

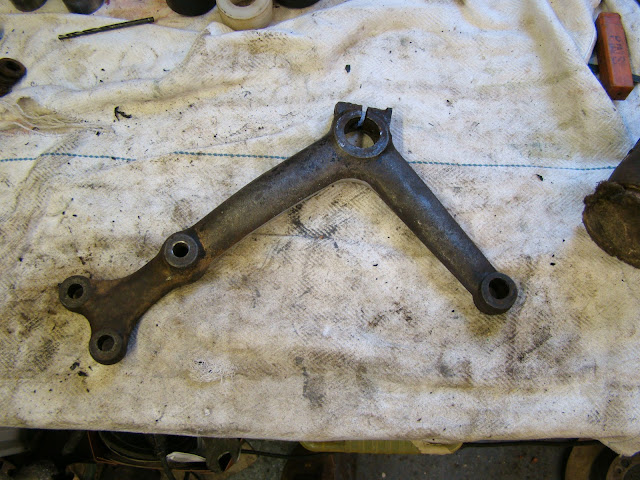
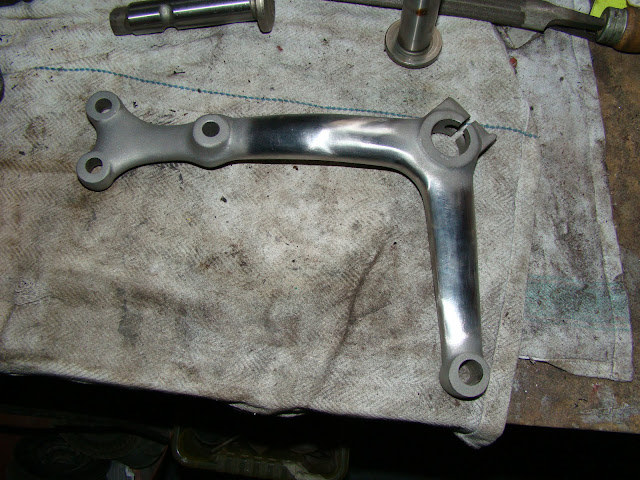
Also forgot to fit the brake return spring, found it in a box of bits I never throw away, cleaned painted.

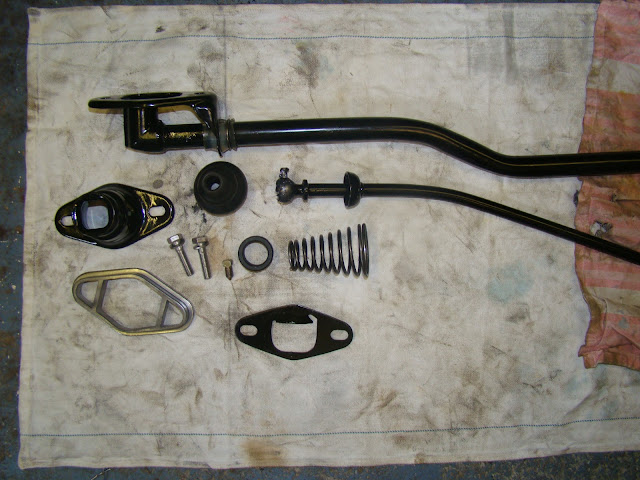
found all my gear stick parts
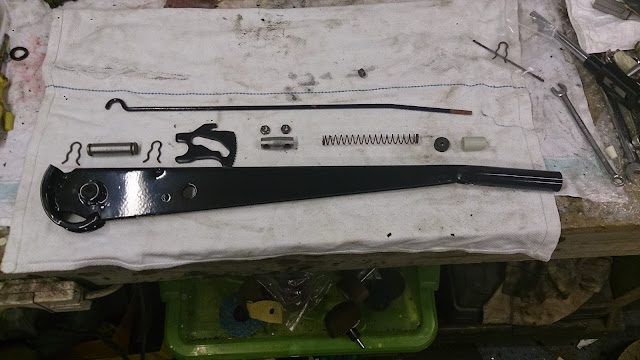
hinge needed cleaning out

Had a problem with a blocked accelerator cable tube, made a twist in a coat hanger to clear it out.
think this may be crap from dipping

nearly all the cab controls in place


I didn't like concept racing mod for the tank straps so I decided to make my own
Started with a strip of Stainless and a rubber cover

Then made some L pieces like the original using a block and punch

spot welded this onto the strip

I wanted to fit the same way as original but the width of the tank and the angle that's needed fot the bracket would not allow

straps made and bent o fit the shape of the tank

strap installed, it tightened up better when tight

All looking pretty

so a few bit fitted now, still finalising the brakes and some other parts looking for and ordering some of the smaller parts before the hubs get a final fit, Really anxious to get it all fitted but don't want to muck up the previous hard work.
Should have it rolling by the next update.
Got my gearbox from Bears, It has a IRS 4 spider gear super diff
with 1.26 3rd and 0.89 4th gear
Finally got my parts back from the powder coaters
which means I can start fitting stuff.
was going to start with the gear box but noticed they had painted over some of the corrosion,
so decided to clean it up and also clean up the casting on the case
masked up ready for repaint
Fitted some conversion drive flanges for larger CV joints
dressed the rest of the box ready to fit
cleaned out my gear shift tube and lubbed up my shaft
fitted my coupling and wire locked it up
slid in my cable and mounted my box in place trying not to take off any paint.
cleaned out the spring plates this included all the powder coating off the internal parts
Mocked up the IRS A arm
trailed the full Range of movement of the drive shafts
found out I needed to drill through the gator plates to get it to fit
found my air box controls ready for a clean


striped and blasted ready for paint
painted ready for assembly
fitted the front beam while it was not assembled
although I had previously reamed the bushes I could not get this arm in as far as it should have gone
so I cleaned it out with a abrasive flapper wheel
fitted the trailing arms, the reamer was just to remove the paint
made a cup to squese the old king pin bushes out with the vice
Laid out the seals and cover plates for fitting the pins then after after a days of working it out found out you cant fit these if you flip the spindles
made a black nylon bush to replace the previous one Id made
the black replaces the white one that I made in stead of a thrust bearing
that would have replaced the steel bush
Started mocking up the front spindles realising I was missing some parts
after cleaning out all the paint I started fitting the pedals parts
And rebuilt my master cylinder after it got painted
there was a few parts I forgot to give to the powder coaters, that I found after an afternoon search
Also forgot to fit the brake return spring, found it in a box of bits I never throw away, cleaned painted.
found all my gear stick parts
hinge needed cleaning out
Had a problem with a blocked accelerator cable tube, made a twist in a coat hanger to clear it out.
think this may be crap from dipping
nearly all the cab controls in place
I didn't like concept racing mod for the tank straps so I decided to make my own
Started with a strip of Stainless and a rubber cover
Then made some L pieces like the original using a block and punch
spot welded this onto the strip
I wanted to fit the same way as original but the width of the tank and the angle that's needed fot the bracket would not allow
straps made and bent o fit the shape of the tank
strap installed, it tightened up better when tight
All looking pretty
so a few bit fitted now, still finalising the brakes and some other parts looking for and ordering some of the smaller parts before the hubs get a final fit, Really anxious to get it all fitted but don't want to muck up the previous hard work.
Should have it rolling by the next update.
orange
Registered user
Posts: 312
Joined: Tue Jul 04, 2006 6:16 pm
Re: My 64 camper Blog
by Choc » Fri Aug 15, 2014 12:00 pm
'Er, stunned for words really.


Keep up the excellent work.
Keep up the excellent work.
Choc

SSVC Member
Posts: 3421
Joined: Wed Jun 28, 2006 7:16 pm
Re: My 64 camper Blog
by John TC » Fri Aug 15, 2014 3:09 pm
Superb

John TC
SSVC Member
Posts: 1031
Joined: Tue Jun 29, 2010 9:29 pm
Re: My 64 camper Blog
by DrumBreaker » Fri Aug 15, 2014 3:24 pm
Wow

Amazing work, detail is incredible......
Amazing work, detail is incredible......
DrumBreaker
SSVC Member
Posts: 274
Joined: Fri Jun 28, 2013 9:46 am
Re: My 64 camper Blog
by orange » Sat Aug 16, 2014 5:40 pm
Thanks for the kind words, it's really incouraging.
It's nice to share my progress even though I'm stuck in the garage.
thanks.
It's nice to share my progress even though I'm stuck in the garage.
thanks.
orange
Registered user
Posts: 312
Joined: Tue Jul 04, 2006 6:16 pm
Re: My 64 camper Blog
by markp » Sun Aug 17, 2014 3:59 am
wow
Hello
Another amazing update well done ..... your updates and Trints updates are on a pare

 a real pleasure to read ..... You make me want to restore another bus


I love the way no stone is un-turned ..... a proper job ..... I take my hat off to you sir
Really coming on well ...Keep pushing not too long to go now
Mark
Hello
Another amazing update well done ..... your updates and Trints updates are on a pare
I love the way no stone is un-turned ..... a proper job ..... I take my hat off to you sir
Really coming on well ...Keep pushing not too long to go now
Mark
markp
SSVC Member
Posts: 4467
Joined: Wed Jul 20, 2011 9:56 pm
Re: My 64 camper Blog
by rusty1962 » Sun Aug 17, 2014 7:29 am
A great update Paul, stunning work

Steve
Steve
rusty1962

SSVC Member
Posts: 1577
Joined: Wed Sep 11, 2013 10:35 pm
Re: My 64 camper Blog
by orange » Thu Sep 18, 2014 2:25 am
here's a small update to show off the shiny bits,
Thanks for the help in the technical section, its been a long time since I took these parts apart so the forum has been really helpful.
Made a cap for the spindle was not a fan of the Ali one that T2D fitted

Here's it painted and fitted

fitted the nylon bush between the king pins

measured up my trailing arm gap which didn't help as there was to much paint to get an accurate measurement. eventually got the camber with a digital protractor against the hub

severed a o ring fitting the link pins

fitted the stub axel on its highest fitting, so it can only get lower.

Fitted my steering pin with the spring washer in the wrong place, thanks for the help it the technical section for putting me straight on that one

sorted my steering parts

to find Id been supplied the wrong ball joints large bay ones
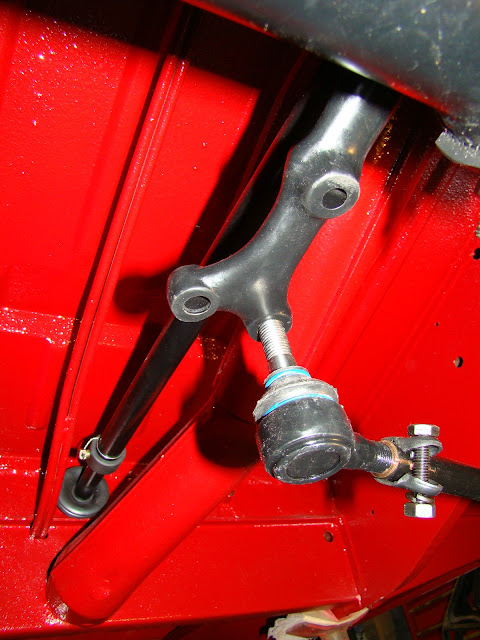
brought a couple more only to realise they were two different manufactures


finally got those fitted to find id been given narrowed tie rods that weren't narrow
this is with the wheels straight.

cut an inch of each of these, that was not quite enough
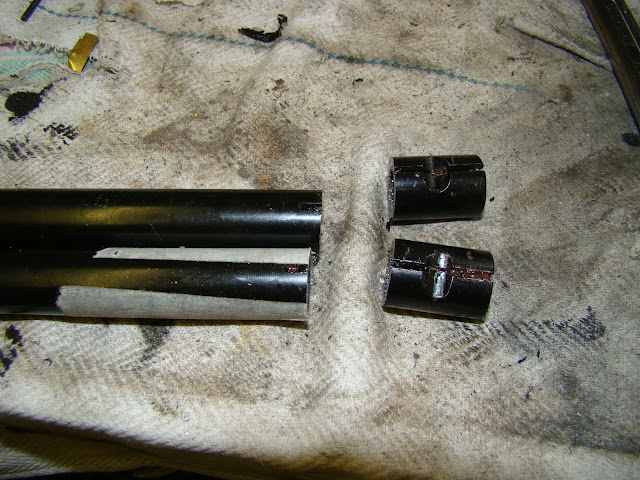
re-tapped the rods, should have just made my own. still need to cut the split in these

Back to the good bits, pulled the bearing out of the Porsche hubs

sand blasted my hubs and fitted the bearing spacers

Baked the hubs 200deg for 20 min, don't tell the misses.

As quick as I could took the inner bearing races out of the freezer and taped then into the hub

once left to cool sprayed with silver high temp paint

dug out my front discs cleaned off the corrosion inhibitor and tapped up the breaking face

Sprayed up the front and rear discs with black high temp paint

had to find some Porsche bearing seals as the VW ones are a little to big

fitted the inner bearing, the spacer behind the bearing is just enough to let the bearing sit on it matting surfaces

laid out all the parts ready to fit
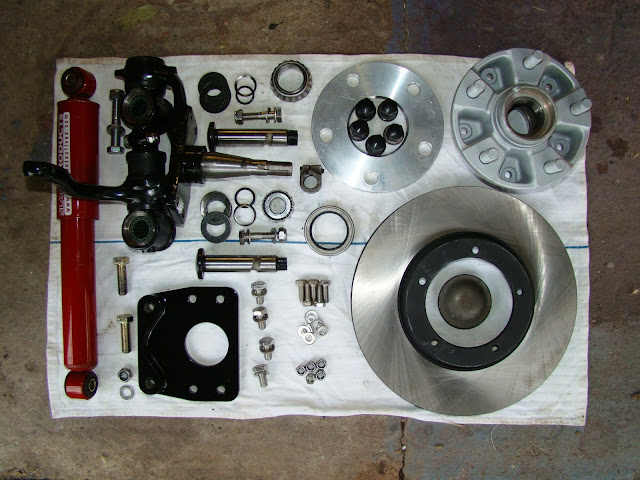
fitted the stub axel, calliper carrier and bolted the disc to the hub
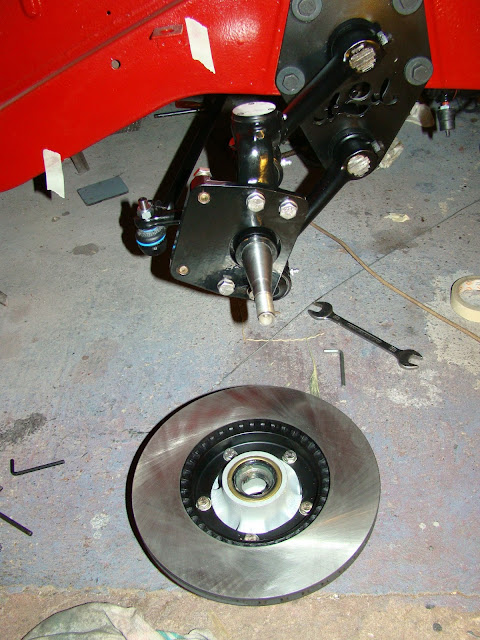
All installed looking pretty


the front calliper's were previously sand blasted to get rid of the corrosion, but needed a quick going over then a coat of wash primer

a light coat of red to match the under side of the van

even the nipples got a tickle

stuck on a couple of decals I got from e bay, think I should have got a stencil so I could paint it cream to match the bus


A coat of lacquer, I was told by the paint shop that thin coats of paint should be OK to dissipate the heat, Lets hope so.

While the lacquer was out I coated the servo

dug out the seal kits I've had sitting around for to long, most of the pistons were shot from the corrosion these were about £80 a calliper plus pads and hoses, so not cheep to restore.

lubed up the piston and seals

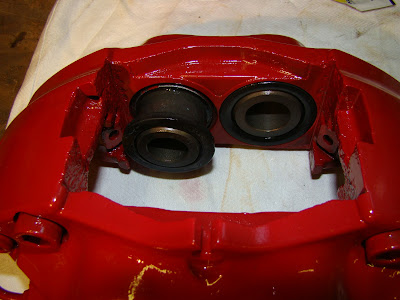
cleaned up the plates and fitted them
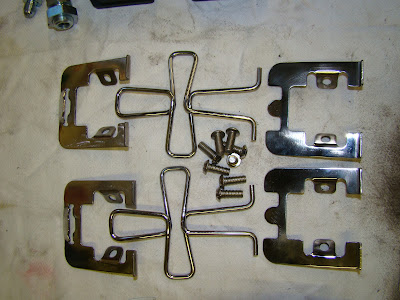
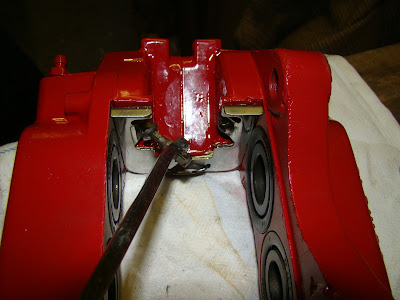
cleaned the anti squeal pads and fitted the pads and retaining springs


then tried them on


OH and finally got the van rolling since paint, big land mark, heres a look back at some of its restoration history


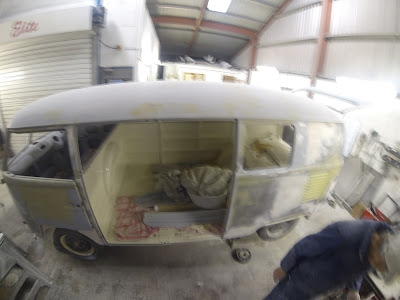


Thanks for the help in the technical section, its been a long time since I took these parts apart so the forum has been really helpful.
Made a cap for the spindle was not a fan of the Ali one that T2D fitted
Here's it painted and fitted
fitted the nylon bush between the king pins
measured up my trailing arm gap which didn't help as there was to much paint to get an accurate measurement. eventually got the camber with a digital protractor against the hub
severed a o ring fitting the link pins
fitted the stub axel on its highest fitting, so it can only get lower.
Fitted my steering pin with the spring washer in the wrong place, thanks for the help it the technical section for putting me straight on that one
sorted my steering parts
to find Id been supplied the wrong ball joints large bay ones
brought a couple more only to realise they were two different manufactures
finally got those fitted to find id been given narrowed tie rods that weren't narrow
this is with the wheels straight.
cut an inch of each of these, that was not quite enough
re-tapped the rods, should have just made my own. still need to cut the split in these
Back to the good bits, pulled the bearing out of the Porsche hubs
sand blasted my hubs and fitted the bearing spacers
Baked the hubs 200deg for 20 min, don't tell the misses.
As quick as I could took the inner bearing races out of the freezer and taped then into the hub
once left to cool sprayed with silver high temp paint
dug out my front discs cleaned off the corrosion inhibitor and tapped up the breaking face
Sprayed up the front and rear discs with black high temp paint
had to find some Porsche bearing seals as the VW ones are a little to big
fitted the inner bearing, the spacer behind the bearing is just enough to let the bearing sit on it matting surfaces
laid out all the parts ready to fit
fitted the stub axel, calliper carrier and bolted the disc to the hub
All installed looking pretty
the front calliper's were previously sand blasted to get rid of the corrosion, but needed a quick going over then a coat of wash primer
a light coat of red to match the under side of the van
even the nipples got a tickle
stuck on a couple of decals I got from e bay, think I should have got a stencil so I could paint it cream to match the bus
A coat of lacquer, I was told by the paint shop that thin coats of paint should be OK to dissipate the heat, Lets hope so.
While the lacquer was out I coated the servo
dug out the seal kits I've had sitting around for to long, most of the pistons were shot from the corrosion these were about £80 a calliper plus pads and hoses, so not cheep to restore.
lubed up the piston and seals
cleaned up the plates and fitted them
cleaned the anti squeal pads and fitted the pads and retaining springs
then tried them on
OH and finally got the van rolling since paint, big land mark, heres a look back at some of its restoration history


orange
Registered user
Posts: 312
Joined: Tue Jul 04, 2006 6:16 pm
Re: My 64 camper Blog
by orange » Thu Nov 20, 2014 12:15 am
Arr just tried to preview my update and lost the lot as it asked me to login again, so here we go again... probably in brief
loom in cab mocked up

indicator cleaned up

working out 12v wiper motor connections

made a bracket for 12v flasher


Do let me know if these fuses are wrong?
fettled repro fish eye reflectors to fit

thread was oversize in body so fitted with a nut and bolt.
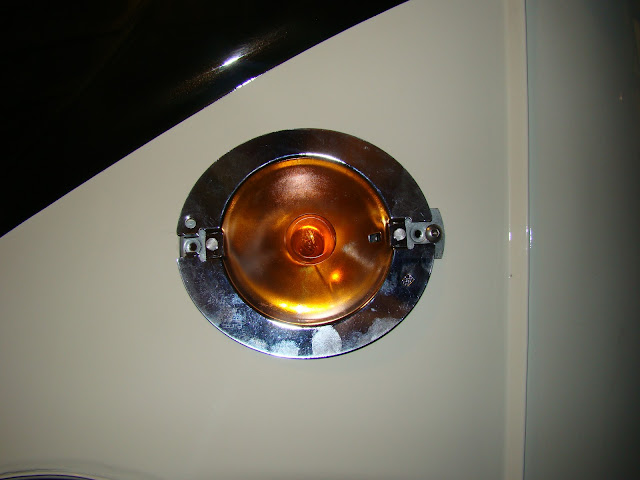
repaired and polished light switch


repaired horn push

fitted shiny horn with caps and heat shrink on the connections

fuse box area tidy

speedo area will need a few wire remaking to tidy up.

trying to work out the route for the rear loom I cut the bulk head hole bigger to fit the extra wired I had added


fitted my starter

then realised the loom was meant to go along the chassis rail.
so did not need to cut the hole bigger, but did need to strip the insulation to get the loom up the rear lights. still not sure if this is correct

drilled a hole bigger in the gearbox earth strap


wish I had taken more photos of when I pulled it all out.

A bit more messing about with the loom but nearly there.
Next break lines and engine.
loom in cab mocked up
indicator cleaned up
working out 12v wiper motor connections
made a bracket for 12v flasher
Do let me know if these fuses are wrong?
fettled repro fish eye reflectors to fit
thread was oversize in body so fitted with a nut and bolt.
repaired and polished light switch
repaired horn push
fitted shiny horn with caps and heat shrink on the connections
fuse box area tidy
speedo area will need a few wire remaking to tidy up.
trying to work out the route for the rear loom I cut the bulk head hole bigger to fit the extra wired I had added
fitted my starter
then realised the loom was meant to go along the chassis rail.
so did not need to cut the hole bigger, but did need to strip the insulation to get the loom up the rear lights. still not sure if this is correct
drilled a hole bigger in the gearbox earth strap
wish I had taken more photos of when I pulled it all out.
A bit more messing about with the loom but nearly there.
Next break lines and engine.
orange
Registered user
Posts: 312
Joined: Tue Jul 04, 2006 6:16 pm
Re: My 64 camper Blog
by henk » Thu Nov 20, 2014 4:26 pm
Nice build,with interesting pictures.
Henk!!!
Henk!!!
henk
Registered user
Posts: 106
Joined: Mon Jul 07, 2014 4:03 pm
Re: My 64 camper Blog
by ..Rustbuster.. » Sat Nov 22, 2014 12:08 pm
Nice bus and great work your doing there, those Porsche callipers look amazing mate.
Nice one for the beam! Had to get out of the car myself as the helper was asleep
Marco
Nice one for the beam! Had to get out of the car myself as the helper was asleep
Marco
..Rustbuster..
SSVC Member
Posts: 32
Joined: Mon Oct 27, 2014 3:08 pm
Re: My 64 camper Blog
by orange » Sat Nov 22, 2014 9:37 pm
Cheers Marco, could not have been easy moving the beam, good luck with your build, keep us updated on your progress, catch you later.
orange
Registered user
Posts: 312
Joined: Tue Jul 04, 2006 6:16 pm
