You are viewing the Split Screen Van Club forum archive.
The forum archive is read-only.Unfortunately in 2021 the Split Screen Van Club forum suffered a ransomware attack and lots of the forum data was lost.
What threads that have been recovered are now searchable on this site. Some threads may be incomplete and some images are still being recovered.
Forum archive search
Fergy
by MartRogers » Thu Dec 10, 2015 4:18 pm
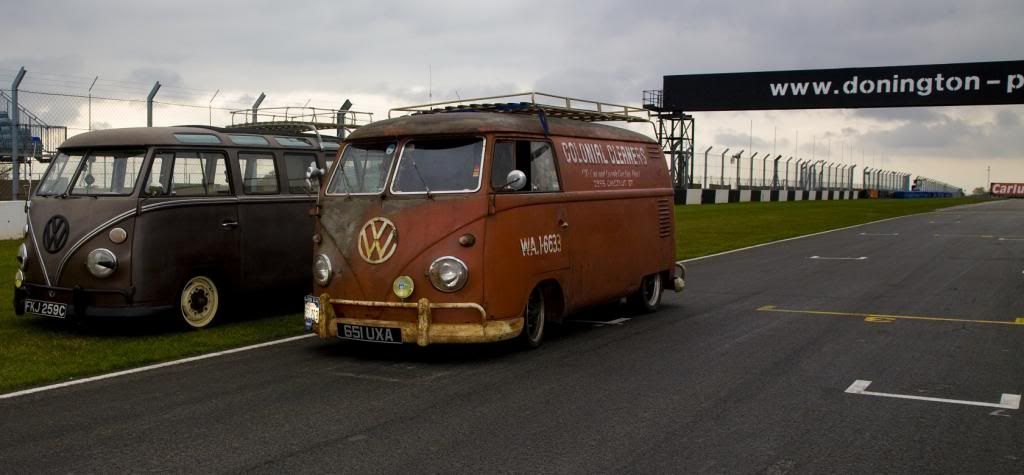
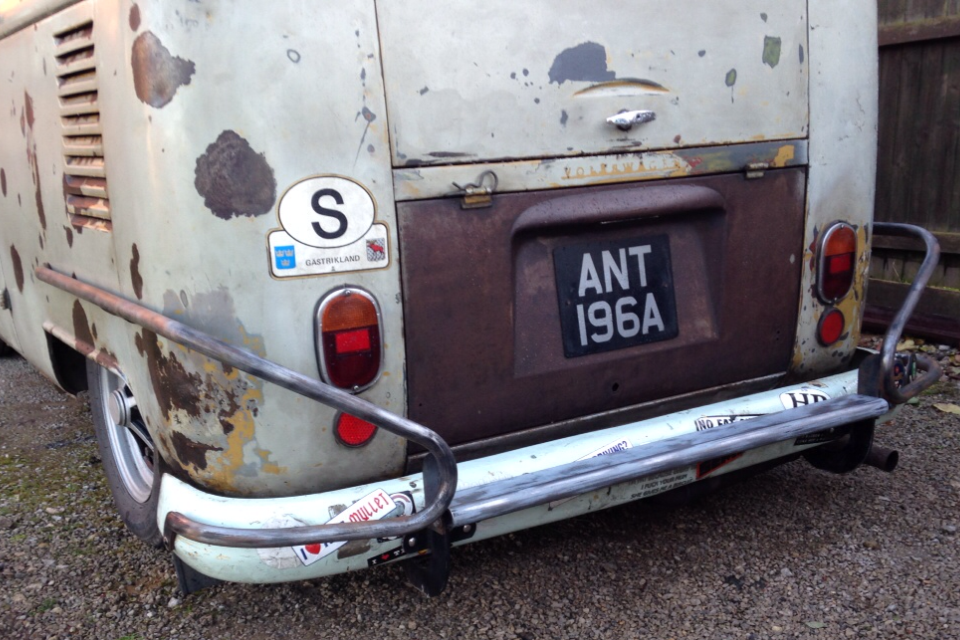
Well I acquired this a few months back and decided it's time I got some pictures up before I lose them , it's a 1960 panel which appears to have been laid up in Alabama since 1974 going by the magazines and newspapers I found in the back. Plan is to repair rust, age as well as I can and run it stock. Initial plan was to ship it off for the welding but I quickly realised that would bankrupt me as I am also doing a lot of work on the house at the same time. Couple of pics for now .


Sent from my iPhone using Tapatalk
Sent from my iPhone using Tapatalk
MartRogers
SSVC Member
Posts: 399
Joined: Sun Jan 27, 2008 10:28 pm
Re: Fergy
by MartRogers » Thu Dec 10, 2015 4:20 pm
So have brought myself a welder after not touching one for about 15 years and in at the deep end !
Sent from my iPhone using Tapatalk
Sent from my iPhone using Tapatalk
MartRogers
SSVC Member
Posts: 399
Joined: Sun Jan 27, 2008 10:28 pm
Re: Fergy
by MartRogers » Thu Dec 10, 2015 5:08 pm
First bit of panel making and welding, gone from this

To this


Sent from my iPhone using Tapatalk
To this
Sent from my iPhone using Tapatalk
MartRogers
SSVC Member
Posts: 399
Joined: Sun Jan 27, 2008 10:28 pm
Re: Fergy
by MartRogers » Fri Dec 11, 2015 1:21 am
Top hats , heater tube and I beams out, what a crap job

Then new ones in along with b post inner and outer repairs and inner sills and step.

Onto this mess now

Went quite well and all ground back have me this

Had to fill the welds in a few times to get rid of pin holes as filler is not an option as it won't rust
Few Sprays with hydrogen peroxide and it's getting there, will match up better once the whole bus is anchor waxed

Then rear quarter , repair panels I have didn't have any lip to the wheel arch so decided to keep as much og as possible by cutting the required sections from the panel

Ground back with first coat of peroxide

And coming along nicely

Put a battery on this night also just for the hell of it and was shocked that almost all of the electrics including the bulbs and indicators still work
That will do for now,
Sent from my iPhone using Tapatalk
Then new ones in along with b post inner and outer repairs and inner sills and step.
Onto this mess now
Went quite well and all ground back have me this
Had to fill the welds in a few times to get rid of pin holes as filler is not an option as it won't rust
Few Sprays with hydrogen peroxide and it's getting there, will match up better once the whole bus is anchor waxed
Then rear quarter , repair panels I have didn't have any lip to the wheel arch so decided to keep as much og as possible by cutting the required sections from the panel
Ground back with first coat of peroxide
And coming along nicely
Put a battery on this night also just for the hell of it and was shocked that almost all of the electrics including the bulbs and indicators still work
That will do for now,
Sent from my iPhone using Tapatalk
MartRogers
SSVC Member
Posts: 399
Joined: Sun Jan 27, 2008 10:28 pm
Re: Fergy
by BlastingDiePast » Fri Dec 11, 2015 7:26 am
Nice work!
What colour you going to paint it......... . ... . . .
What colour you going to paint it......... . ... . . .
BlastingDiePast
SSVC Member
Posts: 1300
Joined: Sat Feb 02, 2013 7:16 pm
Re: Fergy
by MartRogers » Fri Dec 11, 2015 10:23 pm
Ha it may well get painted ... ...... When I'm dead
Sent from my iPhone using Tapatalk
Sent from my iPhone using Tapatalk
MartRogers
SSVC Member
Posts: 399
Joined: Sun Jan 27, 2008 10:28 pm
Re: Fergy
by MartRogers » Sat Dec 12, 2015 9:35 am
Then the one I was dreading, the metal is pretty thin on the long side so was expecting a lot of trouble. I enlisted the help of a chap from the pub who is an old school panel beater by trade who gave up his Sunday and worked some true magic


Dont seem to have any before pictures for some reason but it was in a bad way
Then spent an age grinding it all back, one thing to note we left all the strengtheners out at this point as they were all rotten and there was a bit of damage down the side that had been filled at some point, due to the fact it needed some beating nick just went for it and welded the whole side in about 20 mins, he then set to with his dolly and it was arrow straight in no time. Unfortunately I then welded all the strengtheners in and managed to pull part of the panel in so had to redo this area. All looking good now though
Bit of potion and a few more repairs above the line which turned out to be about ten pin holes that became much more than that ! Still needs some more potion buts it's getting there


Then moved onto the rear inner arches, closing panel in


And rear front and back with battery tray and a few repairs to the side and engine side tray, the side tray was in a bad way but was worth spending time on as chassis number stamped here.

And this bit is getting a bit of paint.

Sent from my iPhone using Tapatalk
Dont seem to have any before pictures for some reason but it was in a bad way
Then spent an age grinding it all back, one thing to note we left all the strengtheners out at this point as they were all rotten and there was a bit of damage down the side that had been filled at some point, due to the fact it needed some beating nick just went for it and welded the whole side in about 20 mins, he then set to with his dolly and it was arrow straight in no time. Unfortunately I then welded all the strengtheners in and managed to pull part of the panel in so had to redo this area. All looking good now though
Bit of potion and a few more repairs above the line which turned out to be about ten pin holes that became much more than that ! Still needs some more potion buts it's getting there
Then moved onto the rear inner arches, closing panel in
And rear front and back with battery tray and a few repairs to the side and engine side tray, the side tray was in a bad way but was worth spending time on as chassis number stamped here.
And this bit is getting a bit of paint.
Sent from my iPhone using Tapatalk
MartRogers
SSVC Member
Posts: 399
Joined: Sun Jan 27, 2008 10:28 pm
Re: Fergy
by MartRogers » Sat Dec 12, 2015 9:37 am

Sent from my iPhone using Tapatalk
MartRogers
SSVC Member
Posts: 399
Joined: Sun Jan 27, 2008 10:28 pm
Re: Fergy
by MartRogers » Mon Dec 14, 2015 8:31 am
Just about caught up with the last few months work now, this weekend was spent sorting the parcel shelf . Not a nice job, this was the previous section , no idea how it rusted quite this badly .

These two panels came from schofields

i cut the corner down to get it in place and then found out all the ribs are different widths apart and I had cut the wrong side grrr.
Anyway welded the corner back on and out it the other way, after lots of careful measuring and taking it in and out about twenty times it fits pretty well, all of the rib spacing worked out spot on apart from having to cut two inches off one side which left me short on the other so had to make a strip to go down this side. Still needs a bit of tidying and I need to do something on one of the sides where it's rotted a bit higher.


Then made a panel to sort the left side inner arch and welded that in, back is just about down now


Time to move into the front !

Sent from my iPhone using Tapatalk
These two panels came from schofields
i cut the corner down to get it in place and then found out all the ribs are different widths apart and I had cut the wrong side grrr.
Anyway welded the corner back on and out it the other way, after lots of careful measuring and taking it in and out about twenty times it fits pretty well, all of the rib spacing worked out spot on apart from having to cut two inches off one side which left me short on the other so had to make a strip to go down this side. Still needs a bit of tidying and I need to do something on one of the sides where it's rotted a bit higher.
Then made a panel to sort the left side inner arch and welded that in, back is just about down now
Time to move into the front !
Sent from my iPhone using Tapatalk
MartRogers
SSVC Member
Posts: 399
Joined: Sun Jan 27, 2008 10:28 pm
Re: Fergy
by MartRogers » Mon Dec 14, 2015 8:40 am
Oh and the rear panel as well.. I was determined to keep the original but offered up a new one to try it..

Didn't look right so set to cutting all the rot off the old one and very carefully stitching the two together


Just got to sort the engine lid now
Sent from my iPhone using Tapatalk
Didn't look right so set to cutting all the rot off the old one and very carefully stitching the two together
Just got to sort the engine lid now
Sent from my iPhone using Tapatalk
MartRogers
SSVC Member
Posts: 399
Joined: Sun Jan 27, 2008 10:28 pm
Re: Fergy
by blink » Mon Dec 14, 2015 9:18 am
THis think is amazing!!!
love the look of the van! like the acid wash on the repairs too.
More photos and work please lol
love the look of the van! like the acid wash on the repairs too.
More photos and work please lol
blink
Registered user
Posts: 78
Joined: Sat Aug 22, 2009 9:16 am
Re: Fergy
by MartRogers » Mon Dec 14, 2015 9:59 am
Ha that's me up to date so they will come a bit slower now, here is a vid of the peroxide in action, mixed up with some salt and it sets to really quick. You can see it rust in front of your eyes and see the smoke / steam ? Coming off it !
https://vimeo.com/148852964
Sent from my iPhone using Tapatalk
Sent from my iPhone using Tapatalk
MartRogers
SSVC Member
Posts: 399
Joined: Sun Jan 27, 2008 10:28 pm
Re: Fergy
by Max Last » Mon Dec 14, 2015 9:39 pm
Excellent stuff Martin, mind the carpet though, be a shame to ruin it! Fergy will be at the sheikhs in no time!
Max Last
SSVC Member
Posts: 1480
Joined: Fri Dec 26, 2008 7:56 pm
Re: Fergy
by MartRogers » Tue Dec 15, 2015 12:28 am
There are one or two slight burns and a few grinder cuts, certainly won't be going back in the front room now
hoping for mot in Feb / March so depending how long reg takes the sheikhs may be a possibility
Sent from my iPhone using Tapatalk
hoping for mot in Feb / March so depending how long reg takes the sheikhs may be a possibility
Sent from my iPhone using Tapatalk
MartRogers
SSVC Member
Posts: 399
Joined: Sun Jan 27, 2008 10:28 pm
Re: Fergy
by Glenn Yale » Tue Dec 15, 2015 10:24 pm
That's awesome, love how you did the engine lid hinge panel.
Glenn Yale
SSVC Member
Posts: 29
Joined: Tue Sep 09, 2014 9:14 pm