You are viewing the Split Screen Van Club forum archive.
The forum archive is read-only.Unfortunately in 2021 the Split Screen Van Club forum suffered a ransomware attack and lots of the forum data was lost.
What threads that have been recovered are now searchable on this site. Some threads may be incomplete and some images are still being recovered.
Forum archive search
Single Garage Resto...
by oilyragg » Sat Aug 20, 2016 9:41 pm
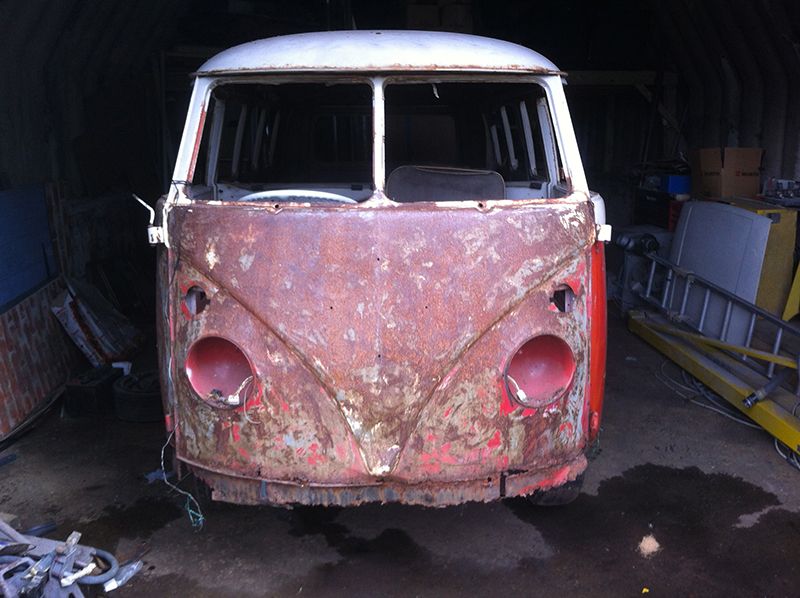
I've been meaning to do a build thread for ages so here goes!
I'm not new to restoration but its the first time i'm doing it in my single garage and boy is it tight!
I have worked on the bus for about a year and a half working evenings and weekends and posted a few bits on the SSVC Facebook page but here is the full build up until Aug 2016
Not many words from me i'll let the photos do the talking.
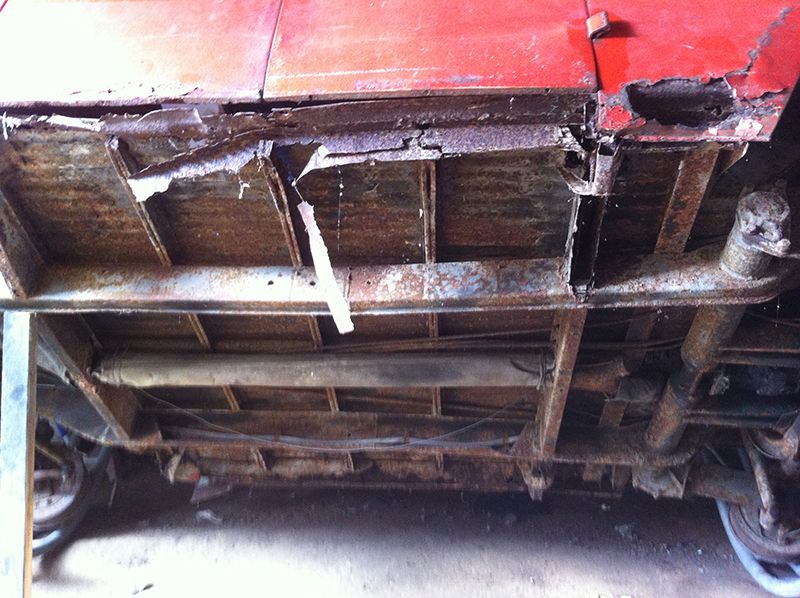
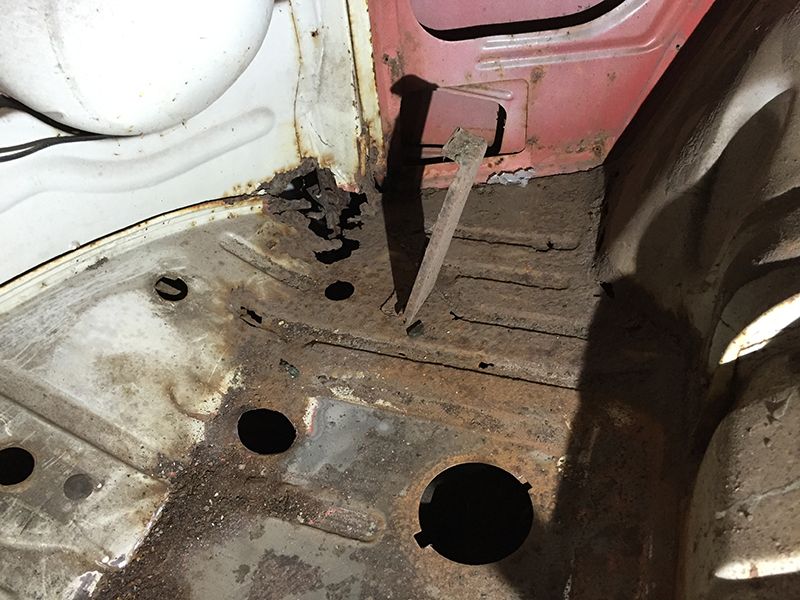
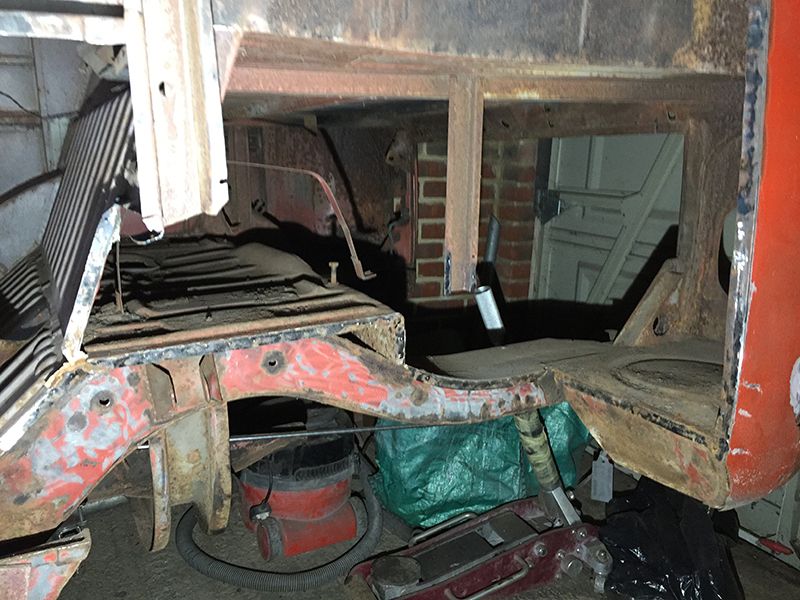
First off to replace the floor...
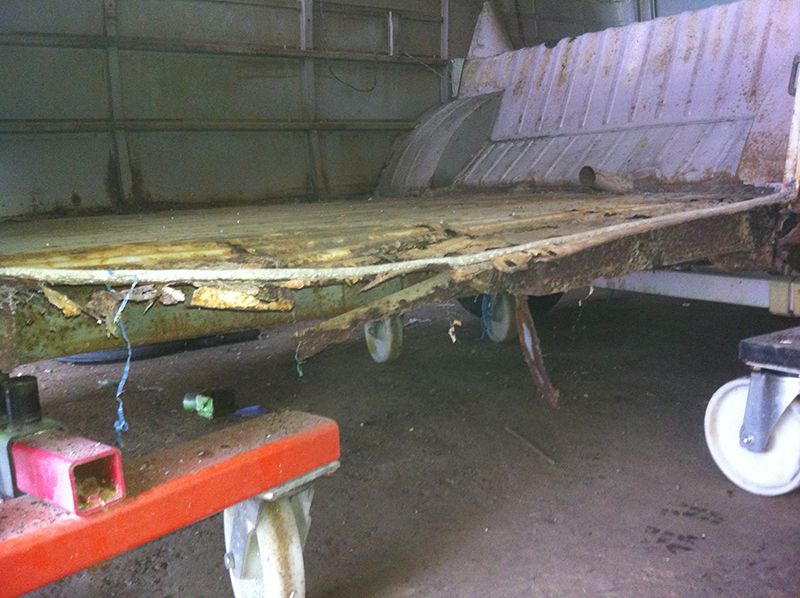

All 'I' beams and top hats rotten as well as all tubes, in fact the heater tube fell off when i jacked it up
Chassis is in good nick though after a clean up
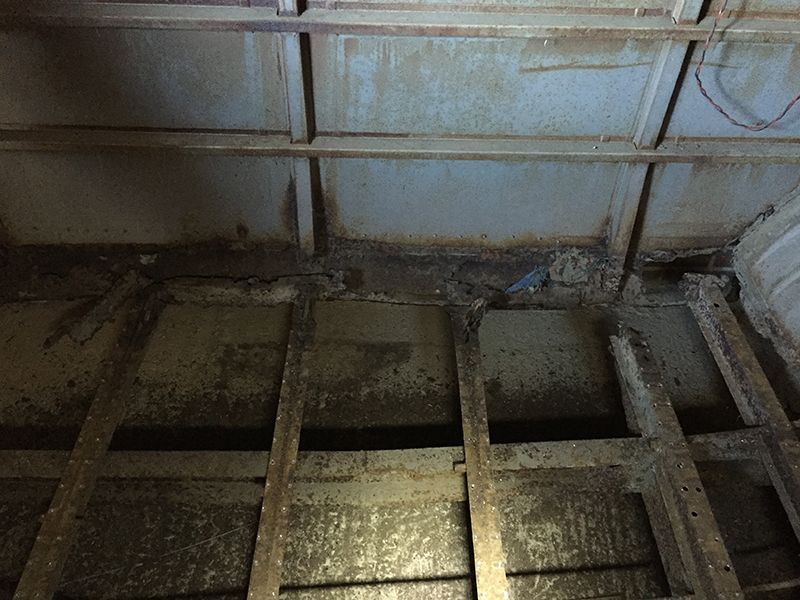
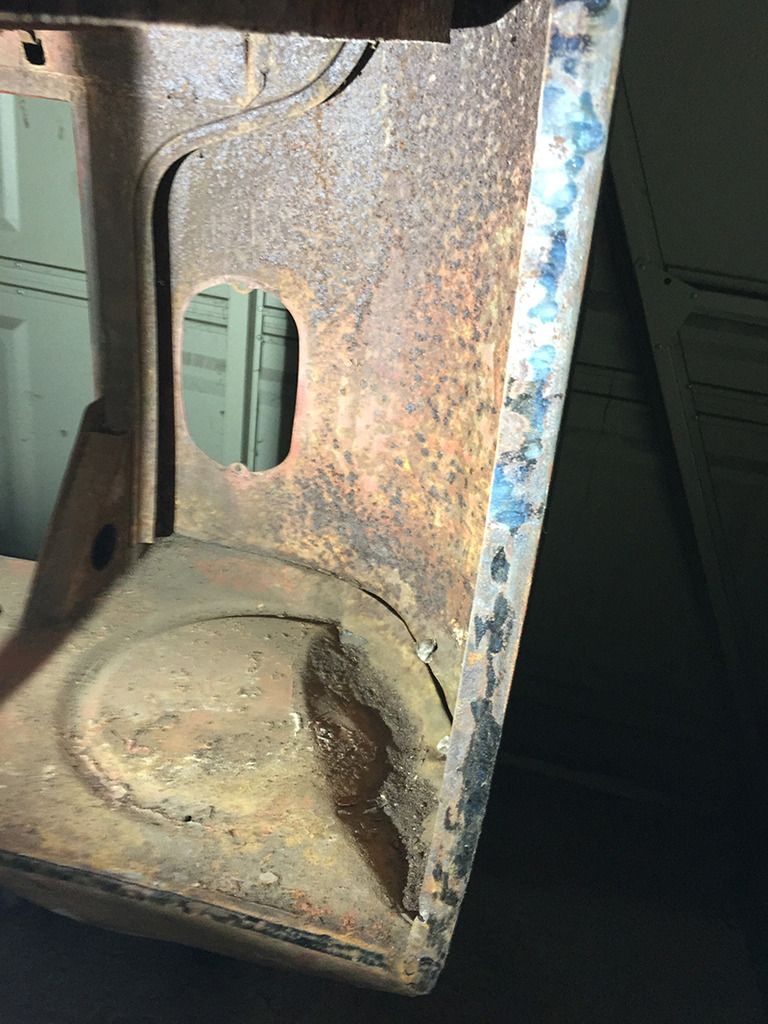
new parts ordered and Epoxied before welding in

new bulkhead panel made and cross member welded in
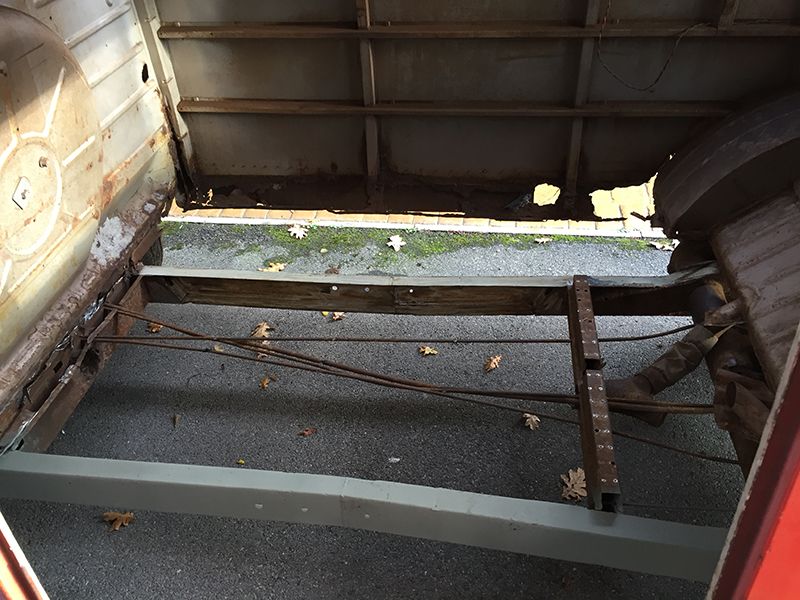
Lots of welding done and almost everything in the pic is a new. The old stuff just crumbled in my fist it was that bad
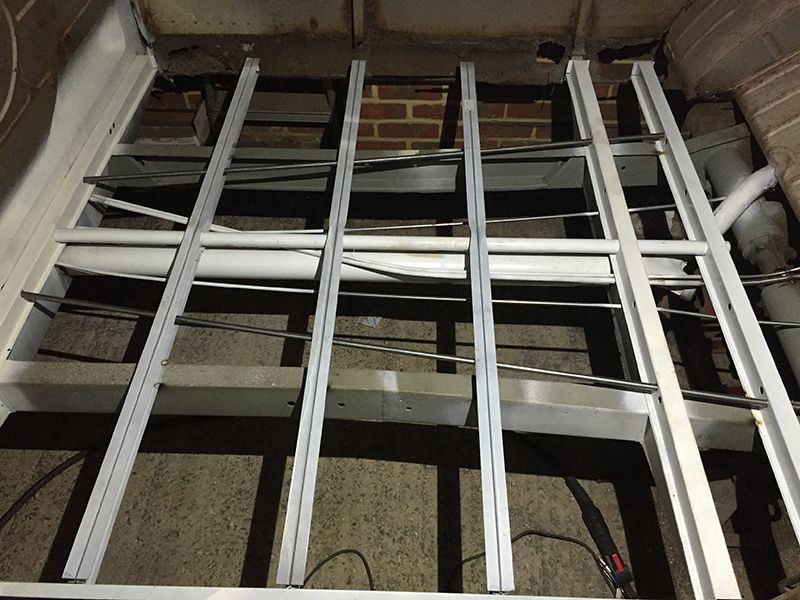
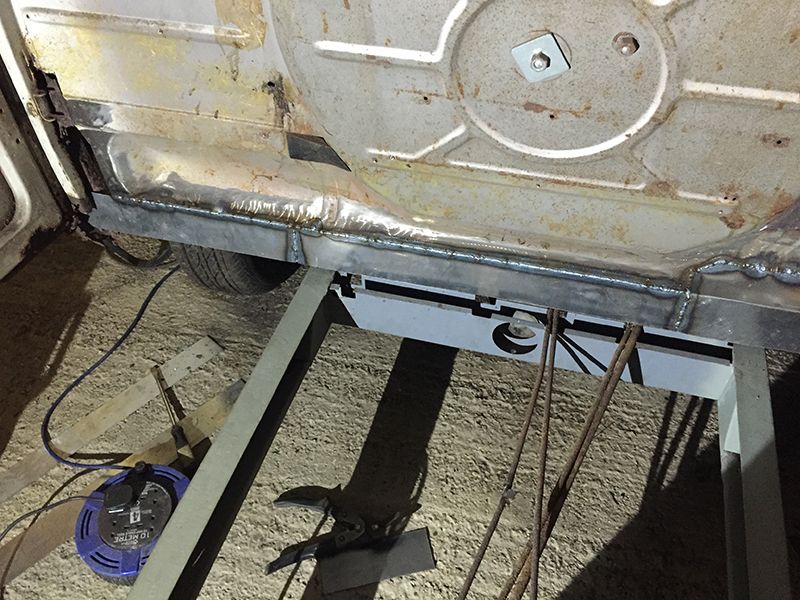
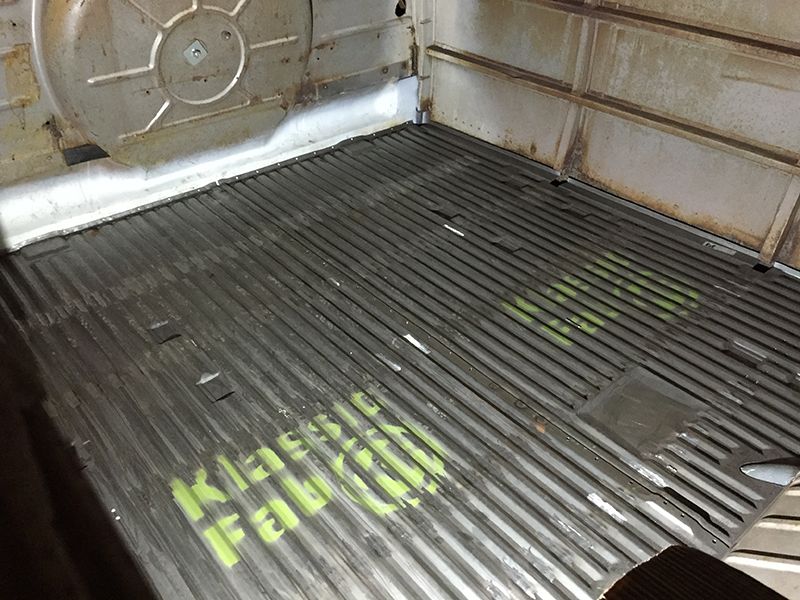
Floor fitted (including rear lip) and welds cleaned up. That was a long day of drilling/welding/grinding!
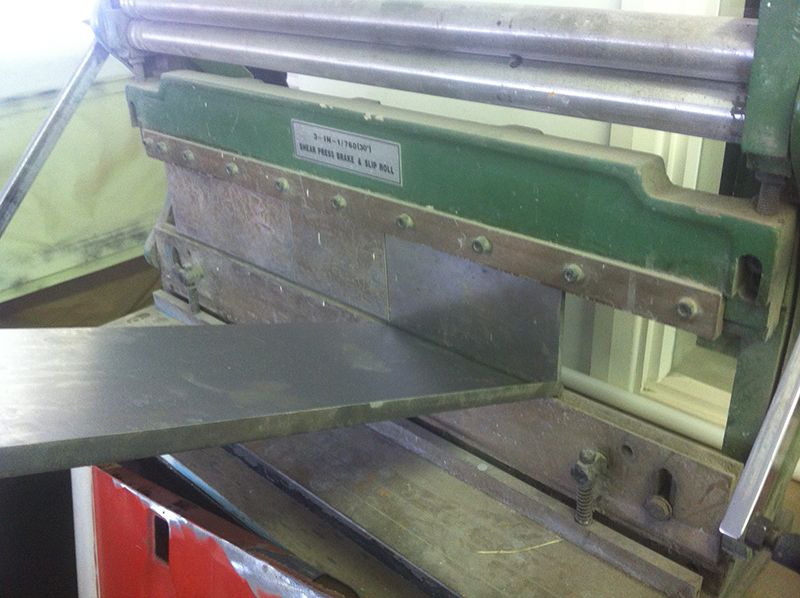
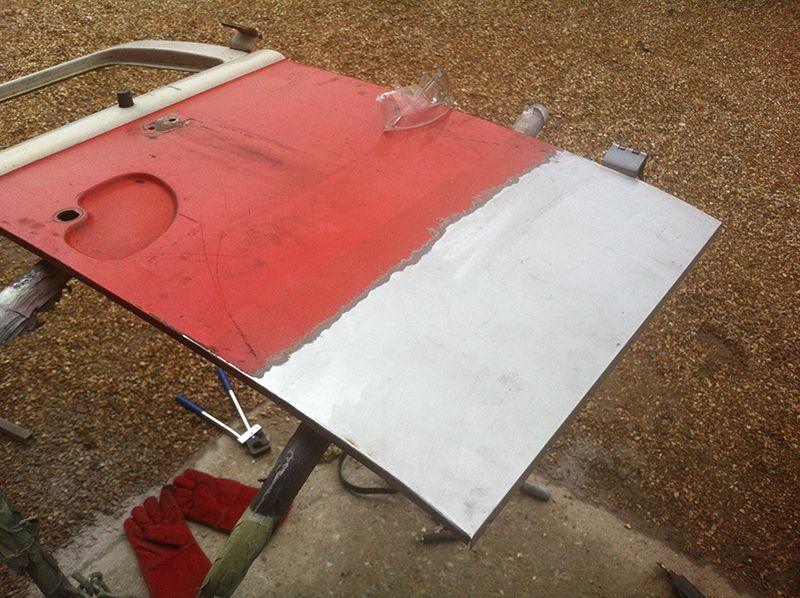
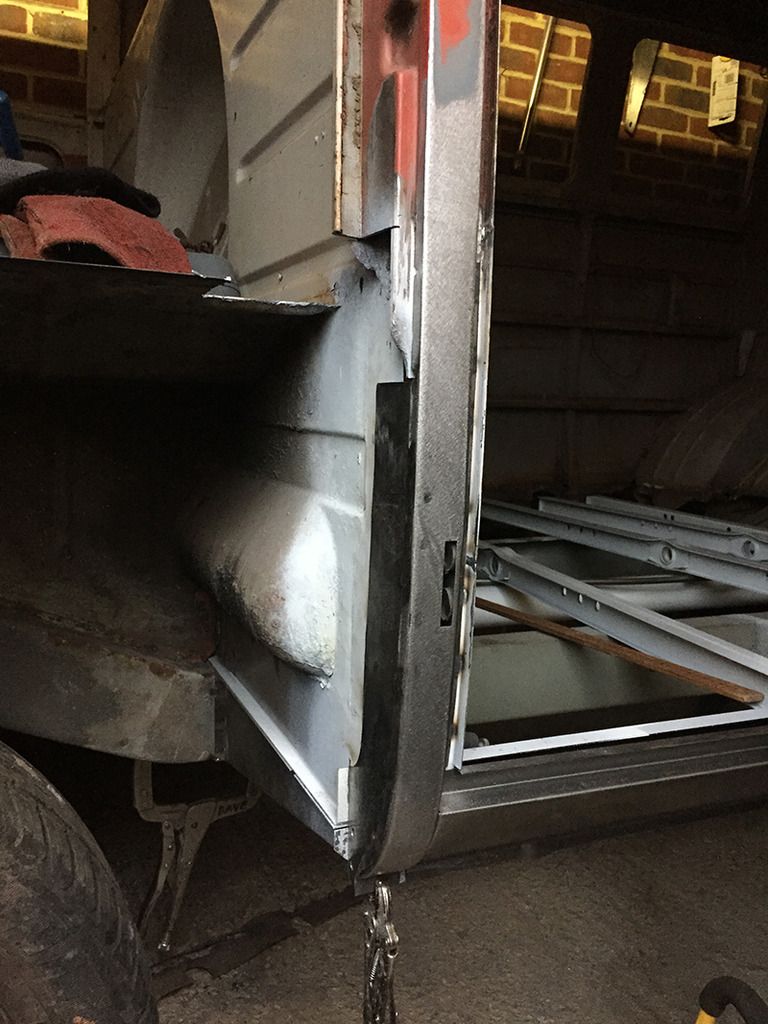
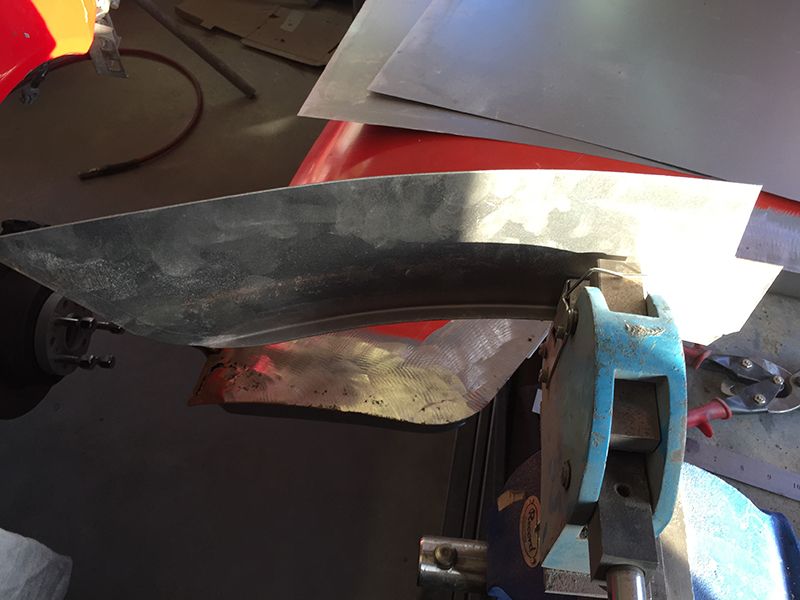
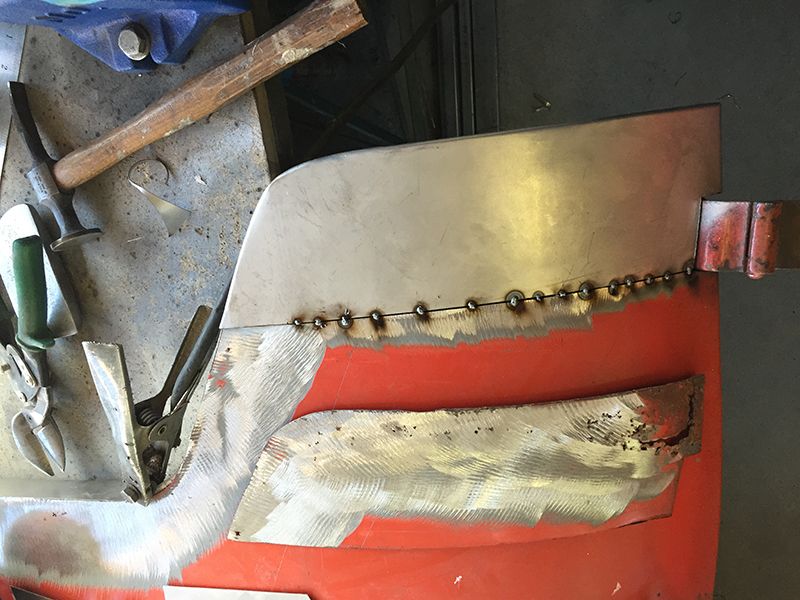
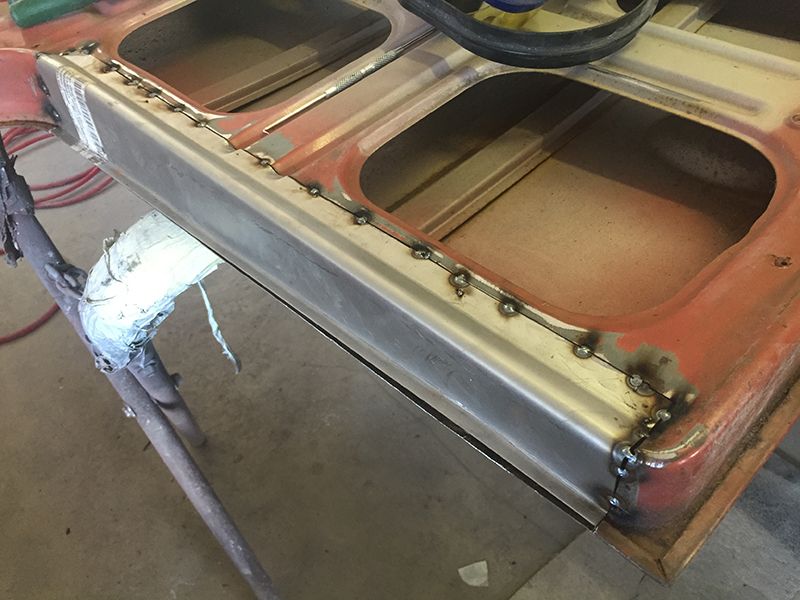
Onto the cargo doors, I decided to make the lower skins...
bending...
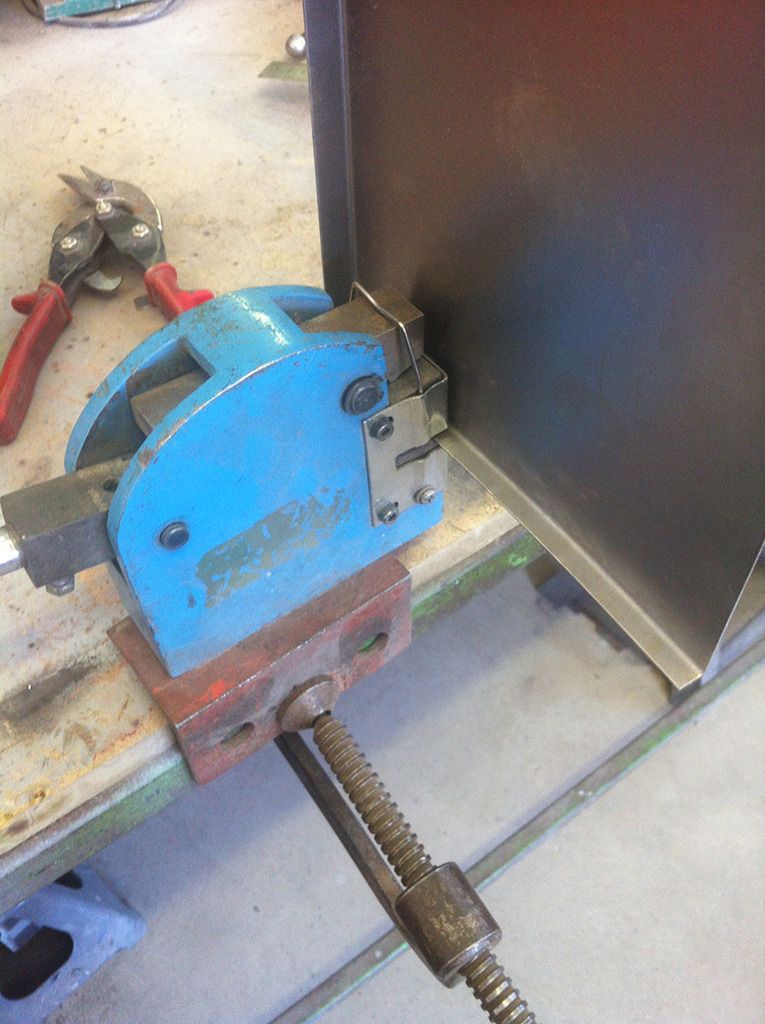
Then shrinking...
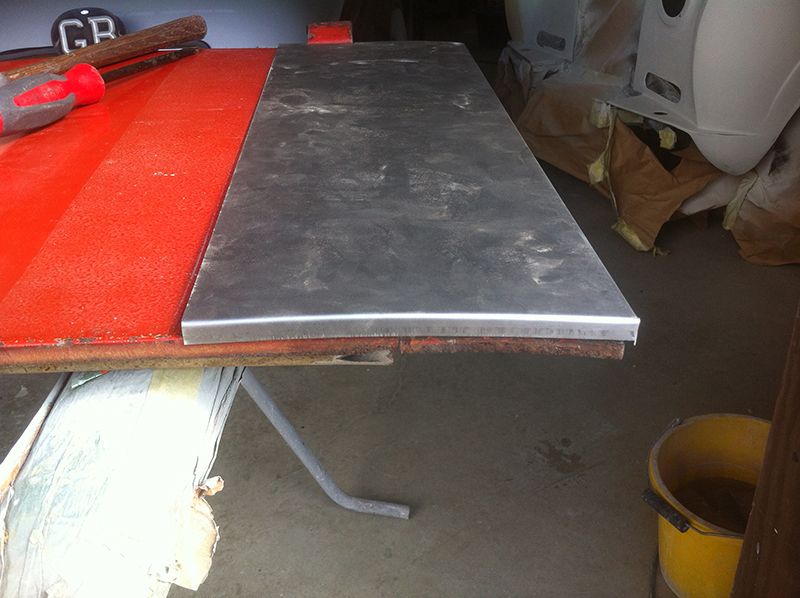
Then welding. I always Butt weld so you can't see the join.
I'm not new to restoration but its the first time i'm doing it in my single garage and boy is it tight!
I have worked on the bus for about a year and a half working evenings and weekends and posted a few bits on the SSVC Facebook page but here is the full build up until Aug 2016
Not many words from me i'll let the photos do the talking.


First off to replace the floor...
All 'I' beams and top hats rotten as well as all tubes, in fact the heater tube fell off when i jacked it up
Chassis is in good nick though after a clean up
new parts ordered and Epoxied before welding in
new bulkhead panel made and cross member welded in
Lots of welding done and almost everything in the pic is a new. The old stuff just crumbled in my fist it was that bad
Floor fitted (including rear lip) and welds cleaned up. That was a long day of drilling/welding/grinding!
Onto the cargo doors, I decided to make the lower skins...
bending...
Then shrinking...
Then welding. I always Butt weld so you can't see the join.
oilyragg
Registered user
Posts: 231
Joined: Sat May 31, 2014 10:10 am
Re: Single Garage Resto...
by oilyragg » Sat Aug 20, 2016 9:43 pm
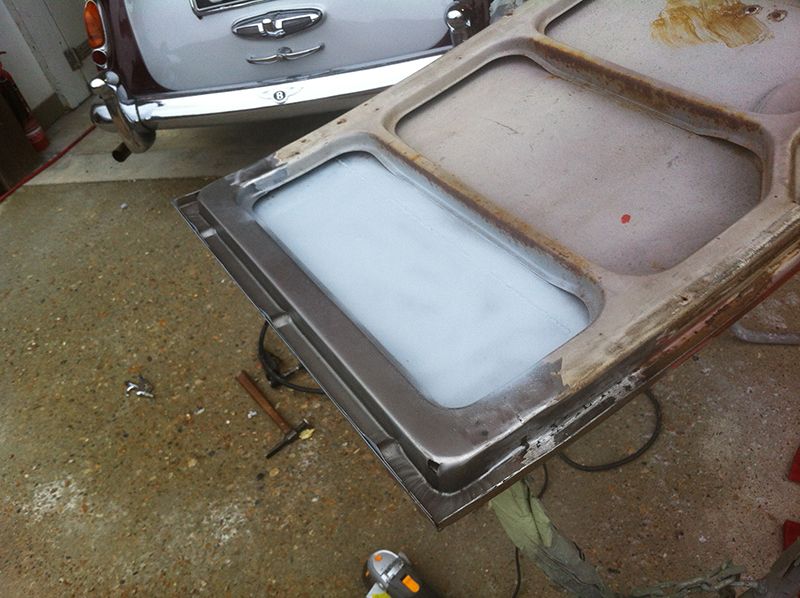
More epoxy
oilyragg
Registered user
Posts: 231
Joined: Sat May 31, 2014 10:10 am
Re: Single Garage Resto...
by oilyragg » Sat Aug 20, 2016 9:50 pm
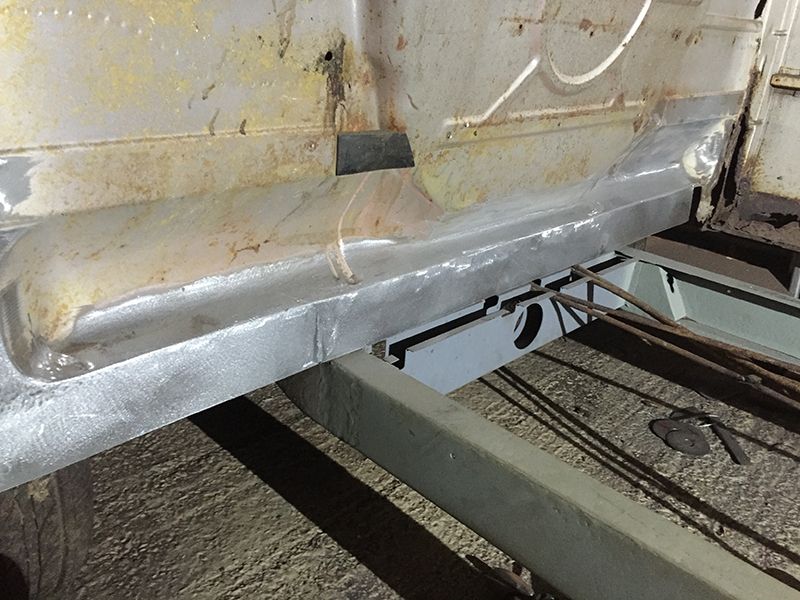
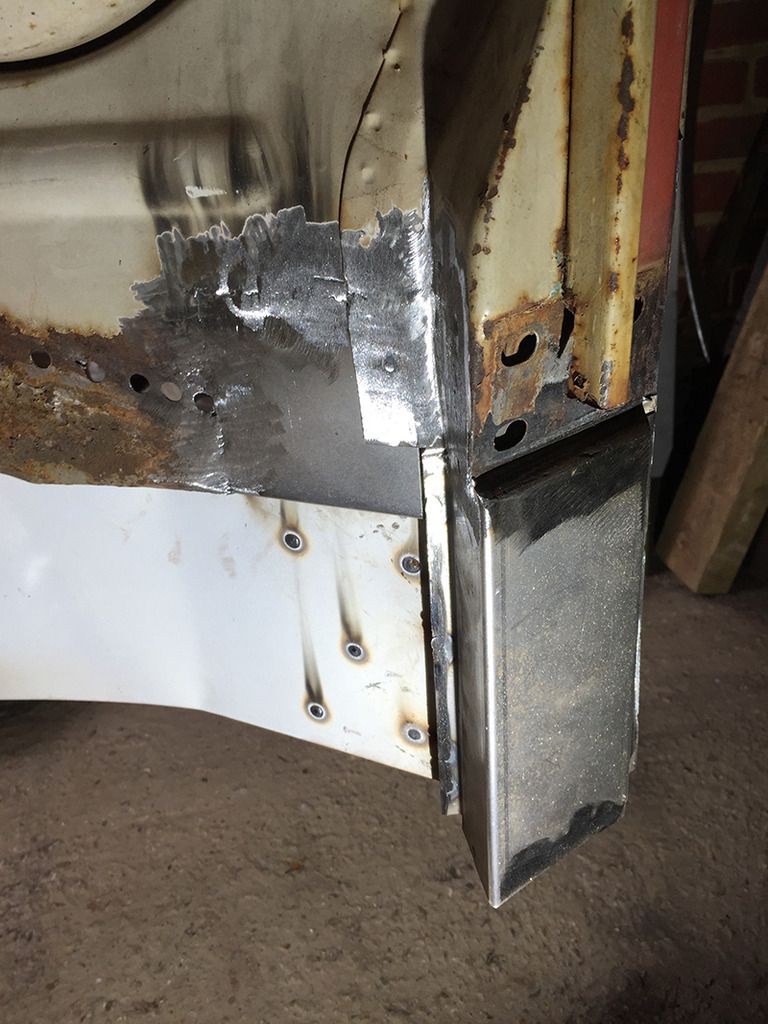
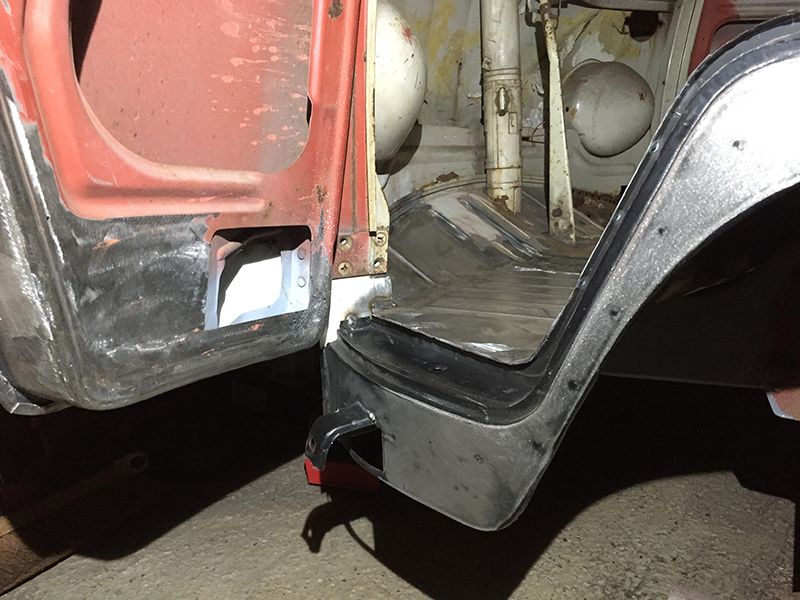
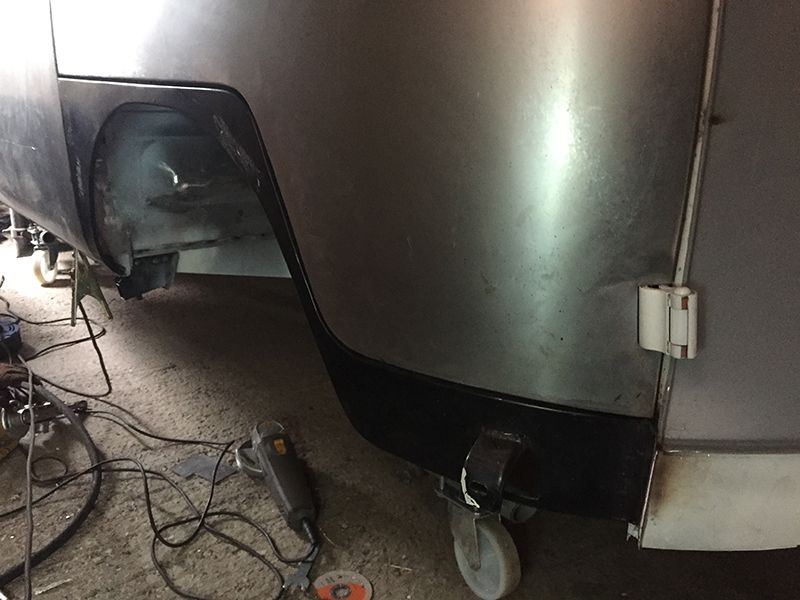
New lower B-post and cill on...
Check fitment of doors and front arch...
Check fitment of doors and front arch...
oilyragg
Registered user
Posts: 231
Joined: Sat May 31, 2014 10:10 am
Re: Single Garage Resto...
by oilyragg » Sat Aug 20, 2016 10:04 pm
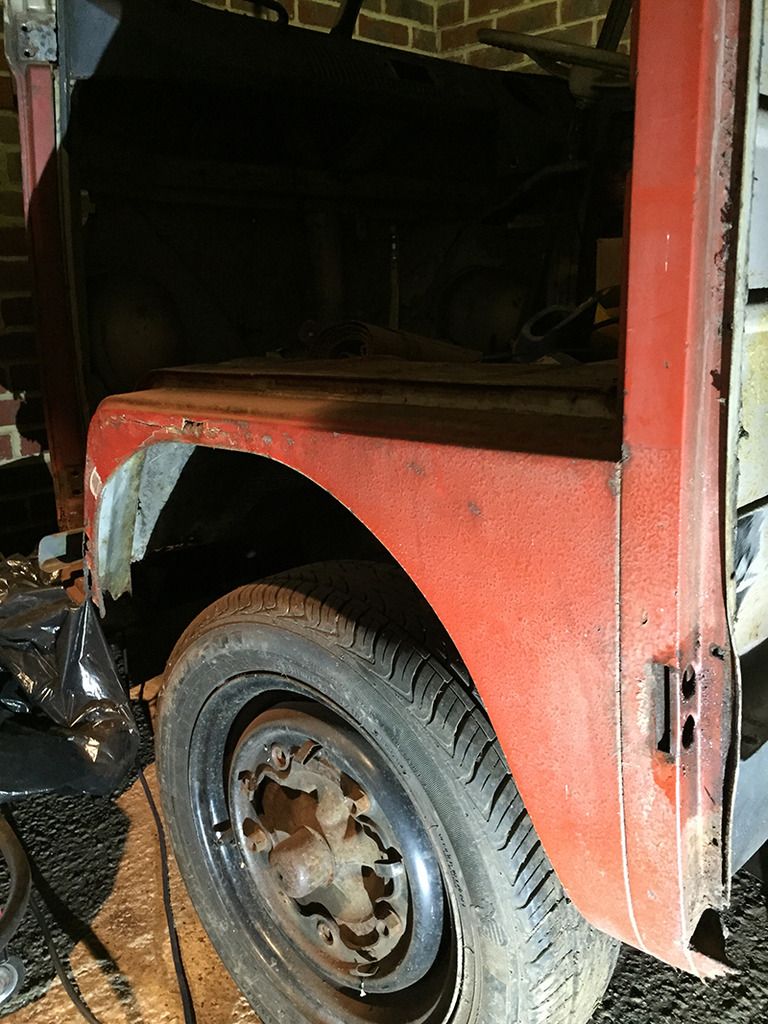
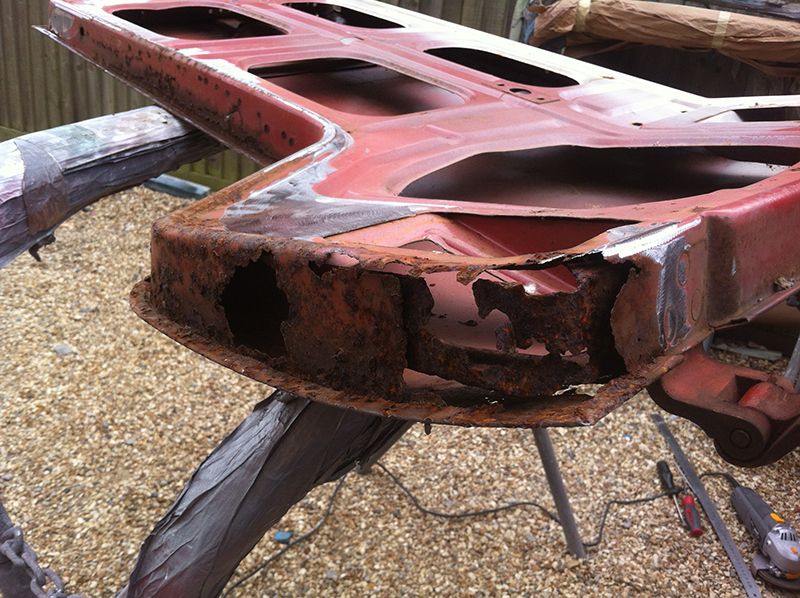
Then its on to the front...
Cut out old...
Replace with new...
I know a lot of you guys like to replace just the lower halfs on the nose but I find you end up filling a lot of the nose panel up to hide the long weld (nothing wrong with this IMO) but I wanted to keep filler to a minimum so I opted to change the whole front panel.

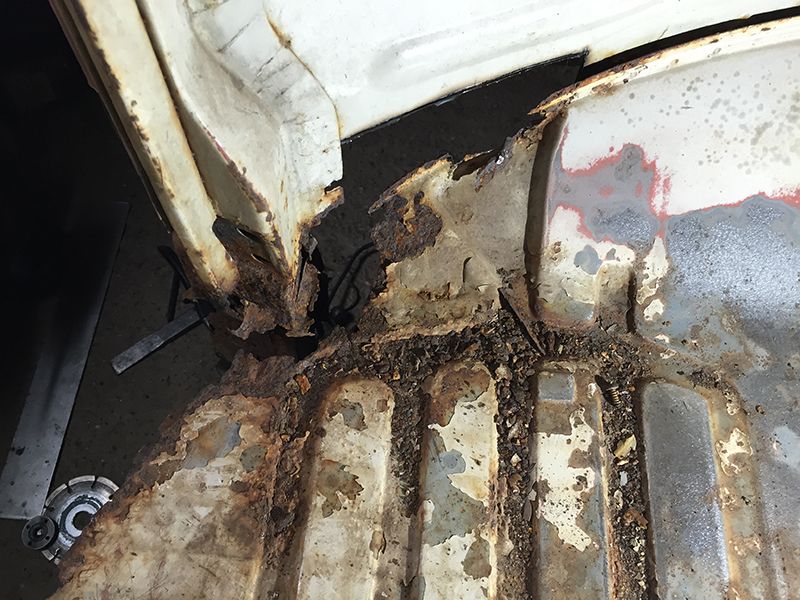
A-posts needed patching

cleaned and primed
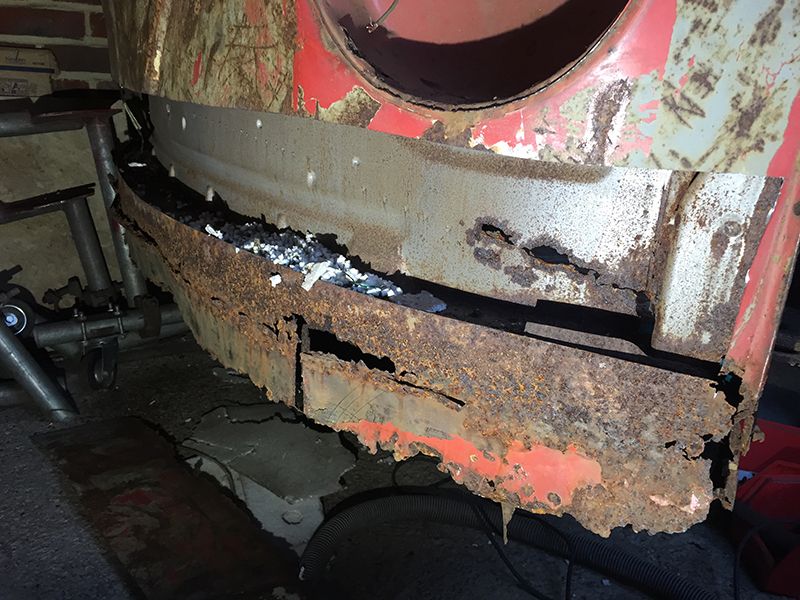
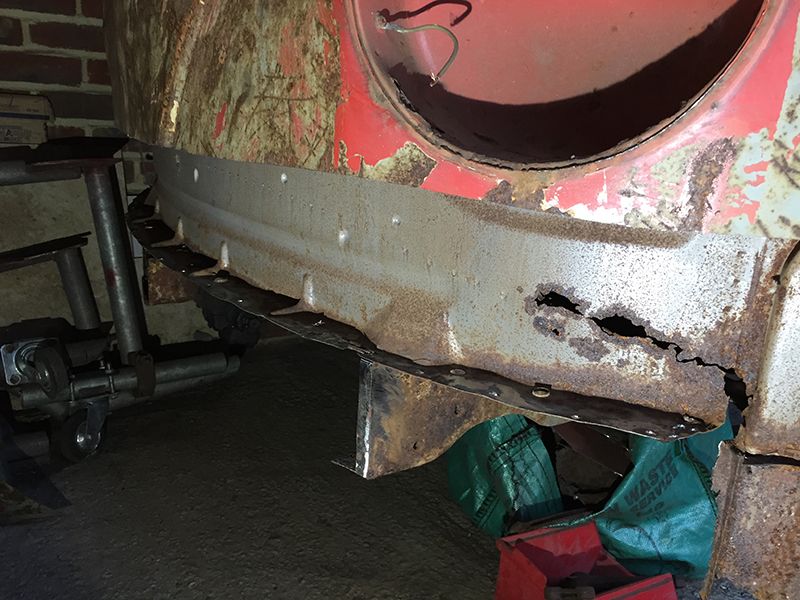
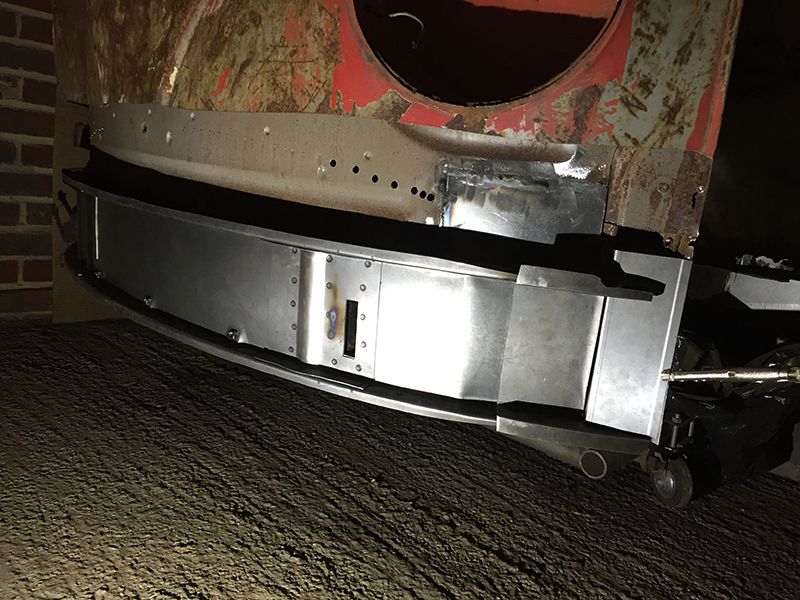
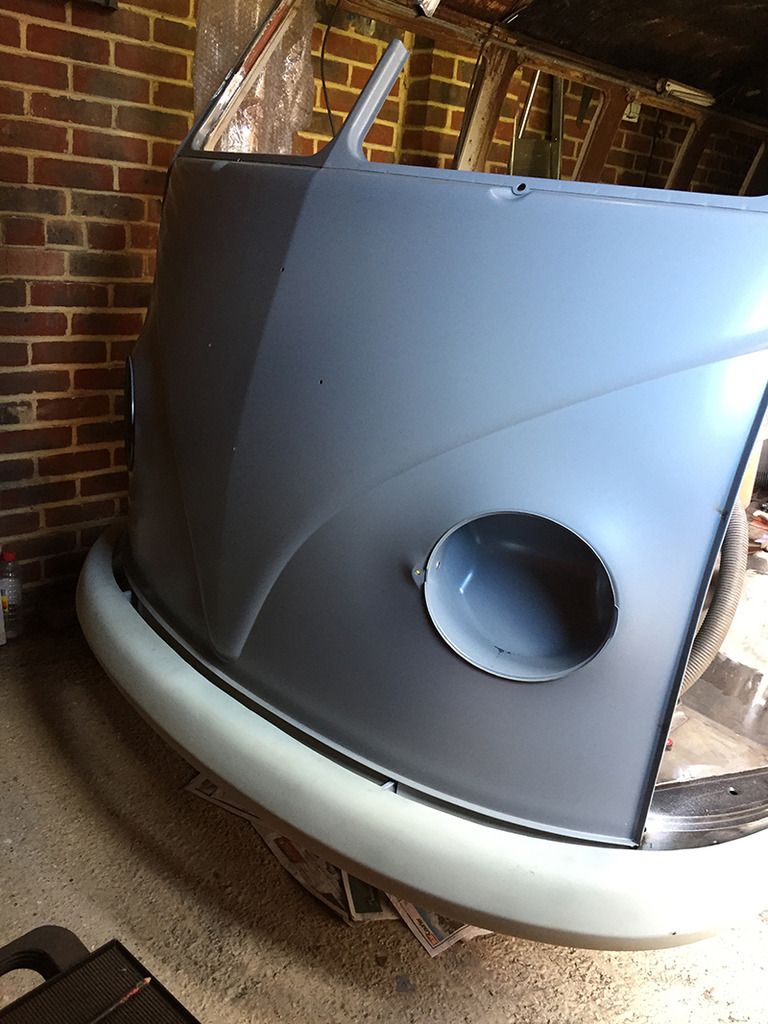
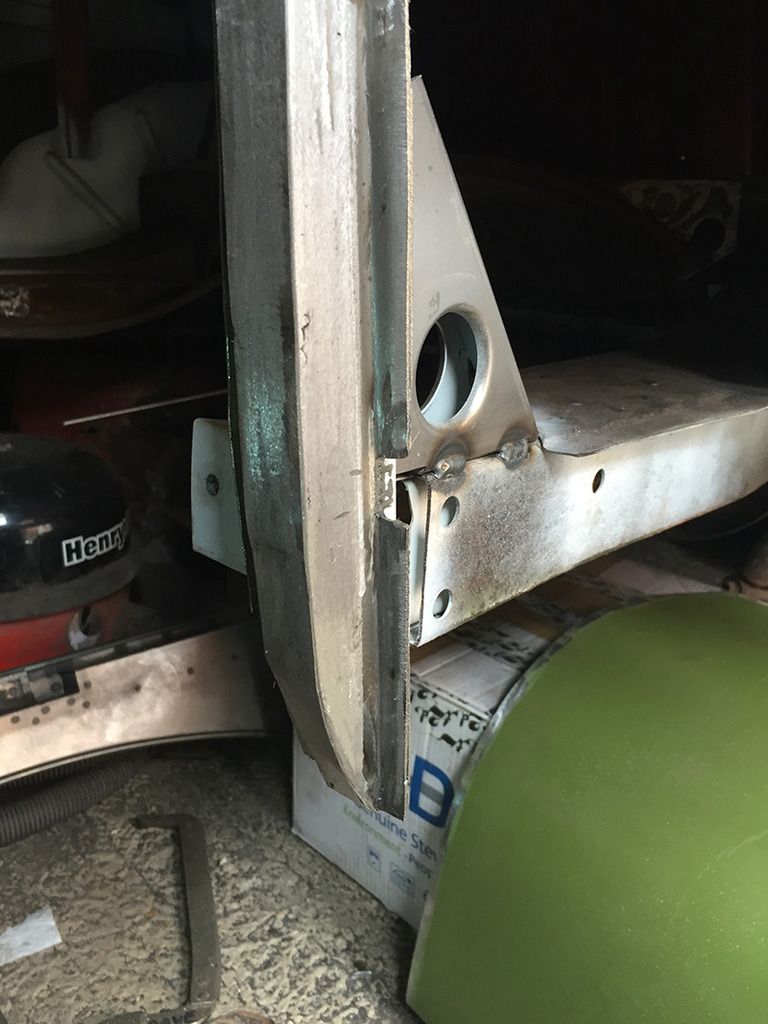
Nose is on and checked fitment of bumper. Large hole in centre pillar was not me getting my measurements wrong lol it had a dent and was rotten so made a new piece up.
Cut out old...
Replace with new...
I know a lot of you guys like to replace just the lower halfs on the nose but I find you end up filling a lot of the nose panel up to hide the long weld (nothing wrong with this IMO) but I wanted to keep filler to a minimum so I opted to change the whole front panel.
A-posts needed patching
cleaned and primed
Nose is on and checked fitment of bumper. Large hole in centre pillar was not me getting my measurements wrong lol it had a dent and was rotten so made a new piece up.
oilyragg
Registered user
Posts: 231
Joined: Sat May 31, 2014 10:10 am
Re: Single Garage Resto...
by oilyragg » Sat Aug 20, 2016 10:15 pm
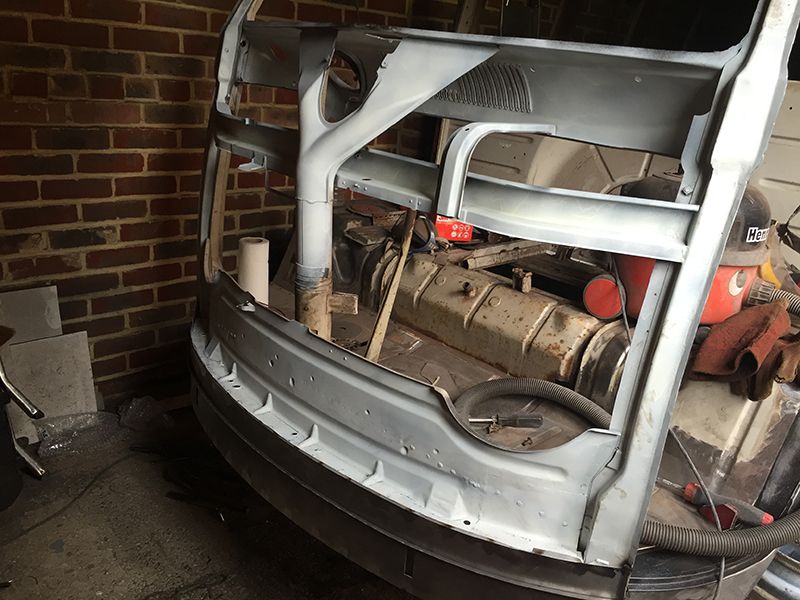
and safari's test fitted...all looking good
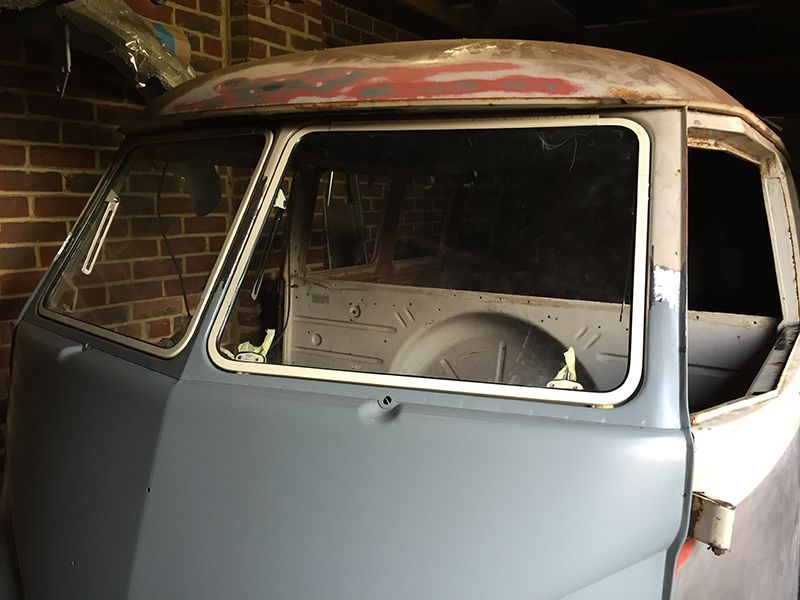
The inside needed new floor, inner A-posts and arch
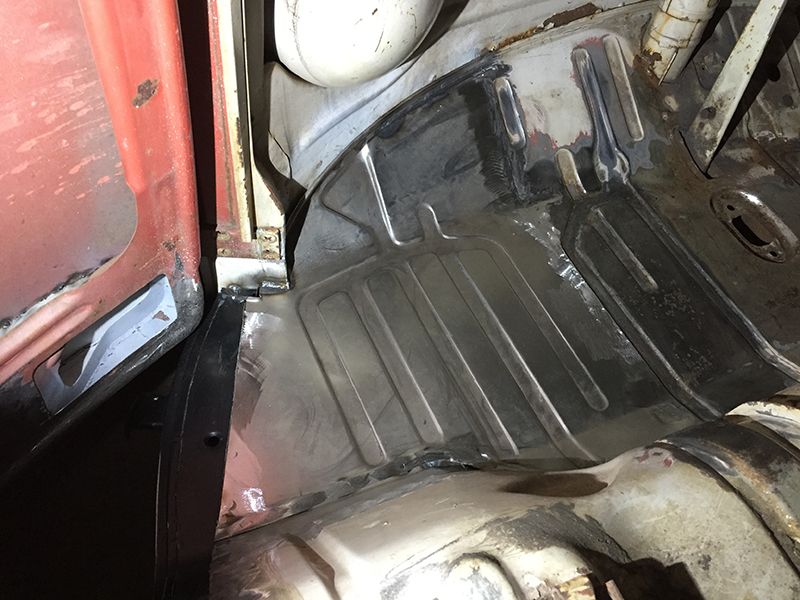
The inside needed new floor, inner A-posts and arch
oilyragg
Registered user
Posts: 231
Joined: Sat May 31, 2014 10:10 am
Re: Single Garage Resto...
by oilyragg » Sat Aug 20, 2016 10:36 pm
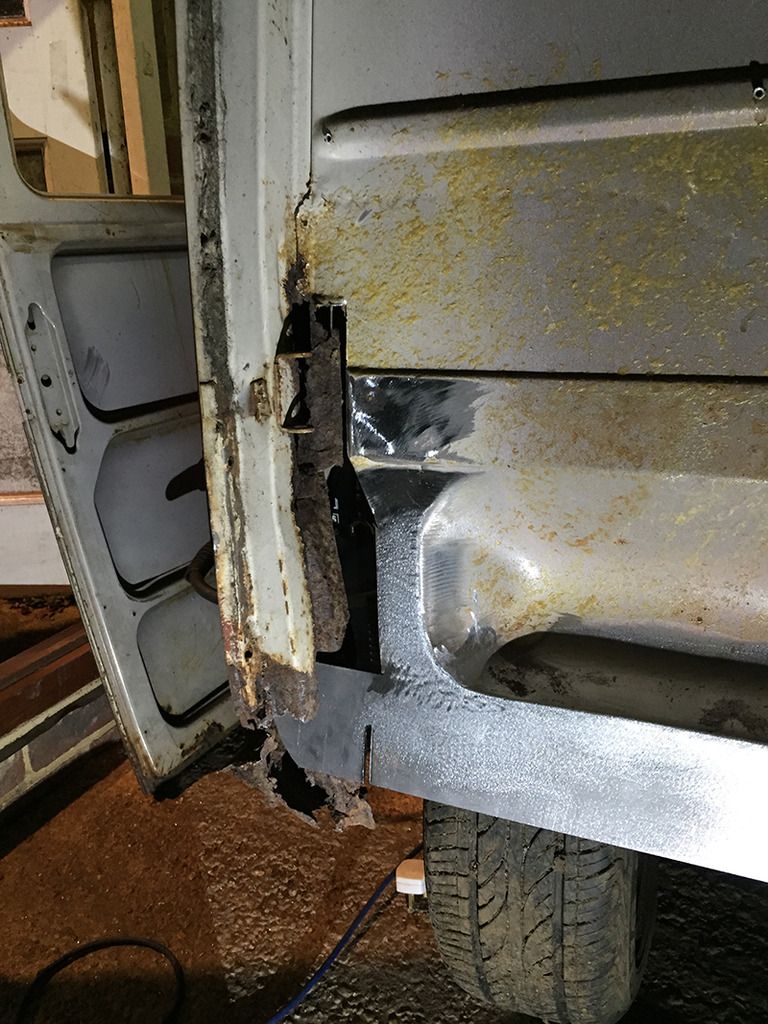
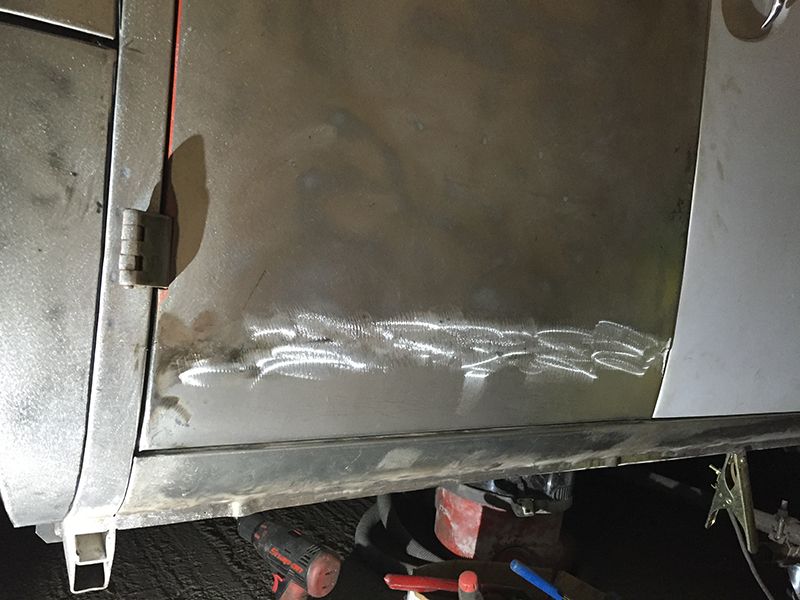
The cab doors were really bad inside and out
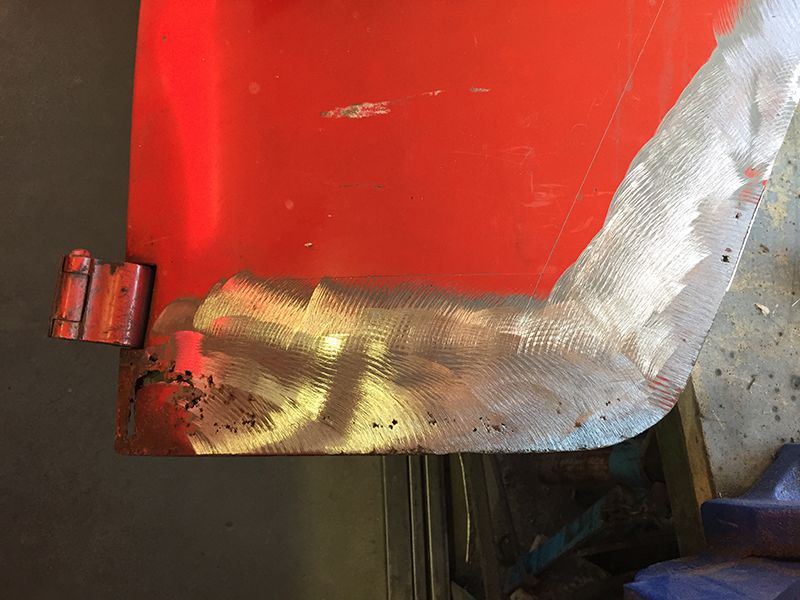
Back out with the shrinker..
I made new door bottoms for both doors as well as rebuilding both top and bottom hinge plates as the doors were dropping about 2" when opening due to cracks in the metal from fatigue. The tough bit was making the curved inner panel at the bottom of the door, it's a pig of a panel to make.
Check fitment before final weld.
oilyragg
Registered user
Posts: 231
Joined: Sat May 31, 2014 10:10 am
Re: Single Garage Resto...
by oilyragg » Sat Aug 20, 2016 10:41 pm
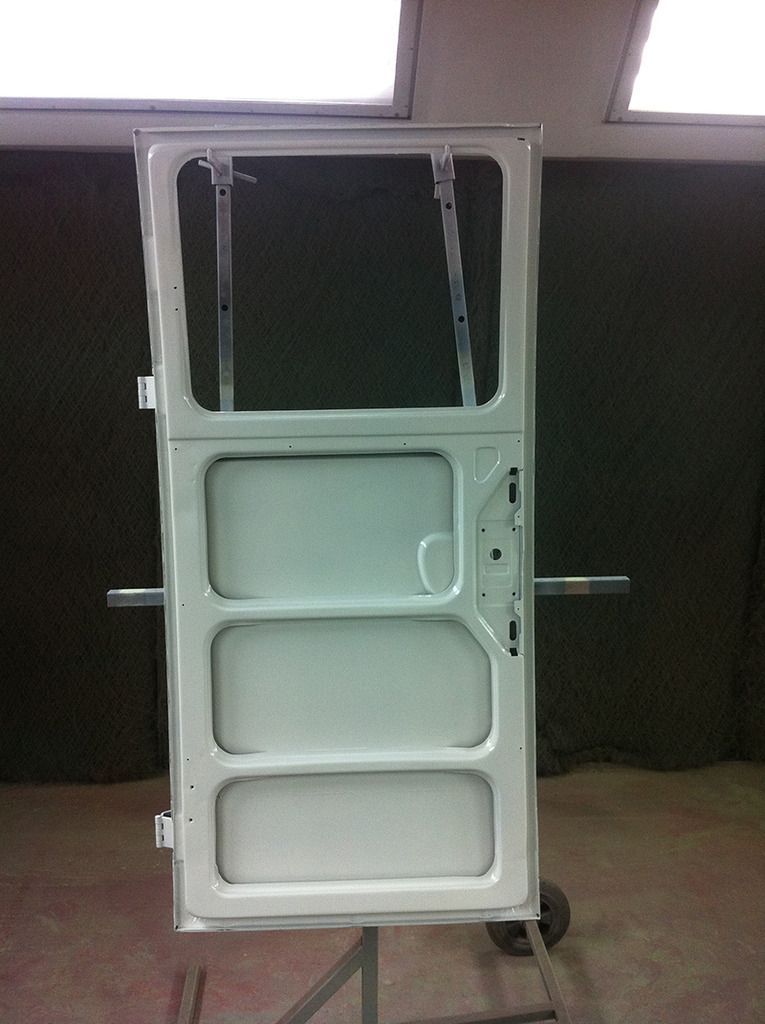
O/S door was even worse than N/S but then I hear that Klassicfab have started making door skins so I gave it a go

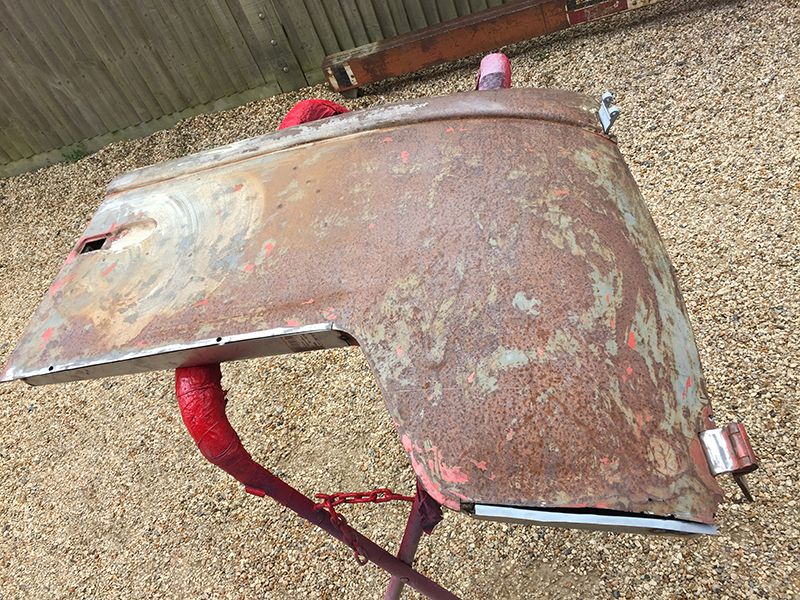
Good fit and it went on well
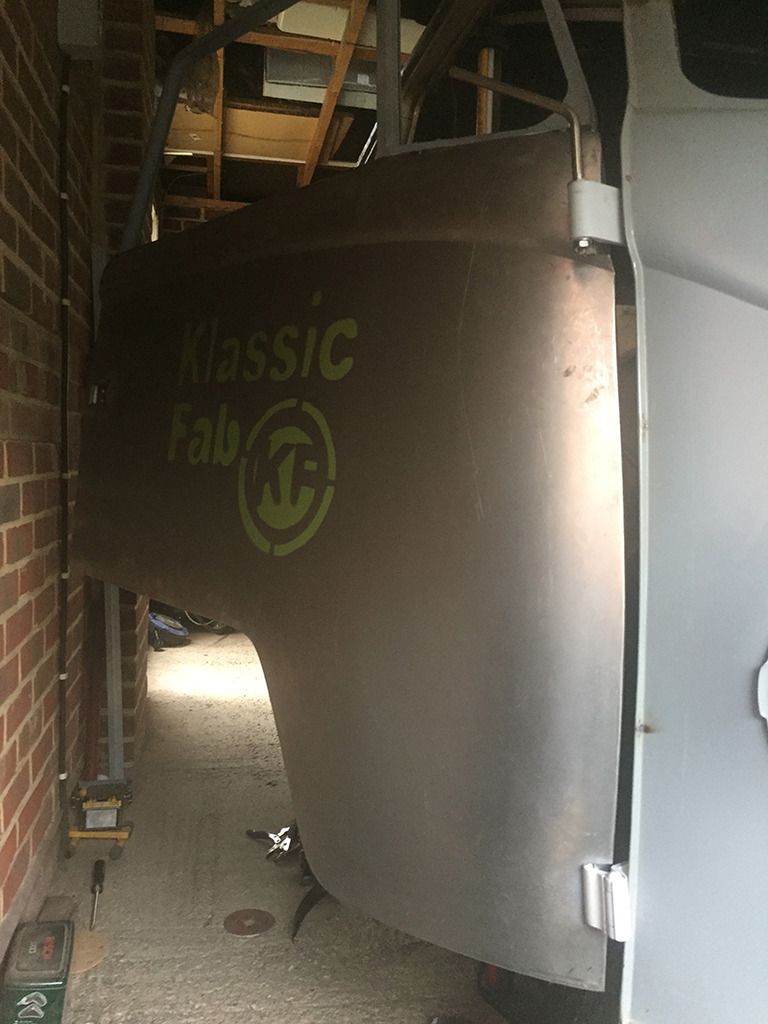
Good fit and it went on well
oilyragg
Registered user
Posts: 231
Joined: Sat May 31, 2014 10:10 am
Re: Single Garage Resto...
by oilyragg » Sat Aug 20, 2016 10:43 pm
and check for fit...
oilyragg
Registered user
Posts: 231
Joined: Sat May 31, 2014 10:10 am
Re: Single Garage Resto...
by oilyragg » Sat Aug 20, 2016 10:53 pm
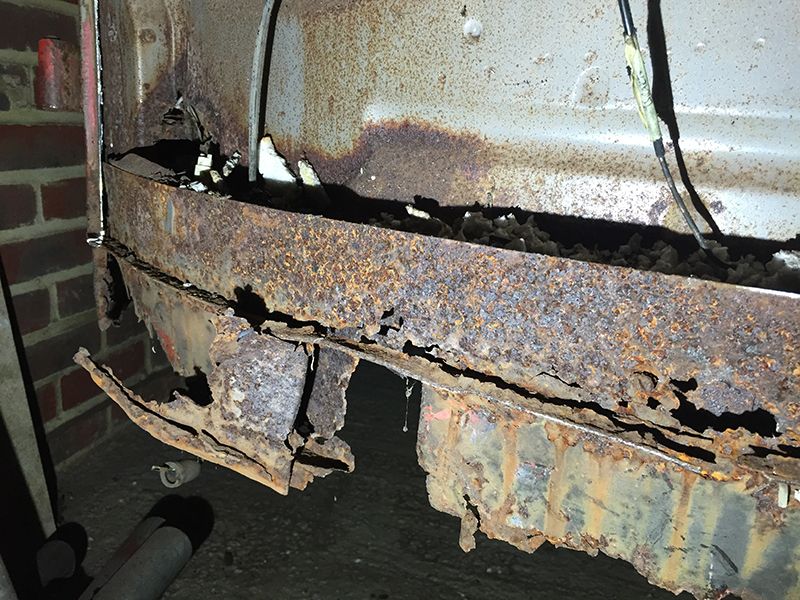
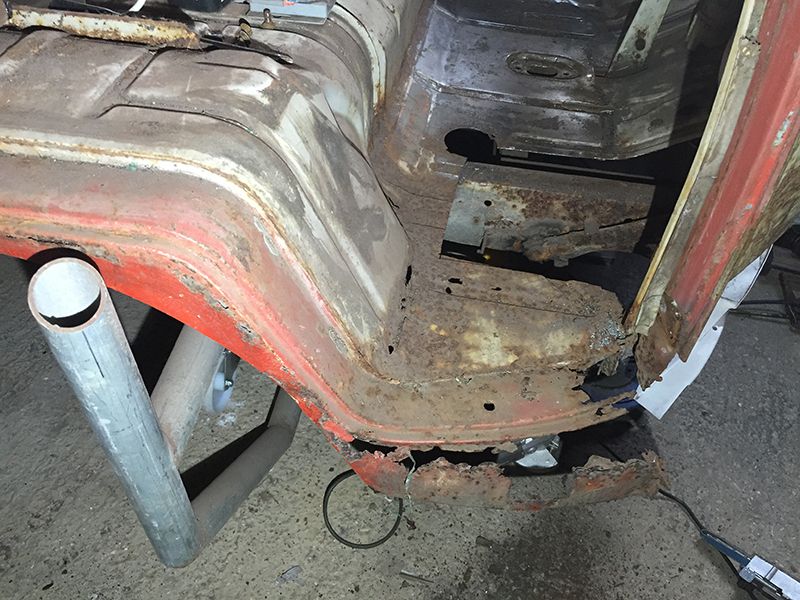
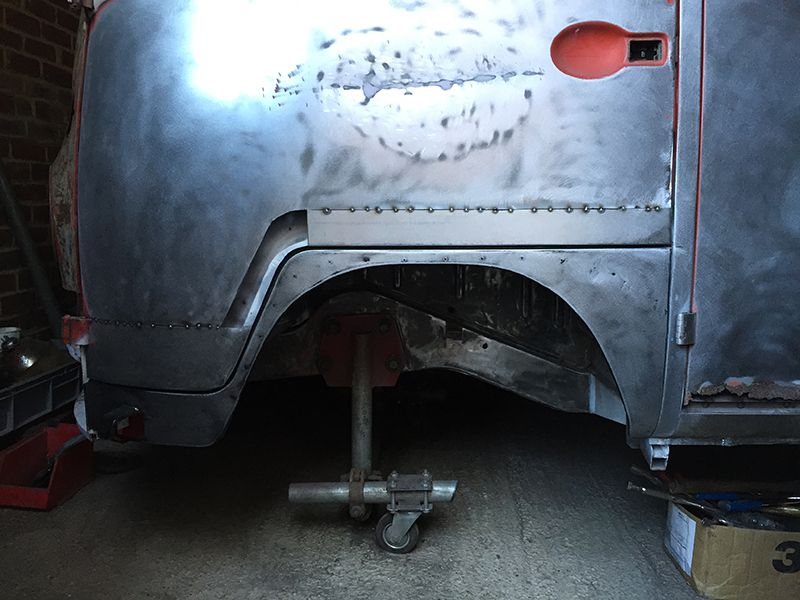
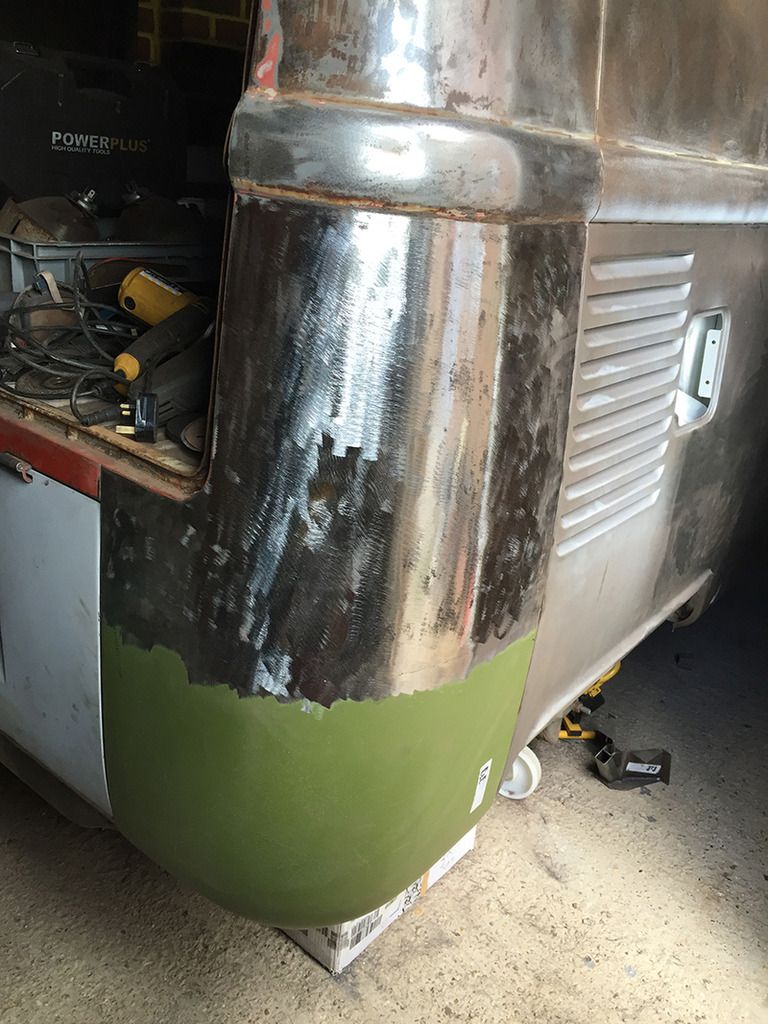
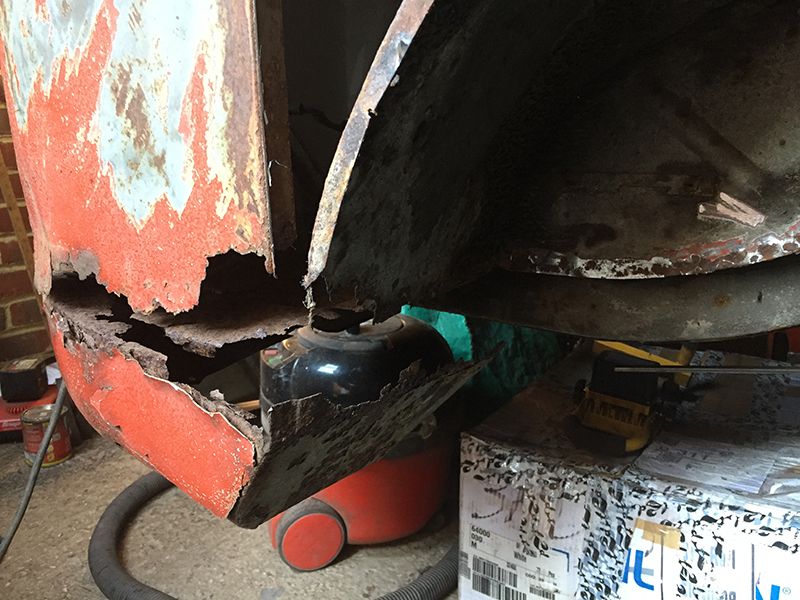
Next was the N/S rear, after cutting out the old short panel it was clear the old wheel arch tub was to much work to patch so a new one was needed as well as the gas bottle tray
cleaning and painting as I go
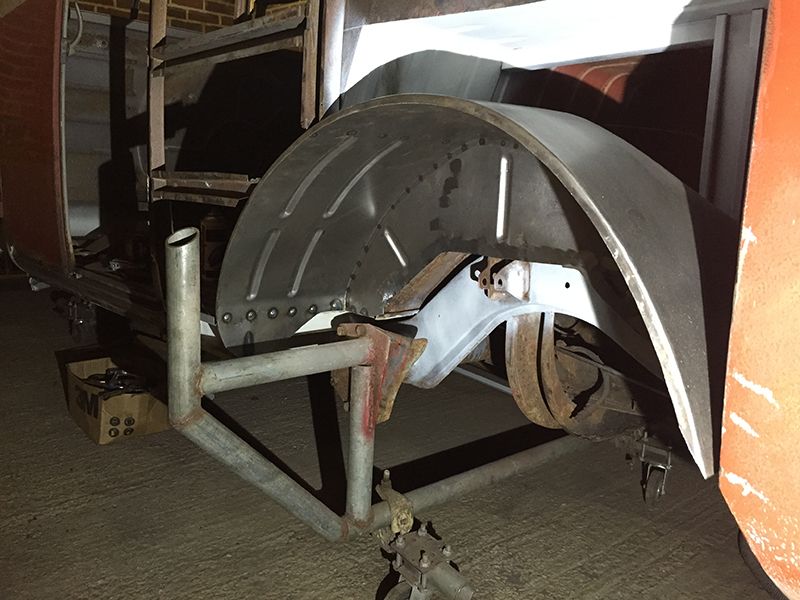
New panel (autocraft great fit) welded and bonded
cleaning and painting as I go
New panel (autocraft great fit) welded and bonded
oilyragg
Registered user
Posts: 231
Joined: Sat May 31, 2014 10:10 am
Re: Single Garage Resto...
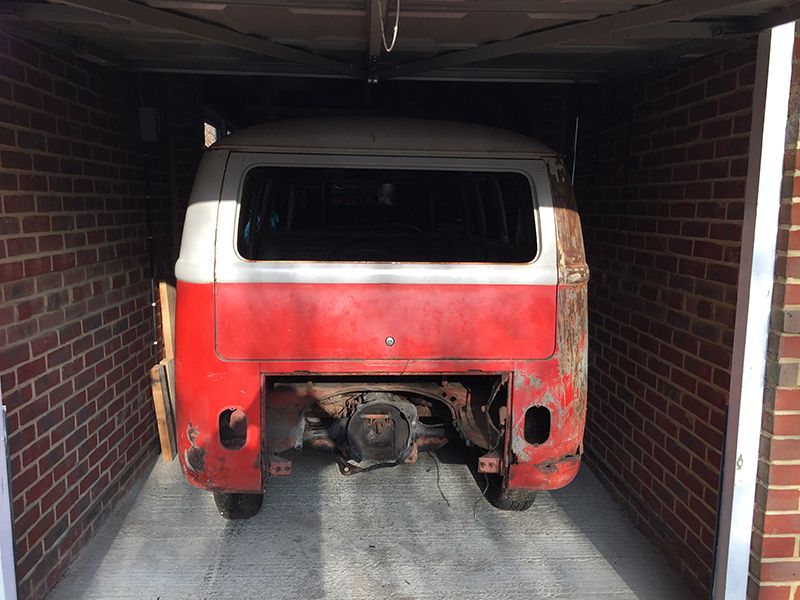
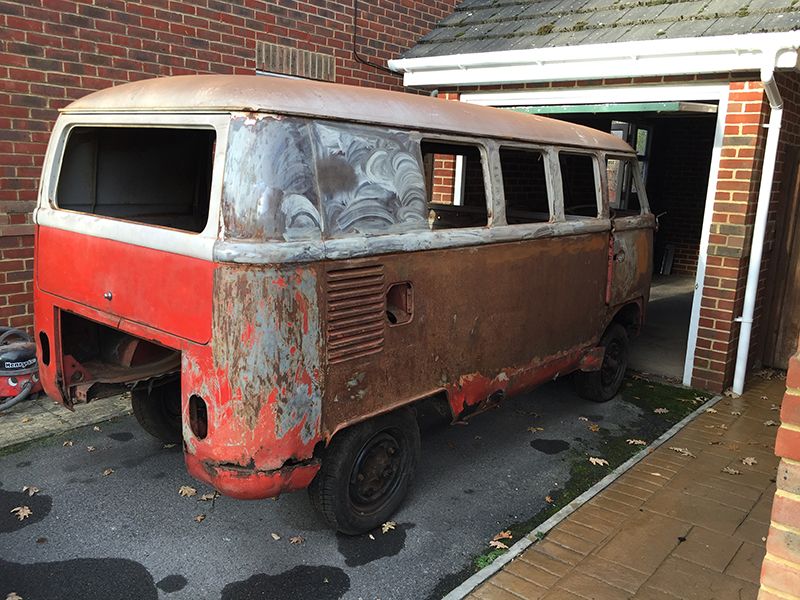
by oilyragg » Sat Aug 20, 2016 11:04 pm
Class repair on the rear

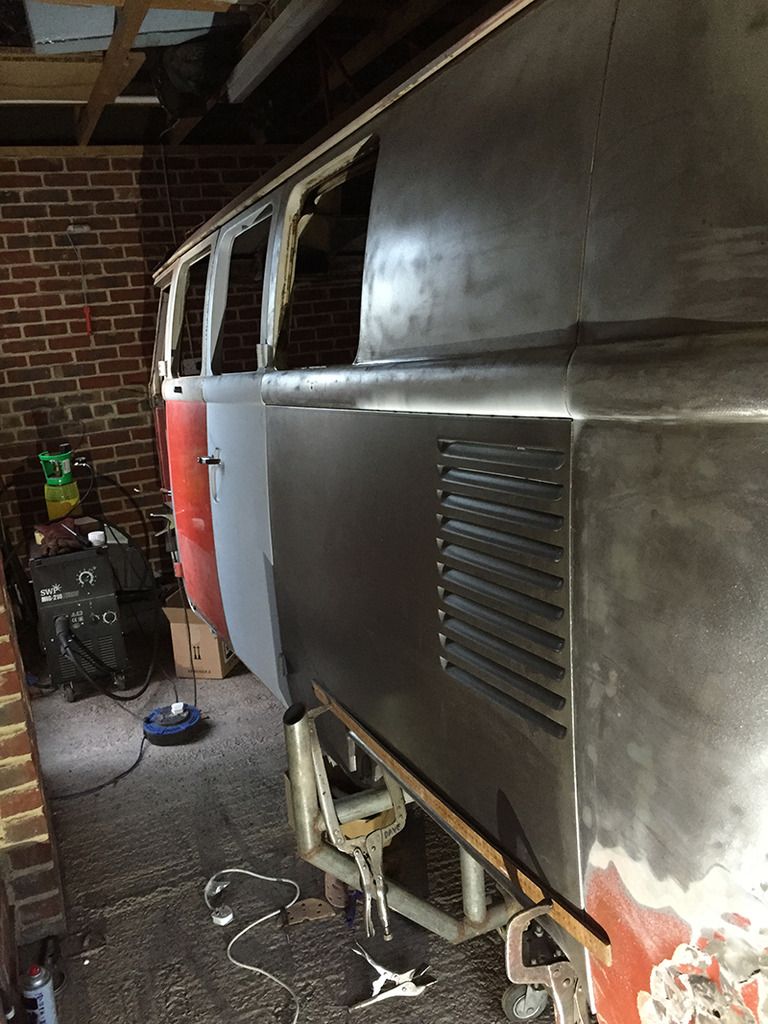
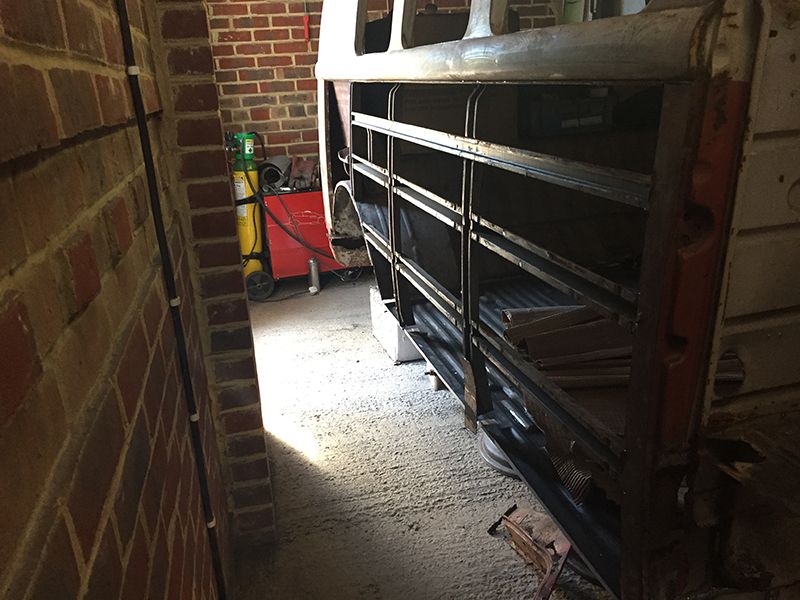
Man cave got a clean so grabbed a shot outside
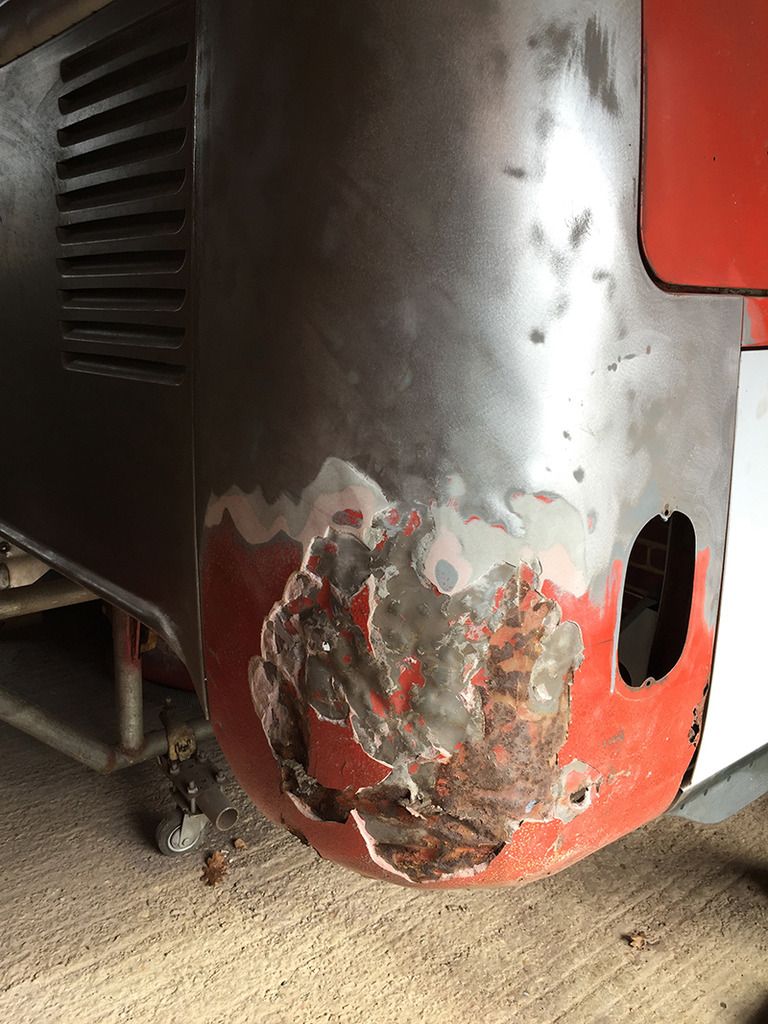
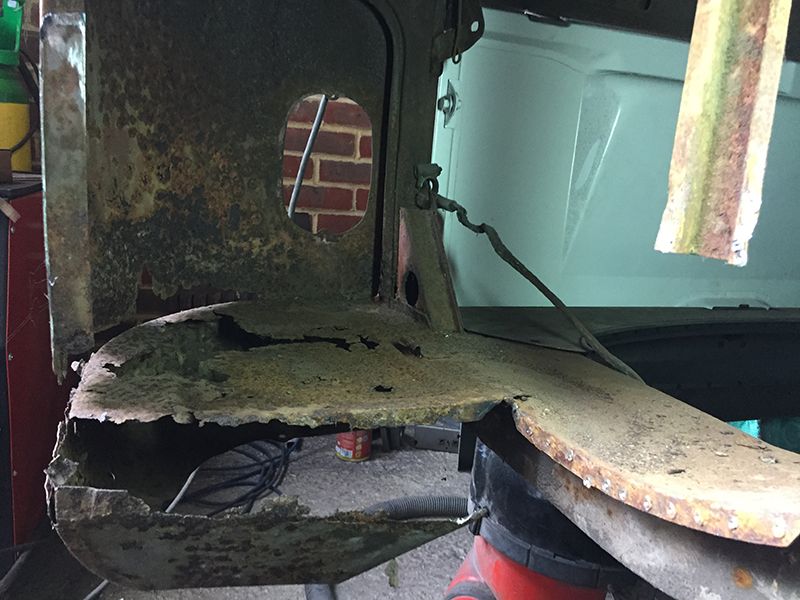
Cut off rear bowl to find more rust
Made new and repaired and after a lot of searching found 2 large rear bowl sections, these seem to be really hard to get hold of
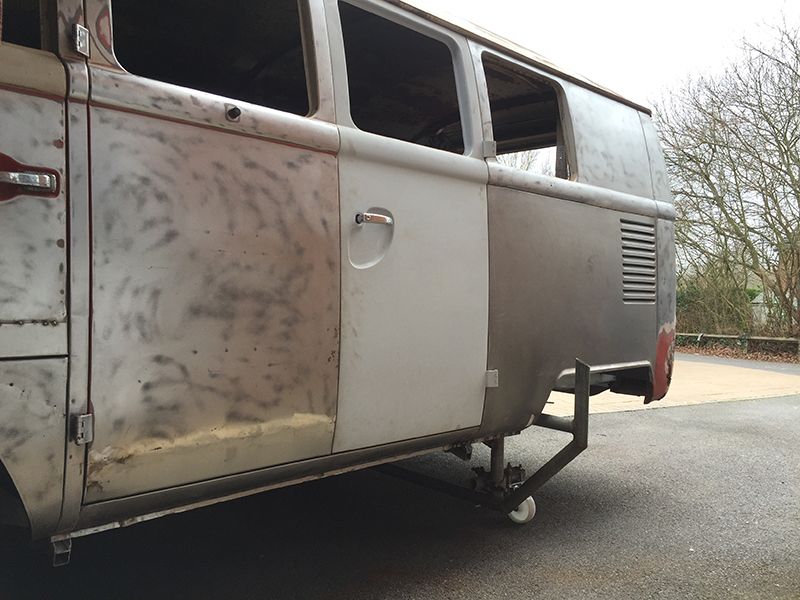
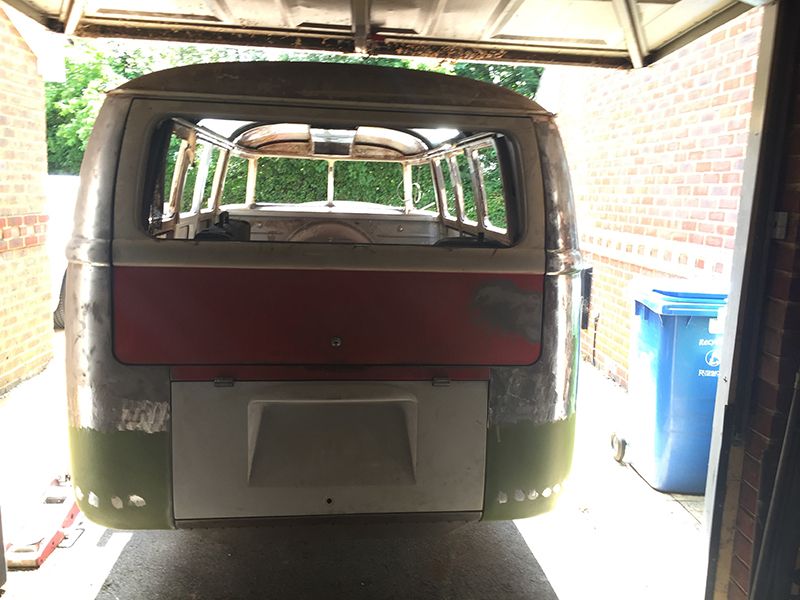
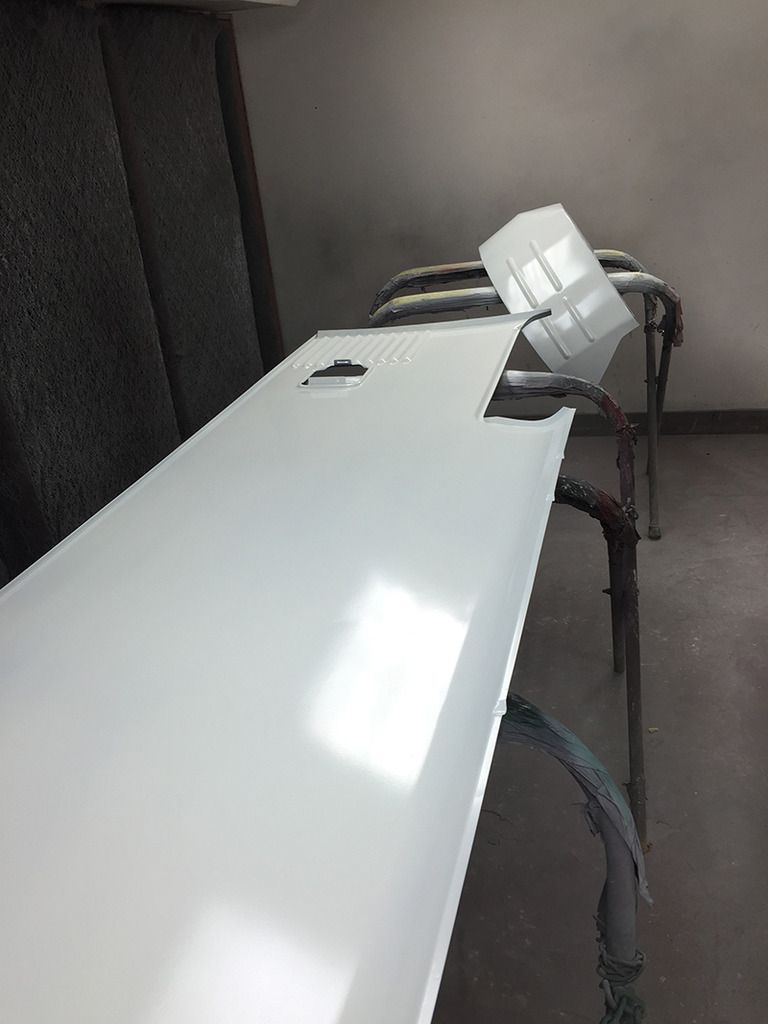
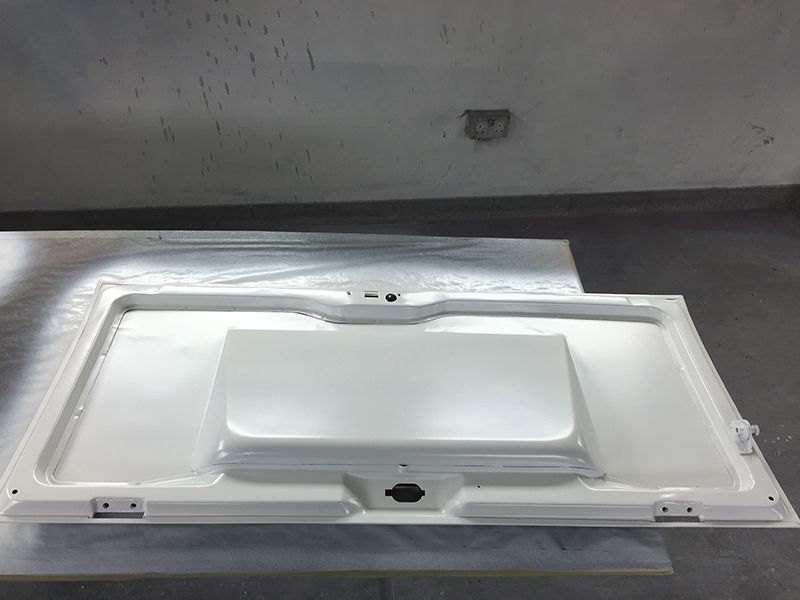
Check for fit of valence and engine lid. Can you spot the join
Man cave got a clean so grabbed a shot outside
Cut off rear bowl to find more rust
Made new and repaired and after a lot of searching found 2 large rear bowl sections, these seem to be really hard to get hold of
Check for fit of valence and engine lid. Can you spot the join
oilyragg
Registered user
Posts: 231
Joined: Sat May 31, 2014 10:10 am
Re: Single Garage Resto...
by oilyragg » Sat Aug 20, 2016 11:09 pm
Now for the big bit...

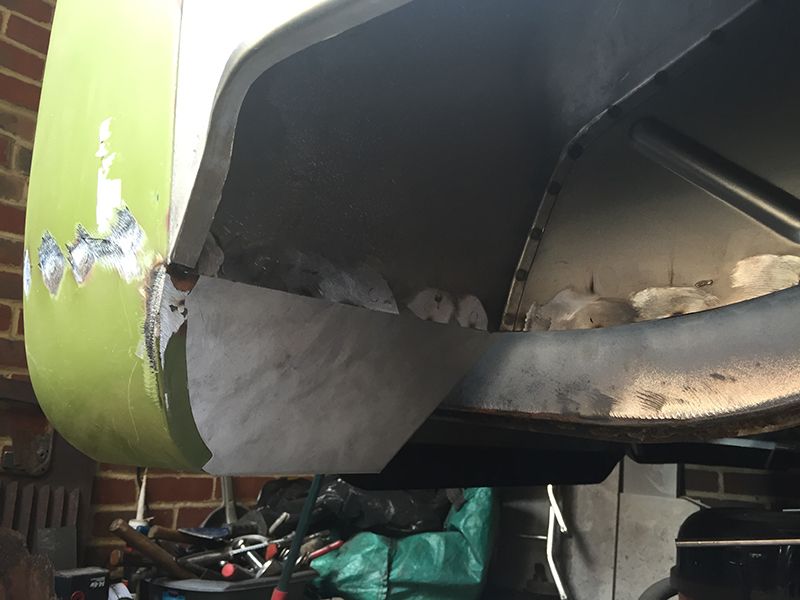
Another new tub required
and battery tray. Ovs.
inside tub and long panel epoxied
Another new tub required
and battery tray. Ovs.
inside tub and long panel epoxied
oilyragg
Registered user
Posts: 231
Joined: Sat May 31, 2014 10:10 am
Re: Single Garage Resto...
by oilyragg » Sat Aug 20, 2016 11:15 pm
Tub in
New panel on again from Autocraft but this side took a lot more time to get right and fitting nicely

New panel on again from Autocraft but this side took a lot more time to get right and fitting nicely
oilyragg
Registered user
Posts: 231
Joined: Sat May 31, 2014 10:10 am
Re: Single Garage Resto...
by oilyragg » Sat Aug 20, 2016 11:16 pm
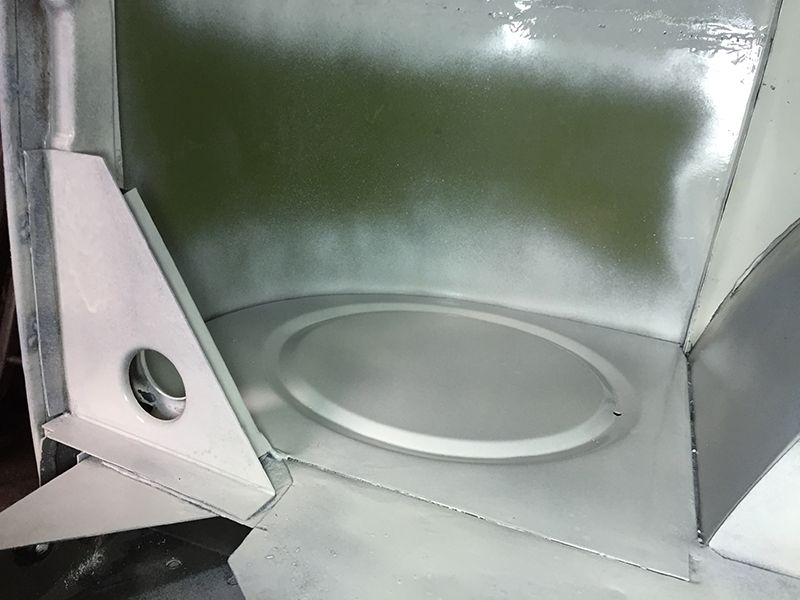
12 volt battery tray fitted
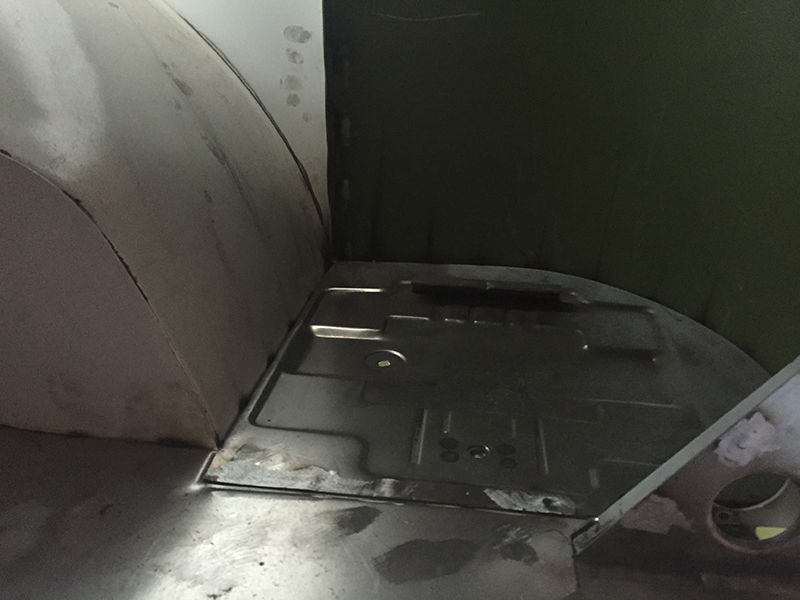
and gas bottle
and gas bottle
oilyragg
Registered user
Posts: 231
Joined: Sat May 31, 2014 10:10 am
Re: Single Garage Resto...
by oilyragg » Sat Aug 20, 2016 11:25 pm
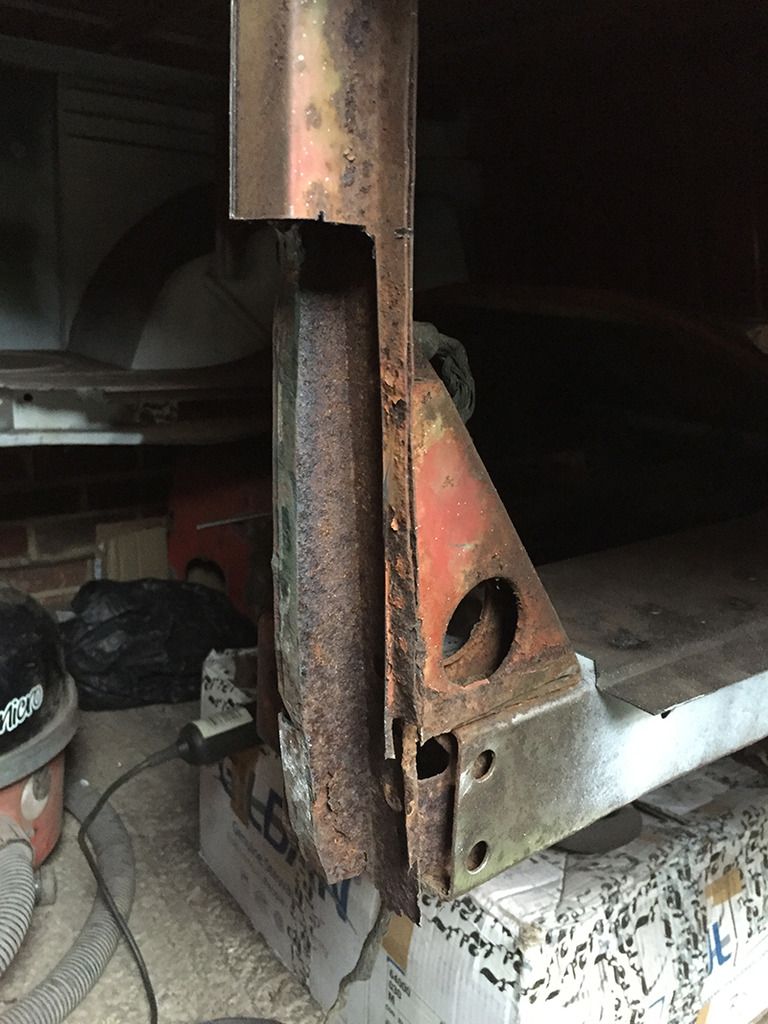
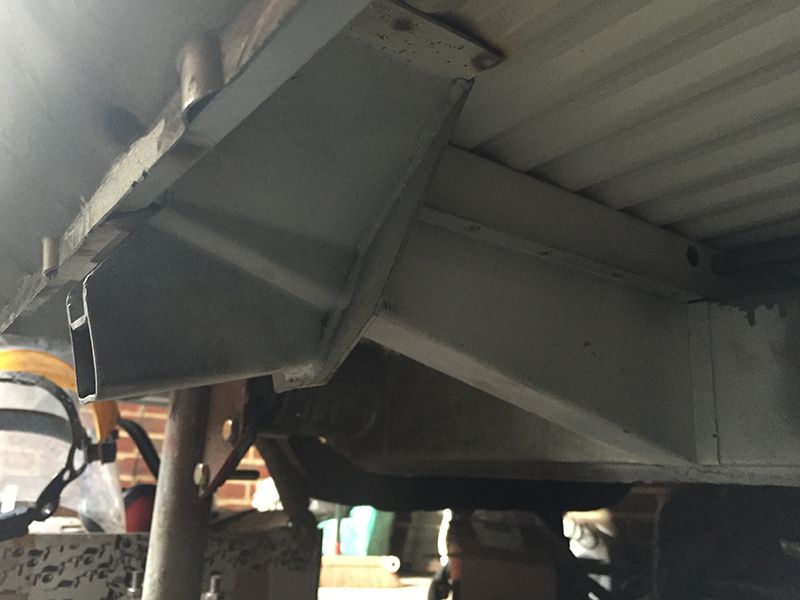
its funny after all the hard work I got immense pleasure from fitting the jacking points, it really made my day.
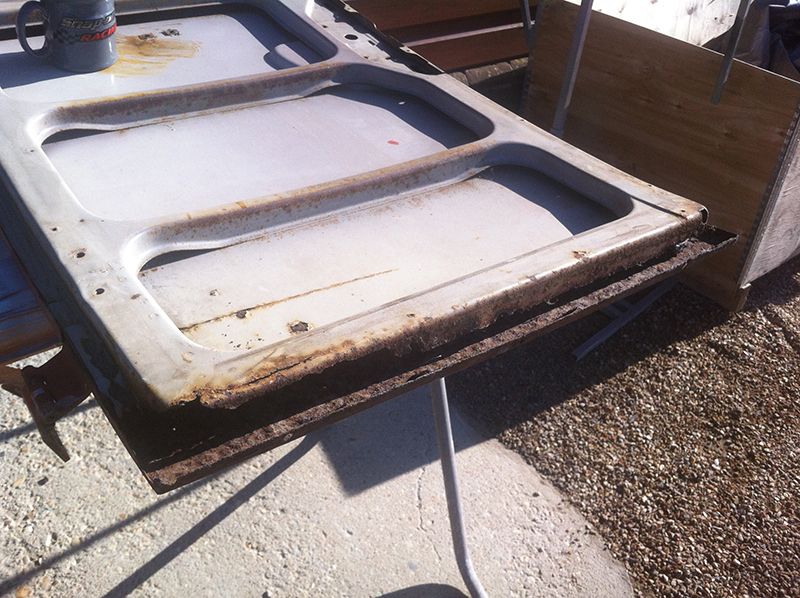
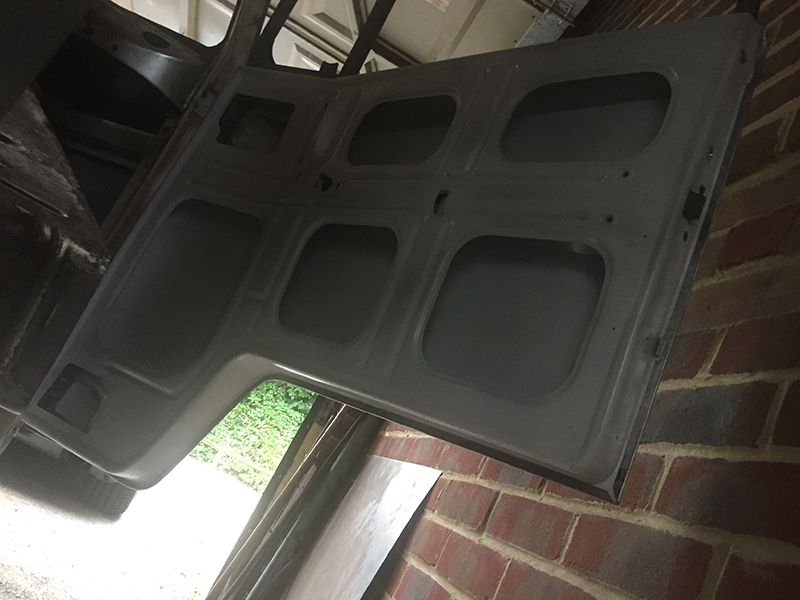
Engine lid was crusty and holey (sounds like a detective series) so more panels were made along with a new tool! Bent over screwdriver to peel back the lip. Metal on the hinge bolts to on both sides needed replacing as again metal fatigue had split and rusted away.
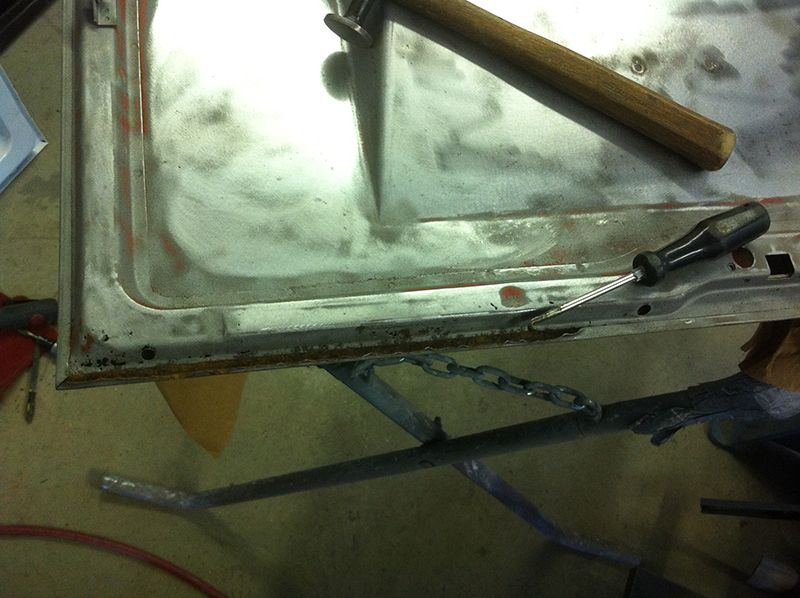
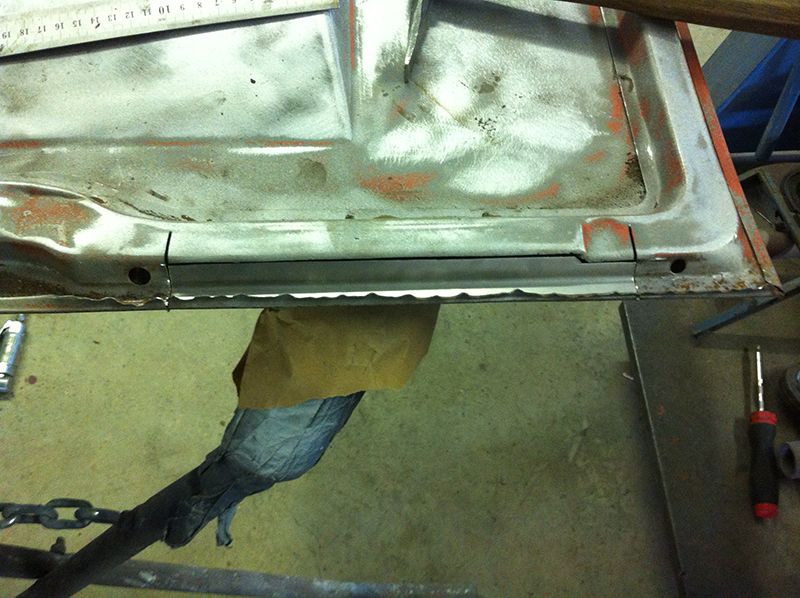
Bottom replaced and skin hammered back into place

Engine lid was crusty and holey (sounds like a detective series) so more panels were made along with a new tool! Bent over screwdriver to peel back the lip. Metal on the hinge bolts to on both sides needed replacing as again metal fatigue had split and rusted away.
Bottom replaced and skin hammered back into place
oilyragg
Registered user
Posts: 231
Joined: Sat May 31, 2014 10:10 am
Re: Single Garage Resto...
by oilyragg » Sat Aug 20, 2016 11:26 pm
and a bit more epoxy
oilyragg
Registered user
Posts: 231
Joined: Sat May 31, 2014 10:10 am