You are viewing the Split Screen Van Club forum archive.
The forum archive is read-only.Unfortunately in 2021 the Split Screen Van Club forum suffered a ransomware attack and lots of the forum data was lost.
What threads that have been recovered are now searchable on this site. Some threads may be incomplete and some images are still being recovered.
Forum archive search
65 13w deluxe 'Project Franklin'
by pauldee » Thu Jun 13, 2013 7:48 pm
So I know some of you have been eager to see how I'm getting on, so here it is! A couple of slight delays from a bit global travel and then quickly having to more premises, but here we are!
This is my first project, and I'm a total newb. Seriously, I'm learning as I go along, so this means a lot of researching of pretty much everything I do, lots of questions, and lots of slowly picking things apart to see how they fit together etc.
So this is how it started:
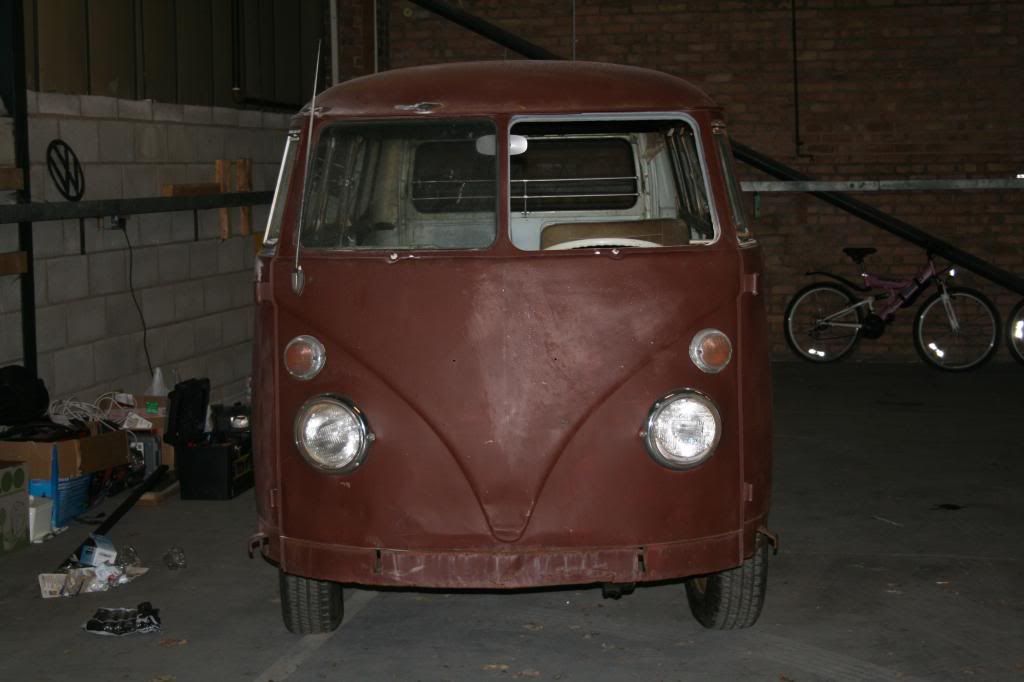
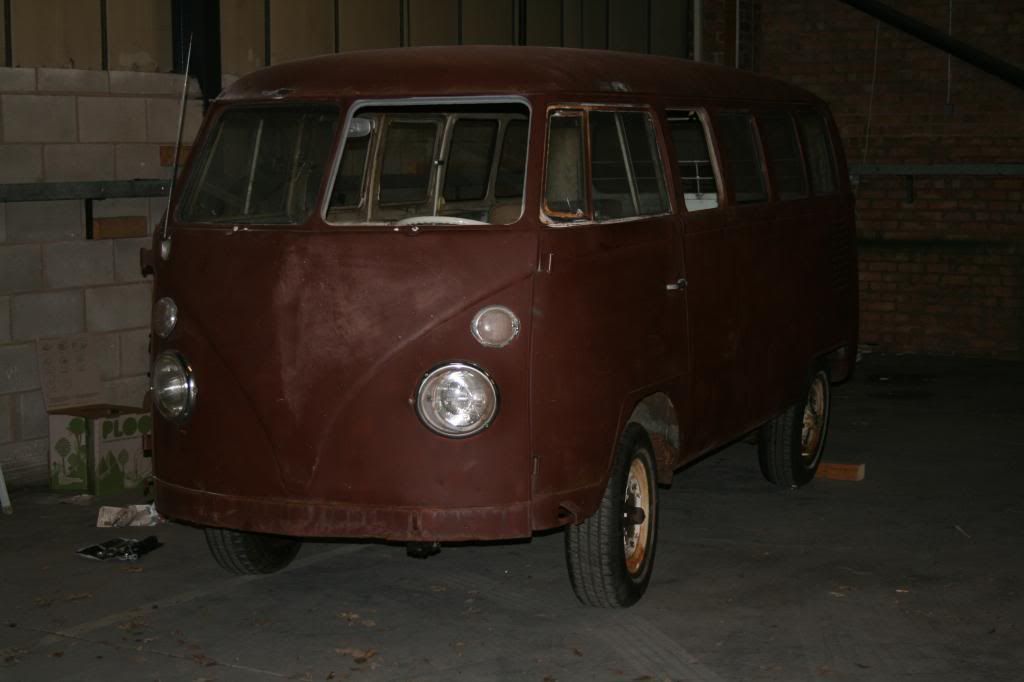
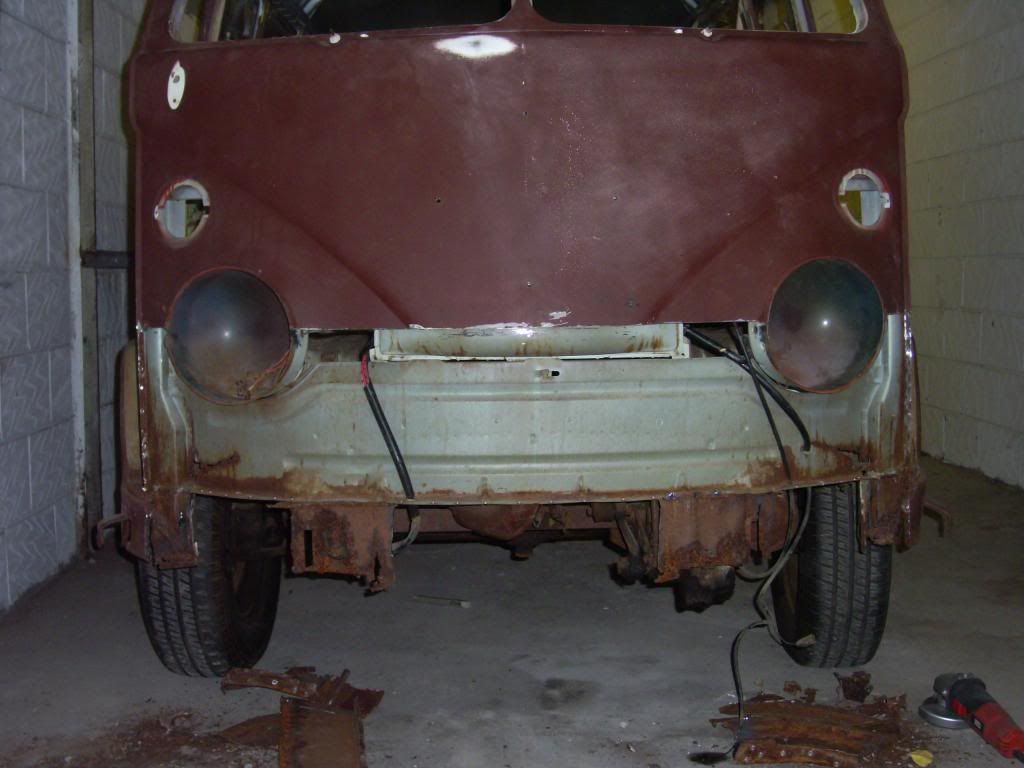
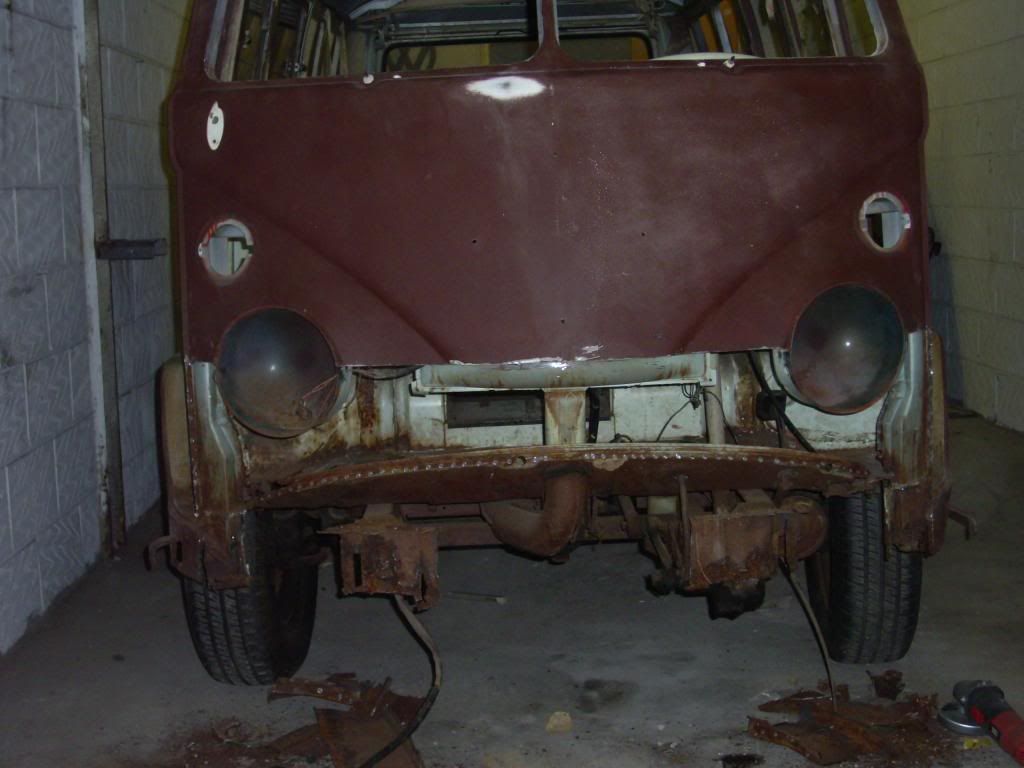
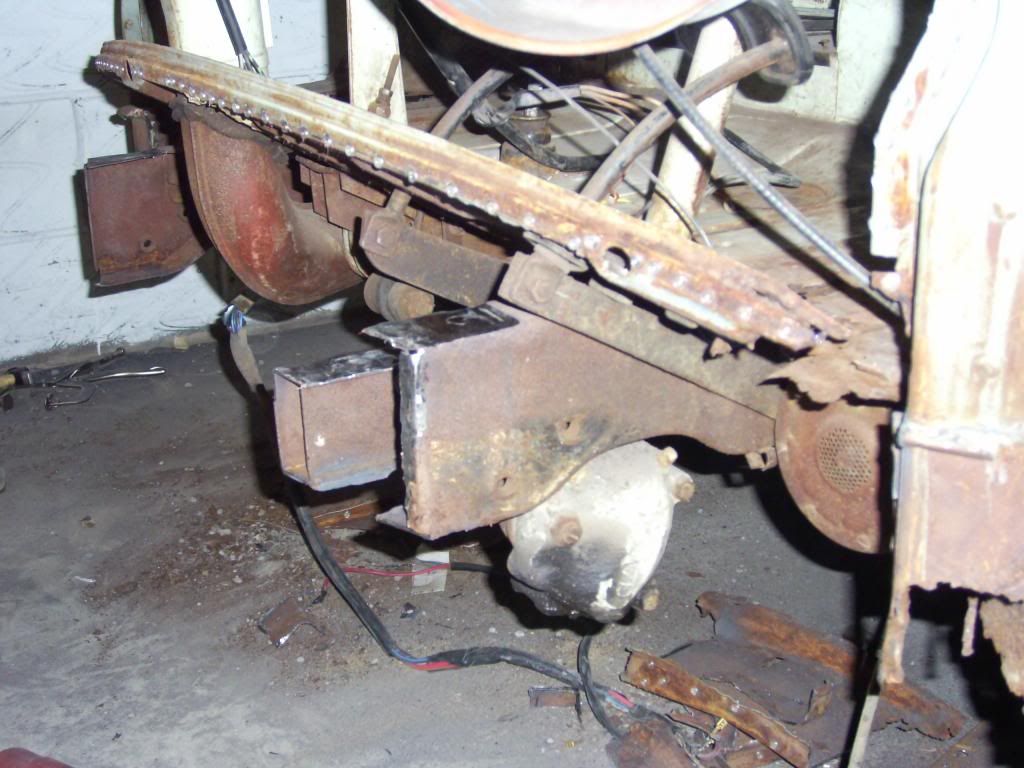
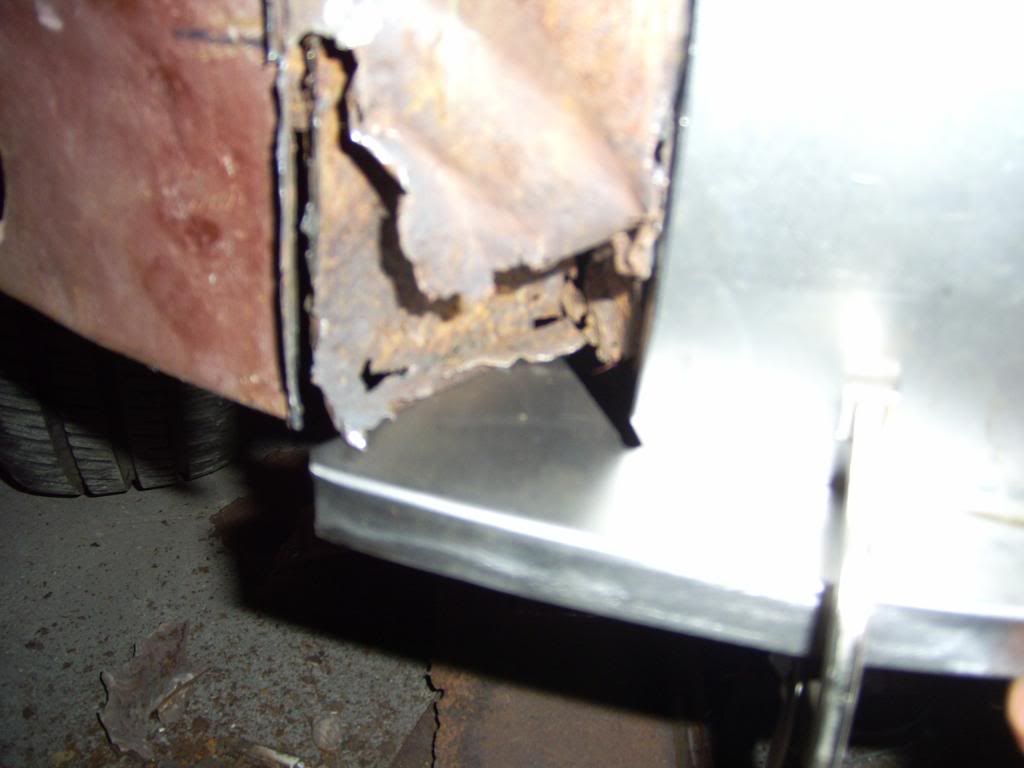
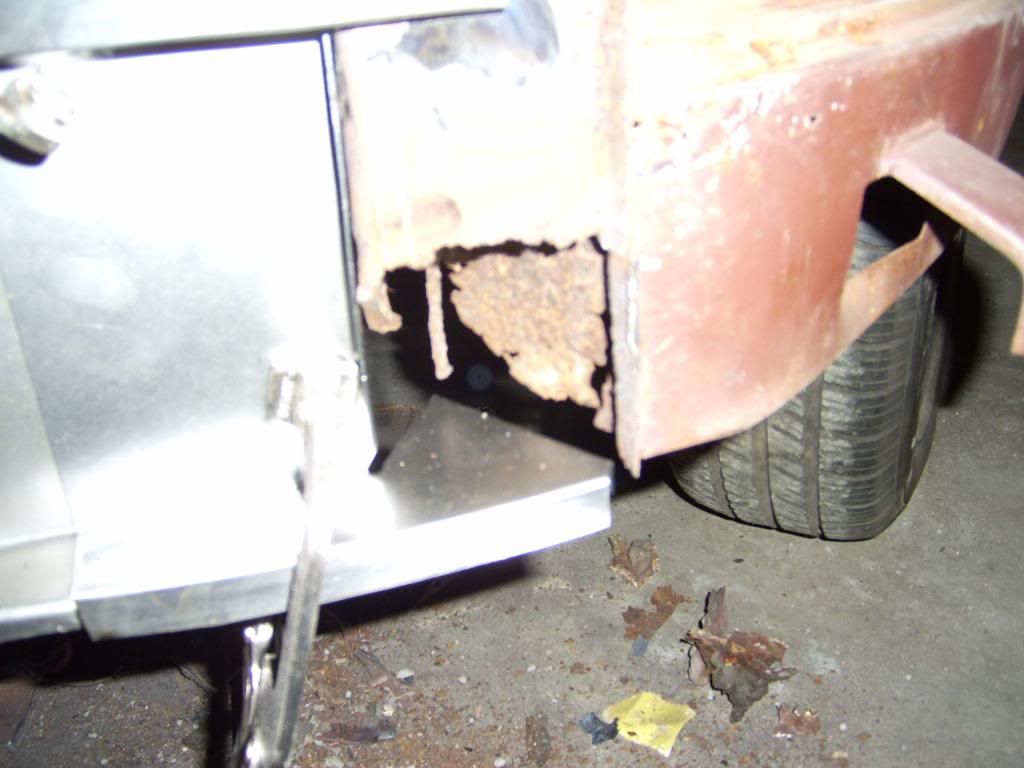
Doesn't look too bad from the outside, but the chassis clearly needs a lot of work:
Generally, the bottom 6 inches needs a lot of sorting, but other than that, everything is in pretty good shape. A bit of pitting on the roof around the gutters but no holes. No serious rust around the windows, pillars and posts all clean.
There are a couple of issues though. As you can see, it's had a knock to the front, and this has very slightly bent the left A-post - not that obvious from a distance, but up close it's evident. I'm not sure yet how much of a problem this is going to be.
And I've no idea what's been going on here:
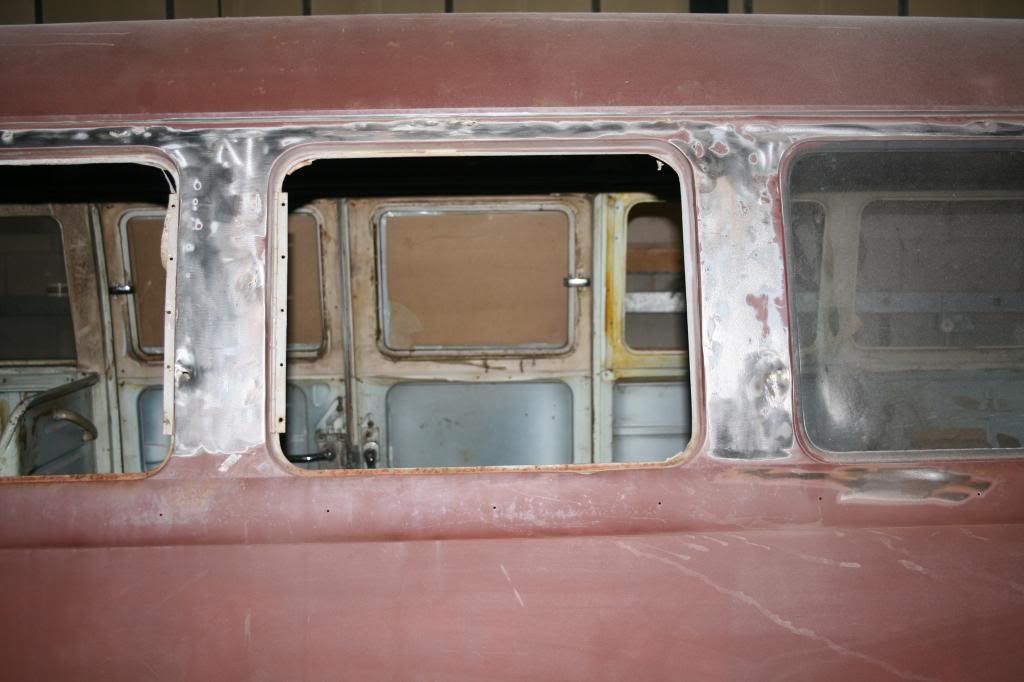
If you can't make it out, it looks like someone's taken a hammer to the frames between the windows. No idea why, just plain vandalism. No one currently makes this panel and I've been struggling to find cuts, so not sure what I'm going to do about this but I'll think of something.
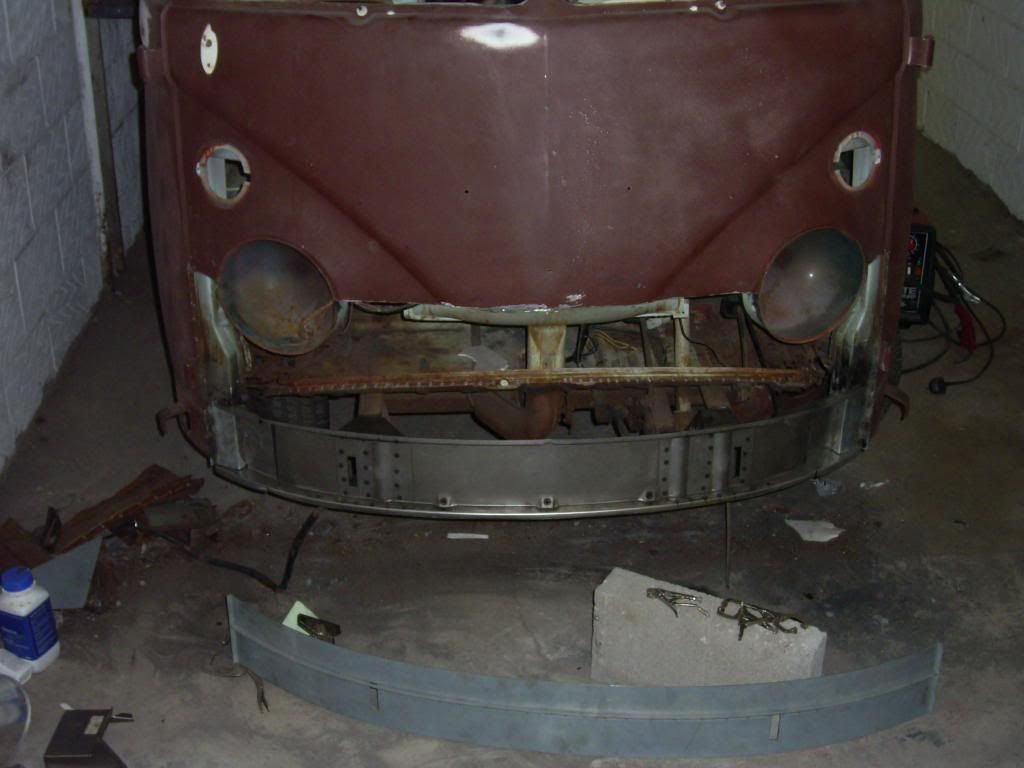
So I've started at the front, because that's where most people seem to start. Not sure I'd advise other newbs to start there though. So far I've only cut bits off:
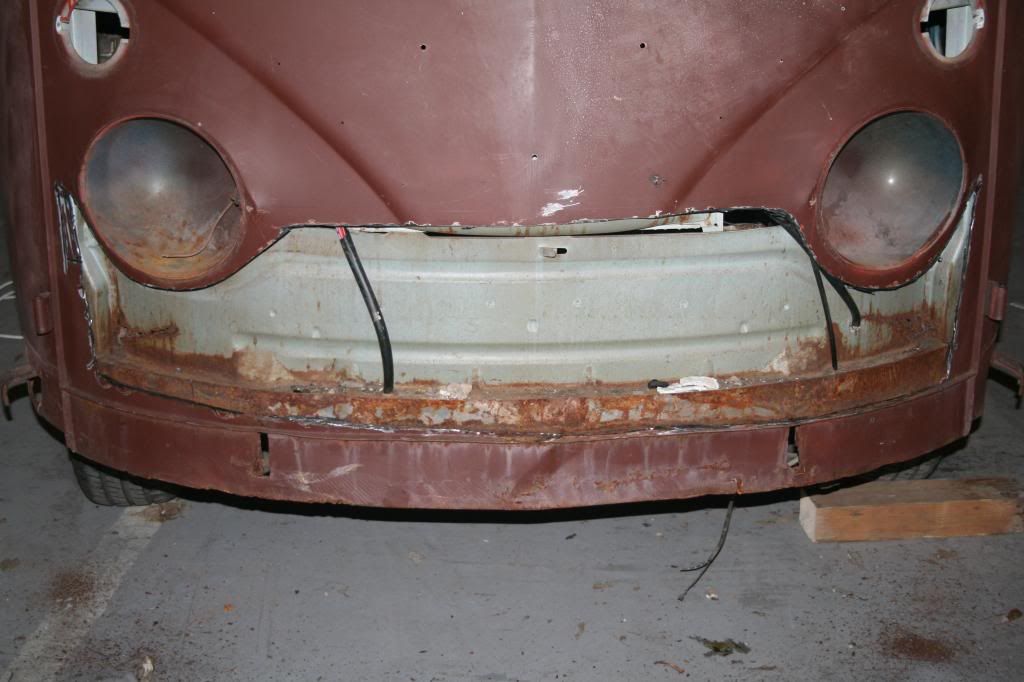
I was hoping that inner front panel wouldn't need any work...
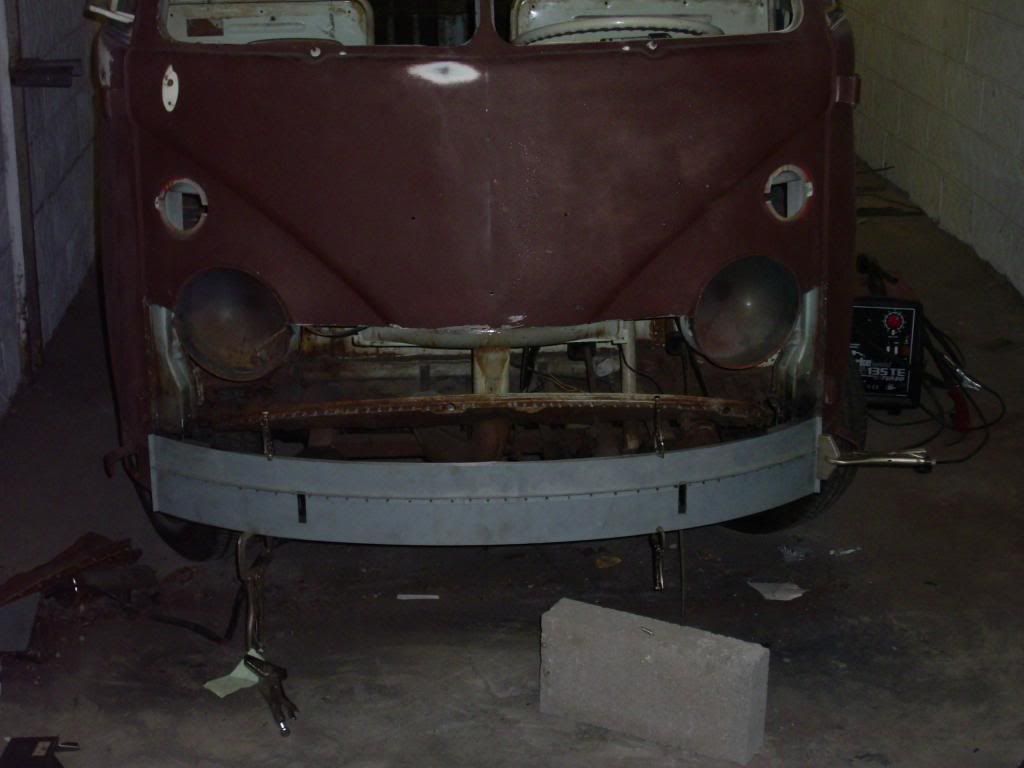
Couldn't resist a few trial fittings:

All looks OKish, but this angle shows a bit of an angle on that join:
Might be that bent A-post coming back to haunt me?
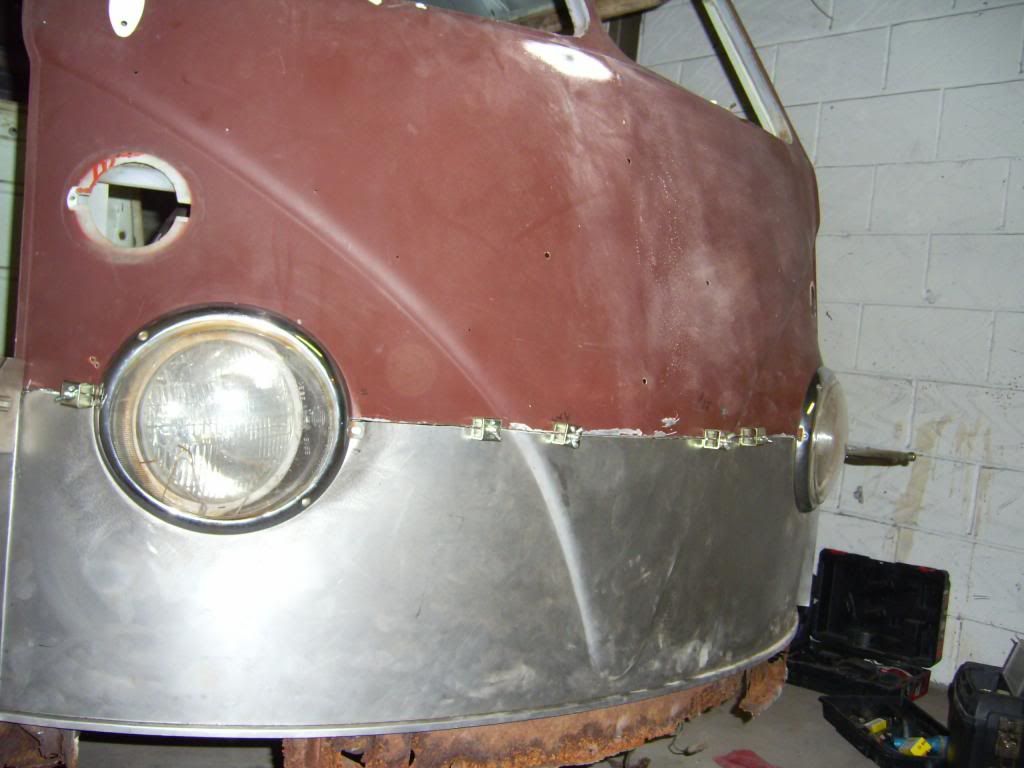
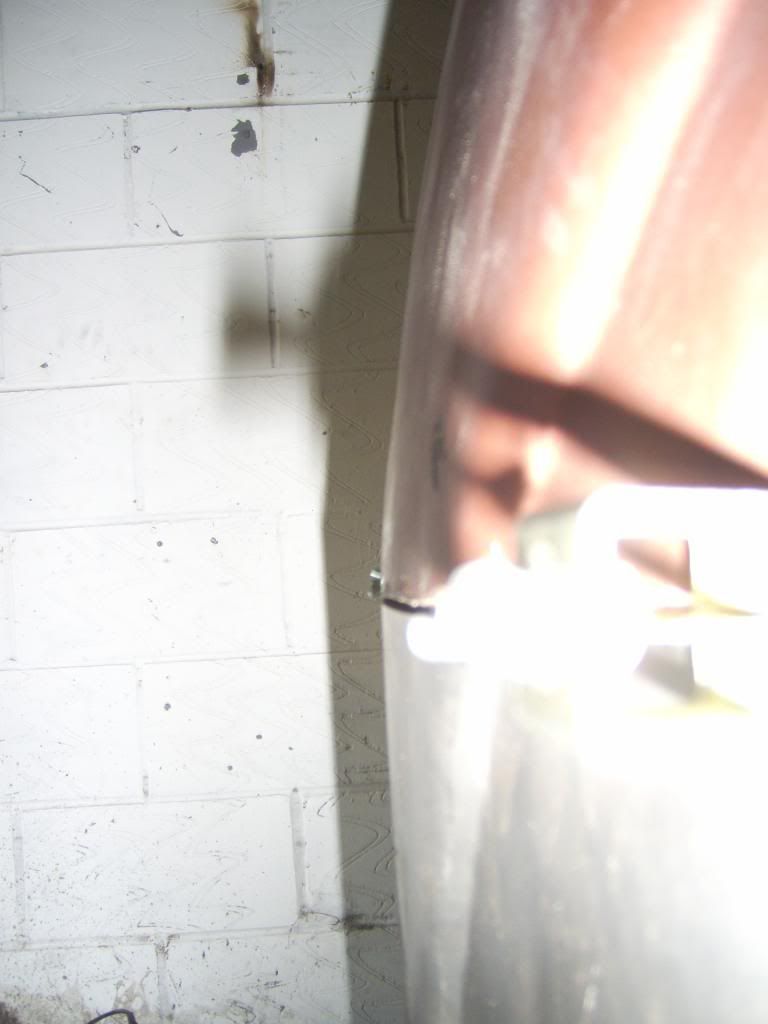
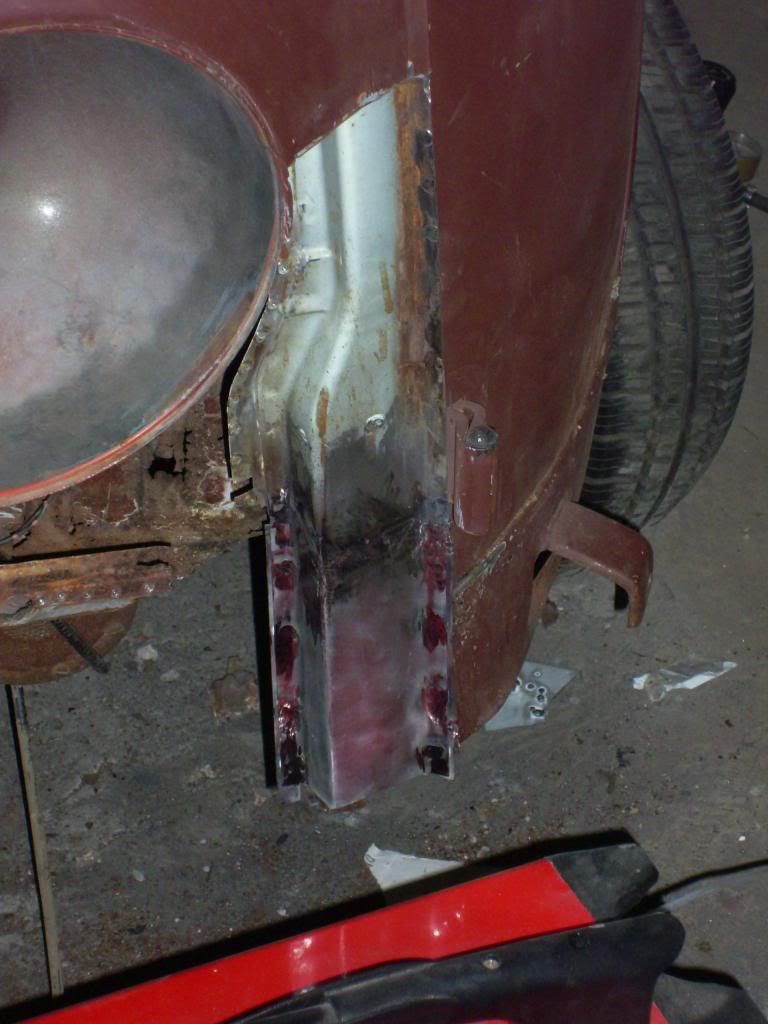
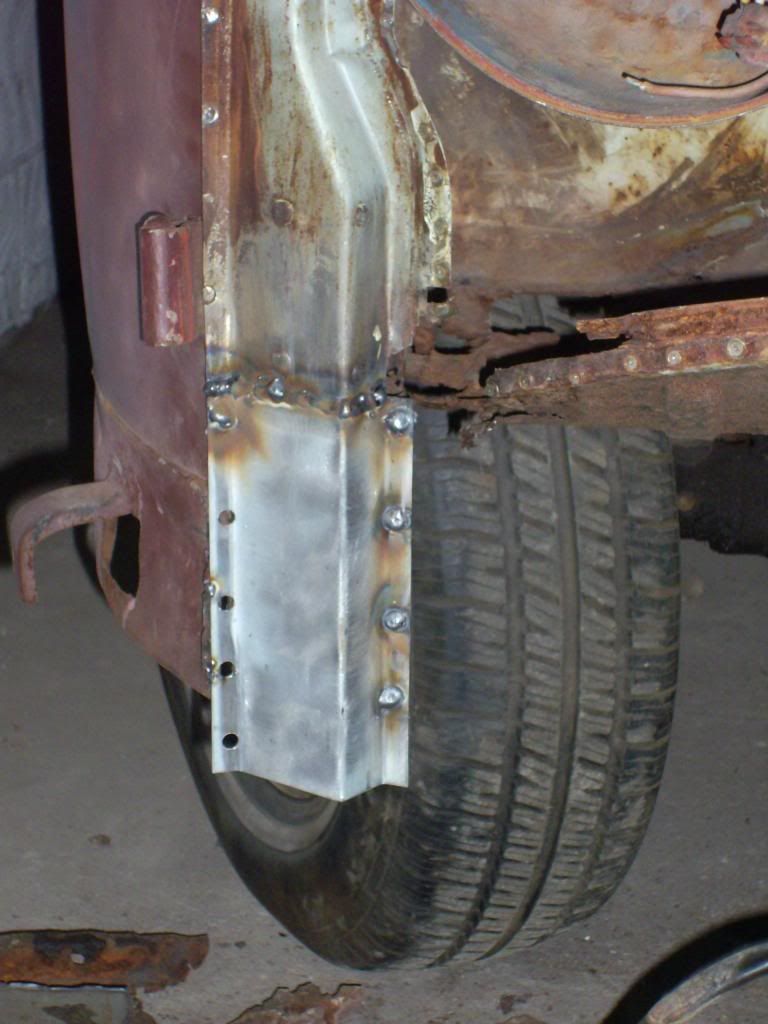
I was warned that repro panels might not be an exact fit, but the edges around the headlight bowls are way out:
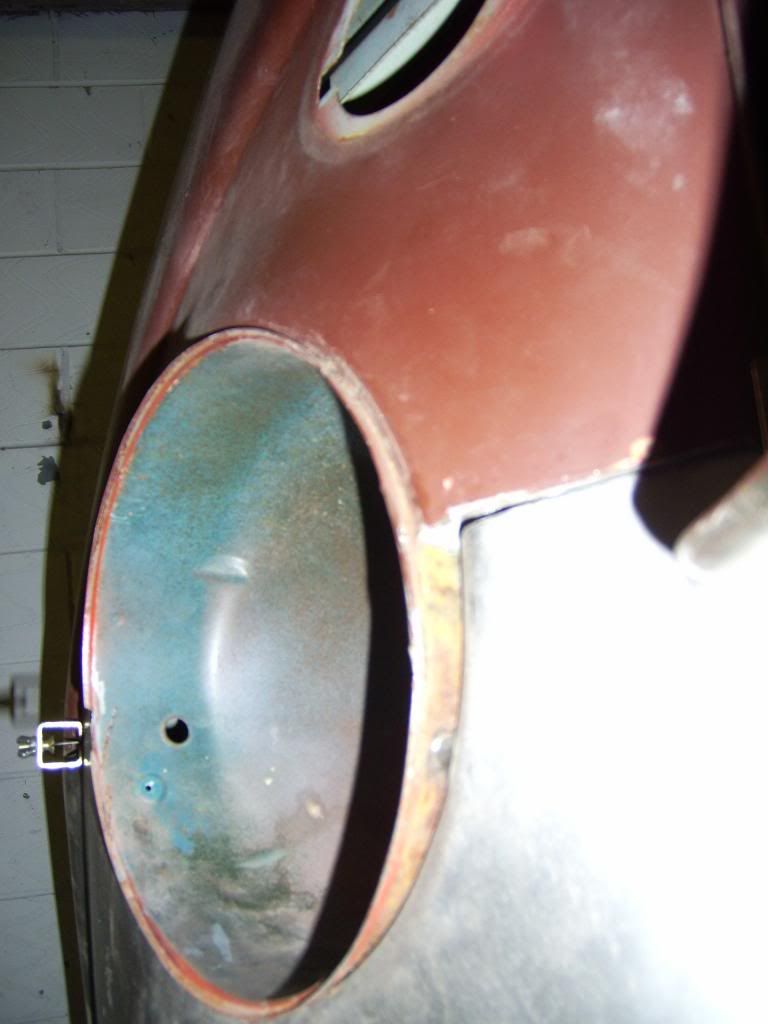
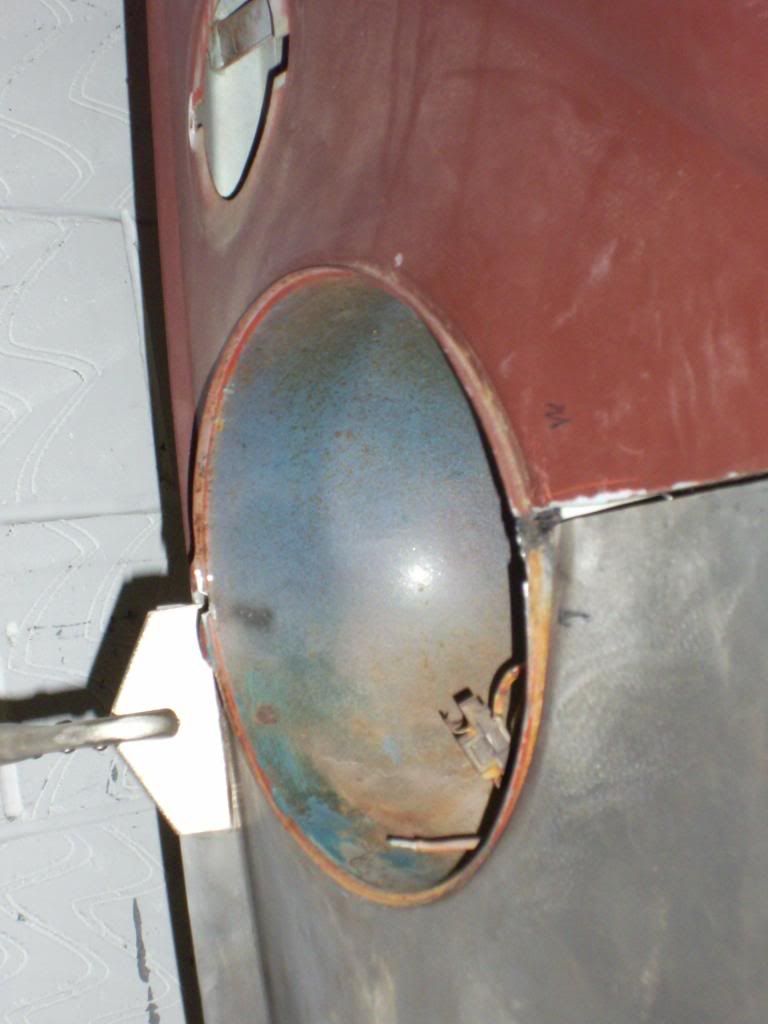
That will take a bit of hammering into shape. I figured it would be easier to replace the lower half of the front panel than trying to straighten it all out, but if I was doing it again I would do it differently, certainly keeping the area around the headlight bowls as much as possible.
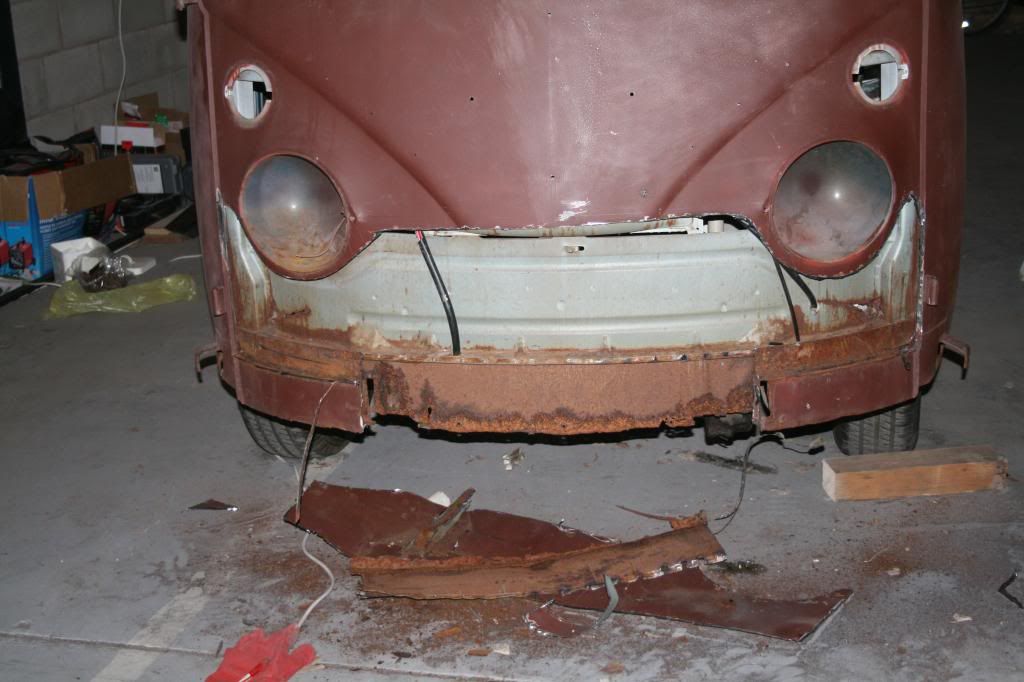
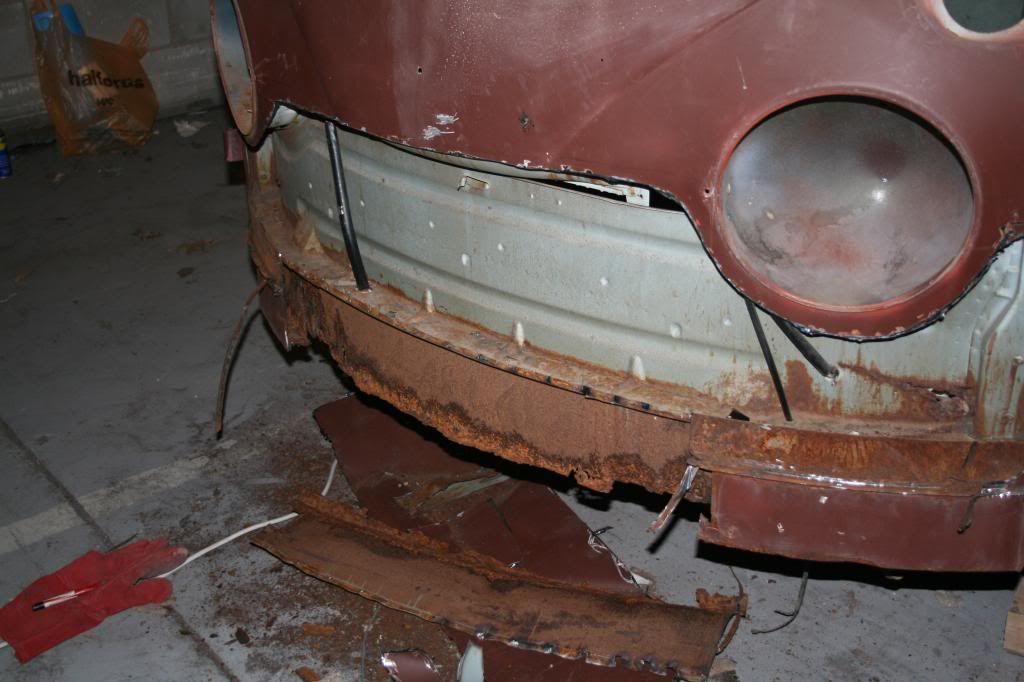
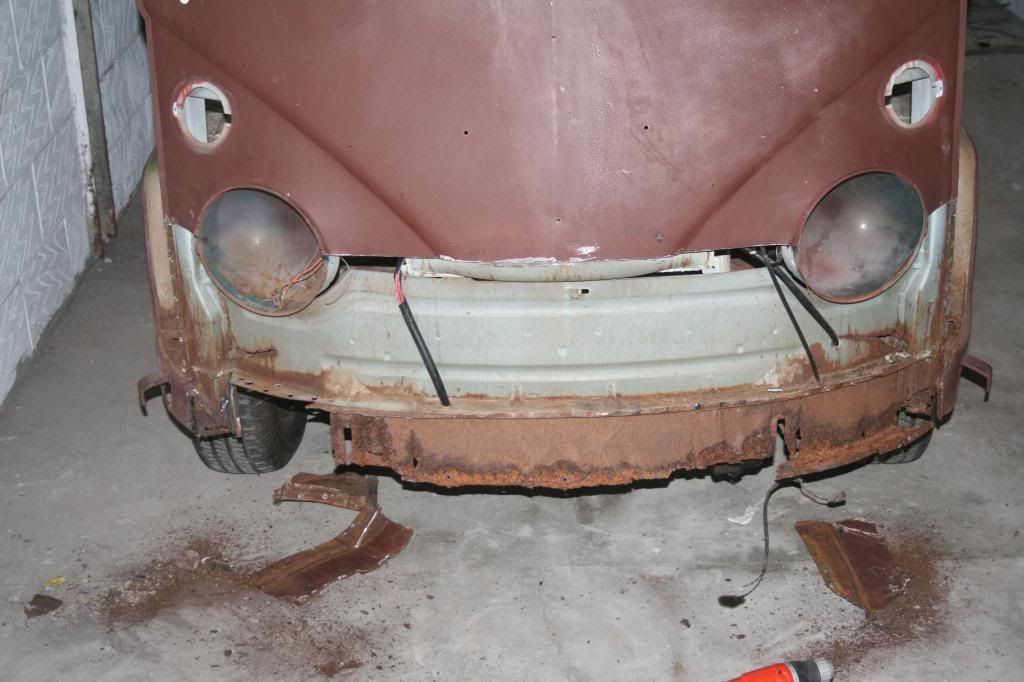
Then more removal of rusty parts:
Slow progress but I'm in this for the long haul!
This is my first project, and I'm a total newb. Seriously, I'm learning as I go along, so this means a lot of researching of pretty much everything I do, lots of questions, and lots of slowly picking things apart to see how they fit together etc.
So this is how it started:


Doesn't look too bad from the outside, but the chassis clearly needs a lot of work:

Generally, the bottom 6 inches needs a lot of sorting, but other than that, everything is in pretty good shape. A bit of pitting on the roof around the gutters but no holes. No serious rust around the windows, pillars and posts all clean.
There are a couple of issues though. As you can see, it's had a knock to the front, and this has very slightly bent the left A-post - not that obvious from a distance, but up close it's evident. I'm not sure yet how much of a problem this is going to be.
And I've no idea what's been going on here:

If you can't make it out, it looks like someone's taken a hammer to the frames between the windows. No idea why, just plain vandalism. No one currently makes this panel and I've been struggling to find cuts, so not sure what I'm going to do about this but I'll think of something.
So I've started at the front, because that's where most people seem to start. Not sure I'd advise other newbs to start there though. So far I've only cut bits off:

I was hoping that inner front panel wouldn't need any work...


Couldn't resist a few trial fittings:


All looks OKish, but this angle shows a bit of an angle on that join:

Might be that bent A-post coming back to haunt me?
I was warned that repro panels might not be an exact fit, but the edges around the headlight bowls are way out:


That will take a bit of hammering into shape. I figured it would be easier to replace the lower half of the front panel than trying to straighten it all out, but if I was doing it again I would do it differently, certainly keeping the area around the headlight bowls as much as possible.
Then more removal of rusty parts:

Slow progress but I'm in this for the long haul!
pauldee
Registered user
Posts: 211
Joined: Sun Mar 25, 2012 11:07 am
Re: 65 13w deluxe 'Project Franklin'
by vwoverall » Thu Jun 13, 2013 8:10 pm
well done -loving the pictures , its coming along real nice.
vwoverall

Registered user
Posts: 54
Joined: Thu Sep 22, 2011 1:32 pm
Re: 65 13w deluxe 'Project Franklin'
by Coolerdub » Sat Jun 15, 2013 3:00 am
Hi Paul looks like you have a nice project there to keep you busy! Also great big garage you have to work in that's a bonus. With the damage around the window surrounds I would be inclined to cut it out small as you can and weld some pieces in looks like there is some good metal on the nose clip still? you could cut clean up and use and it would be og, markp did this on his roof if you look on his thread First VW "Mid Life Crisis"
viewtopic.php?f=8&t=77632&hilit=roof+hole&start=645
or the other technique is lead loading but I've heard that is hard to master see here about half way down for some pic's
viewtopic.php?f=8&t=72412&hilit=lead+loading&start=210
.
Coolerdub
Registered user
Posts: 257
Joined: Sat Jun 04, 2011 10:07 pm
Re: 65 13w deluxe 'Project Franklin'
by pauldee » Sat Jun 15, 2013 10:24 am
Coolerdub wrote:Hi Paul looks like you have a nice project there to keep you busy! Also great big garage you have to work in that's a bonus. With the damage around the window surrounds I would be inclined to cut it out small as you can and weld some pieces in looks like there is some good metal on the nose clip still? you could cut clean up and use and it would be og, markp did this on his roof if you look on his thread First VW "Mid Life Crisis" viewtopic.php?f=8&t=77632&hilit=roof+hole&start=645 or the other technique is lead loading but I've heard that is hard to master see here about half way down for some pic's viewtopic.php?f=8&t=72412&hilit=lead+loading&start=210 .
Cheers coolerdub, that's certainly one of the options I've considered. I'll worry about it when I come to it though, I'll concentrate on the front for now.
As for the garage, as I said, I had to move in a hurry, and when you say it's big, I think you're looking at the old one (actually a warehouse). I was pretty spoilt with that place! if you look at the later pics, the new place is much smaller and more expensive
pauldee
Registered user
Posts: 211
Joined: Sun Mar 25, 2012 11:07 am
Re: 65 13w deluxe 'Project Franklin'
by Coolerdub » Sat Jun 15, 2013 11:28 am
[quote="
As for the garage, as I said, I had to move in a hurry, and when you say it's big, I think you're looking at the old one (actually a warehouse). I was pretty spoilt with that place! if you look at the later pics, the new place is much smaller and more expensive but it's nearer to home.[/quote]
Ah right Paul I missed that and I was not picking up on the surroundings on the later pic's! But yeah nearer to home is always better.
Keep at it looking good so far, is that an Autocraft nose repair panel you have? Always had great reviews so just wondered.
Cheers
Ade
As for the garage, as I said, I had to move in a hurry, and when you say it's big, I think you're looking at the old one (actually a warehouse). I was pretty spoilt with that place! if you look at the later pics, the new place is much smaller and more expensive
Ah right Paul I missed that and I was not picking up on the surroundings on the later pic's! But yeah nearer to home is always better.
Keep at it looking good so far, is that an Autocraft nose repair panel you have? Always had great reviews so just wondered.
Cheers
Ade
Coolerdub
Registered user
Posts: 257
Joined: Sat Jun 04, 2011 10:07 pm
Re: 65 13w deluxe 'Project Franklin'
by pauldee » Sat Jun 15, 2013 11:30 am
Coolerdub wrote:Ah right Paul I missed that and I was not picking up on the surroundings on the later pic's! But yeah nearer to home is always better.
Keep at it looking good so far, is that an Autocraft nose repair panel you have? Always had great reviews so just wondered.
Cheers
Ade
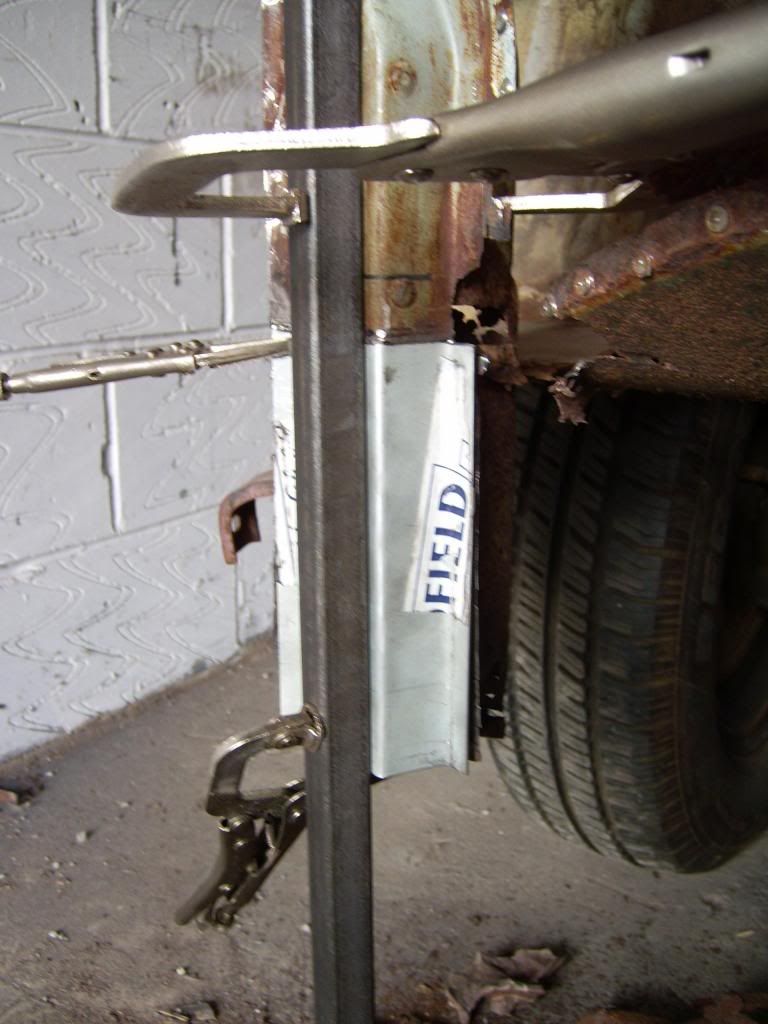
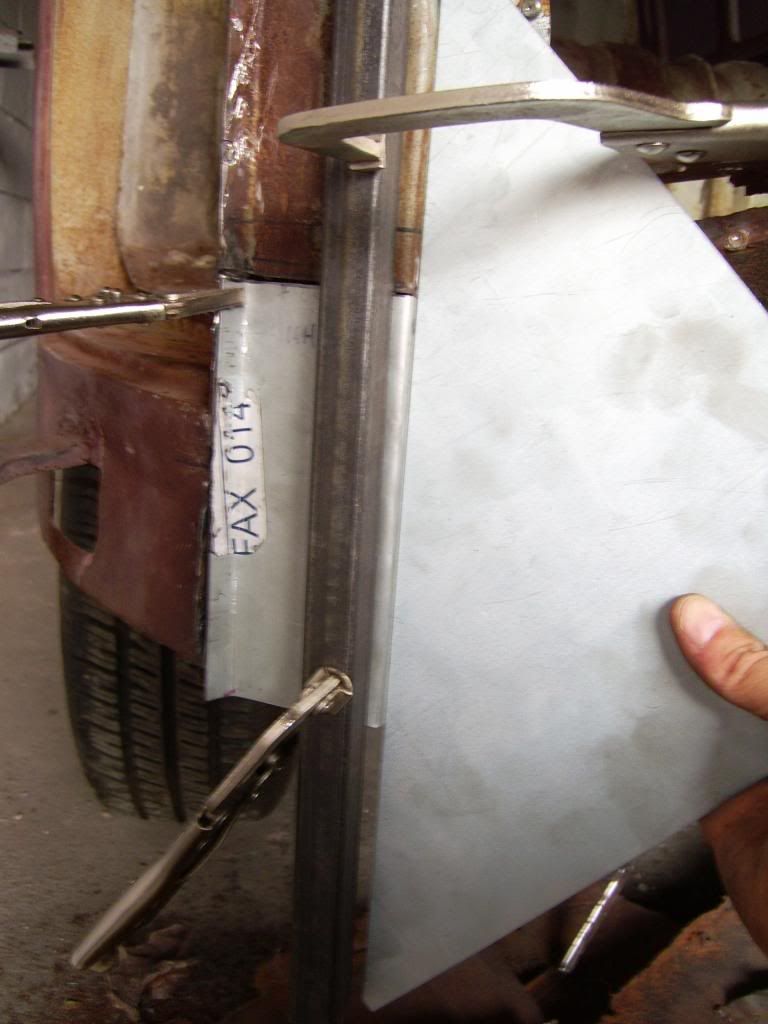
It's a Schofields one. They get pretty good reviews too, but is this a bit more out than it should be?
pauldee
Registered user
Posts: 211
Joined: Sun Mar 25, 2012 11:07 am
Re: 65 13w deluxe 'Project Franklin'
by Coolerdub » Sat Jun 15, 2013 7:45 pm
Paul I'm no expert but Autocraft seem to be the forums favourite, I don't remember anyone saying anything about the cut out for headlight bowls ever, you usually get a remark like I had to do a bit of fettling to get it to fit but not specifically that, your A post being a bit bent wouldn't effect the size of the half hole as I see it maybe send Rick from Scof's a pic see what he says. I take it it's this one that shows it best.
Coolerdub
Registered user
Posts: 257
Joined: Sat Jun 04, 2011 10:07 pm
Re: 65 13w deluxe 'Project Franklin'
by pauldee » Thu Jun 27, 2013 6:29 pm
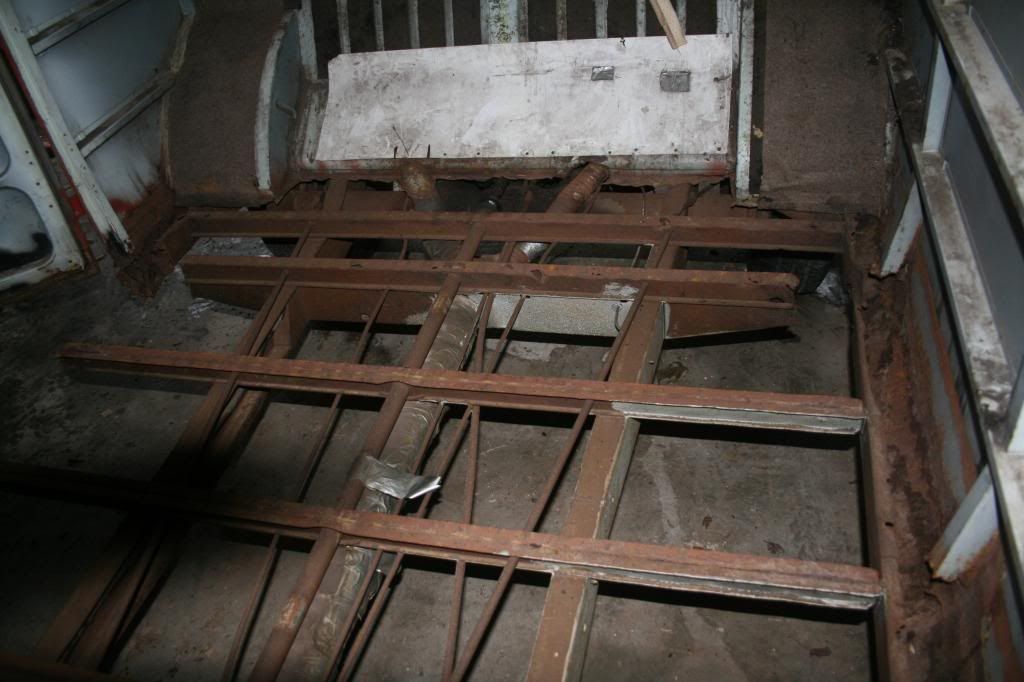
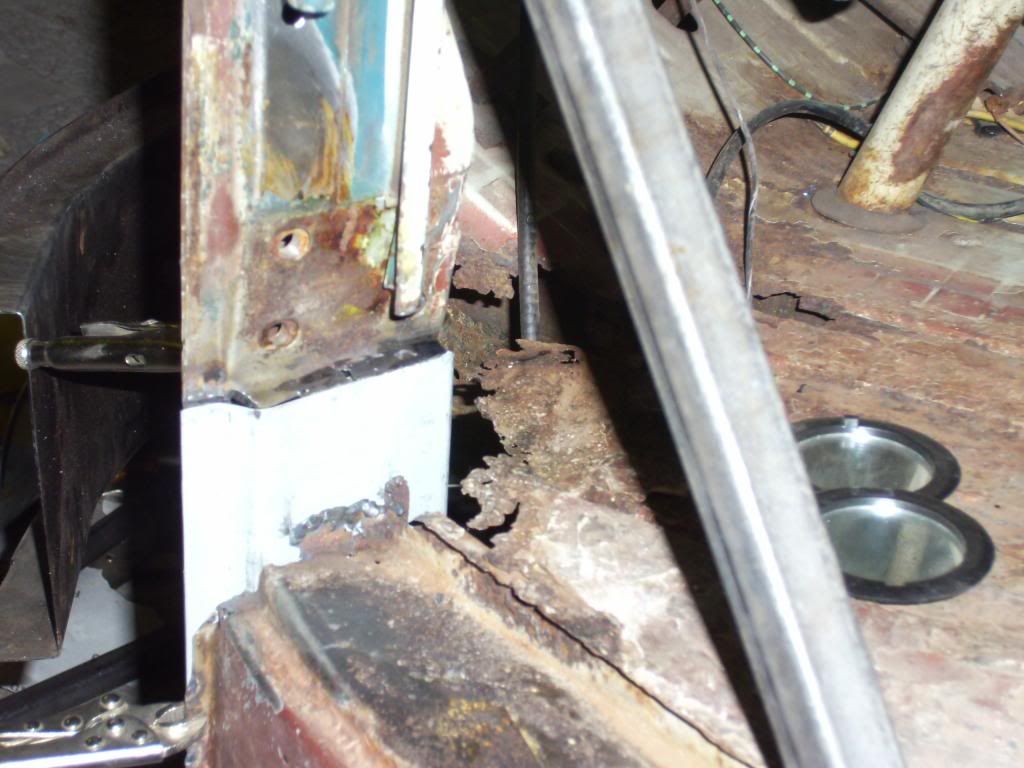
Forgot to put in the picture of the inner valance removed. A lot of drilling out spot welds. It will need some fixing before or after it goes back, haven't decided which:
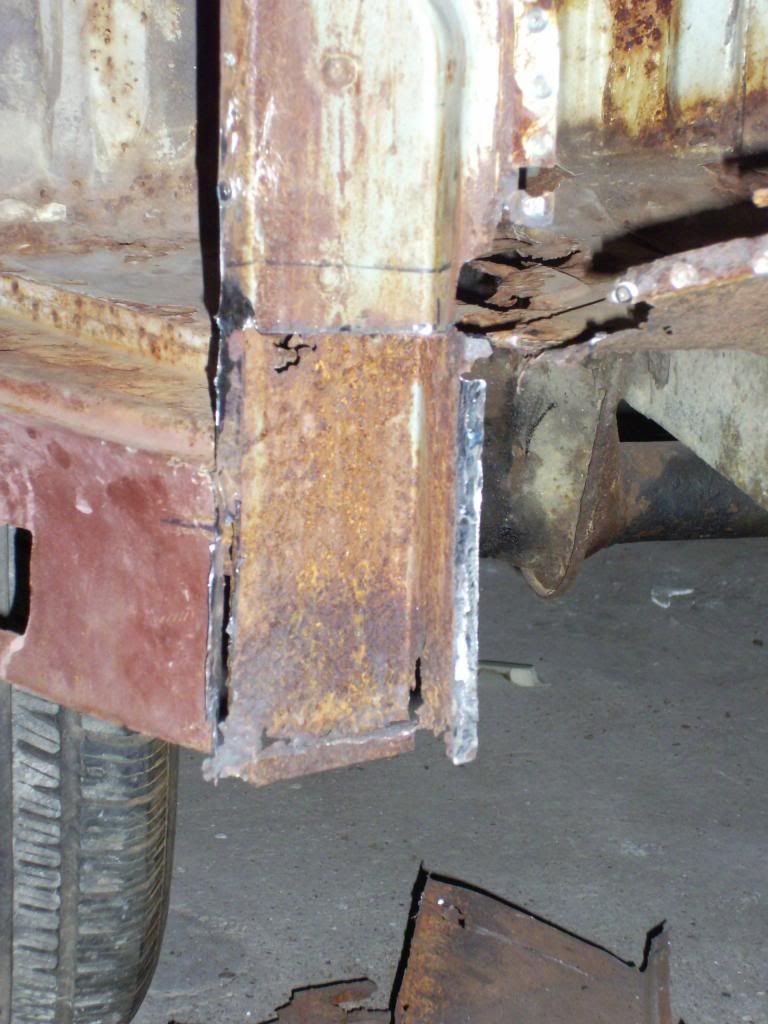
Bit of progress for you: I've been clearing off the end of the chassis rails. It's good to get back to good metal, but this has been a real ballache of a job. I've seen some of you lot just chop the end of the rails off and weld new ends back on, but being a newbie I want to keep as many original reference points as I can.

Bit of progress for you: I've been clearing off the end of the chassis rails. It's good to get back to good metal, but this has been a real ballache of a job. I've seen some of you lot just chop the end of the rails off and weld new ends back on, but being a newbie I want to keep as many original reference points as I can.

pauldee
Registered user
Posts: 211
Joined: Sun Mar 25, 2012 11:07 am
Re: 65 13w deluxe 'Project Franklin'
by pauldee » Tue Jul 02, 2013 9:48 pm
Finished cleaning off the chassis rails. Also cleaned off the end of the A-posts - they're going but I wanted to do a trial fit:

Then started removing the A-post, starting with the front:
http://s1057.photobucket.com/user/paul_t_d/media/4a8dc336-4d58-4022-8f79-5ca999686acb_zpsfbabc2b5.jpg.html
No here's a question for you all: With the inner valance on, I can't seem to replave the inner front panel. If I put the inner front panel in first like this:
Then I can't access the chassis rails to weld on the inner valance!
So I can either:
1. Remove the headlight bowls so I can get the inner front panel on once the inner valance is on. Really wanted to leave them on.
2. Drill out the spot welds on the inner front valance that connect to the brackets that connect to the rails, then put the brackets on then the inner panel then the inner valance. Seems an shame to do because the inner valance is nicely made.
3. Brute force and bending. Not a great option for a newb.
4. Buy a spot welder so I can weld on the inner valance after the inner panel.
any other ideas???
pauldee
Registered user
Posts: 211
Joined: Sun Mar 25, 2012 11:07 am
Re: 65 13w deluxe 'Project Franklin'
by pauldee » Tue Jul 09, 2013 10:44 pm
This week I have mostly been replacing the front of the A-posts. Got a few questions for you guys so if any of you could help me out I'd really appreciate it!
I assume the A-posts are completely straight from here on down, and I can reference them into place like this? Please put me right if not!
and on the inside?
And here, it seems to naturally fall into place like this, but I think this is wrong?
I think it should look more like this?
The black line here shows how much I think it is out?
Another angle showing how this is out a bit:
The other side all falls into place a bit more nicely:
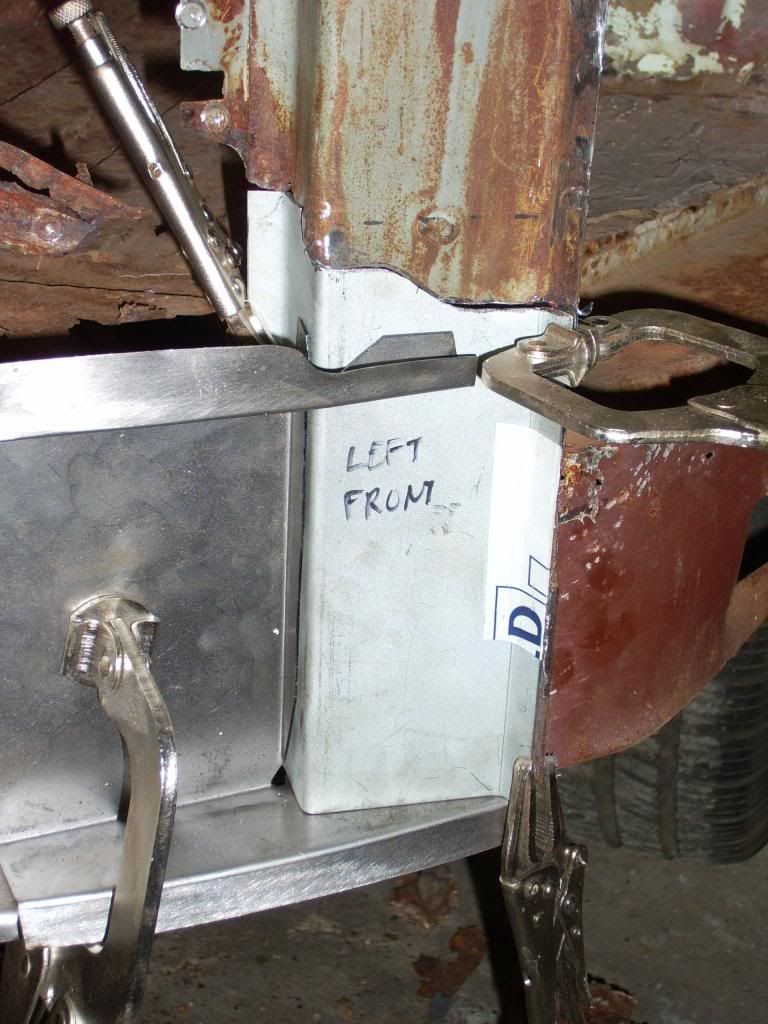
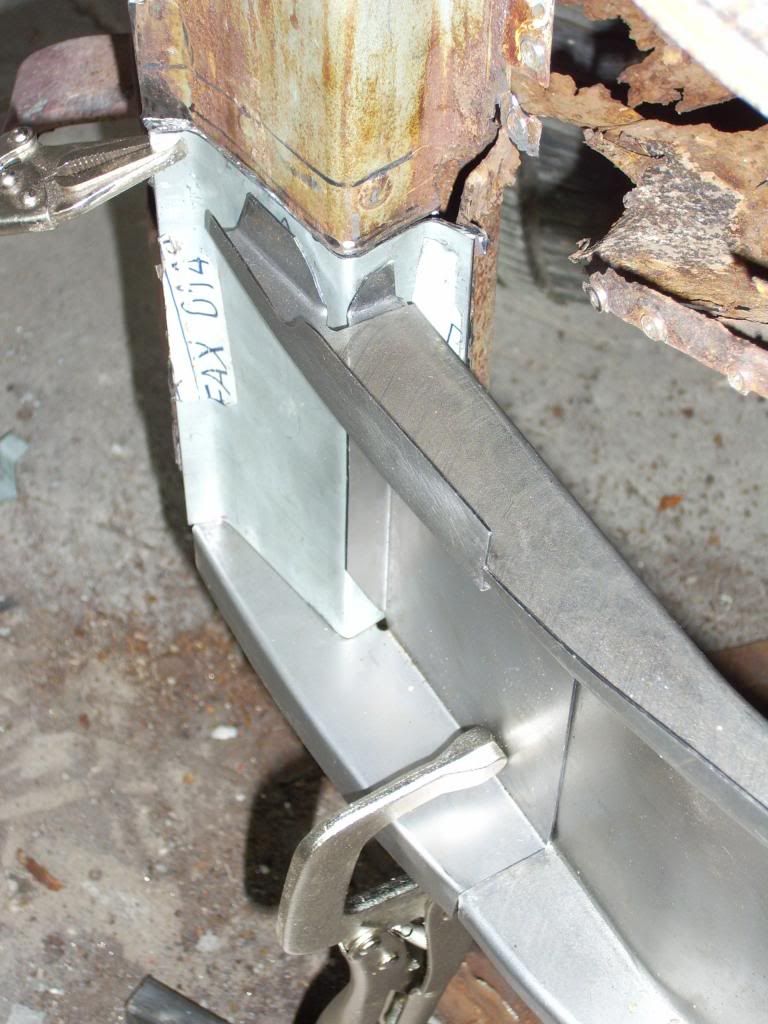
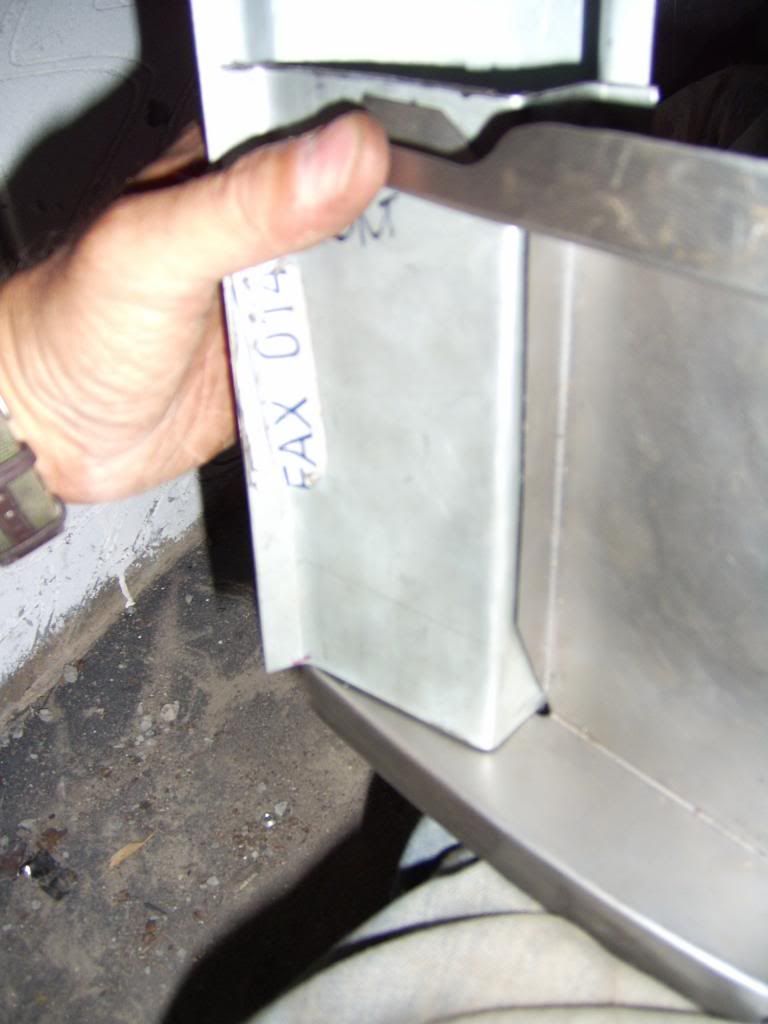
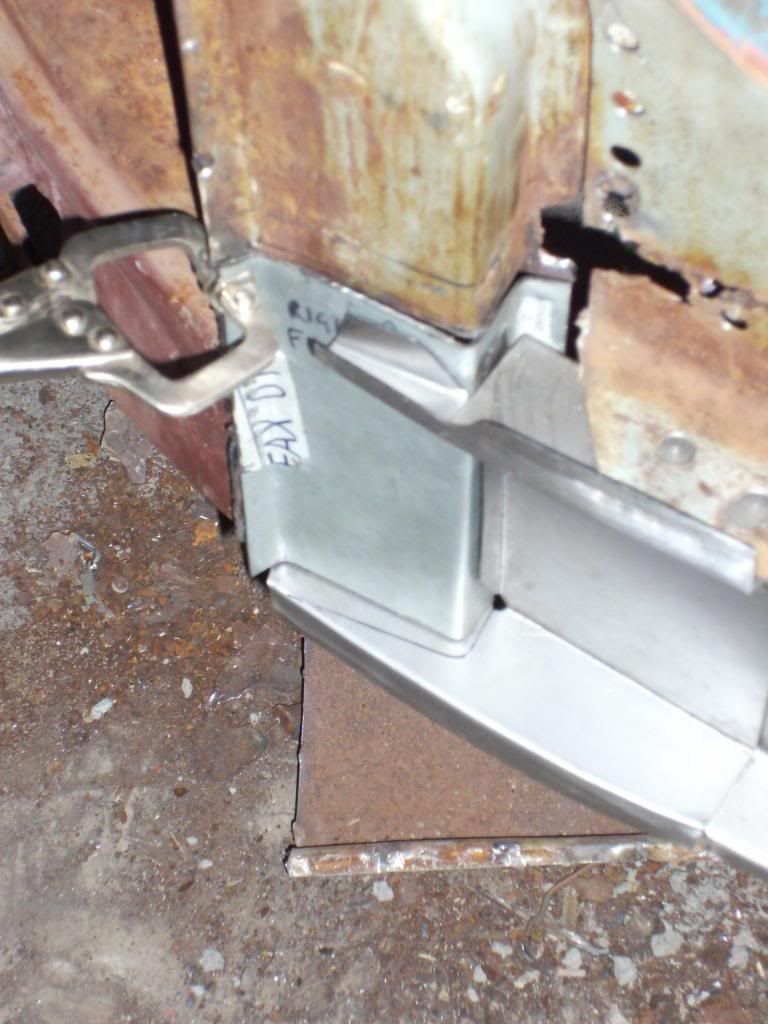
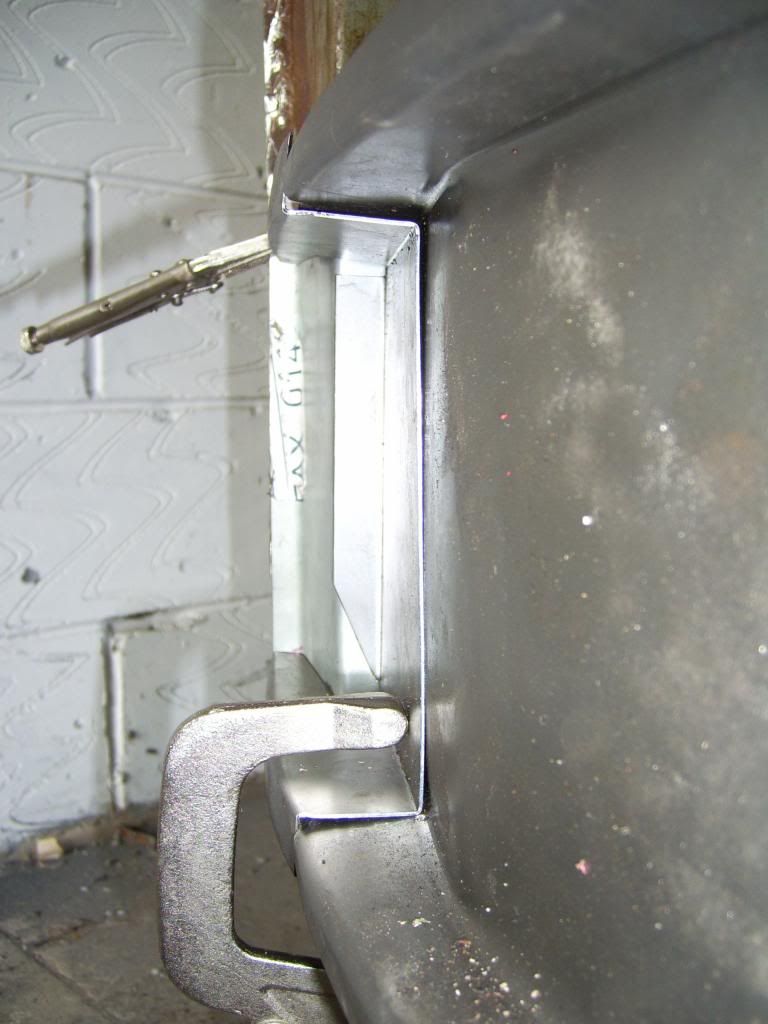
Another issue is the issue of parts not quite fitting again. Shouldn't this bracket not fit into the inner valance a bit better? It's about 5mm out, that does seem a bit much?
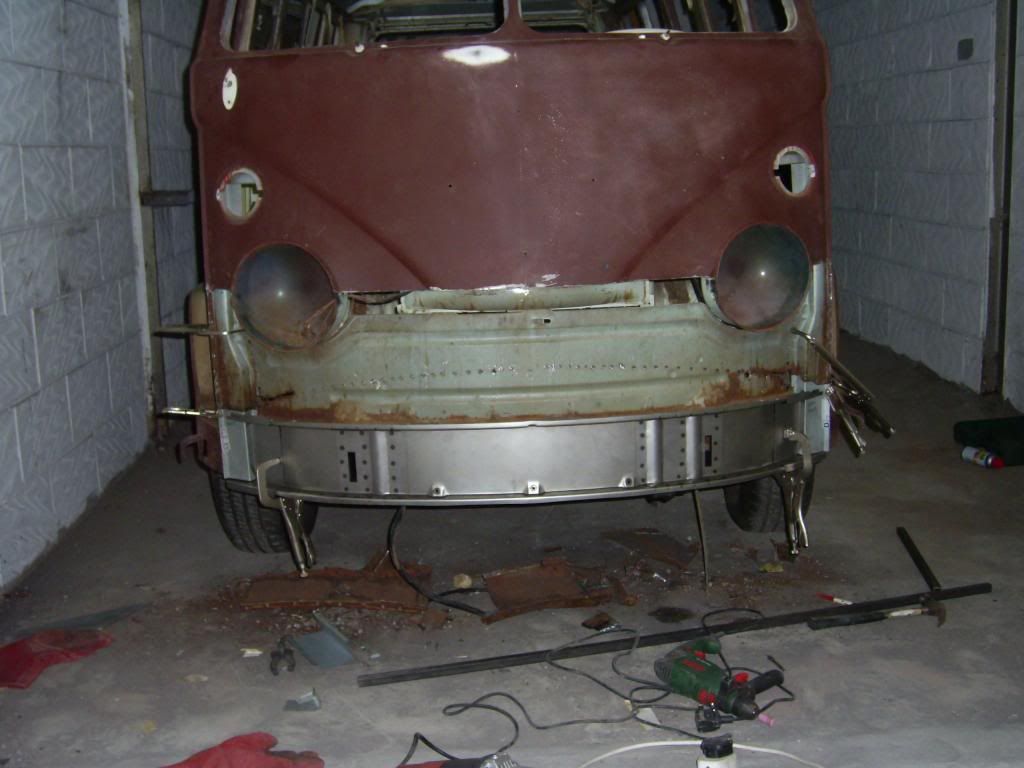
And finally the finished thing so far:

I assume the A-posts are completely straight from here on down, and I can reference them into place like this? Please put me right if not!

and on the inside?

And here, it seems to naturally fall into place like this, but I think this is wrong?

I think it should look more like this?

The black line here shows how much I think it is out?

Another angle showing how this is out a bit:

The other side all falls into place a bit more nicely:

Another issue is the issue of parts not quite fitting again. Shouldn't this bracket not fit into the inner valance a bit better? It's about 5mm out, that does seem a bit much?

And finally the finished thing so far:

pauldee
Registered user
Posts: 211
Joined: Sun Mar 25, 2012 11:07 am
Re: 65 13w deluxe 'Project Franklin'
by pauldee » Thu Aug 01, 2013 11:55 am
Not much to report, but I've been looking at pictures of other blue white over sea blue 13w deluxes, and I've now got a good idea of the look I'm going for:


pauldee
Registered user
Posts: 211
Joined: Sun Mar 25, 2012 11:07 am
Re: 65 13w deluxe 'Project Franklin'
by HE0798 » Thu Aug 01, 2013 2:12 pm
I had the same sort of issues with my A Pillar i set it inline with the upper part of the remaining pillar and it seemed to do, major issues with KF parts being tonk and not really lining up anywhere, I ended up with a mix of both KF and Autocraft.
Trying to remember back to mine but the lower vallance and nose section I installed had extra metal to fold aroun the A Pillar as per the rest of the edge.
Rather that spot welding try drilling and welding through?
Also where the metal does not meet I just ran a cutter down the seam and then welded up the gap when the metal was together.
HE0798
Registered user
Posts: 98
Joined: Tue May 25, 2010 2:07 pm
Re: 65 13w deluxe 'Project Franklin'
by pauldee » Thu Aug 01, 2013 3:34 pm
HE0798 wrote:I had the same sort of issues with my A Pillar i set it inline with the upper part of the remaining pillar and it seemed to do, major issues with KF parts being tonk and not really lining up anywhere, I ended up with a mix of both KF and Autocraft.
Trying to remember back to mine but the lower vallance and nose section I installed had extra metal to fold aroun the A Pillar as per the rest of the edge.
Rather that spot welding try drilling and welding through?
Also where the metal does not meet I just ran a cutter down the seam and then welded up the gap when the metal was together.
I'm beginning to realise what people really mean when they talk about parts 'not being an exact fit' and 'needing a bit of fettling'.
The weird thing is that if I follow the straight line down on the A-posts, the left A-post lines up nicely with the bracket on the front valance, but the right one, which is straight seems a bit out as shown in the photos.
I can bend the front valance into position, but then It's just held in place by the dogleg, so when I remove that the A-post will just ping forward no matter how much I brace it
pauldee
Registered user
Posts: 211
Joined: Sun Mar 25, 2012 11:07 am
Re: 65 13w deluxe 'Project Franklin'
by snapy » Thu Aug 01, 2013 6:35 pm
pauldee wrote:Not much to report, but I've been looking at pictures of other blue white over sea blue 13w deluxes, and I've now got a good idea of the look I'm going for:
That's not blue white over sea blue..............
More like bronze over tan
snapy
Registered user
Posts: 472
Joined: Thu Oct 27, 2011 6:35 pm
Re: 65 13w deluxe 'Project Franklin'
by pauldee » Wed Aug 21, 2013 12:56 pm
A bit more of an update. Replacement left A-post rear section in position:
welded:
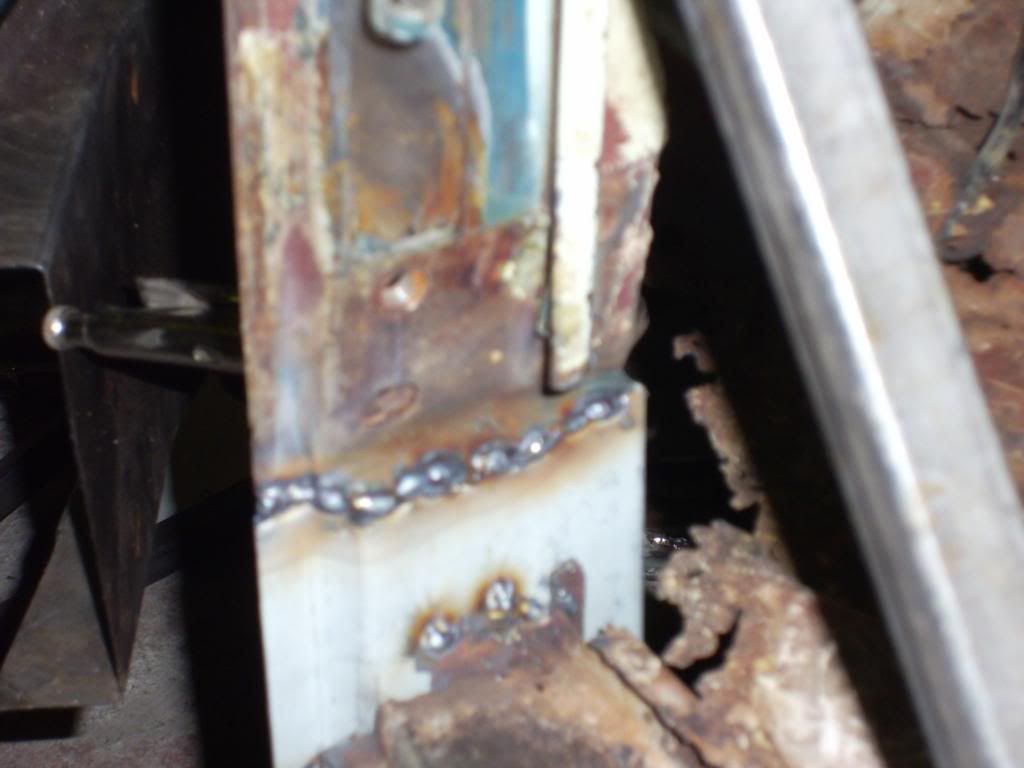
and ground down (ignore the crappy welds to the dogleg, they're just tacks as it will be partly or wholly replaced at some point):

Front part cut to shape:
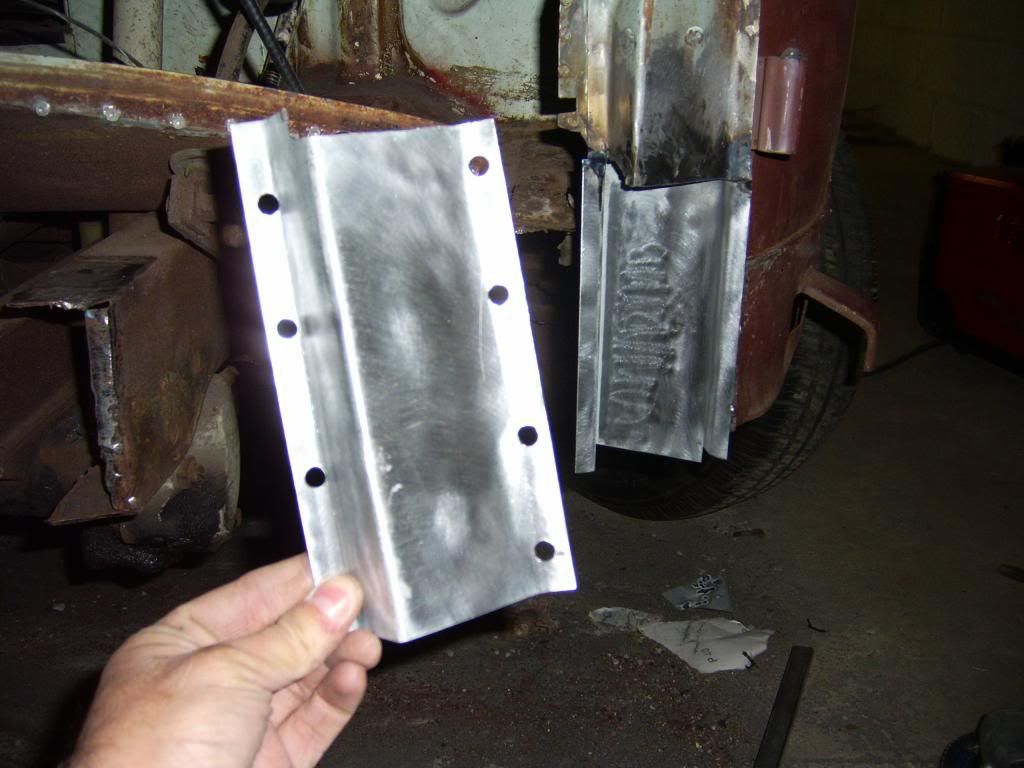
And in position:
Welded:
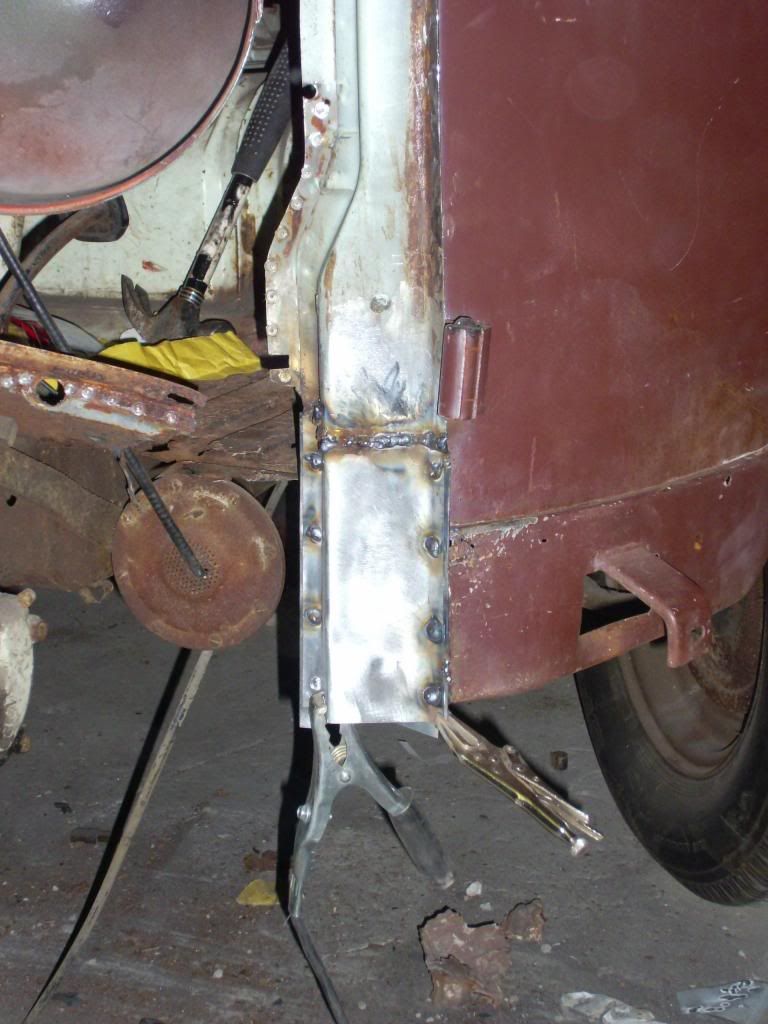
And ground:
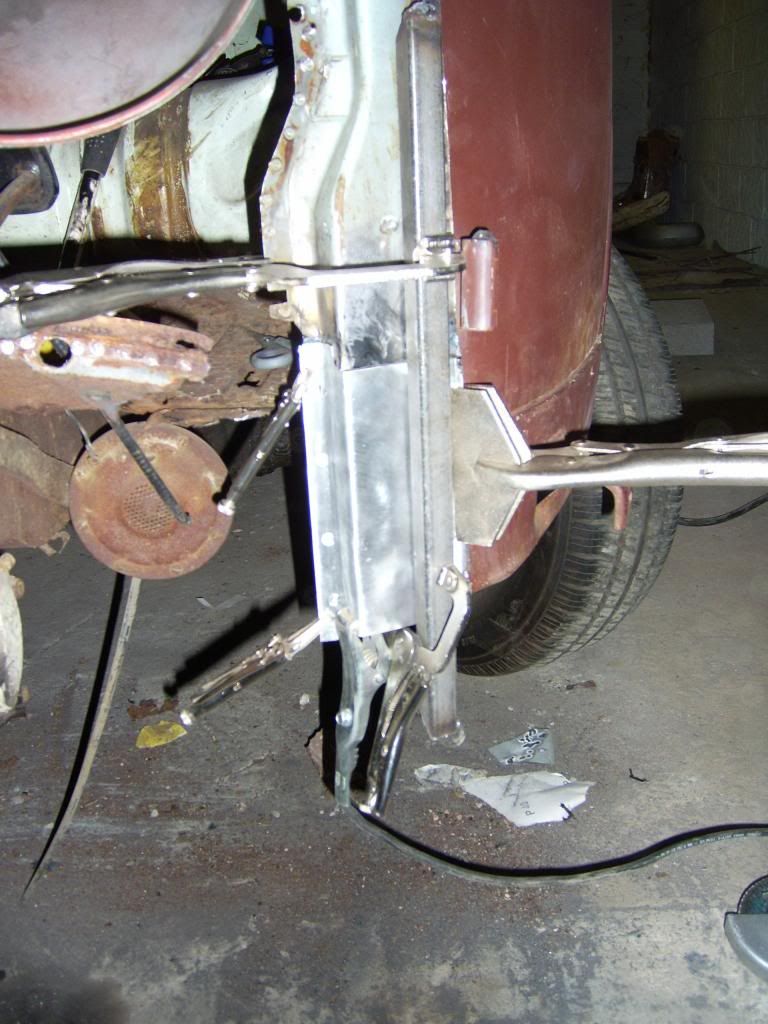
For some reason I didn't take many photos of the right hand side. It's amazing how much work you can do whilst forgetting top take pictures. I was basically the same but I didn't do the rear part, as in this case I had at least something to attach the front to. Here it is mid welding:
With a bit of fettling to the brackets between the inner front valance and the A-posts, the trial fittings seem to go together quite nicely:
It will take a bit more fettling to get that lower front panel on but it should all be OK.

welded:

and ground down (ignore the crappy welds to the dogleg, they're just tacks as it will be partly or wholly replaced at some point):

Front part cut to shape:

And in position:

Welded:

And ground:

For some reason I didn't take many photos of the right hand side. It's amazing how much work you can do whilst forgetting top take pictures. I was basically the same but I didn't do the rear part, as in this case I had at least something to attach the front to. Here it is mid welding:

With a bit of fettling to the brackets between the inner front valance and the A-posts, the trial fittings seem to go together quite nicely:

It will take a bit more fettling to get that lower front panel on but it should all be OK.

pauldee
Registered user
Posts: 211
Joined: Sun Mar 25, 2012 11:07 am