You are viewing the Split Screen Van Club forum archive.
The forum archive is read-only.Unfortunately in 2021 the Split Screen Van Club forum suffered a ransomware attack and lots of the forum data was lost.
What threads that have been recovered are now searchable on this site. Some threads may be incomplete and some images are still being recovered.
Forum archive search
Noah my new 65 Canterbury Pitt project
by jonthebuilder » Fri Aug 23, 2013 5:14 pm
Hi all
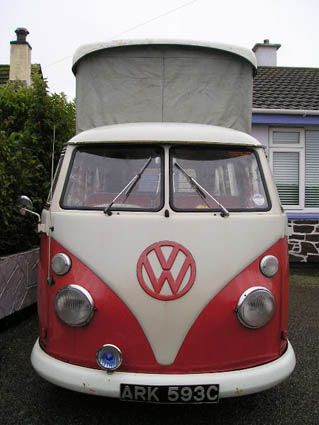
I have recently purchased the 65 Canterbury Pitt Splittie that was advertised on here by elevenreds, a very nice chap indeed.
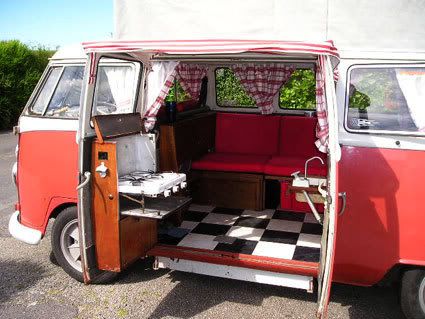
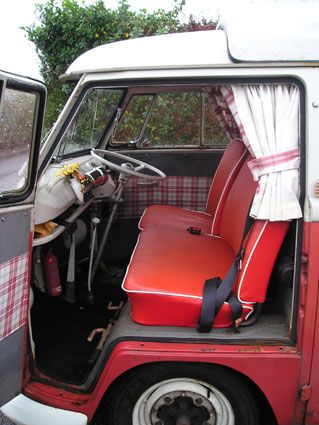
It needs a serious resto, but the previous owner has sourced most of the panels needed and various other bits. What attracted me to the bus was the fact that it has a complete original interior and a pop top with two bunks. I have 4 children including one month old twin boys!
My history with busses is an early bay and then I had a minter of an so42 that I loved. My other half made me sell it to get our current bus because it had no beds in the roof. I currently have a 74 bay with a big 2.4 type 4 engine with porche cooling, cog box gearbox, serious camping interior etc..it's a lovely thing but I has never done it for me so that is now up for sale.
My plans for this bus is to restore to smart solid condition, but not a show winner, as we are keen campers. It needs extensive chassis and floor work, a short side ( autocraft panel supplied) lower nose and nose inners, and other work.. I'm a builder by trade and have done some resto work before but not on this scale so I'm nervous and excited at the same time. First stage is to get the entire underside blasted to see what's left, plus some other localised blasting on the body away from the long panels. I'm drawing all my inspiration and knowledge from the many excellent threads on this forum
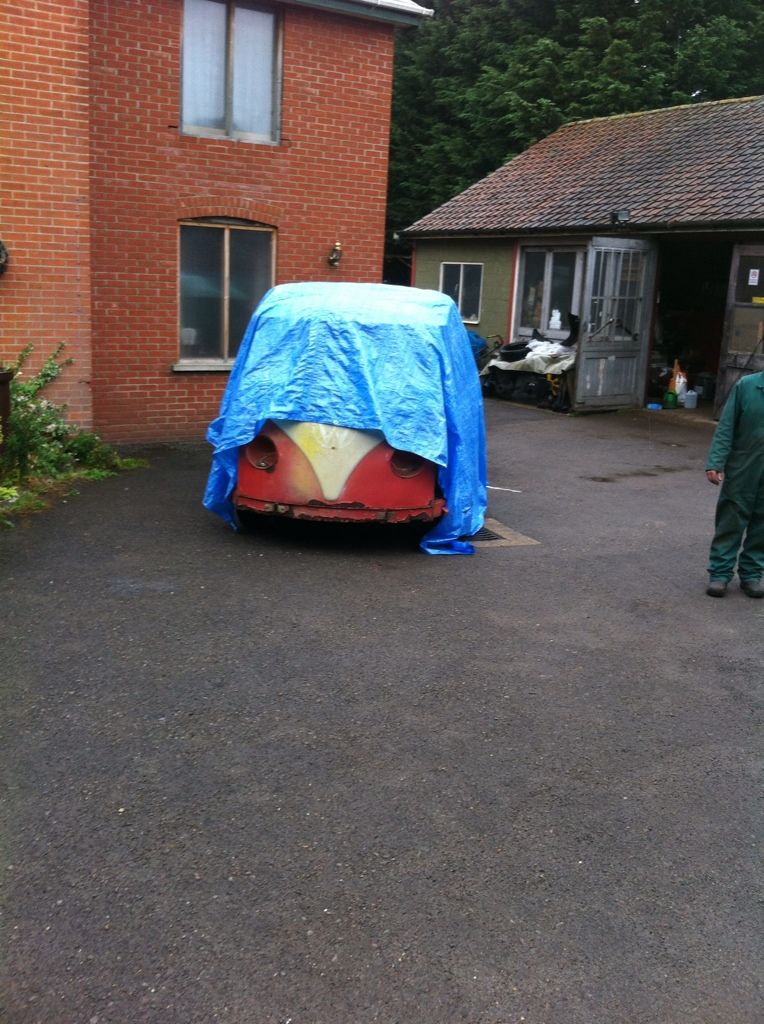
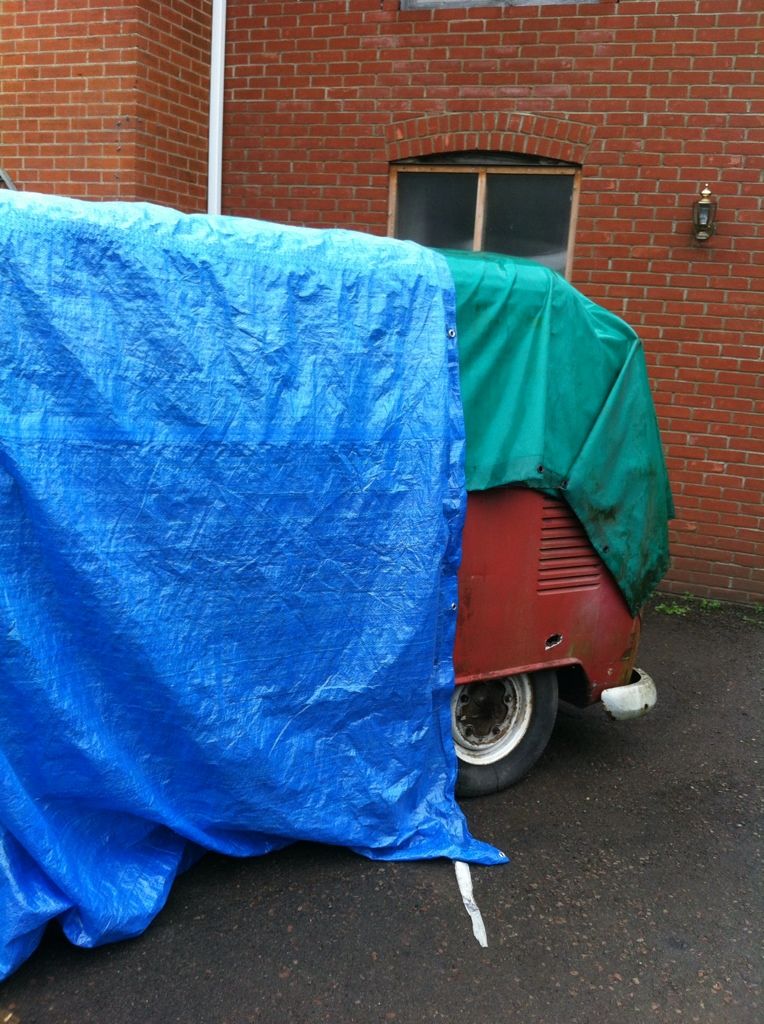
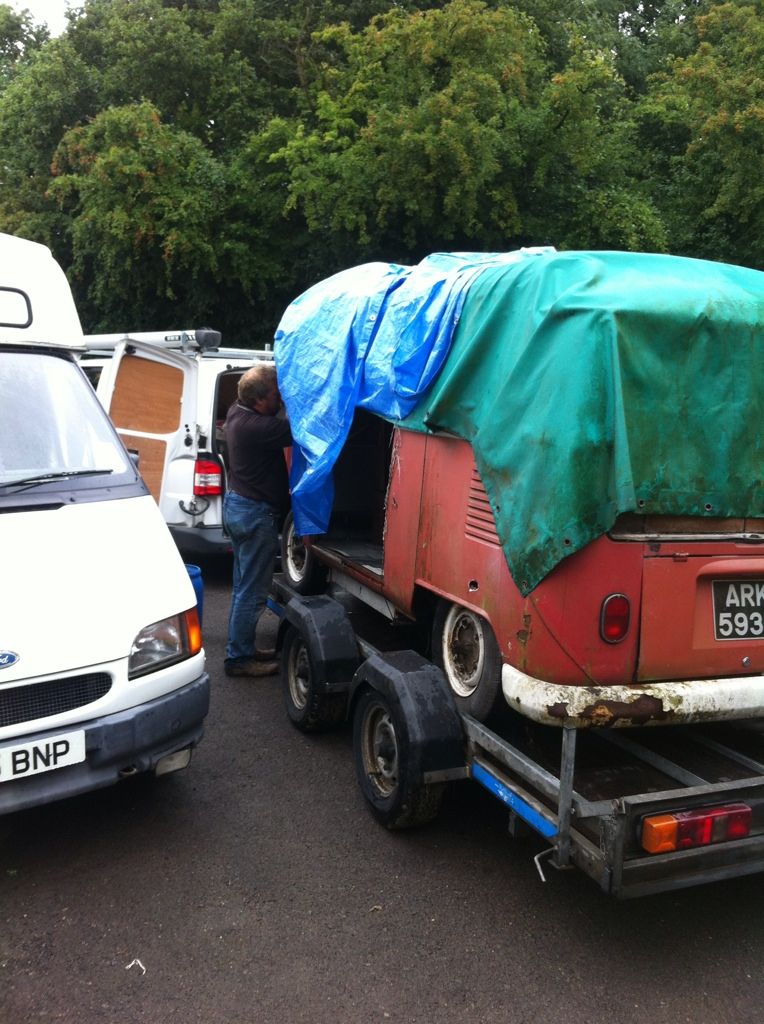
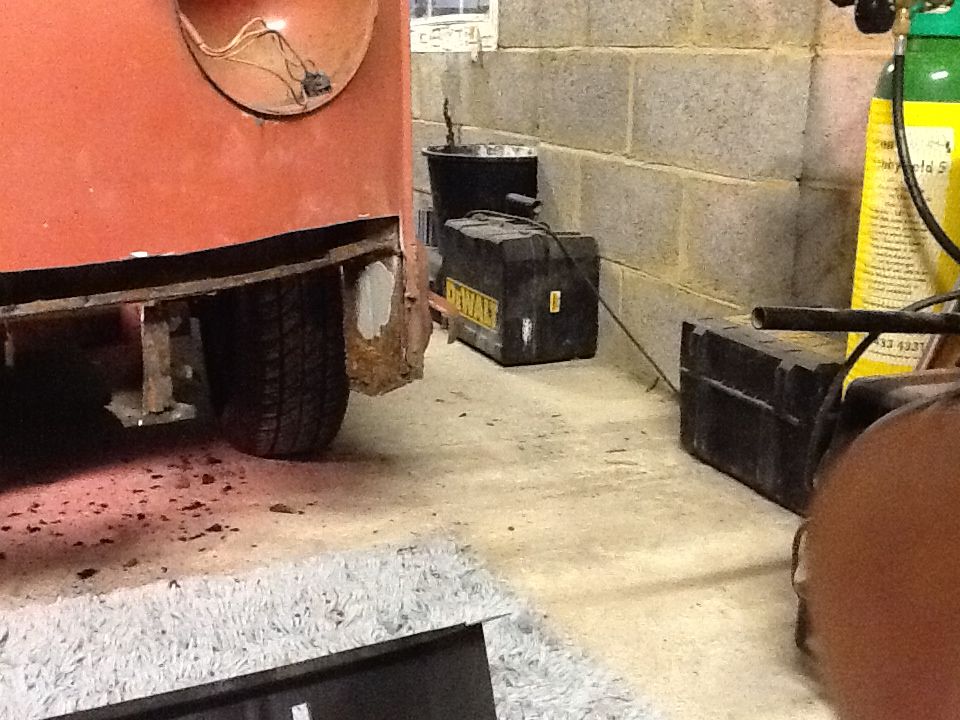
Anyway, some piccies...... These are of the van as found
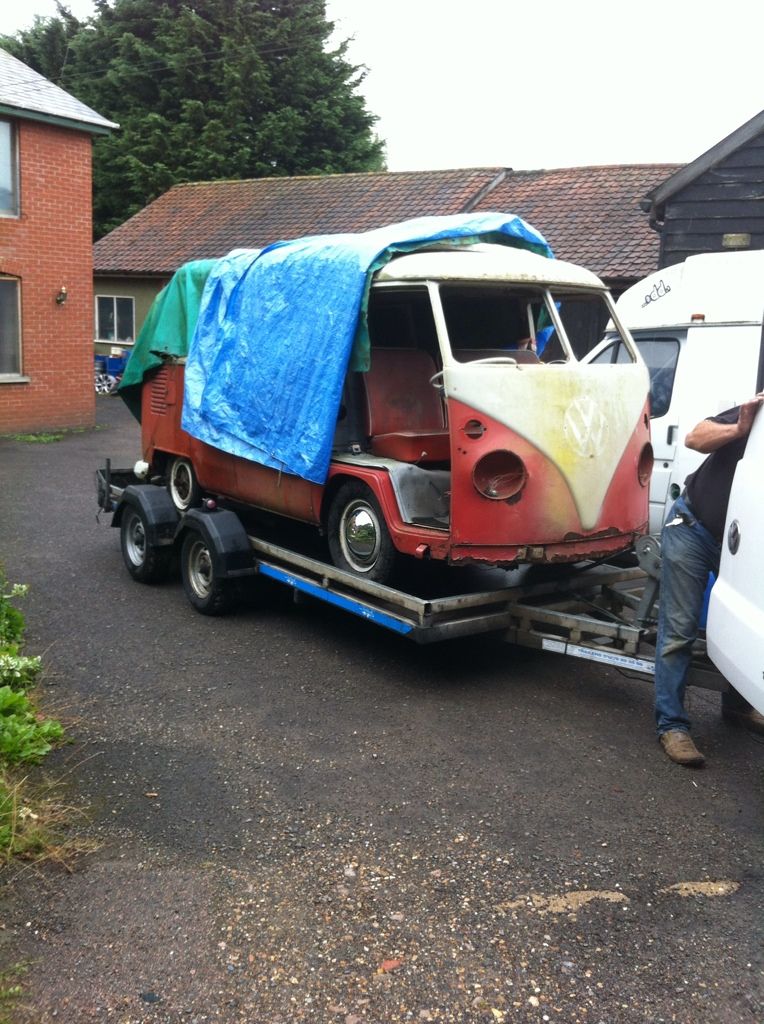
So we loaded her on the trailor and filled my t5 up with all the bits
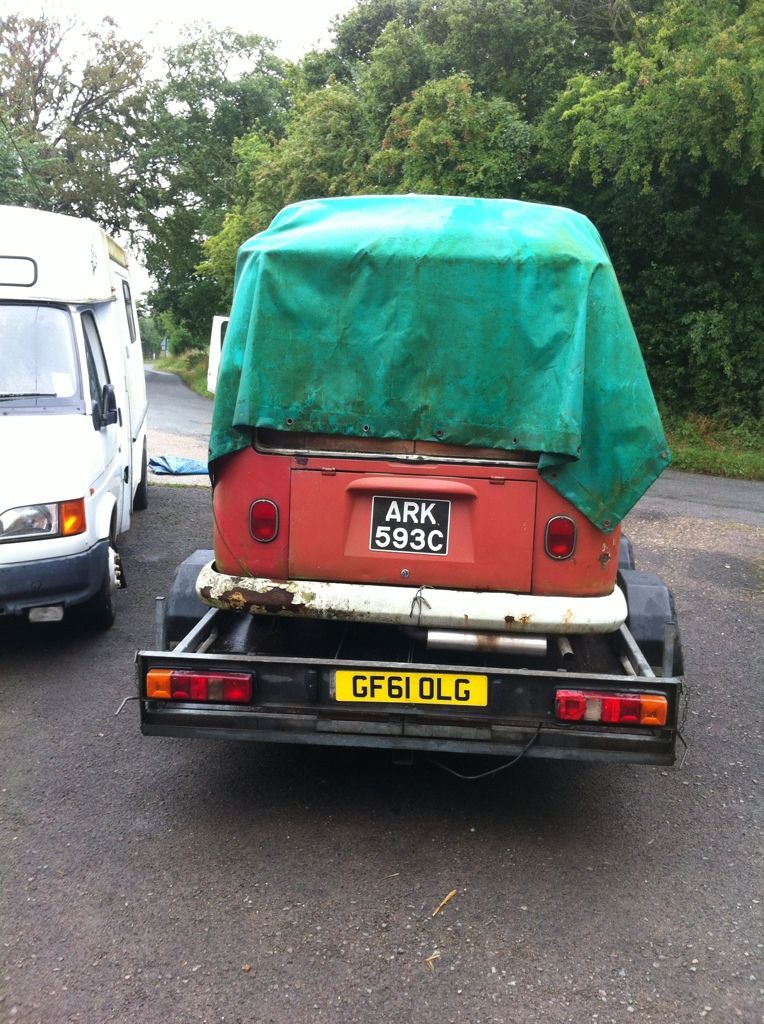
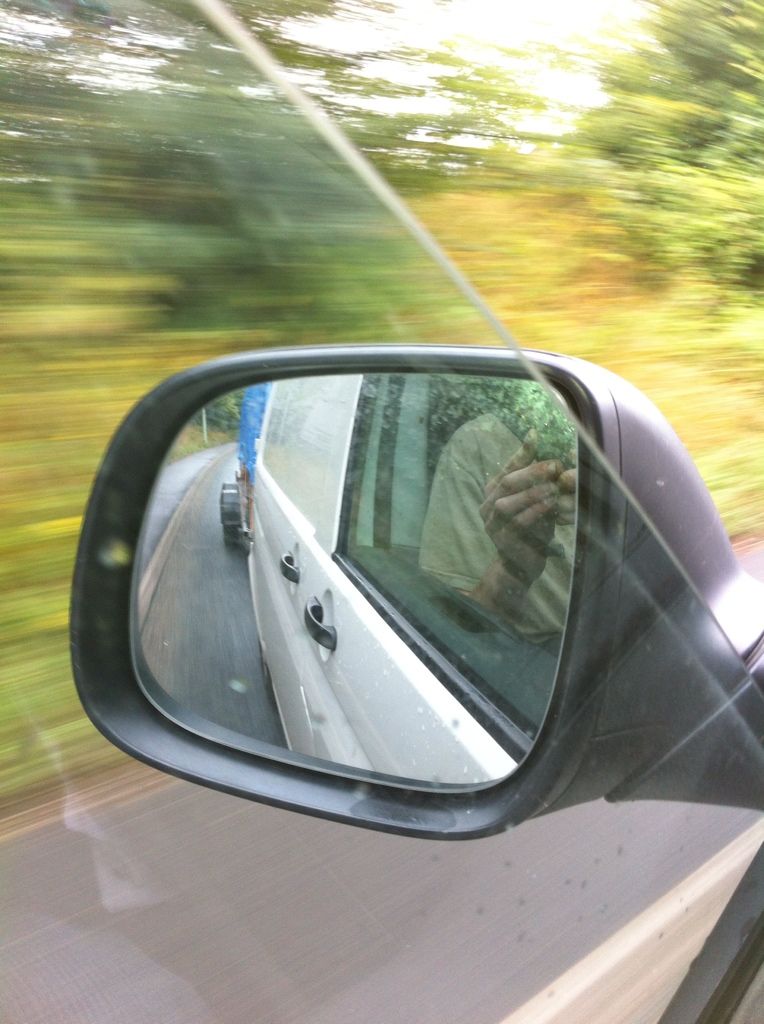
We then set off home
And finally arrived home
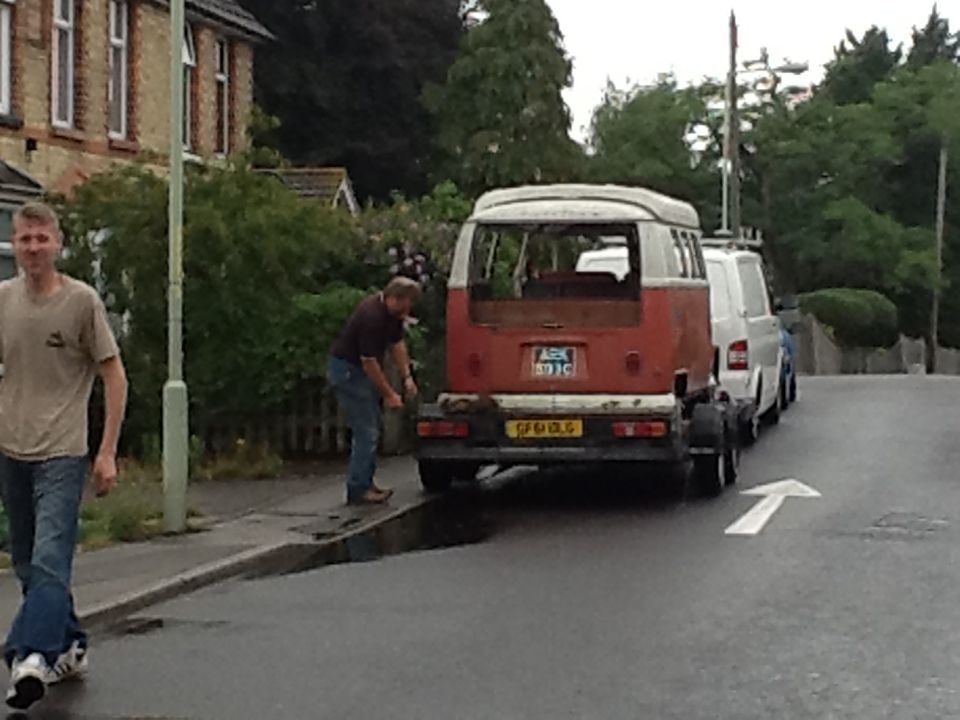


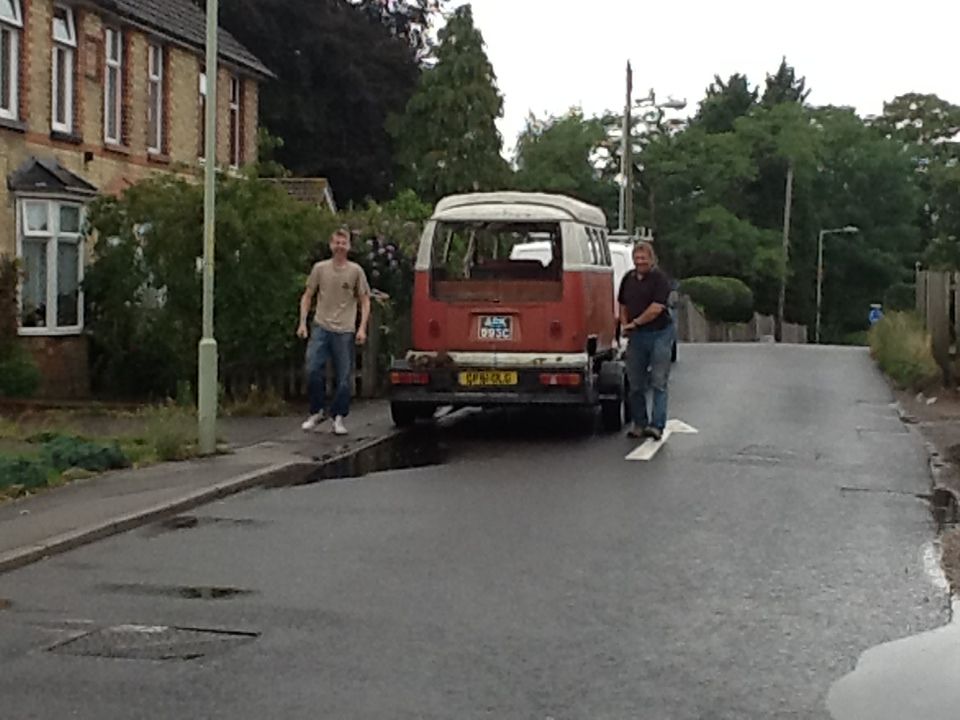
So there we are. She's home safe and sound awaiting her place in the garage when the bay window as sold. If anyone knows anyone interested in a big motor bay then let me know.
Anyway this weekend I hope to remove the interior and other stuff, then my mate is going to help me remove the engine, and then it's off to the blisters. In the meantime, could anyone help me with the following...
Is it still possible to reliably get klassic fab panels in the uk?
Does anyone in the uk supply a rhd cargo floor?
Where can I get the lower bulkhead repair panels with the bulge that protrudes into the wheel arch?
At help gratefully appreciated
Will update again soon
Jon
I have recently purchased the 65 Canterbury Pitt Splittie that was advertised on here by elevenreds, a very nice chap indeed.
It needs a serious resto, but the previous owner has sourced most of the panels needed and various other bits. What attracted me to the bus was the fact that it has a complete original interior and a pop top with two bunks. I have 4 children including one month old twin boys!
My history with busses is an early bay and then I had a minter of an so42 that I loved. My other half made me sell it to get our current bus because it had no beds in the roof. I currently have a 74 bay with a big 2.4 type 4 engine with porche cooling, cog box gearbox, serious camping interior etc..it's a lovely thing but I has never done it for me so that is now up for sale.
My plans for this bus is to restore to smart solid condition, but not a show winner, as we are keen campers. It needs extensive chassis and floor work, a short side ( autocraft panel supplied) lower nose and nose inners, and other work.. I'm a builder by trade and have done some resto work before but not on this scale so I'm nervous and excited at the same time. First stage is to get the entire underside blasted to see what's left, plus some other localised blasting on the body away from the long panels. I'm drawing all my inspiration and knowledge from the many excellent threads on this forum
Anyway, some piccies...... These are of the van as found
So we loaded her on the trailor and filled my t5 up with all the bits
We then set off home
And finally arrived home
So there we are. She's home safe and sound awaiting her place in the garage when the bay window as sold. If anyone knows anyone interested in a big motor bay then let me know.
Anyway this weekend I hope to remove the interior and other stuff, then my mate is going to help me remove the engine, and then it's off to the blisters. In the meantime, could anyone help me with the following...
Is it still possible to reliably get klassic fab panels in the uk?
Does anyone in the uk supply a rhd cargo floor?
Where can I get the lower bulkhead repair panels with the bulge that protrudes into the wheel arch?
At help gratefully appreciated
Will update again soon
Jon
jonthebuilder
Registered user
Posts: 349
Joined: Thu Aug 12, 2010 7:00 pm
Re: Noah my new 65 Canterbury Pitt project
by JacksHere » Fri Aug 23, 2013 6:47 pm
Any pics of the interior roof and floor?
JacksHere
Registered user
Posts: 252
Joined: Fri Apr 23, 2010 10:11 am
Re: Noah my new 65 Canterbury Pitt project
by jonthebuilder » Fri Aug 23, 2013 6:50 pm
I'll take some over the weekend. Some of the interior is out already including the door cooker and the seemingly elusive table!
jonthebuilder
Registered user
Posts: 349
Joined: Thu Aug 12, 2010 7:00 pm
Re: Noah my new 65 Canterbury Pitt project
by msage » Mon Aug 26, 2013 10:10 am
looks like alot of fun hehehehe
enjoy chap
enjoy chap
msage
Registered user
Posts: 35
Joined: Sat Apr 13, 2013 6:02 am
Re: Noah my new 65 Canterbury Pitt project
by funky » Tue Aug 27, 2013 11:52 am
Finished it yet?

funky

Registered user
Posts: 128
Joined: Wed Oct 12, 2005 4:59 pm
Re: Noah my new 65 Canterbury Pitt project
by jonthebuilder » Tue Aug 27, 2013 5:54 pm
Not yet funky. Mind if I take some body cuts from that old blue scrapper on your driveway??

jonthebuilder
Registered user
Posts: 349
Joined: Thu Aug 12, 2010 7:00 pm
Re: Noah my new 65 Canterbury Pitt project
by OP » Tue Aug 27, 2013 6:24 pm
Named by me
 I bought the bus 12 years ago and named
him Noah due to his numberplate ARK. I sold it to a guy in London 7 years ago as I needed a money injection for my business in Cornwall. I was told that £6k was going to be thrown at him straigt away. Although he was a solid bus he needed the money spending. This very obviously wasn't what happened!!!
I bought the bus 12 years ago and named
him Noah due to his numberplate ARK. I sold it to a guy in London 7 years ago as I needed a money injection for my business in Cornwall. I was told that £6k was going to be thrown at him straigt away. Although he was a solid bus he needed the money spending. This very obviously wasn't what happened!!!

I'm so glad he's found an owner who will bring him back to life. I loved this bus and have so many good memories in him
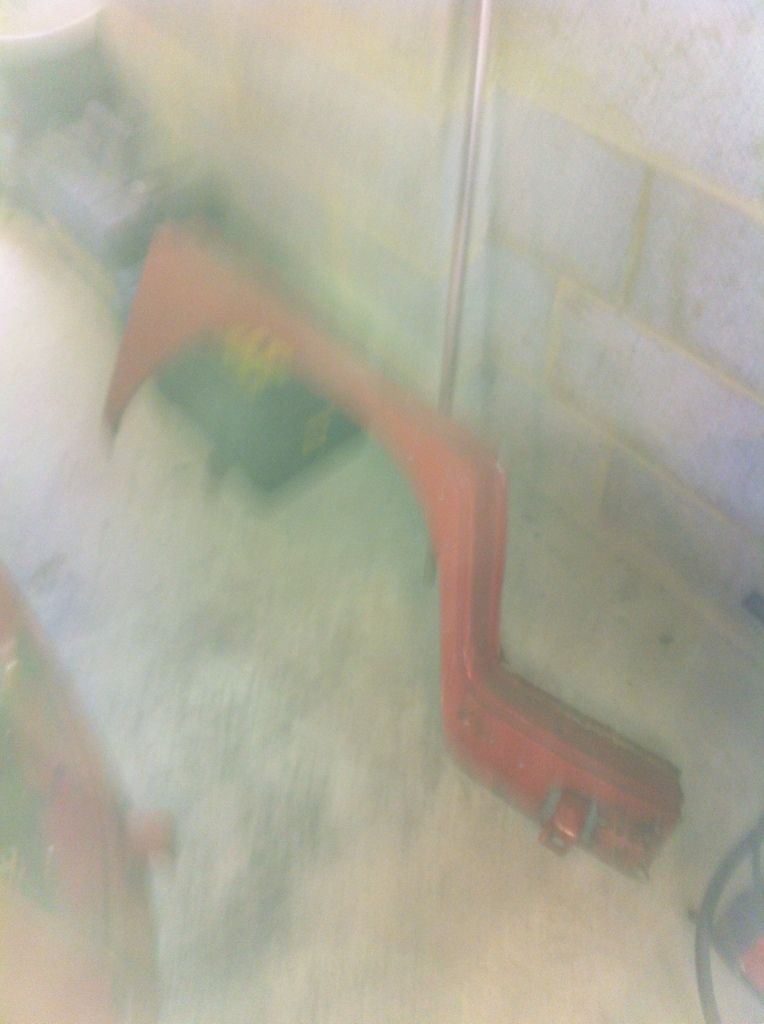
Here he is when I had him....


I bought the bus 12 years ago and named
him Noah due to his numberplate ARK. I sold it to a guy in London 7 years ago as I needed a money injection for my business in Cornwall. I was told that £6k was going to be thrown at him straigt away. Although he was a solid bus he needed the money spending. This very obviously wasn't what happened!!!
I'm so glad he's found an owner who will bring him back to life. I loved this bus and have so many good memories in him
Here he is when I had him....
OP

SSVC Member
Posts: 1958
Joined: Thu Apr 17, 2003 7:33 am
Re: Noah my new 65 Canterbury Pitt project
by jonthebuilder » Wed Aug 28, 2013 4:54 pm
Hey op
Great to hear from the previous owner with some pictures of it on the road. Sadly it has deteriorated since you sold it, but not to the point where it can't be done.. I've stripped her all out now and work will start soon as my bay is sold. Interior is still in lovely nick and complete. He will be going back to original, although a different colour...the Missus wants it light cream over baby blue, that was the precondition of her letting me buy it!
Hopefully you can follow progress on this thread. ..
Jon
jonthebuilder
Registered user
Posts: 349
Joined: Thu Aug 12, 2010 7:00 pm
Re: Noah my new 65 Canterbury Pitt project
by OP » Thu Aug 29, 2013 11:03 am
I look forward to seeing the progress mate. So glad he didn't sell any of the interior as the table in one piece is a rare old beast. I think I may have a photocopy of the original layout plans somewhere. Will see if I can find them.
OP
SSVC Member
Posts: 1958
Joined: Thu Apr 17, 2003 7:33 am
Re: Noah my new 65 Canterbury Pitt project
by jonthebuilder » Sun Sep 08, 2013 9:28 am
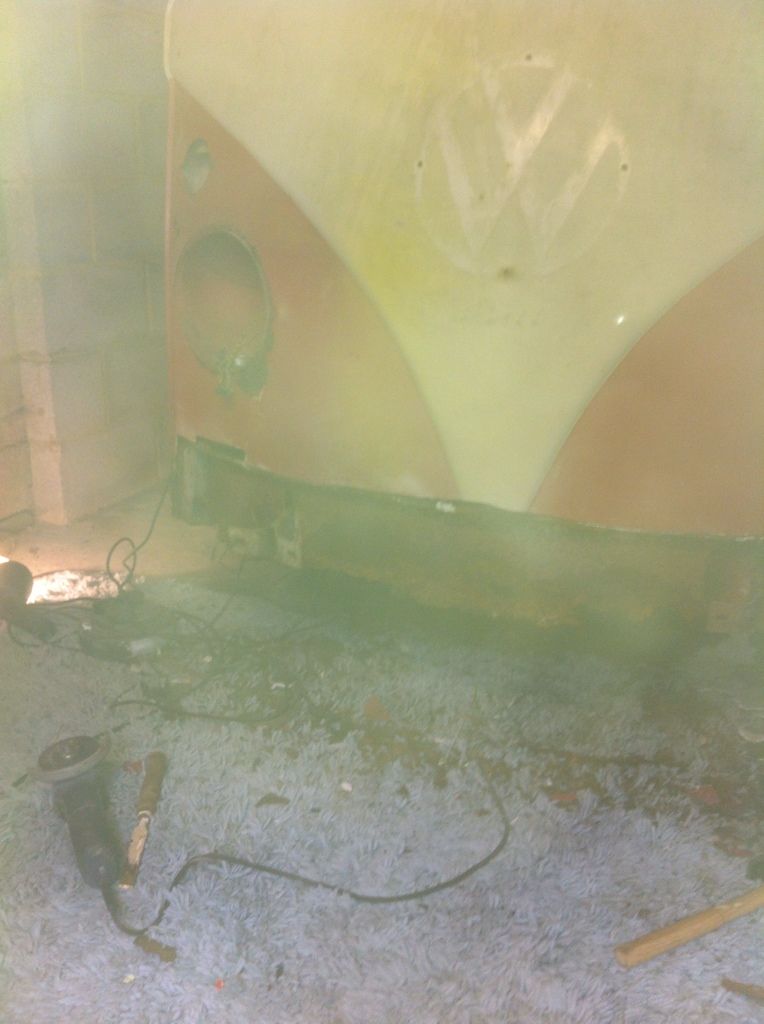
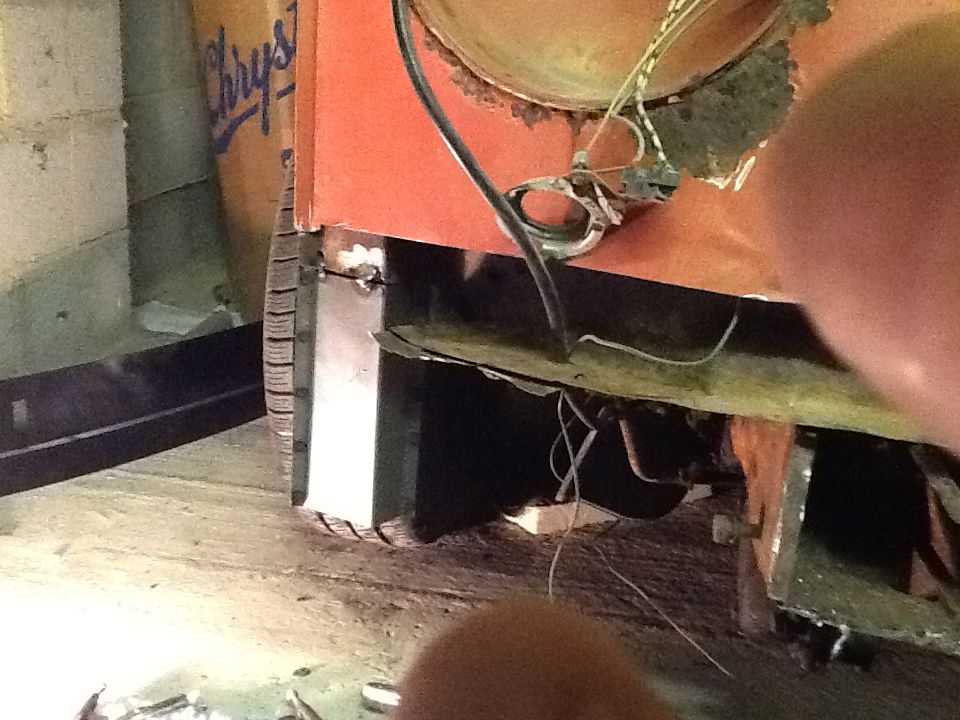
Ok so I have sold my bay window, and it is finally time to move the split into my Garage and start work
I intend to have him sandblasted underneath, but I thought it would make sense to remove the floors and do some repairs before then so that the tops of the chassis rails etc will be within reach of the blaster.
So using my trust fein tool ( micro oscillating saw) and spot weld drill I set about him.
First came off the dog legs. They weren't actually I that bad condition, but they had been fixed on in such a way hat removing them intact would have been extremely difficult. Plus I think they are relatively cheap pattern parts anyway.
So off the drivers side came...
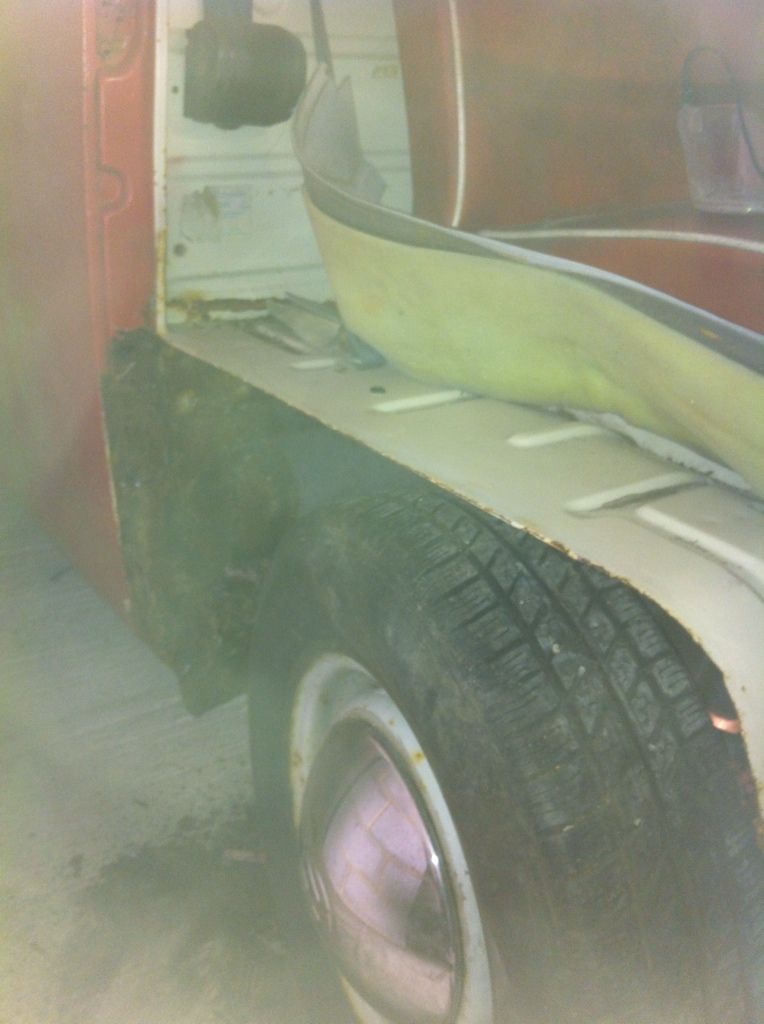
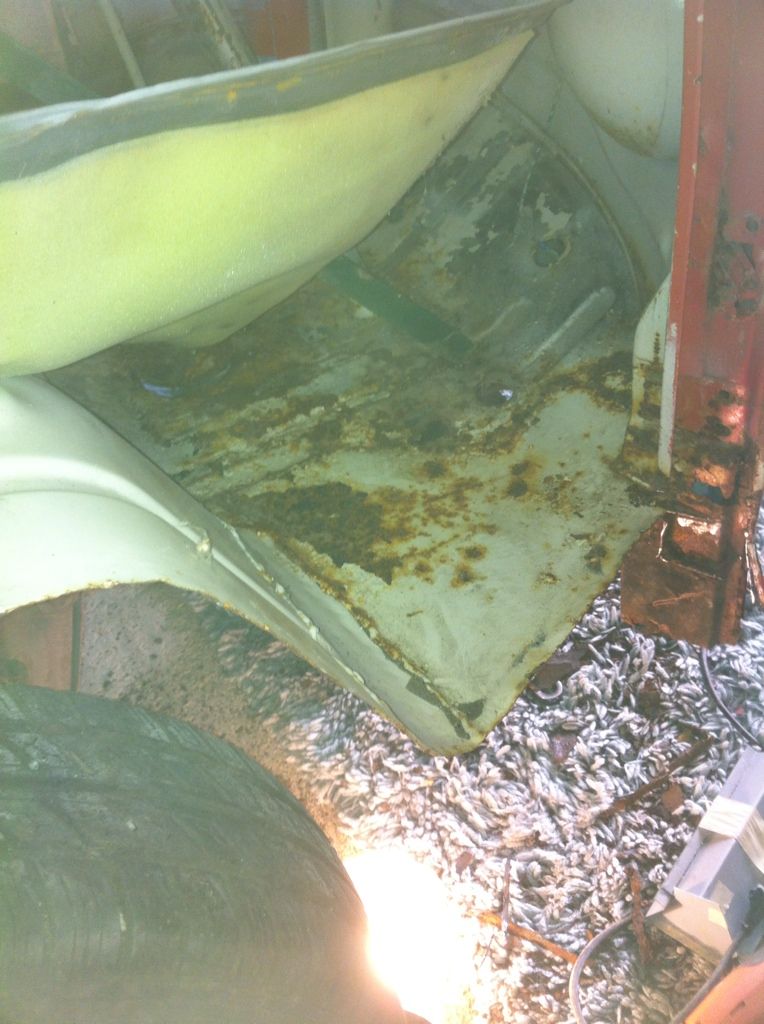
I shan't be wasting the metal, all those little contours on the old doglegs will be useful for localised repairs.
I then started removing the cab floor.. What a mare of a job that is, there must be hundreds of spot welds and where parts of the floor have rusted, you can't see where they are.. Plus the £7 a throw spot weld drills are now both nearly blunt so of hAvnt quite finished it, but getting there...
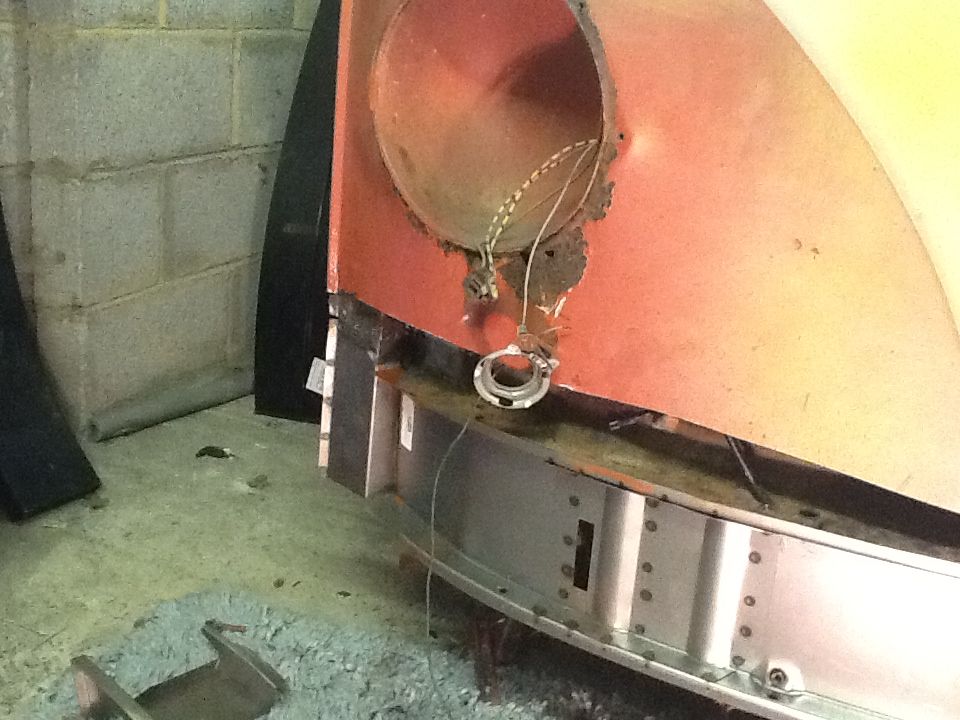
The good news is that bot front chassis legs seem to be I remarkable condition, with just one hole on one leg to repair and another bit that I will remove and repair as the metal is a bit thin. The headlamp support panel looks ok apart from one small localised repair, so once the rest of the cab flor is up, I will remove the lower frog panel and lower a posts and start putting some new metal back
Hope to get back out in the garage early this week
Jon
I intend to have him sandblasted underneath, but I thought it would make sense to remove the floors and do some repairs before then so that the tops of the chassis rails etc will be within reach of the blaster.
So using my trust fein tool ( micro oscillating saw) and spot weld drill I set about him.
First came off the dog legs. They weren't actually I that bad condition, but they had been fixed on in such a way hat removing them intact would have been extremely difficult. Plus I think they are relatively cheap pattern parts anyway.
So off the drivers side came...
I shan't be wasting the metal, all those little contours on the old doglegs will be useful for localised repairs.
I then started removing the cab floor.. What a mare of a job that is, there must be hundreds of spot welds and where parts of the floor have rusted, you can't see where they are.. Plus the £7 a throw spot weld drills are now both nearly blunt so of hAvnt quite finished it, but getting there...
The good news is that bot front chassis legs seem to be I remarkable condition, with just one hole on one leg to repair and another bit that I will remove and repair as the metal is a bit thin. The headlamp support panel looks ok apart from one small localised repair, so once the rest of the cab flor is up, I will remove the lower frog panel and lower a posts and start putting some new metal back
Hope to get back out in the garage early this week
Jon
jonthebuilder
Registered user
Posts: 349
Joined: Thu Aug 12, 2010 7:00 pm
Re: Noah my new 65 Canterbury Pitt project
by funky » Sun Sep 08, 2013 5:16 pm
Gettin stuck in there big Jon!!

funky
Registered user
Posts: 128
Joined: Wed Oct 12, 2005 4:59 pm
Re: Noah my new 65 Canterbury Pitt project
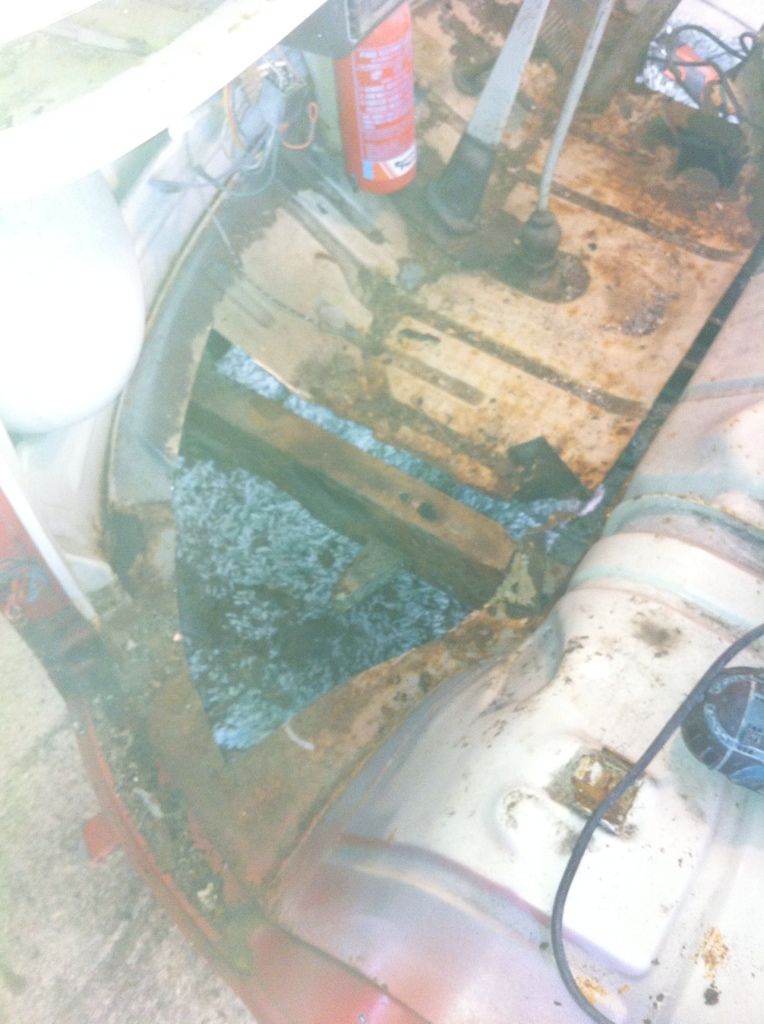
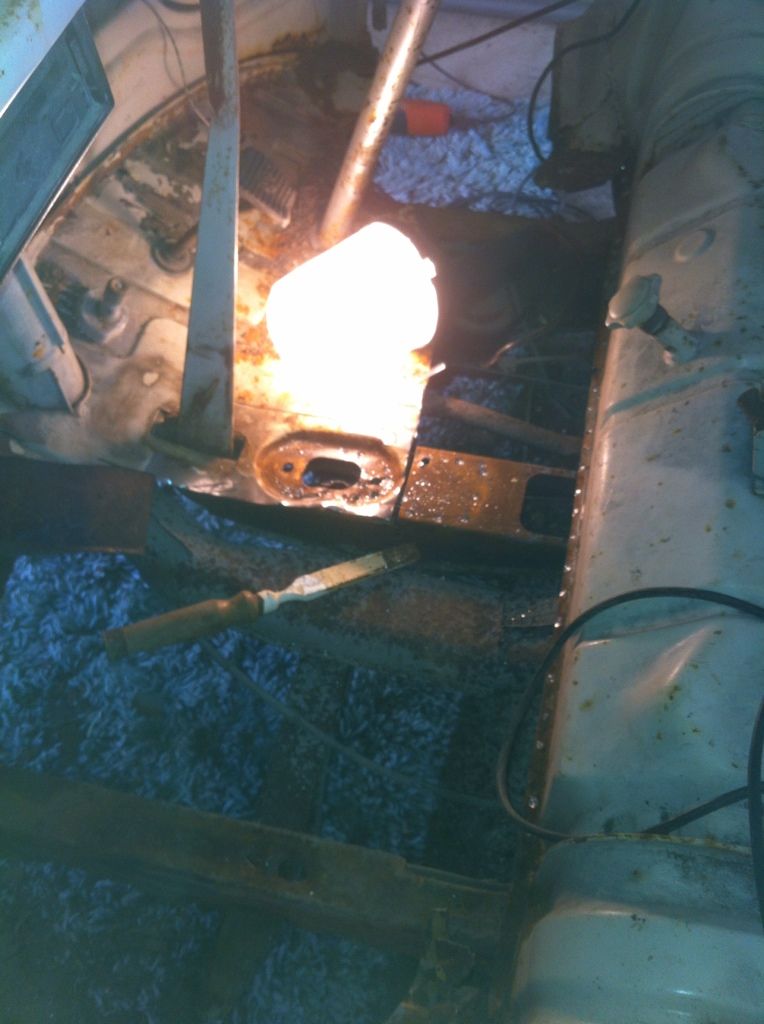
by jonthebuilder » Fri Sep 13, 2013 10:29 pm
Hello all on a rainy Friday night...
As the other half has been going up to bed early with our newborn twin boys, I have had the chance to escape to the garage every evening this week, although the temptation to go another 20 yards to the pub opposite our house has been hard to resist. None t less I have manged to make some progress this week.. I finally got the rest of the cab floor up and have had three deliveries of new panels this week, so I set about the a posts and front end.
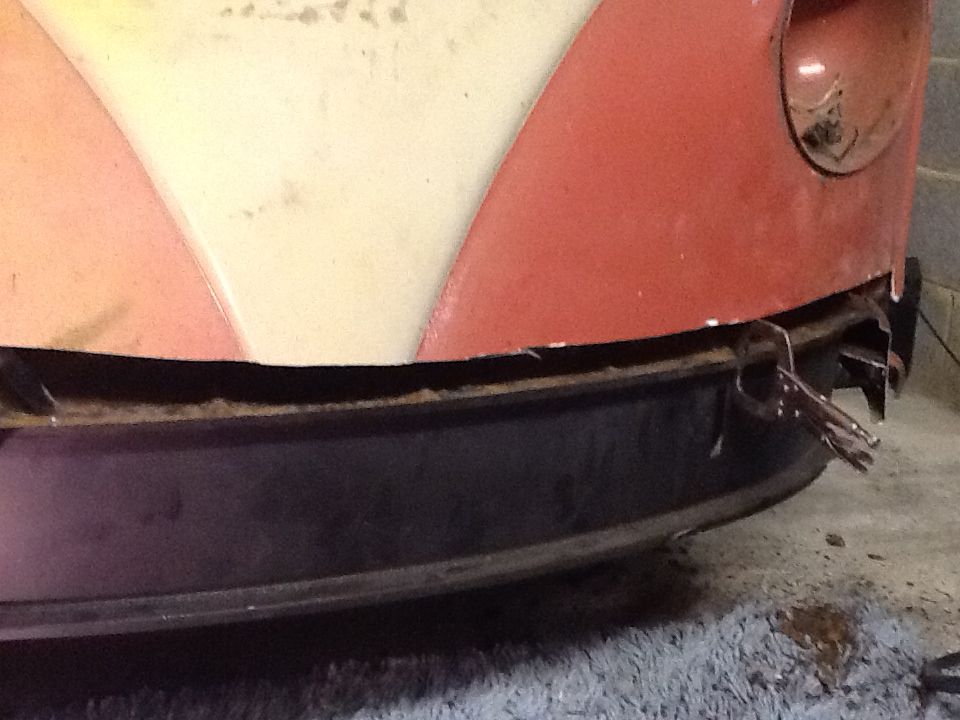
First I removed the lower nose, or rather swept it off with a stiff brush....
Apologies for the quality fbthis photo.....subsequent photos have been taken with my iPad..
He has clearly had a new front panel fitted before and new a posts, although the a posts had been stuffed inside the upper original part to join rather than a nice butt weld..
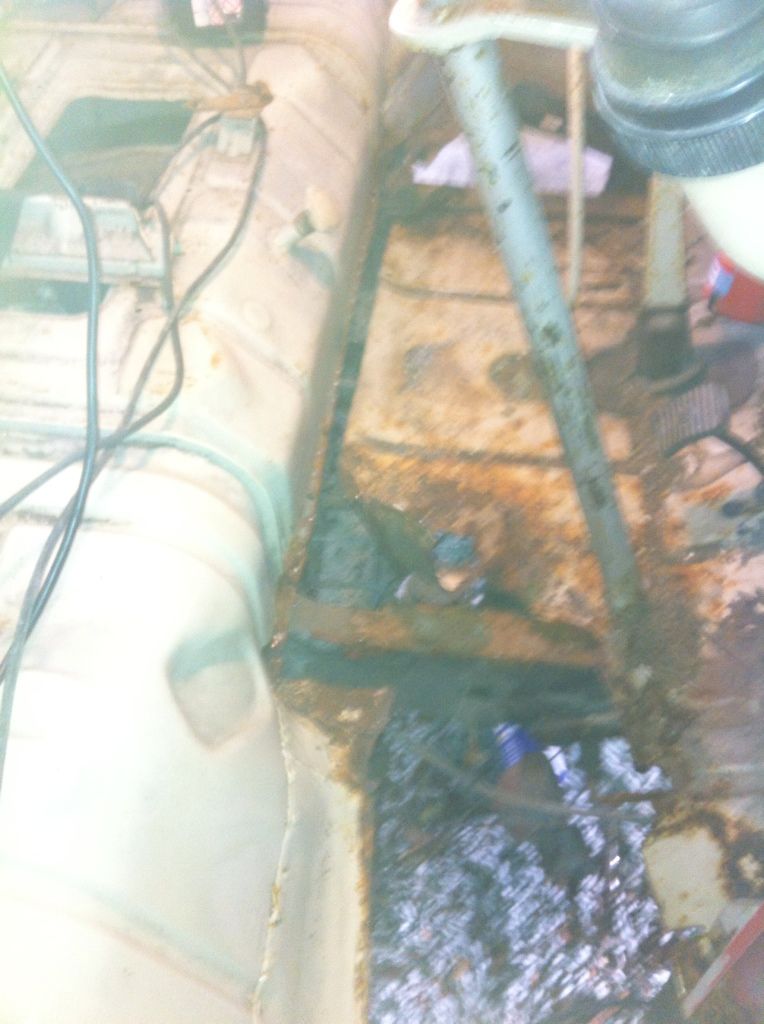
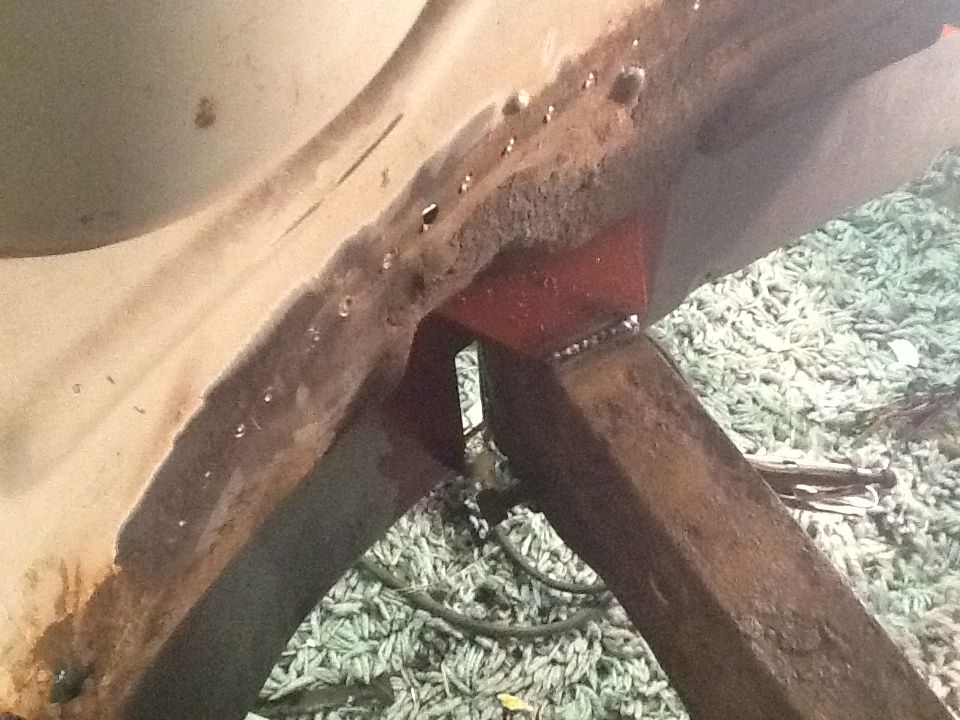
The rot had gone p as far as the lower hinge plate but there was just enough good metal to avoid cutting the posts further up. So I removed the remains of the lower inner valence and the lower front panel and then tacked on the first a post, using a straight piece of steel to ensure the lower a post stayed in line with upper...
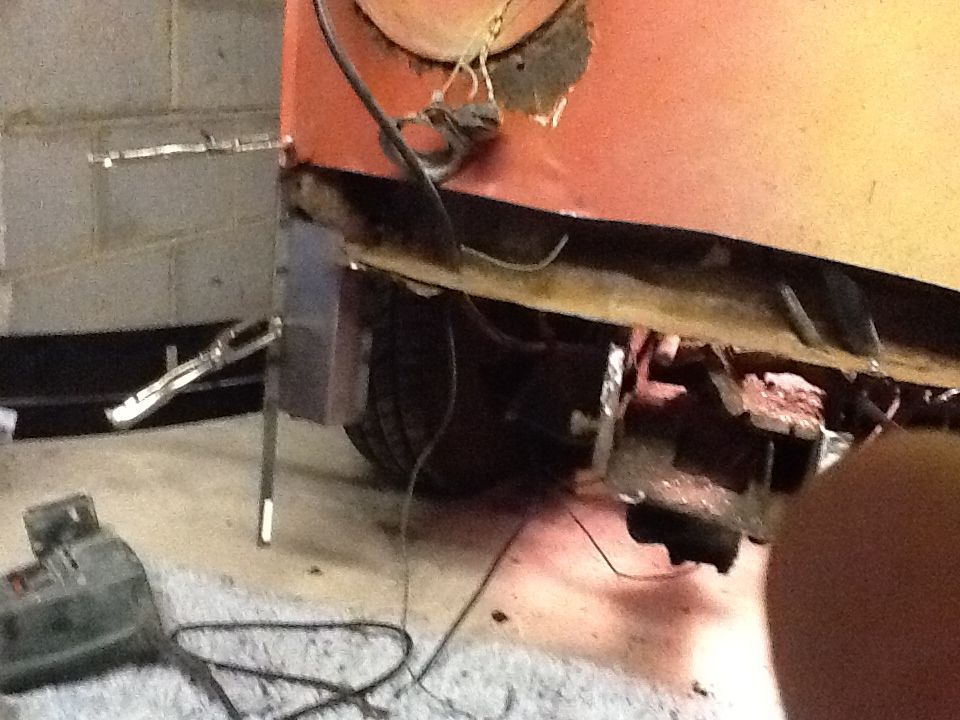
The headlamp support panel has a couple of little holes but I'm not going to replace it, rather repair the holes..
This is the old a post on the other side
First a post tacked on for now unil I check it all lines up
Then I trial fitted the inner valence with the valence support brackets
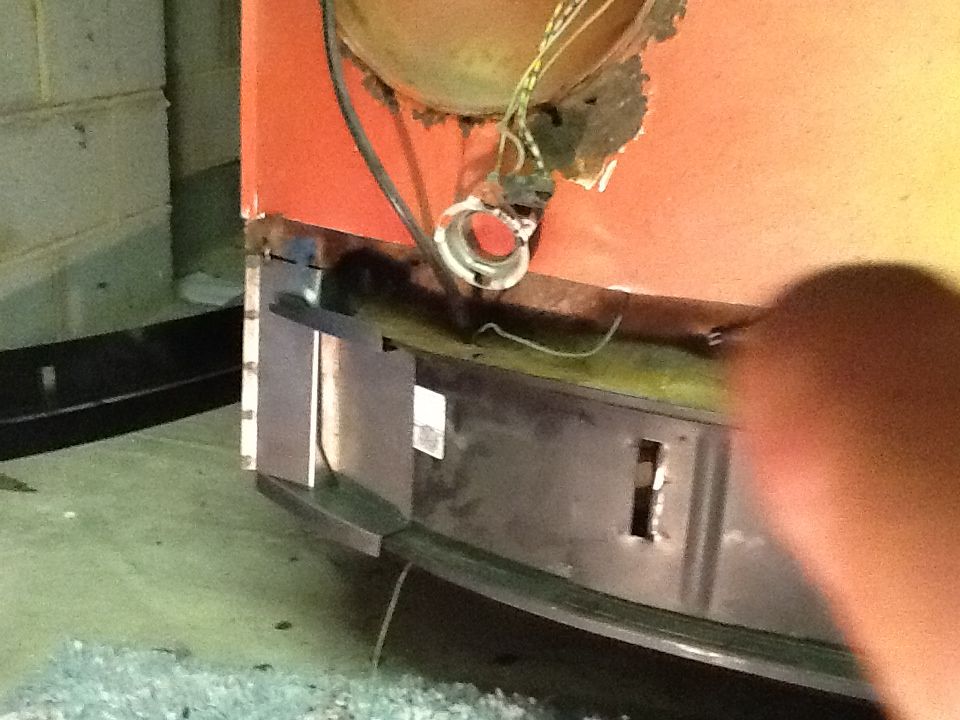
And the same the othe side
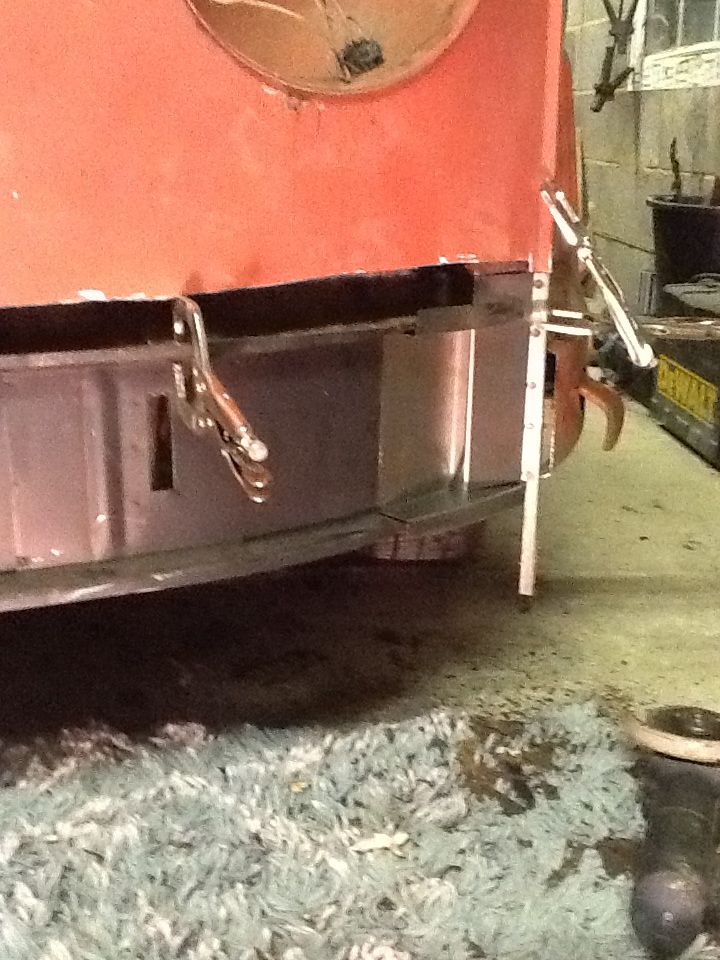
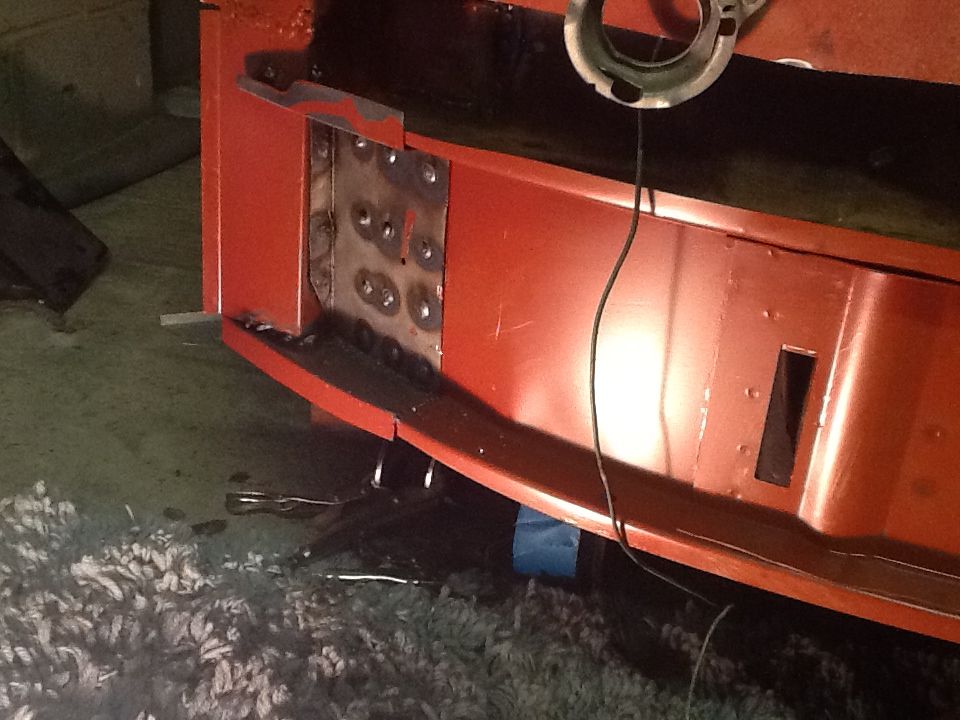
And finally put the lower fort panel on as a try fit..it's a scofield panel that came with the van so it needs a bit of fettling at the edges but its not too bad.
So that's as far as I've got as of tonight. This weekend I'm hoping to fully weld on the lower a posts and shape them round the lower hinge mounts, and then I need to attach the inner valence to the front chassis legs..the lower valence is a scofield part again and doesn't come with any mounting brackets p, whereas the autocraft one seems to have some brackets on the rear to attach to the chassis legs...anyone got any suggestions?
Until next time folks
Jon
As the other half has been going up to bed early with our newborn twin boys, I have had the chance to escape to the garage every evening this week, although the temptation to go another 20 yards to the pub opposite our house has been hard to resist. None t less I have manged to make some progress this week.. I finally got the rest of the cab floor up and have had three deliveries of new panels this week, so I set about the a posts and front end.
First I removed the lower nose, or rather swept it off with a stiff brush....
Apologies for the quality fbthis photo.....subsequent photos have been taken with my iPad..
He has clearly had a new front panel fitted before and new a posts, although the a posts had been stuffed inside the upper original part to join rather than a nice butt weld..
The rot had gone p as far as the lower hinge plate but there was just enough good metal to avoid cutting the posts further up. So I removed the remains of the lower inner valence and the lower front panel and then tacked on the first a post, using a straight piece of steel to ensure the lower a post stayed in line with upper...
The headlamp support panel has a couple of little holes but I'm not going to replace it, rather repair the holes..
This is the old a post on the other side
First a post tacked on for now unil I check it all lines up
Then I trial fitted the inner valence with the valence support brackets
And the same the othe side
And finally put the lower fort panel on as a try fit..it's a scofield panel that came with the van so it needs a bit of fettling at the edges but its not too bad.
So that's as far as I've got as of tonight. This weekend I'm hoping to fully weld on the lower a posts and shape them round the lower hinge mounts, and then I need to attach the inner valence to the front chassis legs..the lower valence is a scofield part again and doesn't come with any mounting brackets p, whereas the autocraft one seems to have some brackets on the rear to attach to the chassis legs...anyone got any suggestions?
Until next time folks
Jon
jonthebuilder
Registered user
Posts: 349
Joined: Thu Aug 12, 2010 7:00 pm
Re: Noah my new 65 Canterbury Pitt project
by pauldee » Sat Sep 14, 2013 7:17 pm
Looking good, I'll be keeping an eye on this!
pauldee
Registered user
Posts: 204
Joined: Sun Mar 25, 2012 11:07 am
Re: Noah my new 65 Canterbury Pitt project
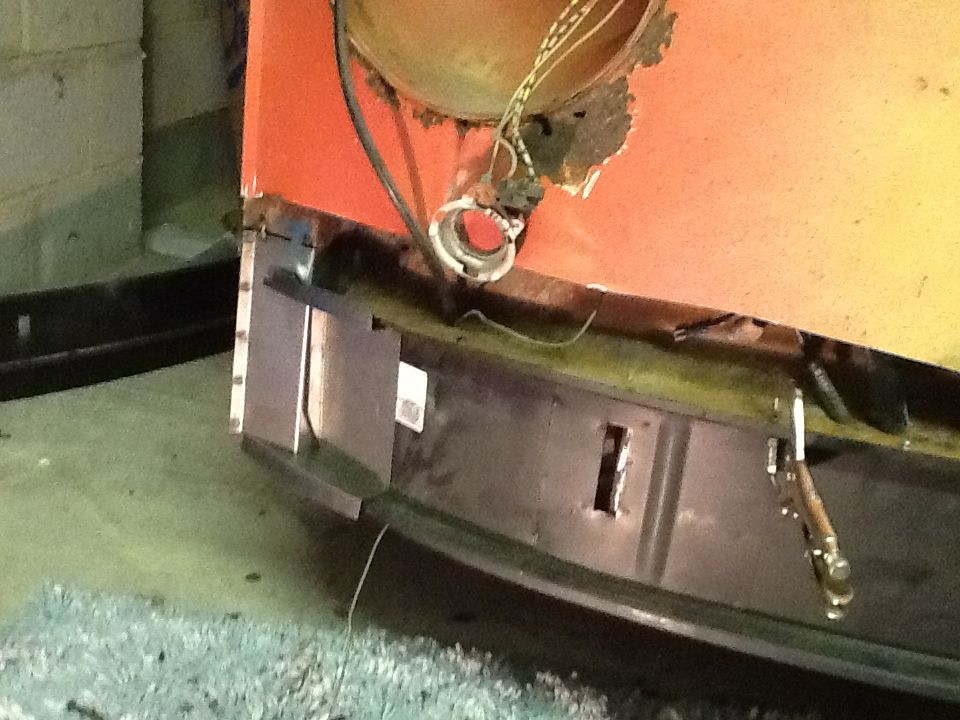
by jonthebuilder » Tue Sep 17, 2013 9:33 pm
Evenin all
Well I managed to grab a couple of evenings in the the garage this week so far.
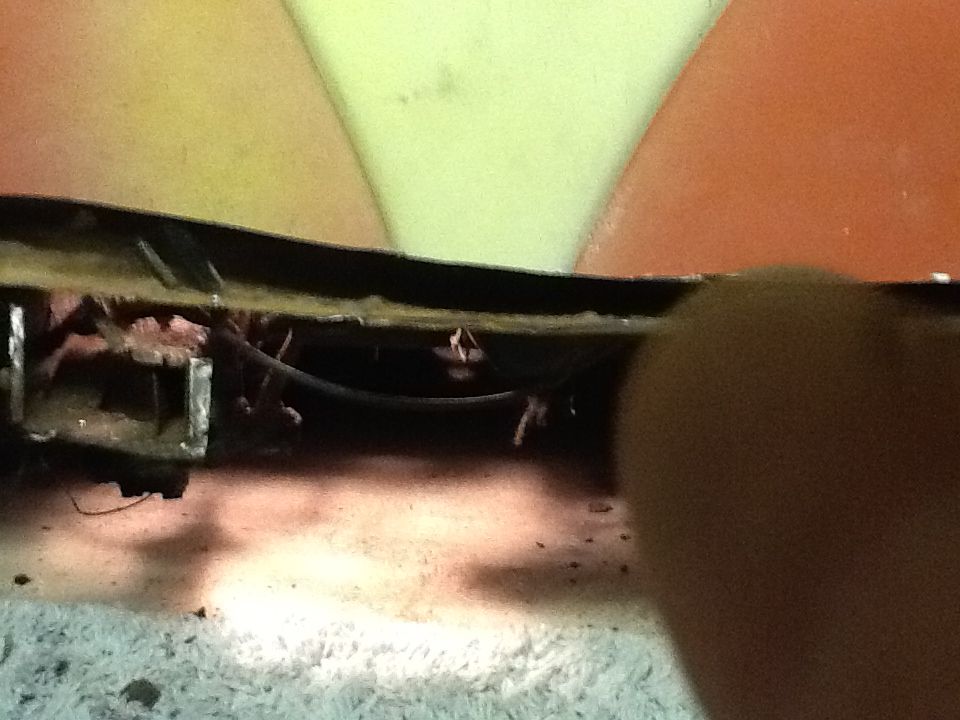
I thought about the schofield valence without the brackets and decided that its not feasible to use that, so yet another call to autocraft and another £110 yielded a valence with the mounting brackets for the ends of the chassis leg. Got to say that the stuff I have had from autocraft so far has been top drawer, well made and a good fit.
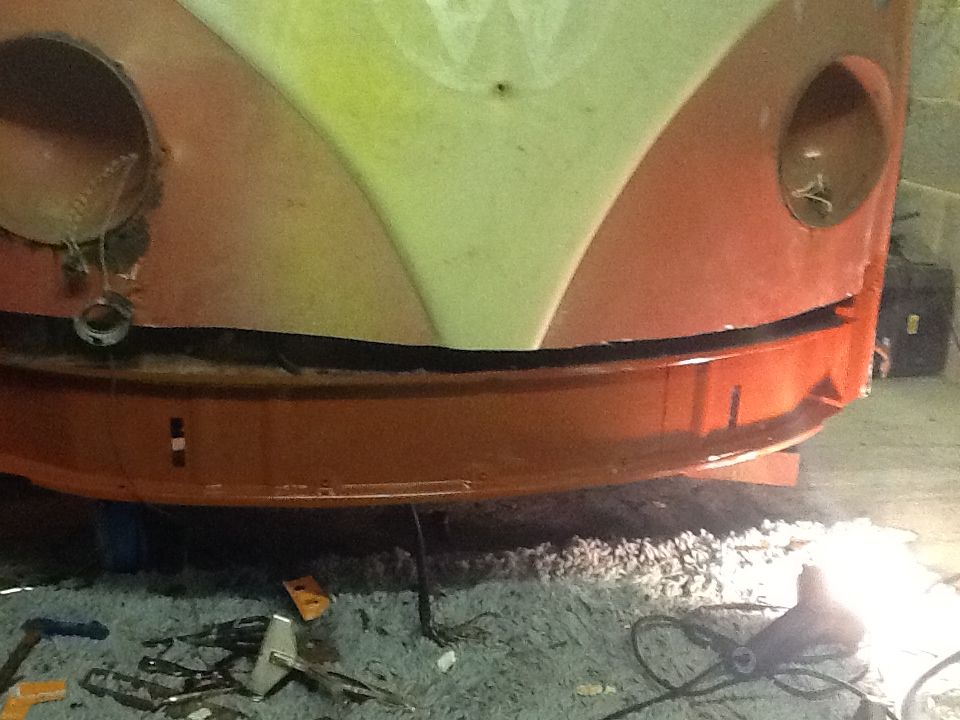
So I cleaned back the edges of the chassis legs and did a trial fit of the valence
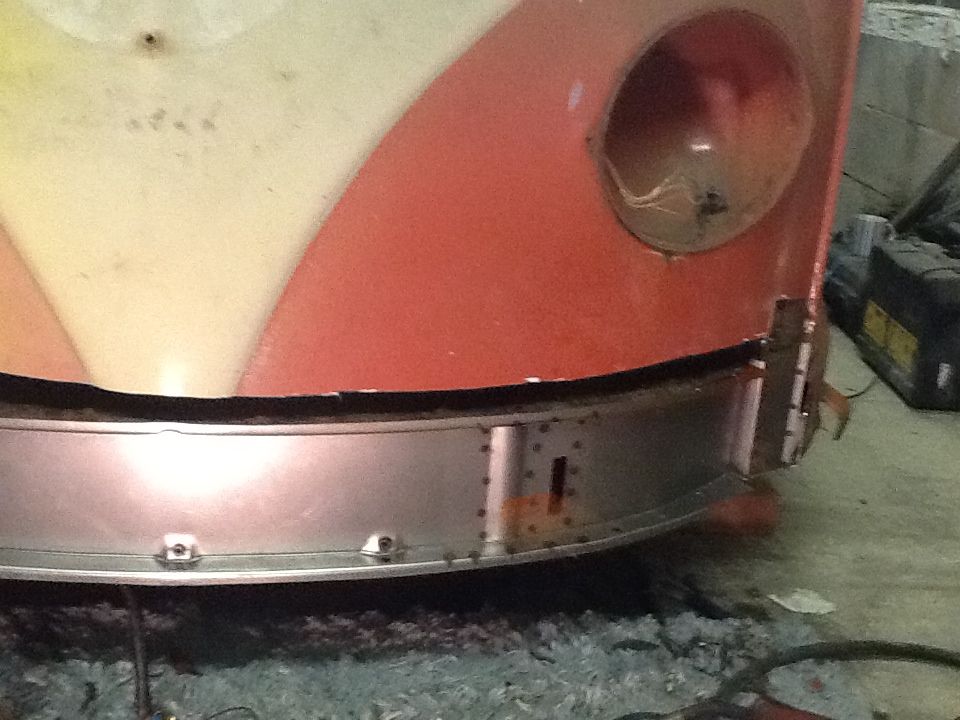
I gave the hard to get areas a coat fired zinc oxide paint, took a deep breath and started to weld it on....
Got one of the brackets that attach the valence to the a post on and then finally gave the whole thing a coat of zinc oxide...
Will try and get the other bracket on tomorrow, but I am under pressure from the other half to finish the utility room that I started a year ago. But then us builders never finish anything on our own houses.......
Well I managed to grab a couple of evenings in the the garage this week so far.
I thought about the schofield valence without the brackets and decided that its not feasible to use that, so yet another call to autocraft and another £110 yielded a valence with the mounting brackets for the ends of the chassis leg. Got to say that the stuff I have had from autocraft so far has been top drawer, well made and a good fit.
So I cleaned back the edges of the chassis legs and did a trial fit of the valence
I gave the hard to get areas a coat fired zinc oxide paint, took a deep breath and started to weld it on....
Got one of the brackets that attach the valence to the a post on and then finally gave the whole thing a coat of zinc oxide...
Will try and get the other bracket on tomorrow, but I am under pressure from the other half to finish the utility room that I started a year ago. But then us builders never finish anything on our own houses.......
jonthebuilder
Registered user
Posts: 349
Joined: Thu Aug 12, 2010 7:00 pm
Re: Noah my new 65 Canterbury Pitt project
by e m p i » Fri Sep 20, 2013 3:18 pm
Ah, that's where I recognised this bus from when it was for sale.
Neale, must be good for you knowing that it's goona be on the road again
Looking good there Jon. When I drilled out the spots in my cab seat mounts I gave up with the spot weld drill in the end and resorted to brute force and ignorance with a big f-off screwdriver.
Can't wait to see the interior going back in this bus.
Good thing is that now its dark so early theres nothing to do outside so may as well get into the garage
Keep it up dude, expect to see this on the road within a couple of weeks
Shalom, Lee.
e m p i
Registered user
Posts: 4548
Joined: Fri Jan 28, 2005 3:51 pm